The Challenge: Cardboard Flowering Box

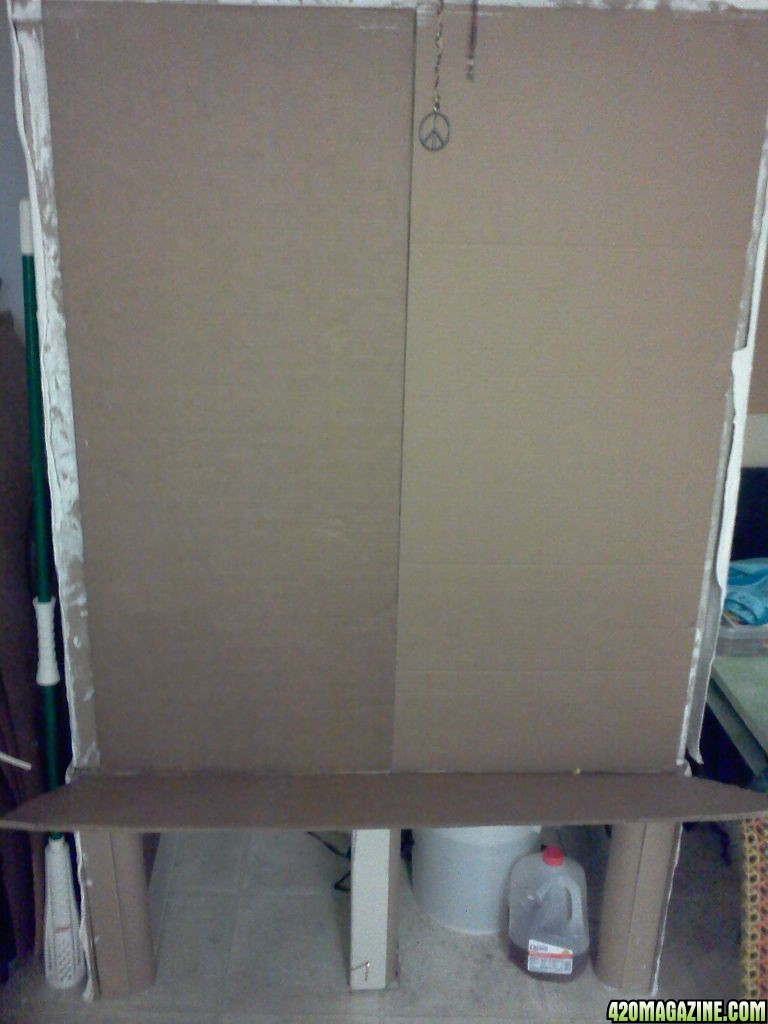
Okay, okay... I know what you're thinking CARDBOARD?!?!

Yes, cardboard. Not just ANY cardboard mind you, an especially strong and less porous cardboard called Hexacomb. Great stuff. I sat inside of the main flower box this morning and no crushing happened. I'm 200+ lbs and nothing happened!. The best part: IT COMES FREE to me from the challenger that attains it at work before it goes into the box crusher as trash. She supplied the initial plans to show how it might be done, and I applied my own knowledge to the project as for strength and maximum durability.
The plan is to make everything as "budget" as possible while still achieving better-than-average results. Keep in mind that this is for PERSONAL USE and is for a SMALL GROW. Nothing fancy.

Everything else will be the same as for a regular flower box, with 1 exception. Pt. 2 of the challenge.

Only T5 lighting. That adds a twist, huh? Although HPS is advised, it has its drawbacks. Heat, for one; in a cardboard box, that amount of heat could lead to disaster. Also, with as short as the box is, toward the finish, the plants will quickly run out of room and burn the tops of the buds.

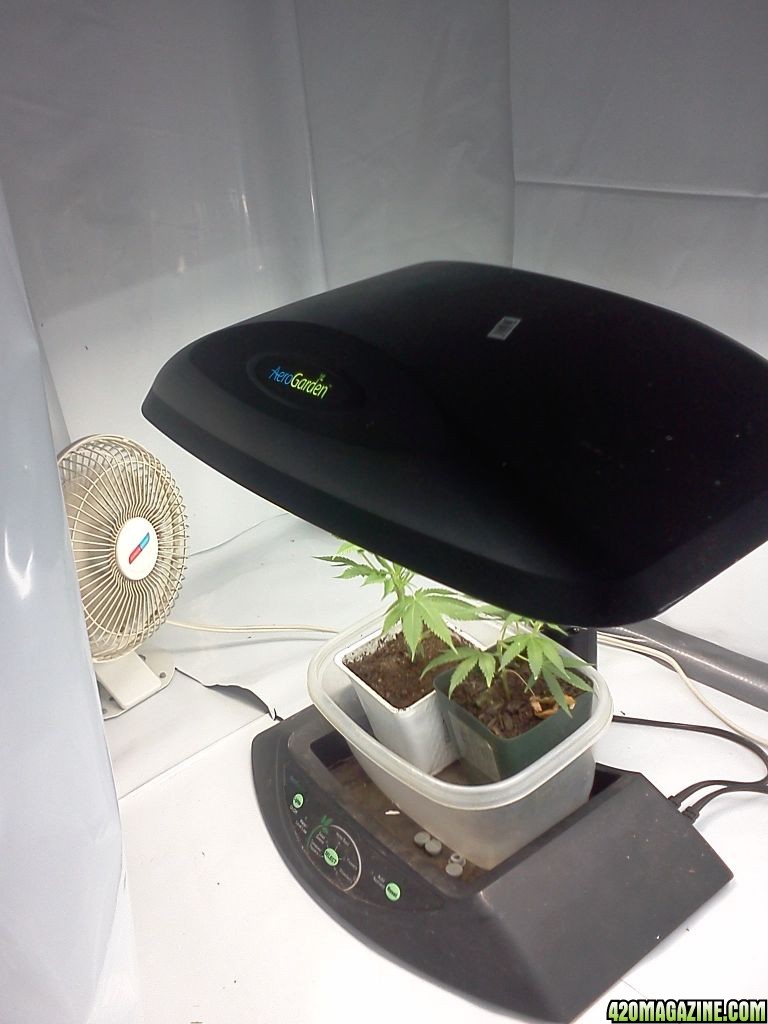
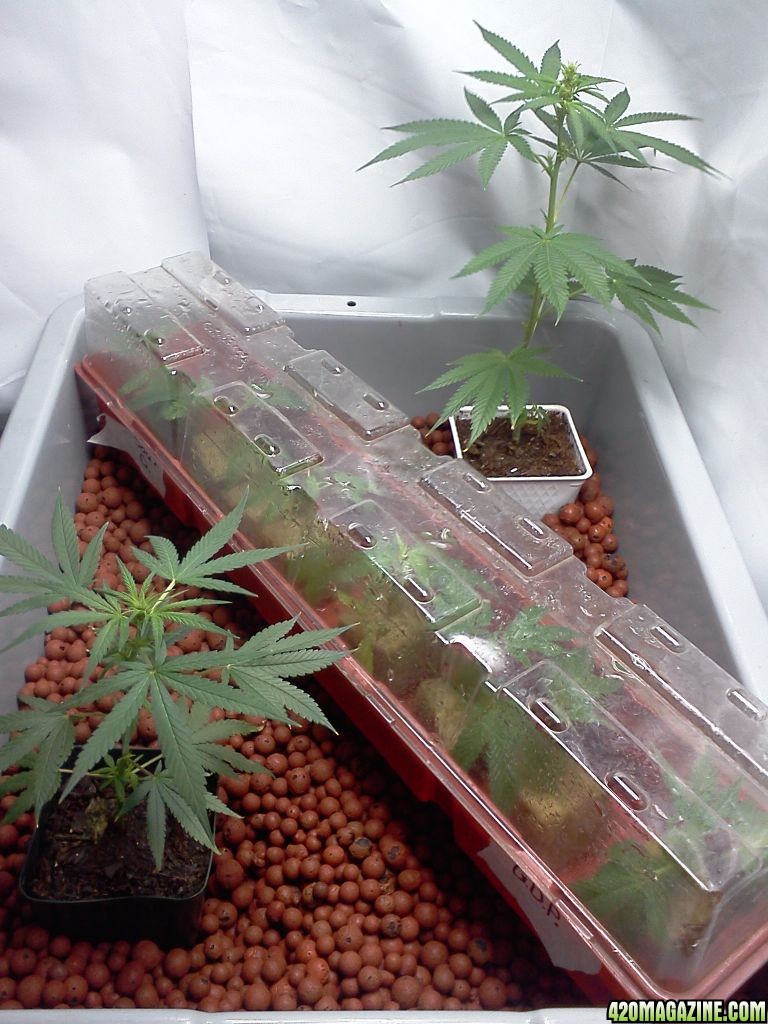
I might have it figured out though. Since this will only be a 2-plant box, it should be okay with 6x T5 with 3000k tubes. 4 hung from the roof and made adjustable for height, and 2 on the sides for canopy penetration. I plan to have the first two plants in simultaneously, I call them the Wonder Twins. Why that name? Simple: I wonder what they are. For more on how those are going, click on "The Gifted" in my signature.

Now about the box and planned nutrient delivery.


Box dimensions:
42" wide x 24" deep x 48" tall
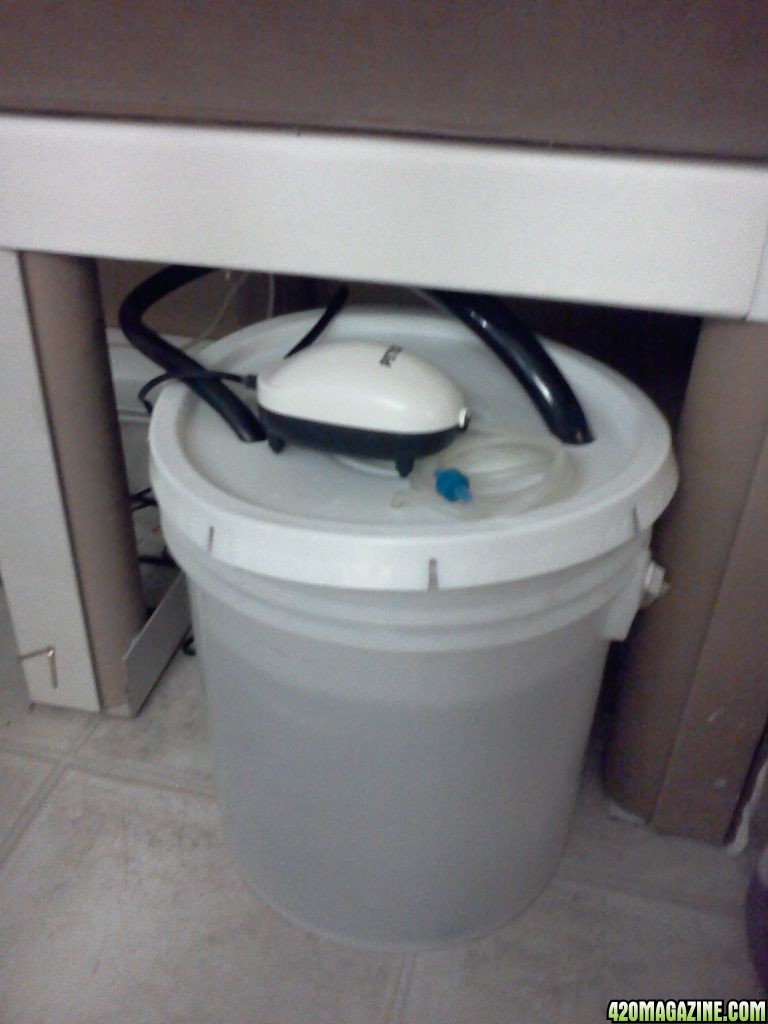
This will be placed on a platform 19" tall to allow for the nutrient res and wiring.
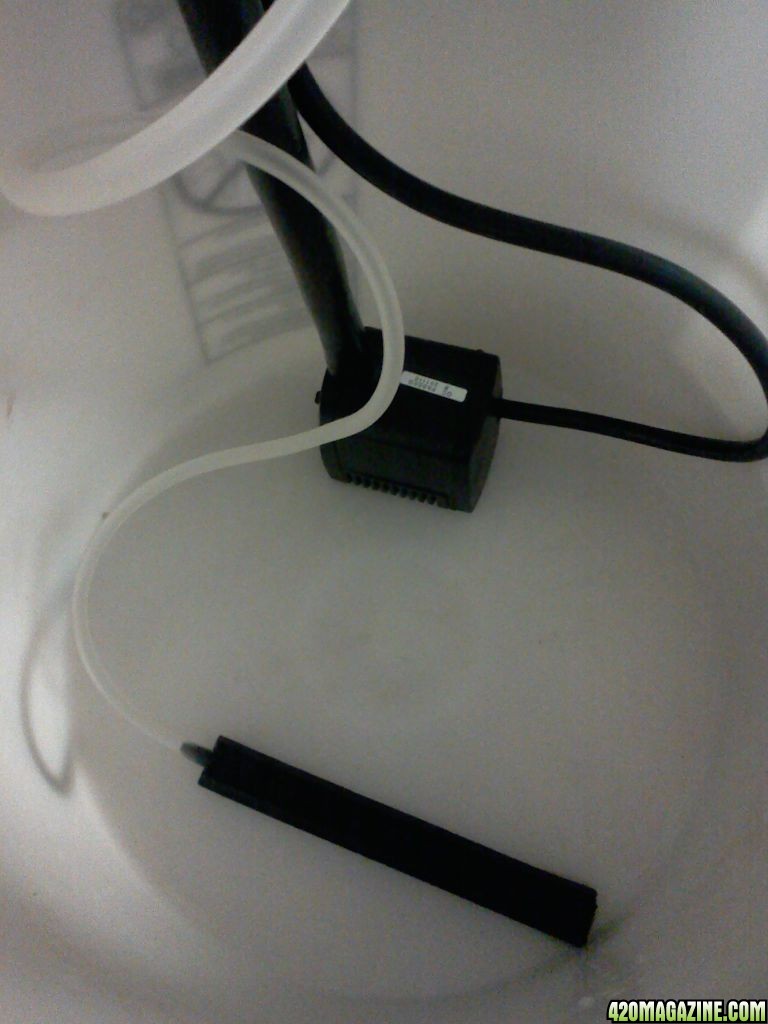
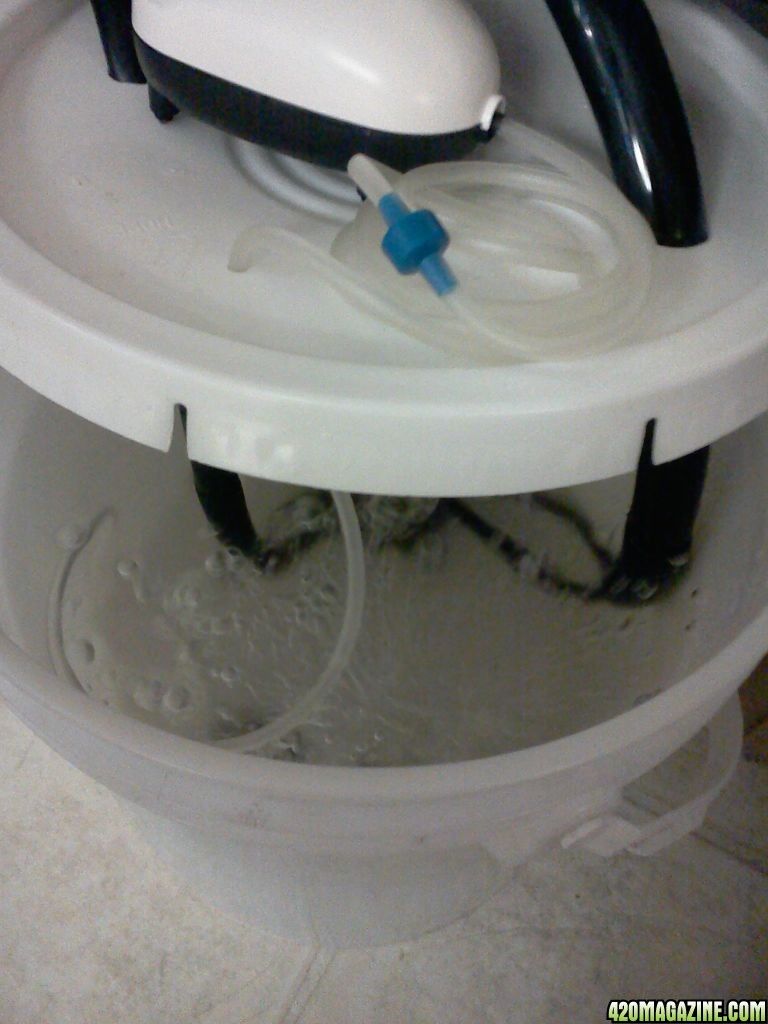
Nutrient Delivery:
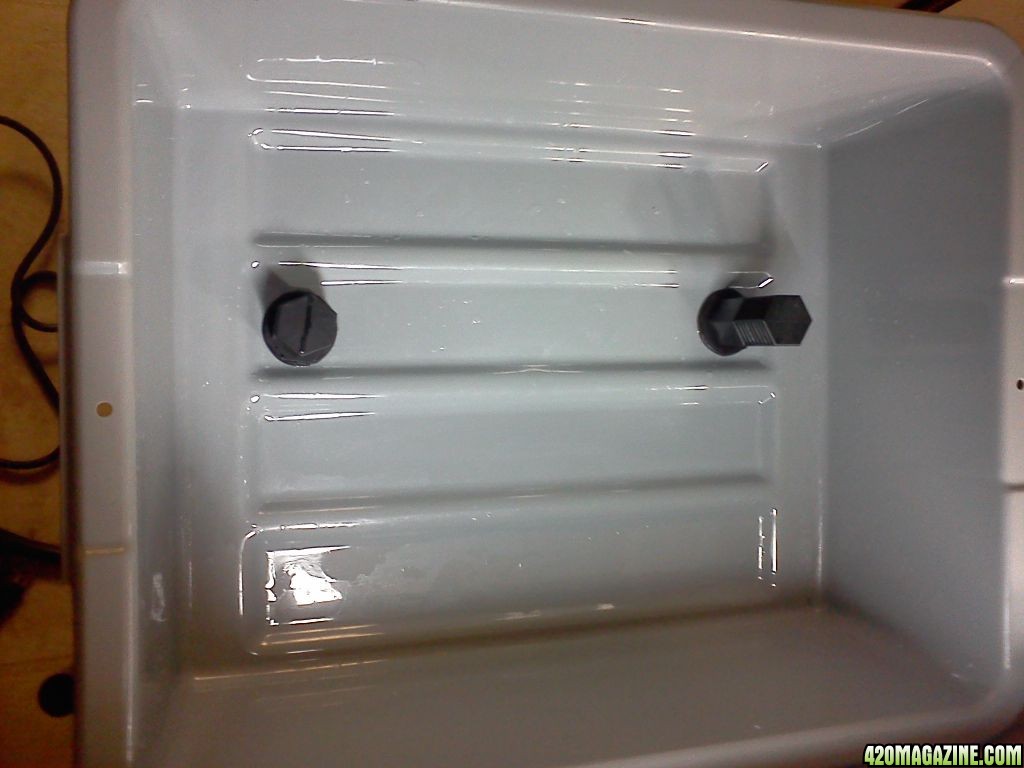
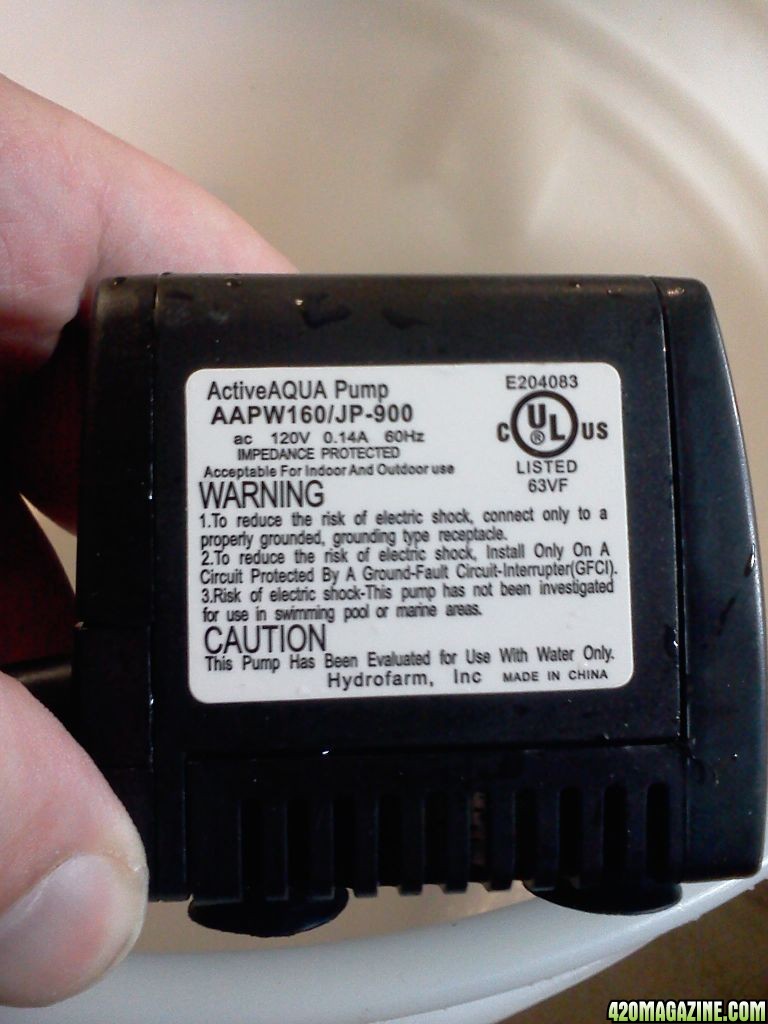
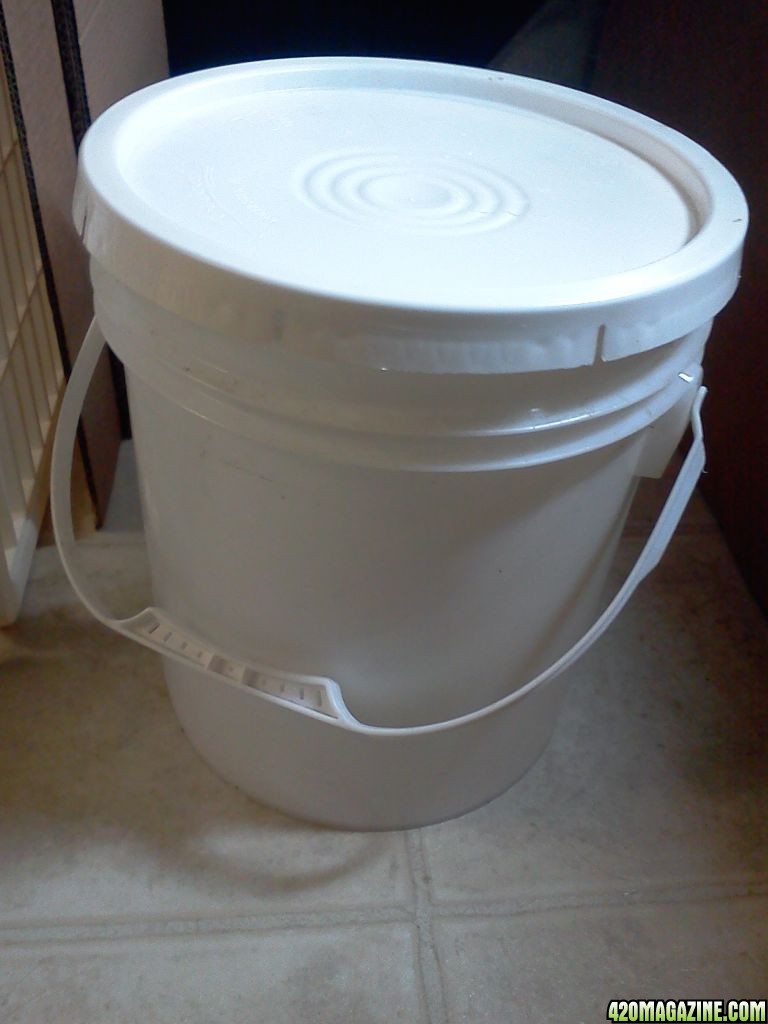
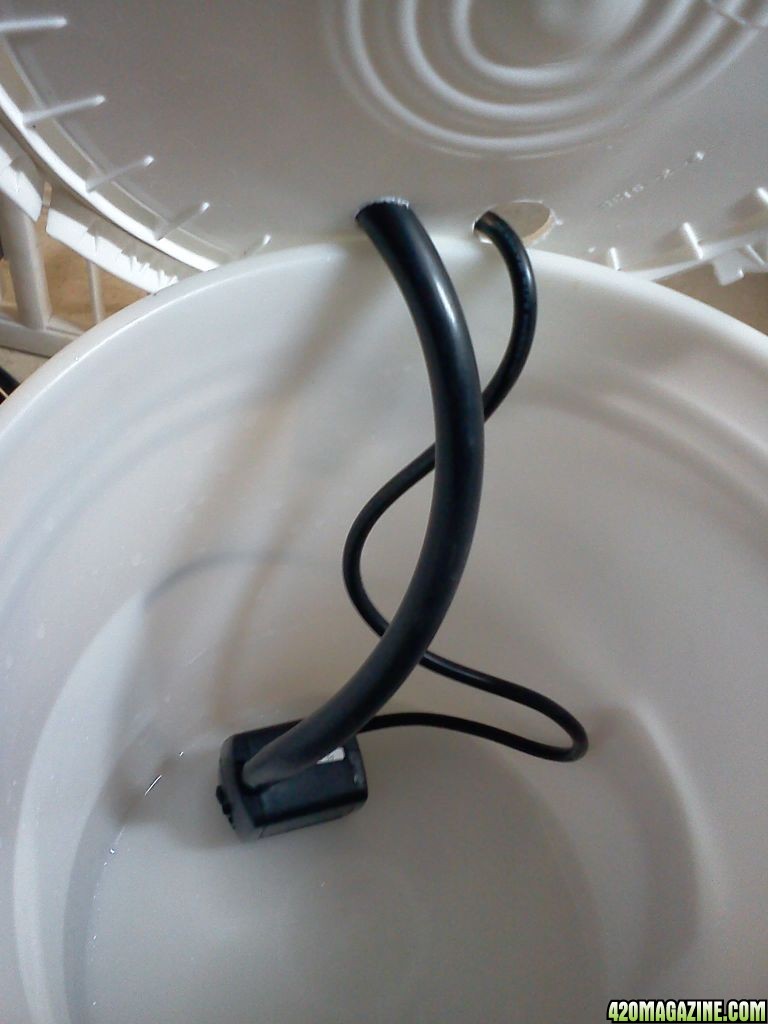
Res will be a plain old 5Gal bucket, maybe 2, from the challenger's work (Washed and Sterilized)
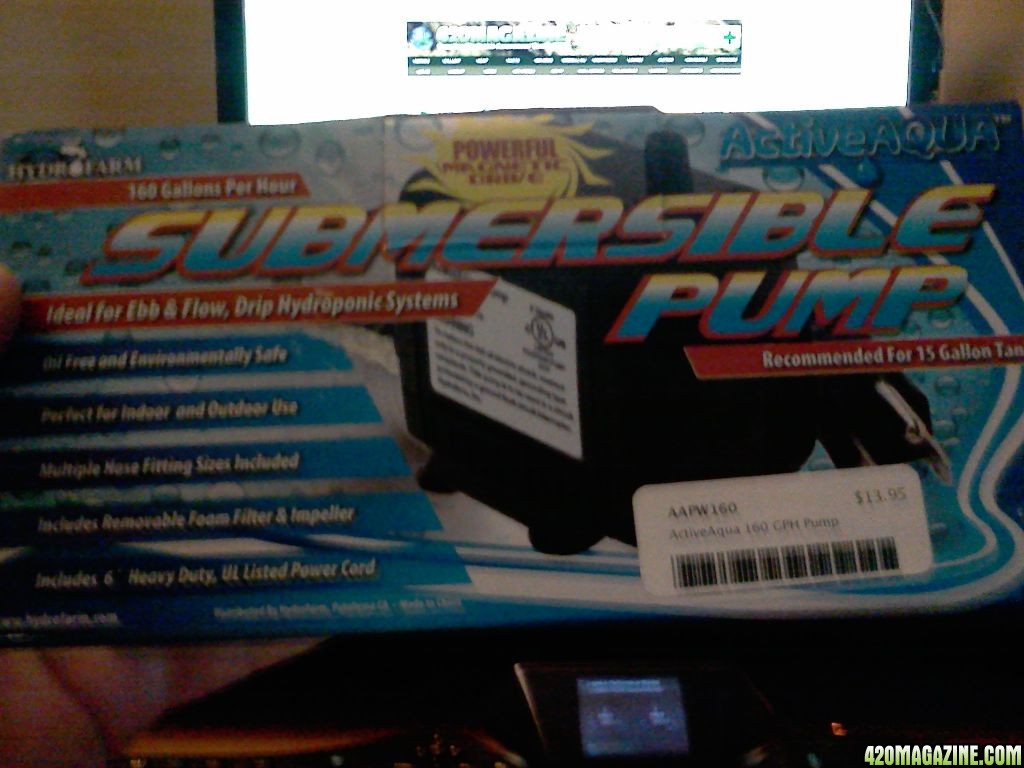
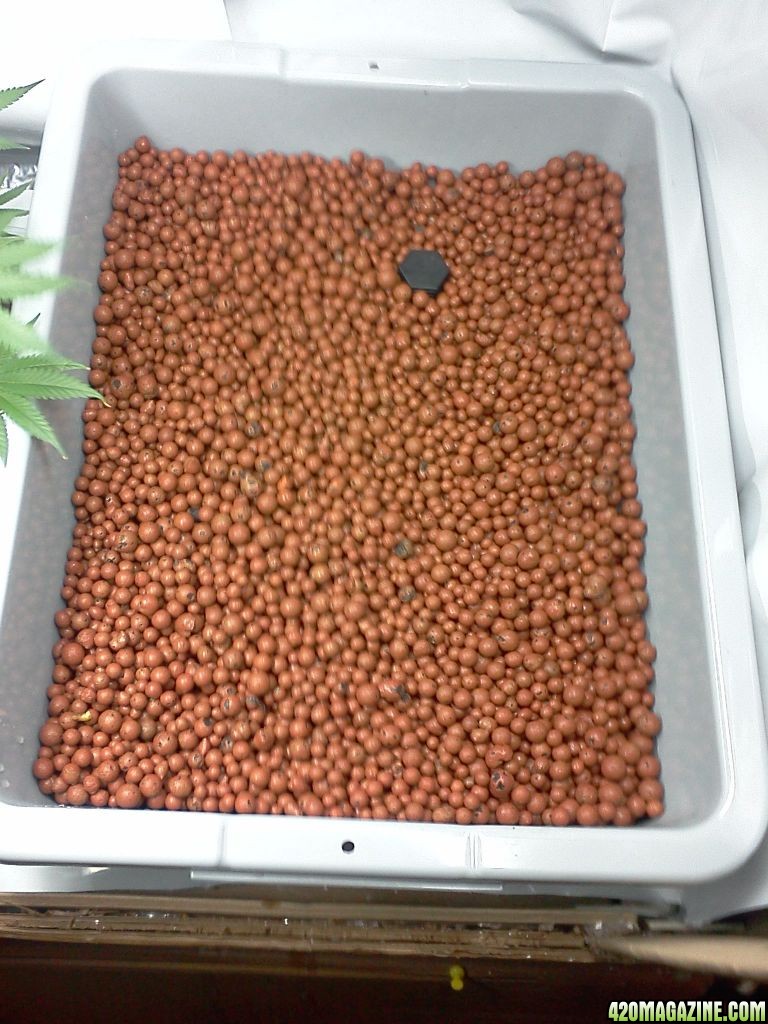
Ebb and Flow 3x/day
I will be using Advanced Nutrients line of ferts and adds
Jungle Juice 3-part system to start with various others to be added at different times during the flower cycle except the flush.
SUPERThrive will be added as well during the full cycle except during the flush.

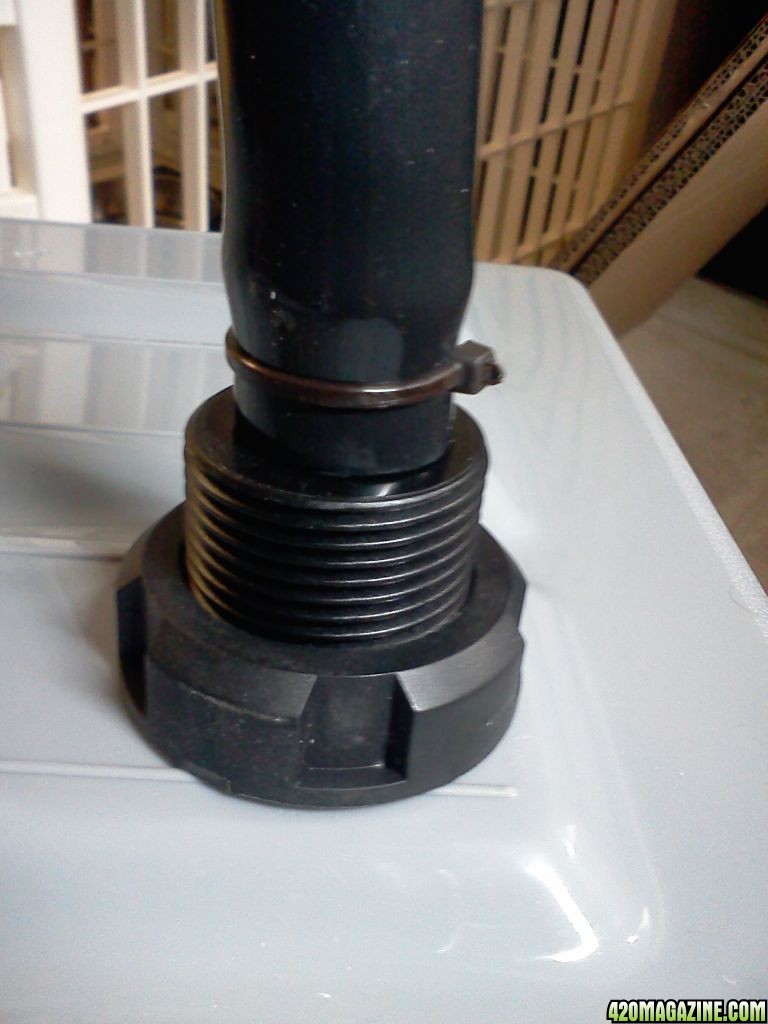
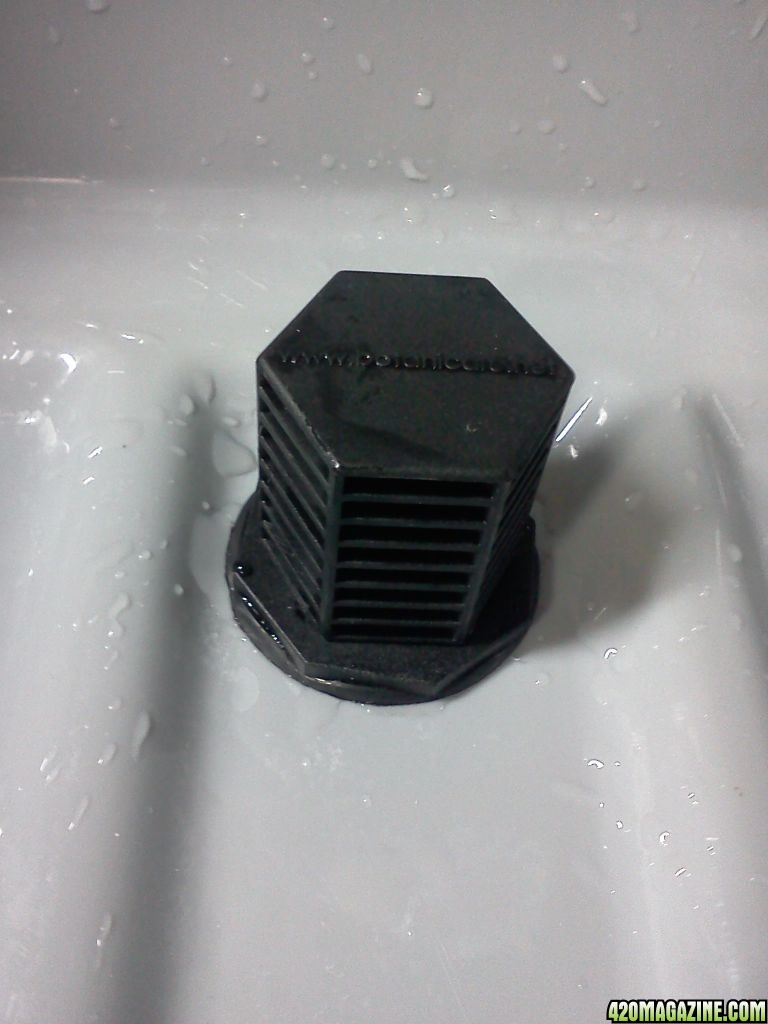
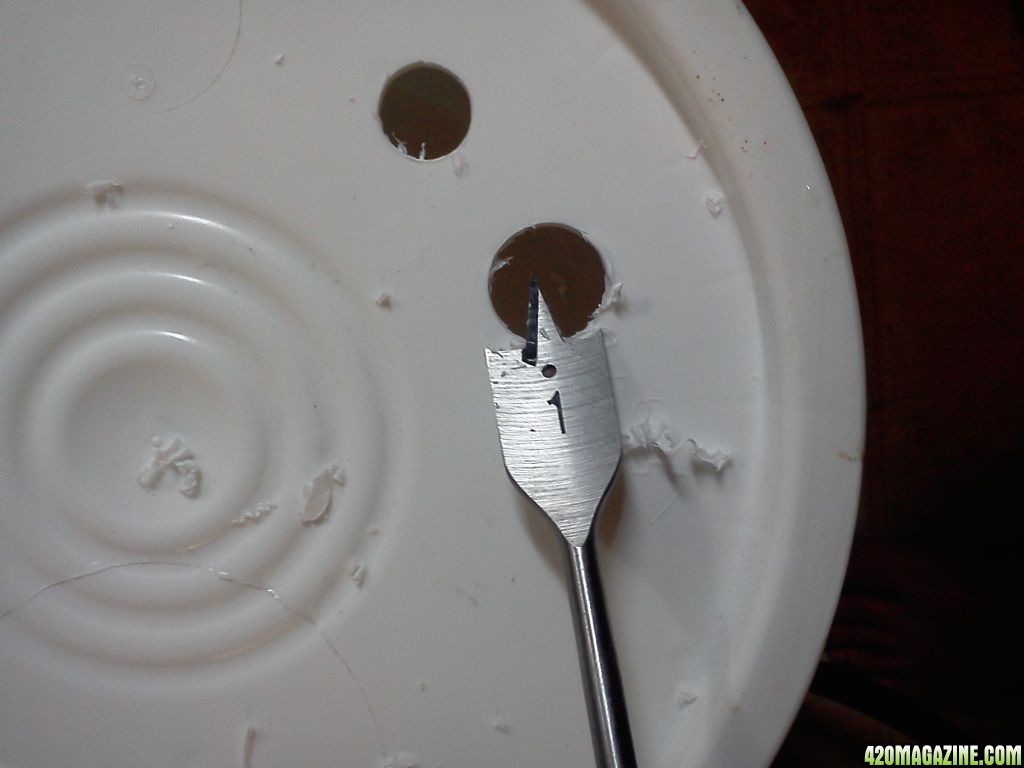
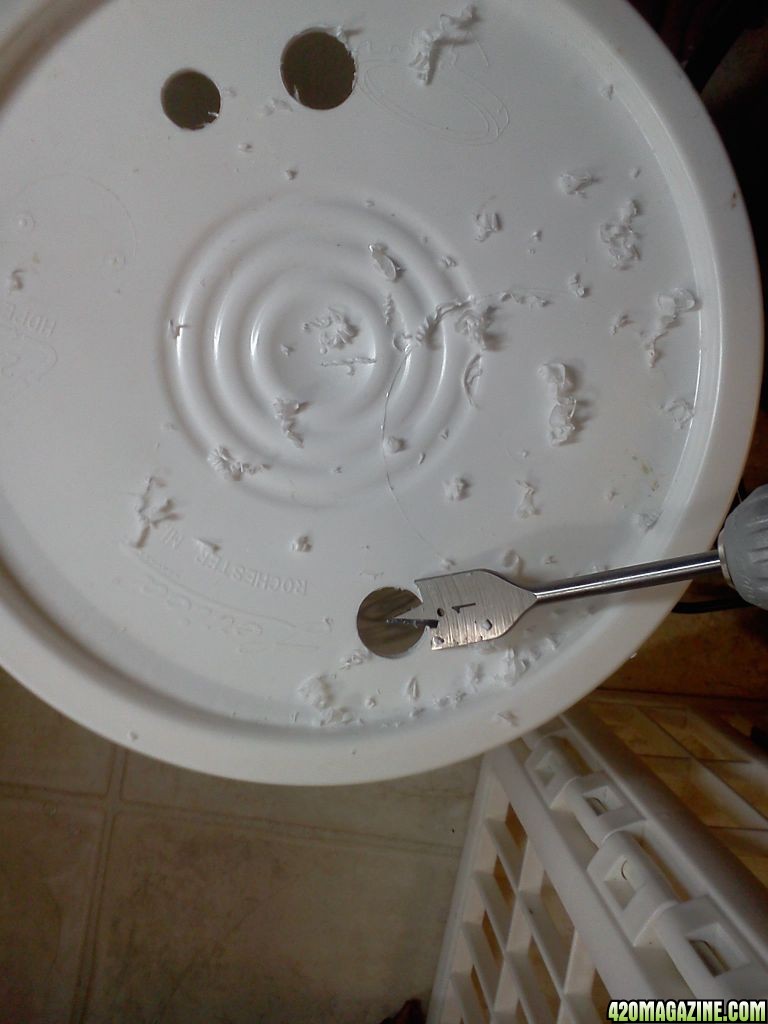
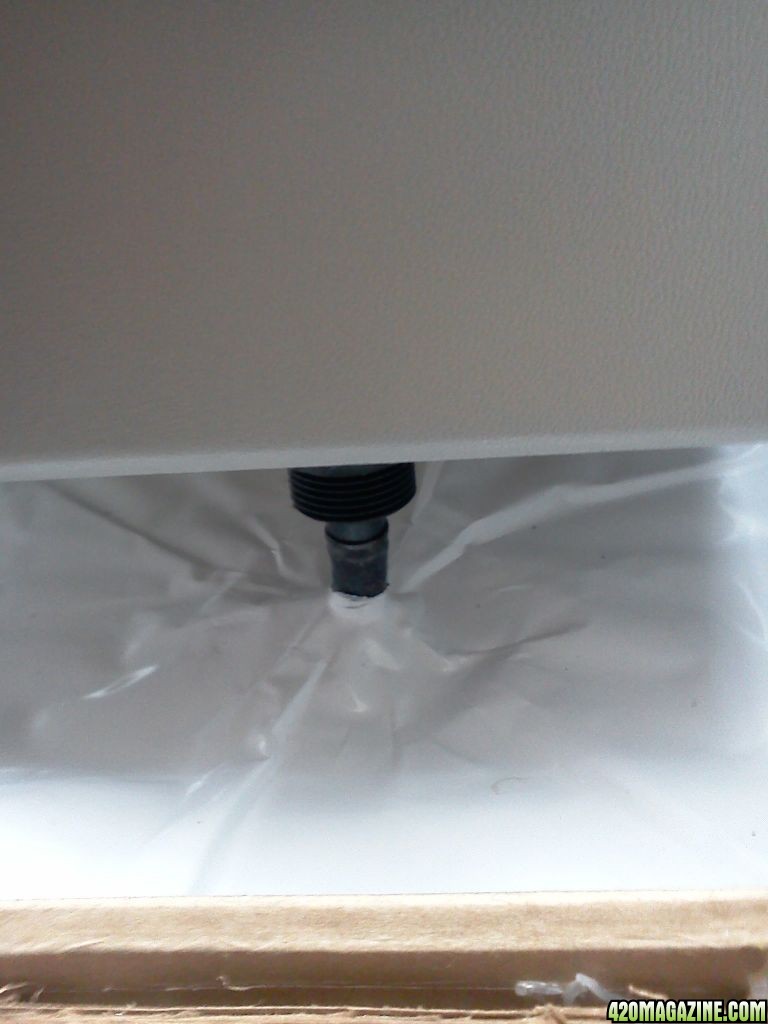
What exactly I'm using for the flood tables, is as yet unclear. I might just go out and get a couple of bustubs from our local warehouse store.

It's still a tossup between a 4" flanged 190cfm Can/Fan in-line combo or 2 120mm fans with carbon scrubbers mounted to the top of the box... It is a small box so the 120mm fans might work well. Also, air in will run through 2 HEPA filters on either side to filter out any unwanted particulates from entering into the grow area.

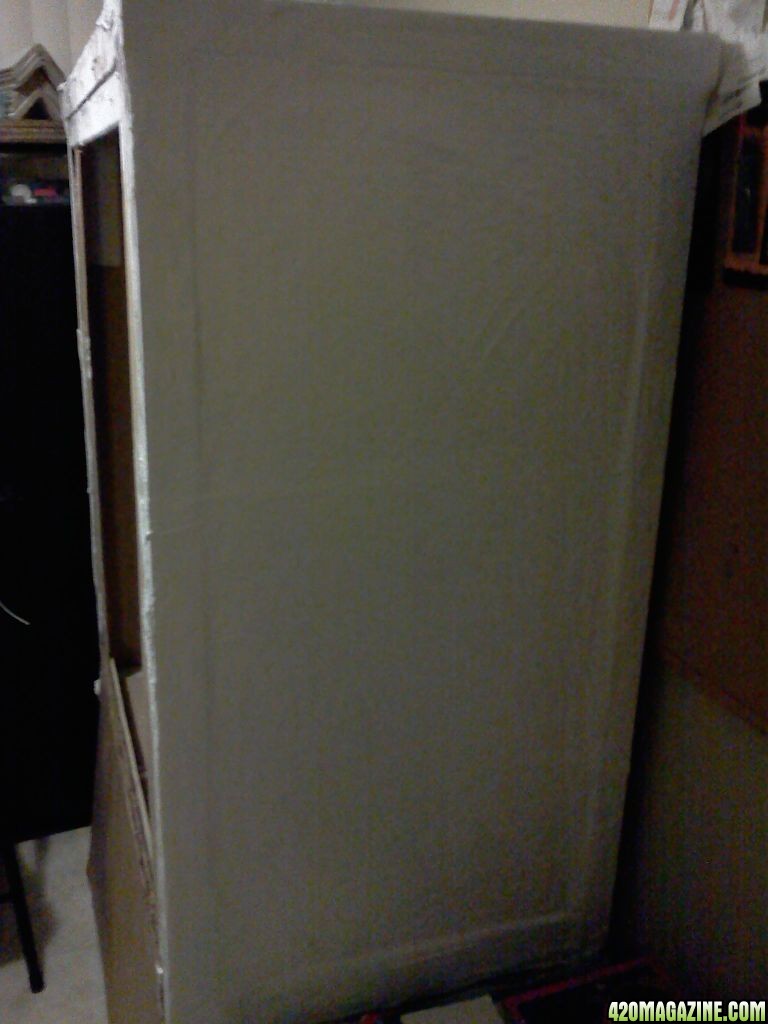
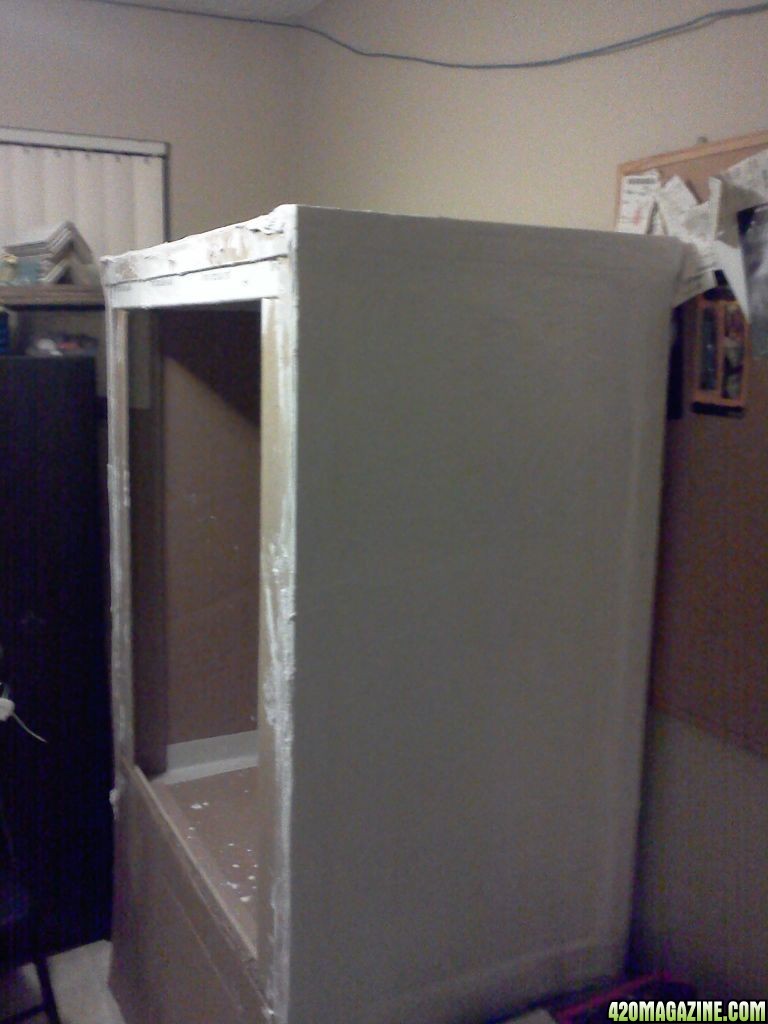
Pics of the started project are posted below.
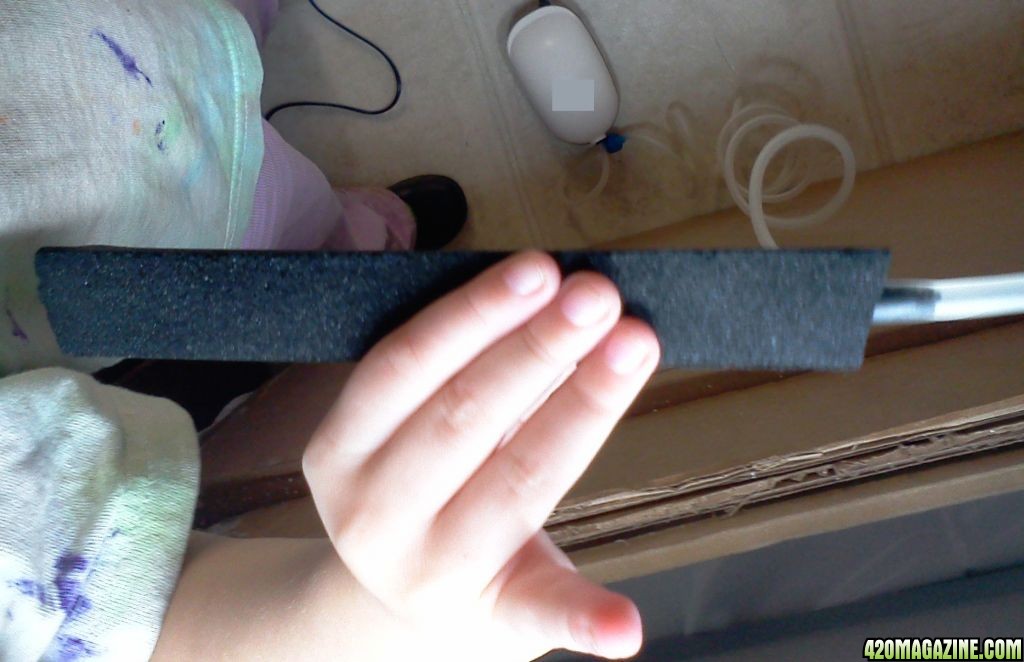
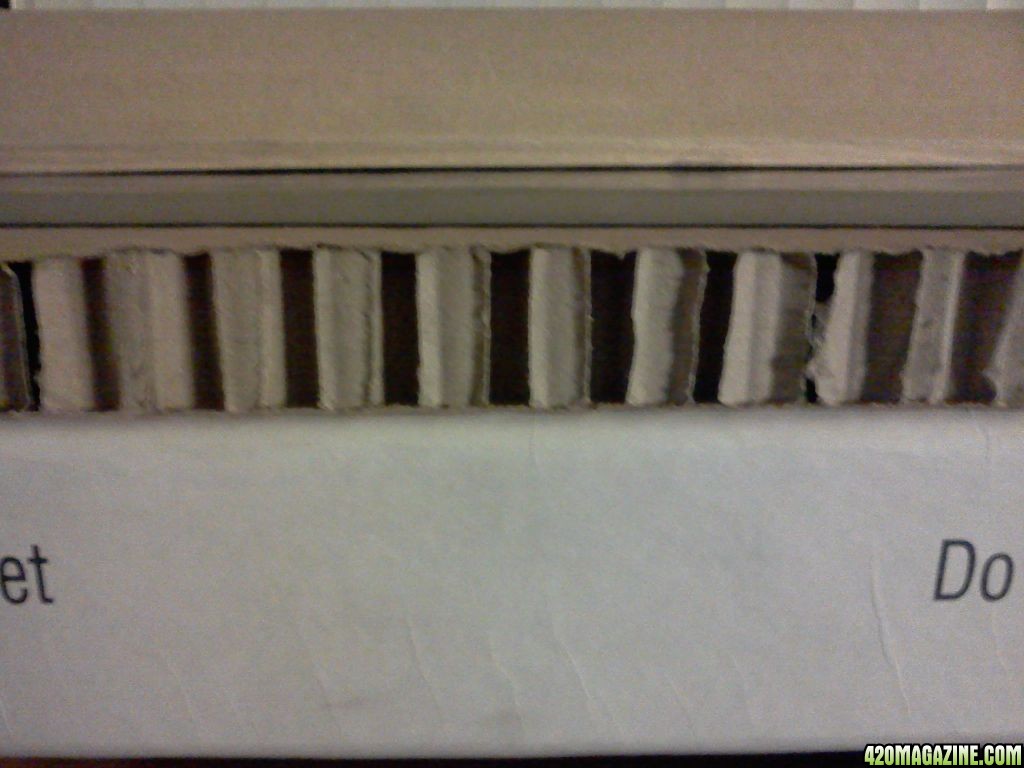
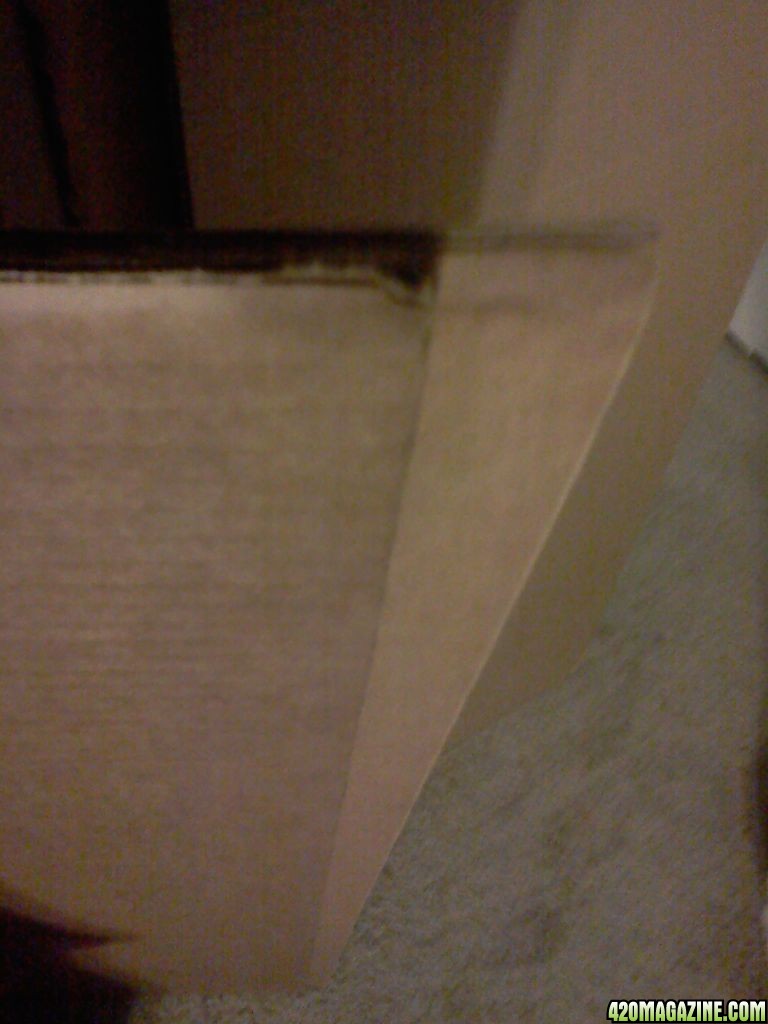
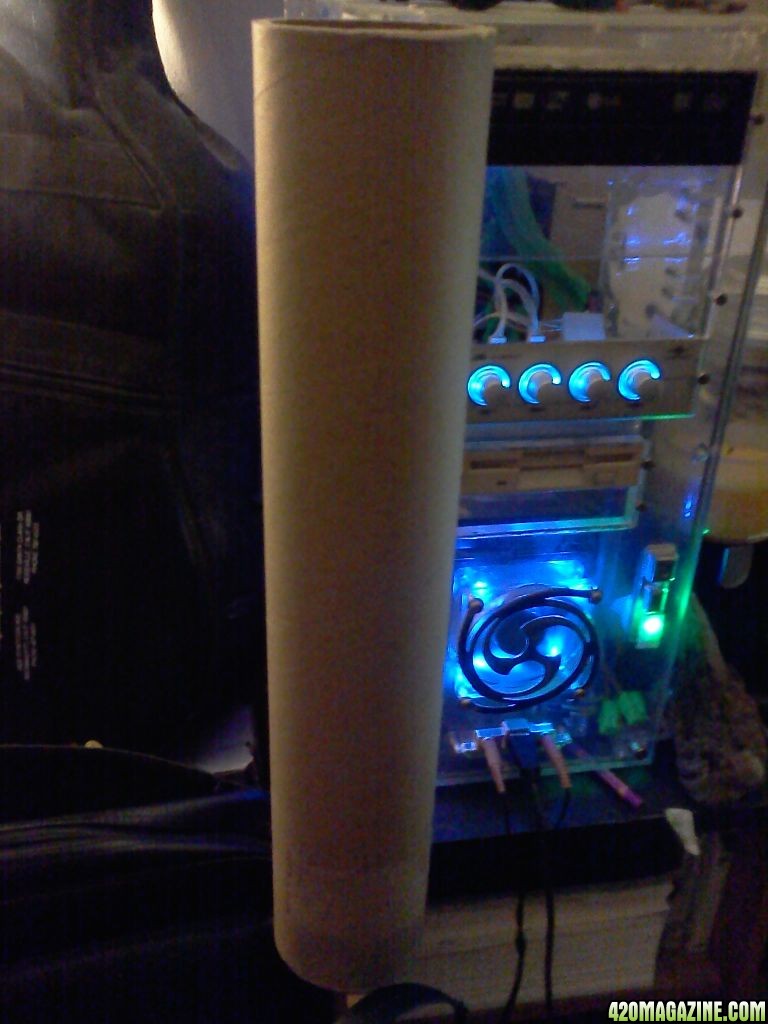
This first image if of the end of one of the pieces of hexacomb to show the thickness of this cardboard.
101811015558.jpg


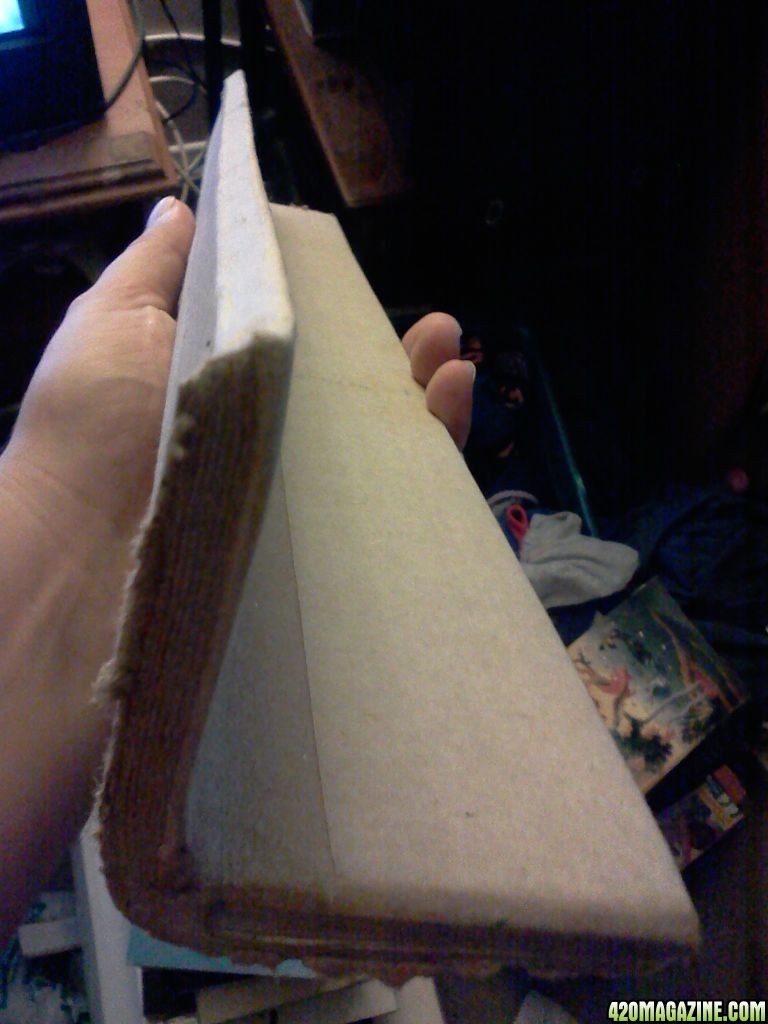
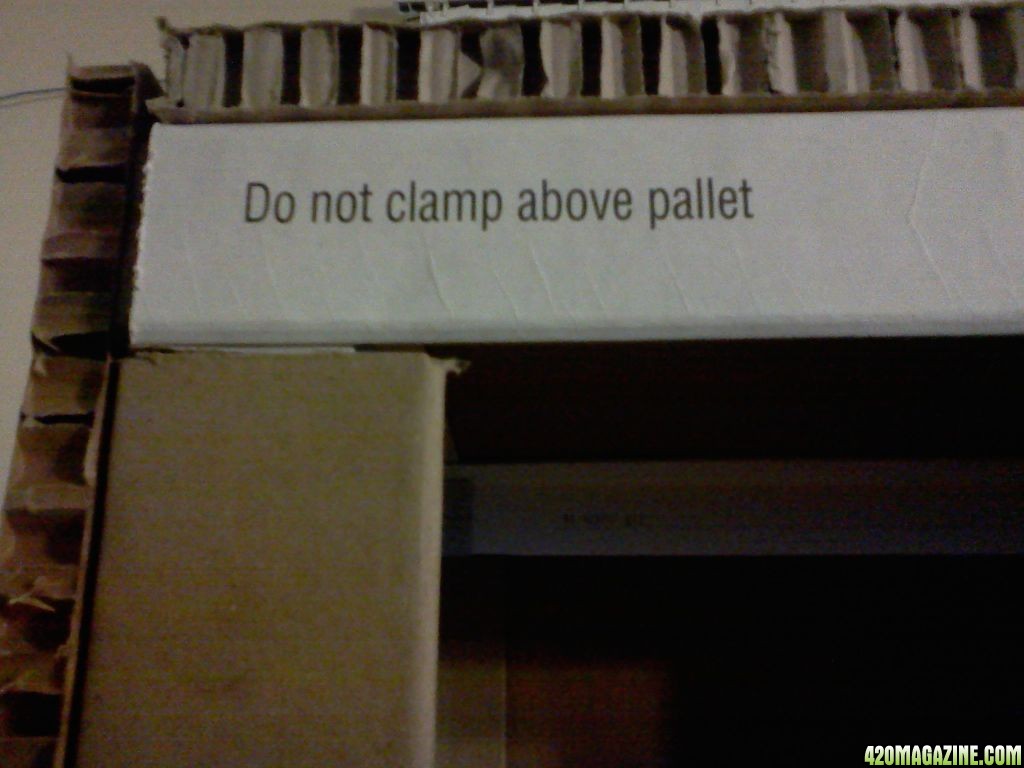
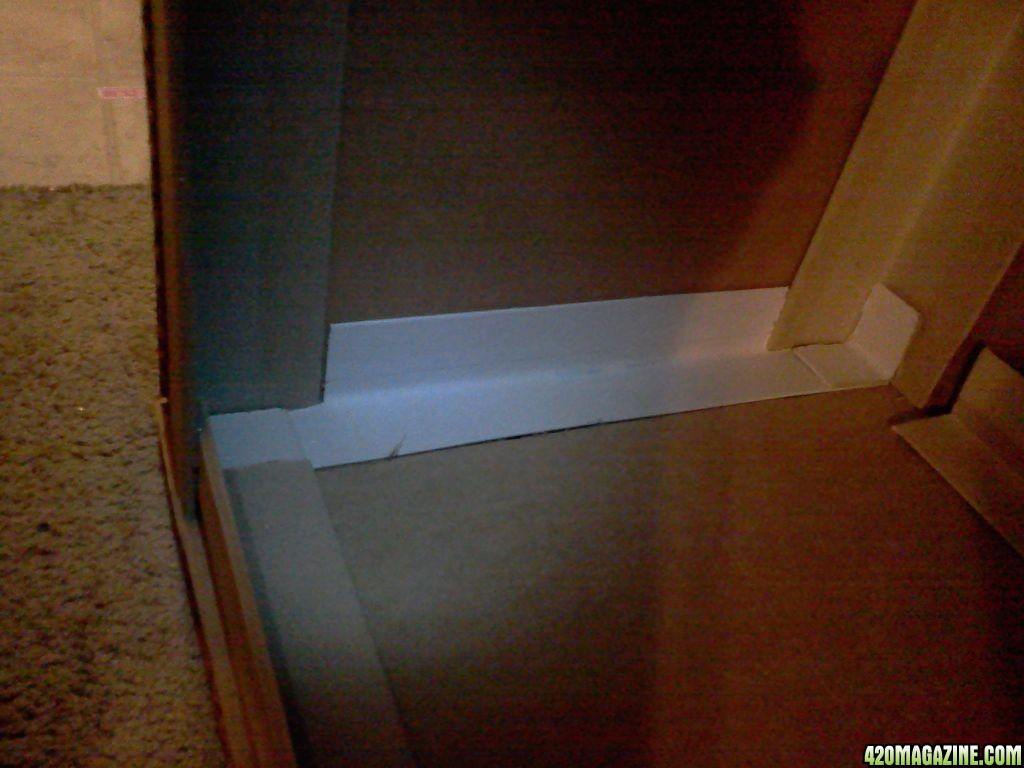
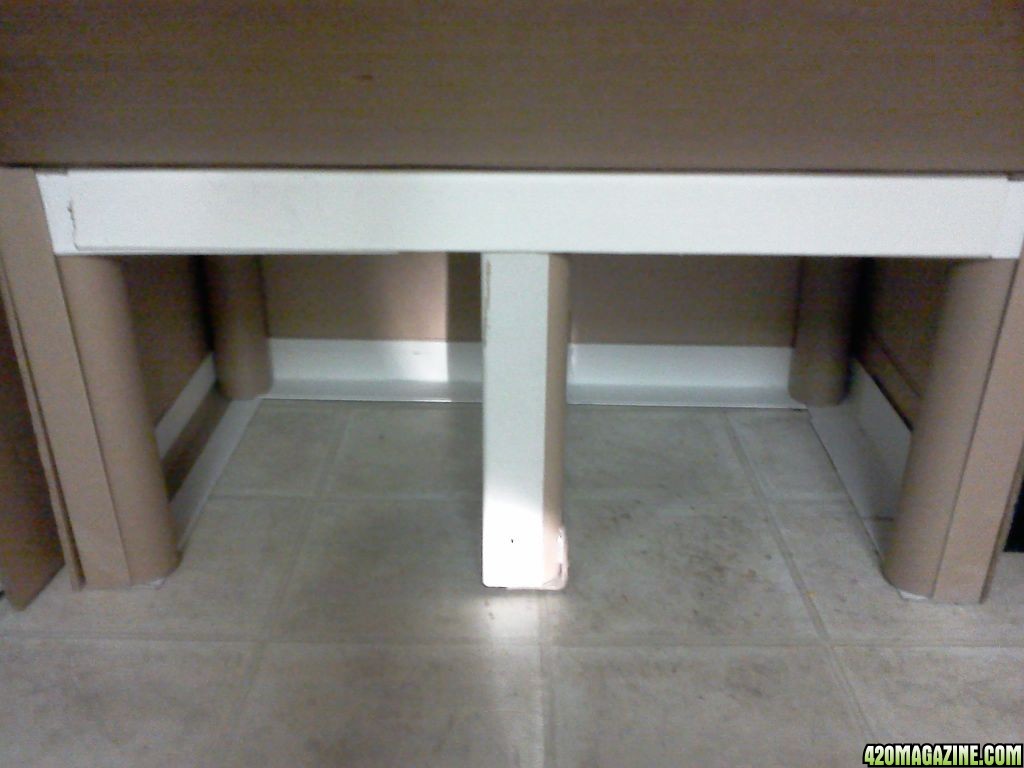
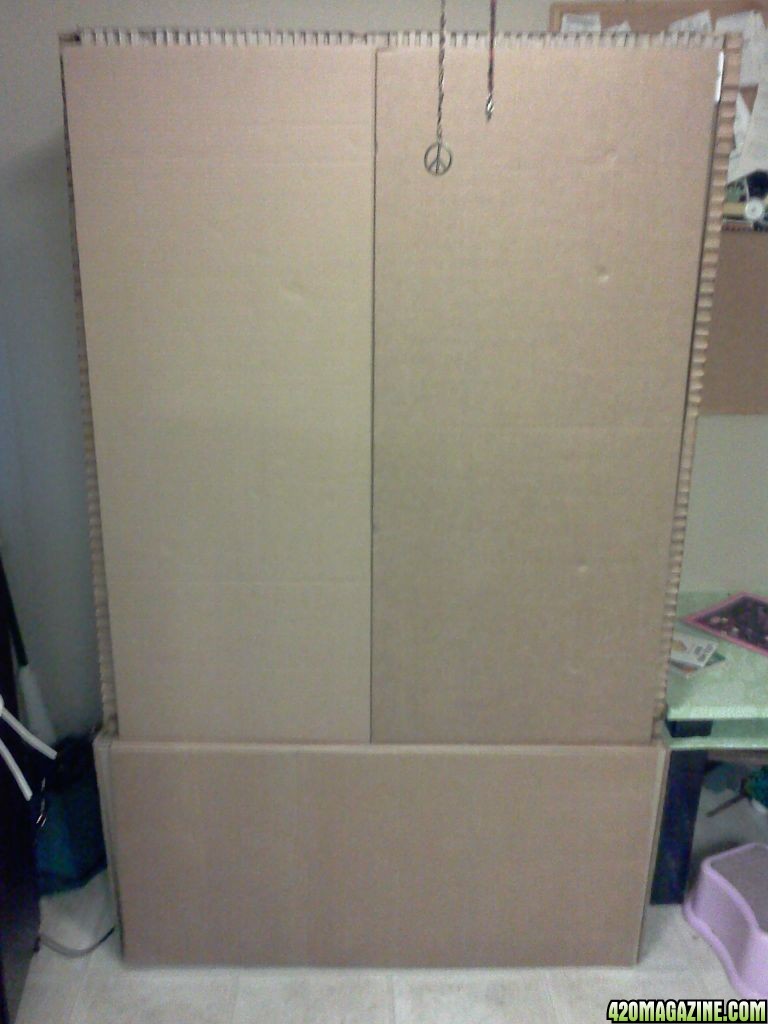
This next is of the main reinforcement at the corners. These are found on palate corners to reinforce overall strength of the stacked product.
101811015315.jpg


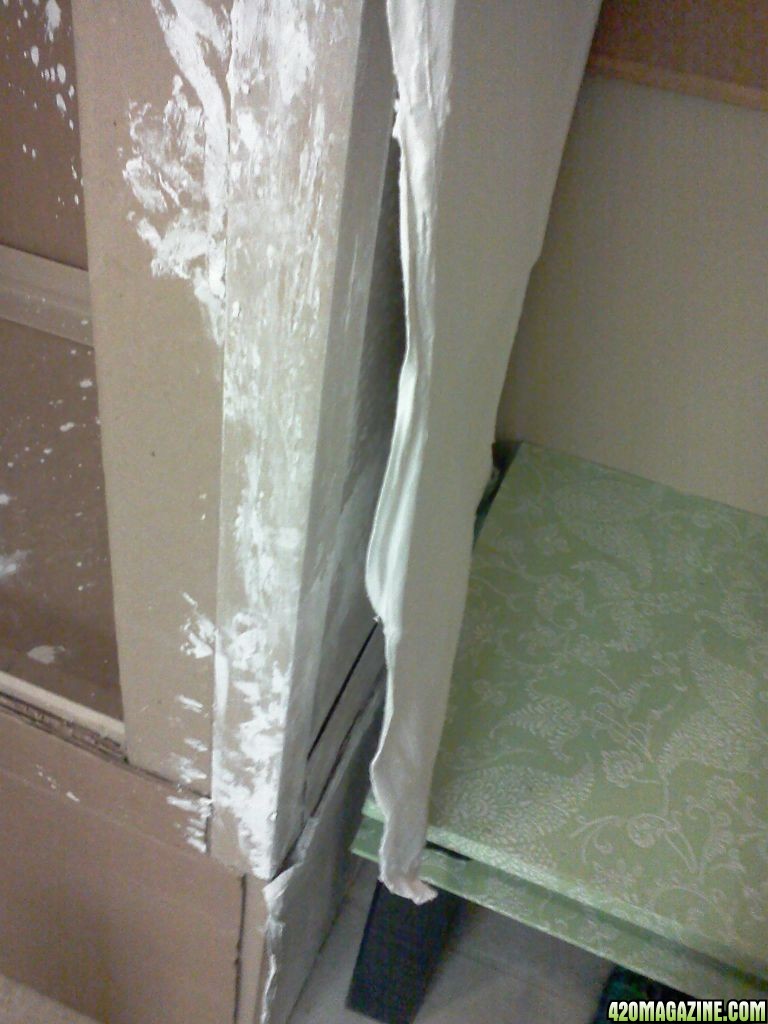
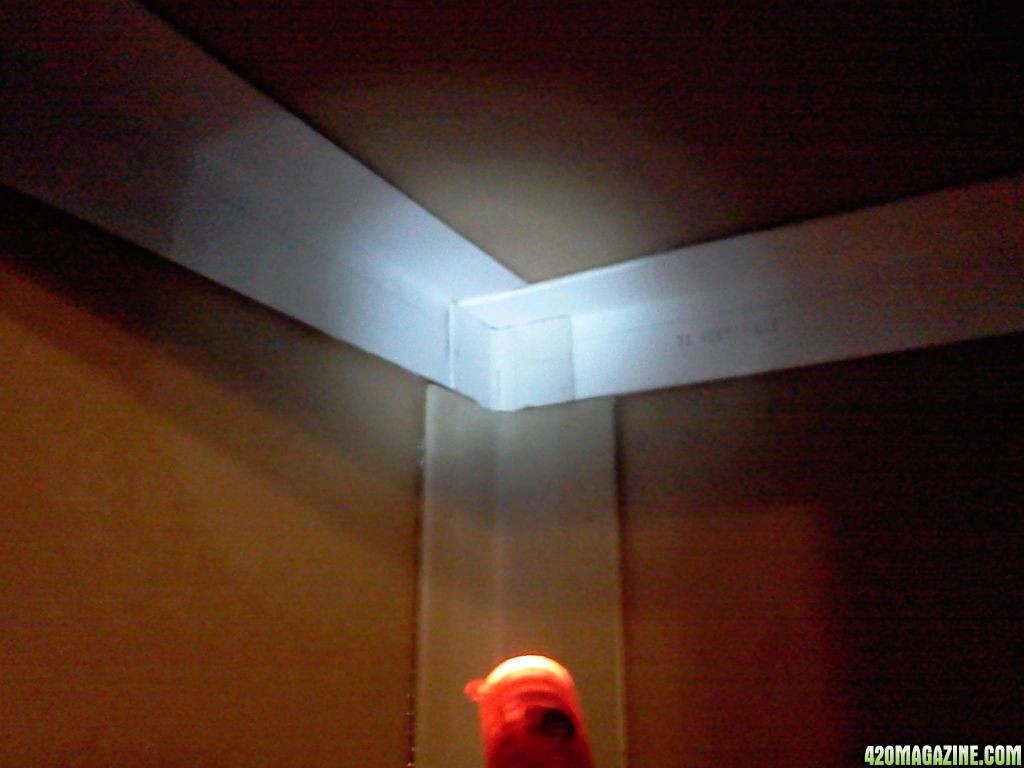
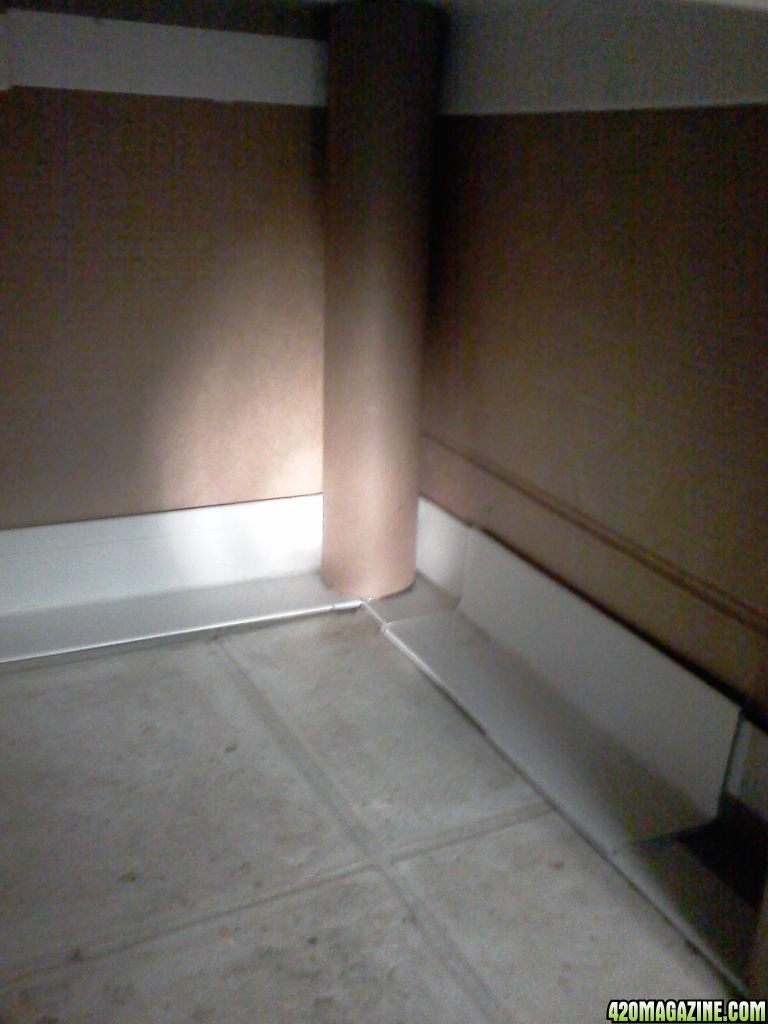
This next pic is of a reinforced outside corner and 1 part of the light barrier.
101811015817.jpg


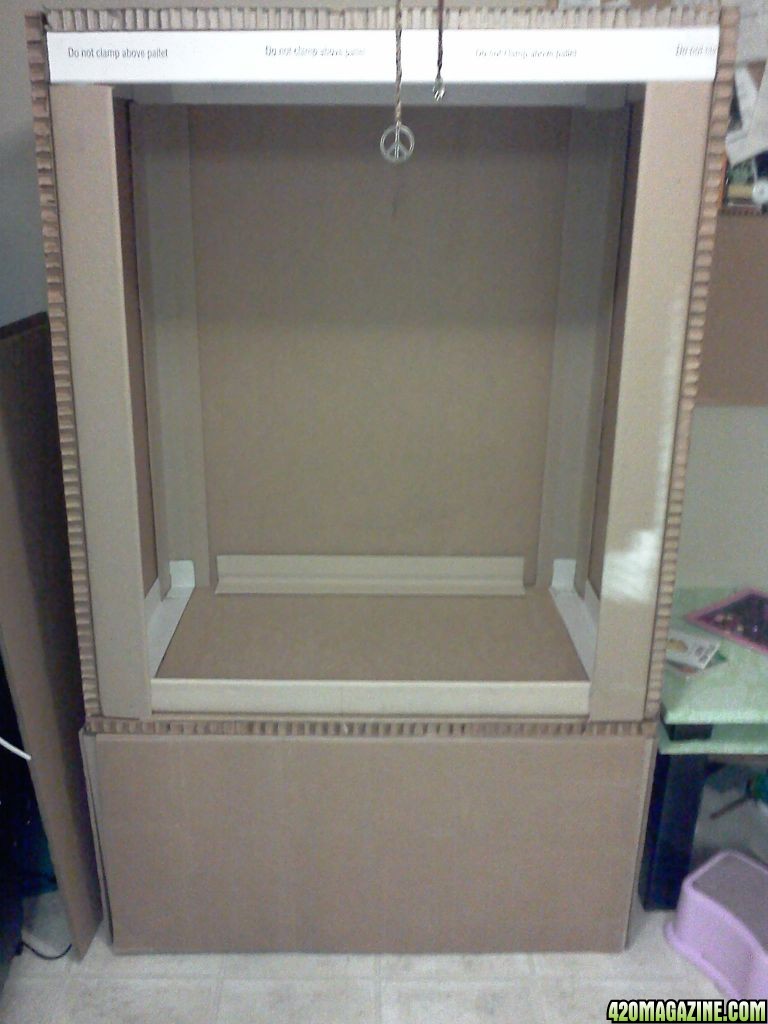
Next we have the reinforcement of the inside joints. I did a pushup this morning after the glue cured to test strength, and it held my full weight 200+ Lbs. completely off the floor.
101811015911.jpg
101811015717.jpg


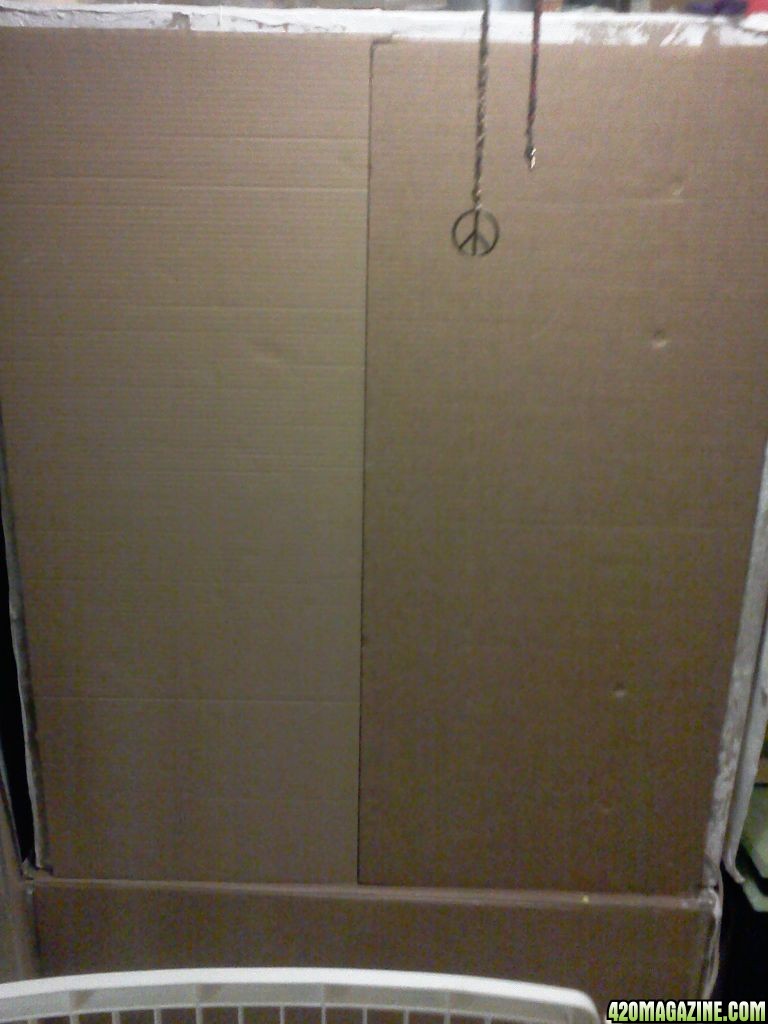
Next we have the interlocking doors made from plain cardboard, designed to help stop light infiltration at the center where they join. The other door has a reverse of this and will fit together to create a double 90deg bend to break light in its travel into the box.
101811020107.jpg


Next is doors opened and closed of the main grow chamber, they're not attached yet, so not light-tight at this point.
101811015442.jpg
101811015530.jpg


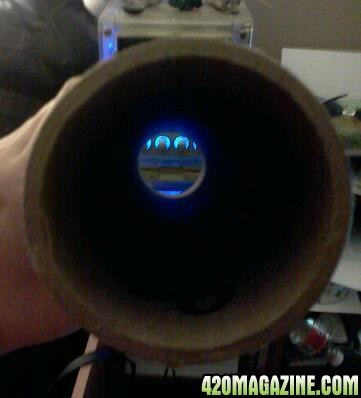
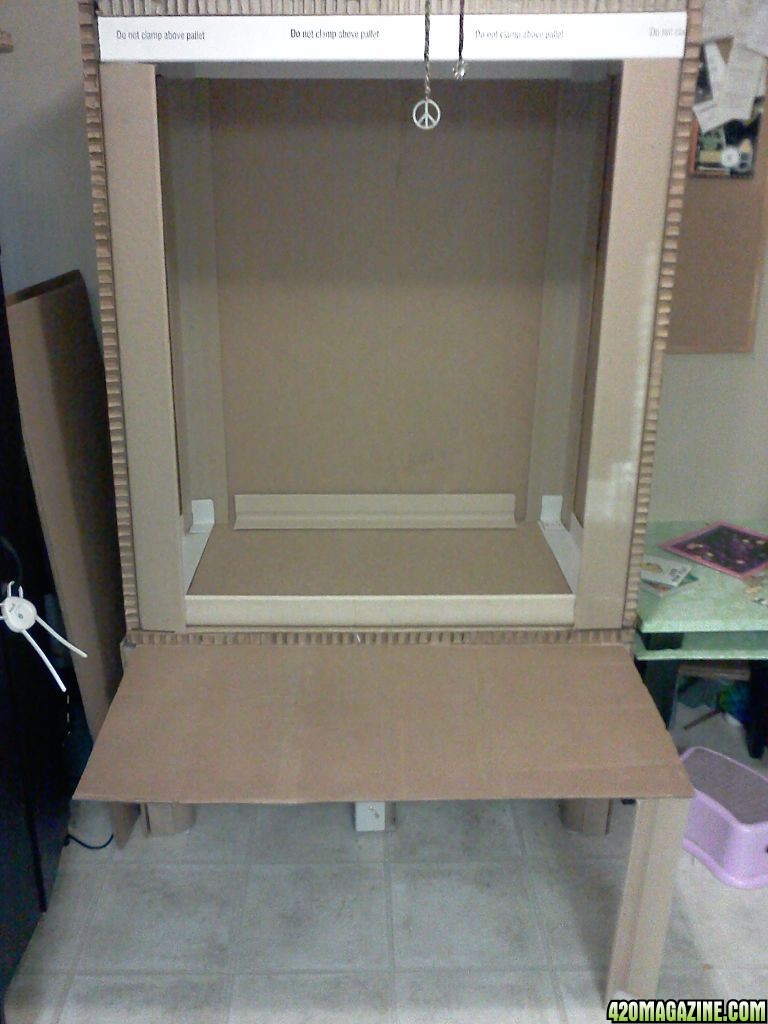
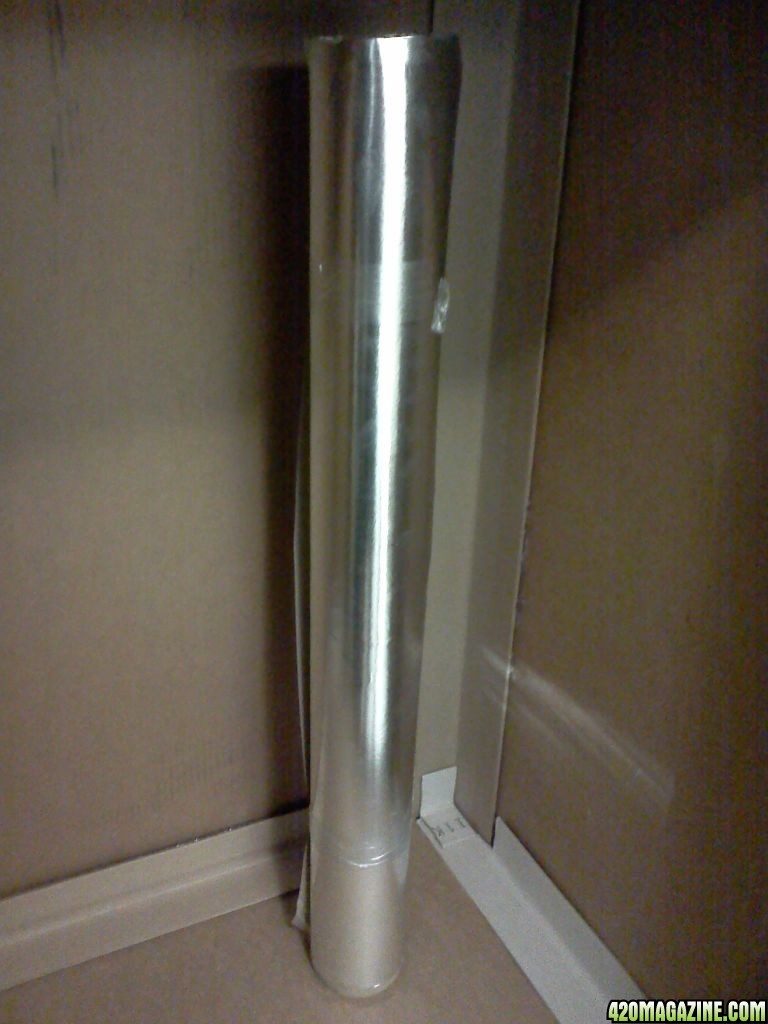
These next 2 are of the cardboard tubes for the stand and storage bottom portion. 6 of these are to be used and braces between of cardboard for stability.
101811020942-1.jpg
101811021040.jpg


I can jump forcefully onto the long side of those cylinders and not crush it. I can only imagine the crush strength end-to-end.


Of course I will be waterproofing the interior with a very thick plastic and placing mylar over that for the optical portion of the system. Also, there will be a mounting area for an 8" fan for circulation that is height adjustable.


This is as far to completion as it gets for right now- more later as construction continues.

Your encouragement and comments are welcome.
 
Are you planning on sealing the inside cardboard with something like paint or mylar? I would worry that the paper would absorb some water from the air inside the grow box. And then start mold problems.

Otherwise I like your work. Looks well thought out.
 
cardboard and moistrure doesnt sound good !

Hence "The Challege"!


Are you planning on sealing the inside cardboard with something like paint or mylar? I would worry that the paper would absorb some water from the air inside the grow box. And then start mold problems.

Otherwise I like your work. Looks well thought out.

Answer was in the last few sentences. I don't blame you for missing it. that was quite a read.


Of course I will be waterproofing the interior with a very thick plastic and placing mylar over that for the optical portion of the system. Also, there will be a mounting area for an 8" fan for circulation that is height adjustable.


This is as far to completion as it gets for right now- more later as construction continues.

Your encouragement and comments are welcome.
 
SECOND PHASE


Just got the second structural part completed today. This is the first chance I've had all week to work on it. I put the base together to house the 2 self-contained E&F reservoirs and the nutrients used in that system and the electrical work for the pumps and the lights above. I decided to make 2 separate sustems, so I could have a staggered growth 4-5 weeks a side. I figured with the feds closing down the dispensaries, that a plant a month should sustain me. I really need to find a green cr/\ck clone for my migraines, though. meh, whatever. purple seems to work okay. Maybe a blue dream is hanging around out there, its the same sativa/indica mix as green crack I think...

At any rate, the base is completed and the whole cabinet is ready for plaster-clothing on the outside for some added strength and waterproofing on the inside. I think that some 23mil black sheeting should work, caulked at the seams. Probably going with an overlap install of the sheeting so I can get a good caulk bead to seal the seams or maybe a bi-fold seam would work best ironed at the edges.....

The pictures in the last post of those cardboard cylinders, here is what they were used to make. I also found the lateral and vertical crush strength of these. Laterally it take 500 lbs to crush. Vertically is 7 times that 3500 lbs. Of course many variables reduce that like weight not being centered on the very end, soaking in water, dents, nicks, and the like all reduce the verticle crush strength. I put these at 1300-1700 each for a total of 7800 - 10200 lbs of crushing strength if weight is distributed evenly. Also, these are covered in a very thin layer with a waxy coating that makes these very water resistant if something should go horribly wrong above and my waterproofing fails.
102211171330.jpg
102211171302.jpg


The doors will be light sealed at the facing with felt or fleece impregnated with some rain and stain spray, and then some panda plastic as a drape over the entire doorway to ensure that nothing destroys the flower hormone before the 12 hours each night are complete. I still haven't decided how to hang the doors and whether they should be hinged, or removable so I don't have them flapping in the way.
102211171140.jpg
102211171219.jpg
102211171533.jpg


This last pic is of the full roll of mylar covered cardboard sheeting that I will use in the ceiling. Not sure if I want cardboard sheets any further down at 40% - 60% RH mold is not the friend of a good flower box.

102211171933.jpg


The next installment will be when the plaster work is done on the outside, and I am ready to waterproof the inside. The plastering and waterproofing will be sort of how-to like for use later as a teaching aid. As such those will be two separate installments so as to better and quicker to find later.

Until then, I'm Jandre saying "Thanks for tuning in" and I hope to see you next time, right here on... This Old Flower-box.

[Clarinet music plays a lilting Theme Song as sponsor plugs roll]
>>>:bravo:<<<

I wonder if I'll ever be as good as Bob Vila at hosting how-to's of construction...
 
Looking great,:bravo: will the t5's be ho or vho? they should do great. I know what can be done with cfls. I hope you journal the twins.

hehe, the twins... Yeah, they're first up, I think. I'll take clones before I put 'em in, but yeah. Then, it looks like the diesel, and 4 weeks later, the GDP, and then staggered flower from there. Unless I hermie one for a back or cross pollination, then she will be the only one in that box. I just dread the 9billion cleanings I'm bound to do to satisfy my fears of a grain of pollen getting in and fookin up my smoke after I let a hermie go bananas in there! But I guess The Diesel and The Wonder Twins wouldn't be here but for happy mistakes. Hell, a lot of *US* wouldn't be here if it weren't for an "oops!"

As far as the lights, I'm thinking 65 watts for the single wall mounts, and 2 130 - 150 2-bulb for the hangars. 390w to 450w of fluorescent light, is nothing to sneeze at when it's only 28cFt, so that should cook pretty well in there. Color band of 2900k to 3200k. With the 190cfm fan and can, it should stay pretty cool without a chiller, too. Still in the design phase of the electrical, but I know first hand the intensity that can be had with t5's people don't give the VHOs enough credit. In confined spaces, they really excel when figuring heat, intensity, and head-space for HPS and all that... with the t5s I can let the girls get to within 3" of the light. That's a 3'6" plant. Not a bad size for an indoor grow. I'll, of course post the yields for all to see my success or failure, whichever it may be. If I fail miserably, who gives a damn? Would anyone but me have benifitted from my medical grow? no.......They're my plants, and the challenge was charged of me. If it's not good enough I'll have 2 weeks to rebuild if needed and it'll be me starting from square 1. You know what? I may even give it a second grow just to be sure I didn't f*ck up the first somehow!

Thanks for the encouragement! I'm gonna need it with all the nae-sayers of t5 flowering performance. I caught it with fluors back then, and still turned out bud that most everyone else swore would have you flying for 3.5+ hours when the norm was 1.5. And THAT was a $40/Qtr back then. So I'm sure to catch it now with t5s. The proof is in the puffing. heheheheh Besides, I like to push things and still come out standing at the end. Why else would I agree to build a flower box out of cardboard but for the fun, learning, and challenge of it. That's the name of the thread!! The Challenge: Cardboard Flowering Box It makes me feel like I've accomplished something. I've done MH and HPS grows. Too easy for me, like playing a game using cheat codes and knowing exactly what to do. There's no fun in it. I know it'll be a lot of work and a lot harder to get comparable yields. That means I'll have to be vigilant, caring, attentive, and sensitive to the needs of the plants. That's exactly what I WANTED to have to do when I started growing again. Anyone can set the perfect environments and watch what happens from the sidelines. The outcome is expected. What I want is to have an expected outcome, and through tending, nurturing, and training, BLOW IT OUT OF THE WATER with a bigger, badder, more robust outcome than I ever thought I'd get! It's like the difference in a Cook and a Chef. They both cook the food, only one does it with style and with the intent to impress and surpass expectations. Of course, HPS can impress... but I ask you this: Would 4-5 pounds a plant be more impressive from HPS or from T5s? Granted, being still rusty and relearning everything, I could BOTCH my first and maybe second attempts. But with great risk..... fik it. I'ma go smoke now. sorry for the rant.
 
Got the plaster done today. Plaster of Paris and flour cloth for added strength. Sides, top, and back. Did the stand box, too just can't see it here... It weighs a frikkin ton, now. Moving to interior and door facing next.

103011210157.jpg

Sorta looks like a painted cabinet, huh?


103011210519.jpg

Signature of the person that gave the challenge, the Teardrop Peace Sign.


103011210507.jpg

My name in the plaster


103011210610.jpg

Door facings still need work, but I have to wait for the plaster to dry.
 
The next phase will be to moisture proof the inside, and to create a light barrier for the doors. Panda plastic, I think should do a good job of keeping any arrant drops of water from weakening the structure inside. The Fan/Can at 190cfm should do pretty well at keeping airflow through. I might get a rheo to be able to slow down the fan if that's possible so there's not much blow-by past the 2 HEPA filter intakes.

Anyway, for the doors I will use felt or fleece overlapping each face of the door, so there is good contact at the door jam, and the door edges. Then, I'm thinking that a curtain of panda plastic should go up in front of the doors for extra measure against little fingers.
 
Update. Setback week. As if My Destructo-Daughter didn't cause enough damage from pulling up a clone, she pulled the right side of the plaster cloth off the frame. Luckily, that side was slated to be redone, as it did not adhere properly to the wall, but I was simply going to plaster over it, not redo the whole fahkhin thing. So I must go get more plaster, cloth, and tear off part she destroyed so I can make repairs. Sigh....

111711194757.jpg
 
LED MAY BE The Challenge: Cardboard Flowering Box

Okay, okay... I think I may go ballsy and do LED's. Hell that'd make it a REAL challenge, huh? maybe 300-500w of 630nm, 400nm, and 460nm 150w each or something in a triband with some whites thrown in. Any LED people out there got your eye on this thread? I'd love your input on this one.
 
Okay, I fell behind so I decided to do SOMETHING to continue forward on this build. I got the panda film in today and 1 of the 6-8 HO T5's hung today. I know these pics don't show it all, but they give a good idea of the light capacity inside with the white instead of cardboard brown.

I just lost my job today because I lost my voice and couldn't talk on the phone, so I had a little time, but restricted money... hence the 1 T5 fixture. But with 4.5 lineal feet of 10ft wide panda film it almost covered the WHOLE inside of the box. I still need more for the roof but the walls and floor are covered in the event of a minor spill, so that's really all I'm worried about for now. Just enough to protect the structural integrity in case of mishap.

I didn't have a lot of time before the lights went off, and the AeroGro is by no means a permanent fixture in there, but here are a few pics I took as I wrapped up for the night to let those little ones sleep. These are some clones I took from -->Sourpuss<--, and -->Thing 2<-- of the wonder twins, I figured I'd go ahead and get them started as a very small test of what the capabilities are of this box. Yes, they're in soil because I don't have the flood tables in yet, the finished box will feature either 2 DWC systems, or 2 Ebb & Flow style systems. I want 2 separate systems, so I can stagger the flower (right and left) and be able to flush or finish each side independently, and have bud pumping out every 4-5 weeks. I plan for this box to go into full production by early next year. The floor still needs to be water-sealed, but I didn't have the time tonight.

Oh, and it should be said that the panda film in the front allows roll-up access to the whole of the interior. The interior shot below is peeking in from the right side of the over-wide front flap.


The Pics!
120811183029.jpg
120811183000.jpg
120811182937.jpg
 
Just a quick note here before I move on to the rest of this journal.


I'm a firm believer, that although space is set aside for any hobby, no matter what it is, your hobby should never take over more living space than absolutely necessary and in no circumstance should it overflow the space set aside for such hobby. With some hobbies this is a simple task. With ANY type of gardening, however, it can get very hard to keep within the set bounds. As such I tend to start with the size I have set aside, and build a box to fit within that size. Then, and ONLY then do I worry about lighting, Nutrient delivery and such. Yes, this can mean some compromises are made, but I would never make a compromise that would hinder any growing experiment. And yes, as I'm still fairly new, although well studied, to hydro I am still in the experimental phase, and as such will be taking risks that other growers would have a bawling fit about while others applaud my daring and encourage me to push my limits to find out my actual skill level instead of sticking to some others plans thinking all the time that's all I can do... All this is to simply and clearly define and highlight for me my strengths, weaknesses to be improved, as well as show me my own comfort level with varying systems and scenarios and to push those to force me to grow as a home gardening hobbyist and cultivator. I fully intend to do more experimentation in the future. Contingency plans do not exist in my world, as usually my bast laid plans are for naught.

I have seen far too many journals pushing limits, trying alternatives, varying styles, inventing new ways and systems on this site. I feel that to do anything less than I am capable would be to cheat the rest of the community out of some well deserved reading material, insight into other ways of growing, and to chronicle and new discoveries and findings just in case I find something new or shatter old myths. This is after all, a science, as well as a passion of mine, and I feel that if I fail to deliver anything less than than average results:
1) Goes to strengthen the community in what not to do.
2) Shows me what I did wrong and as such is a step forward
3) Strengthens and furthers my own knowledge through actual experience.

For now, though, I am sticking to the simple in the interest of time and money. My next post in this journal will be of the decided nutrient delivery system for half of this box. The other side will have to wait for now.


Please give any feedback you wish.
 
DIY Ebb and Flow Hydroponic System:

90% complete.


So in the interest of time and MONEY, being that I am unemployed recently, I decided to go with a simple Ebb and Flow delivery system.

If you don't know how that is done, don't fret. I'm showing it here!

Things you will need:

1 - Flood Tray
1 - Reservoir sized so that it will half fill your flood table +2 to 5 Gallons extra so as not to burn out your pump (OPAQUE or LIGHT PROOF PREFERRED)
1 - Pond pump GPH sized to pump to a height 2' over the height of your flood table over the reservoir
1 - 1/2" ID* tube 3' long
1 - 3/4" ID* tube 3' long
1 - 1/2" barbed drain fitting with rubber washer
1 - 3/4" barbed drain fitting with rubber washer
1 - Spillover riser 1/2 the height of your flood tray
2 - Screen covers or inserts to fit drain fittings
1 - Air Pump
1 - Air hose 3' long
1 - Bar type Air Stone
1 - 24 hour or 7 day timer
Drill
3/4" bit
1" bit
1-1/2" Keyhole bit
zip ties
caulk
(*ID: Inner Diameter)


My system will be a small 7 Gal Ebb and Flow with siphoning drain. I chose these particular parts simply because they were fairly inexpensive, and because they fit the growspace. Pictorial step by step process follows.

The basic principle behind this system is that it will fill half full with nutrients twice a day and then slowly drain so that nothing is left but a bit of moisture for most (almost 22 hours) of a 24 hour cycle. Simply put, it will fill when the lights go on, for 15min, and slowly drain for the next 5 minutes after the pump goes off then once again an hour before lights-out.

This is achieved by the use of a riser, or stand pipe measured to half the height of the given tray placed in the drain. When the lights come on for the day, the pump also goes on, it will fill no further than the top of your stand pipe and the rest will drain though it. When the pump goes off however, the water backflows down the supply line back into the reservoir to entirely drain the whole flood tray, but leaves a TINY bit of water/nutrients in the bottom of the tray, to be taken up throughout the next 10.5 hours.

At 1 hour before lights-out, the pump then comes on again for 15min, fills the tray, and goes off allowing the water to drain out. This gives a final uptake opportunity just before the lights go off for the night.

So, two 15 minute fills per 24 hour cycle.


THE FLOOD TRAY:

For the flood tray, use the 1-1/2" Keyhole bit in the drill to cut out 2 holes on opposing ends of the tray. Attach the fittings to these holes and make as HAND TIGHT as you can- no need for a wrench here. If you would feel safer, apply a small amount of caulk to the underside of the washer inside the bin before tightening down. Attach the tubes as shown using zip ties or hose clamps to secure.

1/2" ID fitting
121411165511.jpg


3/4" ID fitting
121411165533.jpg


These are my fittings and attachments for the stand pipe:
121411165345.jpg


Now, turn over, taking note of the 3/4" ID position and place your stand pipe in the upper side of that fitting and the single screen insert into the fill or pump supplied fitting. These pictures were taken after a leak test with NO HYDROTON so I could empty quickly in case of leak.
121411165421.jpg


Left: Drain Screen. Left: stand tube. I have an extra just in case I want more height, but I got them in two pieces because hydroton floats in water, and I might not be able to fill 4" of a 7" tray. Also, and EMPTY leak test uses three to four times more water than if hydroton was in place, and took the whole 5 gallons to fill with both pieces in place so I removed one, and let it the pump run and drain through while I inspected for any wet or damp spots underneath.
121411165304.jpg


After all fittings are secure, place on a corner of a table or on a bench, making sure not to bend or crimp the tubing, attach the pump, place it in your reservoir, place the drain tubing in the reservoir and plug in the pump. If you like, you can place something solid, large, and waterproof inside as a displacement, so it doesn't drain your res during this phase. Let the tray fill all the way up and spill over the drain tube. Inspect the underside, the fittings, the tubes, and all for any leaks. If you used caulk as a sealer, you'll need to wait for that to dry before testing. I personally have never used caulk for any of my delivery systems and have rarely had a fitting fail. If there was a leak, it was usually my fault for not tightening it down, or missing a hose clamp.

NOTE: In order to keep from burning out your pump, it should be said that if you used something to displace the water, and your reservoir still ran dry, Your pump suddenly got louder than it was in the first of the fill, or you noticed bubbles rising from the fill tube at the end of the fill, you will need a larger reservoir than you have selected. Alternatively, you could look into doing a Drip system if this is the largest res you can come up with.


THE RESERVOIR

I chose a 160 GPH pump (box pictured below). This pump is strong enough for my needs and inexpensive. $14 at my local supplier.
121411171507.jpg
121411165629.jpg


The reservoir is a simple 5Gal bucket filched from The Challenger's work, cleaned, sanitized, and dried before working. As this bucket is white, it has already been accounted for with light penetration, and will be placed inside the lower portion of the grow box and out of light. Cool and dark is your nutrient solution's best friend.
121411165226.jpg


Into the lid I drilled three holes, untill I get the air pump, tubing, and airstone. This was simply for fitting, filling, and testing for leaks. One 3/4" hole for the 1/2" ID supply line to pass through; although the ID is 1/2", the OD is slightly smaller than 3/4". Two 1" holes for the 3/4" ID drain tubing and for the pump's electrical plug.
121411165819.jpg
121411170014.jpg
121411170045.jpg


Place pump inside the bucket, and pass the plug up through one of the 1" holes in the lid of the bucket (I used the hole right beside the 1/2" ID supply line for simplicity). Pass the 1/2" ID tubing through the 3/4" hole.
121411170338.jpg


Pass the 3/4" ID drain tubing through the other 1" hole. The finished product should look something like this:
121411170416.jpg
121411170501.jpg


The next entry in this journal, will be the placement of airstone, tubing and pump, and filling with Hydroton, after placement inside the growbox.

Until then, Live, Love, And Be Well. If not, be well medicated!
 
Okay, so this is the continuation of the Ebb and Flow system for this half of the box. I got the air pump, 6" airstone, hydrotone, elecritcal cords, and second timer for the pump.

I Installed the tray into the box itself and through the floor, drilled a hole for the supply and the return hoses. Through the panda film, I cut a small hole and pushed the hoses into the bottom compartment.
121611125126.jpg


I then filled the bin with Hydrotone.
121611125428.jpg


This is a representation of what your bin could look like. Yes, I know those two are in soil. They don't stay there, this is just a representation. And I need to add more hydrotone anyway, I just didnt, for some reason, get my math right on the volume needed.
121611142332.jpg


The air pump selected for this system, I got from the local pet store for $12.
121611103122.jpg
121611102618.jpg


My daughter insisted on helping today with the build, so I asked her to hold the airstone for this pic.
121611101835.jpg


If you are using an air pump and it will be below the level of the water, it is imperative that you employ a check valve in your hose. This keeps water from flowing back up the tube and into the pump and spilling out onto everything else under the pump. You might think you don't need it, but if the power ever goes out or your pump fails, the entire contents of your nutrient reservoir will drain out through the airstone, into the tube, through the pump, and..... into your floor. Trust me on this one. The power went out at one of my installations that had a 150Gal res. It was completely drained through the air pump because I neglected to install a check valve. When installing the valve look for the "IN" and "OUT" markings on the valve. "IN" is to be connected to the tube coming from your pump. I always check the valve's operation by installing it backward intentionally and turning on the pump to see if air comes though. If there is no airflow, I know the valve is working correctly and turn it around the right way and finish the installation.
121611125859.jpg


Drill a hole in the lid through which the air tubing will pass.
121611130204.jpg

Thread the air tubing through, attach your airstone, and place in the bottom of the reservoir across from the pump. A water pump cannot pump water if too much air gets into it. So placing the airstone away from the pump keeps the pump from getting air in the lines and increasing noise and losing effectiveness.
121611130537.jpg

Now all that's left to do is fill the res, attach the hoses for supply and return, and plug it all in. Check to make sure you have good airflow:
121611142509.jpg

Set your res pump timer, and test run. If you need to adjust the time, like I did (My pump filled the basin in 1min and filled faster than my drain would let water out) do so now. Once the tests are complete, add nutes, pH for your level, and make tidy your space.
121611142433.jpg

I had this exact part in mind when I build the box; that there is a door that this all hides behind.
121611153509.jpg


The final insertion of a mylar covered backing behind the bin, and a fan, and this half of the box is complete. Again, those plants are only in there as a representation to keep the whole thing from looking so bare. But those are the first plants that will be in this box and system as a preliminary test, so I thought it fitting to include them in this build post.
121611155709.jpg
 
Back
Top Bottom