Antics CFL Grow 2014

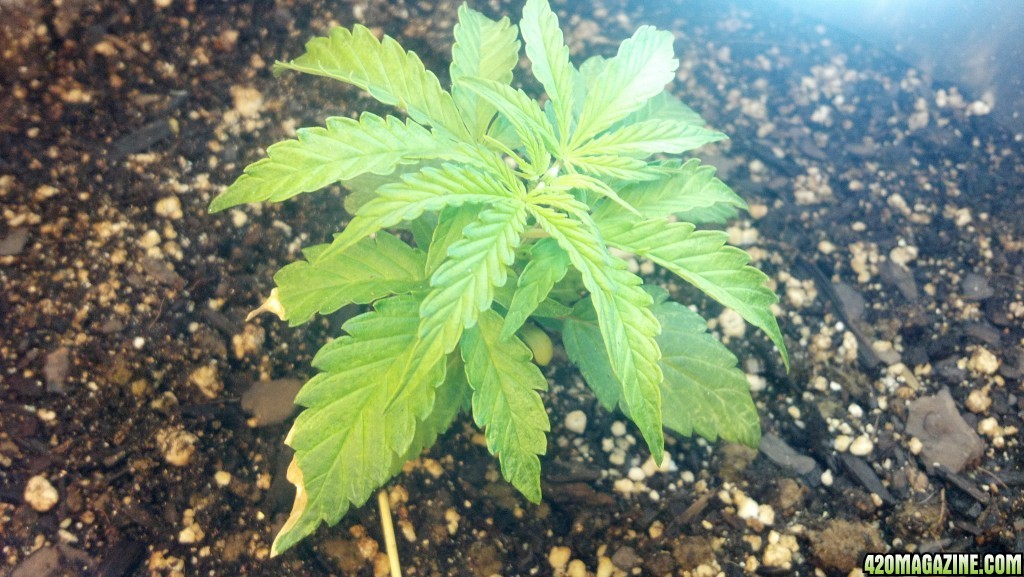
Strain: Quick One from Royal Queen Seeds
This is a feminized auto. I chose auto specifically since I'm new to growing Cannabis (but not new to growing other plants) So I wanted something easier to manage for my first time. I have several other strains that'll be done later on.

Sativa 10%
Indica 60%
Ruderalis 30%

13% THC
Medium CBD

Yield/plant should be between 25g-45g (Seller claims 25g-35g, Breeder claims 45g)
2 plants being grown
Harvest time 8-9 weeks
Total plant height will be 50-60cm each

Indoor grow
Pot size 6.3 gallons
Potting soil medium
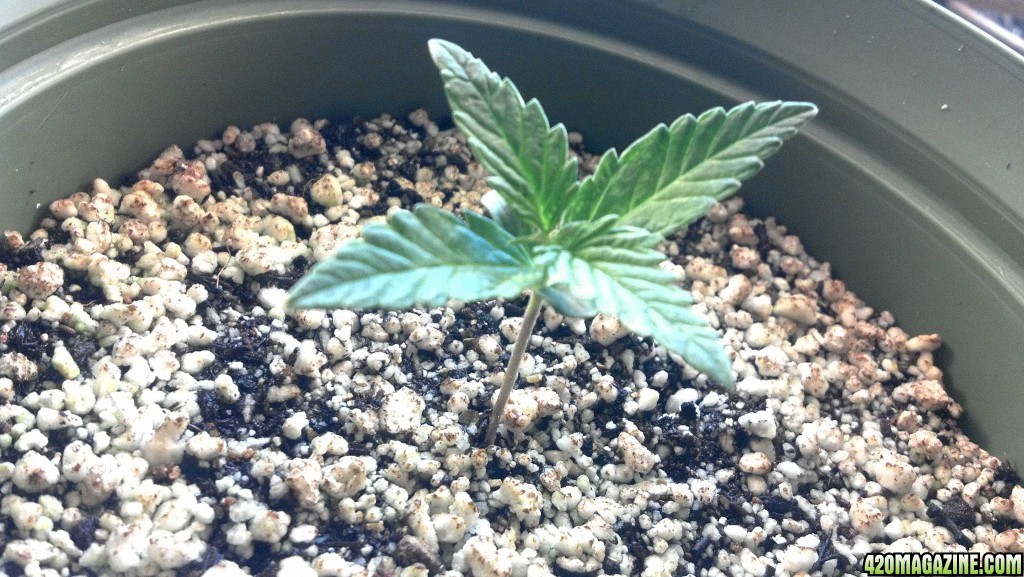
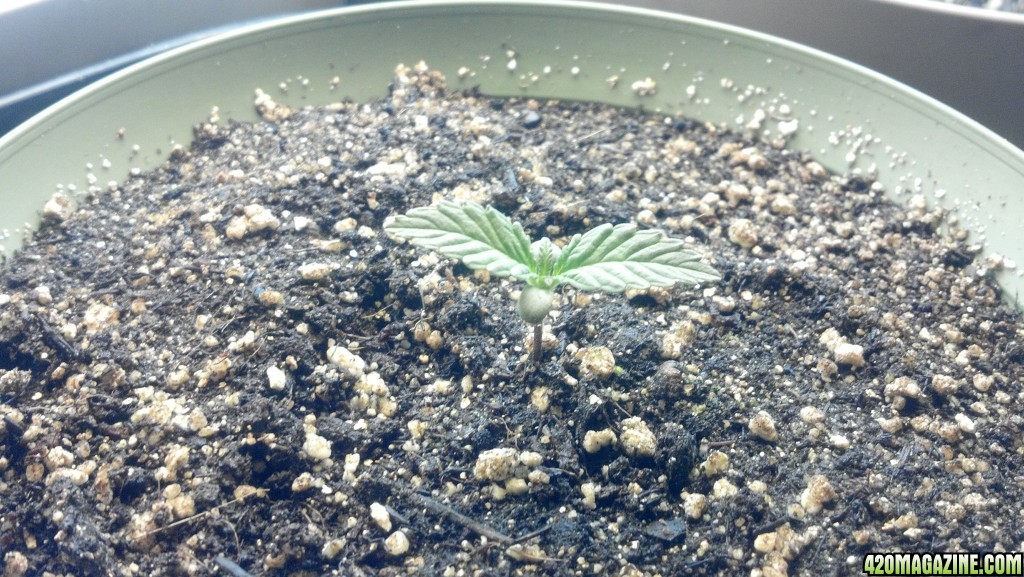
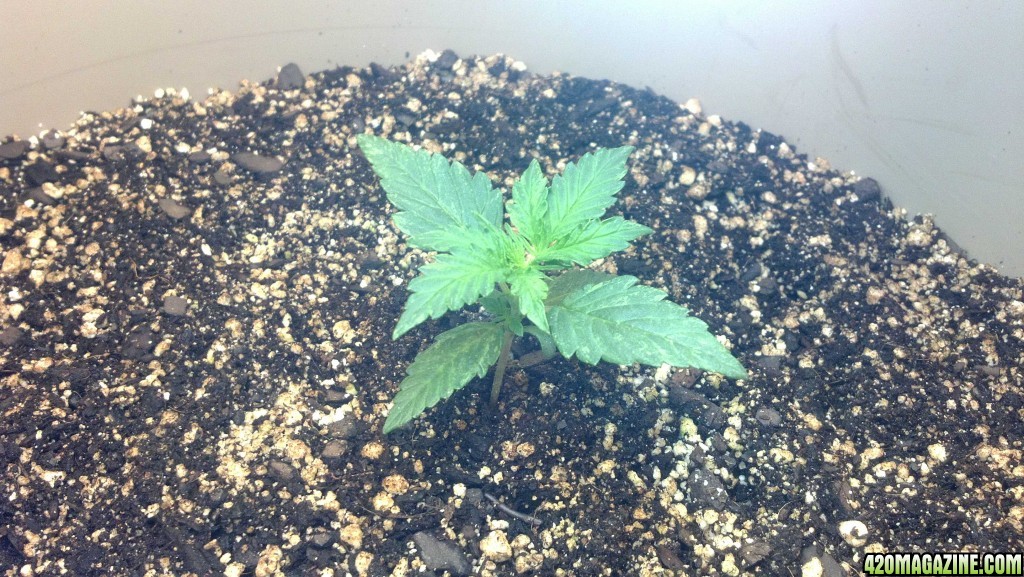
I'm using processed corn cob in place of perlite
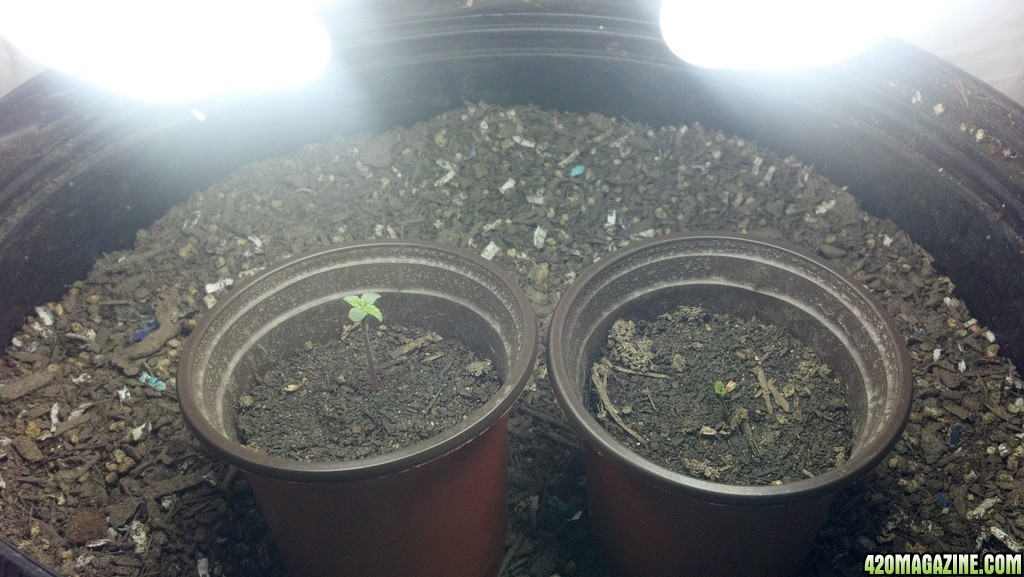
2 plants in ONE pot

3 part Nutrients will be used
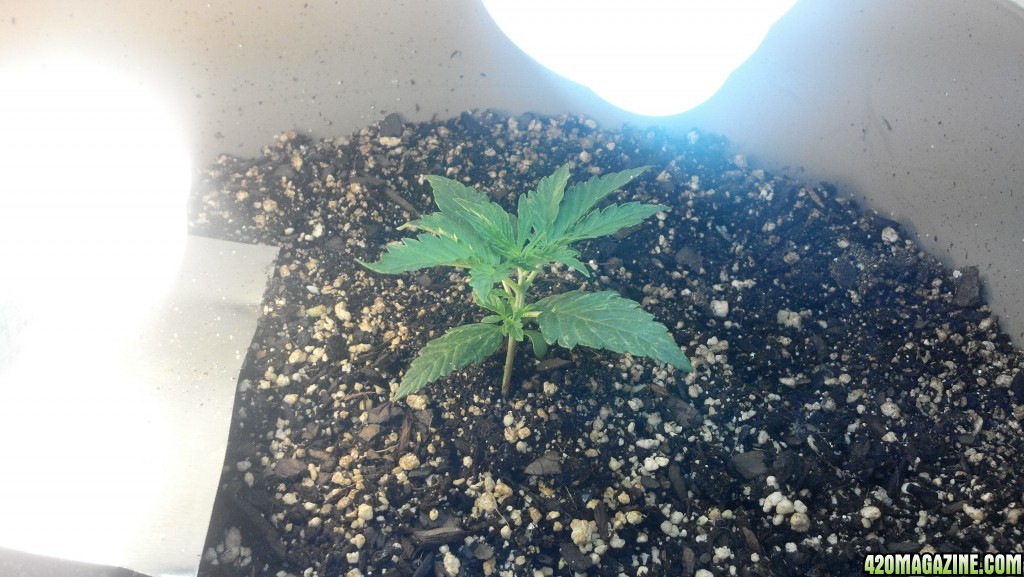
CFL for veg 6500K 45w CFL x4 bulbs (180 CFL watts, approximately 800 Incandescent watts)


I chose the shared pot to get a little practice with LST. I plan to plant them both off center, and train them outwards to get a nice gap between them for light purposes. Being an Auto, it's difficult to get practice topping and cloning, so I'll save those for a later date.

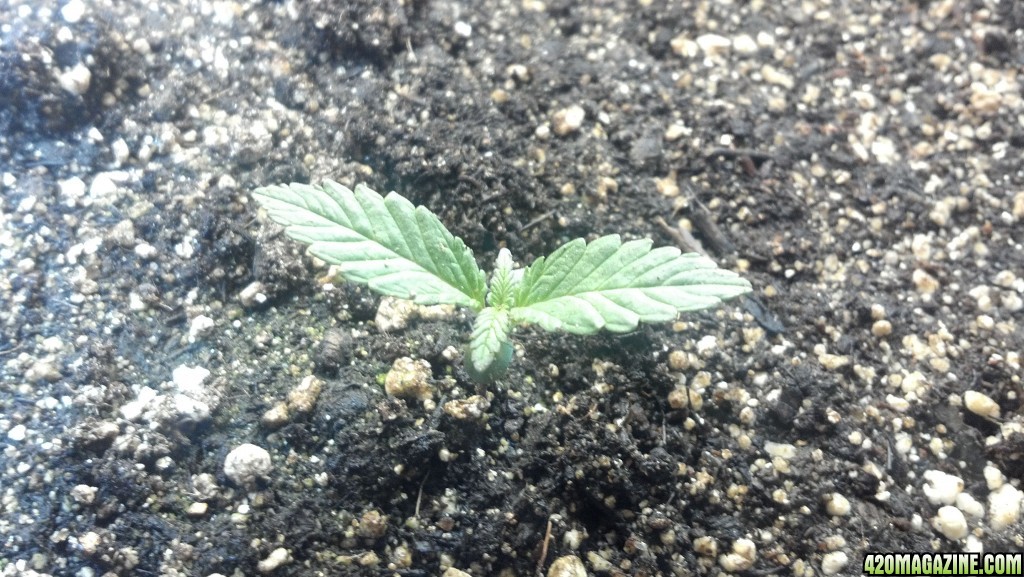
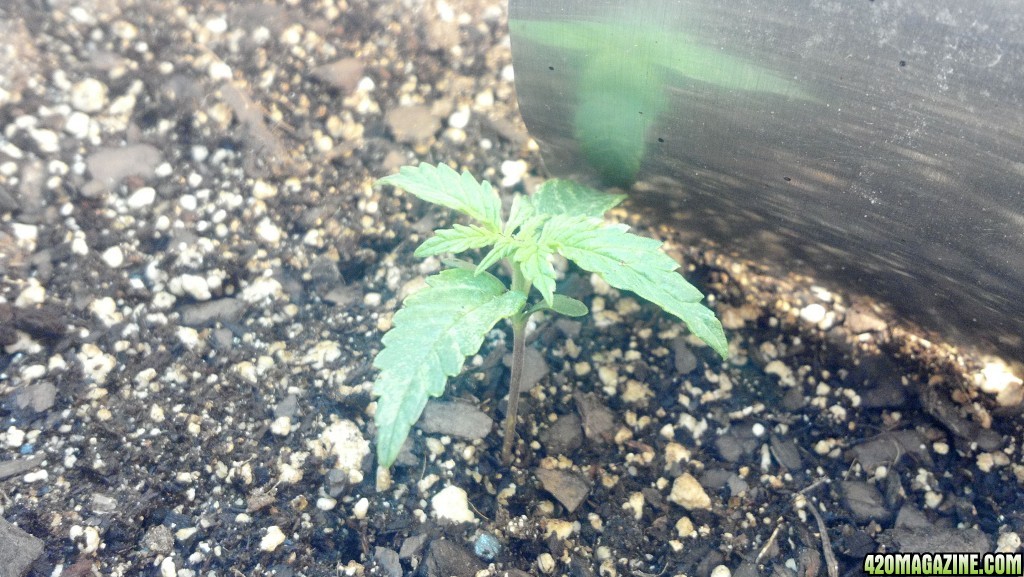
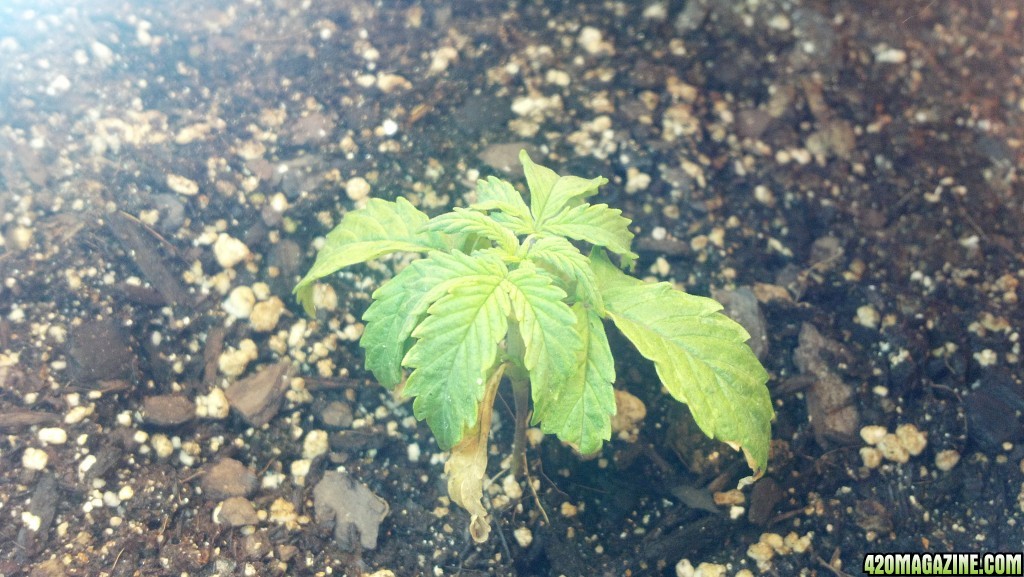
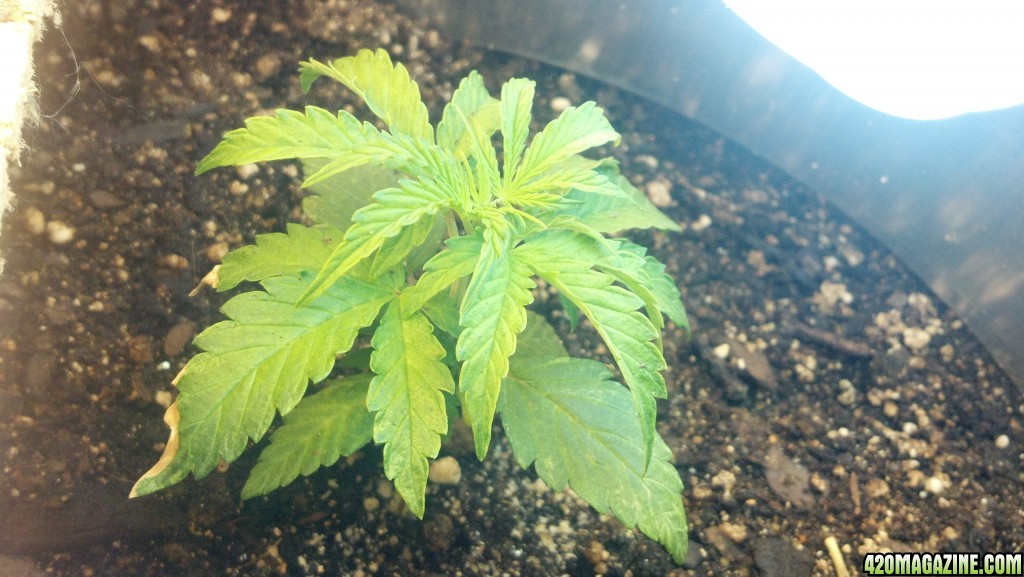
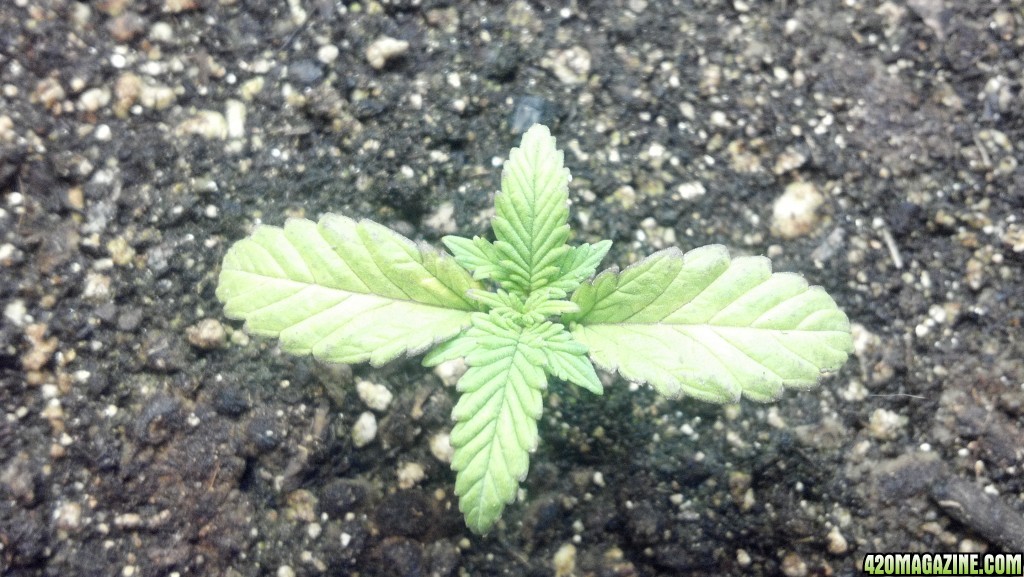
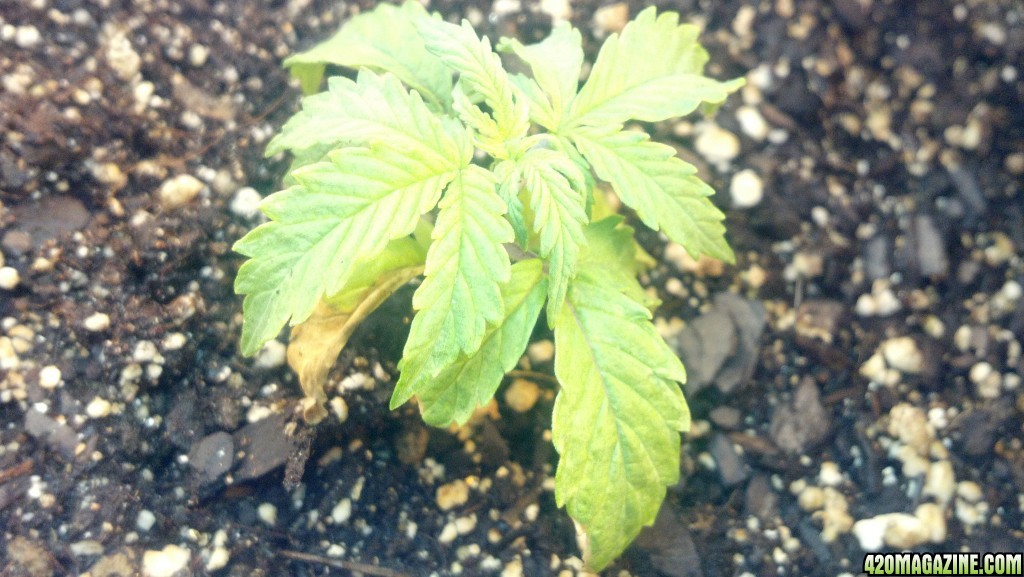
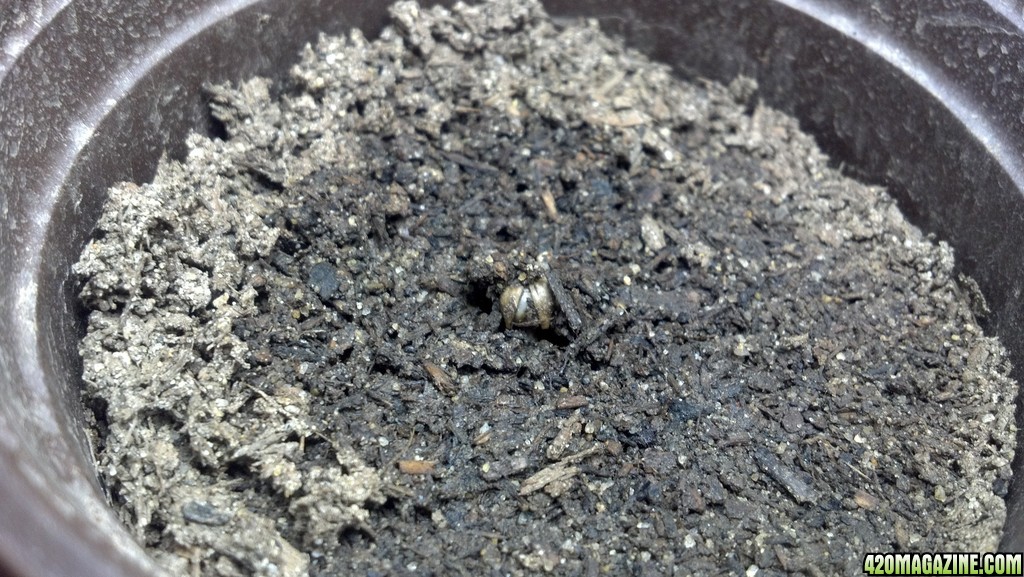
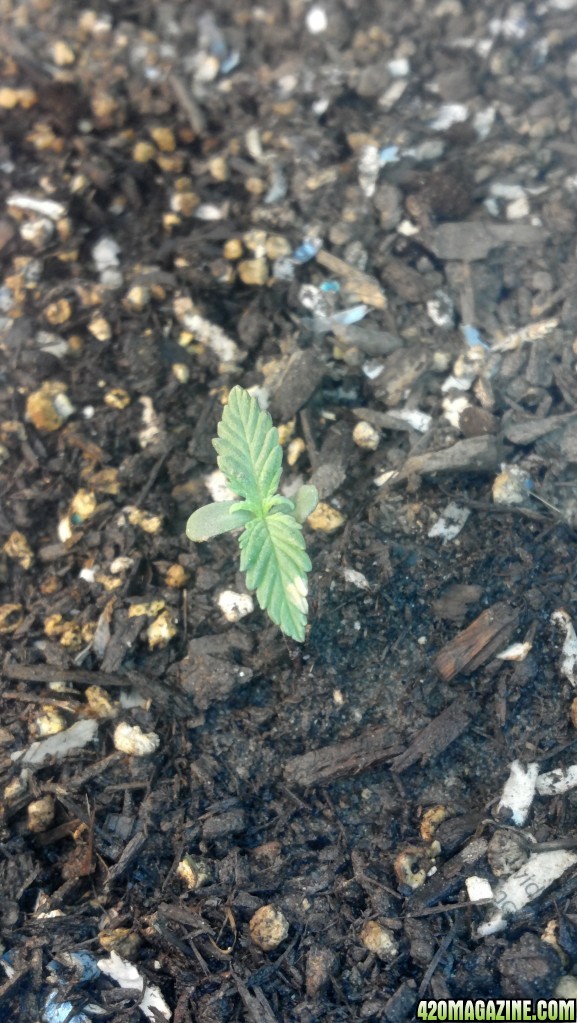
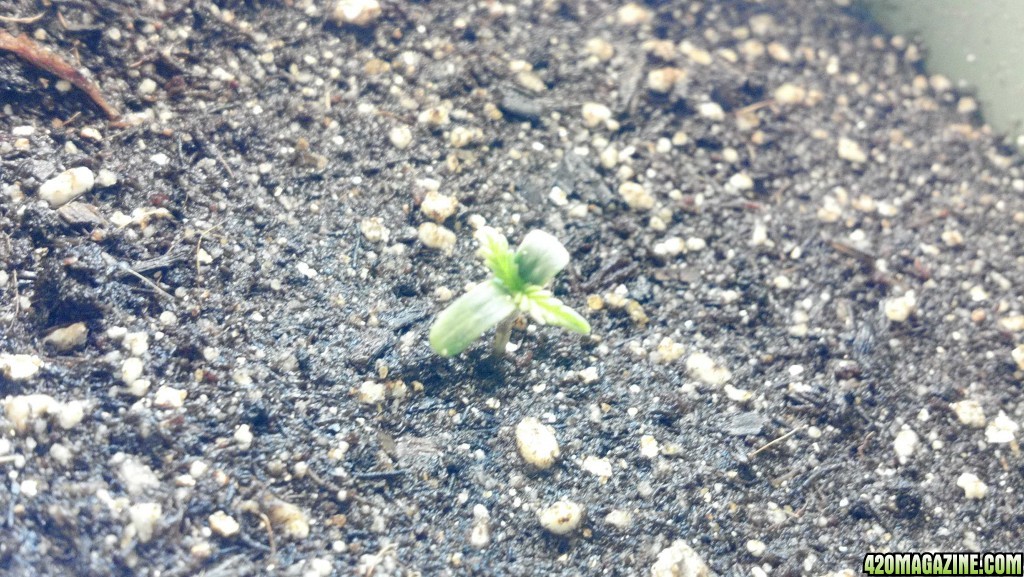
Seeds are currently germinating in plain potting soil. It was loaded with mulch that I had to sift out for the germination, but will be added to the pot later. I'm growing in a small makeshift tent for my experiment here. I have a small oscillating fan with attached hepa and carbon filter that will provide "wind", and am in the process of designing and building a carbon filter/fan now.

I also have some other vegetables in there now (lol) growing some corn, roma tomatoes, hot peppers, and tobacco, and I am currently running a 16/8 light schedule, on a timer.

I need to get a little clean up done before I can take pictures, since this was a spur of the moment decision to do this. I also need to fabricate a light reflector, and build the carbon filter/fan as previously mentioned.

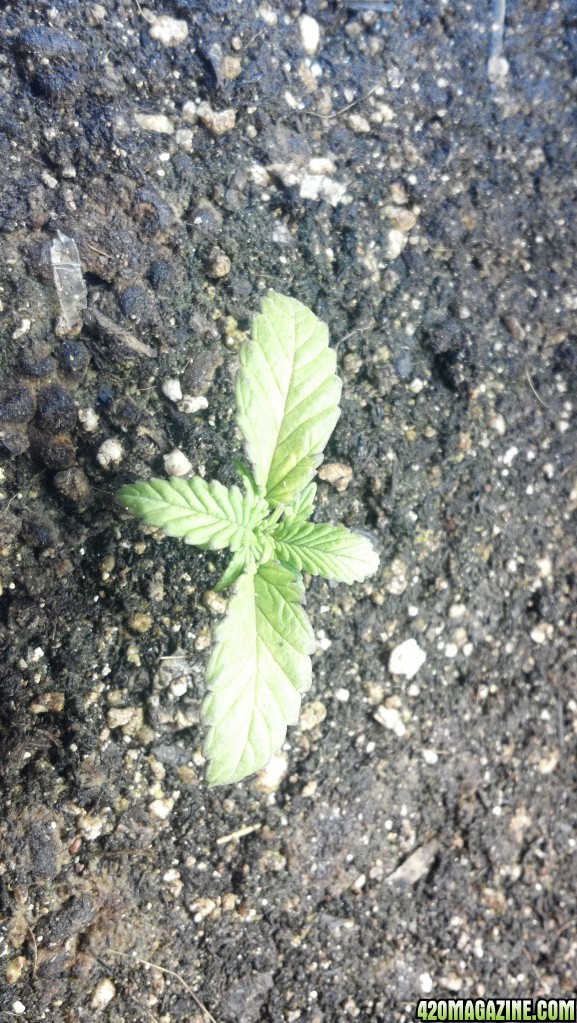
Seeds are both showing taproots, taproot planted down, and are each planted in a 3" pot and I plan to transplant into the final pot in a couple weeks, with as little stress as possible, since I'm on a tight unforgiving schedule with these plants.

Cost so far:
Seeds $40
Bulbs $20
4 way bulb splitter $8
Timer $7
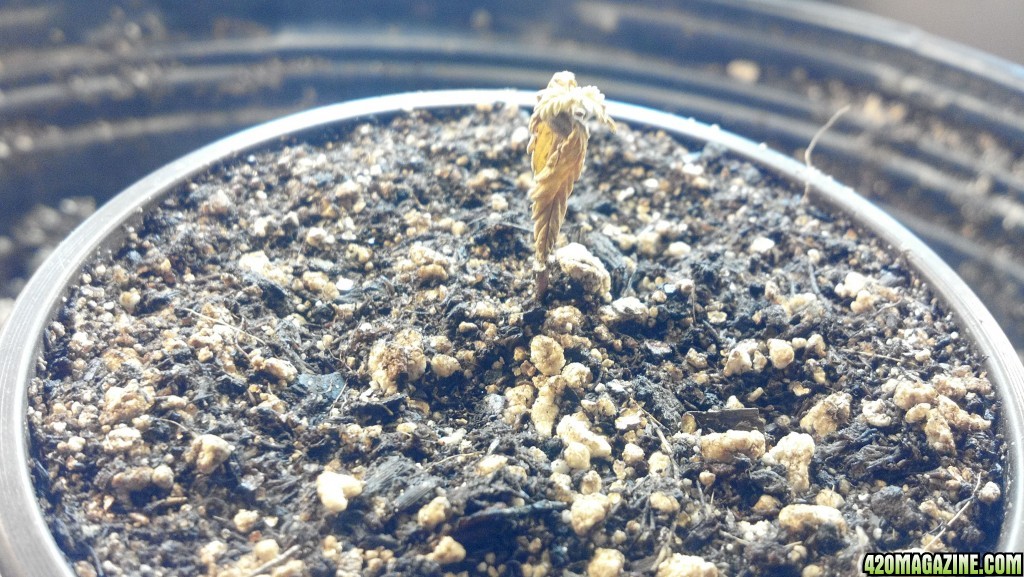
Miracle Grow seed starting mix (This did NOT work well) $5
Plain potting soil $1
Nutrients $44
Activated Carbon $12

Total so far: $137

I had the first fan and filter from an air purifier, had the pot and drain tub, and had the processed corn cob. I already had the tent frame and cover, and already have the materials for the reflector as well.

I expect to spend another $10-$20 and have my exhaust fan/filter completed. I'm currently looking into using a 20" box fan that I have, and picking up 2 20x20 furnace filters, with a nice layer of carbon between them. OR I might make a funnel from the fan, reducing the size of the area needed for carbon pellets, and pulling the air through a long tunnel. Either way, I'm guessing that the more surface area I have, and the more pellets that I have, the better it'll work.

Thanks for reading, and stay medicated.
 
7 days after planting, one seed has finally broken through to the surface. A check on the other seed reveals a massive taproot, and the seed moving closer to the surface.

I was reading a Hydroponic How to by TheCapn here: How To: 10oz per plant perpetual indoors and it gave me an idea.

In it I learned a little about ebb/flow systems. So I figured since my seeds were both cracked, with a small taproot visible, and it seems to be taking so long with me keeping them watered, I decided to stop the flow and start the ebb. That was yesterday. I gave SMALL mists of water which were no more than 1-2 drops that was misted onto the top of the soil, just to lightly dampen the soil, with absolutely no run off water. 1 mist in the morning as lights came on to simulate the accumulated nighttime dew, and one mist mid day as the soil started to dry and pull away from the edge of the pots.

Today? the visible roots on the one seed are now at least 1-2" long

Finally visible!
2014-02-27_10-45-43_311.jpg
 
Day 9:

After a lot more reading about CFLs I've found that everyone's opinion varies on this subject. There really hasn't been any consistent answer in how many bulbs to use, CFL total wattage, Kelvin rating, or anything else. Everyone says something different. There are of course a few opinions that seem to overlap, as well as some information that just makes sense scientifically, so that's what I'll try to base my decisions on.

I'm going to be adding 6 more CFLs to the 4 I already have. I'm going to grab some splitters, and a 6 pack of 23w 2700K (If I can find a higher wattage, I'll obviously grab those, but 23w seems to be the highest I can find without breaking the bank @ $20 per bulb). I'll be using 3 fixtures above the plants, with a total of either 6 or 8 bulbs up top. And one fixture on the back wall with 2 or 4 bulbs. I'm leaning towards 8 bulbs up top, and 2 on the back wall.

I'm going to rebuild my makeshift tent in the next few days as well. I have some white pegboard that should work well for reflecting light, and the holes should work well at drawing in fresh cool air. I'm still shopping around for an exhaust fan, and my activated carbon is on the way.
 
Subbed

How far away are your cfls from plants?
 
Day 10:

CFLs in use right now are 3, 45w 6500K and are 3" above the leaves. Any closer raises air temps around the plants up to 88-90 degrees. at this 3" distance it keeps the temperature at 82 degrees.
If I use all 4 bulbs the temperature in the tent hits 92 degrees without adequate ventilation.

Here we are today at 6am:

And my Nutrients arrived on Friday

A trip to home depot yesterday and I picked up the 3-2 way bulb splitters, and 8 23w 2700K bulbs. I plan to use 6 of the bulbs, but can easily add 2 more if necessary.
I have decided on an exhaust fan, which will just be your average run of the mill table top circular fan from Holmes, and that's on order now.
I located 3 fixtures to use in my garage, along with a couple socket extenders that I can use if needed.

Cabinet/tent rebuild starts this week, and will include some actual pictures of it.

Using a frame covered with a white sheet, then covered with a comforter just doesn't work well. :)
Live and learn!. Thanks to you folks here, I'm able to make changes and upgrade, and not make mistakes, like losing critical light that's being absorbed into fabric.

I will have a total of 273 CFL watts on 2 plants. (1400w Incandescent equivalent, if this figure matters)
This works out to 20,400 lumens total.
4-45w x2700 lumens each
6-23w x1600 lumens each

The new grow area will 32" deep, 32" wide, and 52" tall.
This gives me a total of 30 CUBIC feet. (LxWxH / 1728)
And will be a total of 6.7 SQUARE feet (LxW)

This will give me 40 watts per square foot
And 3,044 Lumens per square foot


Previous Material costs:
$137
+$7.50 3-way light splitters
+$20 8 23w 2700K bulbs
+$15 7" fan, should pull about 185 CFM

New total of $179.50
 
Day 11:

I know.. Another update :( I hate typing all this crap. I really regret starting this thing, but being my first time, I figured it'd give me something to look back on and not repeat the mistakes I made here for my next grow, or duplicate some things that gave me great results.

So the pegboard grow room is just about done. It's ugly, it's crude, and it gets the job done. The bonus of the pegboard, I've found is it's quiet easy to raise my light shelf in 1" increments now.

I finally decided on dimensions of 28" x 28" x 52" tall. I'll recalculate the wattage and lumens per square foot later tonight or tomorrow.

So I've had my 3" pots with my little seedlings sitting on top of the soil in their final 6.3 gallon pot. The taller girl had about 1/4" of roots coming out of the bottom of her 3" pot, so I decided to transplant them both as I was completing the upgraded "tent".

The pegboard provides much better ventilation now, and temperate is at 78-82 (depending how long I keep the door open)
I have also decided to add 4 23w 2700K bulbs to the mix., so I'm running 4- 45w 6500K, and 4 23w 2700K bulbs. Once we start flowering, I'll be adding 2 or 4 more 23w 2700K bulbs.

I have to clean up the wiring a bit, and I have since adjusted the bulbs to about 2" away now, but this about where we sit now.
(Don't mind my corn in the foreground :) )
My small oscillating fan is visible on the right side, and I have a hepa/carbon filter taped onto the the back just to keep the air as clean as possible.

The left and right fixtures are staying where they are, but I'm going to be remounting the middle fixture at a 90 degree angle to the shelf, so that 4 way splitter has the side of the bulbs facing the plants. As the girls get taller, the left and right fixtures will be rotated outwards to cover as much of the plants as possible.

I apologize for the poor quality, this is the best my phone can do with all that light in there.
2014-03-03_11-02-30_722.jpg
 
Looking good so far. Hopefully you will start to enjoy the journal more as you get growth. It gets more exciting and any questions make it easier when you have been documenting to get an answer.

Happy Frieday! !
 
Day 15:

And just a note.. I am counting total days since the day the seeds hit soil to germinate just to make sure I've covered the entire timeline.

Anyways, I woke up today to small yellow spot on one of the girls. This happened to the slightly shorter girl, that emerged a couple days after the first. I have started a 25% mix of nutrients. (Mix calls for 2.5ml/gal each of the 3 part nutrients, or 7.5ml/gal total) and my first thought was nutrient burn, but no signs of it on the other girl.

The yellow spot is ONLY on the top of the leaf, and the underside of the leaf looks completely normal. CFL was about 2"-2.5" away after a few adjustments, and installing one of the two reflectors (2nd reflector will be installed when the plants have a few more leaves, and the lights are raised a bit more), and my guess now is that she's suffering from a little light burn.

2014-03-07_10-08-10_119.jpg


I've given the soil a light flush with 8oz. of water for each of the girls, and have moved the CFL back to a distance of 4" from each plant, as well as raised the fan so the girls are both getting a nice breeze.

My PH meter is STILL being shipped after a nice USPS blunder of trying to deliver it in the wrong state, then shipping it back to the originating post office, at least according to tracking. But we all know how accurate the tracking system is. So who knows. It's supposed to arrive today. Yet it's currently over 3000 miles away. Do you believe in miracles? I don't.

Both of the girls are growing their 2nd set of leaves in now as well, and I'm hoping that other than the light burn, everything else is on schedule. I'm also guessing that as time goes on and the roots grow out, and they grow more leaves, that plant growth will increase exponentially, being able to absorb more nutrients, water, light, etc..
 
I will have a total of 273 CFL watts on 2 plants. (1400w Incandescent equivalent, if this figure matters)
This works out to 20,400 lumens total.
4-45w x2700 lumens each
6-23w x1600 lumens each

The new grow area will 32" deep, 32" wide, and 52" tall.
This gives me a total of 30 CUBIC feet. (LxWxH / 1728)
And will be a total of 6.7 SQUARE feet (LxW)

This will give me 40 watts per square foot
And 3,044 Lumens per square foot

Ok and since I forgot to update my wattage/square footage stuff for a few days now, here it goes.

The figures quoted above were for the planned size of 32x32x52.
I ended up building the enclosure to be 28"x28"x52" Which isn't much of a difference, but here's what it works out to anyway:

273 CFL watts total.
Which is 20,400 total lumens.
4- 45w 6500K @2700 lumens each
6- 23w 2700K @1600 lumens each

The total size is 23.5 CUBIC FEET (Original plans were 30 cubic feet)
The total surface is 5.3 SQUARE FEET (Original plans were 6.7 square feet)

With the new figures:
51.5 watts per square foot (Original was 40w)
3,849 lumens per square foot (Original was 3,044)

So by removing 4 inches on each side, I increased wattage per square foot by 11.5 more watts. And I increased 805 lumens per square foot.

As far as what I've read about using CFLs, I'm at or above what most people suggest is needed (depending which article you read). So here's to hoping those guides were right.

And I can't wait until these are almost done. I'm planning a CBD Crew MED GOM 1.0 (Fem/Auto) and Royal Queen Power Flower (Fem) next! (assuming this works out well!) As long as everything goes well, I'll start germining the next two in the next 2 weeks or so.
 
After a few attempts to make reflectors, and all of them failing, or just being far too difficult to make work, I went with the easiest method, and it seems to have worked the best.

My cabinet is just made of some white pegboard that I had leftover in the garage. Assembly was a breeze just using a few zip ties.
I'm using a piece of 3/4" MDF that I had left over from another project, and it's sitting on top of some pegboard utility hooks, creating a nice shelf. The lights are all attached to this shelf, which also serves great as a utility shelf to put my spray bottle and other misc goodies.

In the end, making a reflector was as easy as just cutting 2 pieces of aluminum flashing (It should be dull enough not to create hot spots, the finish/reflectivity is very similar to the 'dull' side of aluminum foil)

I'm using 2 pieces, one piece sits over the lights towards the rear, under the shelf, and ended up being a perfect fit, as it's being held up perfectly by the porcelain light fixture.

The front piece needed a 90 degree bend to create a lip on the front piece, which is attached to the MDF using a few screws and washers.

Both pieces of the reflector were given a nice curve by rolling them around a can of furniture duster spray.

The front center view from above:


Front center view from underneath:


View from underneath, showing the lip, reflectivity, MDF 'shelf', and Utility hooks for support:


And another view, slightly right of center. The flashing is held up by the groove in the porcelain fixture. The ends of the flashing piece in the rear are supported by the utility hooks in the pegboard.


There is a small 2" gap where the MDF isn't covered, but it's much better than it was, and the reflectivity has improved greatly. The cabinet above the shelf is much, much darker now since I'm keeping most of light below.
 
Day 18:

Ever hear the phrase "If it's not broken, don't fix it" ?
My PH meter arrived Saturday. Immediately, I checked the PH level, 4.5-5. So I start freaking out. Back to the forums, and I find out I can raise the level with a little baking soda. I got it to hold around PH 6. So I was happy.

The girls weren't so happy. The next morning everything went to hell. Sagging/curling leaves. Looks definitely like nutrient burn, although from baking soda.
Things aren't looking good right now. I flushed the soil with 8 gallons of clean water. I dumped the runoff as the drain tub filled up. And at risk of stressing the girls further, decided to repot them in brand new soil/perlite this time around.

I'm hoping to at least salvage a small harvest now. Just in case the flush and repotting falls through, I planted 2 more in the same brand new soil/perlite, and have no plans to fix what isn't broken the next time around.
 
Well just an update, one plant has completely died. The other is barely hanging on now.

I've planted the last seed I had of Quick one, and have also started my CBD MED GOM 1.0, which is doing absolutely amazing. From morning to night, I can see a visible size difference in them.

So I'll continue this journal when I have something valid to add regarding progress.
 
KCHO

Keep Calm and Herb On.

So let's get this thing continued. So I killed 2 plants. Shit happens right? And I'm new to indoor growing, so let's chalk it up to inexperience and move on. I figure I'll just keep this all in one journal since I haven't successfully completed one yet, so let's go!

I planted a MED GOM around the time of my PH correction panic, and then a few days ago planted another, then just planted 1 more Quick One.

So anyways...

MED GOM 1.0 specs:

Strain was bred by Grass-O-Matic and CBD Crew. Sold under the CBD Crew name as well as the Grass-O-Matic name.

Sativa/Indica/Ruderalis hybrid. And I can't find ANY specs on % of each.

4%-10% THC
4%-15% CBD

Yields 25g-50g per plant
Fem/Auto

So back to the first failed grow... Here's the last dead Quick One:
ResizedImage_1395530060714.jpg

Here's the youngest MED GOM Roughly 5 days from seed?
ResizedImage_1395530035047.jpg

And the oldest MED GOM. Roughly 10-12 days from seed?
ResizedImage_1395529992412.jpg


I've got my 45w 6700K bulb literally about 1/2" to 1" away from the biggest plant now.. and honestly, I notice a difference every morning I wake up, and every night when I go to bed. It's insane how fast it's growing compared to my last attempt.
 
The ' My Photos' link is down .. you can click the 3rd icon from the right above your edit window, the camera with a folder in the lower right, to access your pics. (I could that is)
 
Just a picture update since it's been a few days.

Royal Queen Quick One:
ResizedImage_1395928315329.jpg

CBD Crew MED GOM 1.0:
ResizedImage_1395928339844.jpg

CBD Crew MED GOM 1.0:
ResizedImage_1395928372678.jpg


Obviously they've all been planted a few days apart. I planned on growing 2, but had enough space and light for a third, so decided to plant the first CBD MED GOM, then as the original 2 Quick Ones died, They were replaced with another MED GOM, and then another Quick One.

Progress seems to be much more noticeable now and I had to transplant the oldest MED GOM into its final pot, since the roots were insane. And the Quick One has also been transplanted into the MED GOM's old pot, since the roots were visible at the drainage holes in the small 3" pot.

In about a week or so, I expect to have to transplant both of the smaller girls into their final pots as well.

The oldest is about a week or so older than the younger MED GOM, and I planted the Quick One about a day or two after that.

They're all Feminized Autos, so I won't have any issues with lighting. I plan to keep the same 16/8 schedule (But have been contemplating moving up to 18/6) all the way through. I'll just be harvesting one, then a week later another, and then a day or two later, the last. Which is fine with me, I'll be able to get one cut and set for drying before having to do another.
 
Thanks :D 
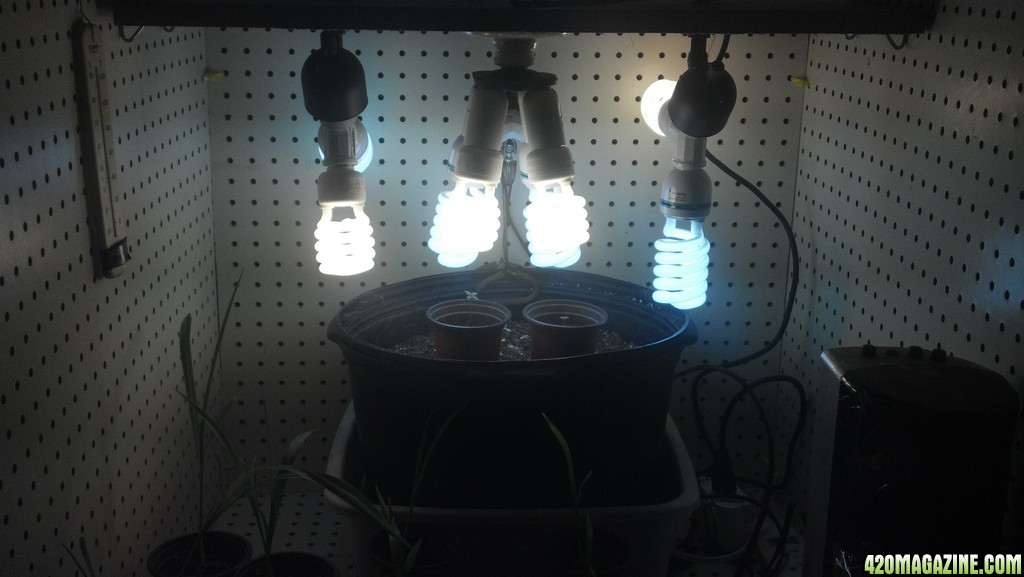
I'm actually looking at adding a few more bulbs as well for this grow, and I figure they should have enough life left for 1 more grow. After that I'll be upgrading to LED or HPS/MH.

But... if the CFL grows produce enough (And by produce enough, I mean at the top of the range, or exceeding the expected yield), I might just redesign my grow area, and redesign my lighting to do all CFL grows. But I'm temped to switch over to LEDs eventually for $ savings on power.
 
I transplanted the last 2 just the other day, so I don't have to worry about that anymore. And when I removed them both from their smaller pot, which was maybe 1.5-2 quarts, both had visible roots at the bottom of the dirt, and on the sides.

And it's been 2 days, so what the hell, let's take some more pictures! They've all changed a bit anyways, so I might as well show them off.

I now have added 3 more bulbs. 2 are 23w 2700K, and 1 is 23w 6500K.

Yes. I'm the guy that will be growing from start to finish using BOTH 6500K and 2700K bulbs. :)

I added a 23w 2700K next to both of the MED GOMs with a little home made reflector to increase the light on each, and the 23w 6500K is in a fixture with reflector hanging 1" above the Quick One.

I added these lights since the readings on my Lux meter were weak (Although after a few seconds with the door open you see spots anyways) Readings on the Lux are now looking great. So enough typing, and lets get to the pictures.

Quick One:

ResizedImage_1396087009223.jpg


MED GOM 1.0

ResizedImage_1396086989450.jpg


MED GOM 1.0

ResizedImage_1396087023201.jpg


I've also noticed some spotting, or lighter areas on the leaves of the older girls, which are the MED GOM 1.0, And I checked the PH, and it was sitting around 7.2, so I've started to use a little lemon juice mixed with their water to correct that. After the first day, my PH is down to about 6.9.

I used about 3 capfulls diluted into 16oz of water which I mist into the soil, then follow up with a spray bottle of just water to dilute it even further. After the Baking soda incident, I don't want to risk killing these. Lesson learned.

Tomorrow I'll check and adjust the PH again if needed, since I'll have to start Nutrients in a week or so.
 
Update time. Day to day I see a few small changes, but man, nothing compares to looking at the pictures side by side.

It turns out that the lemon juice I used to correct the PH a bit affected the 2 CBD Crew MED GOM 1.0, and caused some burning (No nutrients used yet!) Which is visible on the leaves, but both still seem to be growing just fine.

The Quick One wasn't even phased by it, and shows no sign of any damage from it.

So don't use lemon juice to lower the PH of a MED GOM 1.0. :)

PH on all 3 is still sitting around 6.8-7.2 which is a bit high, but it should start to fall when I start adding nutrients.

Pics:

Quick One:
2014-04-02_11-13-40_949.jpg

MED GOM 1.0:
2014-04-02_11-14-04_926.jpg

MED GOM 1.0:
2014-04-02_11-14-22_580.jpg
 
Also to add to the previous post (Edit time expired) Last night I have started feeding nutes to all 3, more diluted than the last time with the first 2 Quick One plants (Which too many nutes is what I believe caused the drop in my soil PH, which lead to the panic, then adding baking soda which lead to their early death)

Again, I'm using a 3 part nutrient system, and directions call for 2.5ml/gallon of each: grow, micro, and bloom
I have diluted this further to 2.5ml/ 1.5 gallons. The MED GOM 1.0 both seem extra sensitive when I added a little lemon juice (diluted) and caused some burning on the leaves of both plants, so I did'nt want to risk killing them, or stressing them even more with too many nutrients. The youngest plant, which is Royal Queen Quick One, received the same # of sprays (nutrients are being delivered from a spray bottle) as the other two. This morning I see no evidence of nute burn, and all 3 are looking happy and lively.

It's difficult to see in the picture above, but the Quick One appears to have a border of purple around the edges of the leaves.

What the hell.. I'm posting this already, I might as well go take more pictures too. I'll see if I can capture the purple edge on the leaves of Quick One.

*Taking pictures now, then uploading*

Quick One
2014-04-03_08-30-23_660.jpg

MED GOM 1.0
2014-04-03_08-31-04_443.jpg

MED GOM 1.0
2014-04-03_08-31-57_470.jpg


Finally a picture with the cotyledon leaves visible, and they're starting to yellow on the oldest plant, and I assume will be slowing dying off as it gets bigger.
 
Back
Top Bottom