doktorkush
New Member
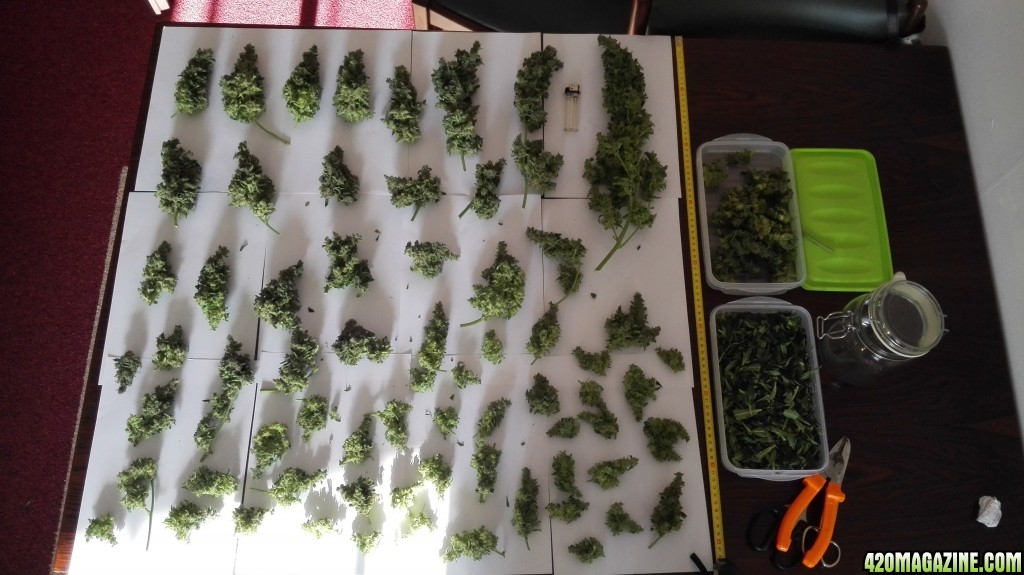
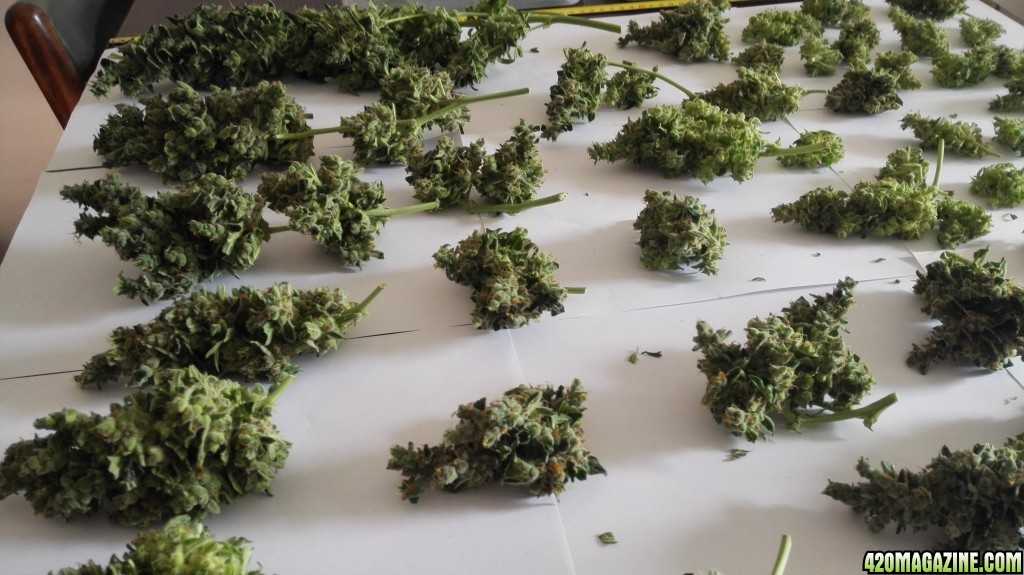
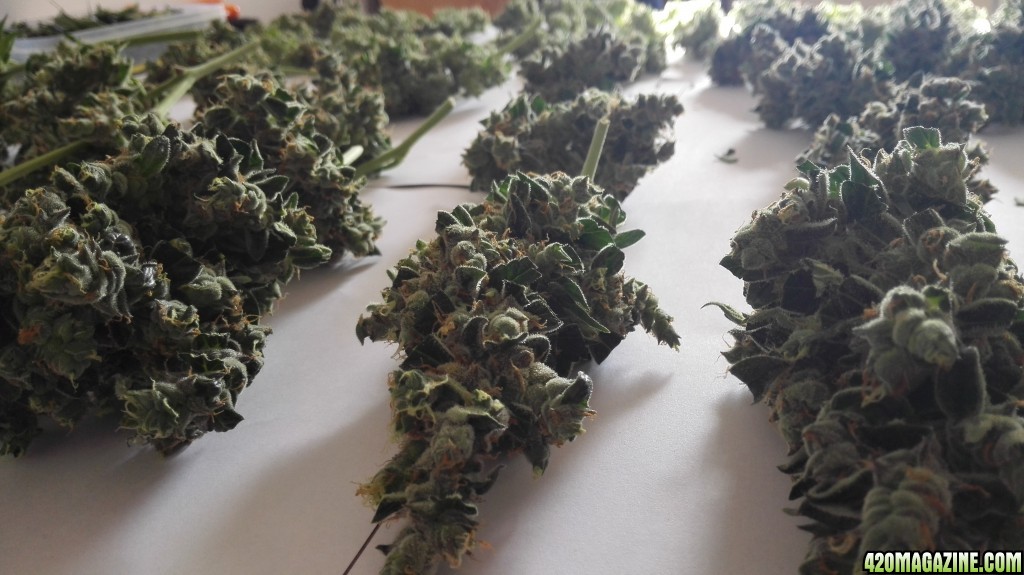
After months of working on it, a little at a time, I am finally almost done and ready to start growing in the coming week. For me, the decision to start growing was multifaceted. Buying weed can be expensive (and I do smoke quite a lot) and the quality is never the same but also I enjoy growing plants and building things. When I started reading about growing weed indoors the idea instantly appealed to me but instead of just buying a grow tent I decided to build my own. But not just any makeshift box, I wanted to go all out and build a proper, hermetically sealed (airtight), efficient, solid growing environment. I wanted to waste no light or space and grow the best weed that I can with the little space that I had. I ended up building the grow box you see below from scratch. Drawing a line it cost me way more than it would have by buying a grow tent but it is incredibly rewarding looking at what I created with my own two hands. Here are the results:
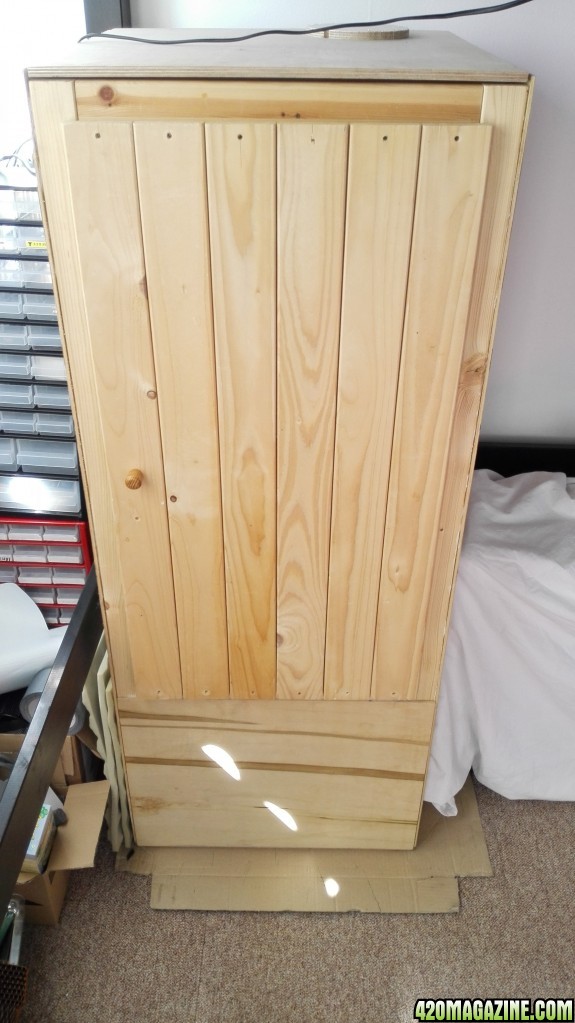
It measures 49cm x 49cm x 122cm (1.6 ft x 1.6 ft x 4 ft). I started by building a solid wood frame onto which I attached plywood panels and sealed all the corners with silicone making sure it is air-tight. I didn't have any proper blueprints, I just designed while I built. I did all this in the spare time I had during weekends, which is why it took so long. Around half of the wood use is wood that other people threw away, but I managed to save it from rotting in the rain and put it to good use")
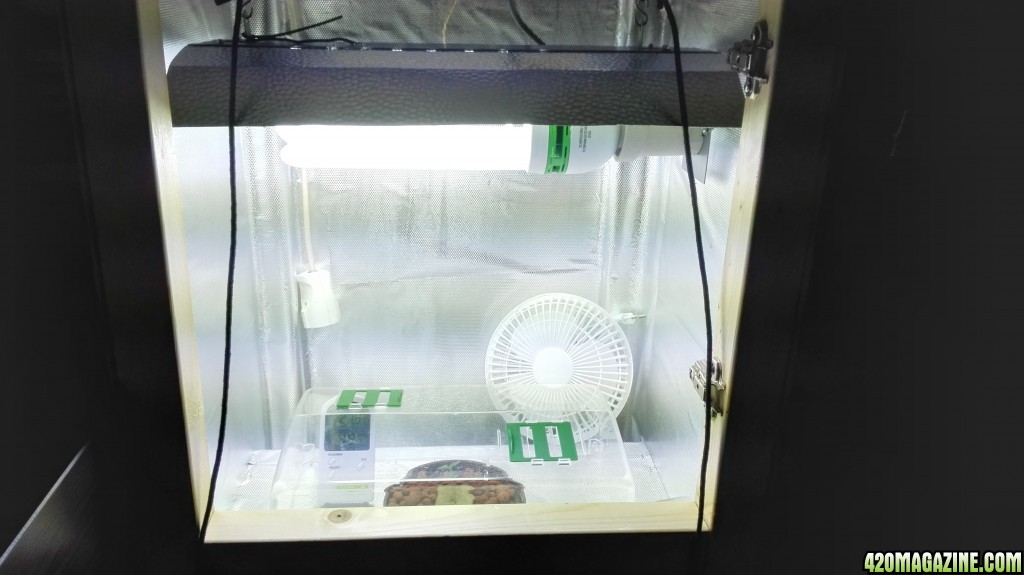
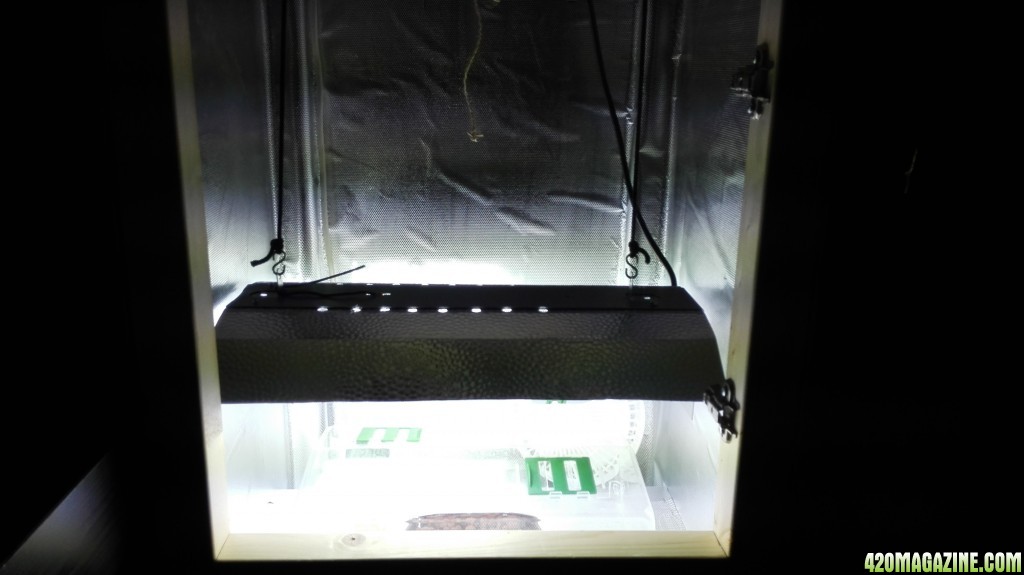
I'd like to give you a rundown of the rig starting from the top part which houses the light, carbon filter and exhaust fan.
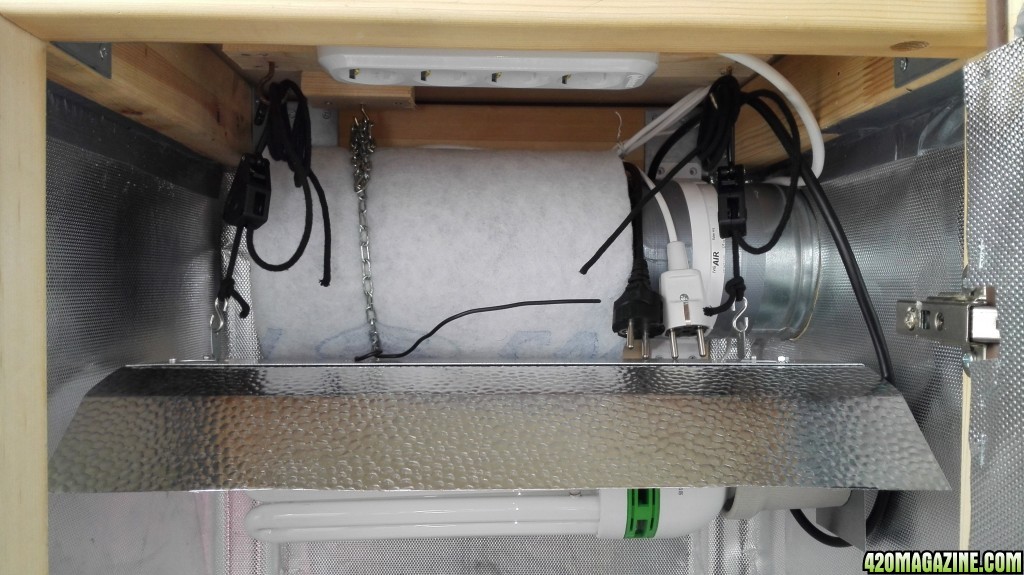
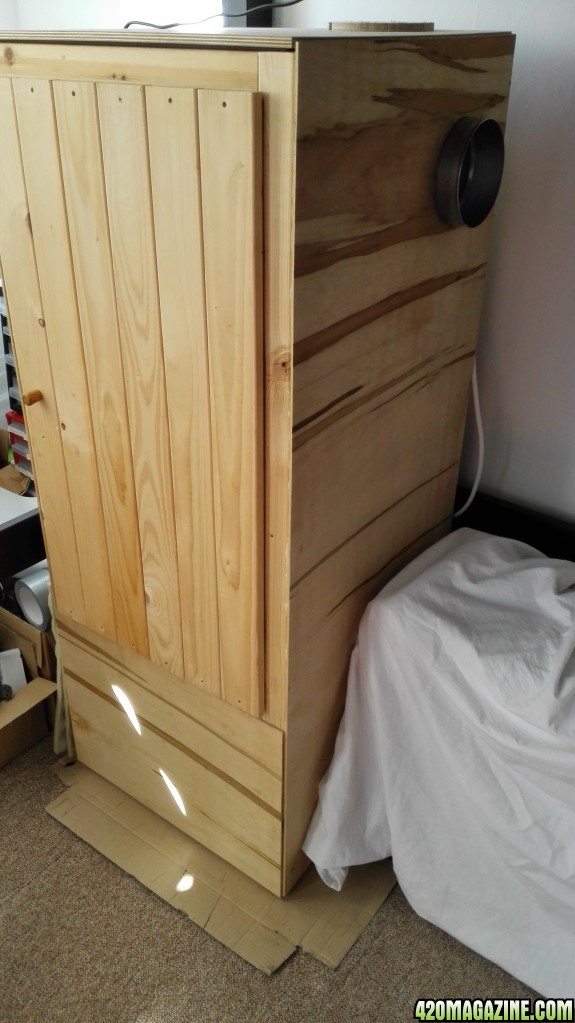
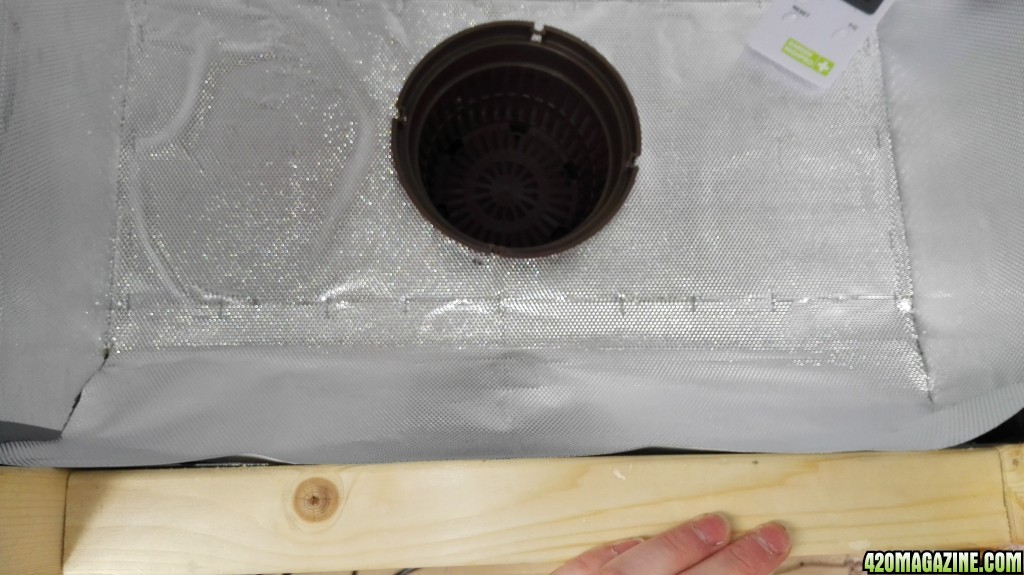
At the top I have a 25cm (10") by 12,5cm (5") carbon filter attached to a 125mm (5") exhaust fan capable of moving 185m3/h (100 cu ft/min). I think this is definitely overkill considering the size of the enclosure but I really don't want any smells escaping. Immediately below it I have my 125 watt CFL light bulb with a "custom" reflector above it. By custom I mean that I had to cut it in order to fit. 125 watt is admittedly not much but being unsure about the amount of heat they let off I really didn't want to risk it. I might upgrade to 250W CFL if it doesn't get too hot. I only have one cable going into the box and two sockets, one at the bottom and one at the top. Working with such small spaces was difficult and frustrating at times but in the end I used every last inch the best I could.
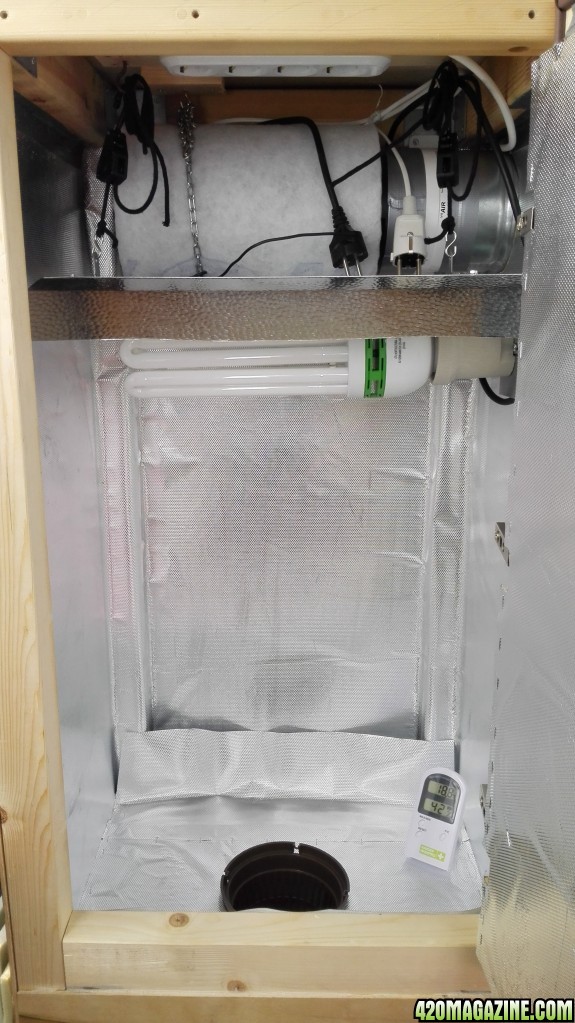
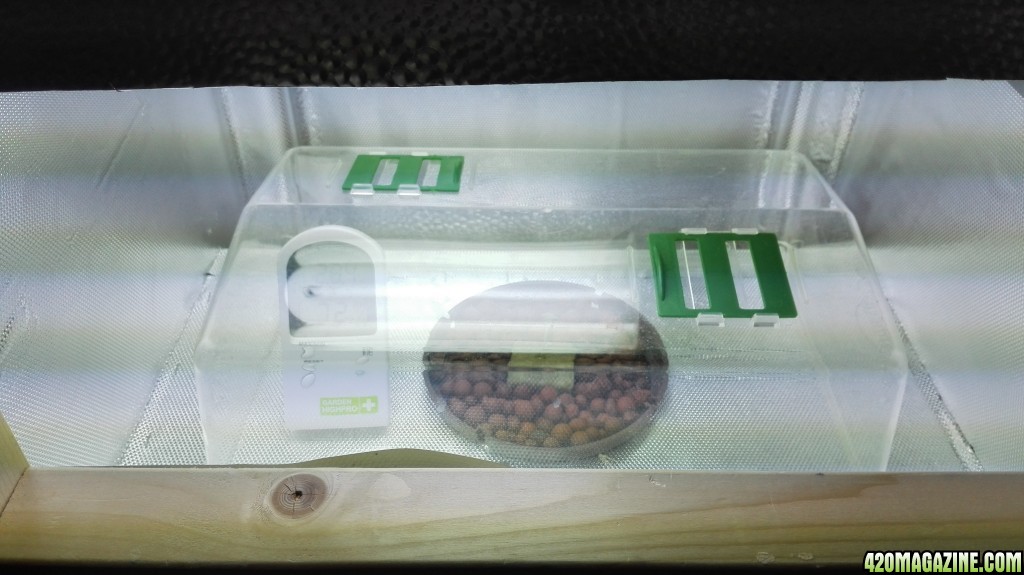
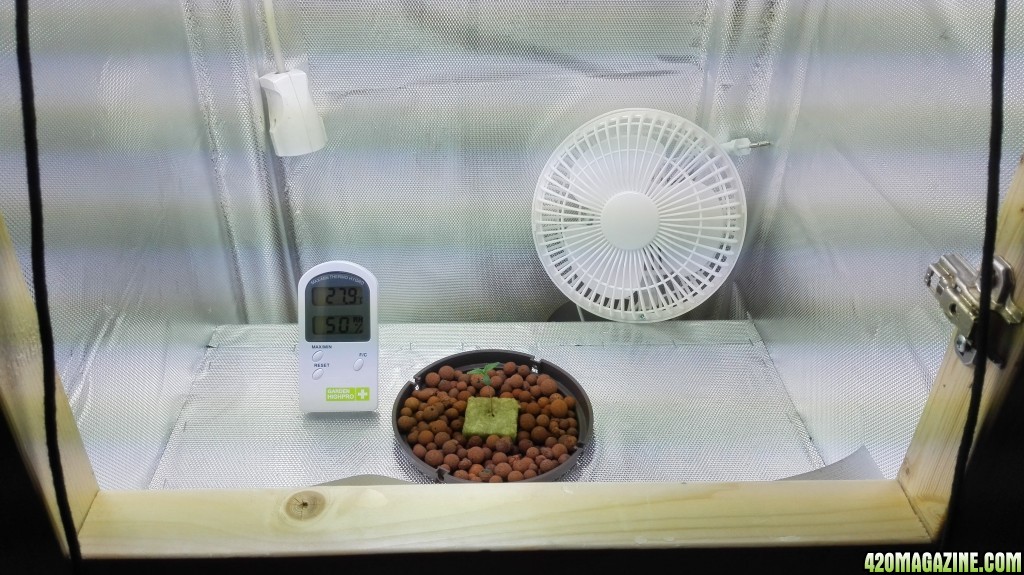
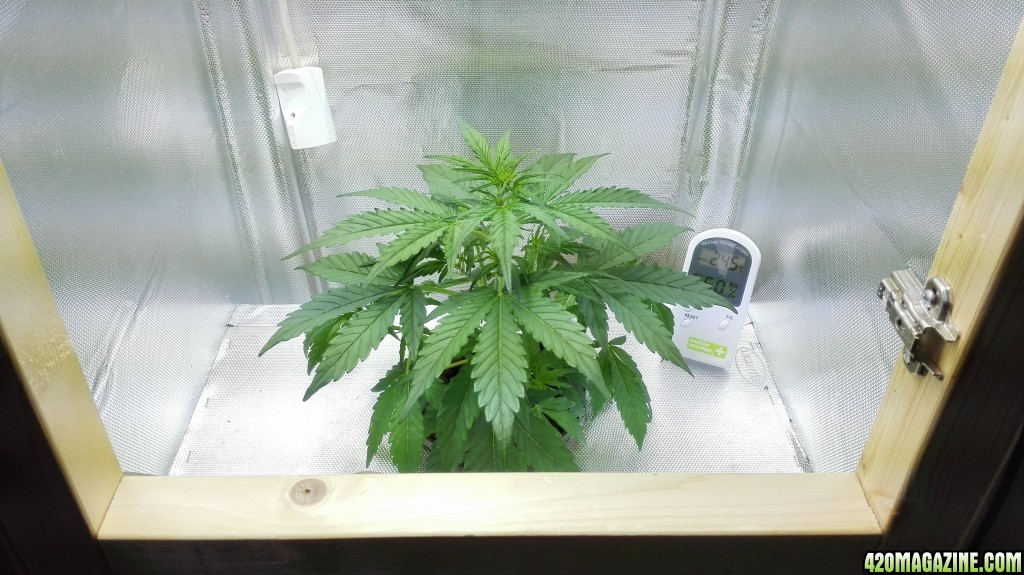
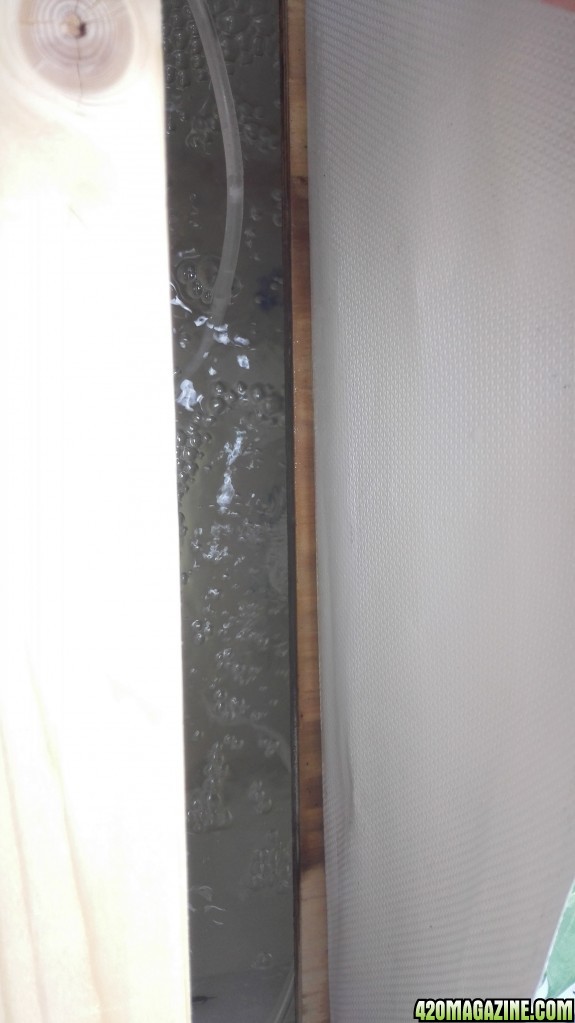
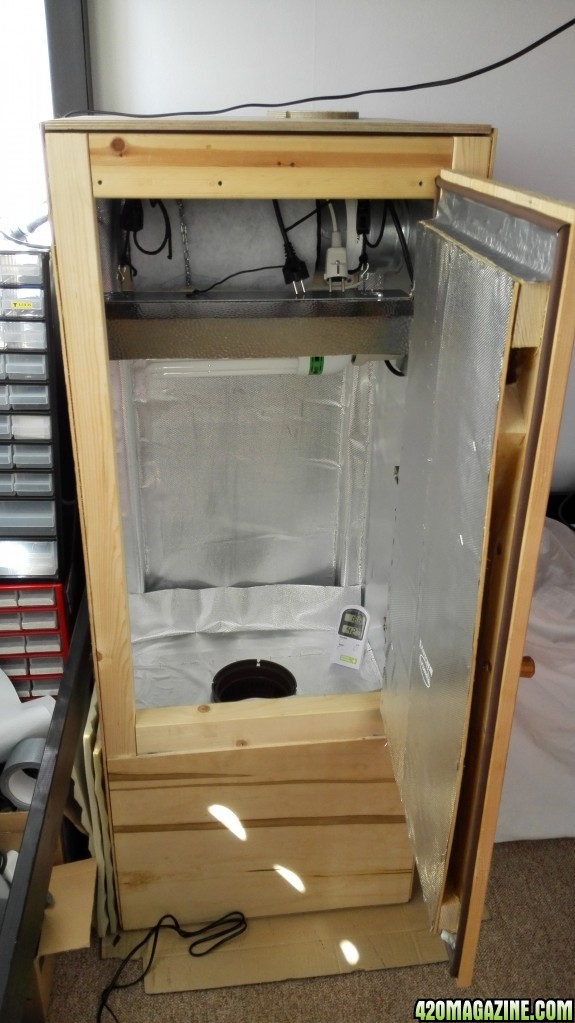
The effective growing space is 46cm x 46cm x 60 cm (1.5 ft x 1.5 ft x 2 ft) with all surrounding surfaces being covered in reflective foil. I have used a spray-on glue which initially failed miserably, hence the air bubbles, but in the end I managed to get it to stick. The piece of plywood at the bottom is also covered in reflective foil to make the most of the little amount of light that I have.
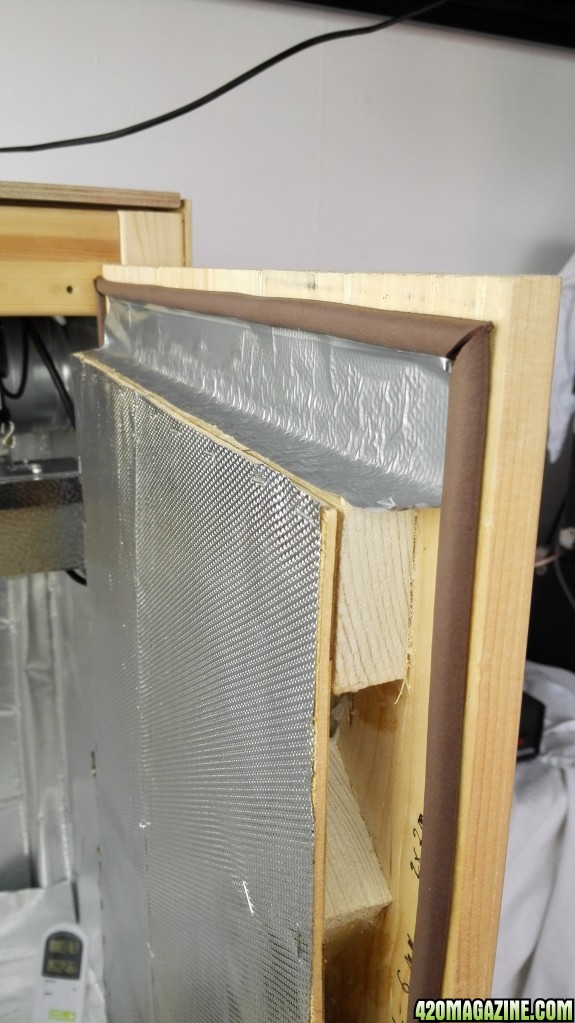

I also built the door from scratch using some wood that somebody threw away. I put rubber gaskets around the edge to make sure the only air coming in is through the intake hole at the bottom and I covered it with reflective foil. Installing the hinges and making sure it closes properly was a challenge but I am really happy with the results.
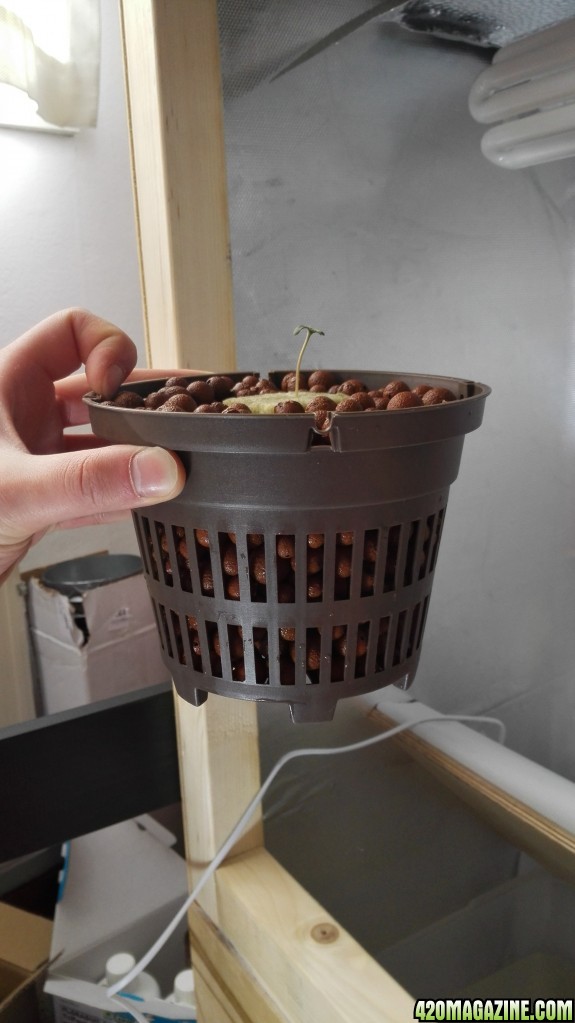
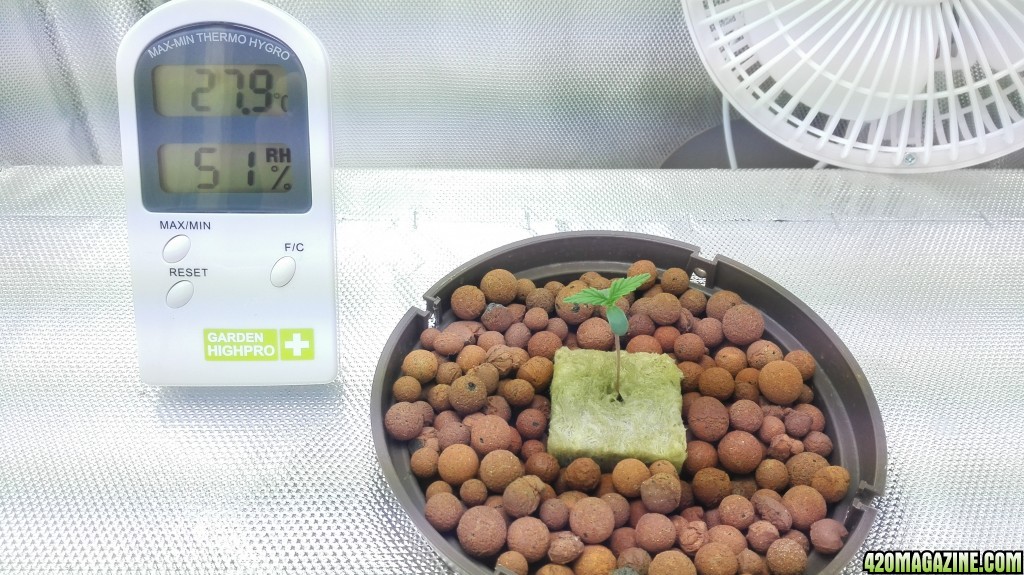
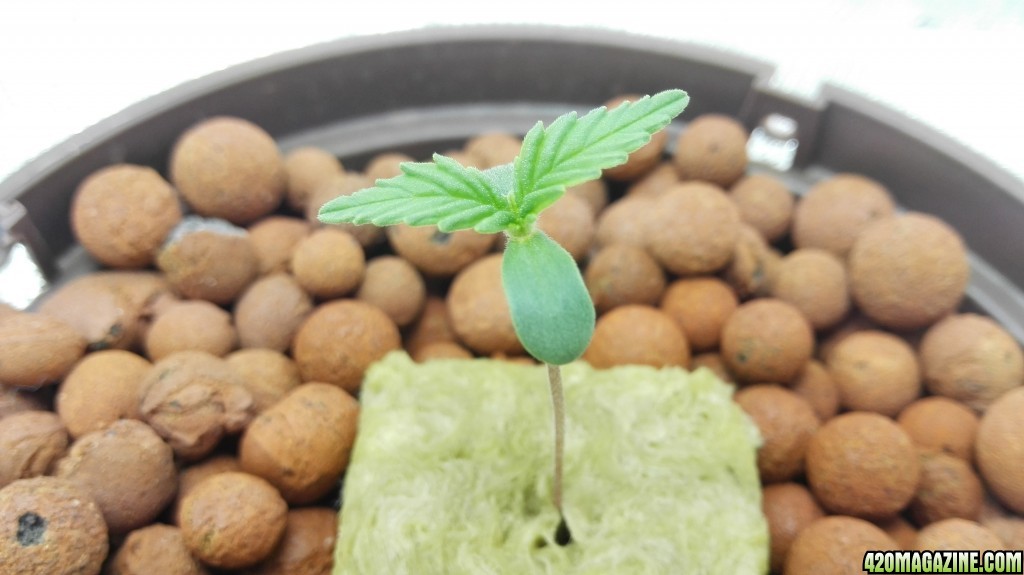
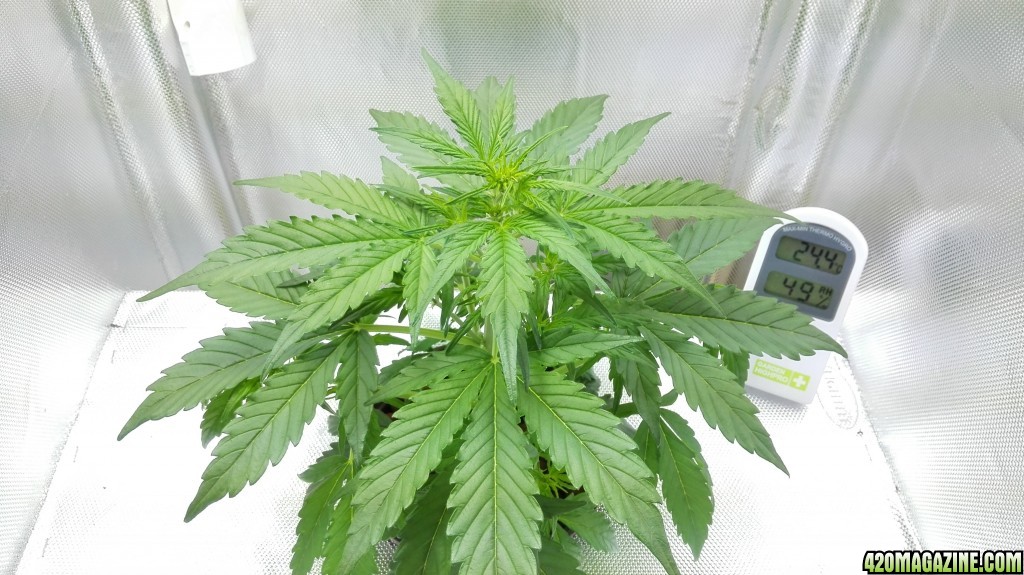
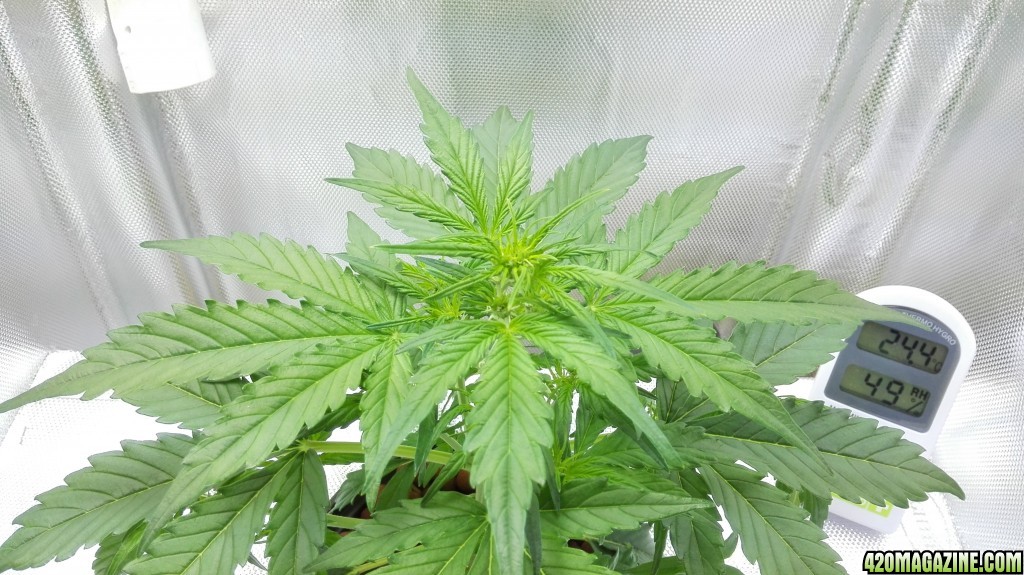
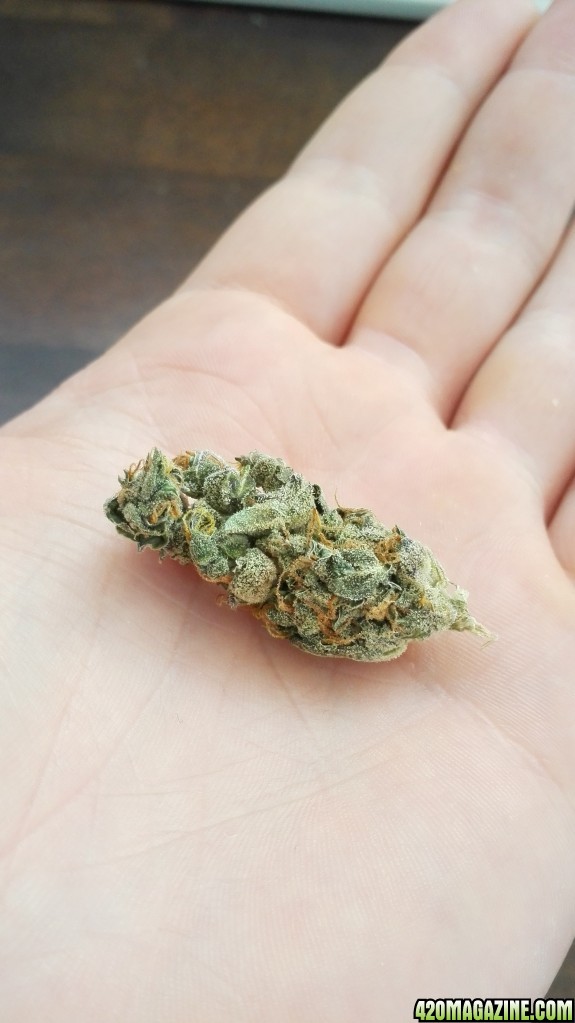
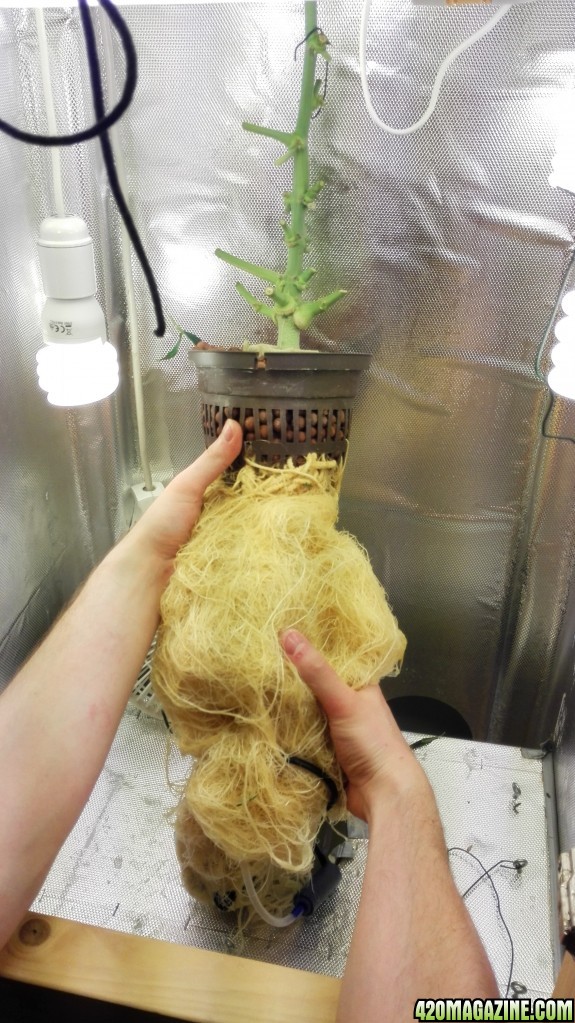
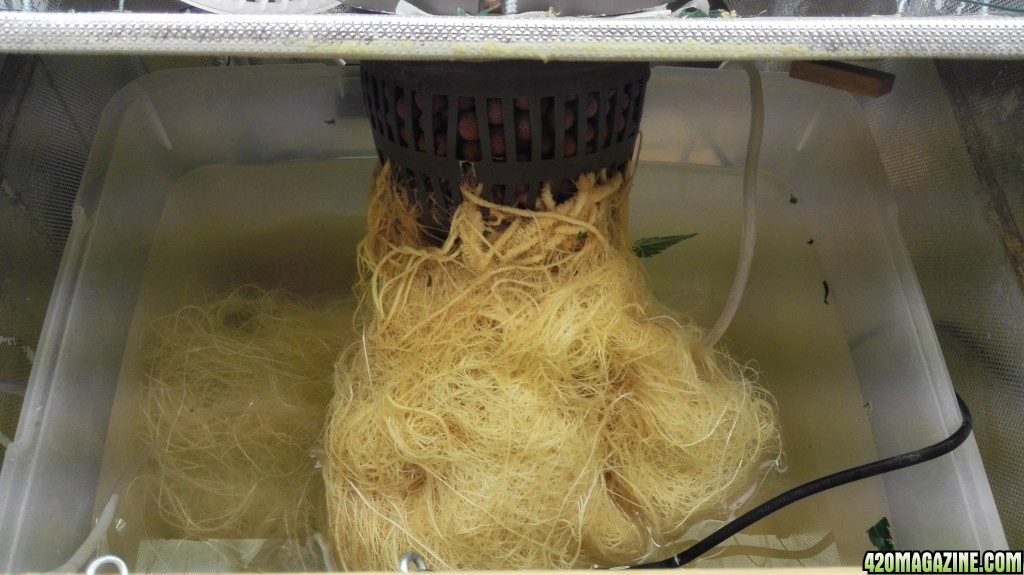
Choosing hydroponics for my first grow might not be the best option but as I mentioned earlier, I want to get the best yield I can possibly get considering the space. On the positive I went for arguably the easiest hydro system which is the DWC. I have a 15 liter or 4 gallon tank sitting at the bottom which has a 4 watt, 3.5l/minute air pump putting oxygen into the water. I also bought a small water pump in case I need it.
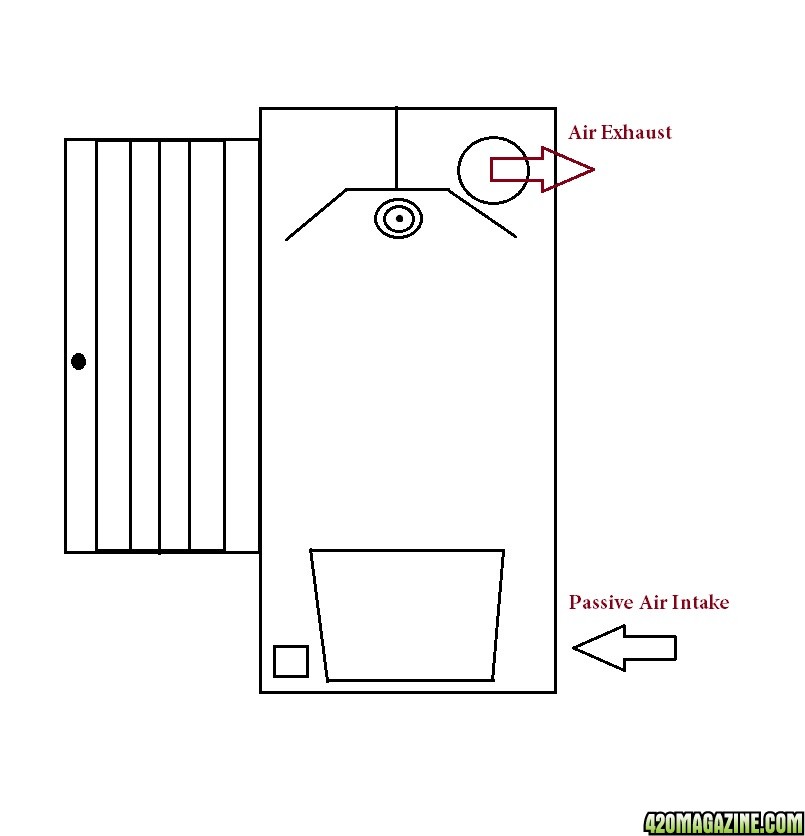
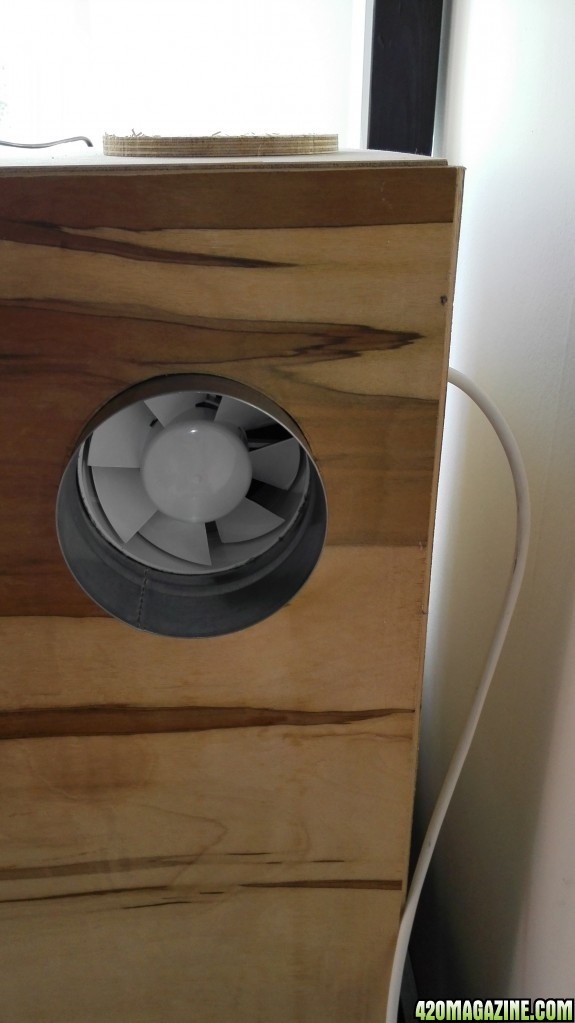
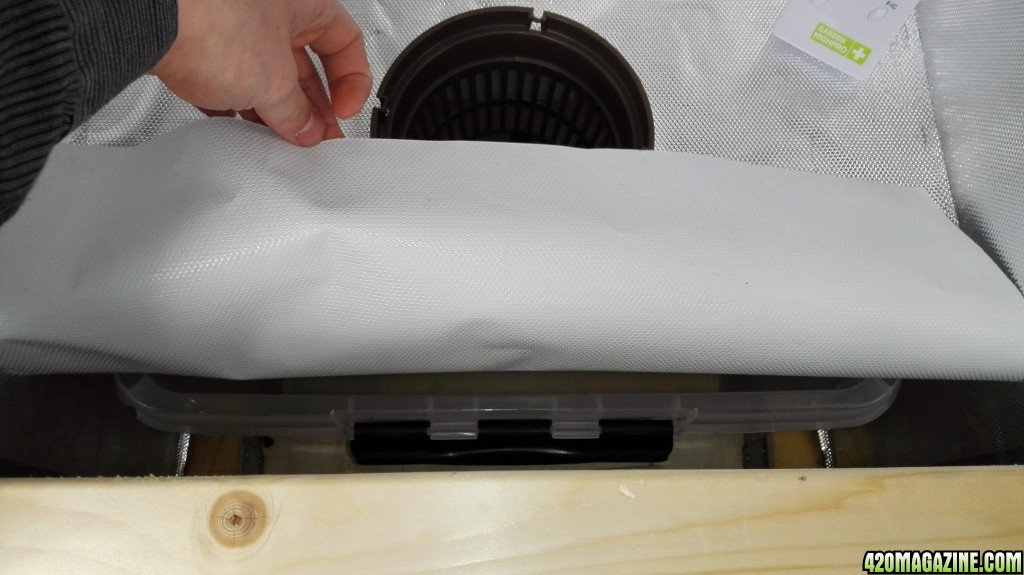
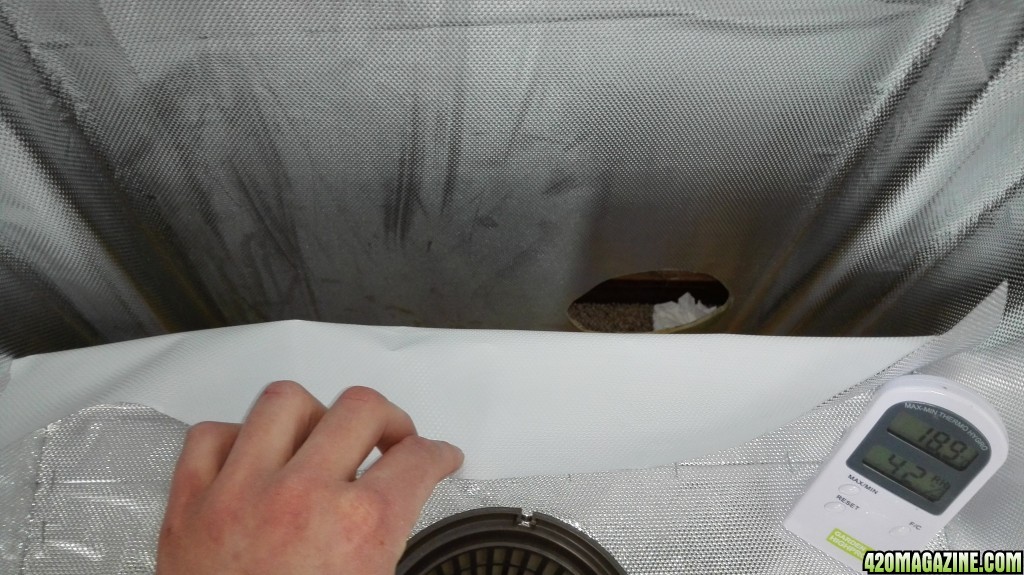
I did a test run to check the temperatures and while the mighty exhaust fan is excellent at keeping the temperatures down it is too damn noisy. Therefore I decided to cut out another exhaust hole at the top and mount a 12cm PC fan to do the "exhausting" because I read that you cannot really smell the plant unless it is in the flowering phase so I am thinking about only turning on the carbon filter+noisy fan if needed.
On my to do list before I start the actual grow:
1. Install the 12cm PC fan at the top and temporarily cover the current exhaust hole.
2. Seal the gap around the exhaust duct
3. Connect an air duct to the intake hole
4. Add a power socket at the bottom
5. Do a final dry run with everything in place to check the temperatures.
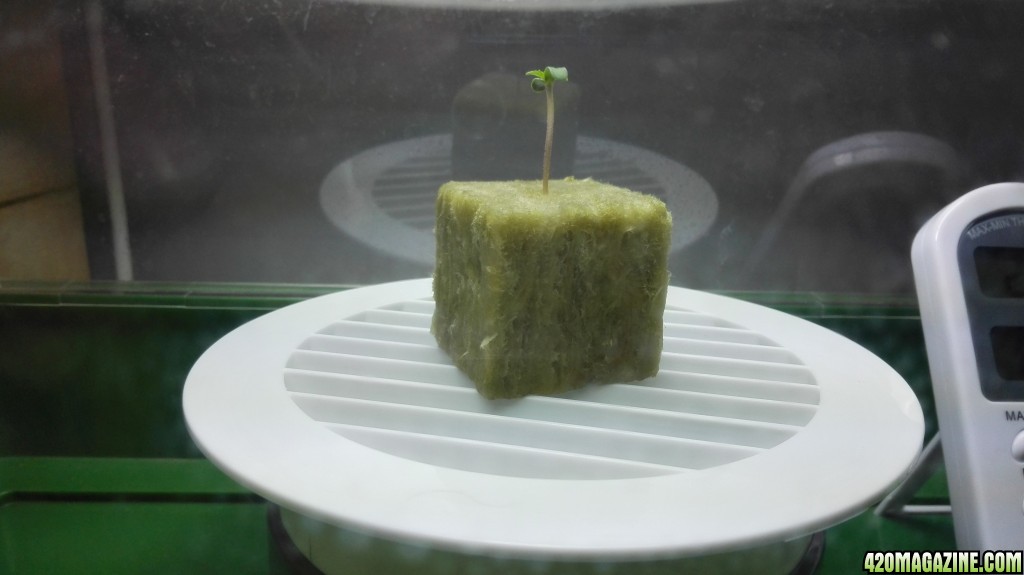
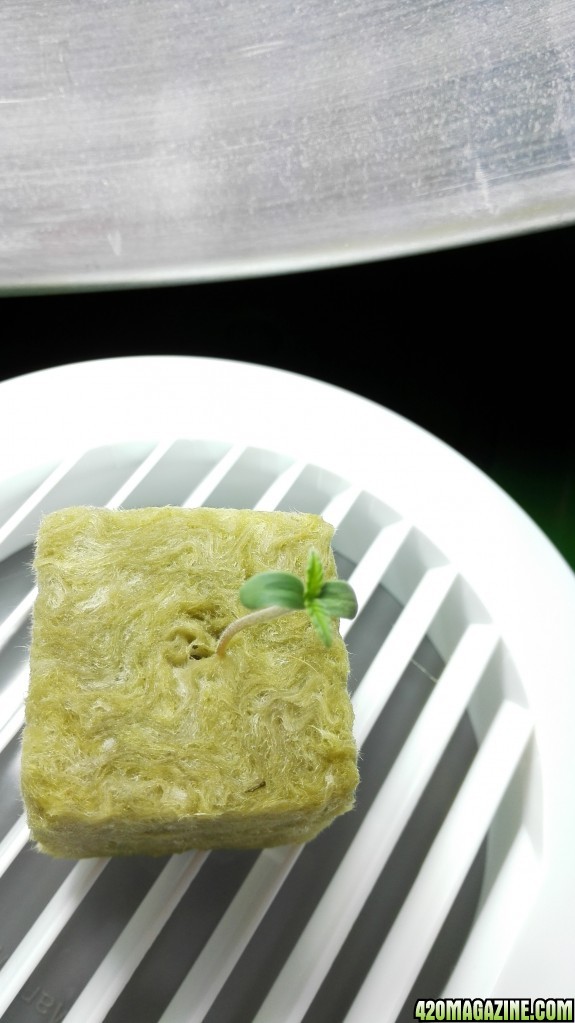
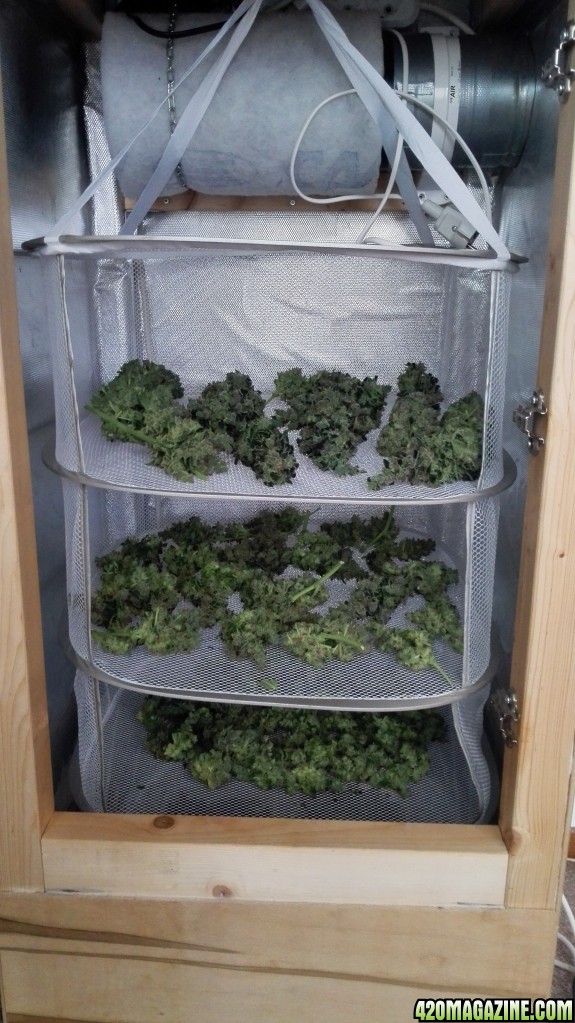
As soon as I complete doing those things (today or tomorrow), I shall start the germination process. I will of course post as many photos as I can and I will also ask as many questions as I can, hehe.
Thank you for taking the time to read, feel free to comment and I hope you will enjoy!
It measures 49cm x 49cm x 122cm (1.6 ft x 1.6 ft x 4 ft). I started by building a solid wood frame onto which I attached plywood panels and sealed all the corners with silicone making sure it is air-tight. I didn't have any proper blueprints, I just designed while I built. I did all this in the spare time I had during weekends, which is why it took so long. Around half of the wood use is wood that other people threw away, but I managed to save it from rotting in the rain and put it to good use
I'd like to give you a rundown of the rig starting from the top part which houses the light, carbon filter and exhaust fan.
At the top I have a 25cm (10") by 12,5cm (5") carbon filter attached to a 125mm (5") exhaust fan capable of moving 185m3/h (100 cu ft/min). I think this is definitely overkill considering the size of the enclosure but I really don't want any smells escaping. Immediately below it I have my 125 watt CFL light bulb with a "custom" reflector above it. By custom I mean that I had to cut it in order to fit. 125 watt is admittedly not much but being unsure about the amount of heat they let off I really didn't want to risk it. I might upgrade to 250W CFL if it doesn't get too hot. I only have one cable going into the box and two sockets, one at the bottom and one at the top. Working with such small spaces was difficult and frustrating at times but in the end I used every last inch the best I could.
The effective growing space is 46cm x 46cm x 60 cm (1.5 ft x 1.5 ft x 2 ft) with all surrounding surfaces being covered in reflective foil. I have used a spray-on glue which initially failed miserably, hence the air bubbles, but in the end I managed to get it to stick. The piece of plywood at the bottom is also covered in reflective foil to make the most of the little amount of light that I have.
I also built the door from scratch using some wood that somebody threw away. I put rubber gaskets around the edge to make sure the only air coming in is through the intake hole at the bottom and I covered it with reflective foil. Installing the hinges and making sure it closes properly was a challenge but I am really happy with the results.
Choosing hydroponics for my first grow might not be the best option but as I mentioned earlier, I want to get the best yield I can possibly get considering the space. On the positive I went for arguably the easiest hydro system which is the DWC. I have a 15 liter or 4 gallon tank sitting at the bottom which has a 4 watt, 3.5l/minute air pump putting oxygen into the water. I also bought a small water pump in case I need it.
I did a test run to check the temperatures and while the mighty exhaust fan is excellent at keeping the temperatures down it is too damn noisy. Therefore I decided to cut out another exhaust hole at the top and mount a 12cm PC fan to do the "exhausting" because I read that you cannot really smell the plant unless it is in the flowering phase so I am thinking about only turning on the carbon filter+noisy fan if needed.
On my to do list before I start the actual grow:
1. Install the 12cm PC fan at the top and temporarily cover the current exhaust hole.
2. Seal the gap around the exhaust duct
3. Connect an air duct to the intake hole
4. Add a power socket at the bottom
5. Do a final dry run with everything in place to check the temperatures.
As soon as I complete doing those things (today or tomorrow), I shall start the germination process. I will of course post as many photos as I can and I will also ask as many questions as I can, hehe.
Thank you for taking the time to read, feel free to comment and I hope you will enjoy!