RageMonkey
New Member
Ok after my experience with the first grow I did a year ago using miracle gro potting soil (bad idea form the start) - i decided to get the phototron out of storage and try my luck at building a self-built bubbler aka Deep Water Culture.
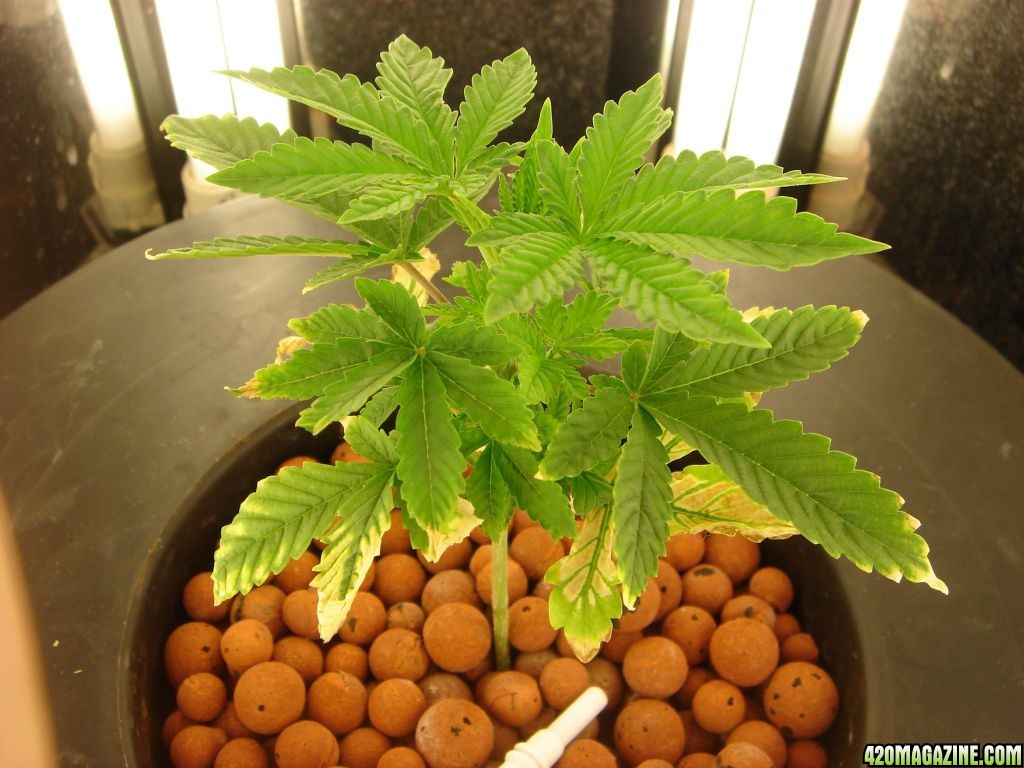
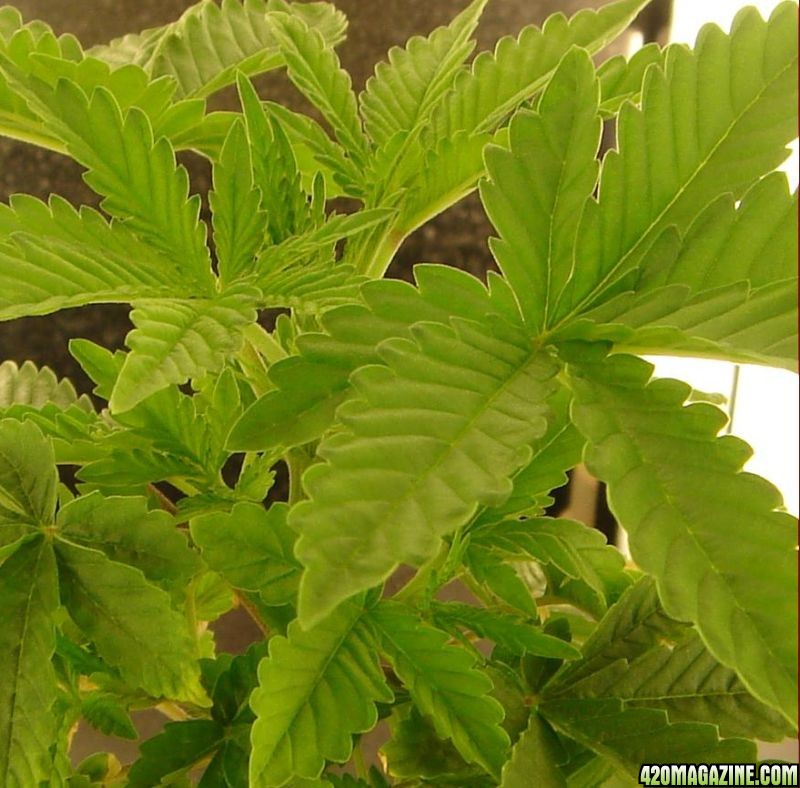
I had a few problems starting out due to a faulty pH meterwhich was reporting 3.5 for an actual pH of 6.5 - thus causing my little seedling to have an imediate zinc deficiency. However, i corrected that by switching to a real ph/tds meter from Hanna and now the plant bounced back in under a week.
So here's the setup:
Anyway, here is what I started with:
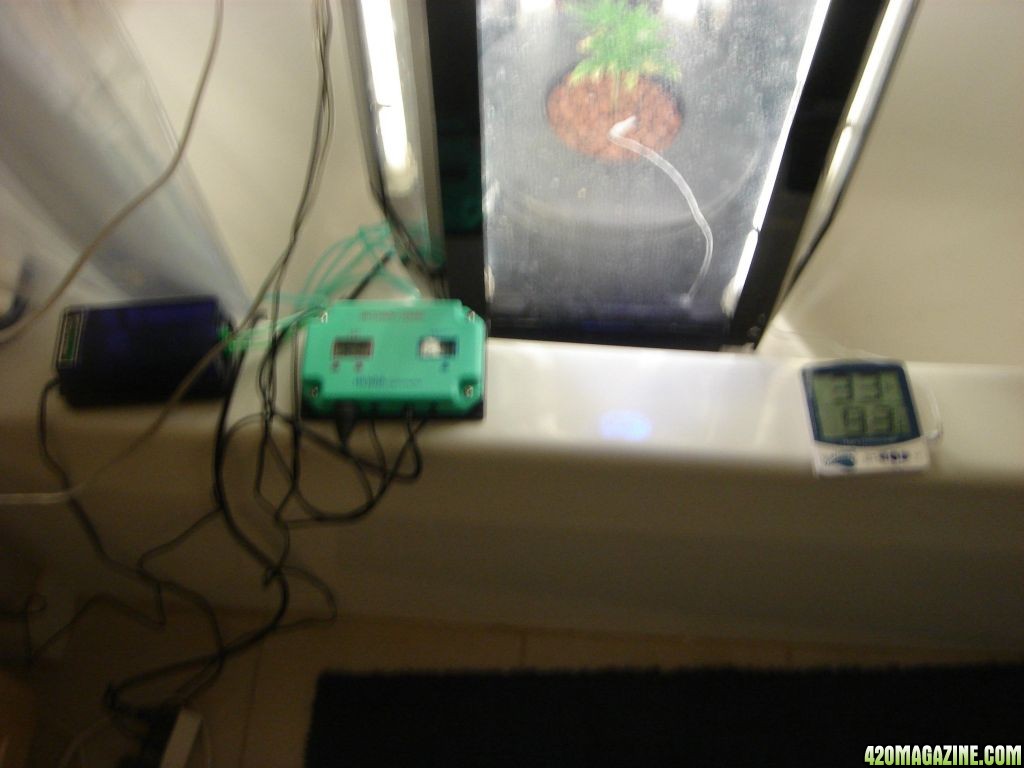
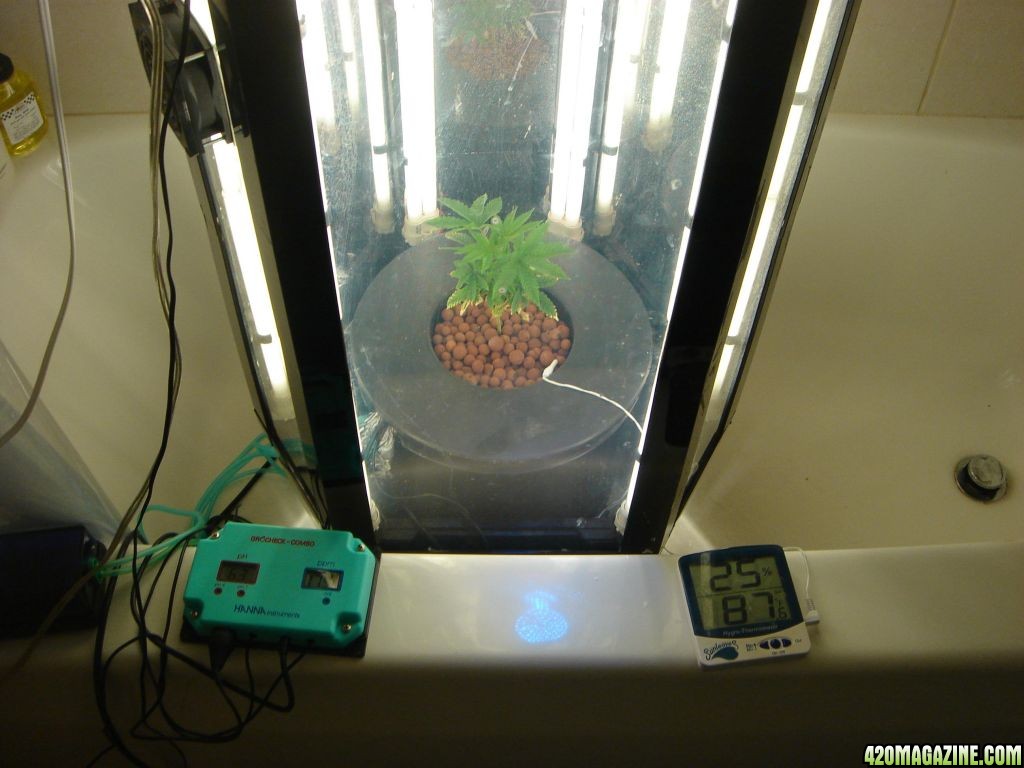
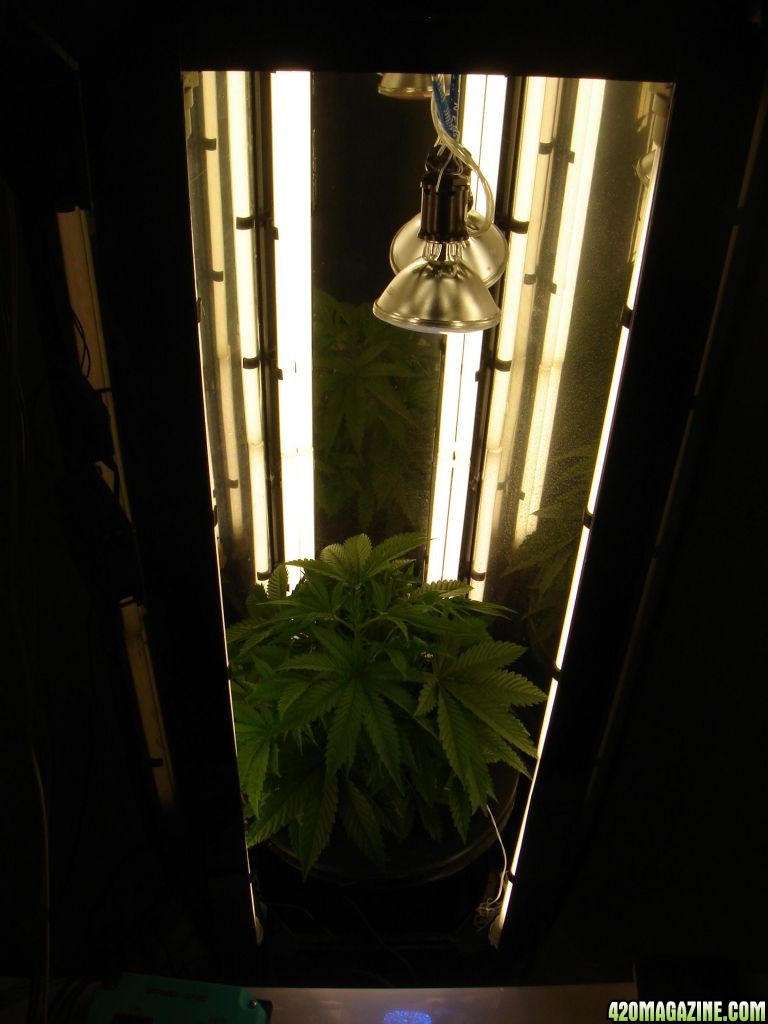
- Phototron 8 (51" tall) with AVP module
- 1 sunleave hygrometer/thermometer with remote sensor
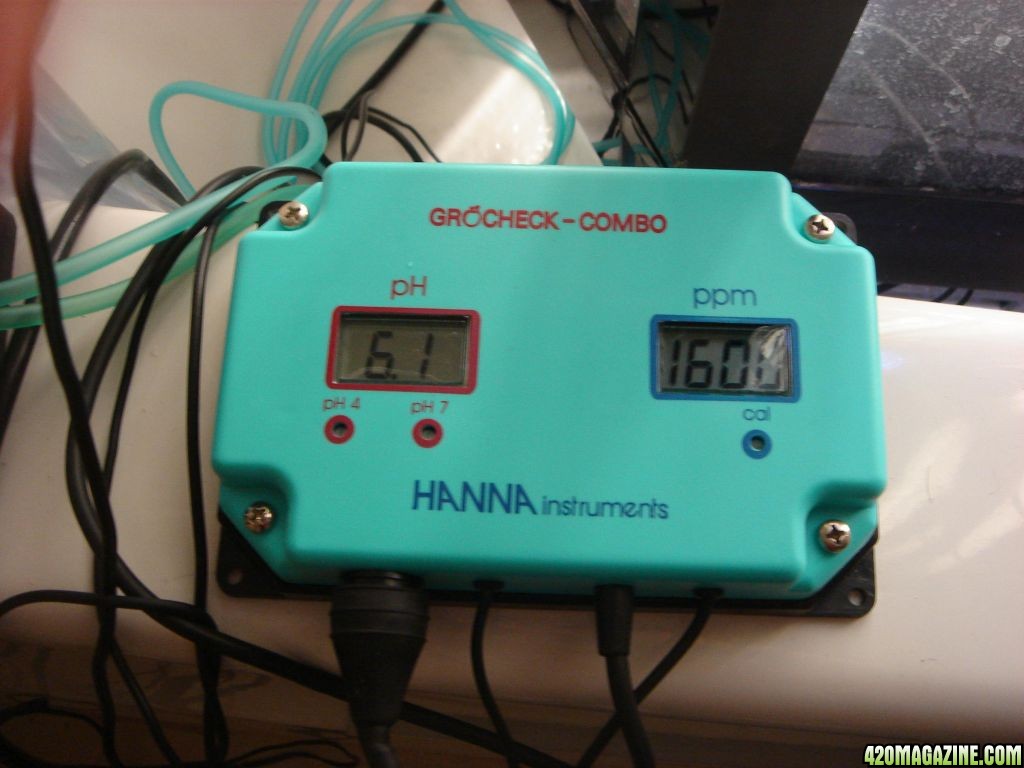
- 1 Hanna GroChek combo pH/TDS 24/7 meter - Absolutely awsome!
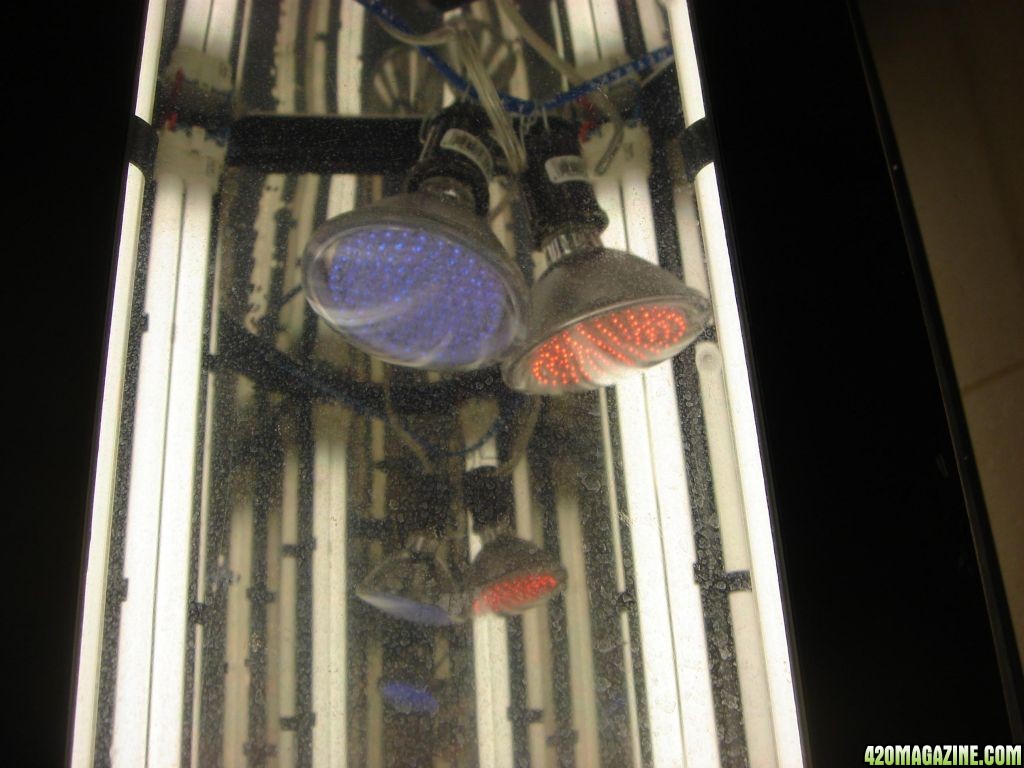
- 1 x 90 LED blue grow lamp 6.4 watt
- 1 x 90 LED red grow lamp 6.4 watt
- 1 x 3.5 ml BD syringe
- 1 double air pump
- 2 x 8' silicone air tubes
- 2 x 24" air wands
- 1 black 2.5 gallon bucket
- 1 black bucket lid with integrated 6" net pot
- 1 x 2 liter bag of hydroton
- humidity dome with grodan cubes
- 1 minifluorescent grow light - low heat
- plain old tap water - TDS ~400 ppm
- 1 digital timer to manage the bloom cycle
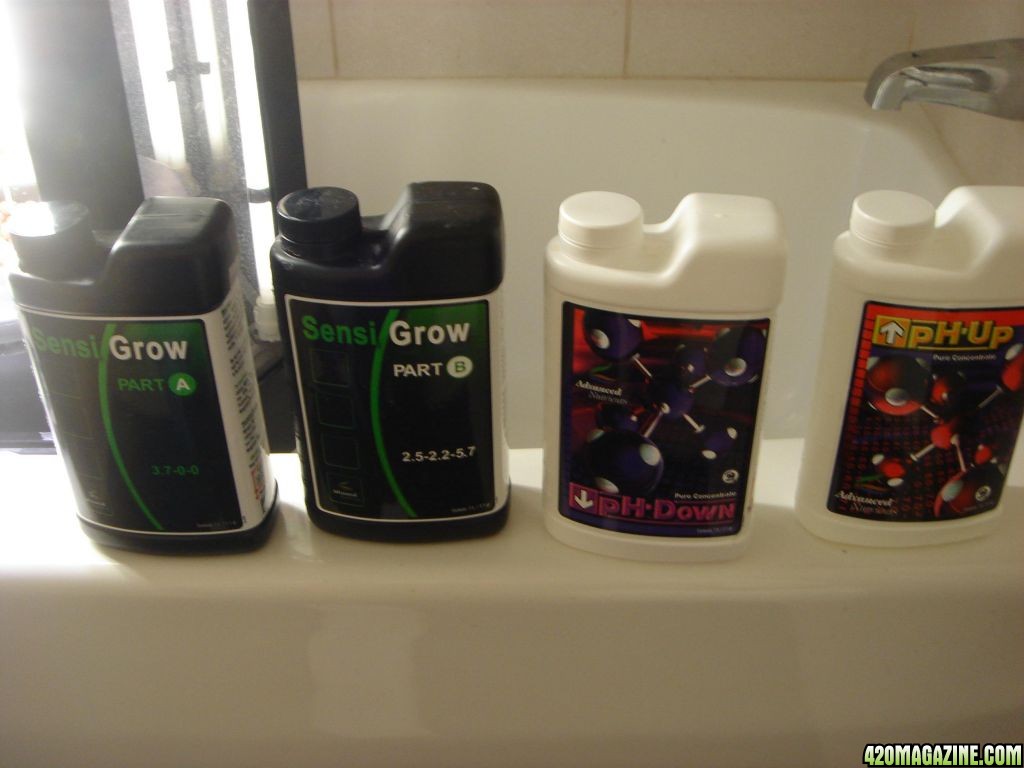
- Sensi grow and bloom 2 part hydro nutrients
- advanced nutrition pH up/down solutions
Seeds:
- 10 x Nirvana Northern Lights
Lights (plan of action):
- veg: 24/0
- bloom: 12/12
Ok so when I started this my intention was to grow a plant obviously, but I thought that it would die for sure. My green thumb is generally more of a black thumb of death and horrible slow plant disease.
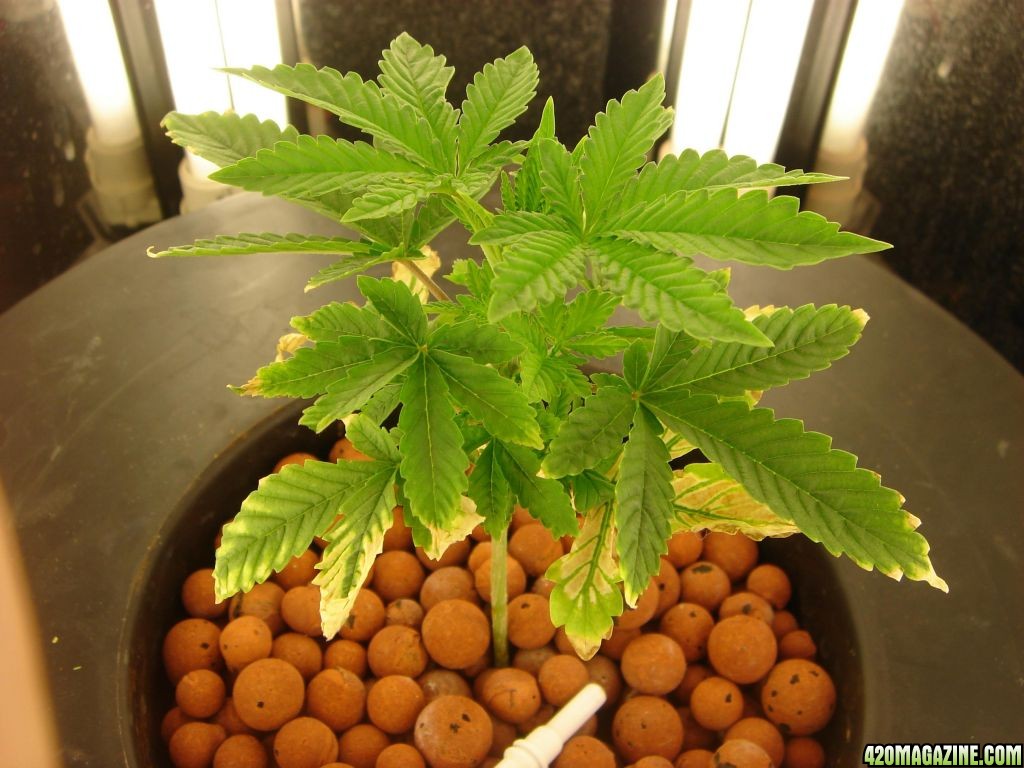
Anyway, I popped a single seed into a grodan cube, placed it in the center of my humidity dome tray, poured a single cup of water over the cube. Next i put the CFL grow lamp over the tray. After 7 days, i had a healthy 4" sprout with sunleave and a first set.
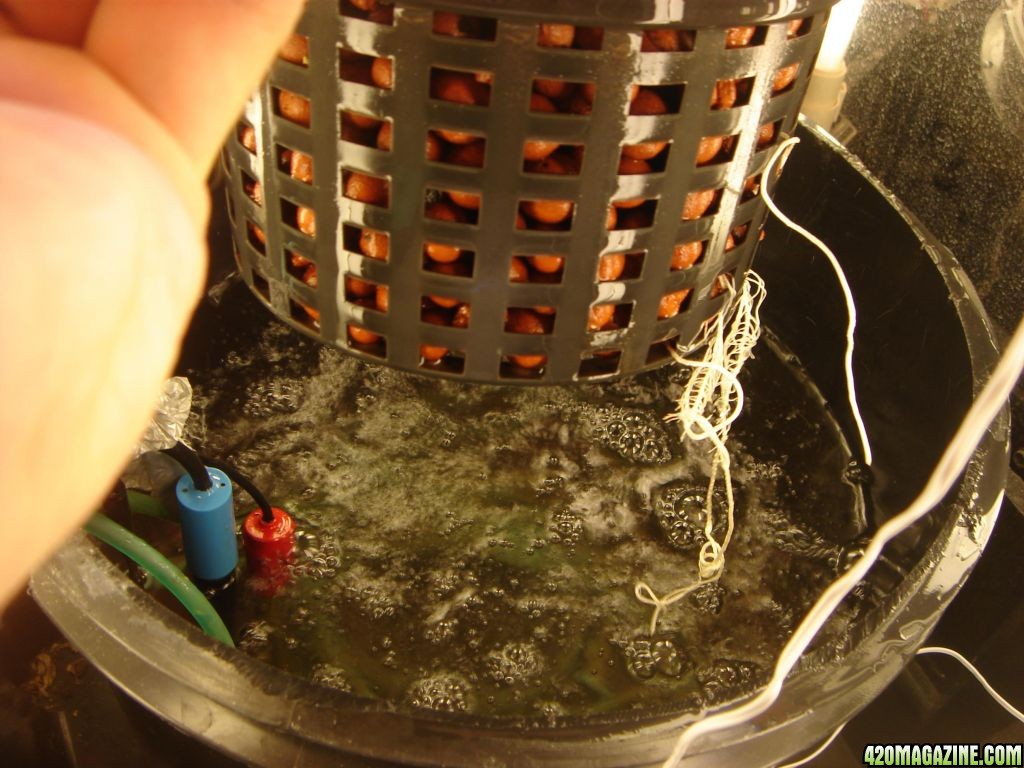
At that point I prepared the bubbler bucket by cutting off the top 2" of the bucket so it would fit through the large opening in the phototron sideways. I also put a notch in the top for cables/air hoses etc.
Next i placed bucket in the phototron, put the airwands in the bottom and added 2.5 gallons of water. This would put 3/4 of the net in the nutrient solution. I then added 17 ml of sensi grow part A and 17 ml of sensi grow part B to the 2.5 gallons of water.
The grodon cube was then placed in the net pot on top of 1.5" of hydroton and more hydroton was filled in to the top of the net pot.
That's pretty much it. Pretty easy setup. After tossing my hand pH meter I also added a Hannae GroChek pH/TDS combo meter which has 2 probes and a groudning electrode submerged in solution at all times. Here's a tip: If you are concerned that your pH meter is giving you bad readings, you can test it quickly in a glass of milk. Milk has a pH of 6.5 and since marijuana needs a pH of 5.5 - 6.5, you can tell if your pH meter is giving you bad readings without waiting for a shipment of $30 worth of calibration solution. My first pH meter was off by 3 points which caused me to adjust the solution to 9.5. This was killing the plant deader than a doornail in less than 4 days. Get a decent meter like a hanner grochek and avoid the crappy digital dip meters. Mine cost me $125 and it's worth every damn penny.
Initially I am runnign the lights at 24/0 and I plan to use a standard 12/12 during bloom.
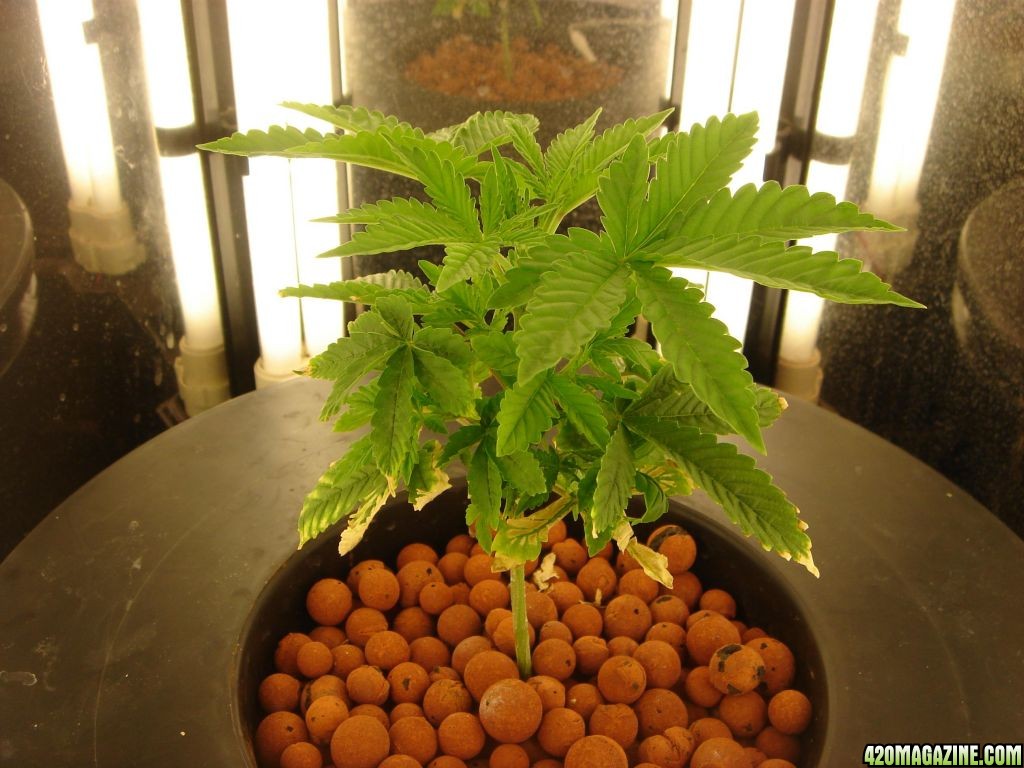
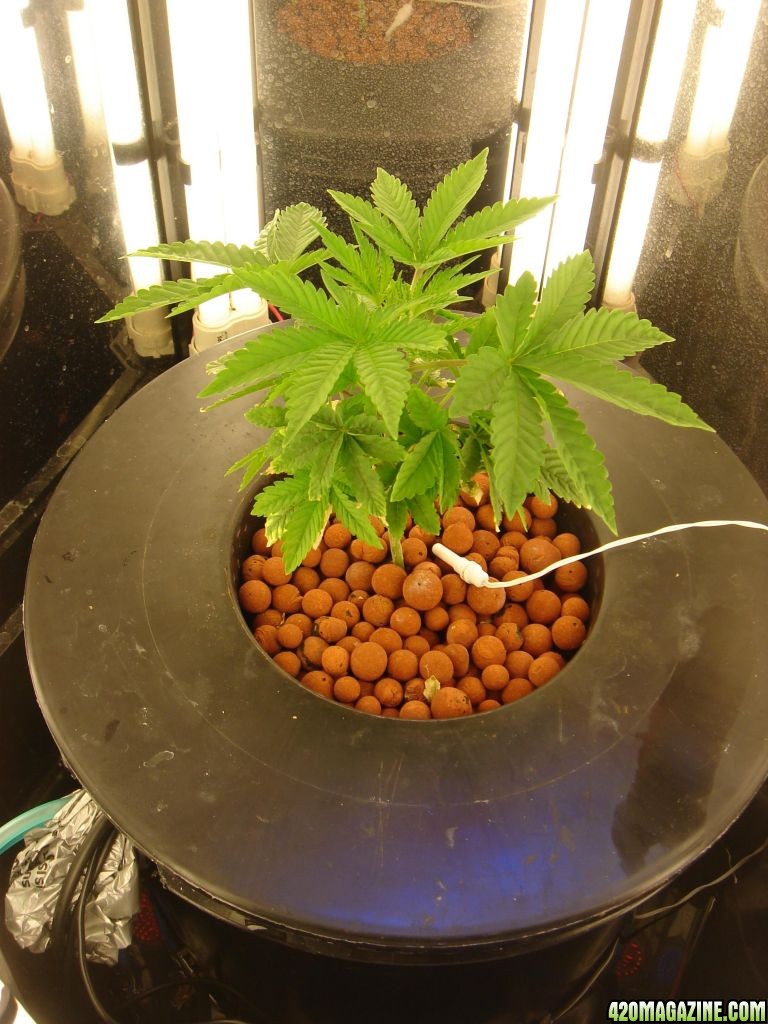
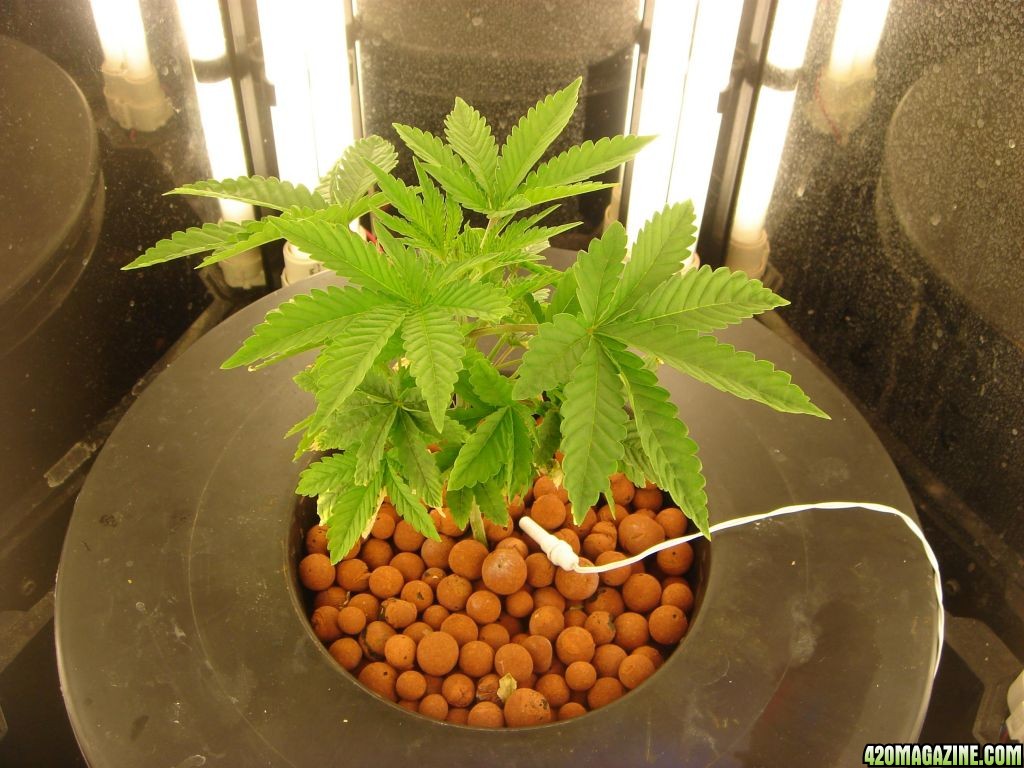
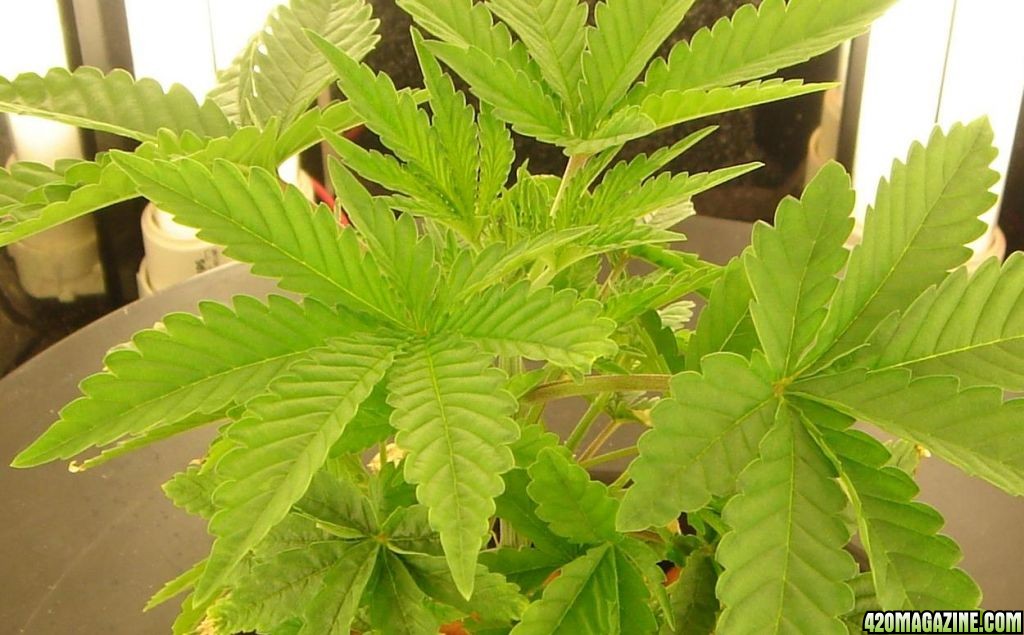
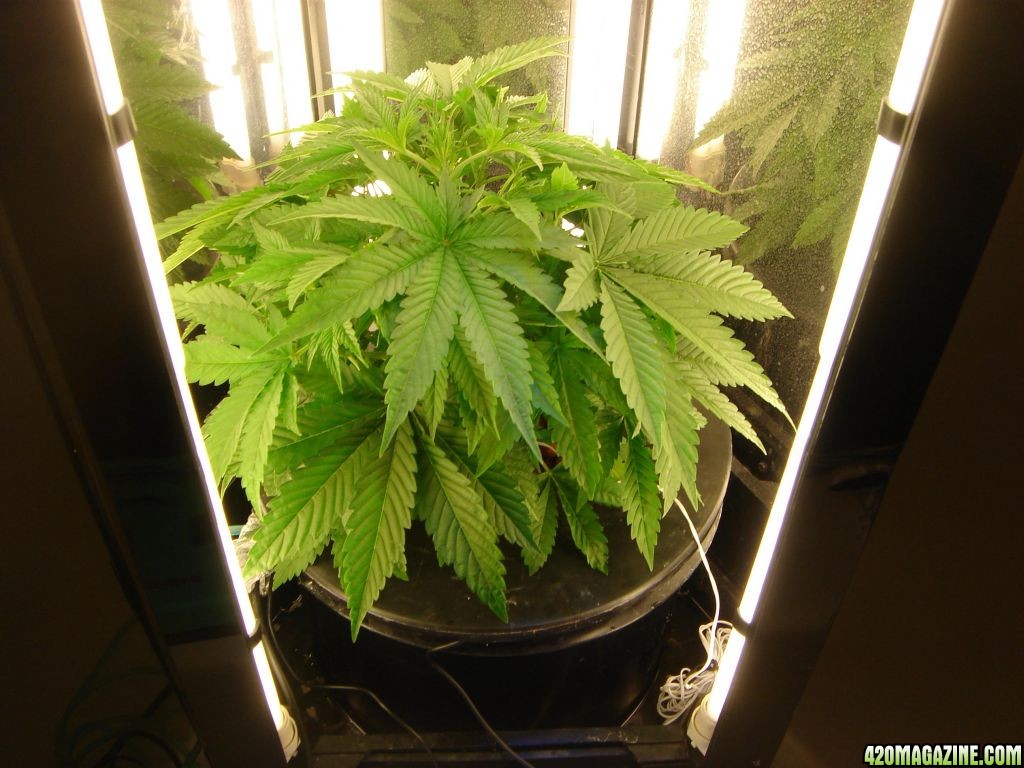
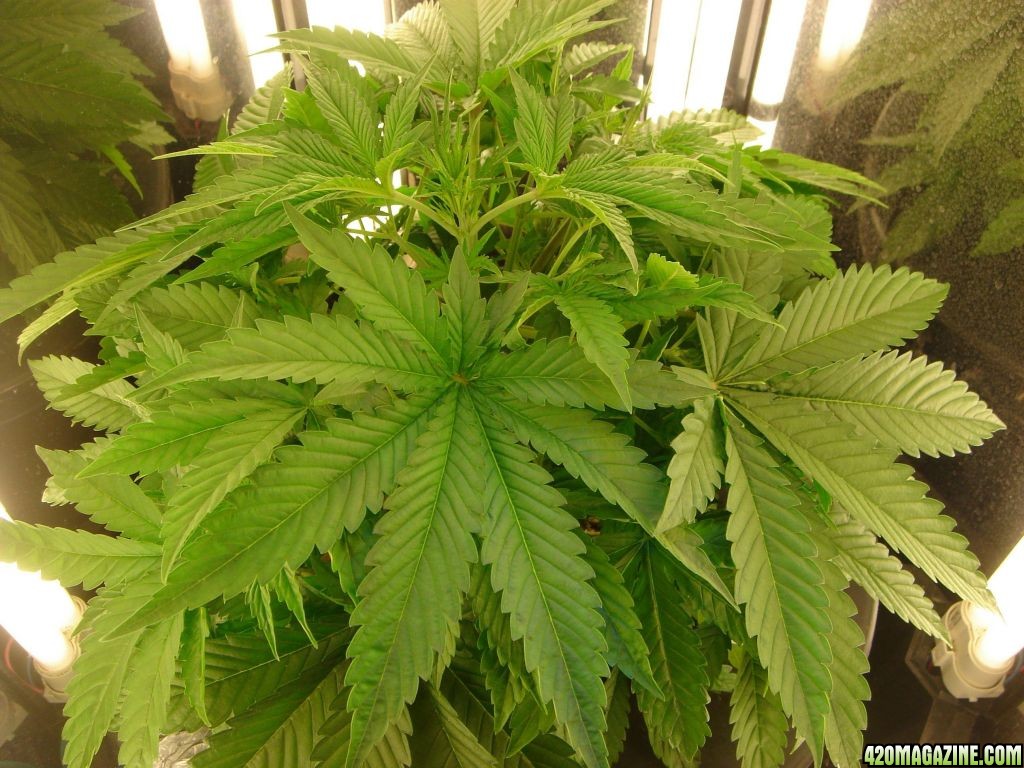
Ok so right now I am 3 weeks into this. 1 week for seedlign and 2 weeks for veg. Next post will have the current pictures. As of right now I must say this setup is pretty maintenance free. All I am required to do is adjust pH once a week, check the water level daily, and change the nutrient solution out completely every 2 weeks. When the plant gets bigger I may add a 20 gallon tote to hold nutrients and two small pumps to recirculate nutrient solution since larger plants consume more water, but for now I am quite surprised at how easily and well this is growing.
I had a few problems starting out due to a faulty pH meterwhich was reporting 3.5 for an actual pH of 6.5 - thus causing my little seedling to have an imediate zinc deficiency. However, i corrected that by switching to a real ph/tds meter from Hanna and now the plant bounced back in under a week.
So here's the setup:
Anyway, here is what I started with:
- Phototron 8 (51" tall) with AVP module
- 1 sunleave hygrometer/thermometer with remote sensor
- 1 Hanna GroChek combo pH/TDS 24/7 meter - Absolutely awsome!
- 1 x 90 LED blue grow lamp 6.4 watt
- 1 x 90 LED red grow lamp 6.4 watt
- 1 x 3.5 ml BD syringe
- 1 double air pump
- 2 x 8' silicone air tubes
- 2 x 24" air wands
- 1 black 2.5 gallon bucket
- 1 black bucket lid with integrated 6" net pot
- 1 x 2 liter bag of hydroton
- humidity dome with grodan cubes
- 1 minifluorescent grow light - low heat
- plain old tap water - TDS ~400 ppm
- 1 digital timer to manage the bloom cycle
- Sensi grow and bloom 2 part hydro nutrients
- advanced nutrition pH up/down solutions
Seeds:
- 10 x Nirvana Northern Lights
Lights (plan of action):
- veg: 24/0
- bloom: 12/12
Ok so when I started this my intention was to grow a plant obviously, but I thought that it would die for sure. My green thumb is generally more of a black thumb of death and horrible slow plant disease.
Anyway, I popped a single seed into a grodan cube, placed it in the center of my humidity dome tray, poured a single cup of water over the cube. Next i put the CFL grow lamp over the tray. After 7 days, i had a healthy 4" sprout with sunleave and a first set.
At that point I prepared the bubbler bucket by cutting off the top 2" of the bucket so it would fit through the large opening in the phototron sideways. I also put a notch in the top for cables/air hoses etc.
Next i placed bucket in the phototron, put the airwands in the bottom and added 2.5 gallons of water. This would put 3/4 of the net in the nutrient solution. I then added 17 ml of sensi grow part A and 17 ml of sensi grow part B to the 2.5 gallons of water.
The grodon cube was then placed in the net pot on top of 1.5" of hydroton and more hydroton was filled in to the top of the net pot.
That's pretty much it. Pretty easy setup. After tossing my hand pH meter I also added a Hannae GroChek pH/TDS combo meter which has 2 probes and a groudning electrode submerged in solution at all times. Here's a tip: If you are concerned that your pH meter is giving you bad readings, you can test it quickly in a glass of milk. Milk has a pH of 6.5 and since marijuana needs a pH of 5.5 - 6.5, you can tell if your pH meter is giving you bad readings without waiting for a shipment of $30 worth of calibration solution. My first pH meter was off by 3 points which caused me to adjust the solution to 9.5. This was killing the plant deader than a doornail in less than 4 days. Get a decent meter like a hanner grochek and avoid the crappy digital dip meters. Mine cost me $125 and it's worth every damn penny.
Initially I am runnign the lights at 24/0 and I plan to use a standard 12/12 during bloom.
Ok so right now I am 3 weeks into this. 1 week for seedlign and 2 weeks for veg. Next post will have the current pictures. As of right now I must say this setup is pretty maintenance free. All I am required to do is adjust pH once a week, check the water level daily, and change the nutrient solution out completely every 2 weeks. When the plant gets bigger I may add a 20 gallon tote to hold nutrients and two small pumps to recirculate nutrient solution since larger plants consume more water, but for now I am quite surprised at how easily and well this is growing.