Kriaze
Well-Known Member
Hello once again 
After a break from journalling for awhile I have decided to start another after being talked into it by MrAm4zin, it wasn't a hard thing for him to do as I had missed this aspect of my Cannabis related hobby, but hey if it makes you feel better looking at my terrible gardening MrA who am I to spoil your fun?")
This won't be a steady journal as I'm not a steady type of person, there will be ups and downs both with the grow area and myself but I will always try to remain factual and if anything is theoretical I will hopefully be able to make that clear to everyone. There will also be a little bit of everything so maybe there will be something of interest to each and everyone of you that reads this. Feel free to skip through my walls of text and photographs and ask questions at the end of the thread. I'm a great believer in the fact that the silliest question is the one that remains unasked. I'm a noob that's not quite a noob and I am unafraid to admit it and ask questions myself, in turn I would encourage everybody else to do so too.
OK so where to start?
First of all let's take a look at the grow areas and then we can go into more detail as to what is what.
These photographs were taken yesterday during lights on so they're about as current as we can get, here goes:
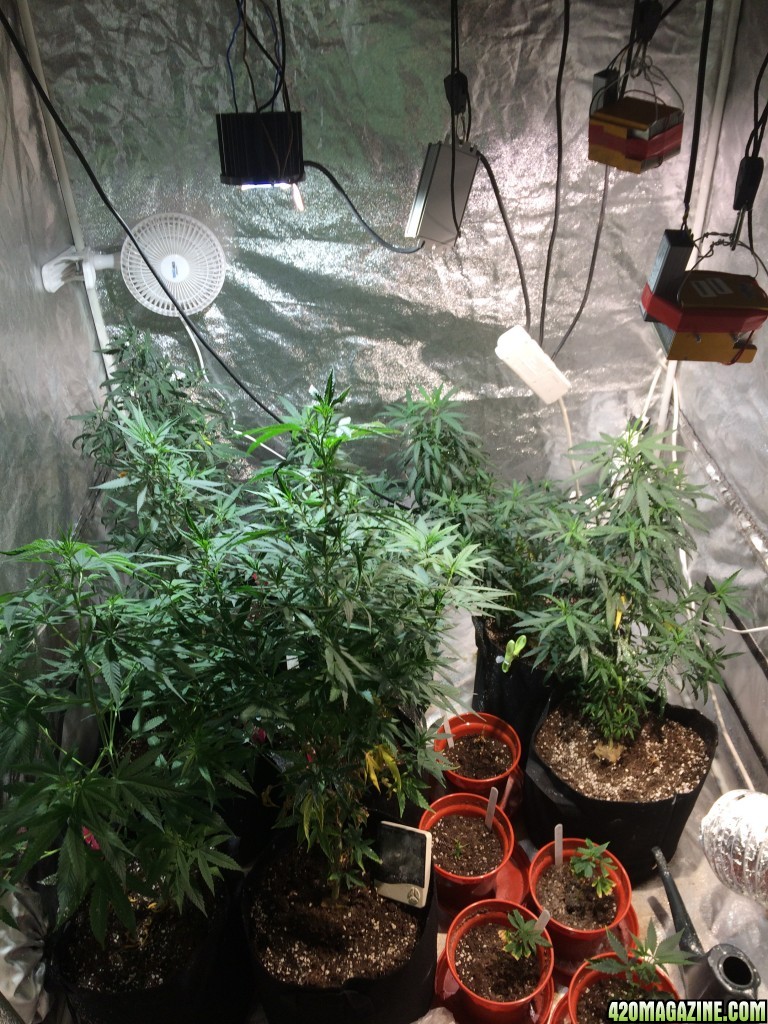
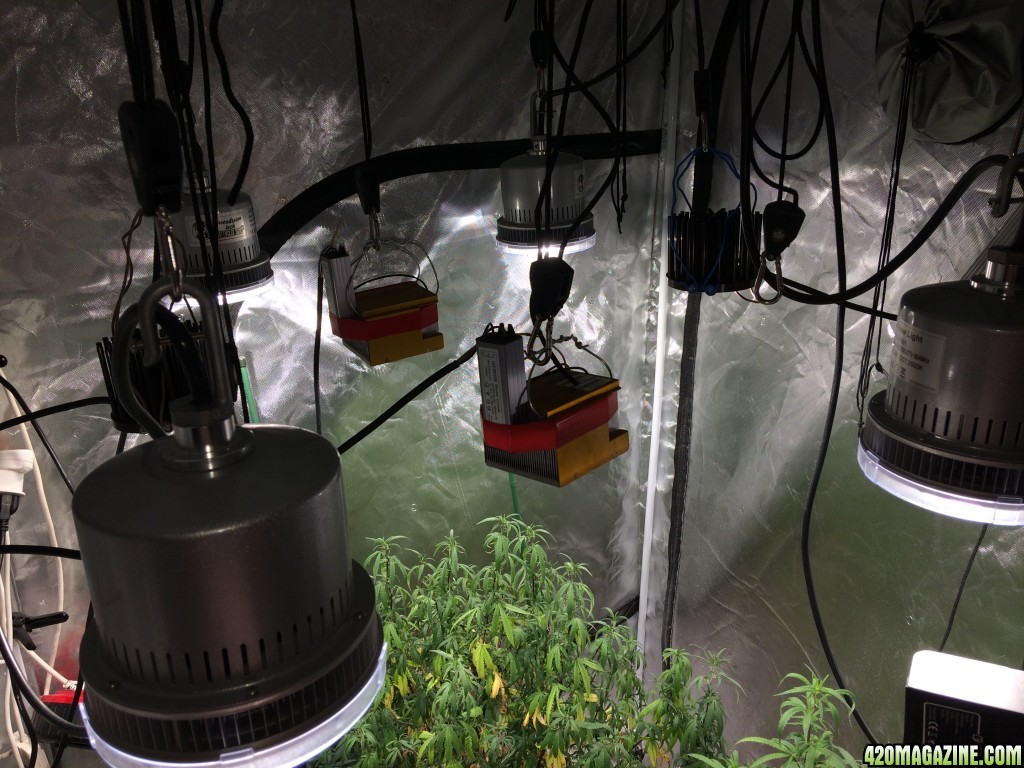
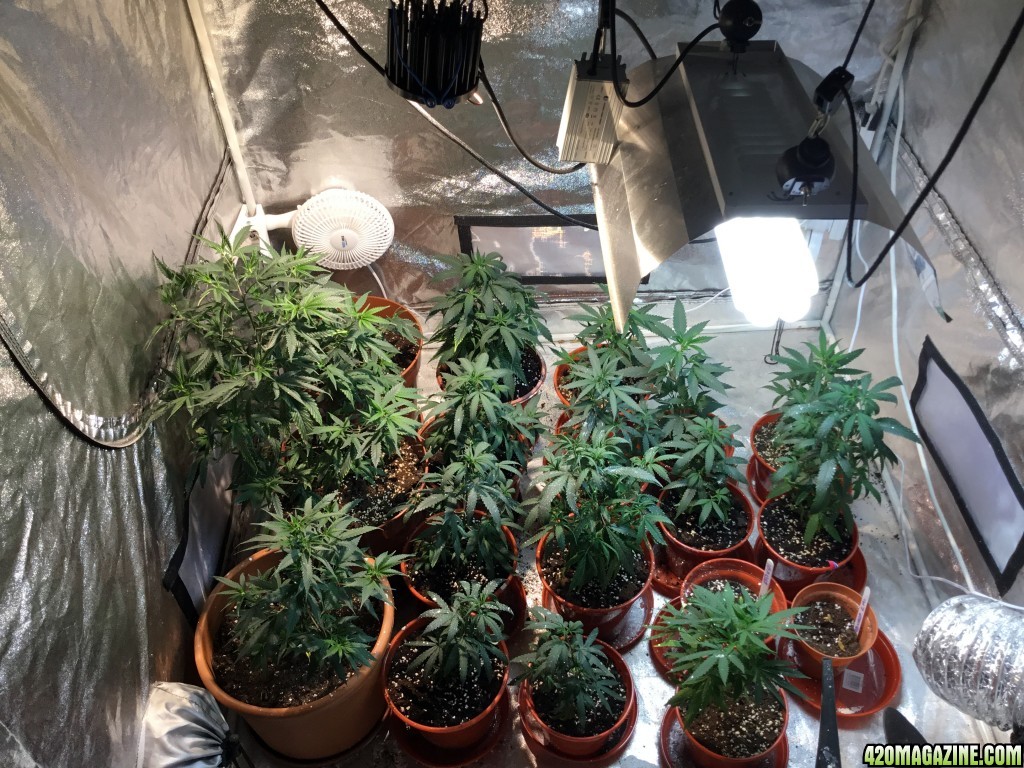
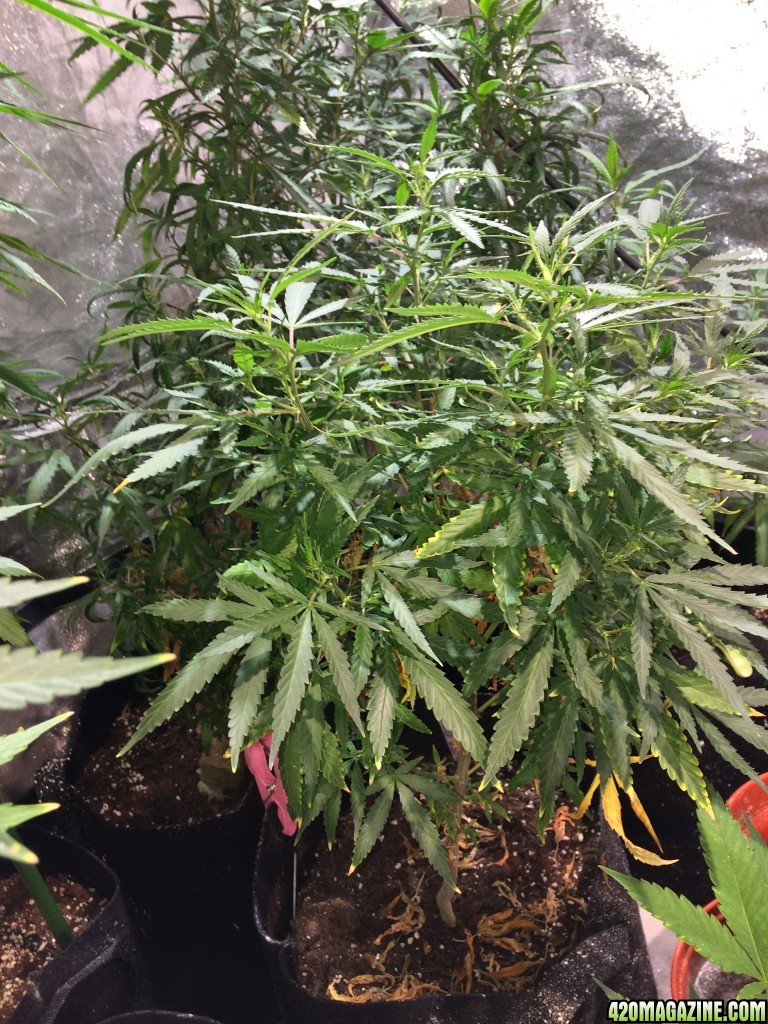
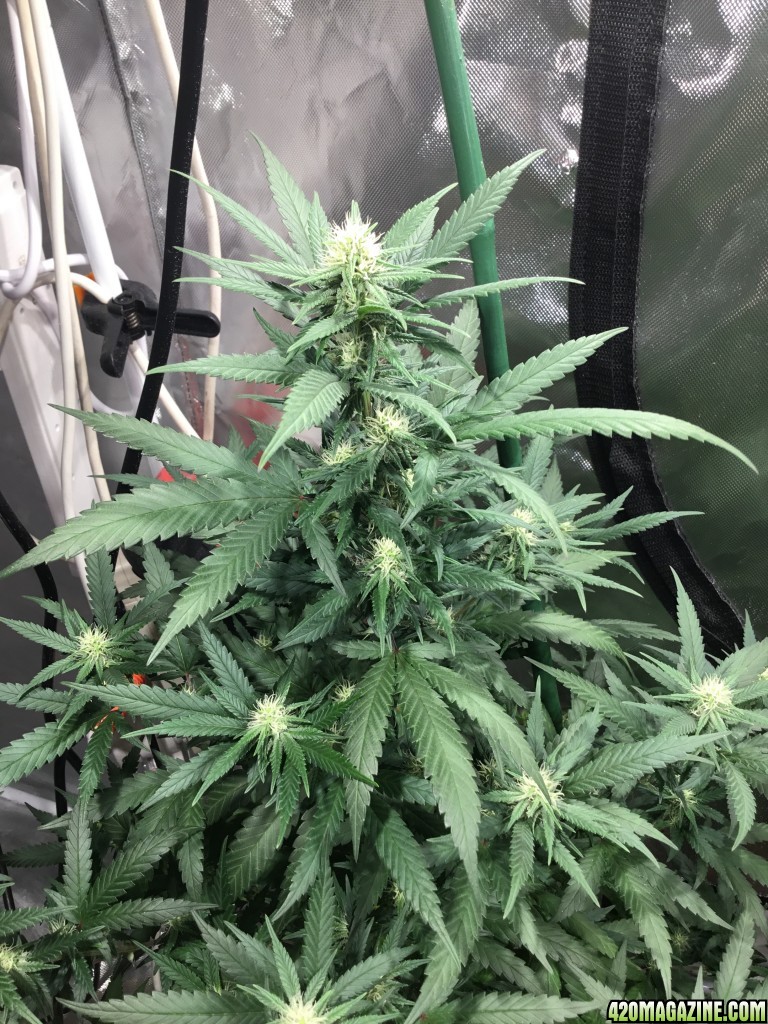
Veg tent (4'x4'x 7') :
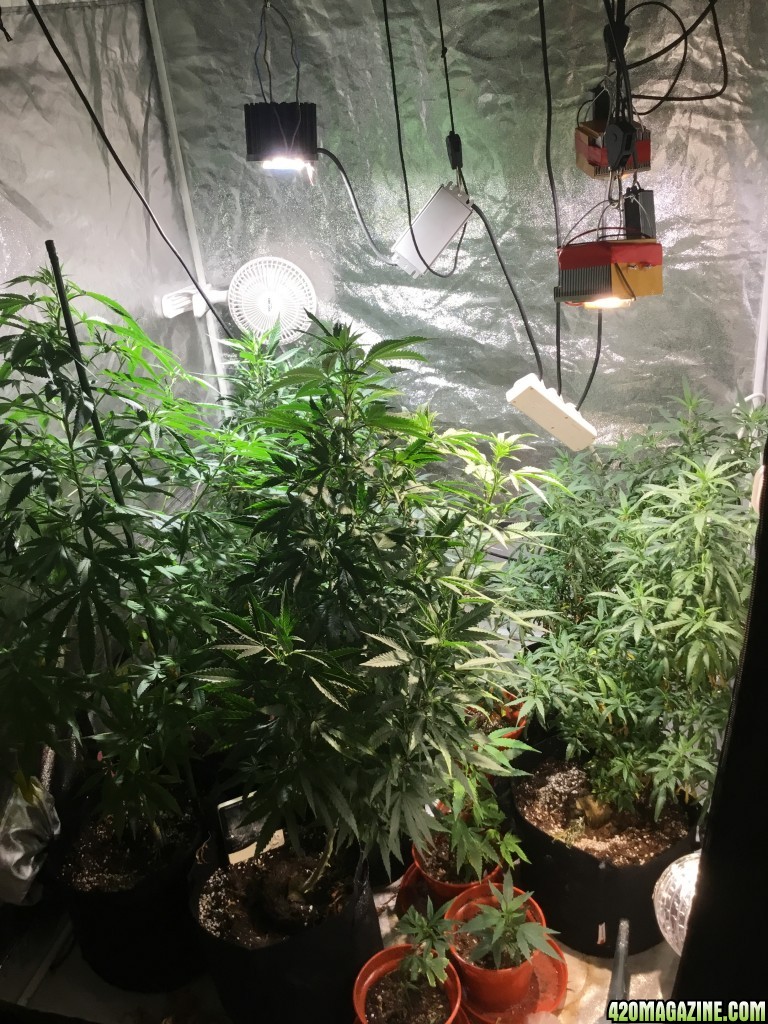
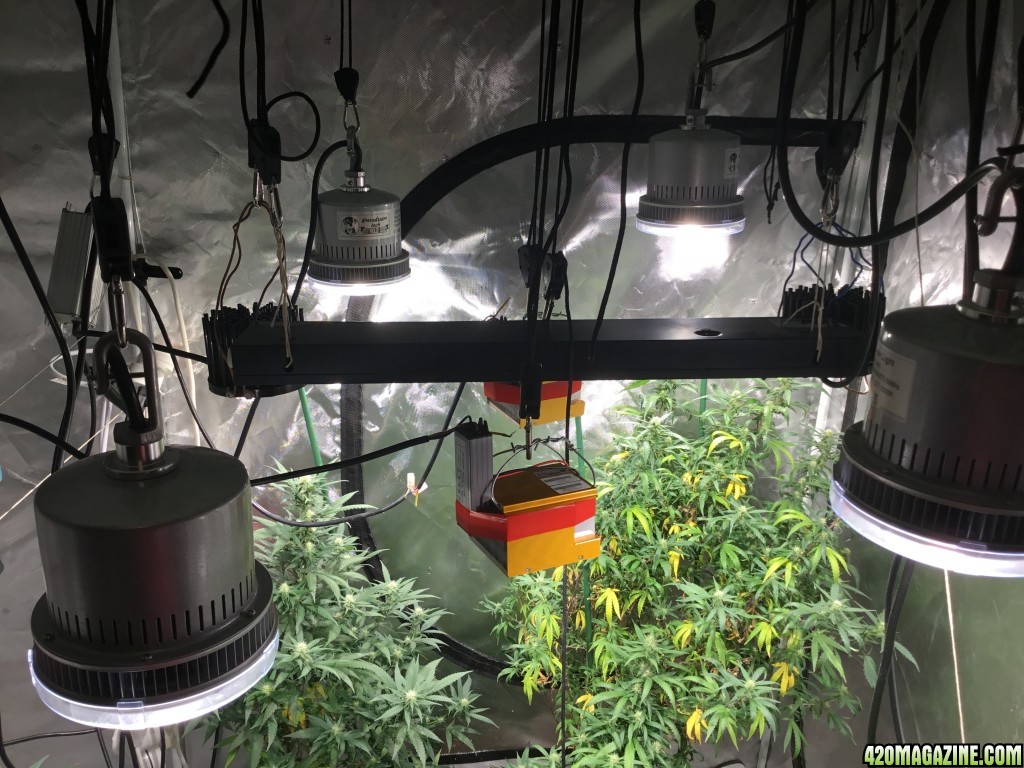
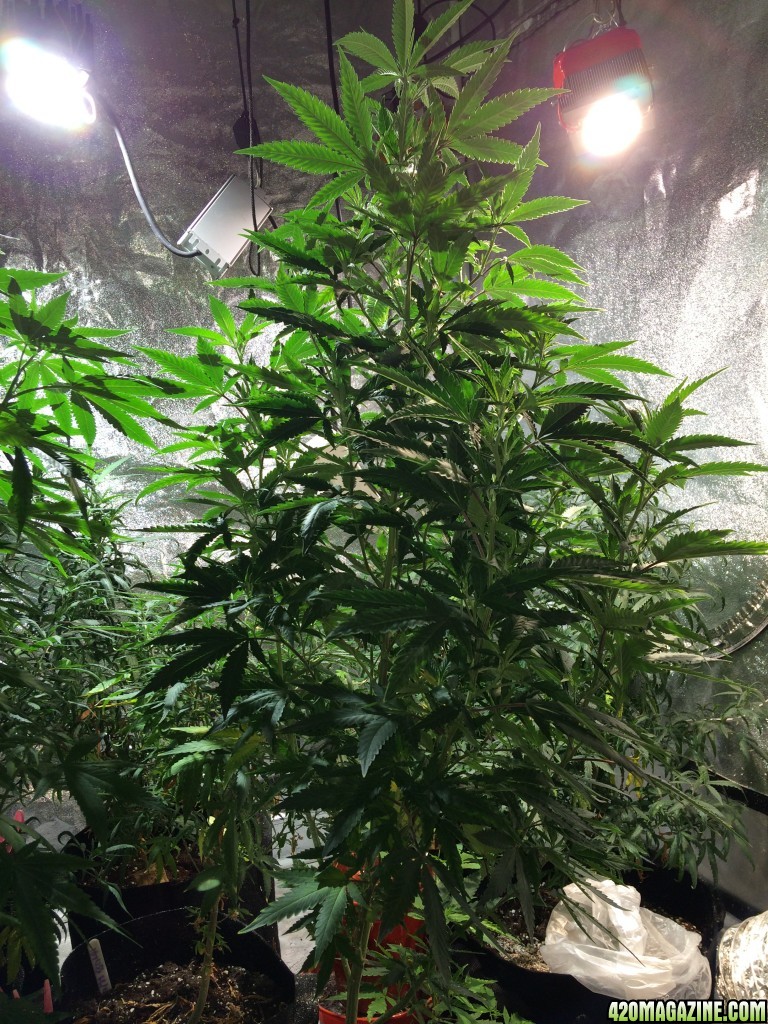
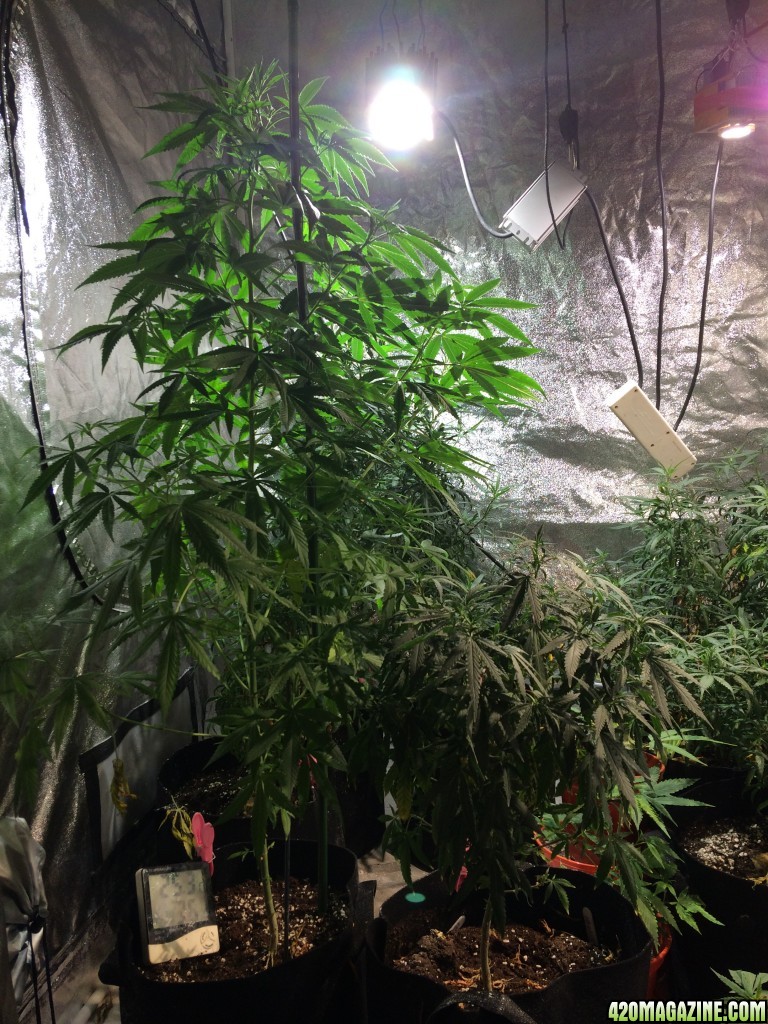
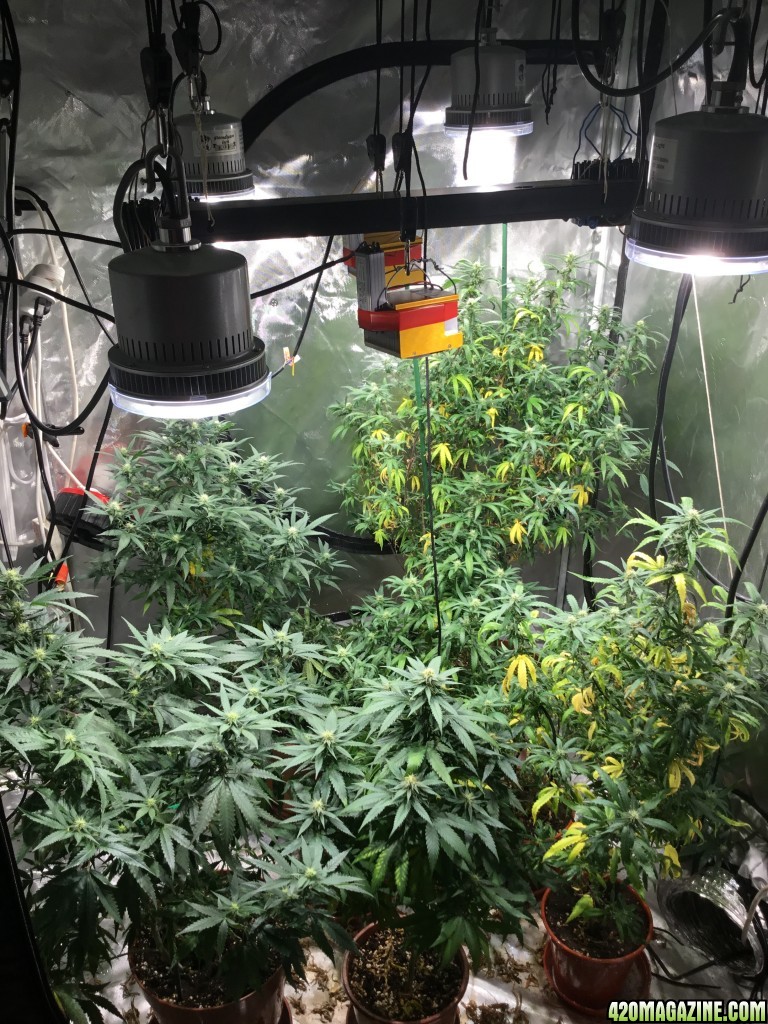
Flowering tent (8'x4'x7') :
I live in an area where stealth is essential so tents are a must as I do not have the freedom to dedicate full rooms to my hobby, one day in the future maybe.
Nutrients that I use for the chemical part of the grow:
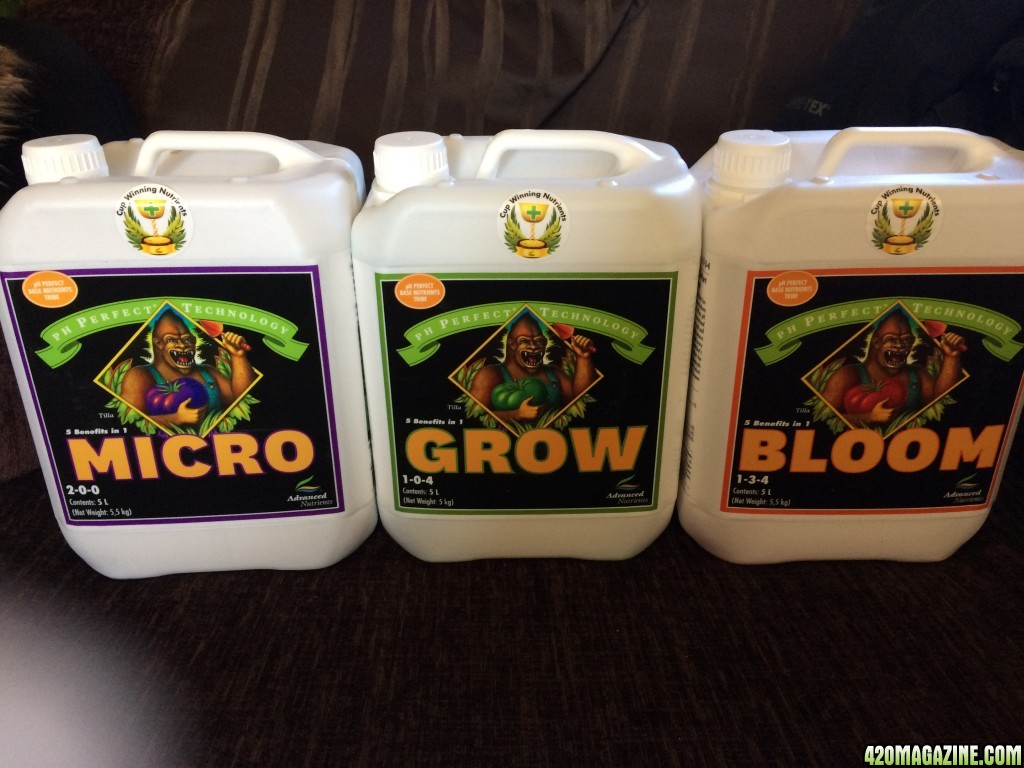
Advanced Nutrients PH Perfect range of base nutrients. I was very impressed with these the last time I purchased some so I have recently acquired some more. No PH pen is needed so long as your tap water is within reasonable limits for nutrient uptake due to the nutrients being bonded to salts making them more available to the plants.
Bear in mind that with a chemical grow you are in essence killing off the microlife in your soil and force feeding your plants. Salts will inevitably build up in both the plants and the soil so a 'mini flush' of sorts is recommended in between feeds. I would recommend a minimum of one flush per three feeds and sometimes one per two feeds is necessary. So it would go something like this: Feed water/nutrients - Feed water/nutrients - Feed water only (1 in 3) and Feed water/nutrients - Feed water only (1 in 2).
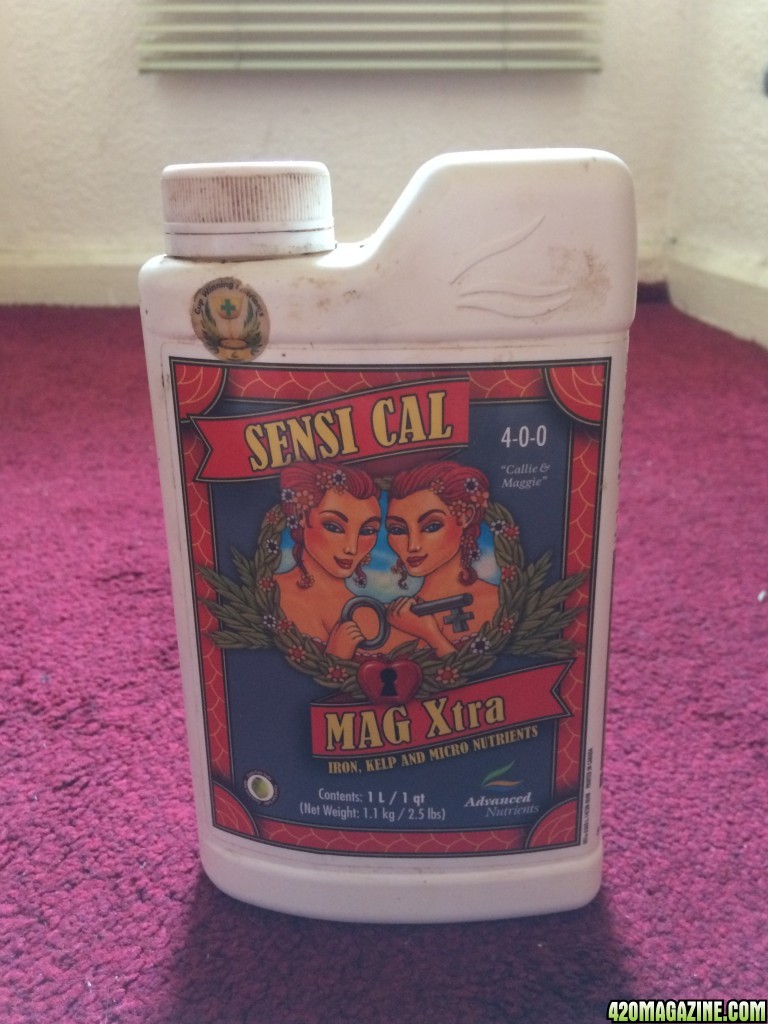
AN CalMag. I find this is a must under LED growing, whether they are Blurple LED's or the new white light COB's I still have CalMag deficiencies as you will see on some of my plants.
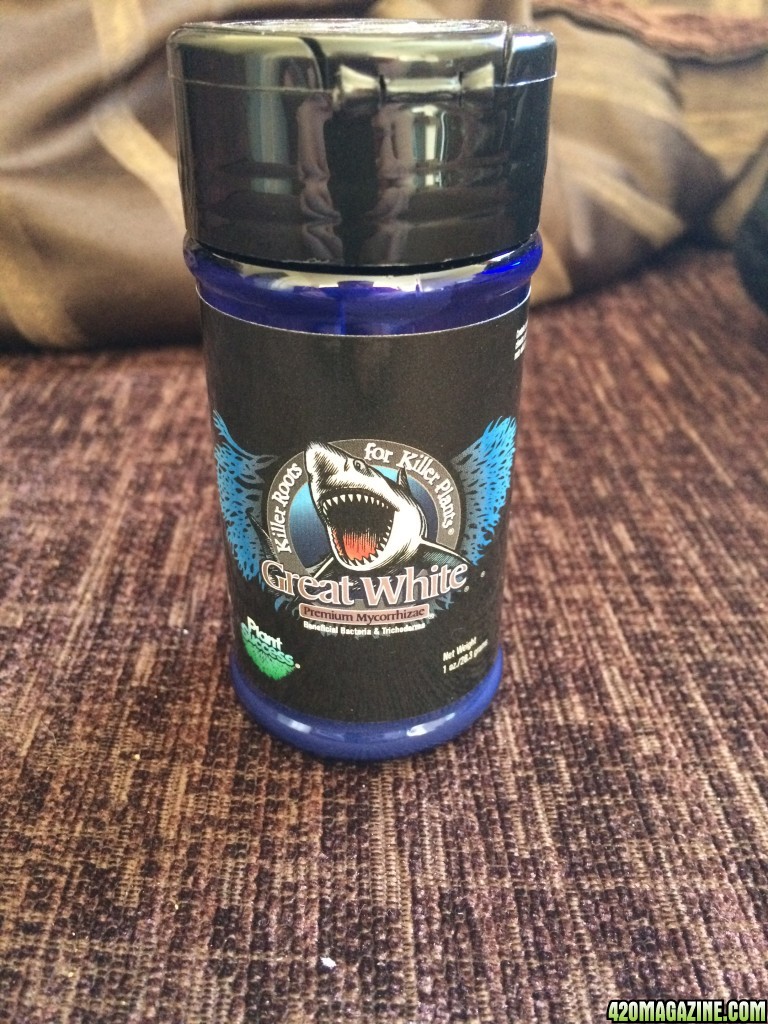
Great White Mycorrhizae, need I say anymore? Good bud growth comes from a strong root system and this is essential in my opinion. I'm new to this but the evidence that I see online is overwhelming so this will be an ongoing part of my feeding regime.
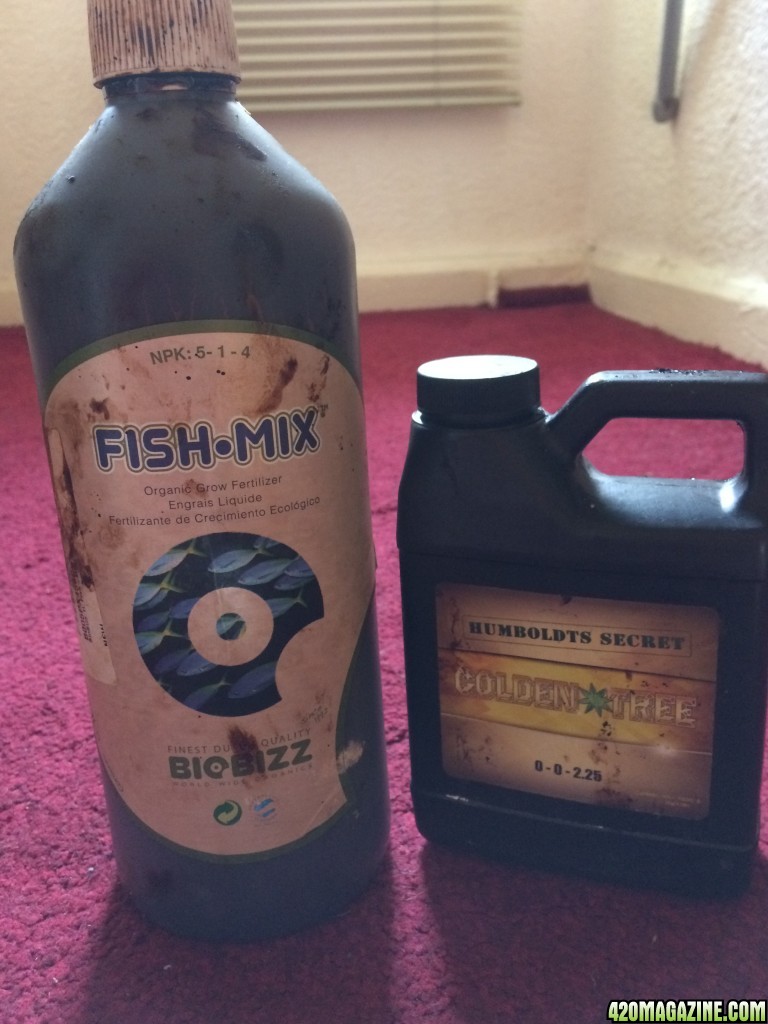
Fish Mix is used throughout veg and Humboldt's Secret Golden Tree is used in flower. These are organic too and you will note that I also use them in my organic(ish) feeding regime.
Soils used for my Chemical Grows:
I feel that quality soil is essential to any grow whether it will be chemical or organic(ish) but not fully organic. The soils that I use are always on trial, and I have used quite a few different ones ranging from abysmal (usually a store's own) to average (Canna Terra Pro, Biobizz AllMix/LightMix) and also some that I rate highly (Plant Magic Soil Supreme and Alpha Mix (quite a hot soil)).
That said I have been paying £16.99 per 50 litres (around 2 cubic feet) of Alpha Mix lately but I will currently be testing some cheaper soil that has been tried and tested elsewhere with good to great results. They will be mixed with Perlite for both the Chemical and organic(ish) grows. I will show the soils and their respective prices below.
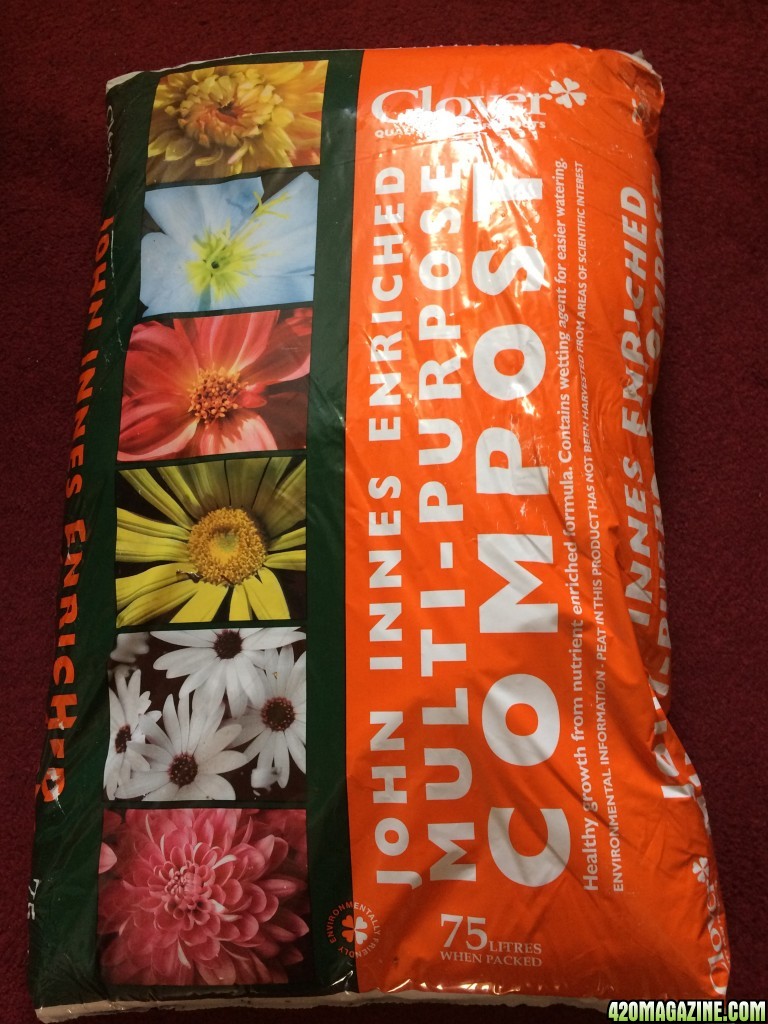
Clover John Innes Multi Purpose Compost. £15 for 225 litres (around 8 cubic feet) :
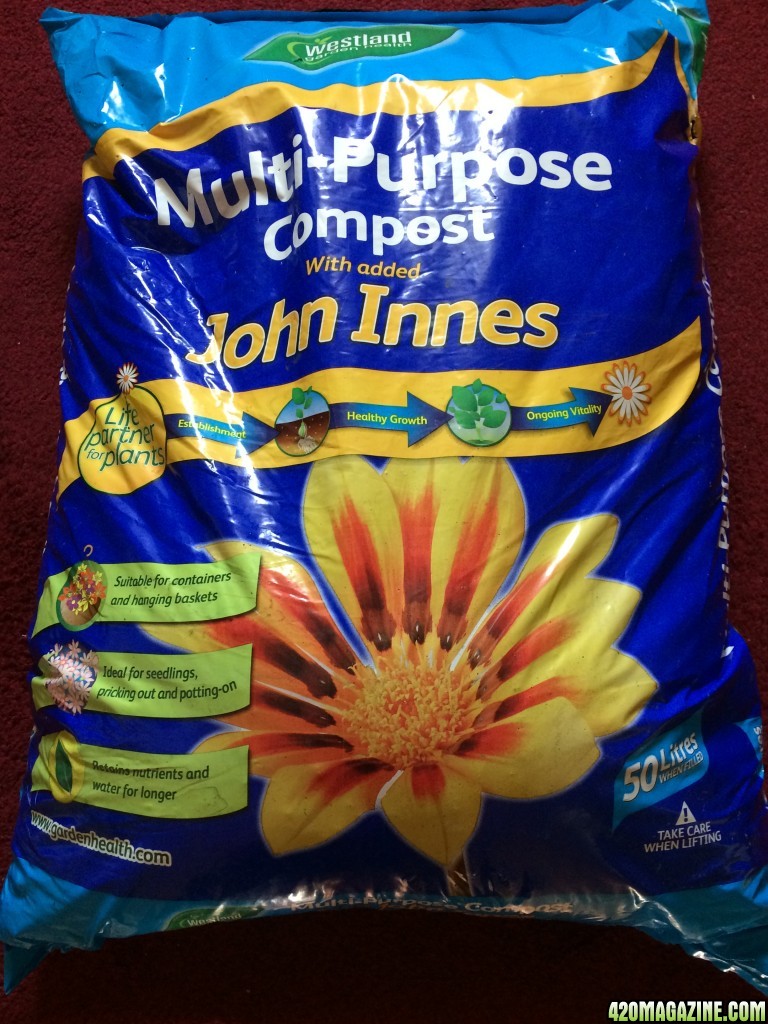
Westland John Innes Multi Purpose Compost. £10 for 150 litres (around 6 cubic feet) :
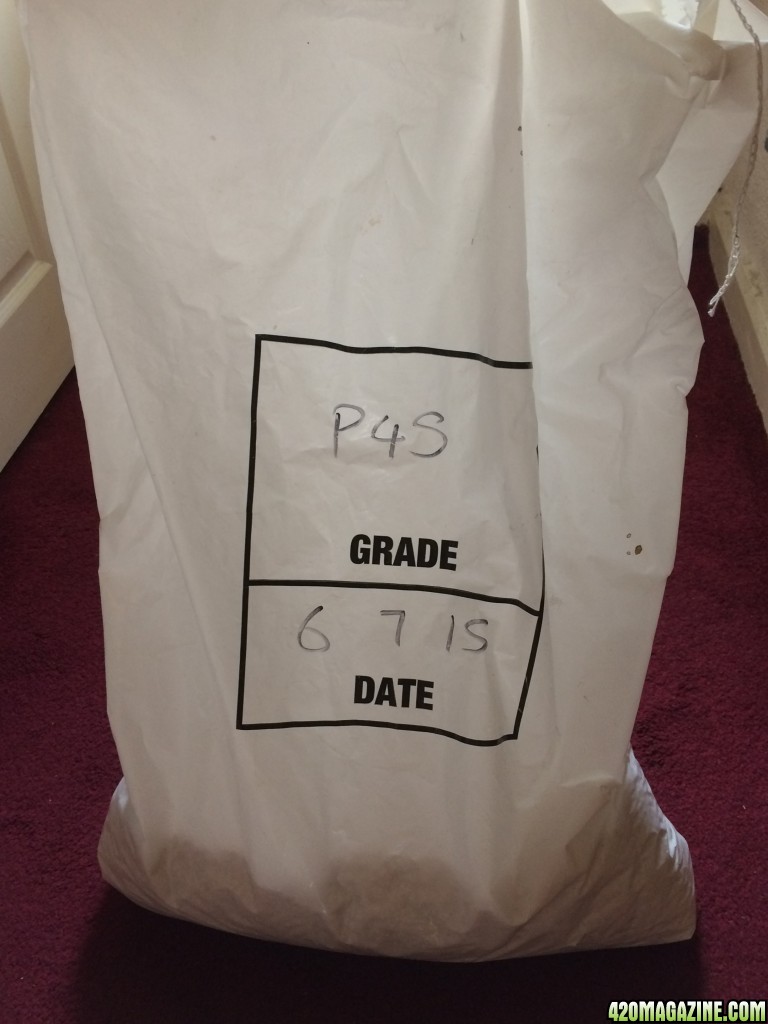
Perlite for aeration:
That pretty much concludes the chemical side of things so I will now show what I use for my organic(ish) grows.
By organic(ish) what I mean is that instead of using fully organic products I will instead use organically sourced bottle nutrients. Although using these is not great for the microherd the end resulting smoke tends to have a better flavour and smoother smoke than a non flushed/improperly flushed chemical grow. Also as the nutrients are chelated in organic acids instead of salts there is not so much a need for a 'mini flush' in between feeds. In fact I have done a grow where I have not even used water only and there was no salt build up and the flavour was there at the end. You may or may not have to use a PH pen on an organic(ish) grow as the chelation isn't as effective with bottled organic feed (so far as I am aware through my experiences) as it is with chelated chemical feed. Also please bear in mind that although you may not be killing off all the microherd in your soil you will still be pissing them off greatly when using chelated acids due to the PH swings that will occur with each feed.
Nutrients that I use for the organic(ish) part of the grow:
As above I will use Fish Mix in veg and Humboldt's SGT in flower along with Great White Mycorrhizae. I will also use some base nutrients such as:
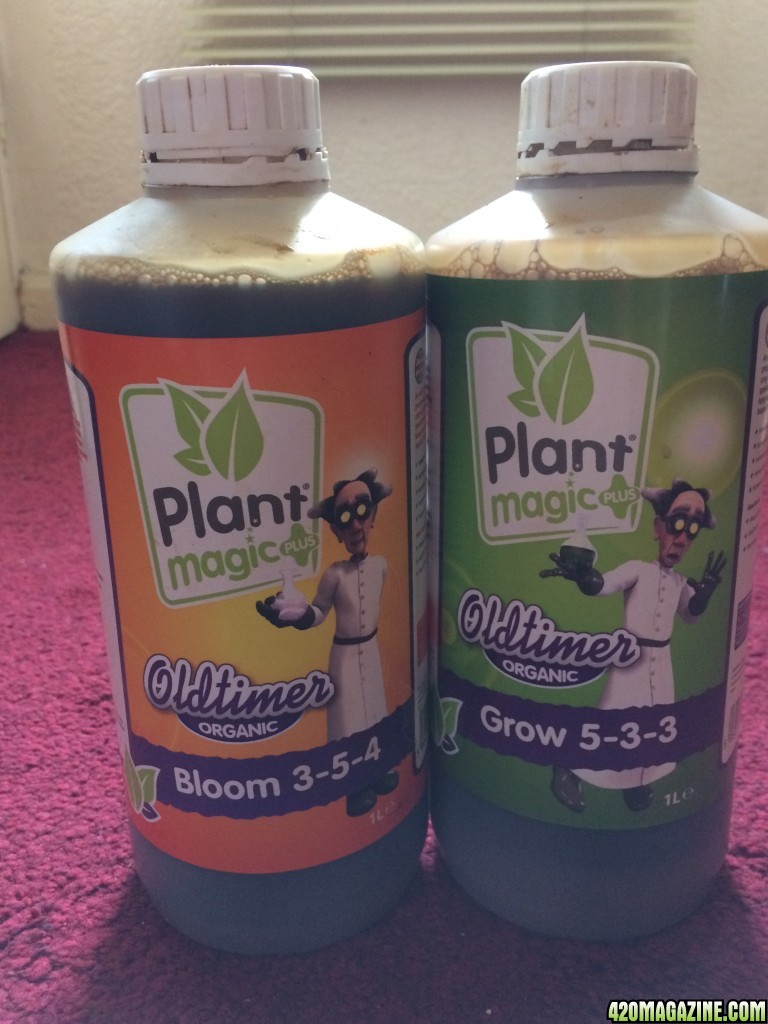
These nutrients I find reasonable. They are slightly chelated but PH sometimes needs adjustment and you will notice this pretty soon into your feeding regime if this is the case. As with any type of grow you will want to keep a close eye on your plants and rectify any problems as soon as you see them...unless you're a lazy gardener like me, my plants are strong or die")
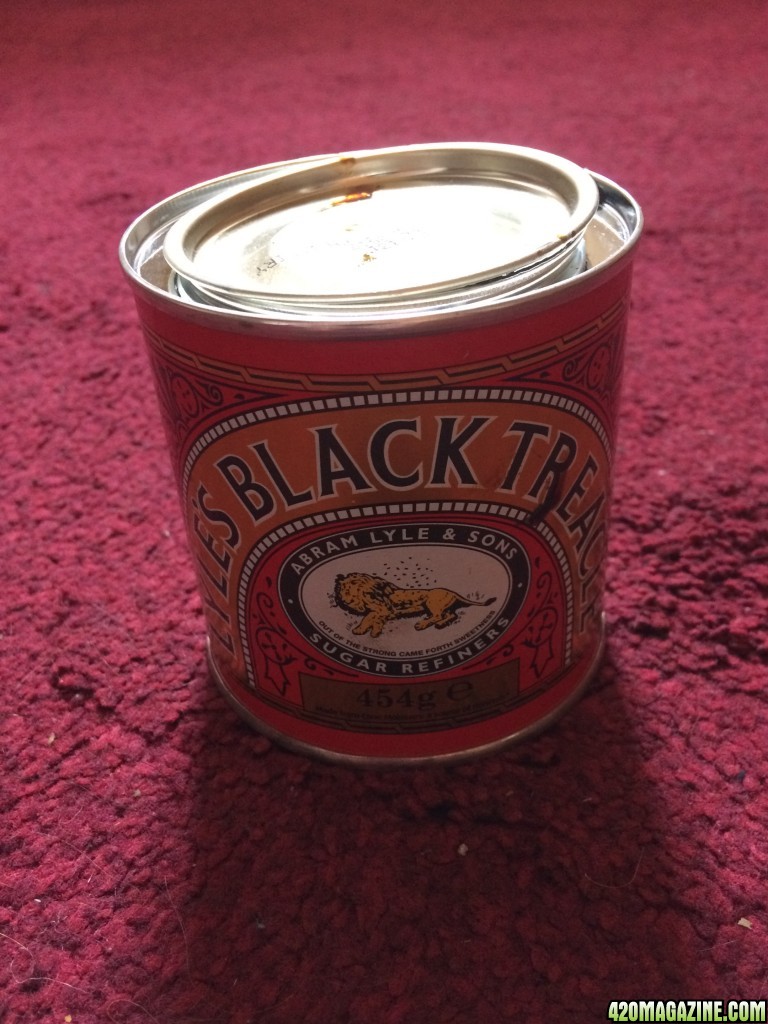
As a CalMag supplement I use Black Treacle (the UK equivalent of Blackstrap Molasses). It has a 4:1/5:1 ratio of Calcium to Magnesium which is just how Cannabis likes it. Without Calcium the plants find it hard to uptake the magnesium which in turn can in effect lock the magnesium out causing people to add more magnesium than necessary making matters worse. Too much magnesium in the soil/plant makes for a very harsh smoke so don't forget to keep your feed ratios as accurate as possible. I use 1 tsp of Black Treacle melted into a cup of boiled then slightly cooled water and added to 4 litres of water (around a gallon of water/feed). I will use this whenever a plant shows signs of deficiency for one or two weeks or if the particular strain is a heavy feeder I may use it to encourage growth as my heavy feeders tend to be calcium hungry whores. Whilst the plant is in veg I will usually just topdress with EWC (EarthWorm Castings or Vermicompost) and water in. An inch or two usually lasts for a good two weeks of outstanding healthy growth. It is also very hard to burn a plant using organic ingredients for those of us that can be a little too heavy handed when it comes to feeding.
Soils used for my organic(ish) part of the grow:
For these types of grow the soils that I use tend to be Cannabis specific soils that I mentioned above although as I get more confident I will use either my own compost mix with Perlite or the above mentioned Clover and Westland products. Not a lot really to be said about these soils as they will be close to either my chemical soil listed above or my organic soil which will be listed below.
Nutrients used in my organic part of the grow:
OK this is where it gets tricky. There are many different recipes and types of organic soils for growing Cannabis. We have Subcool's SuperSoil, Moonshineman's Organic Soil Mix, The Rev's True Living Organic Soil, Doc Bud's Hi-Brix and Recycled Living Organic Soil to name but a few. There is also another one used by a lot of people but it slips my mind at the moment so apologies if anyone is offended that I have not mentioned their particular soil, feel free to come and contribute here as I'm sure that people would love to hear your contribution, as would I Along with these particular named soils there are plenty of others that give great results, one in particular that I remember is UncleCannabis' home made soil.
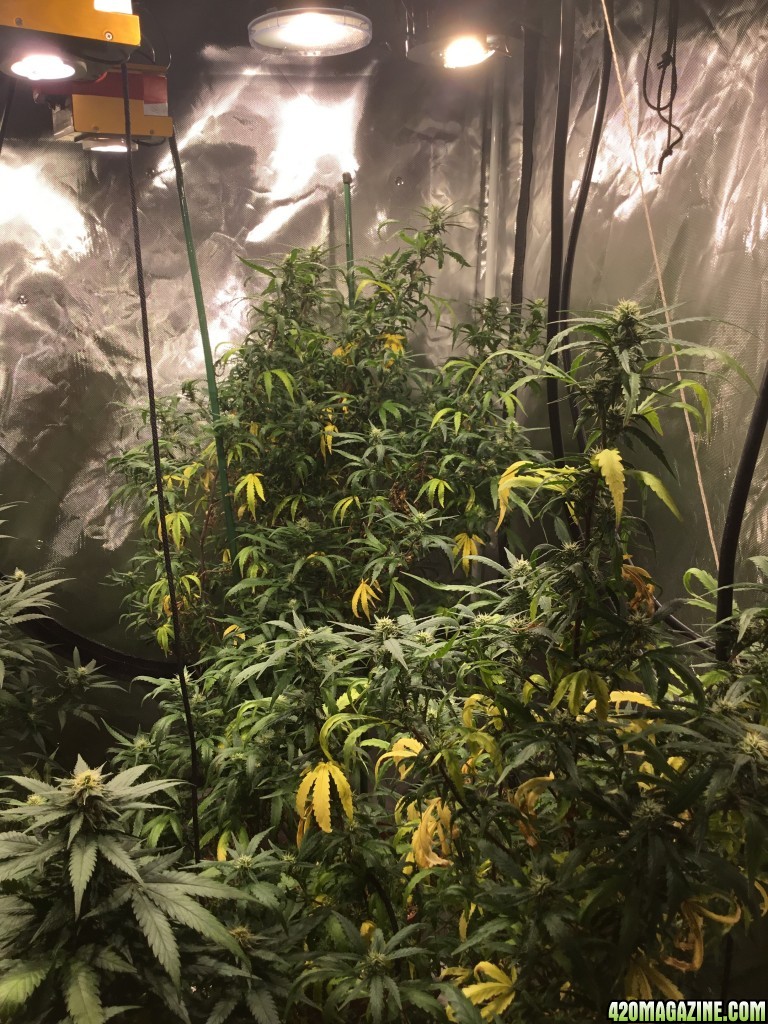
The problem with most of these recipes for me personally is that a lot of the ingredients are unavailable in the UK so after reading upon reading and learning how to use a spade I have worked out my own recipe which I am still working on. My recipe needs additional Calcium and Magnesium added to water currently as the plant matures in the flowering stage so please don't take my recipe as gospel, it's far from it although it is improving with time. You will see an example of plants grown in my own recipe and you will see that they are deficient in CalMag. At least these are deficiencies nowadays and not lockout which again can be caused by a recipe gone wrong, but what I would say is if you have the option of growing (and killing) extra plants whilst testing out your mix go ahead and do it! It's fun and it's a great learning curve watching the plants grow in the soil that you yourself have created, with a little help from dry organic ingredients.
First and foremost you will want to create a compost pile. Not only is this good for your plants and vegetable/fruit garden but you are also cutting down on greenhouse emissions by recycling your waste instead of it going to a landfill where it becomes anaerobic (aerobic is oxygenated or turned so to speak allowing aerobic microbes to breed (good thing) whereas anaerobic is without oxygen allowing a lot of bad microbes to breed) and releases methane gas into the atmosphere. So in effect you are helping to save the world little by little
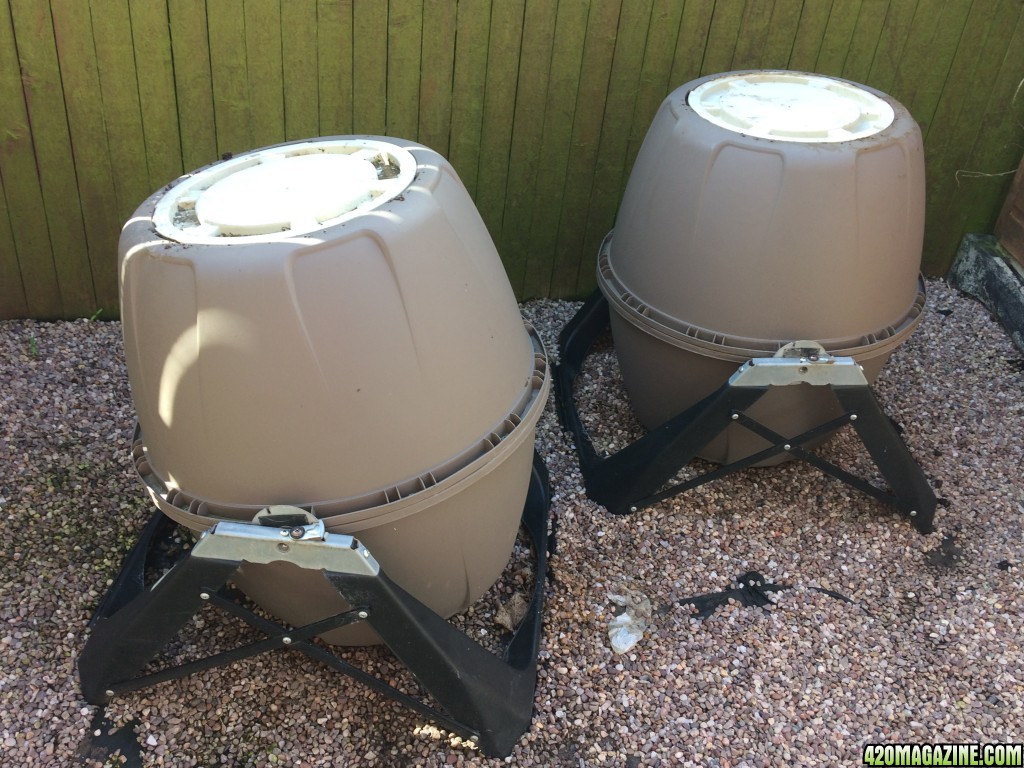
These are my compost tumblers and a lot of my kitchen waste will go in here along with recyclable cardboard, paper (be careful of anything with print on that uses chemical dyes), grass cuttings, decomposing leaves, organically grown Cannabis roots and leaves are excellent for going in here, I tend to split mine between my composters and my worm farm which I will show below. What we are looking for here is a good mix of nutrients, micro nutrients and macro nutrients that will break down in the best possible way. To achieve this we are looking for around a 25/30:1 Carbon to Nitrogen ratio. Carbon are 'brown' goods such as cardboard, decomposing leaves, paper, straw etc or what I would call 'dead' materials whereas Nitrogen materials would be your kitchen waste or any green grass cuttings etc or what I would consider 'live' materials. I won't go into too much detail here but if anyone has any questions or interest then feel free to let me know and I can go into further detail.
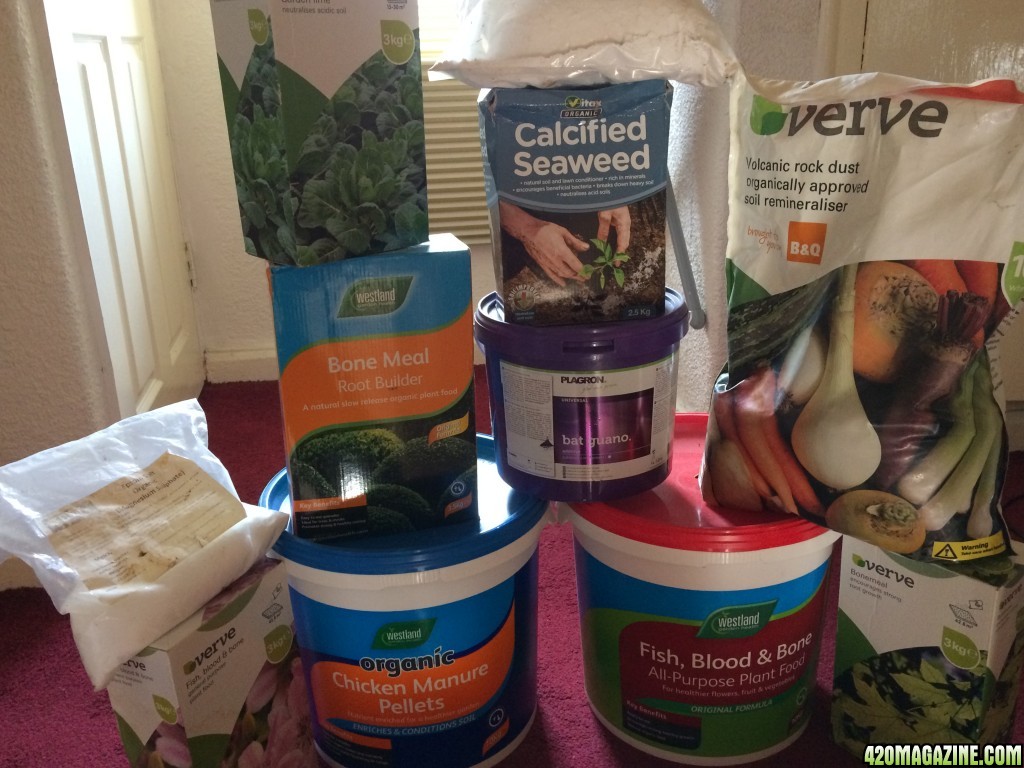
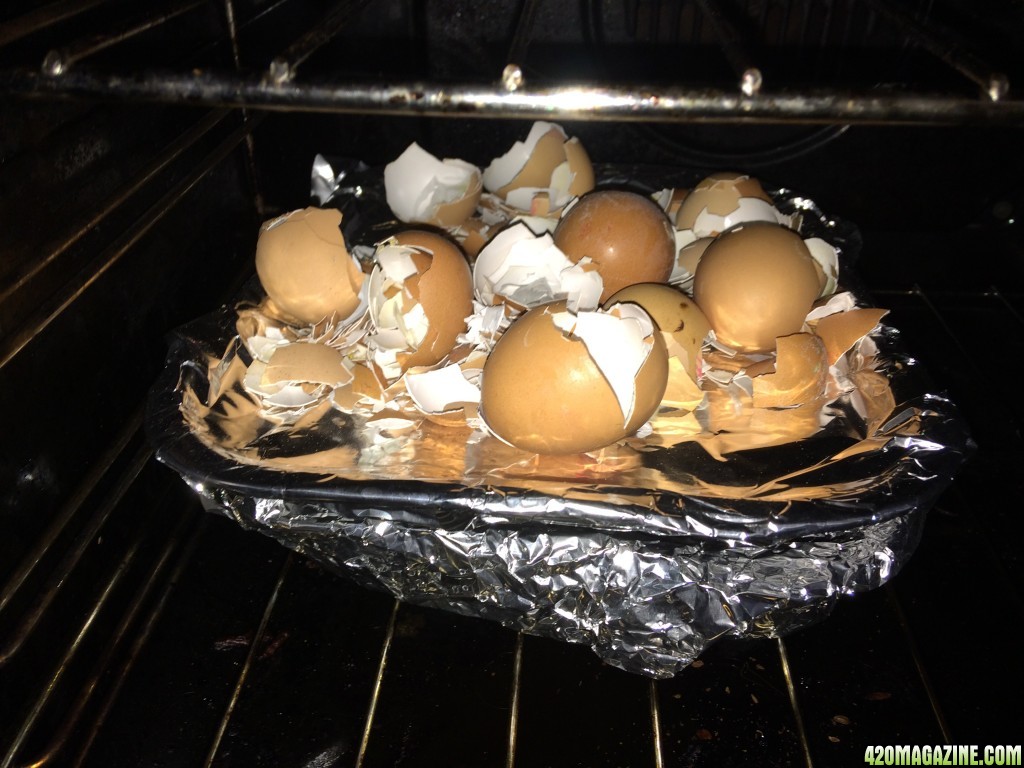
In a perfect world I would be able to cover every nutrient, micro nutrient and macro nutrient purely with what I have to hand, as this is rarely the case I will tend to amend my compost whilst it is cooking and for that I use dry organic (to the best of my knowledge) ingredients such as those shown below:
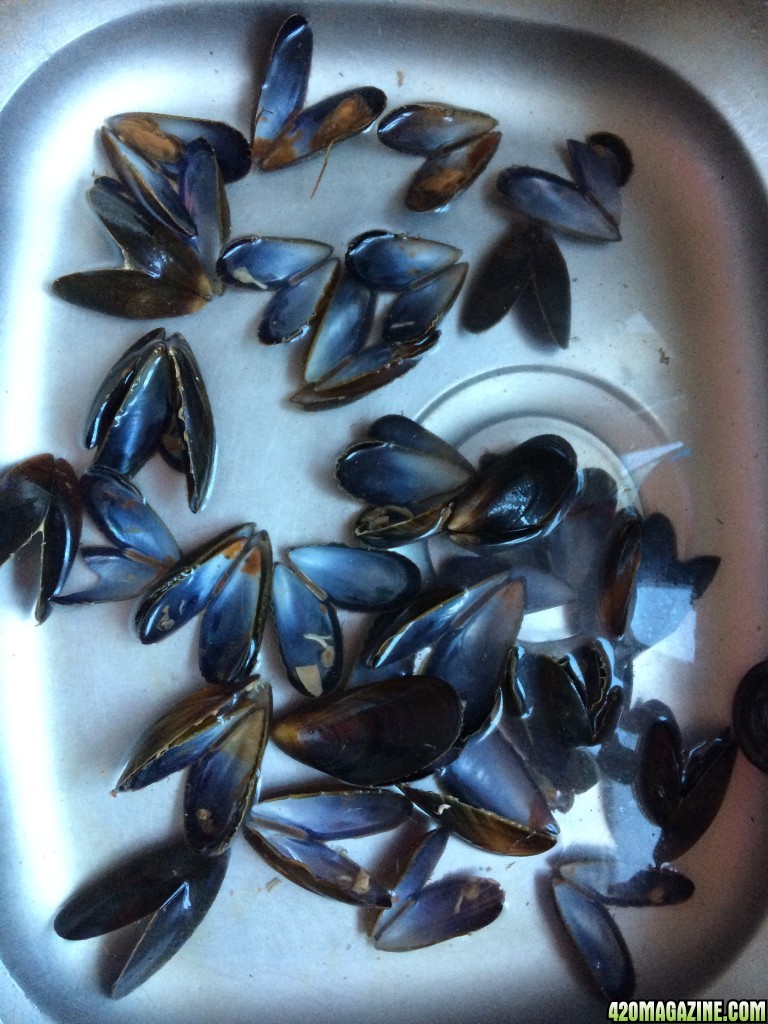
When the compost has broken down, smells nicely earthy and isn't too wet or dry it can be used along with something such as Peat Moss and Perlite to create a stable soil mixture. Unfortunately the gathering of Peat Moss has begun to eat into nature's wildlife habitats and is now frowned upon as a green option. There are other options such as Coco Coir and Fytocell but each will have a downside (retains salts, causes PH imbalance or breaks down too quickly etc) or you could just go and grab a spadeful of soil from your own garden, be careful though as you will be introducing unknown qualities to your soil and that's not always a good thing. In fact I tested this theory out in one of my previous grows with my own garden soil/clay and had no end of problems. Much better if you can designate your compost to it's primary use, or even have two composts going, one for higher Nitrogen levels and one for higher Phosphate for instance (veg and bloom). Some other amendments that can be added you would find surprisingly easy to find. Here are a couple that I save and use whenever I have had a meal containing them:
This is how my compost looks when I consider it to be viable:
If you are only able to have one thing for your organic garden due to lack of space/waste/funds etc then I would suggest that you would have it be this:
This truly is the black gold of gardening! Worm farms are a lot easier to maintain than most people consider them to be. Their Vermicompost or EWC (EarthWorm Castings) are not only valuable for your garden they are also PH neutral which means there will be no PH swings affecting your plants uptake of their nutrients, and the microherd loves them! I seriously cannot stress enough how wonderful EWC is for our beloved plants, we can use it in the base mix as a nutrient and also topdress with it as a nutrient booster. Don't try to grow in EWC alone though (I've tried), it will become a muddy mess when wet and compacted like rock when dry, but as an addition to the substrate or as a top dressing it will ensure your plants and microlife remain healthy.
Here are my worms hard at work creating another tub load of Black Gold for me (this worm farm has 4 tiers but I usually have one or two in the garden ready for use) :
In an ideal world with the right base soil substrate we would be able to water our plants only with rainwater (again usually PH neutral but be careful if you live in an industrial zone or are collecting from a water butt attached to a roof guttering painted with lead paint as this may make it acidic or containing lead particles etc), unfortunately as I have found myself (as have most others) this is often not the case and some form of amendments may be required. These can be in the form of aerated (again we want aerobic not anaerobic) compost teas, top dressings or as I read in The Rev's - True Living Organics book by spiking (adding dry nutrients into holes outside the transplant area whilst transplanting). As I have a lot of dry nutrients this would be the best method for me. I will use this method once I give up on trying to make a pure water only soil, if ever I do give up that is
This concludes the first part of my journal, apologies for the long post but I feel as I have been away quite awhile and there is plenty that I would like to share. Next up: Lights and environment!
May your buds be forever bountiful
After a break from journalling for awhile I have decided to start another after being talked into it by MrAm4zin, it wasn't a hard thing for him to do as I had missed this aspect of my Cannabis related hobby, but hey if it makes you feel better looking at my terrible gardening MrA who am I to spoil your fun?
This won't be a steady journal as I'm not a steady type of person, there will be ups and downs both with the grow area and myself but I will always try to remain factual and if anything is theoretical I will hopefully be able to make that clear to everyone. There will also be a little bit of everything so maybe there will be something of interest to each and everyone of you that reads this. Feel free to skip through my walls of text and photographs and ask questions at the end of the thread. I'm a great believer in the fact that the silliest question is the one that remains unasked. I'm a noob that's not quite a noob and I am unafraid to admit it and ask questions myself, in turn I would encourage everybody else to do so too.
OK so where to start?
First of all let's take a look at the grow areas and then we can go into more detail as to what is what.
These photographs were taken yesterday during lights on so they're about as current as we can get, here goes:
Veg tent (4'x4'x 7') :
Flowering tent (8'x4'x7') :
I live in an area where stealth is essential so tents are a must as I do not have the freedom to dedicate full rooms to my hobby, one day in the future maybe.
Nutrients that I use for the chemical part of the grow:
Advanced Nutrients PH Perfect range of base nutrients. I was very impressed with these the last time I purchased some so I have recently acquired some more. No PH pen is needed so long as your tap water is within reasonable limits for nutrient uptake due to the nutrients being bonded to salts making them more available to the plants.
Bear in mind that with a chemical grow you are in essence killing off the microlife in your soil and force feeding your plants. Salts will inevitably build up in both the plants and the soil so a 'mini flush' of sorts is recommended in between feeds. I would recommend a minimum of one flush per three feeds and sometimes one per two feeds is necessary. So it would go something like this: Feed water/nutrients - Feed water/nutrients - Feed water only (1 in 3) and Feed water/nutrients - Feed water only (1 in 2).
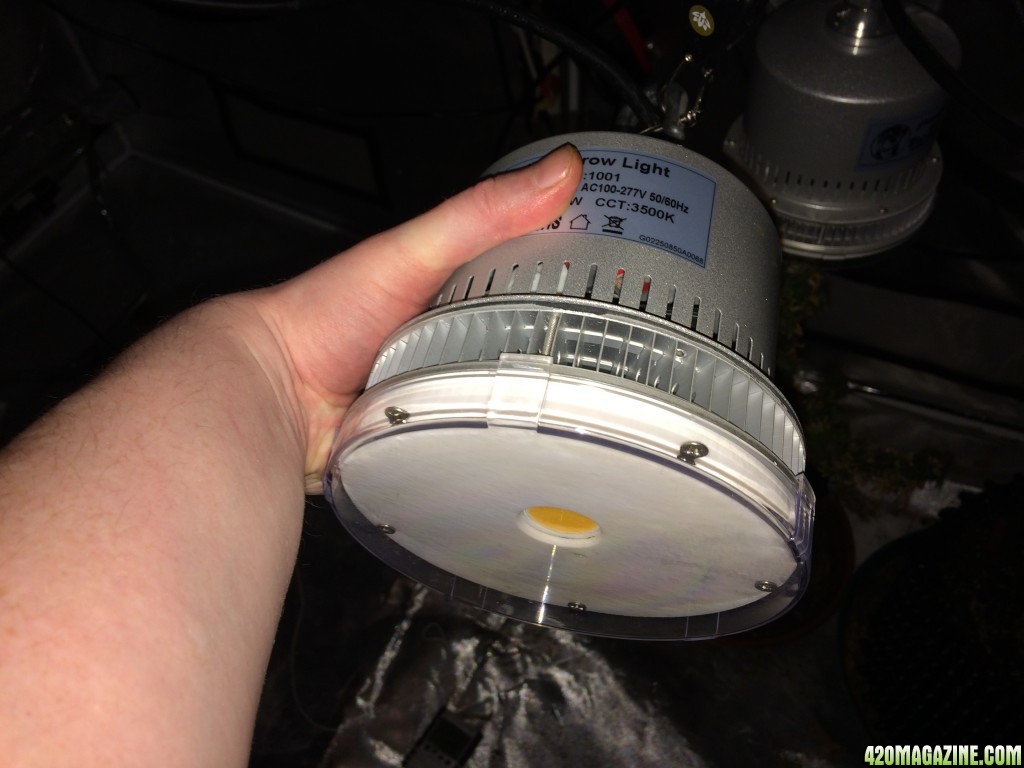
AN CalMag. I find this is a must under LED growing, whether they are Blurple LED's or the new white light COB's I still have CalMag deficiencies as you will see on some of my plants.
Great White Mycorrhizae, need I say anymore? Good bud growth comes from a strong root system and this is essential in my opinion. I'm new to this but the evidence that I see online is overwhelming so this will be an ongoing part of my feeding regime.
Fish Mix is used throughout veg and Humboldt's Secret Golden Tree is used in flower. These are organic too and you will note that I also use them in my organic(ish) feeding regime.
Soils used for my Chemical Grows:
I feel that quality soil is essential to any grow whether it will be chemical or organic(ish) but not fully organic. The soils that I use are always on trial, and I have used quite a few different ones ranging from abysmal (usually a store's own) to average (Canna Terra Pro, Biobizz AllMix/LightMix) and also some that I rate highly (Plant Magic Soil Supreme and Alpha Mix (quite a hot soil)).
That said I have been paying £16.99 per 50 litres (around 2 cubic feet) of Alpha Mix lately but I will currently be testing some cheaper soil that has been tried and tested elsewhere with good to great results. They will be mixed with Perlite for both the Chemical and organic(ish) grows. I will show the soils and their respective prices below.
Clover John Innes Multi Purpose Compost. £15 for 225 litres (around 8 cubic feet) :
Westland John Innes Multi Purpose Compost. £10 for 150 litres (around 6 cubic feet) :
Perlite for aeration:
That pretty much concludes the chemical side of things so I will now show what I use for my organic(ish) grows.
By organic(ish) what I mean is that instead of using fully organic products I will instead use organically sourced bottle nutrients. Although using these is not great for the microherd the end resulting smoke tends to have a better flavour and smoother smoke than a non flushed/improperly flushed chemical grow. Also as the nutrients are chelated in organic acids instead of salts there is not so much a need for a 'mini flush' in between feeds. In fact I have done a grow where I have not even used water only and there was no salt build up and the flavour was there at the end. You may or may not have to use a PH pen on an organic(ish) grow as the chelation isn't as effective with bottled organic feed (so far as I am aware through my experiences) as it is with chelated chemical feed. Also please bear in mind that although you may not be killing off all the microherd in your soil you will still be pissing them off greatly when using chelated acids due to the PH swings that will occur with each feed.
Nutrients that I use for the organic(ish) part of the grow:
As above I will use Fish Mix in veg and Humboldt's SGT in flower along with Great White Mycorrhizae. I will also use some base nutrients such as:
These nutrients I find reasonable. They are slightly chelated but PH sometimes needs adjustment and you will notice this pretty soon into your feeding regime if this is the case. As with any type of grow you will want to keep a close eye on your plants and rectify any problems as soon as you see them...unless you're a lazy gardener like me, my plants are strong or die
As a CalMag supplement I use Black Treacle (the UK equivalent of Blackstrap Molasses). It has a 4:1/5:1 ratio of Calcium to Magnesium which is just how Cannabis likes it. Without Calcium the plants find it hard to uptake the magnesium which in turn can in effect lock the magnesium out causing people to add more magnesium than necessary making matters worse. Too much magnesium in the soil/plant makes for a very harsh smoke so don't forget to keep your feed ratios as accurate as possible. I use 1 tsp of Black Treacle melted into a cup of boiled then slightly cooled water and added to 4 litres of water (around a gallon of water/feed). I will use this whenever a plant shows signs of deficiency for one or two weeks or if the particular strain is a heavy feeder I may use it to encourage growth as my heavy feeders tend to be calcium hungry whores. Whilst the plant is in veg I will usually just topdress with EWC (EarthWorm Castings or Vermicompost) and water in. An inch or two usually lasts for a good two weeks of outstanding healthy growth. It is also very hard to burn a plant using organic ingredients for those of us that can be a little too heavy handed when it comes to feeding.
Soils used for my organic(ish) part of the grow:
For these types of grow the soils that I use tend to be Cannabis specific soils that I mentioned above although as I get more confident I will use either my own compost mix with Perlite or the above mentioned Clover and Westland products. Not a lot really to be said about these soils as they will be close to either my chemical soil listed above or my organic soil which will be listed below.
Nutrients used in my organic part of the grow:
OK this is where it gets tricky. There are many different recipes and types of organic soils for growing Cannabis. We have Subcool's SuperSoil, Moonshineman's Organic Soil Mix, The Rev's True Living Organic Soil, Doc Bud's Hi-Brix and Recycled Living Organic Soil to name but a few. There is also another one used by a lot of people but it slips my mind at the moment so apologies if anyone is offended that I have not mentioned their particular soil, feel free to come and contribute here as I'm sure that people would love to hear your contribution, as would I
Along with these particular named soils there are plenty of others that give great results, one in particular that I remember is UncleCannabis' home made soil.The problem with most of these recipes for me personally is that a lot of the ingredients are unavailable in the UK so after reading upon reading and learning how to use a spade I have worked out my own recipe which I am still working on. My recipe needs additional Calcium and Magnesium added to water currently as the plant matures in the flowering stage so please don't take my recipe as gospel, it's far from it although it is improving with time. You will see an example of plants grown in my own recipe and you will see that they are deficient in CalMag. At least these are deficiencies nowadays and not lockout which again can be caused by a recipe gone wrong, but what I would say is if you have the option of growing (and killing) extra plants whilst testing out your mix go ahead and do it! It's fun and it's a great learning curve watching the plants grow in the soil that you yourself have created, with a little help from dry organic ingredients.
First and foremost you will want to create a compost pile. Not only is this good for your plants and vegetable/fruit garden but you are also cutting down on greenhouse emissions by recycling your waste instead of it going to a landfill where it becomes anaerobic (aerobic is oxygenated or turned so to speak allowing aerobic microbes to breed (good thing) whereas anaerobic is without oxygen allowing a lot of bad microbes to breed) and releases methane gas into the atmosphere. So in effect you are helping to save the world little by little
These are my compost tumblers and a lot of my kitchen waste will go in here along with recyclable cardboard, paper (be careful of anything with print on that uses chemical dyes), grass cuttings, decomposing leaves, organically grown Cannabis roots and leaves are excellent for going in here, I tend to split mine between my composters and my worm farm which I will show below. What we are looking for here is a good mix of nutrients, micro nutrients and macro nutrients that will break down in the best possible way. To achieve this we are looking for around a 25/30:1 Carbon to Nitrogen ratio. Carbon are 'brown' goods such as cardboard, decomposing leaves, paper, straw etc or what I would call 'dead' materials whereas Nitrogen materials would be your kitchen waste or any green grass cuttings etc or what I would consider 'live' materials. I won't go into too much detail here but if anyone has any questions or interest then feel free to let me know and I can go into further detail.
In a perfect world I would be able to cover every nutrient, micro nutrient and macro nutrient purely with what I have to hand, as this is rarely the case I will tend to amend my compost whilst it is cooking and for that I use dry organic (to the best of my knowledge) ingredients such as those shown below:
When the compost has broken down, smells nicely earthy and isn't too wet or dry it can be used along with something such as Peat Moss and Perlite to create a stable soil mixture. Unfortunately the gathering of Peat Moss has begun to eat into nature's wildlife habitats and is now frowned upon as a green option. There are other options such as Coco Coir and Fytocell but each will have a downside (retains salts, causes PH imbalance or breaks down too quickly etc) or you could just go and grab a spadeful of soil from your own garden, be careful though as you will be introducing unknown qualities to your soil and that's not always a good thing. In fact I tested this theory out in one of my previous grows with my own garden soil/clay and had no end of problems. Much better if you can designate your compost to it's primary use, or even have two composts going, one for higher Nitrogen levels and one for higher Phosphate for instance (veg and bloom). Some other amendments that can be added you would find surprisingly easy to find. Here are a couple that I save and use whenever I have had a meal containing them:
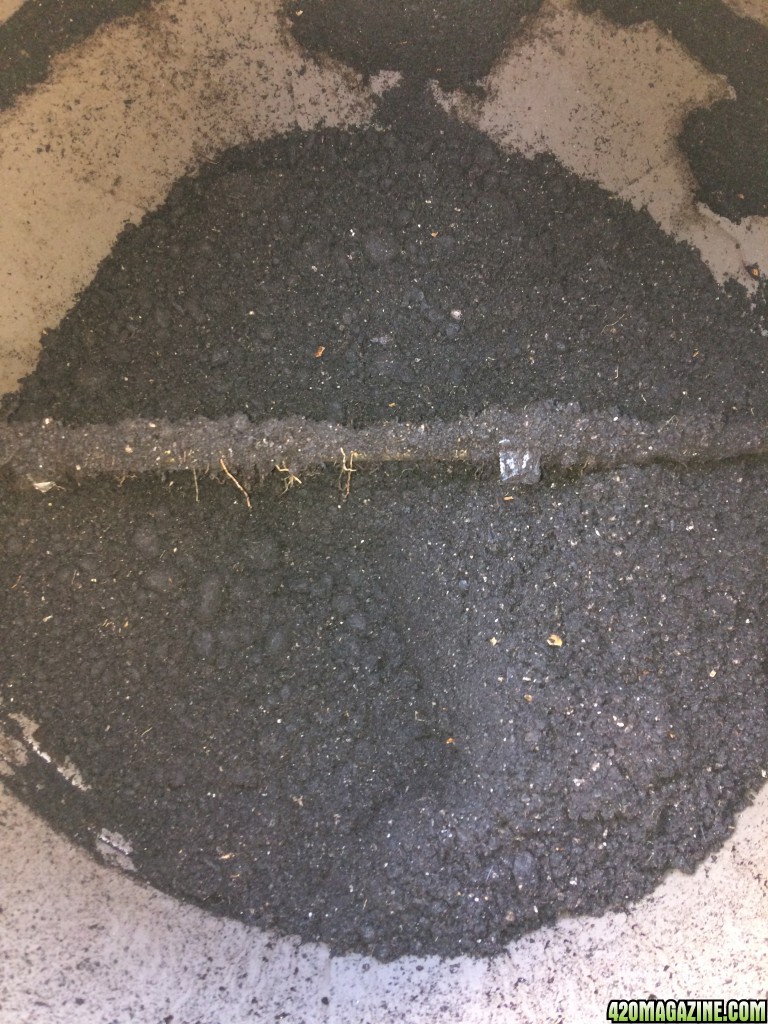
This is how my compost looks when I consider it to be viable:
If you are only able to have one thing for your organic garden due to lack of space/waste/funds etc then I would suggest that you would have it be this:
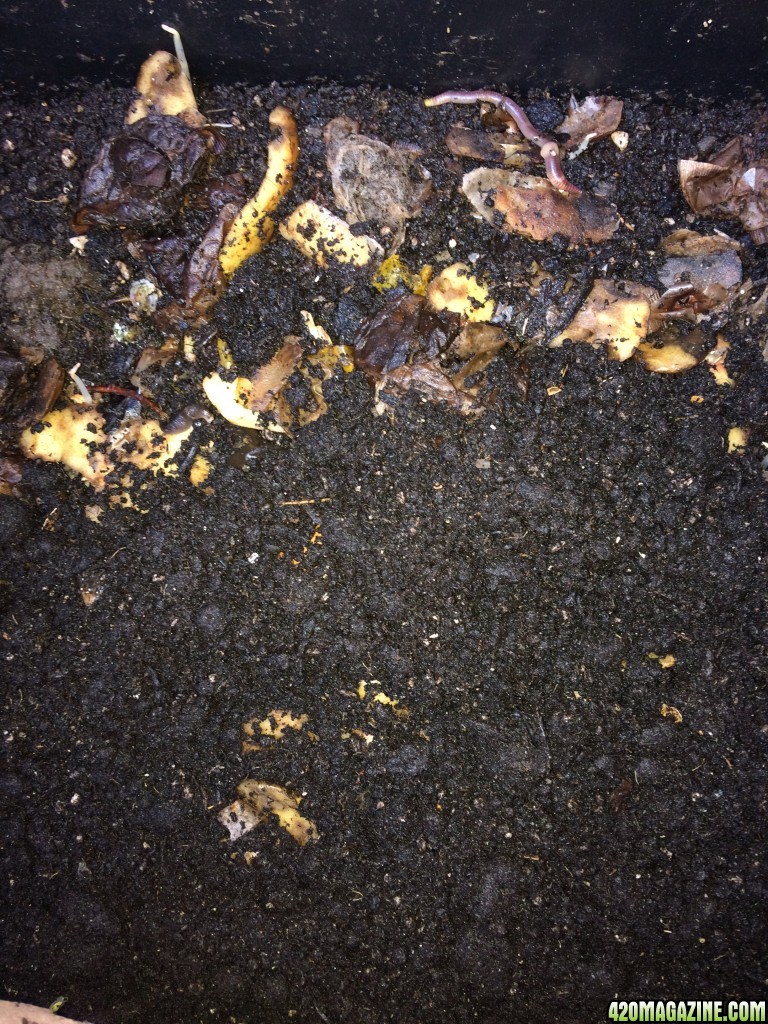
This truly is the black gold of gardening! Worm farms are a lot easier to maintain than most people consider them to be. Their Vermicompost or EWC (EarthWorm Castings) are not only valuable for your garden they are also PH neutral which means there will be no PH swings affecting your plants uptake of their nutrients, and the microherd loves them! I seriously cannot stress enough how wonderful EWC is for our beloved plants, we can use it in the base mix as a nutrient and also topdress with it as a nutrient booster. Don't try to grow in EWC alone though (I've tried), it will become a muddy mess when wet and compacted like rock when dry, but as an addition to the substrate or as a top dressing it will ensure your plants and microlife remain healthy.
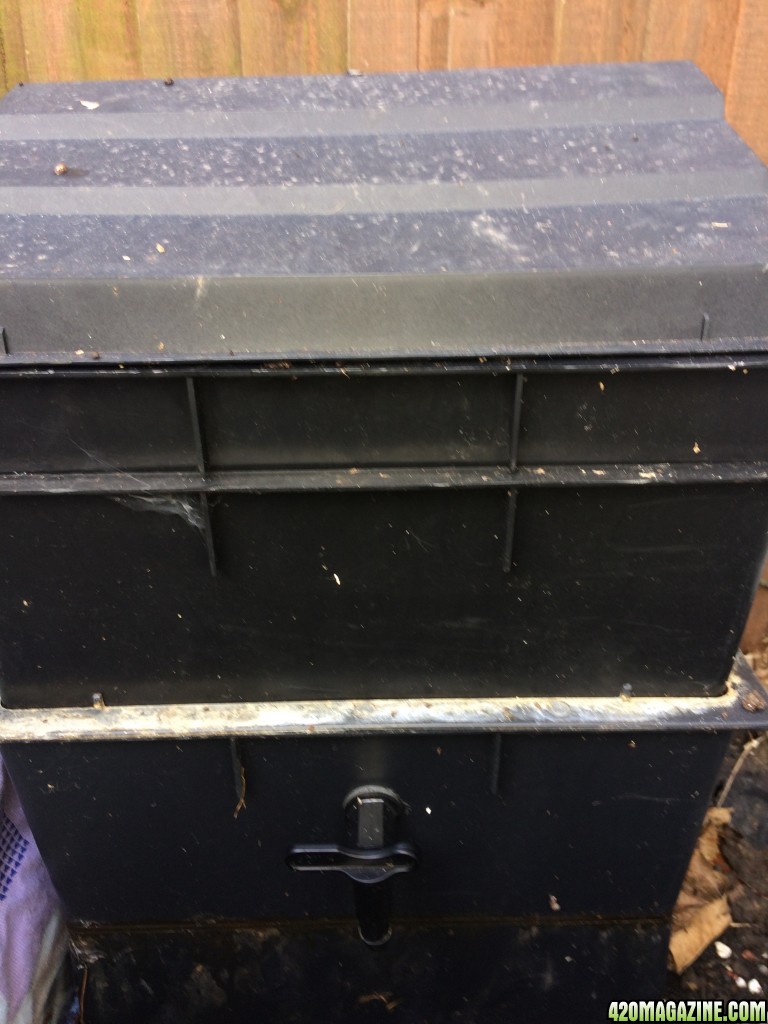
Here are my worms hard at work creating another tub load of Black Gold for me (this worm farm has 4 tiers but I usually have one or two in the garden ready for use) :
In an ideal world with the right base soil substrate we would be able to water our plants only with rainwater (again usually PH neutral but be careful if you live in an industrial zone or are collecting from a water butt attached to a roof guttering painted with lead paint as this may make it acidic or containing lead particles etc), unfortunately as I have found myself (as have most others) this is often not the case and some form of amendments may be required. These can be in the form of aerated (again we want aerobic not anaerobic) compost teas, top dressings or as I read in The Rev's - True Living Organics book by spiking (adding dry nutrients into holes outside the transplant area whilst transplanting). As I have a lot of dry nutrients this would be the best method for me. I will use this method once I give up on trying to make a pure water only soil, if ever I do give up that is
This concludes the first part of my journal, apologies for the long post but I feel as I have been away quite awhile and there is plenty that I would like to share. Next up: Lights and environment!
May your buds be forever bountiful