Basement Grow Room Building - Noob

Deftera420

Well-Known Member
Hello and welcome to my grow room building journal. I've started this journal to kill some time and maybe look for hints and advice about preparing my area.

I'm well informed about the basics of what is needed to successfully grow your own however; I know that means nothing to an experienced grower so to help my chances, I want to build a room that I can completely control and maintain the environment of.

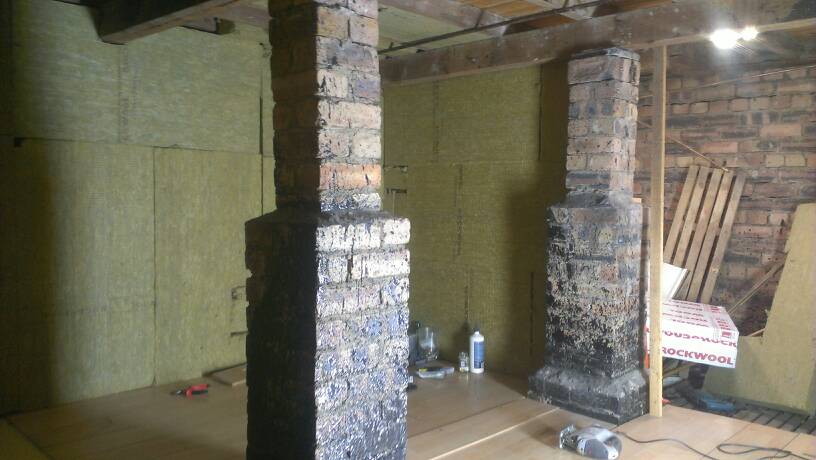
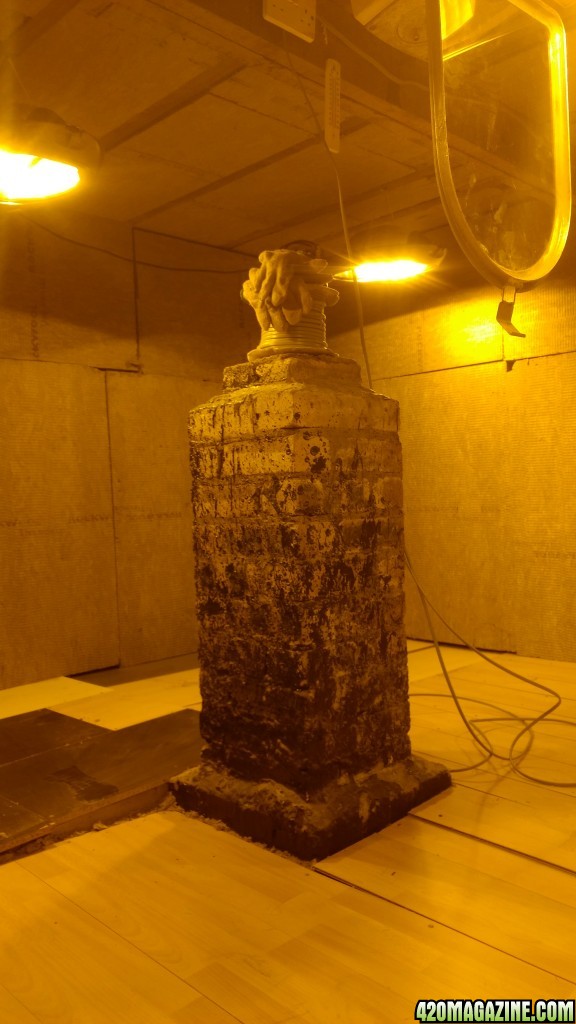
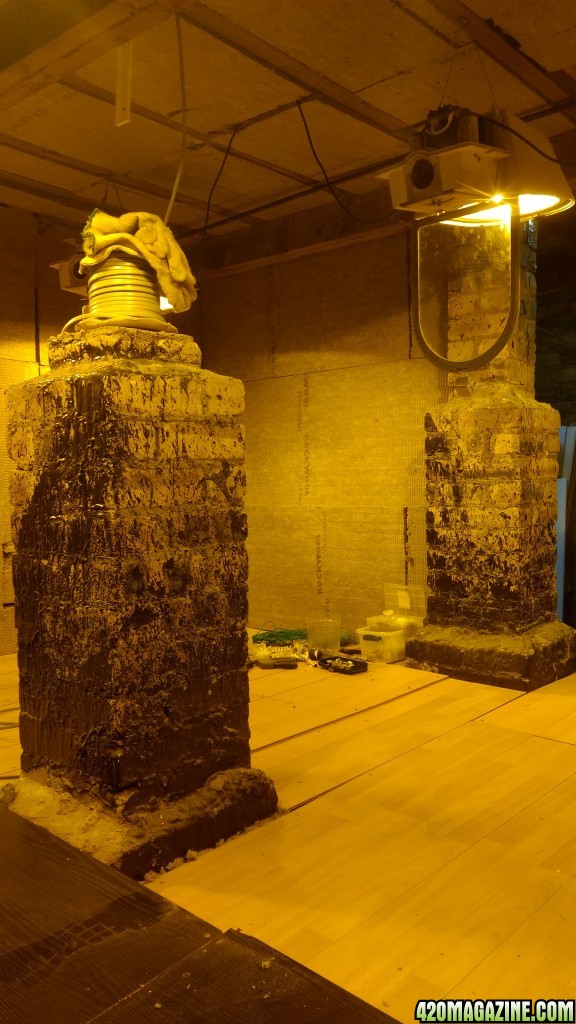
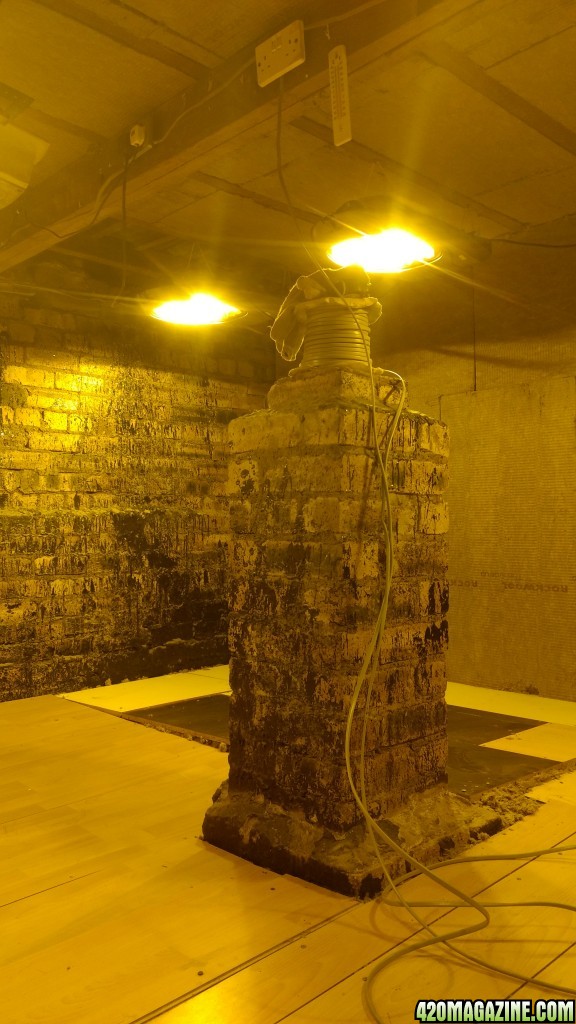
My room is in my basement which, unfortunately, is above ground so I don't get the privilege of natural insulation from surrounding earth. It measures approximately 3m x 3m height 2m.

What I've done so far...

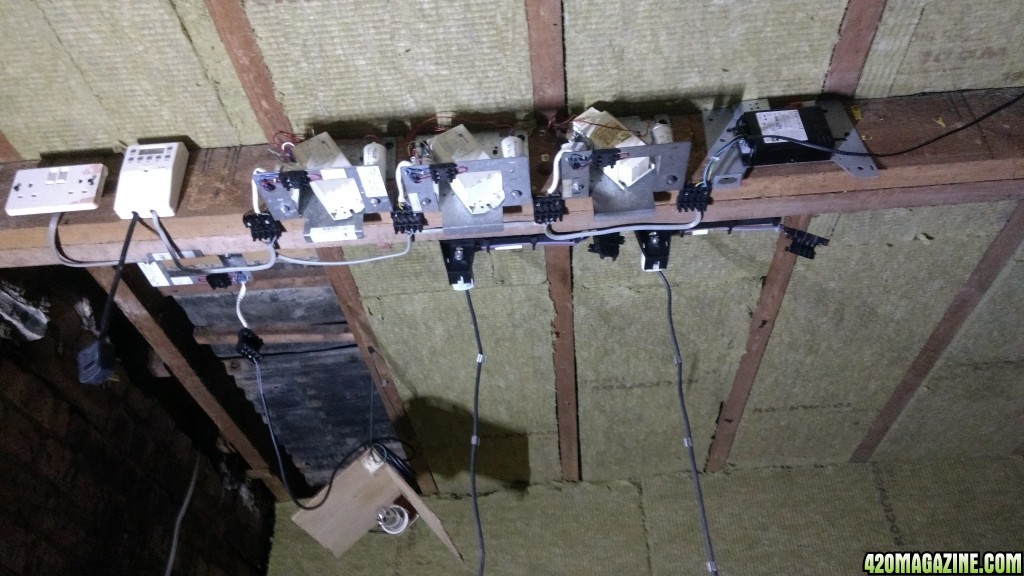
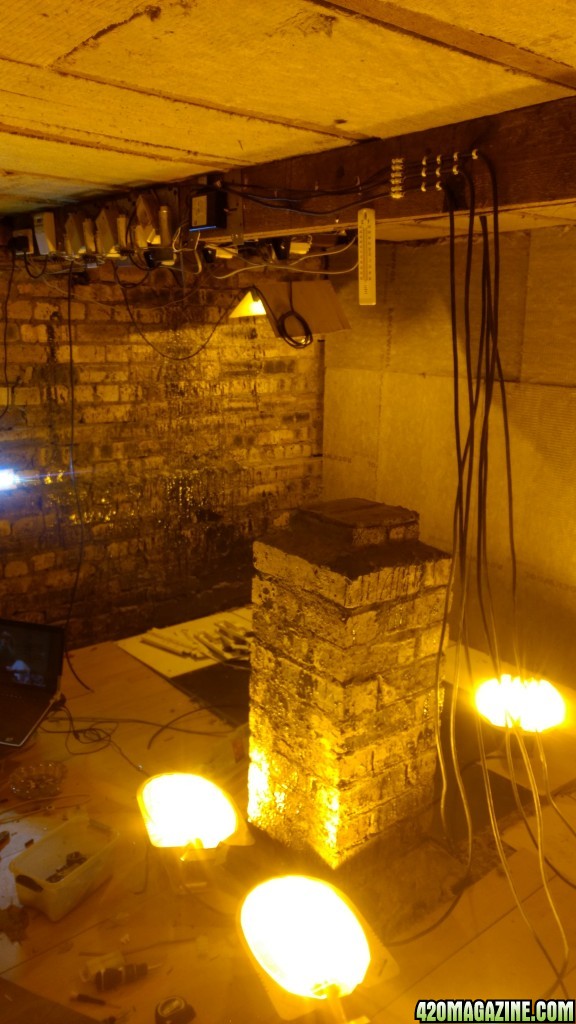
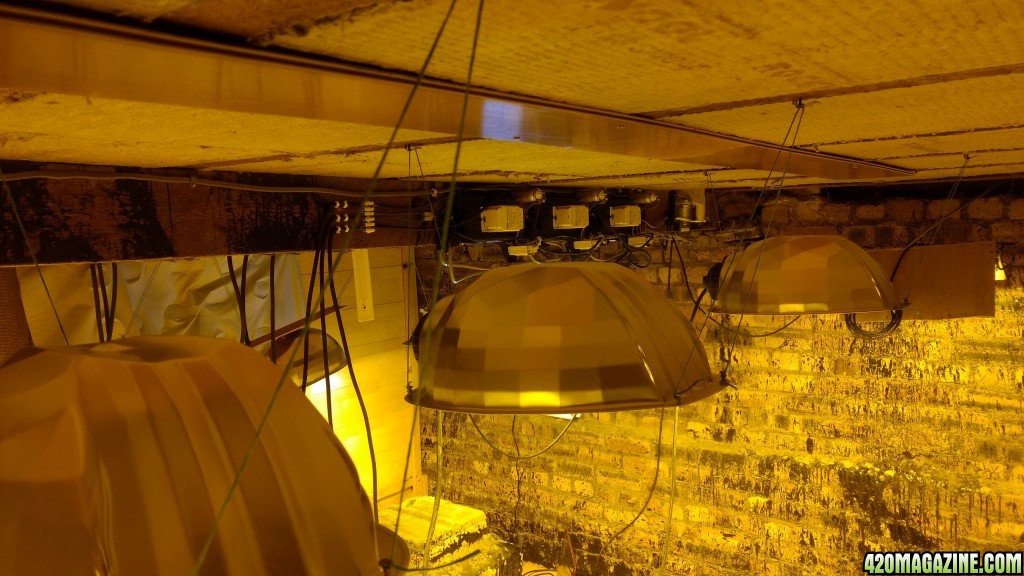
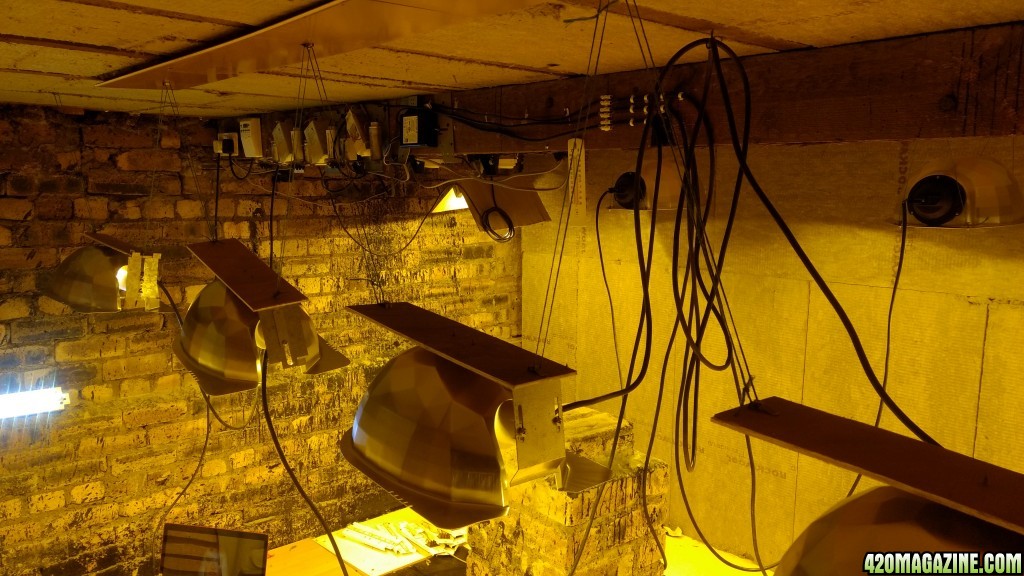
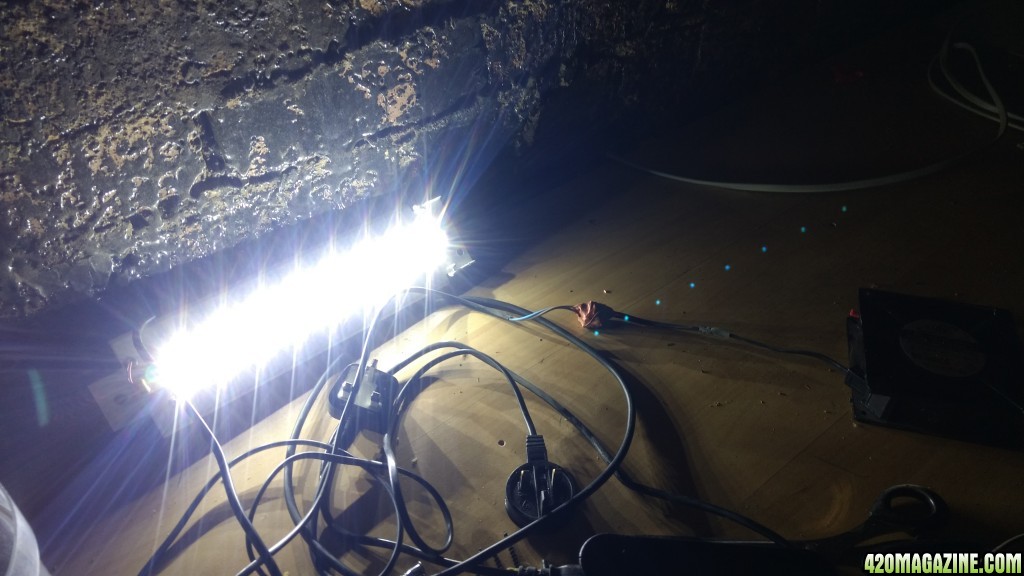
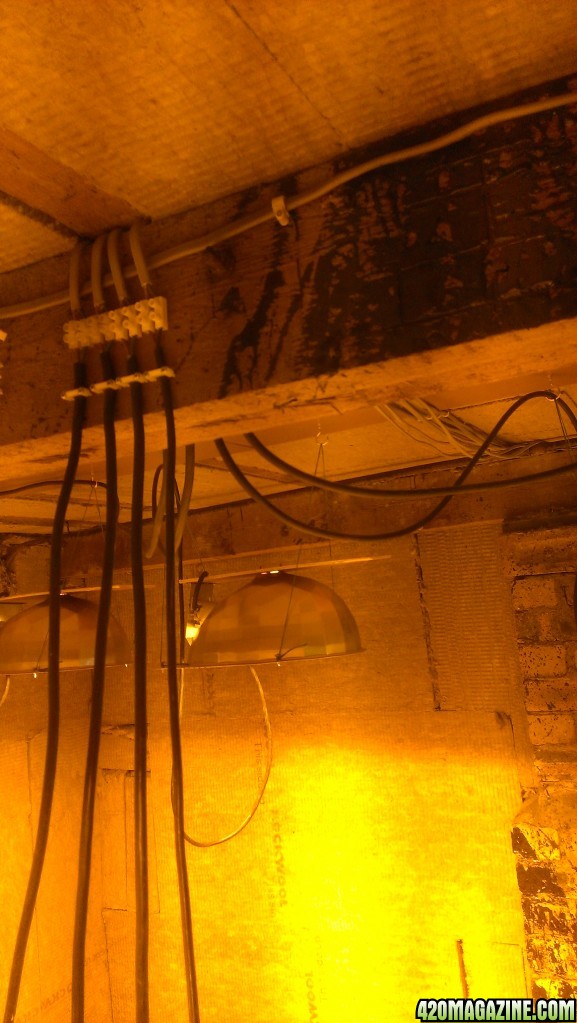
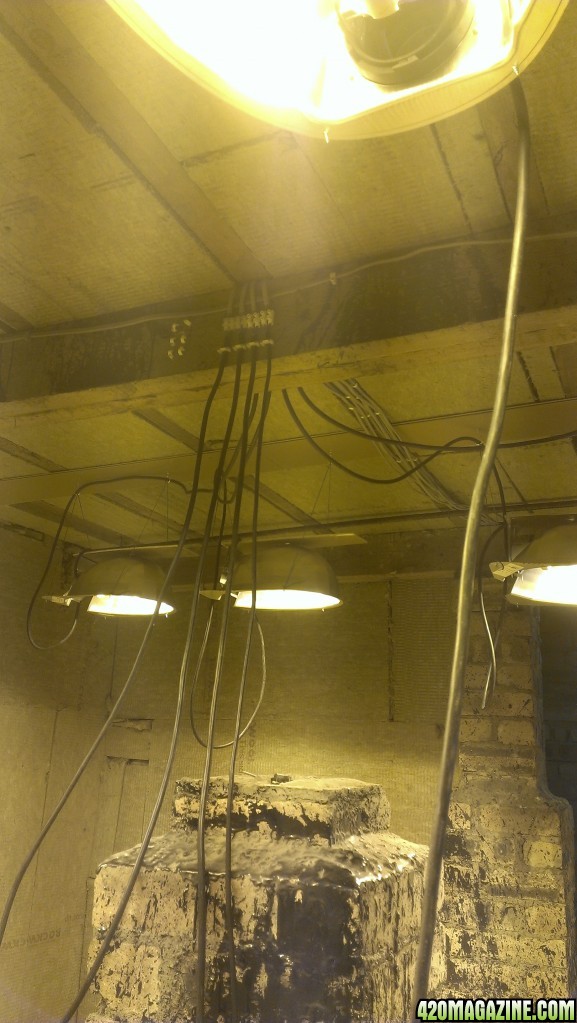
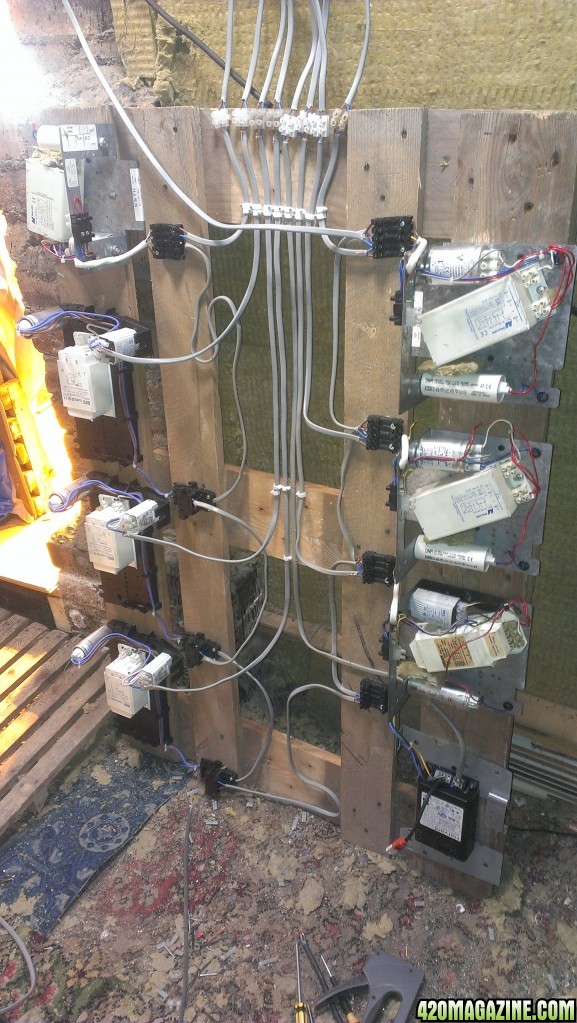
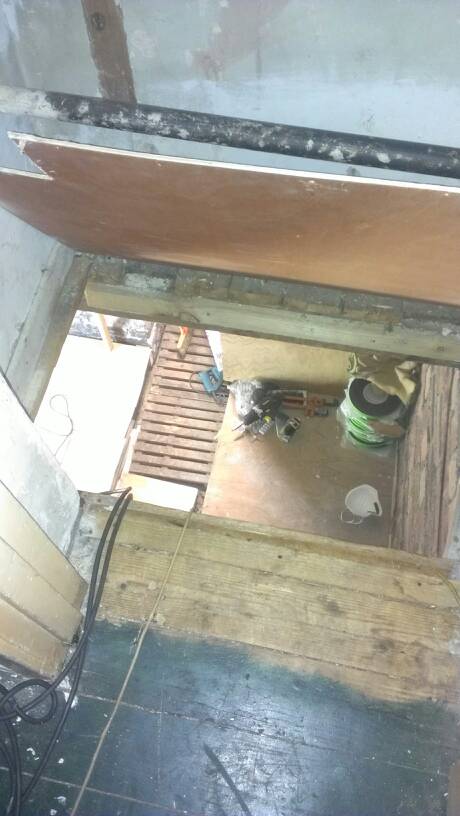
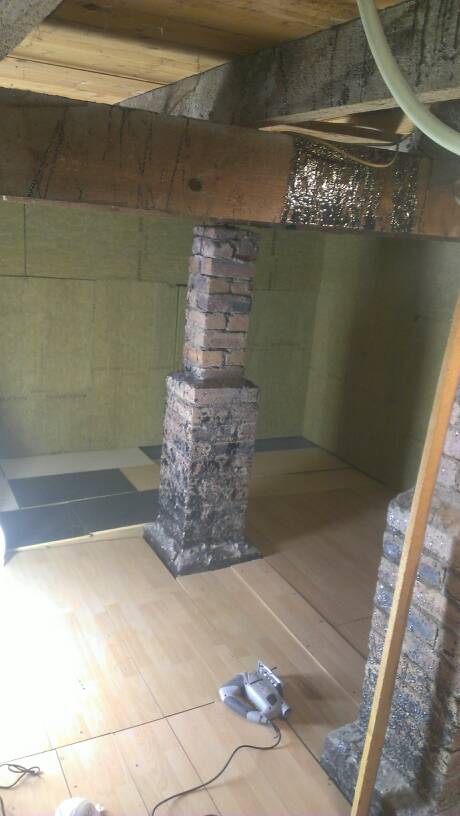
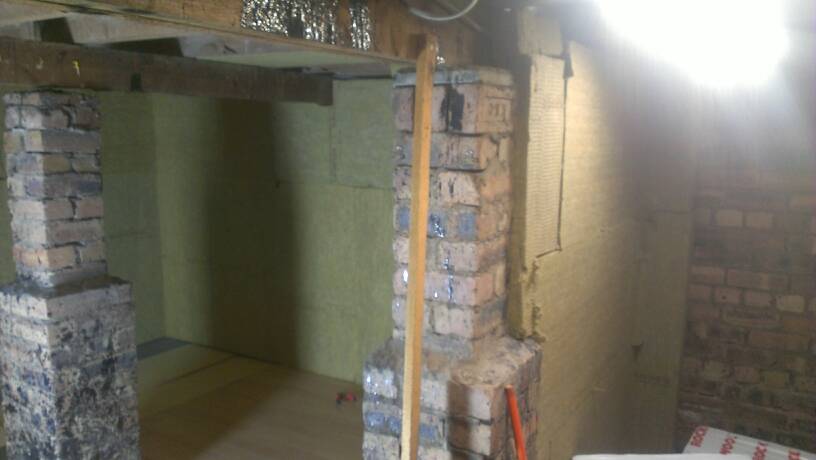
I have "decked" the floor of the basement while maintaining the integrity of the damp proof floor underneath. I've also insulated the walls and ceiling area using rock wool slabs (Always wear protective clothing and face mask and safety glasses when dealing with insulation) this stuff will have you itching for days! I've attached a few pics of my room so far.
420-magazine-mobile498278339.jpg
420-magazine-mobile999943377.jpg
420-magazine-mobile362812998.jpg
420-magazine-mobile71099248.jpg
420-magazine-mobile53174286.jpg


Next: Black out plastic everywhere, ducting, ventilation.

Sent from my HTC One S using 420 Magazine Mobile App
 
Also, I made a lamp for working under the floor out of LED strips I got from a friend who was helping refurbishing a residential building. Each strip has its own driver attached to the back of the unit, 8x 3watt LED lights per strip and I have 8 strips. I hate looking up LED lighting as it's still new tech for growing and as well,
420-magazine-mobile1770838376.jpg
much more costly initially. I would like to know if they can be of any use in my future grow room even just as extra light around the bottom area of plants.
420-magazine-mobile1493679902.jpg
420-magazine-mobile597288754.jpg


Sent from my HTC One S using 420 Magazine Mobile App
 
I wouldn't have put wood on the floor.


Sent from my iPhone using 420 Magazine Mobile App
Hi, It will be covered with plastic sheeting which I intend to stick sand strips to for obvious non slip reasons. The floor underneath is uneven and coated in a thick water proofing sealant, not sure what they call it but if you damage the seal then moisture from under the foundations can then rise into the house causing damp. The floor is essential in that respect. Why not wood?

Sent from my HTC One S using 420 Magazine Mobile App
 
Long time nothing doing...

Had to abandon my project for a little while due to lack of funding, things sorted, hope to get things in motion again.

Managed to bag a bargain on ebay for a bulk load of lights that needed a good amount of refurb/repair, also came with all the 150W HPS bulbs and a few spare.

After checking through the lot, I'm left with 6x working 150W HID lights with built in ballasts and the circuitry for another 2 lights if I build or buy reflectors for them.

Decided to hang the lights to see what kind of coverage the reflectors are capable of, I've temporarily nicked the outlet from the room above and placed it in my room still part of the house Ring Main Loop, then I wired up the lights in parallel 2 sets of 3. I'm not an electrician, I know enough on the subject to keep safe and also understand exactly which way my house is wired. Ideally this room needs it's own ring and fuse breaker, don't want any unnecessary disturbances on the ring.

I've been wondering if these lights will be enough to bring up the temps. Tonight is a fine example of a typical cold winters night where I live, -1C outside at night here, at the same time, with all the lights on and the room full of gaps and no heating on in the room above, it reaches 15C in there. I'm hoping, once the room is covered edge to edge with panda plastic and sealed sufficiently, that I might achieve at least close to the desired temperature. I'd prefer to manipulate cooling rather than having to add extra heat that isn't a light, will have to wait and see...

16987.jpg
22622.jpg
32185.jpg
41634.jpg
 
I've made a couple of simple reflectors from the left over light fixtures and ballasts, the ballasts are open and bare so will need to be mounted away somewhere. I was thinking of doing the same to the rest of the lights actually, maybe fixing all the ballasts along the center beam. The the lights with the built in ballasts are pretty heavy, if they were to fall, it would be enough weight to squash a clay pot full of soil like a water balloon and more so.

Way before I started building, while clearing out the basement, I found a contactor timer switch left behind from an old heating system that was once installed. I knew it would come in handy for something, works a treat. Lol I'm like Stig of the Dump me.

IMG_20180210_160600215.jpg
IMG_20180210_160630671.jpg
IMG_20180210_160523369.jpg
 
Just a wee post to show progress of wiring in my room, finished pics soon. I have mounted the timer and I'm using a plug and socket to power it at the moment, ideally this will be wired straight to the fuse box as a spur... I think.

In an effort to make moving lights around less hassle and probably a lot safer, I've mounted the ballasts to the main beam and wired the light cables having them all leave the same fixed spot on the beam but with sufficient lengths of cable to reach the intended area.

I'm really enjoying setting up my room, can't wait till it's finished, hope it's worth the blisters, cuts and scrapes :)
IMG_20180211_013604395.jpg
IMG_20180211_062428929.jpg
IMG_20180211_083315288.jpg
IMG_20180211_083333581.jpg
IMG_20180211_083358242.jpg
IMG_20180211_013637061.jpg
 
I'm aware this is probably the worst place to mount bare electrical components because of rising heat/humidity, I intended to isolate the ballasts outside the grow the area by building a frame around them and surrounding in plastic of wood maybe, might be an idea to add cooling to the ballasts area if it's going to be sealed off.
 
Sometimes I catch my self being stupid, occasionally, before I act on that stupidity.. Looking for chains in the "Hangers & Accessories" section of a well known hydroponic site based here in the UK...

Online Hydroponics store: £7.95 = 5m "Jack Chain"
jackchain_tool_shop.jpg

or
Tool shop anywhere: £5.75 = 10m "Jack Chain"
jackchain_tool_shop.jpg
 
I have been using the lights on the timer setting 18/6, possibly the longest period of time the light will be on for. I'm now very concerned about where I have mounted all those ballasts, I know ballasts can get hot but it's an awful lot of heat coming off to need to vent, Rockwool slabs are fire resistant but it's not enough to stop a worrying feeling, besides that there is no reason why I cannot mount them outside of the grow area since I have plenty of space and it is a lot cooler outside the room... I just cant be arsed to do it all over :S
 
In the process of adding additional lights to the corners of the room. Earlier today I had an idea, after some research I found out I could use an old android smart phone as a remote camera for my room, connected to a dedicated Wifi Network it seems to work great. Just need a program like Ispy on your computer to receive the video feed.

2018-02-15_01-55-50_863.jpg
 
Dude I would really vapor barrier and then drywall then paint with exterior paint over that rockwool. Its gonna absorb tons of moisture and get moldy plus its a huge fire hazard as is.
 
Hey Canna, you should swing by and check out my new grow space. Bit smaller but custom like yours. Maybe find some answers along the way...... you've got some great ideas!
My new grow space
 
Hey Canna, you should swing by and check out my new grow space. Bit smaller but custom like yours. Maybe find some answers along the way...... you've got some great ideas!
My new grow space

Hey Cavallero, thanks for checking out my setup. Any tips and ideas are are greatly appreciated, sort of building on the fly, changing things here and there as I go, pretty tight budget right now too lol. I will certainly swing by and check out your grow space, next lunch break I think lol. Cheers bud.
 
Dude I would really vapor barrier and then drywall then paint with exterior paint over that rockwool. Its gonna absorb tons of moisture and get moldy plus its a huge fire hazard as is.

Hey Kipp2, nice to see more folk having a look and contributing. I plan on covering the entire room with blackout/white plastic and sealing as well as I can with heat proof tape. Would this be a "vapor barrier" type idea? it was never the plan to have bare rockwool for walls anyway. Cheers.
 
Dude I would really vapor barrier and then drywall then paint with exterior paint over that rockwool. Its gonna absorb tons of moisture and get moldy plus its a huge fire hazard as is.

Hey Kipp2, nice to see more folk taking a look and contributing. I plan on covering the entire room with blackout/white plastic and sealing as well as I can with heat proof tape. Would this be a "vapor barrier" type idea? it was never the plan to have bare rockwool for walls anyway. Cheers.
 
Also, I thought rockwool was an excellent choice since rockwool slabs are actually used as fire prevention in some applications, it can tolerate temperatures of up to 1000°C and is designed to slow the spread of flames. Ive tried flaming even the flakiest of pieces of rockwool.... nothing happened except that after 2 minutes of flame it turned to ash like substance, without actually bursting into flames itself.
 
Probably at some point someone will wander in and declare that what you're building, with all that wiring and gear hanging everywhere, is dangerous and insane- but I'm kind of liking it. For years I used ancient magnetic ballasts which were gerry rigged together into various dangling mobiles, which would occasionally zap me if I brushed up against the wrong parts of them.
Anyway - looks like you sort of know what you're doing. Props for doing it old school. :thumb:

As you probably know, for not a very large sum of money you could replace all of that gear with a single self contained 1000w digital ballast that would be much easier, safer, and more efficient, only one bulb to change, etc etc. blah blah blah.
Some sort of hardboard/ cement board is great for covering walls, or at least sections thereof. It's fireproof and you can screw into it for mounting stuff on. Not the cheapest though. Too much bare plastic is kind of a pain.
 
Back
Top Bottom