Bluter's shower space

i've been kindly given some space to use. it's an area originally intended for a shower that never got built. over the years it was used as storage and filled with junk. i was given the go ahead if i agreed to clean out the junk and do a few other things. good deal.

here's the space with all the stuff cleared out and some of the initial framing and side board started for the grow area.

full


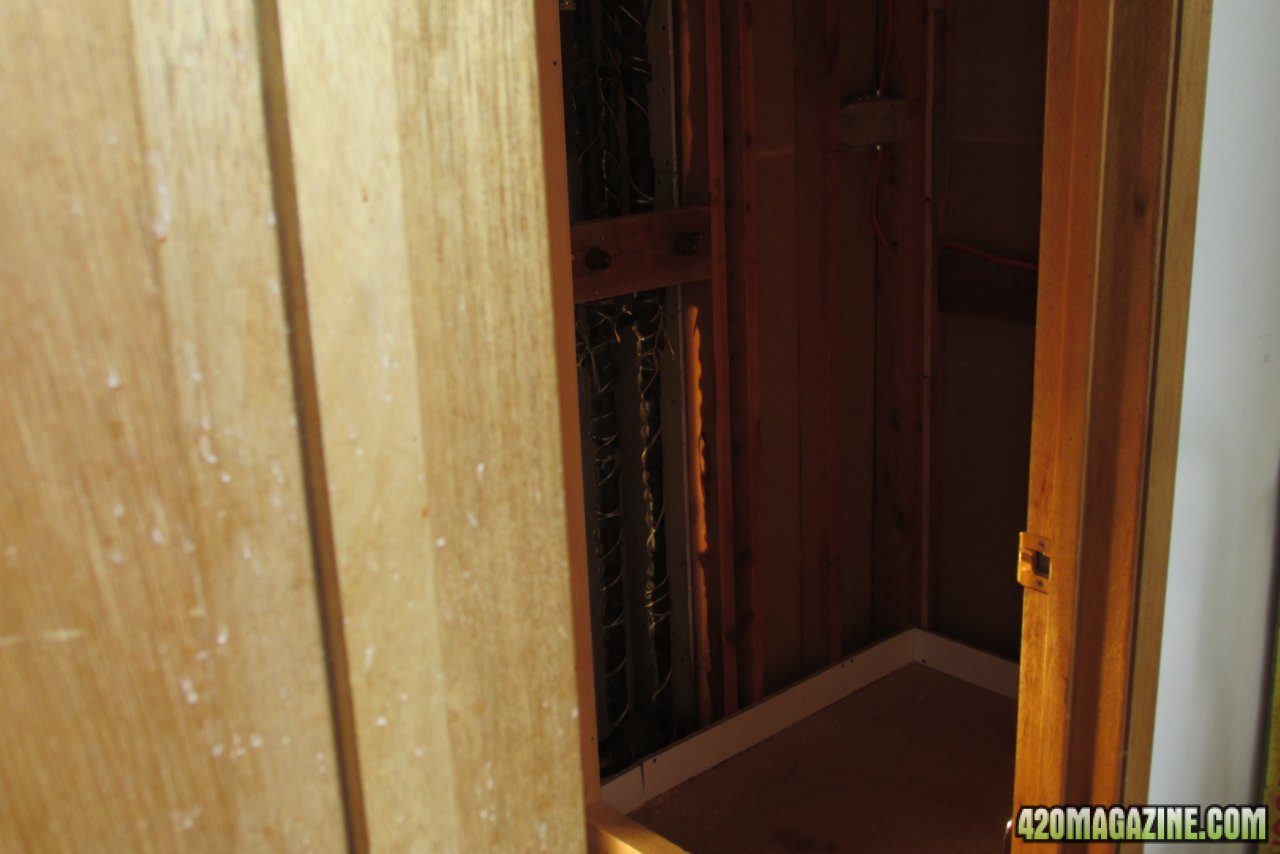
hard to get close enough for a decent pic. it's a bit small measuring out at 38" x 42" with a usable height of 7 ft and some change. there are a few challenges as with any space, there's a heating duct cutting a foot of my usable height out or i'd have 8 feet to work with. original plan was to rough in a closet and go with a tent, budget constraints and a desire to use the entire space won out in the end.

this the base of the area framed in with the side board.

full


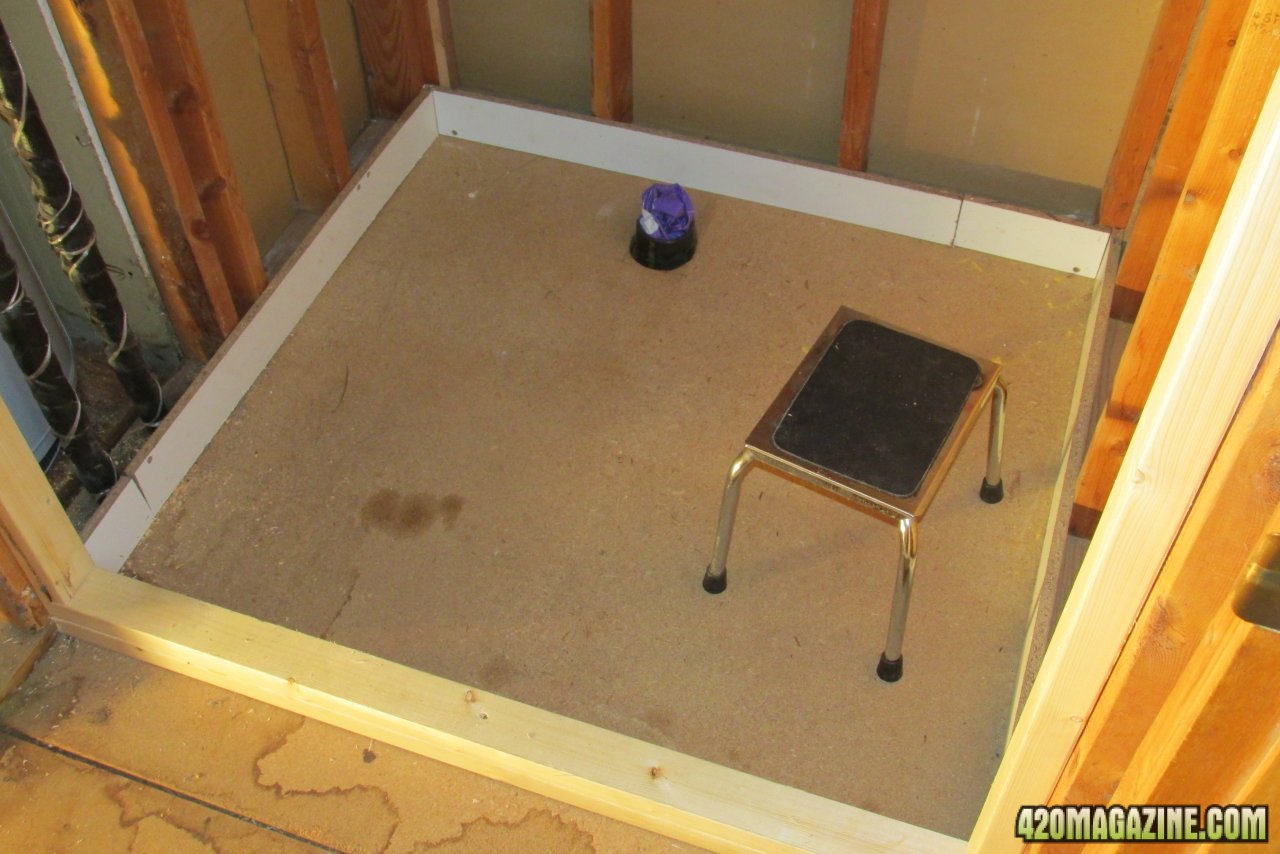
it has few advantages. that drain is functional and will come in handy. a bunch of the stuff i am using is reclaimed / re used / which helped direct some of the design decisions. will still be over $200 cdn to prep the space before any grow equipment costs are factored.

there was a light / junction box on the ceiling and other power available nearby. chucked a plug into the box temporary to trace circuits and see what and how much was on each of them.

full


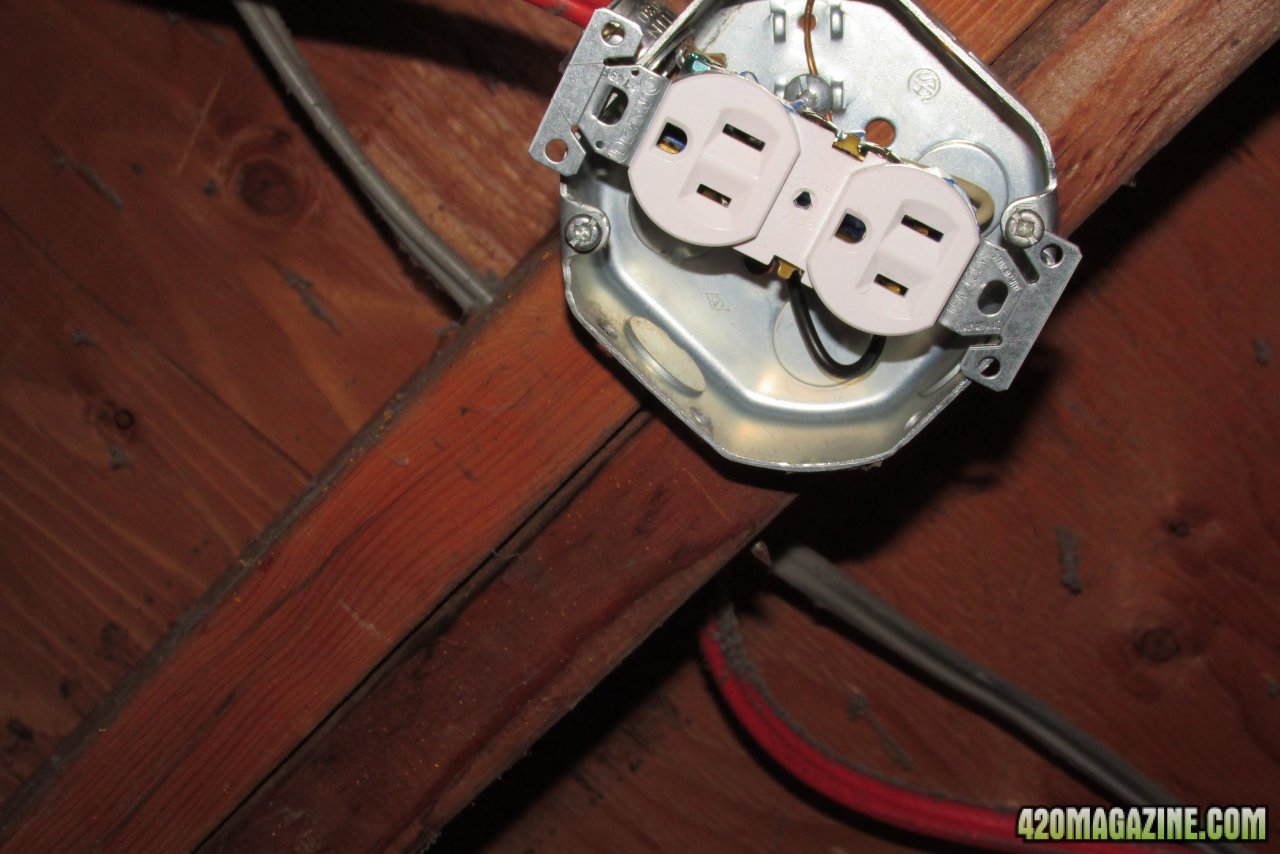
decided there was too much going on so wound up running a dedicated plug on it's own circuit to power the main stuff. tiny run but it took most of the day.


look at the new plug and some cheater framing added in.


full


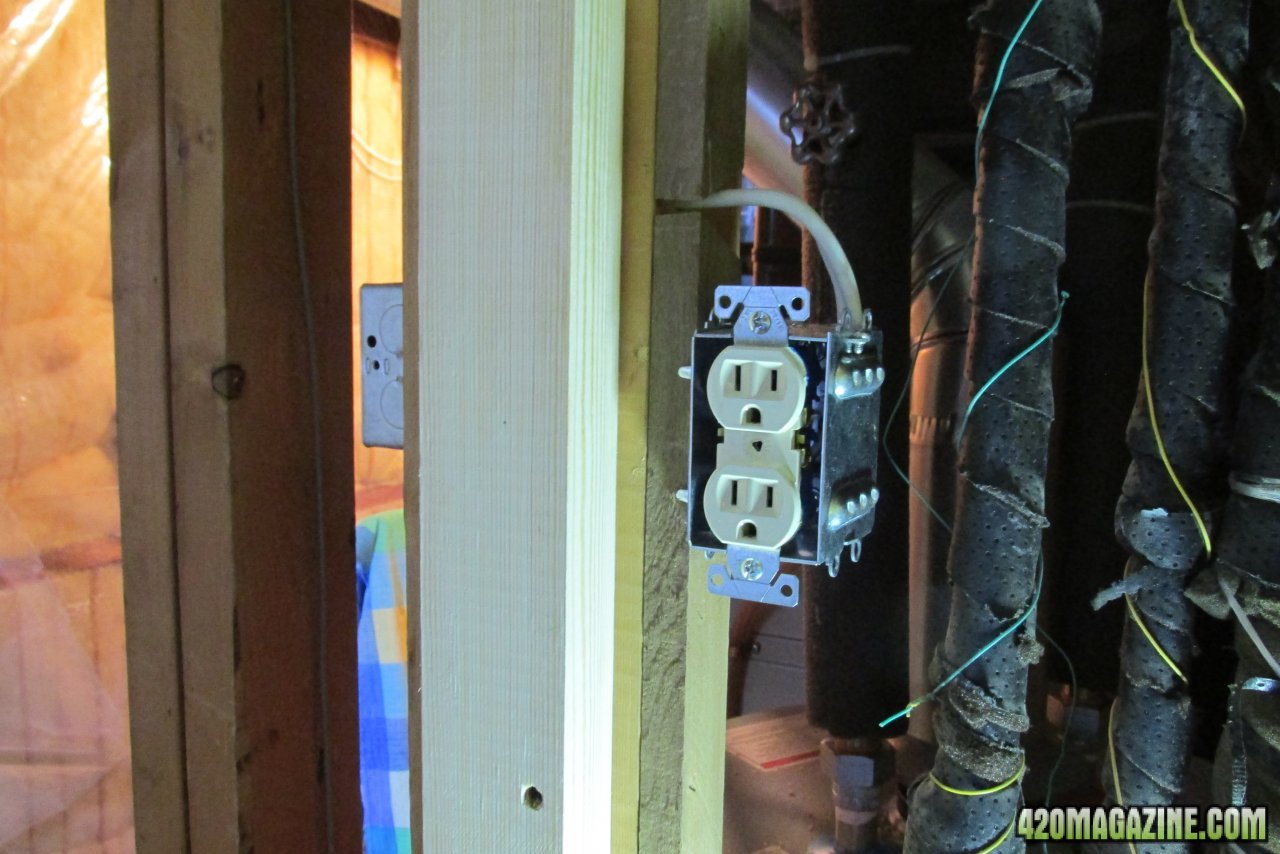
plan is to build a little distro board which will be powered off that plug and attached to the inside wall of the space.

the room has air exchange to the outside already in place up above in the ceiling.


full


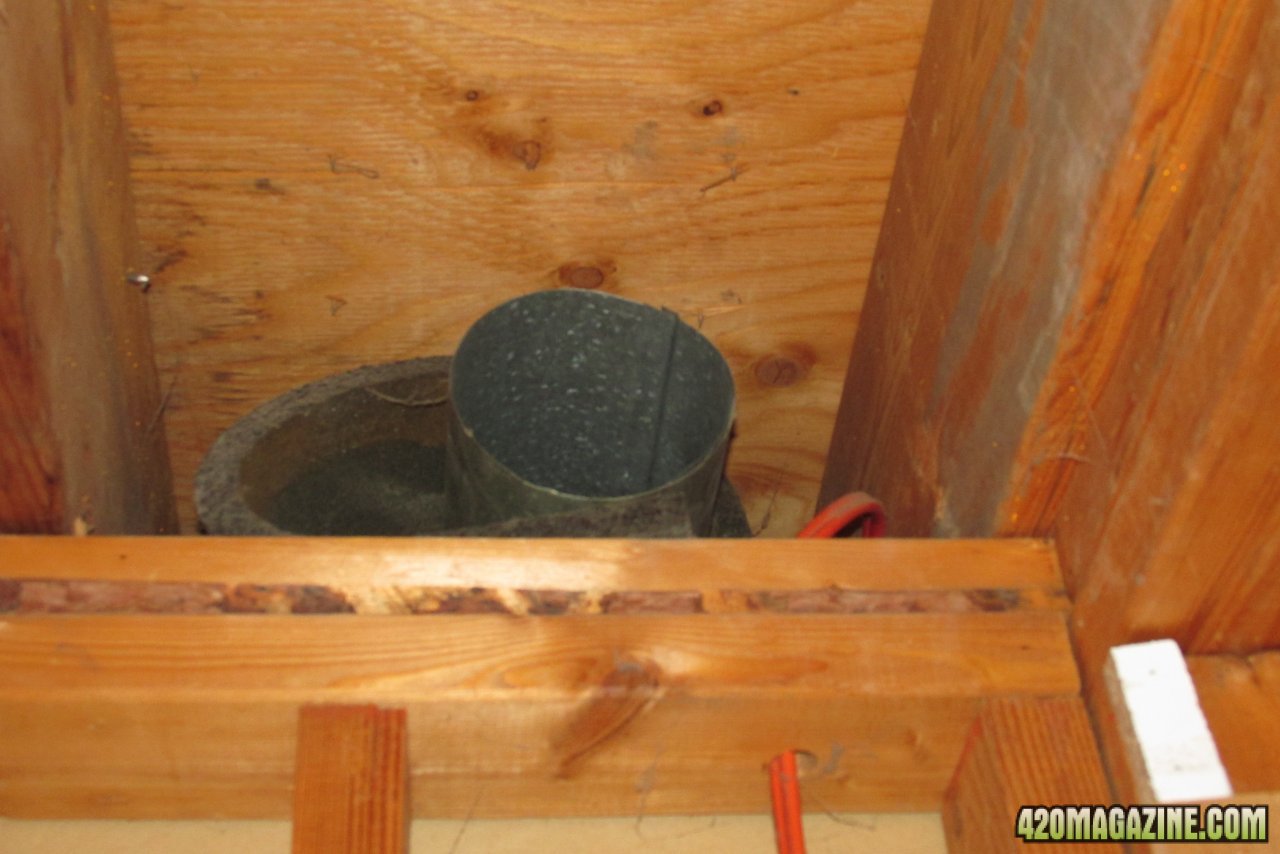
excellent. the ducting is 5 inch. day after getting the power sorted picked up a couple elbows and a reducer to 4 inch. my fan and filter are both the smaller size. with the out figured attention turned to incoming air. used a wall space to draw incoming air and added some acoustic insulation to the incoming air column.

here's a look at the top of the air column.

full


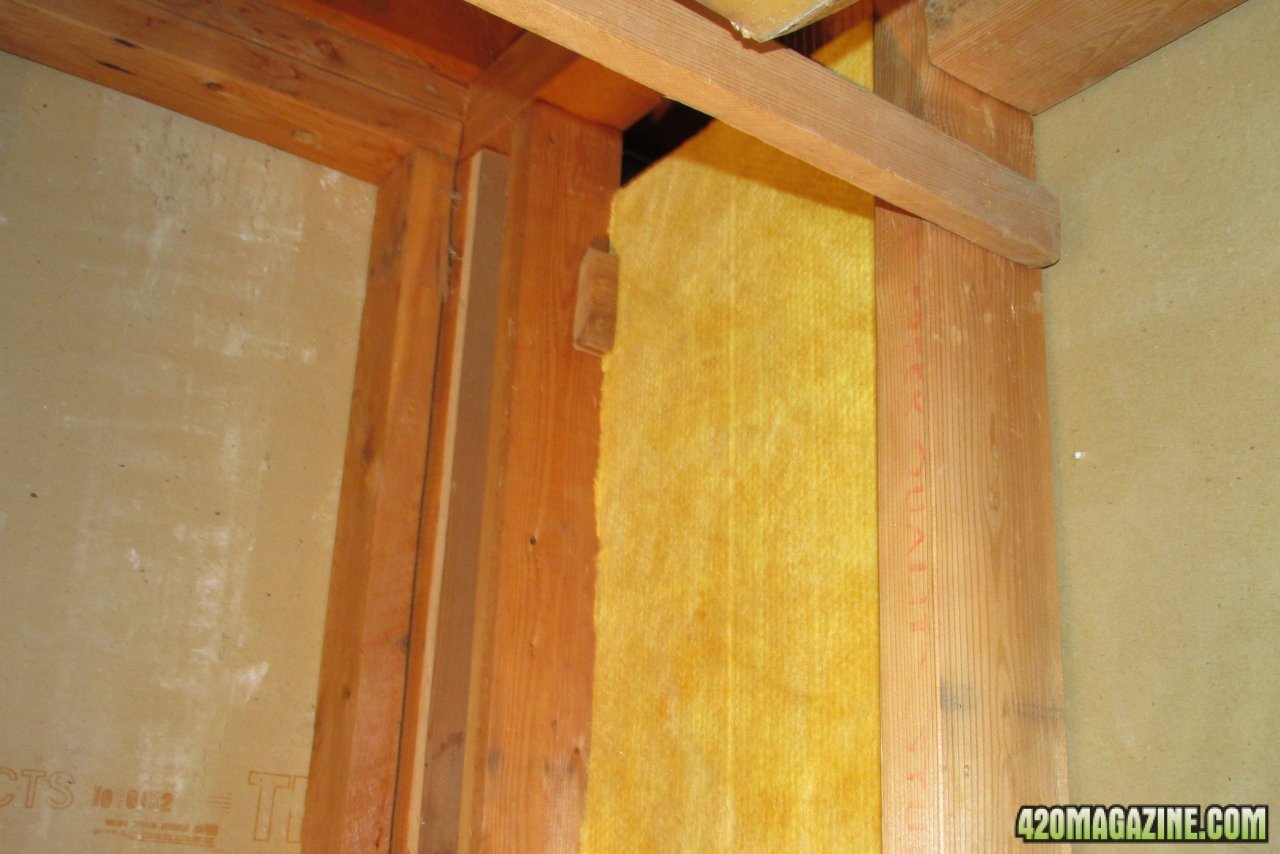
ignore the temp rough frame at the top of the pic. it was there to give an idea of how to box out the heating duct. the air will be vented in at the bottom of the room.

the insulation is for sound only, it breathes and has no real r factor. it is getting used as the first layer and will keep everything nice and quiet. it is extra product from another project, so free.

gonna get this posted. comments questions etc welcome..


- bluter
 
built a better frame to box out the heating duct properly and insulated the ceiling for sound.

full


full


full


roughed in the rest of the acoustic insulation.


full


you can see the incoming air vent near the bottom of the space.


full


the switch will ultimately control the fan.

started adding an inner layer of reflectrix to the top of the ceiling and finished boxing out the heating duct. the reflectrix will form an inner layer and acts as a vapor barrier.


full


pulled the light box for a more appropriate receptacle, then added a mounting board for the plug and fan on the ceiling. will probably need another mount to suspend the filter properly, but still a good start.


full


can see the exhaust duct up there. much nicer plug. left the board rough as no real light is gonna need to be reflected from up there. the fan and filter will live up there, above the light rig and not taking up any usable growing space. the plug is on a different circuit from the rest of the space. the load on that circuit was so small that it was safe to put the fan on it without worry.


about as far as i got. have to make a push to get it finished in the next couple days.


take care - bluter

:peace:
 
back at it. framed in a doorway .... using most of the front as a door as there's no real access lol :p


full


full


hmm these pics are huge. then made most of the inside silver.


full


much better


full


then made a door. was kinda pissed over that as i was hoping for an easy off the shelf solution and wound up with none of it, as it was a non-standard size, and the goal was greatest access possible. but knew that going in, so fabbed up this..


full


the door was likely biggest thing to deal with so far.

plenty of corona and potatoes so can't be in too bad a shape ;)


yay we have a door


full


used scrap pieces of acoustic insulation for the door


full


waste not .. :)

used the wasted plywood from the door to trim the outside of the space and added door stop / light blocker to the frame


full


door stop is all re habbed wood

tossed some hardware on the outside and called it a day


full


gonna silver the inside of the door tomorrow finish the light sealing. probably get fan and filter hung and then look at another catch or two on the door to keep it all solid. maybe get the distro panel built if the rest goes well. still have to add poly to the floor and seal the inside.

kinda looking for maybe another answer than just poly for the floor. or maybe poly and something on top of it.. dunno.

suggestions etc welcome

cheers - bluter

:peace:
 
door all silvered.


full


started sealing up tight for light and air. want it to draw from the air column primarily. using duct tape for hard wear surfaces and aluminum tape for seams. sealing the up floor edges with duct tape as well before poly.


full


first couple layers. made sure any cracks / seams / etc were covered up. an old loyalty card or bondo applicator helps.


distro board got built.


full


plug boxes are staggered to fit timers. wrapped the board before build.


installed in the space.


full


love the distro board. this is all on the dedicated circuit. left one plug open on the main for expansion. area is less than a 4 x 4 so keeping compact and neat is a must. need all the possible space for access and grow.


got the fan and filter sorted. fan mounts are home fabbed. not my idea but super impressed with how they turned out and how well they work. just managed to get both fan and filter squeezed on the mount board.


full


the whole thing is tucked up behind the heating duct i boxed out and will sit above the light rig.


starting to look much more proper. framing on the sides is for hanging the lights.

full


full


getting closer. :)


cheers - bluter

:peace:
 
gave it a final push to get done.

made a simple water trap for the the floor drain to protect the underfloor.

full


lined the floor with 5ml poly.


full


sealed floor and side wall up.


full


can see a liberal amount of silicon around the drain to seal the top part as well.

needed a better floor material than just poly to slide buckets around on etc. sourced used puck board. it's the board from the sides of hockey rinks. it's a plastic composite.


full


didn't have enough to do the floor in one shot so pieced it together.

all in.


full


it's a bit beat but works all good for my purposes. the corners and drain hole are routered in.

then finished sealing up all the edge seams.

full


installed hangers. the eye hooks are for the light rig and the tea cup hooks are to route wires and can be strung to tie branches or dry.


full


hooks in action. i strung stuff up to test fit and check gear.


full


got the light rig in. mix of 3500 and 3000K CLU048 1212's and knockoff 5050 smd's.


full


running at 10%. things are too bright to get a decent full up shot. my camera keeps stopping it down lol.


full


5050's doing their burple thing.


full


they're really just for ramp up / down and will run on a separate timer. can be useful for other stuff as well.


space is about set. looks like i might have some clearance issues with the power board. i have enough stuff to build a 6 cob rig but likely have enough light for the space.


full


just need some timer's and plants.

next gonna build a simple rdwc system.
 
Would be a shame if that was turned back into a shower

lol it never was a shower. at least not completed. now it's permanent grow installation. :)
 
In production or not it's still amazing space. Super excited to see more!


well these showed up the other day to light a fire under my ass and get going..


full


black indica. pretty beat up but free. my mom claimed them and have given them a better place to develop roots lol.
 
tweaked the system to fit the space better.


full


i don't like the central bucket reservoir as it wastes valuable growing area that you pay to light up. too bad i can't run it external.

promise a build coming soon. been running and no time. trying to save the babies right now. mom's upset and don't think they'll make it, and she can get near anything to grow. i gotta get nutes and solve for water fast. our water is over 600 ppm or worse at times. i traded for an ro system but it's been slow coming.

gonna build a bubble cloner. the babies are indoor greenhoused with other starter plants right now, but i'm thinking of pulling them and putting them in the grow space under 24 hr light. i don't much like cobs for cloning / seedlings tho.

any ideas welcome.

cheers - bluter :peace:

Don't worry about the central bucket. When they grow they will be higher so will be able to use the central space! Great system though!
 
Back
Top Bottom