Building soil from scratch and on the cheap!

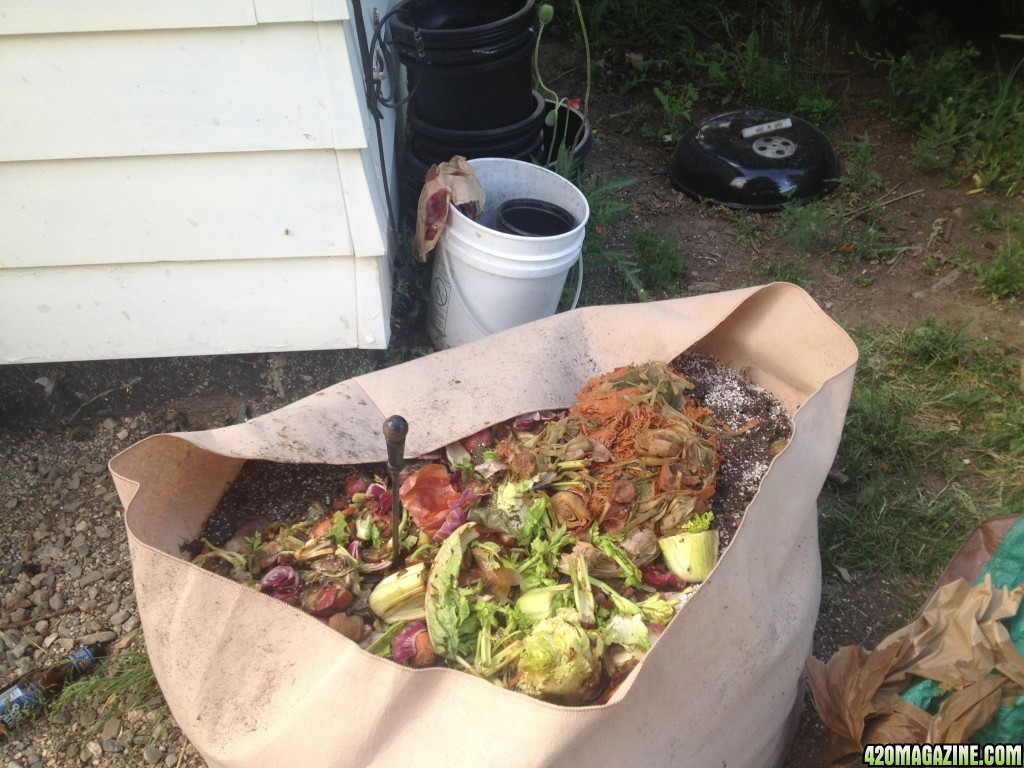
Before I head out to camp and before I forget, I added 10 gal of veggie scraps to the mix today.
This will probably mean that it will take longer till its ready. I don't plan on using this soil till sept at earliest probably. I think everything will be broke down by then.

image11373.jpg
image11374.jpg

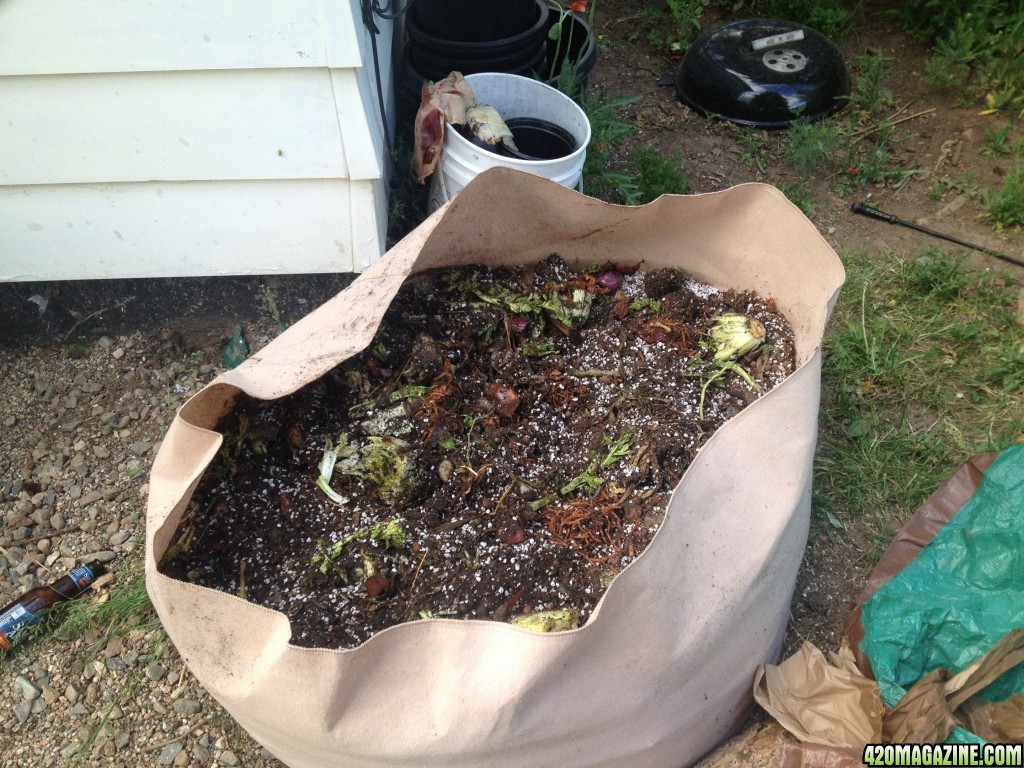
And turned the mix over well and covered with tarp again.
 
You're doing the right thing. I'd add some nitrogen hyperaccumulators to that or some blood meal. That will speed up nitrification process.
 
Tea looks good to me, IDK. Nice and foamy and normal looking/smelling.
image11432.jpg


And here is another batch I made with rainwater a while ago
image8820.jpg


I think I'm gonna start using my tap water. Unless it causes some kind of problem.
I think my tap water is better than most. F*ck it, lol.
 
If you already put it just forget about it.
 
it real interesting reading up on the soil theories here. great thread.

i had a couple thoughts as i read thru:

con, do you lab test your soil?

co, as far as chloramines i understood that are deactivated upon contact with pretty much any impurity in tbe water. for example a couple of handfulls of ewc will neutralize a 5gal water bucket. my village, Dankville, uses chloramines and i usually bubble my water for a while, in the sunshine, then i toss in some slivered aloe vera let it go a few more mins and use it.


also microbeman is an excellent reference point for tea brewing expertise. he uses microsopy to verify the efficacy of various practices. his recipes are thrifty and verified.

i think mulch or covercrops might be a good strategy to defeat issues with water quality. i have grown many exotic plants over the decades and water straight from my spigot seemed like the least of my worries. I found the plants ive cultivated Not to be very sensitive to our water. Still I try and use rainwater for the girls soil and r/o or humidifier water for foliar. if it gets dry around here i wont hesitate to bubble some village water and throw in a lil aloe or fish hydrolysate.

i think mulch must have the effect of making it more hospitable for biota in the upper level of soil and where the layers are in contact. i use a leaf mulch.

i havent used a cover crop/living mulch yet but i plan on experimenting with this technique in the near future.

nice idea CO.
 
I was also gonna mention looking up Microbeman today after finding and reading his thread on another site and learning that hes the one who runs the Microbe Organics site I have read and bookmarked.

I learned that foam on a tea is not a good indicator of how ready or good a tea is because just adding alfalfa or Molasses to water and aerating it will make foam without any microbes present. Those were not the exact words of course and I cant remember them exactly or remember exactly where in the thread it was mentioned to copy it here but there is alot of good info in his forums and on his site.

I wanted to mention this because of what I said about making that batch of tea with your water. Turns out it may not be that simple.

Its defnitely worth looking into but he doesnt agree with the Revs way of growing, or making teas anyway,so you may not be as interested if you are stuck on the way you are doing things now. He talks about how adding the extra things to the teas other than compost and molasses actually do the opposite of what we add them for. Again NOT his words and I dont remember exactly how he said it but it is all there to be found if you search the name. Im off to go read more now.

EDIT** I stated the website as Gardening with Microbes but it is actually Microbe Organics. Both are mentioned in the forum I was reading and both have great info.
 
I went back to re-read and search for something for my journal and noticed something I missed that goes along with what VonDankenhoek said above me and Id like to share it here.

What is compost tea?

In my opinion compost tea is poorly named. It is not something one drinks and it is not created by steeping in boiled water as is tea. Aerated compost tea making is an active process which extracts microorganisms (breaks them loose from binding spots) into aerated water and provides them with a food source (foodstock) which causes them to multiply.

A more apt name would be a microbe multiplier and the process is almost identical to a laboratory device known as a bioreactor. Actually we have attempted a name shift by calling our new 12 gallon device an airlift [vortex] bioreactor. (see youtube below) This, in my opinion, is a more descriptive term for what is going on but it looks like the term compost tea is going to stick.

If one is using quality compost or vermicompost (hereinafter referred to as [vermi]compost), an efficient ACT maker with sufficient aeration and the correct amount of foodstock, like black strap molasses, it is all about timing and to an extent temperature.

One must, of course use water which is free of chlorine/chloramines. This is easily done by putting a bit of molasses, ascorbic acid or a bit of [vermi]compost in ahead of time, which neutralizes these oxidizers.

The first microbes to begin dividing and growing in ACT are bacteria/archaea and fungi (if present in the [vermi]compost). The fungi grows out rapidly as fungal hyphae and is often attached to pieces of organic matter free floating.

The bacteria/archaea can divide every 20 minutes and appear as moving (motile) or stationary (non-motile) dots, rods and long strands. Usually these organisms are seen in large volume by the 18 hour to 24 hour period of the process, which for simplicity’s sake we’ll call a brew (since that is the term which has been colloquially applied).

In response to the population explosion of bacteria/archaea we have a congruent reactive increase in the protozoa population beginning around the 24 hour period. The usual type of protozoa which we see, given an efficient brewer is flagellates, however sometimes there will also be naked amoebae. The third type of protozoa, which we do not wish to see a ton of, are ciliates, as they can indicate the presence of anaerobic bacteria. The flagellate population can double every 2 hours so usually at the 36 hour period we have a sufficient diversity of microorganisms to call the brew finished and apply it to the soil and plants.

A good temperature range is usually 65 to 75 F but unless really cold the timing estimate is quite reliable.
 
Great share thanks.

So what happened with my tea using my tap water is this:

Since I did 2 rounds of ingredients the first day neutralizes the chlorine and or chlorine. Then I added the other ingredients and actually made a compost tea. Very interesting to learn that it works like that.

In regards to the "foamy look so I'm good",
There is always foam of some sort when you begin brewing a tea. Then as time goes on the tea develops a specific, thicker foam. I'm quite sure that this foamy look I'm describing is in fact a sign of the tea spawning microbes exponentially. I have only had 1 tea that "didn't work" and didn't look like this. I just canned it and did another. Not sure what was up with that.

The cool thing is this organics approach really does take care of the plant. I can do it pretty well without really knowing why stuff works and exactly what is doing what inside of my soil.
 
it real interesting reading up on the soil theories here. great thread.

i had a couple thoughts as i read thru:

con, do you lab test your soil?

co, as far as chloramines i understood that are deactivated upon contact with pretty much any impurity in tbe water. for example a couple of handfulls of ewc will neutralize a 5gal water bucket. my village, Dankville, uses chloramines and i usually bubble my water for a while, in the sunshine, then i toss in some slivered aloe vera let it go a few more mins and use it.


also microbeman is an excellent reference point for tea brewing expertise. he uses microsopy to verify the efficacy of various practices. his recipes are thrifty and verified.

i think mulch or covercrops might be a good strategy to defeat issues with water quality. i have grown many exotic plants over the decades and water straight from my spigot seemed like the least of my worries. I found the plants ive cultivated Not to be very sensitive to our water. Still I try and use rainwater for the girls soil and r/o or humidifier water for foliar. if it gets dry around here i wont hesitate to bubble some village water and throw in a lil aloe or fish hydrolysate.

i think mulch must have the effect of making it more hospitable for biota in the upper level of soil and where the layers are in contact. i use a leaf mulch.

i havent used a cover crop/living mulch yet but i plan on experimenting with this technique in the near future.

nice idea CO.


Hey there Von,
Thanks a bunch for coming thru and sharing. Glad to have ya.

Awesome share on the chloramines.
Microbe man sounds like something I should be reading.
I think mulch is super important. Not only microbes but roots grow up there, ... If u mulch and make the top layer root friendly.
Cover crops seems like the way to go for outdoors, would be cool to see ya try it indoors in containers for sure. I read about cover crops a lot when looking into no till gardening.

Stick around, ill eventually grow a cannabis plant in this soil and see how it works.
 
You may want to look at vermicomposting indoors. It is clean and you can do it under the sink provided the temperatures are relatively even all the time. Not too cold or hot. Put all kitchen scraps in, wet newspapers, etc. You will have tea because most vermicomosters have a spigot and also the castings. I used to do it. I think this winter I will start back up. You will need red worms as these are the very best at decomposition in the pile of OM you feed them.

BTW, I read your soil recipe. That is what you consider cheap soil? Wow, I think that soil is beautiful. I like the dash of Azomite!


Hey there GF, welcome to the thread.
I've been rockin my worm farm 360 for like a year and a half now lovin it. This summer is the first time I brought it out of doors.
Cheap soil... Well it's good soil and I didn't have to run out and purchase anything. Cheap for me.
;)
 
I once administered a dosage of the juice that comes from the vermicomposting spigot and my plants jubilated. I understand though that it doesn't always have that effect.

I think they call that leachate tea and its supposed to be some potent stuff. I always pour it back in the worm bin. Actually put some of that into this cooking soil mix too a week ago, forgot to add that.
 
con, do you lab test your soil?

Was it addressed to me? No, I don't cause I can't afford it, but my soil is good, based on garden made compost accumulated over the years on naturally occuring slightly clayish loam and sandstone. Everything around is granite, sandstone or other glacial rock, so yeah our soil is very good. By itself it's a little bit too compact, but cut with compost or beach sand it's as good as it gets with only volcanic soil ahead. I'll mineralize it though with crushed lava rock and over time it should get even better.
 
Hey there GF, welcome to the thread.
I've been rockin my worm farm 360 for like a year and a half now lovin it. This summer is the first time I brought it out of doors.
Cheap soil... Well it's good soil and I didn't have to run out and purchase anything. Cheap for me.
;)

Thank you for that nice welcome! The main thing is to make sure the temperature is not too hot outside. Worm bins that are above ground, which is what they essentially are, have no way to monitor their body temps and will definitely perish if it gets hot. By hot I mean anything above 80. And never put it in the sun. I'm just speaking in a general way to the thread, not directly to anybody in particular.

The tea you get can always be diluted with rain water or some purified water. Even water allowed to sit over night to allow as much of the chloramine/chlorine dissipate. Not to mention the fluoride. I wish everybody had the luxury of rainwater.

That said, you had some interesting ingredients laying around! I was on a different pot website like this (not as good by far) and one of the members posted a whole sheet of these soil mixes. I copy and pasted it. Would you like me to post it here? All different kinds of mixes.
 
I am not a member of the site I got this from, but it was in a grow journal. I do not remember what site it was, either! Doh. I thought some of it looked interesting.


LC’s Soiless Mix #1:
5 parts Canadian Spaghnam Peat or Coir or Pro-Moss
3 parts perlite
2 parts wormcastings or mushroom compost or home made compost
Powdered (NOT PELLETIZED) dolomite lime @ 2 tablespoons per gallon or 1 cup per cubic foot of the soiless mix.
...Wal-Mart now sells worm castings.

Or, if you use Pro Mix or Sunshine Mix...
LC's Soiless Mix #2:
6 parts Pro Mix BX or HP / Sunshine Mix (any flavor from #1 up)
2 parts perlite
2 parts earthworm castings
Powdered (NOT PELLETIZED) dolomite lime @ 2 tablespoons per gallon or 1 cup per cubic foot of the soiless mix.
If you use a 3 qt. saucepan as “parts” in the amounts given above, it equals about 1 cu. ft. of soiless mix and you can just dump in a cup of powdered dolomite lime.
But, a "part" can be anything from a tablespoon to a five gallon bucket. Just use the same item for all of the "parts".

Now for the plants organic food source

Choose one of these organic plant food recipes to add to LC's Soiless Mix.

RECIPE #1
If you want to use organic nutes like blood, bone and kelp...
Dry Ferts:
1 tablespoon blood meal per gallon or 1/2 cup per cubic foot of soil mix
2 tablespoons bone meal per gallon or 1 cup per cubic foot of soil mix
1-tablespoon kelp meal per gallon or 1/2 cup per cubic foot of soil mix or Maxicrop 1-0-4 powdered kelp extract as directed
1 tablespoon per gallon or 1/2 cup per cubic foot of Jersey Greensand to supplement the K (potasium) in the Kelp Meal and seaweed extract.
Mix all the dry ferts into the soiless mix well and wet it, but don't soak it with Liquid Karma and water @ 1 tbs./gal. Stir and mix it a few times a week for a week or two so the bacteria can get oxygen and break down the bone meal and make it available. And don't let the mix dry out, keep it moist and add water as needed. It'll also have time to get the humic acids in the Liquid Karma going and the dolomite lime will be better able to adjust the pH of a peat based mixture too.
With this recipe, all you need to do is add plain water until harvest.
When I'm working with seeds, I punch a hole in the bottom of 16 ounce cups and fill them with plain LC's Mix. Lightly wet the mix in the cups and germ one seed in each cup. At the same time I mix enough LC's mix along with the blood/bone/kelp to fill all the 3 gallon flower pots I'm going to use for the grow. After about two weeks, the seedlings and the blood/bone/kelp mix are ready. I transplant the seedlings into the 3 gallon pots and just add water until harvest.
When you go to flower and pull up the males, save the mix in the pots. It is ready to be used again immediately. Just remove the root ball and transplant another seedling into it.

RECIPE #2
If you want to use guano in your soil mix...
Bongaloid's Guano Mix.
Use all these items combined with one gallon of soil mix.
1/3C hi N Guano (Mexican Bat Guano)
1/2C hi P Guano (Jamaican or Indonesian Bat Guano)
1TBS Jersey Greensand
1TBS Kelp Meal


RECIPE #3 (My favorite)
If you want to use guano tea and kelp...

Guano Tea and Kelp:

Seedlings less than 1 month old nute tea mix-
Mix 1 cup earthworm castings into 5 gallons of water to make the tea.
Add 5 tbs. Black Strap Molasses.
Use it to water your seedlings with every 3rd watering.

Veg mix-
1/3 cup Peruvian Seabird Guano (PSG)
1/3 cup High N Bat Guano (Mexican)
1/3 cup Earth Worm Castings (EWC)
5 tsp. Maxicrop 1-0-4 powdered kelp extract
(That makes the "dry mix". You can make all you want and save it to use later.)
Mix with water @ 1 cup of dry mix into 5 gallons of water to make the tea.
To that 5 gallons of tea add:
5 tbs. Liquid Karma
5 tbs. Black Strap Molasses
Use it to water with every 3rd watering.

Flowering nute tea mix:
2/3 cup Peruvian Seabird Guano
2/3 cup Earth Worm Castings
2/3 cup High P Guano (Indonesian or Jamaican)
5 tsp. Maxicrop 1-0-4 powdered kelp extract
(That makes the "dry mix". You can make all you want and save it to use later.)
Mix with water @ 2 cups of dry mix into 5 gallons of water to make the tea.
To that 5 gallons of tea add:
5 tbs. Liquid Karma
5 tbs. Black Strap Molasses
Use it to water with EVERY watering.

You can use queen size knee high nylon stockings for tea bags. 3 pair for a dollar at the dollar store. Tell 'em you use them for paint strainers. Put the recommended tea in the stocking, tie a loop knot in it and hang it in your tea bucket. The tea should look like a mud puddle. Agitate the bag in the water vigorously. An aquarium pump and air stone will dissolve oxygen into the solution and keep the good bacteria (microherd) alive and thriving. Let it bubble a day or two before you use it. If you find you are making too much tea and having to throw it out, use 2 1/2 gallons of water and cut the nute amount by half.


RECIPE #4
Three Little Birds Method
40 gallons used soil
4 cups alfalfa meal
4 cups bone meal
4 cups kelp meal
4 cups powdered dolomite lime
30 pound bag of earthworm castings . . .
That’s the basic recipe . . .
However we also like to use
4 cups of Greensand
4 cups of Rock Phosphate
4 cups of diatomaceous earth


RECIPE #5
Fish and Seaweed (This is sooo easy)

For veg growth…
1 capful 5-1-1 Fish Emulsion
1 capful Neptune's Harvest 0-0-1 Seaweed or Maxicrop liquid
1 gallon H2O

For early flowering…
1 tbs. Neptune’s Harvest 2-3-1 Fish/Seaweed
1 gallon H2O

For mid to late flowering…
1 tbs. Neptune’s Harvest 2-4-1 Fish
1 gallon H2O
 
Back
Top Bottom