Urdedpal
New Member
Hello fello members. I am Urdedpal and I would like to have some of your time. I would like to show you one of the easiest methods of cloning that I have come across. DIY (Do it yourself) means I made this cloner and I want to show people how to make one themselves. DWC (Deep water culture) is a simple form/method of hydroponics. Now don't get scared because I said hydroponics, you will be amazed at how easy it is and you can still use the clones in dirt/soil for vegging and flowering.
This tutorial will show people how to make a DWC cloner, will tell you how to collect clones, and how to use the cloner. So smoke a bowl or two and read on if your interested.
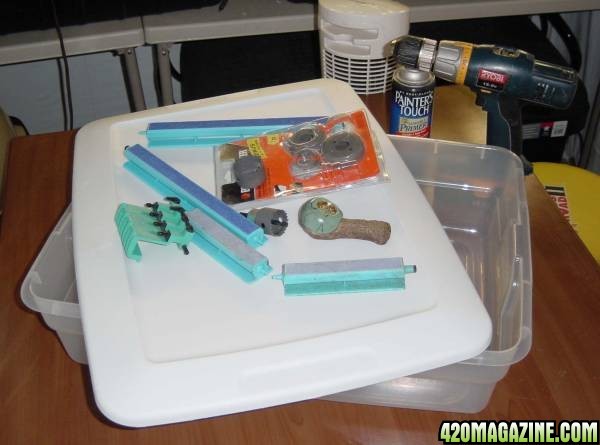
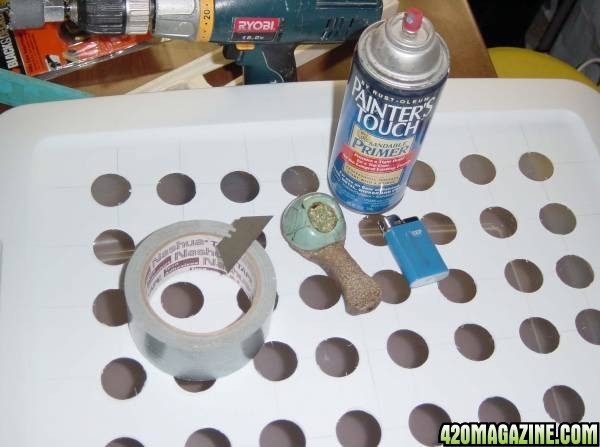
Here's a list of things you will need. Alot of this stuff you might already have around the house. If not you can purchase these items easier at a store like walmart.
1. container with lid (I am using a 28qt/27liter storage container you can go larger or smaller)
2. cheap holesaw kit (I have a black and decker version from walmart)
3. drill
4. razor blade
5. ductape
6. airpump (size depends on how many airstones connected)
7. airpump tubing
8. airstones or bubblewand (How many depends on how big your container is)
9. multi airtubing connector or T fittings if you are using more than one airstone
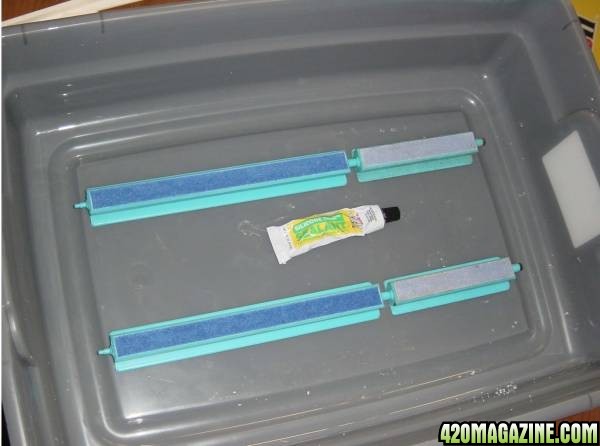
10. Silicone sealent (same type used for aquarium repair)
11. Styrofoam between a 1/4 to a 1/2 inch thickness (Can be found easily in the insulation department at a hardware store like Lowes or home depot or you can use a cheap styrofoam cooler)
12. spraypaint or primer
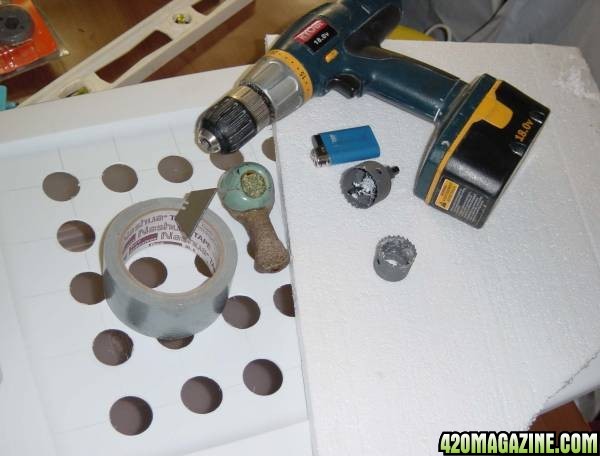
Step 1. Take a bowl and fill it with weed. Now smoke half the bowl of weed. (NOTE:You lightweights might wanna skip that part until after the project is completed)Using a hole saw 1 and 1/4-32mm bit and a drill cut holes into your lid. The amount of holes depend on how many clippings you need to grow into clones. You might want to use a ruler and pencil to evenly space out your holes. I went with forty holes. Holes can be close or far apart its more a matter of choice. Also cut smaller holes for the air tubing, you can do this by using just the drill bit portion of the hole saw kit and reaming it out with a razorblade until its big enough for the tubing to go through.
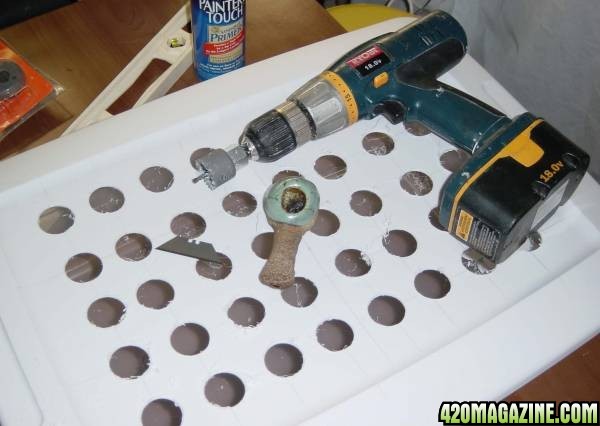
Step 2. Using a razorblade ream out the holes on both sides of the lid to remove plastic fuzz then wipe or rinse fuzz off of lid. Make sure you clean it up good and make sure its dry cause now we are gonna paint it. When you paint it please do this outside. Instead of spraypaint I use primer cause it sticks better to plastic. Spray only the exterior of the lid and the container. You will have to put on at least 3 coats of paint. You want to make the container light resistant or light proof. (Note: You can sand the plastic on the container to form a better bond but that sounds like too much work to me. I just add another coat when it gets scratched or flakes off) While its drying, this is a good time to smoke another bowl or 2.
Step 3. (Sometime when you are waiting for the container to dry or while your high but not stoned) grab your drill and a 1 and 1/2in-38mm holesaw bit and cut holes into your styrofoam.
I think its makes the job easier to cut the holes into the styrofoam on top of a cardboard box. Your gonna have to take apart the holesaw bit after every hole you make. The insert gets stuck in it everytime.
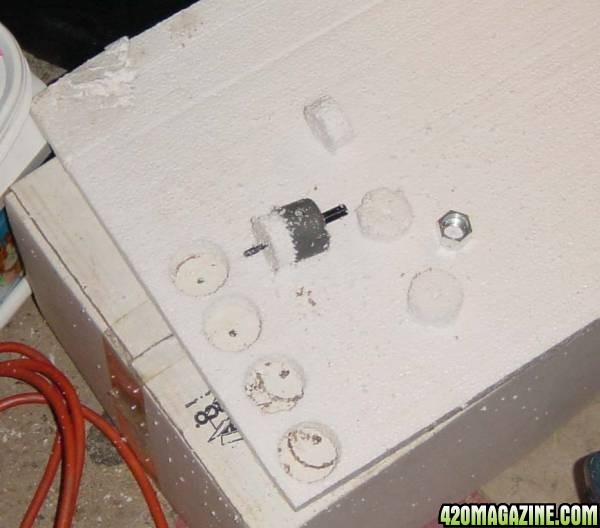
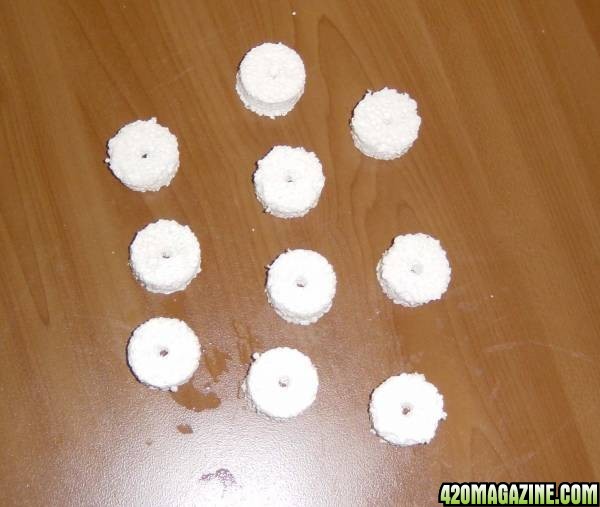
Its the holes you want to keep. These will be the inserts that you will be using to fill in the holes in the lid. Gently clean under running water and rub loose foam from inserts.
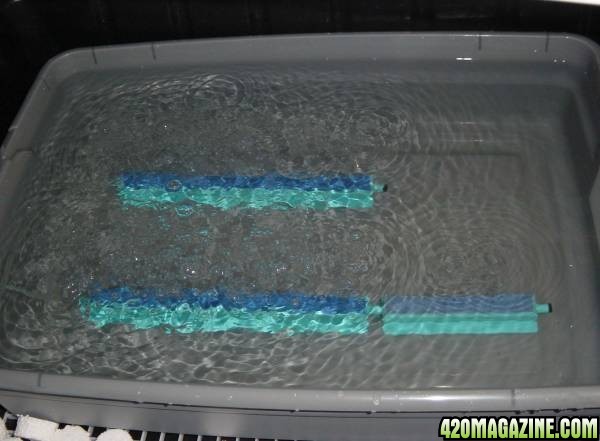
Step 4. After container is dry and I hope you painted only on the outside of the container, in a pattern that will evenly distribute the bubbles glue the airstones or bubble wand to the bottom of the container with the silicon sealant and let dry.
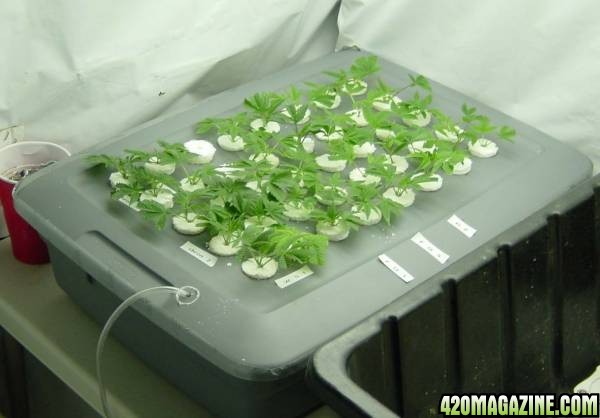
Now all you have to do is connect your tubing and put the lid on. After lid is secure use ductape and tape along the outer edge of the lid to the container. The tape is to prevent water from dripping out of the cloner. Now you have a genuine DIY DWC URD Power cloner LOL.
Now how do you use this thing we made? You gonna have to tune in tomorrow. Its getting late and I have seeds to sow.
TO BE CONTINUED. Sorry.
This tutorial will show people how to make a DWC cloner, will tell you how to collect clones, and how to use the cloner. So smoke a bowl or two and read on if your interested.
Here's a list of things you will need. Alot of this stuff you might already have around the house. If not you can purchase these items easier at a store like walmart.
1. container with lid (I am using a 28qt/27liter storage container you can go larger or smaller)
2. cheap holesaw kit (I have a black and decker version from walmart)
3. drill
4. razor blade
5. ductape
6. airpump (size depends on how many airstones connected)
7. airpump tubing
8. airstones or bubblewand (How many depends on how big your container is)
9. multi airtubing connector or T fittings if you are using more than one airstone
10. Silicone sealent (same type used for aquarium repair)
11. Styrofoam between a 1/4 to a 1/2 inch thickness (Can be found easily in the insulation department at a hardware store like Lowes or home depot or you can use a cheap styrofoam cooler)
12. spraypaint or primer
Step 1. Take a bowl and fill it with weed. Now smoke half the bowl of weed. (NOTE:You lightweights might wanna skip that part until after the project is completed)Using a hole saw 1 and 1/4-32mm bit and a drill cut holes into your lid. The amount of holes depend on how many clippings you need to grow into clones. You might want to use a ruler and pencil to evenly space out your holes. I went with forty holes. Holes can be close or far apart its more a matter of choice. Also cut smaller holes for the air tubing, you can do this by using just the drill bit portion of the hole saw kit and reaming it out with a razorblade until its big enough for the tubing to go through.
Step 2. Using a razorblade ream out the holes on both sides of the lid to remove plastic fuzz then wipe or rinse fuzz off of lid. Make sure you clean it up good and make sure its dry cause now we are gonna paint it. When you paint it please do this outside. Instead of spraypaint I use primer cause it sticks better to plastic. Spray only the exterior of the lid and the container. You will have to put on at least 3 coats of paint. You want to make the container light resistant or light proof. (Note: You can sand the plastic on the container to form a better bond but that sounds like too much work to me. I just add another coat when it gets scratched or flakes off) While its drying, this is a good time to smoke another bowl or 2.
Step 3. (Sometime when you are waiting for the container to dry or while your high but not stoned) grab your drill and a 1 and 1/2in-38mm holesaw bit and cut holes into your styrofoam.
I think its makes the job easier to cut the holes into the styrofoam on top of a cardboard box. Your gonna have to take apart the holesaw bit after every hole you make. The insert gets stuck in it everytime.
Its the holes you want to keep. These will be the inserts that you will be using to fill in the holes in the lid. Gently clean under running water and rub loose foam from inserts.
Step 4. After container is dry and I hope you painted only on the outside of the container, in a pattern that will evenly distribute the bubbles glue the airstones or bubble wand to the bottom of the container with the silicon sealant and let dry.
Now all you have to do is connect your tubing and put the lid on. After lid is secure use ductape and tape along the outer edge of the lid to the container. The tape is to prevent water from dripping out of the cloner. Now you have a genuine DIY DWC URD Power cloner LOL.
Now how do you use this thing we made? You gonna have to tune in tomorrow. Its getting late and I have seeds to sow.
TO BE CONTINUED. Sorry.