DIY rotating garden on the cheap

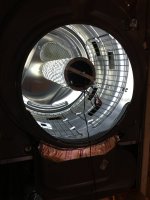
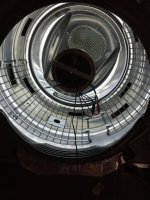
The picture with the grate shows the inside of the drum. Under the white covers are rockwool cubes 4x4", they are attached on the outside of the drum. The drum rotates once per hour, under the drum is a reservoir with nutrients, the rockwool cubes pass through the nutrients in the reservoir. the rockwool transports the nutrients to the plant.

Brain cramping????? Lucky you!
I know people who have no brain....some are in politics......
 
O
The picture with the grate shows the inside of the drum. Under the white covers are rockwool cubes 4x4", they are attached on the outside of the drum. The drum rotates once per hour, under the drum is a reservoir with nutrients, the rockwool cubes pass through the nutrients in the reservoir. the rockwool transports the nutrients to the plant.

Brain cramping????? Lucky you!
I know people who have no brain....some are in politics......

k I get it now thanks
 
Drum speed might need to timed by how much water the rw picks up on its pass through the reservoir. They suck up a lot of water.. How are you going to start the clones. I'm assuming you'll be using them.. I can't begin tell you how many times I've started one design, then had what I thought was a better idea..

Now going a little off topic. Great idea using an existing rotating drum for your project.. I've been thinking of building a rotating resin casting machine.. The mold is filled with catalyzed resin and sealed, then the mold rotates in two directions at the same time until the resin is set.. It's a simple, fast process, time limited to resin setting time and cure time.. Now I'm looking for a small horizonal drum machine...
Check out, Projects from my shop thread, in the miscellaneous forum.
 
Drum speed might need to timed by how much water the rw picks up on its pass through the reservoir. They suck up a lot of water.. How are you going to start the clones. I'm assuming you'll be using them.. I can't begin tell you how many times I've started one design, then had what I thought was a better idea..

I can be variable with the drum speed and I have control over the height of the nutrient level in the reservoir. I’ve read a post of someone who bought a commercial one and with him, the RW blocks went only 6 mm deep in the nutrients….
Yes, the plan is to finish the space for the mother plant first and take clones. On itself not a problem as I have a lot of things on order for the drum. I could also get some clones from a friend, not the strains that I am looking for but it could be a nice trial.
“I can't begin tell you how many times I've started one design, then had what I thought was a better idea..”, well….I recognize that……I was impulsive in the past, always full with ideas and getting a new one with only looking at something….it must be in the genes…. Each time I had an idea I ran to the store and bought materials for big bucks. After one week I had ANOTHER, better idea, ran to the store and bought stuff for big bucks! At least I do ideas as a business, so I can deduct most $$$, but I think 5x nowadays before to really start something. Looking at your projects, I think we are much alike LOL.
 
Focusing more on the space for the mother plant so I can take clones to start the rotating garden. Nevertheless, I installed a large exhaust hood for the R-garden that I picked up for $2.00 at a garage sale last weekend.

exhaust-hood.jpg
 
Thank you scrogster, I have to say, this is by far the nicest project I have ever done.
 
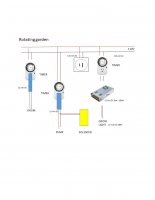
Sorted out the electric panel for the R-garden, just in case I was missing something, and yes, the transformers that I had, had not enough output for the grow lights. For the pump and motor I can use small transformers as the drum, pump and solenoid each use less than 6W.

Basically I only need to make a panel with 4 - 110V receptacles, the rest is “plug and play”.

There is one receptacle not used, that one I will use to plug in the pump so I can pump out the bottom reservoir.


Rgarden electric.jpg
 
Hello all! This morning I pretty much finished the en suite for the mother plant and finally got some time to spend on the rotary garden again.

Rlight1.JPG


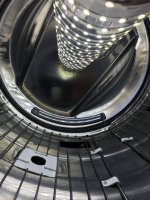
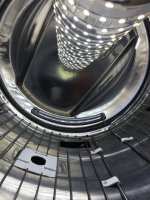
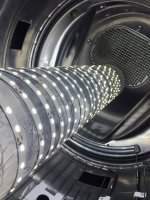
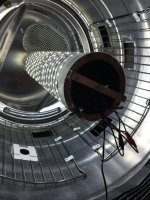
As you can see in the pictures, I did the central light in the drum. I also did the electrical panel, but no pics from that, sorry.

So the light……duct 5” – 2 ft. long, mounted as in the last picture.
  • What you see are 2x200 LED’s 6500K, but eventually this will be replaced with 2x300 LED’s (on order), each 20 lumens……at least that is what the seller states.
  • In between (on order) will come 300 leds 5000K, maybe used additional or during flowering.
  • Also additional and in between, will come 300 LED’s 3xred & 1xblue
I will be able to use the different light strings all independently.

For two days I am running a test with a pepper plant, half the light intensity as in the drum and pictures, fertilizer Masterblend 700 ppm and that little devil just LOVES the light and food!

All in all I am pretty happy how things are turning out, AND I am still within my budget of $250.00 but I am getting close LOL…….
Rlight1.JPG
.Rlight2.JPGRlight3.JPGRlight4.JPGRlight5.JPGRlight6.JPGRlight7.JPG

This evening I will start the germination process for the mother plant, it will be Harlequin 1:18 FEM.

Wish me luck!
 
OK, I made a new, simplified electrical diagram for the R-garden.
The motor for rotating the drum and the internal circulation fans run constantly, so they don’t have to be on a timer.
Don’t “play” with electricity if you don’t know what you are doing!

Rgarden-electric.jpg

Cheers
 
Finally the led’s came in and I have installed them on the center tube, here is what’s on it:
  • 2 x 300 led 6500K, the manufacturer states that each led delivers 20 lumens, I don’t have a light meter but it lightens up my whole kitchen…..they are supposed to draw less than 100 W, have to check that hopefully later today.
  • 1 x 300 led 5000K, no idea about light intensity as I bought these years ago for an abandoned project but I do know it draws 36 W.
  • 1 x 300 led full spectrum, 3 red, 1 blue.
Hopefully I will be able to install the tube today and take some pictures.

To be continued.

center-light.jpg


center-light-close-up.jpg
 
Got some pics from the different possibilities of light settings. Did not check the wattage as the cheapo connectors from Canadian tired failed over and over again. Guess you get what you pay for….

6500K.JPG


6500K-5000K.JPG


65005000full.JPG


5000K.JPG


5000Kfull.JPG


fullspectrum.JPG


I used an old HP tabletop computer to make an electrical enclosure, the two empty holes in the cover will be filled with time relays, on order presently. An enclosure like that could also be used as a LED light, the dedicated transformer inside and the LED strips under it.

enclosure.jpg
 
scrogster "So cool your like MacGyver. "

Yes , less rich but more handsome.... :yahoo: :roorrip::woohoo:
 
This morning I found out that there will be serious delay concerning the parts that are still missing, like DC motor coupling, exit fans and solenoid valve %$#&%$# delivery mid-November…….

To be able to test the system, I will make a (hopefully temporary) alternative drive for the drum, use lighter fans and do the solenoid action manually.

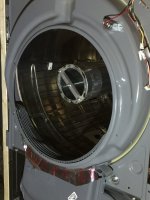
I will start to test the closed-loop air system, for that I need to install a fan but I have installed the door already, see pics.

It is such a beautiful sight, that I think it will replace the bonfire with friends, we pull up a few chairs and drink a beer before the rotating garden….

front-installed.jpg


front-installed-and-light.jpg
 
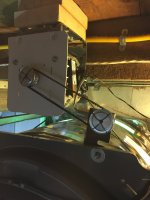
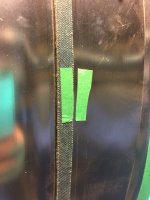
Installed an exit fan for the closed-loop air system, but it works a bit “la la”, good enough though if I need to use it in case the new fans are not in on time. Made an alternative drive for the drum for the time being (see pic1), one rotation of the drum takes 40 minutes, no slip of the belt (see pic2) this evening I will let it run some time with a few bricks as weight in it, but that will create no slip as well, as the belt will have more tension. Still haven’t figured out how to tension the small DC motor in pic1.

IMG_6868.JPGIMG_6869.JPG
 
In the picture you see the nutrient feeding system. The pump (together with solenoid valve) will be on a timer for 40 minutes (one drum rotation), once a day. (Or each 18 hours or so, depends of the amount of nutrient uptake of the rock wool) If possible, I will replace the lower reservoir with a 5 gallon bucket, easier to replace the nutrient solution and the level in the bucket will be higher, better for the air stone(s) to do their work.

Final-overview-picture.jpg
 
Back
Top Bottom