First Grow DIY Box & Bagseed

Stirstick

Well-Known Member
Hey there I have been lurking for a month or so as I start my first attempt at growing. I have been a regular user for 20 years and now with the legalization here in Canada I want to grow my own and save some cash in the long run.

Decided to start the grow journal as I'm early on and wanted to get some of the great input I see on others journals.

I appoligize if the first post is a little lengthy but just getting up to date.

My son was doing a project for school and I needed lumber so used the same as he lol. 1x2 to frame my box. Originally I was going to make it wider but realized it was too much for the space (still had to take it apart to take it upstairs to its spot)

I ended up with 48" long by 60" Tal and about 26" deep.
IMG_20181109_194355.jpg


I then got three sheets of 1/4" osb to box it in.

IMG_20181109_205115.jpg


I gave the inside a quick coat of flat white paint (not as thourogh as I'd like but on a shoestring budget)

I ordered a 7 split light fixture from Amazon which is currently my primary lighting.

I started germinating some bag seed I had, two of which were promising and the other two I just put in for odds.

IMG_20181110_105938.jpg


Within about 24 hours I had my first tap root.

IMG_20181111_215723.jpg


And then the other one popped and decided to get them in some Solo cups.

IMG_20181112_115244.jpg


IMG_20181112_115413.jpg


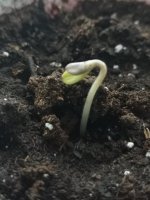
They went in the dirt on the 12th of November, by the 14th they were out saying hello.

IMG_20181114_105452.jpg

IMG_20181114_105429.jpg


So I leave them by the window for the first day as I didn't want to shock them with light I got the fan and lights set up. I wired an old computer fan to a 12v adaptor for an old laptop. Seems to do the trick. I cut out a hole and mounted it on the top.

Plan is if smell becomes a problem I'm going to move to box next to the window and vent directly out doors. Gotta love it being legal.

In my light I'm running led bulbs. I've got 3x9.5w 2700k bulbs and 4x10w 5000k bulbs.

IMG_20181116_122556_BURST009.jpg


Sorry about the light and dark patches, I think the fan is pulling at a frequency that's interupting my camera.

With in a day or so I wanted more light so I had a couple of old light sockets and got a couple of 23w cfl bulbs at 6500k.

Things seemed to be going ok. I water and let dry to encourage root growth. I'm going to continue in next post as I've reached my attachment limit lol
 

Attachments

  • IMG_20181114_105452.jpg
    IMG_20181114_105452.jpg
    453.4 KB · Views: 194
IMG_20181116_122703_BURST001_COVER.jpg


Now the one on the left a couple of days ago the stem seems to be a bit weak and layed down.

I thought maybe she was just thirsty so I gave a good watering till I had run off and it's been about 36 hours this morning and she still isn't upright. Her leaves look ok and turn towards the light.

IMG_20181119_113010_BURST001_COVER.jpg


Any thoughts on getting her upright again?
 
You can encourage stronger stems by having a gentle breeze blowing on the plants, just enough to make them move around a bit. Do you know your day and night temps? Big swings can cause stretching I have heard. Also, how close are your lights? They may be a little underpowered for flowering but I think should be fine for now.
 
Hey PE636 thanks for dropping by. My temps have been pretty consistent daytime about 76 and I think about 72 for night (last night dipped to 69 but that's cause the batteries died in my house thermostat lol)

I have had a fan on periodically but I don't like to leave it on for more than a couple hours a day.

Lights: led are about 15" from the plant with the cfl at about 3".

I plan on adding some additional lighting as I get closer to flowering.

Update she had fallen over again this morning and the leaves are all confused how to grow cause they were upside down.

IMG_20181120_104824_BURST002.jpg


So I decided to give it some proper support. Here's hoping this works.

IMG_20181120_105509_1_BURST001_COVER.jpg
 
Perfect job on tying it up. You just need it to stay upright and gain some strength. They're a little stretchy, but not too bad. When you transplant, you can bury the stem a bit into the new pot.
 
how long should they stay in the solo cup before I transplant?

I like to wait until the roots are pretty well established....mainly so that the roots hold everything together when transplanting. Best to have at least the third set of true leaves showing. I've needed to transplant early a couple of times when they were getting too tall or spindly. And that works but is not ideal.
 
Update: the one I propped up seems to be doing well, leaves continuing to grow. I think I might start with some nutes in the next few days to give em a boost.

IMG_20181121_195016.jpg
IMG_20181121_195036.jpg
IMG_20181121_195026.jpg


I also started a couple of more seeds last night as I have a fear of males and want to better my odds. These seeds I have about 10 from the same batch and even took a pic of a nug so I know what it looked like before and what mine look like.

IMG_20181115_163627.jpg
 
Hey Man,

I will definitely follow along.

I have made a very similar build, well at least is start that way. I tried using the exact same adapter/LED set up, and I learned a lot from starting small. My first plants produced about 8-9 ounces in a box that was 3 x 2 x 4'.

Since that time I have tricked it out pretty well, and it's now completely automated. I have temp and humidity switched that trigger exhaust/heat or exhaust/humidity depending on the conditions. There are multiple fans and a CO2 generator.

I'm be no means an expert grower, but as far as the box is concerned I have created a perfect and adjustable bubble to grow in. If you run into any snags let me know.

Moss
 
I had started with the adapter you have, I eventually bought an additional 2, but before they arrived I reconsidered and bought 2 used 300w Mars Hydros.

My box is 36 L x 24 W x 48 H, it lined with Mylar.
I just bought a 4" inline fan with variable speed controls, which is connected to my Carbon Filter.
I have 2 Ran bird switches which help me automatically control Temp and Humidity.
When the temp gets too low, I have hard wired a IR heating bulb. When the temp gets too high I have a secondary exhaust fan with helps dump some heat.
As for humidity, I use a small home humidifier with a 2L tank which turns on when humidity get too low, and turns off when my target is reached.
I run a medium sized fan, and two small usb fan to get airflow.
Lastly I created a CO2 generator out of sugar and yeast to ensure I have a steady flow for my plants.

I loved starting with a DIY grow, and a setup that I could afford while I decided if I really enjoyed this hobby. Turns out I love it, and I started to add piece by piece. The box when closed just looks like a wooden chest, and is completely light neutral. My kids have walked by it over and over and there's minimal scent and a faint buzzing.

For my travels, there is no substitute for real lights. I was able to get decent growth from my first grow with the LED setup we started with, but when I added the lights things changed drastically. My second grow was immensely more productive, and the lights aren't actually that costly.

I ran two 3 plant grows, but I only had 2 seeds left, so I have lent my whole unit to a friend this time around and he will start a journal this week. I will DM you a link to his journal when it has begun, as I dont want to steal any attention from yours.

Moss.
 

Attachments

  • IMG_1727.JPG
    IMG_1727.JPG
    731.4 KB · Views: 209
had started with the adapter you have, I eventually bought an additional 2, but before they arrived I reconsidered and bought 2 used 300w Mars Hydros

I went back and read your first grow journal, enjoyed the read. We did start very similarly! Coincidentally I sent a pic of my plants to a family member and a proper led 1000w (about 200 draw) coming for Christmas ) Here's hoping my current setup will get them through most of the veg.

Update: the two seeds I started germinating got their root yesterday and went into Solo cups. I planted a little deeper because I believe the one plant I have that toppled was because it came through to close to the surface. Maybe some pics of the two new ones if they decide to peak out overnight.

The two older girls got their first bit of food and I hope it wasnt too early or too much.

I'm using pro-mix organic based multipurpose garden fertilizer (12-6-6).

instructions called for 8ml in 5L of water. I had no need for that much so I cut it down to 2L which was easier to measure. I lowered the dose to about 1ml, I need to go get a syringe to make this easier.

I had let the girls dry out pretty much before I fed and only gave an amount till I saw a little runoff. The injured plant I will call A2 had a bit of curl happening before I fed and the edges of the leaves seemed a little brittle which I will chalk up to her being thirsty. If she looks the same tomorrow I will put up a pic.

The first plant I'm calling A1 it was also the largest nicest looking seed. The new ones will be B1+2.

I also rewired my cfl lights as I had them pigtailed to one cord which isnt the best idea and difficult to move around. Looks a little tidier now (still not great)

I think the A's are into their third node if I'm counting pairs of leafs going up ignoring the starter leaves. They are at 9 days above soil. That's it for today. I'll grab some pics for tomorrow's post and let you know how they reacted to the nutes.
 
Good evening folks. Great news, B1 + 2 have made an appearance.


B1 just poking through:

IMG_20181124_190755.jpg


B2 is a little further out:
IMG_20181124_190714.jpg


A1:
IMG_20181124_190639.jpg


A2:
IMG_20181124_190702_BURST003.jpg


Not much for today, gave a little water all around. Tomorrow I will give a good watering as they are drying pretty quickly.

Noticed a little discoloration on A1 but I don't think it's much but I'll keep an eye on it.

IMG_20181124_190852.jpg
 
Quick update: the B's are looking good. I gave everyone a good drink today, A's seem to be drinking more. I take that as a good sign!

No further discoloration than what was there

All of them:
IMG_20181125_154014.jpg


A1:
IMG_20181125_154040.jpg


A2:
IMG_20181125_154032.jpg


B1:
IMG_20181125_154112.jpg


B2:
IMG_20181125_154105.jpg


I had turned off the led lights as they seem to be whats causing the flicker on my camera, just to take a quick couple of shots
 
Update days 16 A and 6 for B's:

Continued growth all around. A1 yellowing on lower leaves continues so I think it might be a N def.

A1:
IMG_20181128_123259.jpg


I gave another small feed today. About 1ml in 2L of water. The A's are drinking more there cups we're pretty light today so it worked out.

I think I will probably transplant the A's over the weekend.

I would really like to try Ase's quadline technique as I think it will work great in my grow space.

A2:
IMG_20181128_123313.jpg


B's:
IMG_20181128_123321.jpg
IMG_20181128_123331.jpg


Group shot:

IMG_20181128_123345.jpg
 
Update on A's day 18:

Ok so I bought some soil today, pro mix organic moisture control. Seems to be ok and not as loaded as some of the premium mixes.

Decided based on some muchly appreciated advice to start training and transplant a little later to not stress too much and give some recovery time.

So I went ahead and removed the first two nodes tonight and I will top above node 4 on the weekend then transplant a day or two later.

Diagram of nodes:
IMG_20181130_212351.jpg


Before:
IMG_20181130_225842.jpg

IMG_20181130_225825.jpg


After:
IMG_20181130_230054.jpg
IMG_20181130_230400.jpg
IMG_20181130_230510.jpg
IMG_20181130_230458.jpg


I did remove the support from A2 as it's supporting itself fine now and I will correct the lean when I transplant.
 
Update A's day 20:

After giving the girls a trim of the bottom 2 nodes I saw no I'll effect. I gave them a light nute watering yesterday to help with anything they may need.

Today they were still looking great so I decided to proceed with tipping them above the 4th node.

A2 it was easier because the nodes are more spread out, but A1 is tight and totally understand now where FIM came from lol. I think it went well.

Before:
IMG_20181202_124142.jpg

IMG_20181202_124525.jpg


After:
IMG_20181202_125052.jpg

IMG_20181202_125102.jpg


I did it about noon and 10 hours later they are still looking good. I will see how they are tomorrow and make a judgement call on up potting to my 5L pots (recycled kitty litter jug lol)
 
A2 is looking a little droopy today ( more so than usual) so going to postpone transplant for a day or two to give a little more recovery time. A1 looks unchanged.

Pots were a little light so gave a little water today.

B's are going strong and I believe onto their third nodes.

Have a great day everyone!
 
Back
Top Bottom