

- Thread starter
- #21
FiveToMidnight
Well-Known Member
A few hours sleep does a creaky old body good.
I know not of LED lights other than for what they would cost to replace all my old magnetics I could grow pot for a couple of years at least.
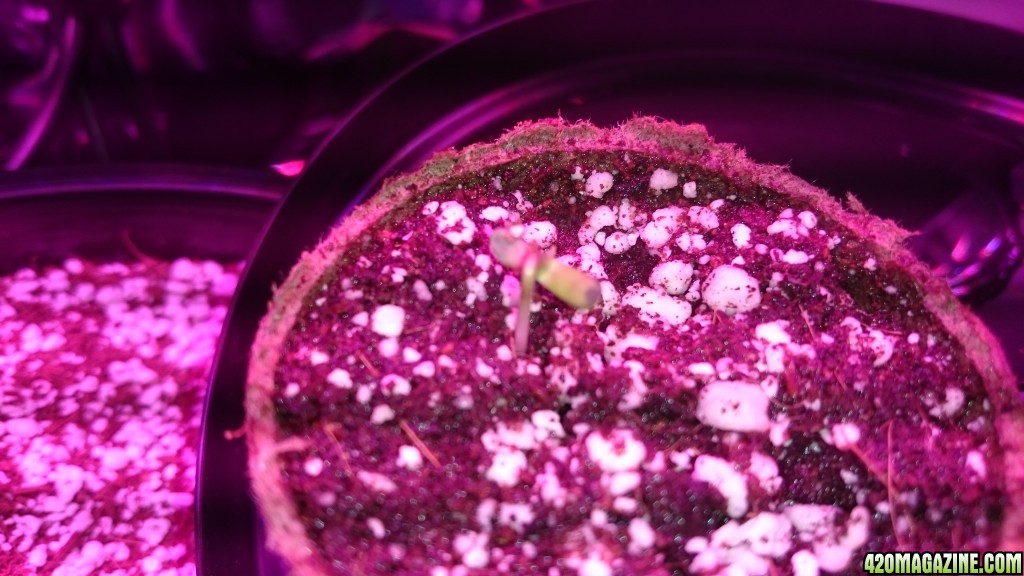
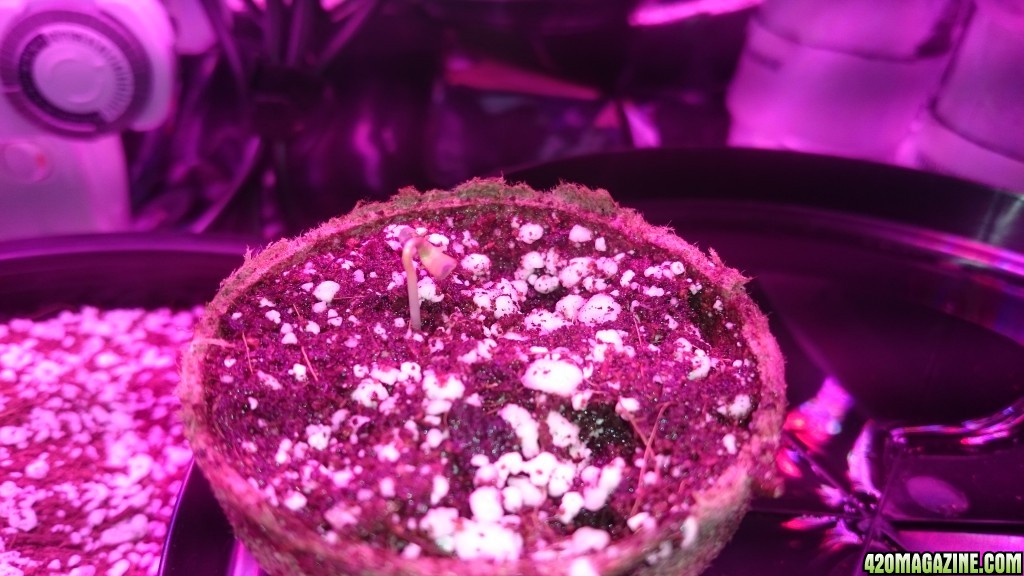
I'm not fond of rapid rooters, peat pucks and the like. Very small pots or seed starters with the same media the plants will grow in is best. I use a screen the same mesh as mosquito screen, 1mm mesh, to filter out the chunks in my ProMix HP and have a great medium to start seeds or cuttings in. I also have a pill jar lined inside with 150 grit sandpaper that I put my seeds in and shake gently for a full minute to lightly abrade the surface of the seed so it absorbs water easily and also get through any residual skin oils from people handling the seeds with their fingers. Use tweezers to move seeds around. I plant directly into the promix without soaking or paper towels for excellent germination rates even with 10 yo seeds where 50% is damn good. The 9 - hole pots I use look like this. Fill only as many holes as you need.
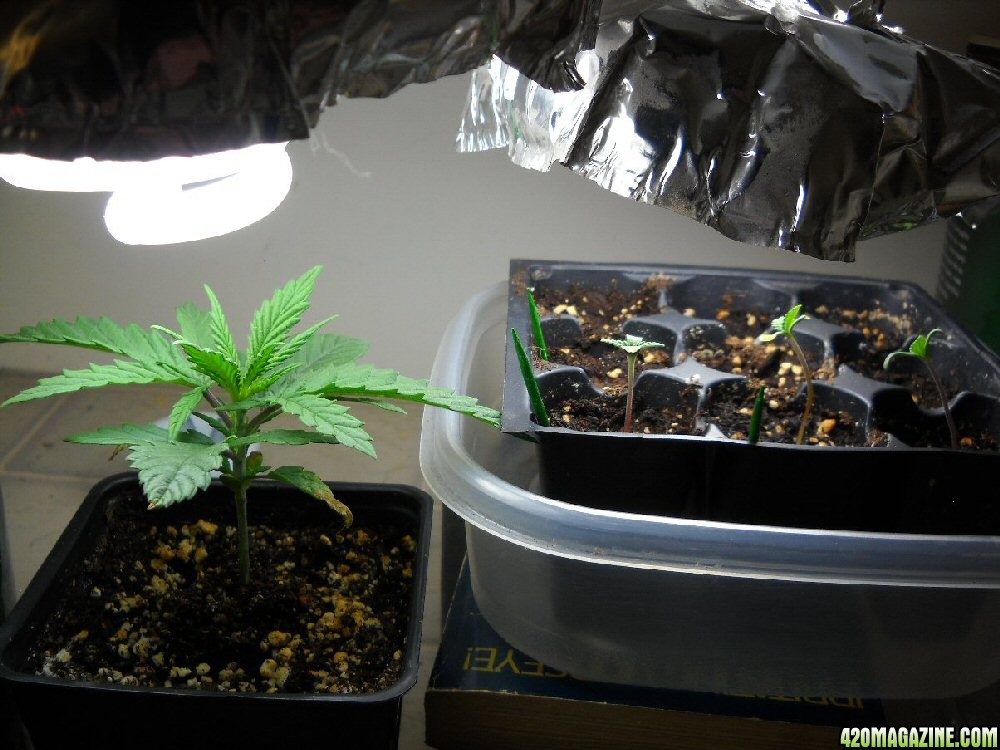
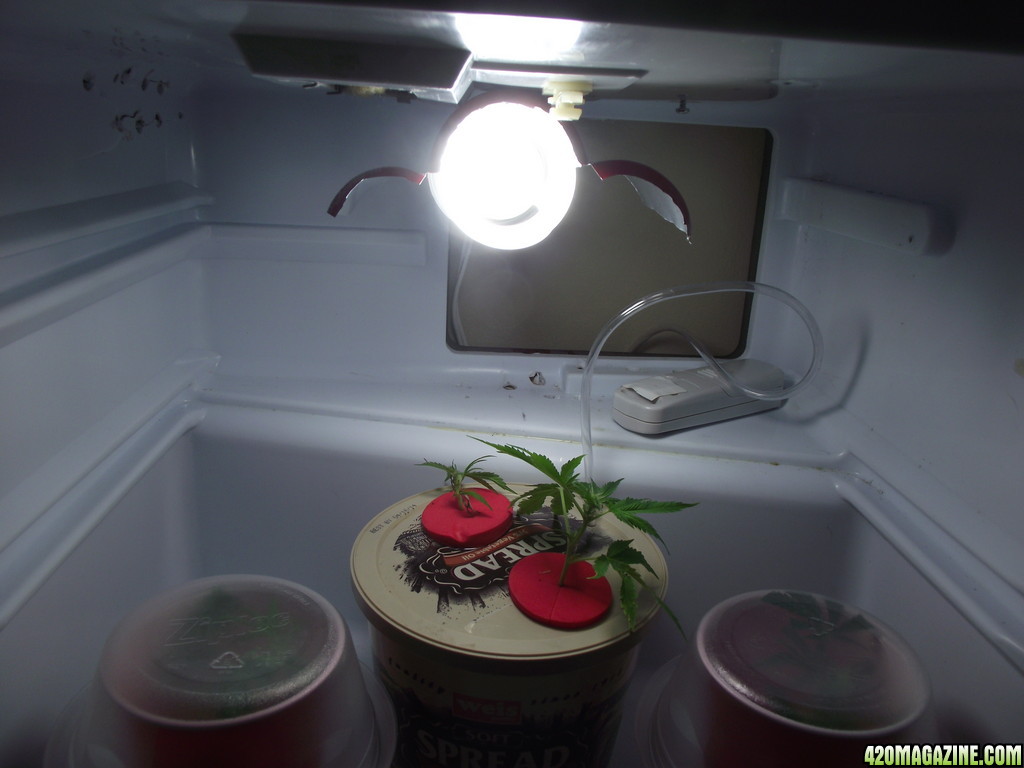
You might want to get the sprouts started under CFL light 5-12am. One 23W 5000 - 6500K CFL does a great job starting them with very little chance of doing any harm and you'd want that no more than 3" away. After they have a couple of sets of true leaves and are in their bigger pots the under the big light they go.
The thing you want to avoid is tall, stretched out sprouts that look like they belong on a plate of chicken chow mien. Some folks say have a fan blowing on them enough to have them waving in the breeze all the time but that can dry them out real fast and even give them wind burn. What I do is once I see the jagged tips of the first true leaves starting to poke out I flick them back and forth with a finger tip. Gently at first a couple or more times a day then with increasing vigor as they get stronger. A few strains grow so short and bushy that there is no need for this.
Syringes are an excellent way to always have very accurate measurements Skybound and I have many. I used to refill my printer's ink cartridges and kept the syringes and blunt needles that came with the kits. The local farm supply store is a good source for larger ones and also food grade, clear plastic tubing that fits over the tip to make it easier to get the nutes out of the bottles or grab samples out of one of my DWC tubs. My favorite is an old 30cc glass one. Super smooth action but I have a couple of 60cc plastic ones with tubing on them for larger quantities. When using one to mix up your nutes keep a small container of clean water handy. After taking one nute suck up a small amount of water, 2cc or so in a 12cc one and then pull the plunger all the way back, shake it quick and squirt the rinse into the jug you are adding nutes to. Repeat and on to the next nute. This procedure prevents cross contamination of the various things you will stick it in.
When someone says use say 250ppm don't sweat it. At that level 50ppm +/- is just fine. At higher levels 100ppm +/- is fine too. Same with pH. If your target is 6.0 and it reads 0.2 either side of that it's close enough. pH pens are never dead on and people that have a $50 one that reads to 2 significant digits like 5.83 are deluding themselves. You'd need to spend $1000 or more to get that kind of accuracy with any degree of confidence and that extra digit is really meaningless to a grower.
I only check the ppm for DWC. Growin in pots I just use 1/4 strength for seedlings until the get 3 or 4 nodes and are starting to take off then 1/2 for a feeding or 2 then 3/4 for really good growth. Rarely do I go full strength until a week before I flip when I will go full but use 1/2 the grow and 1/2 the bloom and a bit of Big Bud to prime them for flowering.
I saved a long post I did in another thread about this stuff and it follows. I'll highlight some of the more important points pertinent to your situation and some is a repeat of what's above.
----------------------------------------------------------------------------------------------------------------------------
The whole idea of the pH Perfect line is that you don't have to worry about adjusting the pH of your water. In fact you probably won't be able to change it from whatever you get once the nutes are in the water. The pH buffers in the nutes will resist changing the pH from what they want it to be and AN has engineered it to stay at the pH that is best for pot. I'm a chemist and not exactly sure how they do it.
There is no way to tell you when to water/feed. For potted plants I water when they need it. Every 4 or 5 days is about when I need to water my big ones. I know when to water by hefting the pots. They feel very light when it's time but the plants aren't drooping yet.
Allow your plants to dry out one time enough to just begin to droop then lift the pot up and really feel the weight. Jiggle it up and down so your brain gets the feel for it. Then use something that you can keep track of how much water it takes to saturate that pot until it can't take any more water. (I measured water into a 2L pop bottle and marked every 100ml with a felt pen and did the same to a 4L milk jug but marked it every 250ml.) Then hoist that pot up and feel it's weight. Wait until that pot feels almost as light as when it dried right out but the plants are still up and happy then it's time to water again. You could also keep a same size pot full of you dry soil mix to compare to until it becomes 2nd nature. Three days is about perfect for watering as a general rule. If you have to water every day or every 2nd day it's time to repot to something bigger. I have catch pans under my pots so when it runs out I let it sit in it for a half hour or so then suck out the excess with a turkey baster. That way I know the root ball is saturated with no dry areas. I sometimes water from the bottom by filling the pan and letting it wick up so that I can let the top 3" stay dry to help prevent gnats. Always seems to be a few buzzing around.
If you know how much water it takes to soak the plant then you can mix up your nutes more accurately or if in a hurry just dump 80% of that amount in and head out the door knowing they have adequate water.
Measure your nutes etc accurately as well. I have a bunch of different sized syringes from 1cc up to 60cc to draw up nutes from the jugs and then squirt them into the tub or watering can. The local farm supply has a big assortment and also had clear plastic tubing so you can fit some onto the end of the syringe and more easily get the nutes out. Keep a glass of plain water to suck up a little bit twice between different bottles of nutes and rinse the tube and syringe so you don't cross contaminate the concentrated products.
It is a real good idea to have a small aquarium air pump and air stone to aerate any water be it tap, RO or distilled. Then it is saturated with as much O2 as possible and good for preventing root rot. I have a dual outlet one for that so I can do two jugs at once when filling a tub. If I only have one jug to do I just drop both stones in. Distilled water has almost zero oxygen in it. It's "flat" water. If no air pump is available then left standing in an open pail for a day will let it absorb oxygen from the air.
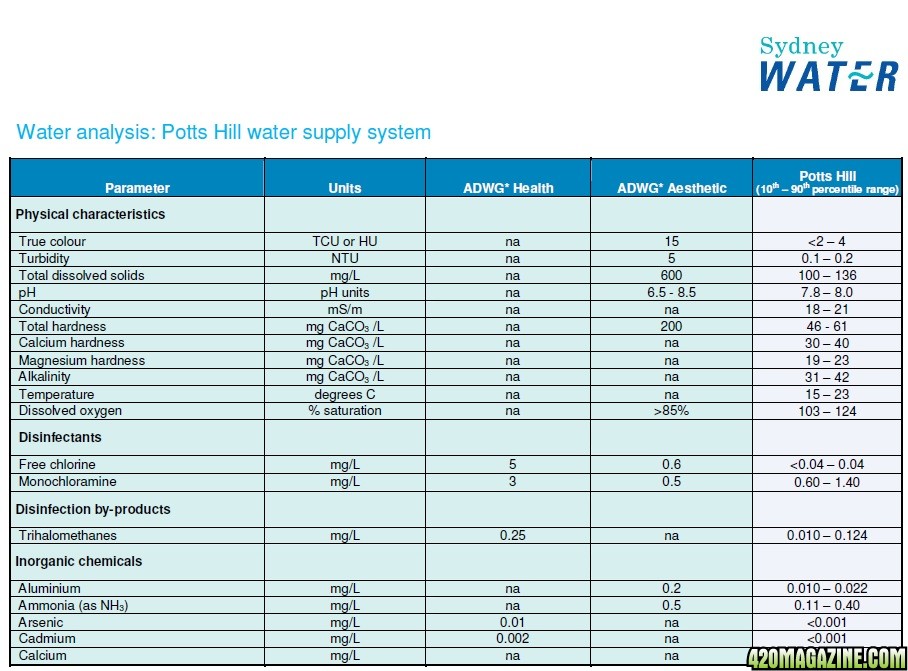
I only ever use RO or distilled water for my plants in pots or DWC. My distiller died about a year ago so it's been RO ever since. Either is better than using tap water. Most tap water is pretty hard and causes salts buildup in the soil that interferes with everything. Get a water quality report from your supplier. Usually a phone call to your city/town can get you an email of their latest test results or it might be on their website. If they ask why you want this info ask them why they need to know that. Or tell them you want to get into brewing your own beer or start raising salt water tropicals or grow rare orchids. None of their damn beeswax. As a consumer you have the right to that info so screw 'em with a big stick. Best to be polite until you have that info tho.
All I got for now.
L8r
")

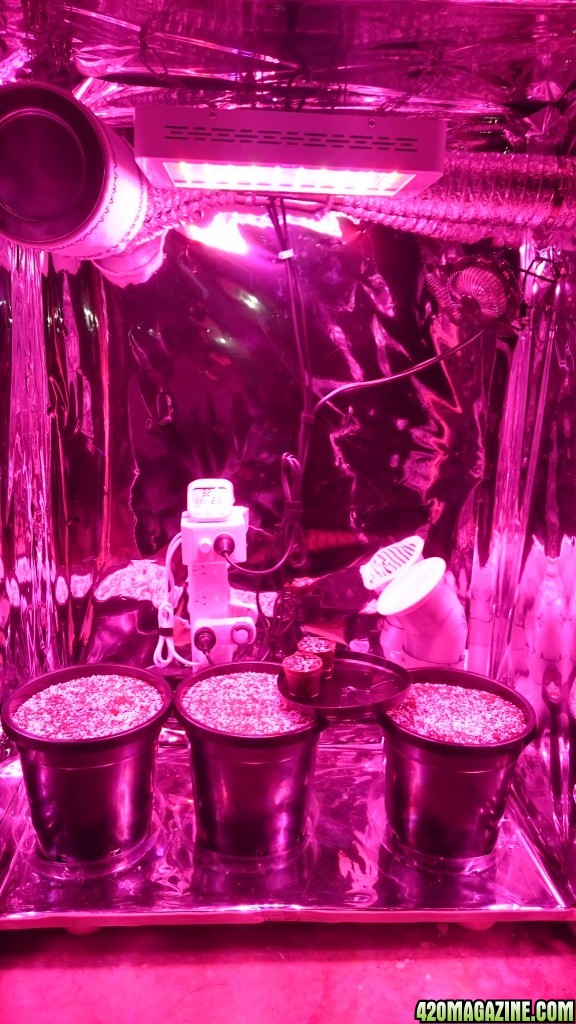
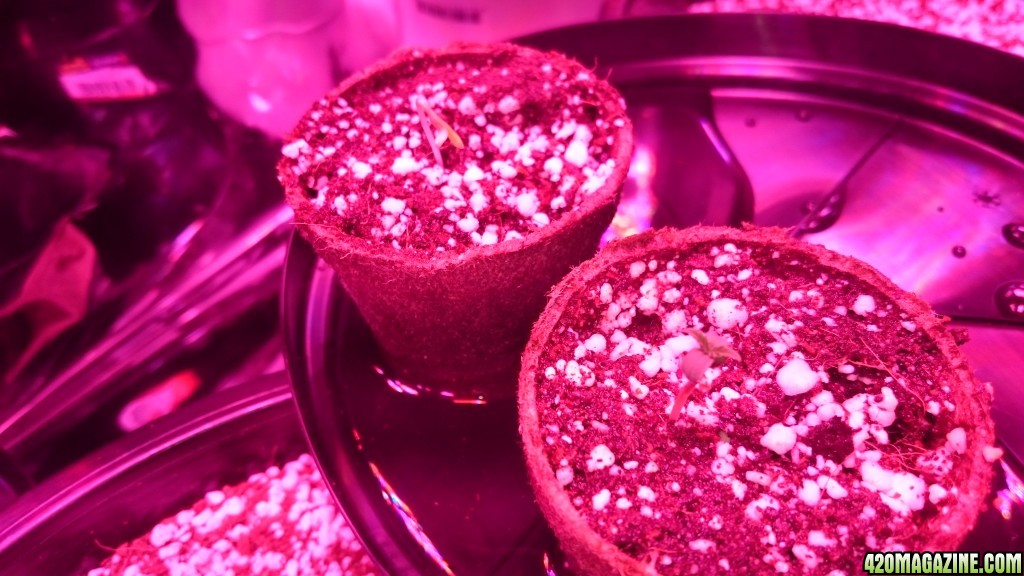
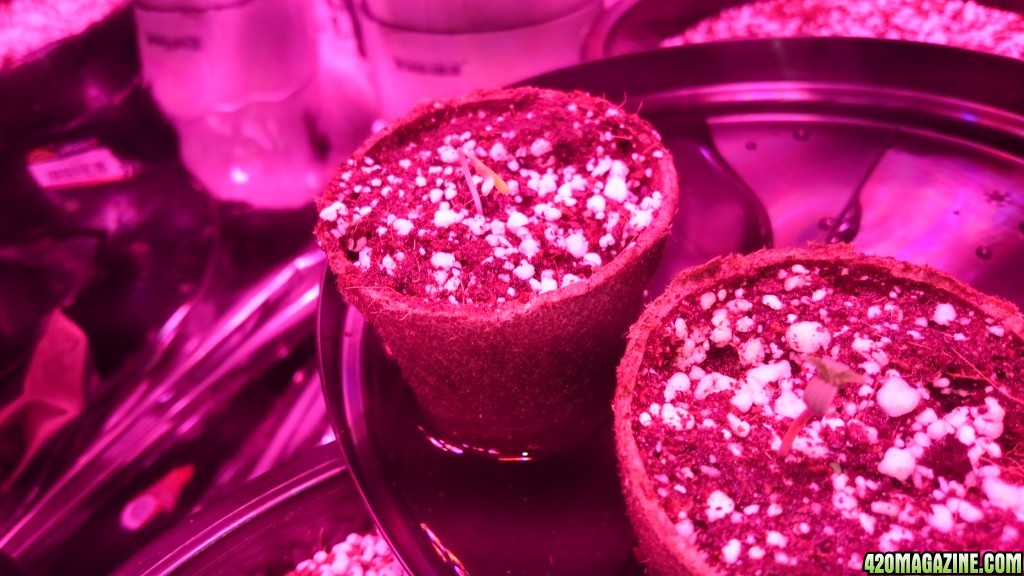
I don't have any CFL's at this time and want to try to avoid spending anymore money, it has already become quite an expensive project. I have however put one under the light last night as it had just sprouted. I have left the light at its maximum height as advised by Skybound.
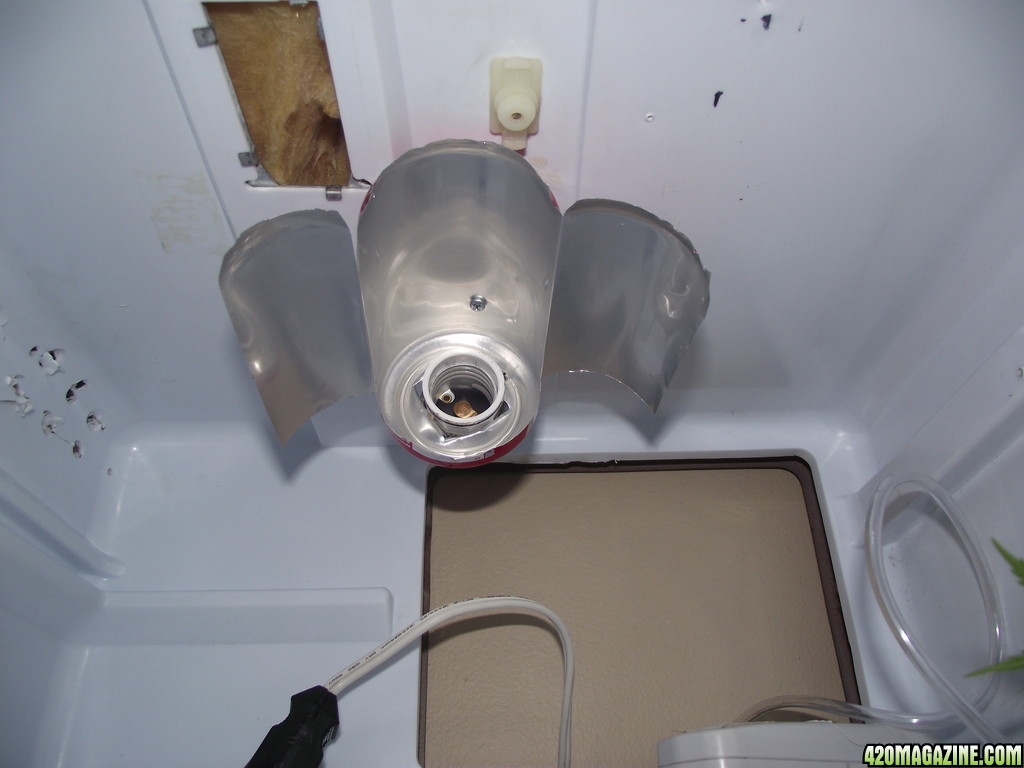
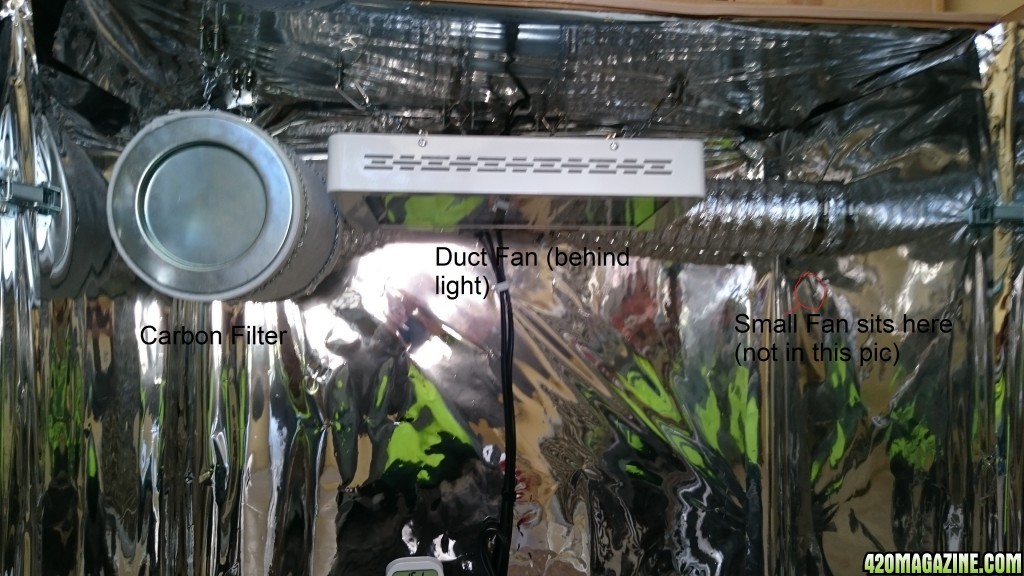
I also have a small fan inside the box but this is for temperature control more than airflow, however it works for that too. I don't think it is too much but will have to experiment and see what happens.
I got some syringes as advised so will follow both yours and Skybound's directions on mixing.
It's great to know PPM has some buffer and not need to be perfect necessarily. I realise the closer to perfect the better but it's nice to know I have some room for error.
What is this air stone you speak of? I have heard others mention them too but have been told it is not essential. Could you please explain how I would use these please?
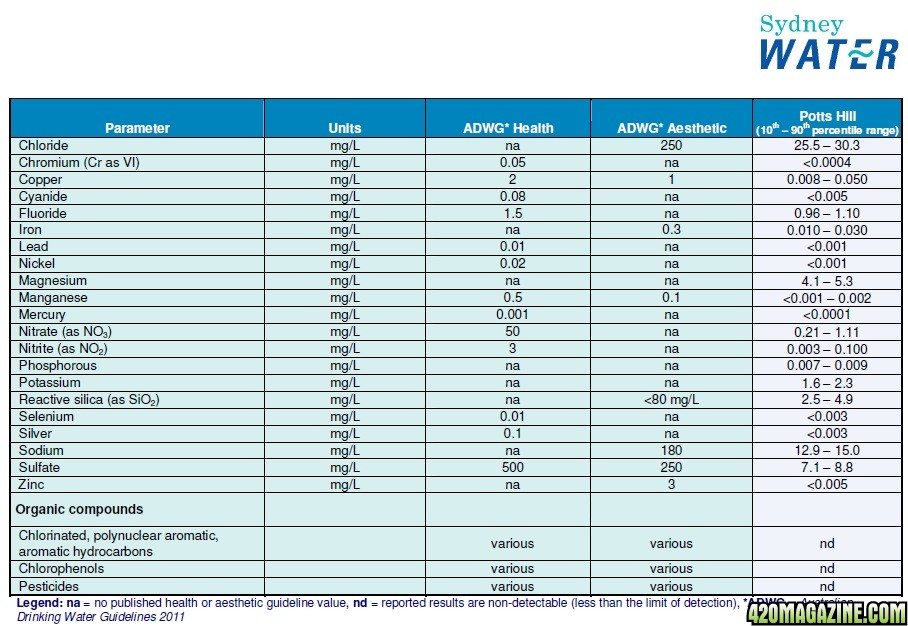
I have a water report downloaded from the local water supplier and can post if you are interested, I'm not really sure what I need to take note of or what it is telling me.
Thanks heaps for so much information, I really do appreciate all the help. As mentioned, I couldn't do without people like yourself and Skybound


 )
)