

Cloning with Rapid Rooters
Why cloning, and why Rapid Rooters?
Cloning is something that can be done many ways, but the goal is to cut a section from a plant, typically in veg (flower clones are difficult but possible) with the goal of it generating new roots, and becoming a second plant with the same characteristics of the "mother" it came from.
Cloning with Rapid Rooters has given me nearly 100% success. It's also easy, and inexpensive compared to cloning machines or "cloners", though they can also work very well. The important thing with cloning, is to find a process that works well for you, and is repeatable and reliable.
FYI: Typically with rooter plugs, it takes me 6-12 days to see roots, depending on the strain (some sativas, especially, can take a little longer).
***************************
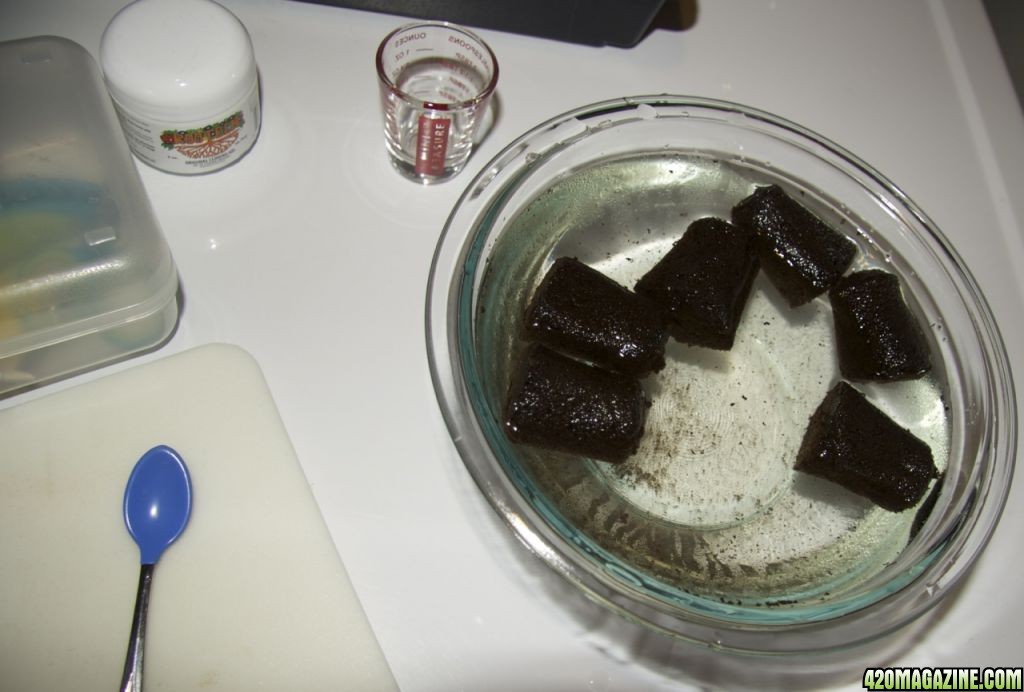
Okay, first, I get all this out:
- Scissors (for taking cuttings from plant - important that it's sterile, use alcohol)
- Razor Knife (for make 45 degree cut on stem, again, make sure it's sterile)
- Rooting gel (for coating the 45 degree cut and node above it)
- Plastic cutting board, or clean/sterile surface
- Small container for rooting gel (don't dip into the container - keep it sterile)
- Clonex (for presoaking rapid rooters - I also use it to re-wet them while waiting for them to root)
Here's my process:
First, I soak them in a Clonex solution, at 5ml per liter (lightest recommendation on the bottle). For water, I use bottled spring water (think drinking water). Normally, I let them soak for 12-24 hours in this solution.
Supplies (Clockwise L to R: Scissors/knife box, Roottech Gel, Shotglass for gel, soaking rooters, plastic cutting board, small clean spoon for scooping out rooting gel into shotglass)
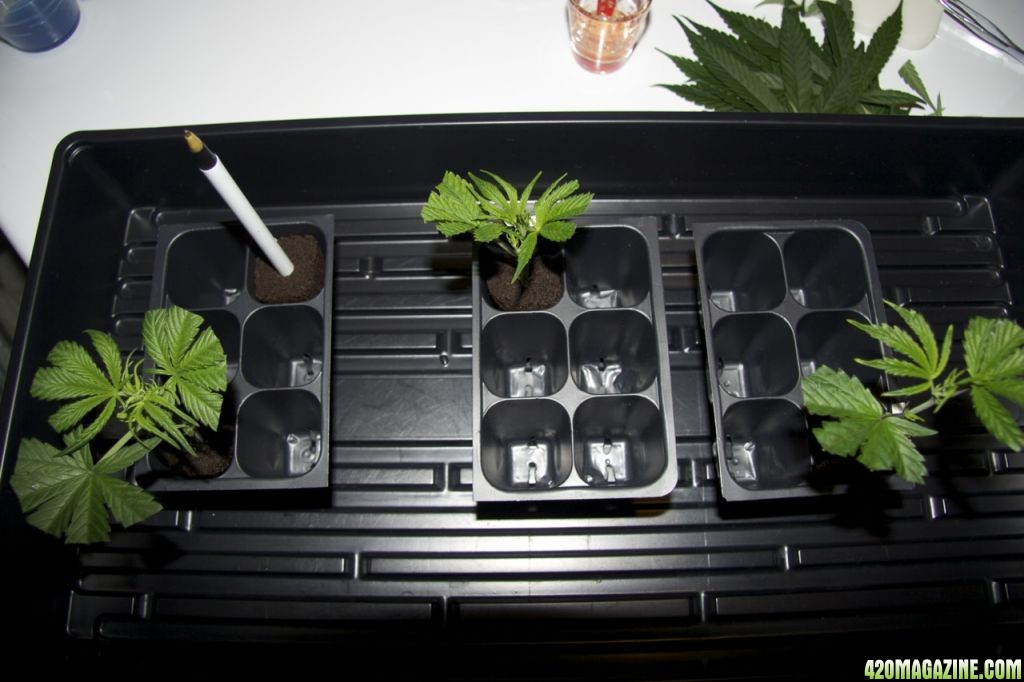
Then I give them a gentle squeeze, and a little shake as they should be wet/moist, but not thoroughly soaking wet. I use the non-writing end of a ball point pen to hold open the hole in the Rapid Rooter while I take my cutting.
When I take the cutting, I quickly trim off the excess leaves, leaving only a couple of trimmed leaves on top. Then, I place the cutting on a plastic cutting board and I make a 45 degree cut right below a node. I immediately dip the cutting in my rooting gel. Sometimes I scrape the stem, but honestly it works fine without it. Make sure there are a couple of nodes above the cut, too.
I use and prefer "RootTech" gel, but I'm sure other rooting gels would work, too. Then, I remove the pen from the hole in the rooter, and insert my cutting into the rooter.
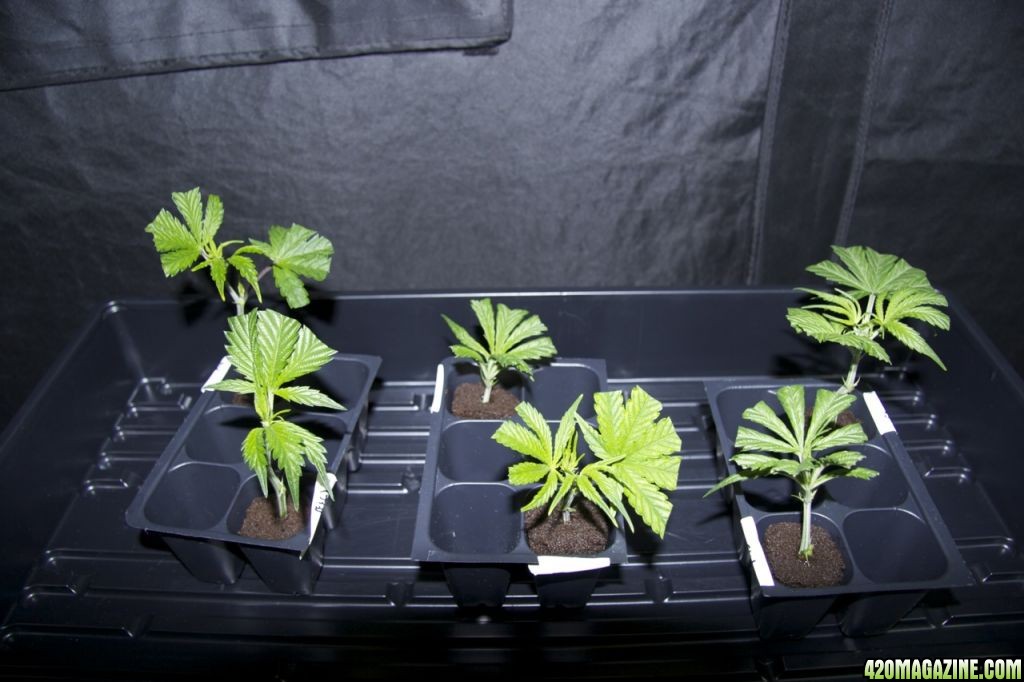
TIP: I like to keep the humidity dome on while I take other cuttings, as sometimes they start to wilt before I'm finished. Even though they'll pop back up for me eventually, I like trying to keep them from wilting in the first place. I keep the humidity dome lid misted at all times in the cloning process (until they start to root). The first few days are the most crucial as far as maintaining high humidity in the dome (keeps them from wilting). After that, I start opening the vents slightly to let fresh air get in. I still mist the dome twice daily until they root.
TIP: If my cutting is "loose" in the rooter plug, I use a tweezers to remove a piece of rooter from an extra rooter (I like to have an extra for these purposes). I take this chunk of material, and gently stuff it into the hole with the cutting to "firm up" the cutting in the rooter. Cuttings should be steady/firmly in place and not loose in the rapid rooters.
TIP: Sometimes I leave too much leaf material and they just can't hold themselves up. In these cases, I trim the leaves more (after the fact), and so far it's almost always helped.

Summary:
- Soak the Rapid Rooters in Clonex prior to using, for up to 24 hours (my preference).
- Use hormone gel (I like Root-tech) to coat the cut on the stem, as well as the node just above the cut.
- Trim the leaves, place the cutting in the plug, and put it under a humidity dome until it shows roots.
- Mist the dome every day until it roots, opening the vents slightly at about day 3.
- For lighting, I use a pair of T5 bulbs, above the humidity dome. 100-125 watt equivalent CFL bulbs can work nice too (one or two above the humidity dome). HID's can work, but they are a little intense for young cuttings, so they should be turned down (dimmed) or placed farther away from the dome for successful results. I've not cloned with LED or other forms of lighting, but I'm sure that would work also.
**************
I hope someone finds this useful or helpful. If you like this thread, please give it a favorable "star rating". If you use this method successfully or something similar, please share your results with us here. I welcome questions and feedback!

X


")


