GreenThumbsUp
New Member
Hey guys, it's been awhile! Havn't been able to access my proxy from a remote client site, LOL, and get here.
Anyway, I am 3 weeks into using a new aeroponic cloning machine I made, and since I saw my first sets of roots this AM (on a very hard to clone plant, nonetheless!), I thought I'd share my design with you.
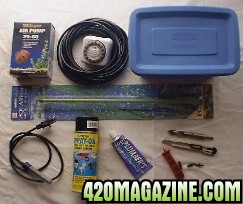
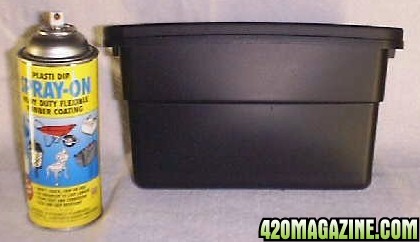
I took a little plastic cooler (holds two six-packs, stacked), cut big hole near the top inside, a smaller hole outside (back of the cooler), and dug the insulation out between the two holes. I feed an air tube and the power cord for the 10" flourescent (6w) in the top.
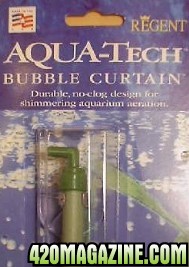
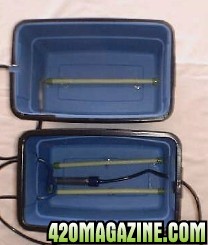
IN the bottom, I put 4 bubble wands and hooked them to the air tube. That is attached to a 10-15 gallon fishtank air pump.
IN the bottom is some pig wire fencing that is coated in plastic, for a shelf. The wire is about 3" from the bottom. I bent it and folded it so it fits snug since the inside gently slopes smaller.
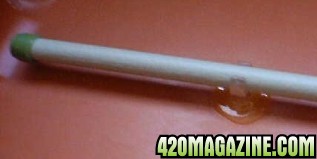
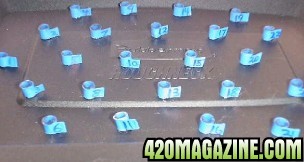
I then measured a 1/2" thick styrofoam sheet (from a cheap styro cooler) to fit down there and rest on the shelf and have about 1/4 inch between the front wall and the styro (so the under chamber stays humid, but the air can escape too).
I sliced the styro into 2 wide strips, then those into 4 pieces for a total of 8 pieces. I cut a wedge into the center of those (that's where you push your clones, it's a wedge so it can hold varying widths of stem).
I filled it 2" full of Olivia's Cloning Solution, and plugged it in. Then I took 8 clones, did the whole cutting thing Urdedpal describes, but put them in the styrofoam clones placed so the stems are 1/4 to 1/2 away from the water's surface. The air bubbles bring in necessary oxygen to the water (in case the roots grow into it, they won't rot in highly oxygenated water), and also keep the air 1" above the waters surface at about 98% humidity. It also runs about 80 to 89 degrees F, depending on temp in the house. It could be made a little cooler by putting a little fan the top vent to force more air through, but the air pump seems to keep air moving just right so the upper chamber stays from 80 to 50% humidity, depending on how much you prop open the lid as well. OH, when the water level falls, because its purely due to evaporation, I re-fill it with de-ionized water, not more olivias!
Oh! I built it because I have a nice little indica mother that is one of the "hollow stem" plants. I've never gotten her to root in rock wool or those plugs, or soil. So, I read an original aeroponics article from the scientist that invented the method, and rigged this little machine. Well, it seems to be working so far! If it fails drastically in the next few weeks, I"ll come back and tell ya.") When I again am home and can safely get to my proxy.
When I again am home and can safely get to my proxy.
Anyway, I am 3 weeks into using a new aeroponic cloning machine I made, and since I saw my first sets of roots this AM (on a very hard to clone plant, nonetheless!), I thought I'd share my design with you.
I took a little plastic cooler (holds two six-packs, stacked), cut big hole near the top inside, a smaller hole outside (back of the cooler), and dug the insulation out between the two holes. I feed an air tube and the power cord for the 10" flourescent (6w) in the top.
IN the bottom, I put 4 bubble wands and hooked them to the air tube. That is attached to a 10-15 gallon fishtank air pump.
IN the bottom is some pig wire fencing that is coated in plastic, for a shelf. The wire is about 3" from the bottom. I bent it and folded it so it fits snug since the inside gently slopes smaller.
I then measured a 1/2" thick styrofoam sheet (from a cheap styro cooler) to fit down there and rest on the shelf and have about 1/4 inch between the front wall and the styro (so the under chamber stays humid, but the air can escape too).
I sliced the styro into 2 wide strips, then those into 4 pieces for a total of 8 pieces. I cut a wedge into the center of those (that's where you push your clones, it's a wedge so it can hold varying widths of stem).
I filled it 2" full of Olivia's Cloning Solution, and plugged it in. Then I took 8 clones, did the whole cutting thing Urdedpal describes, but put them in the styrofoam clones placed so the stems are 1/4 to 1/2 away from the water's surface. The air bubbles bring in necessary oxygen to the water (in case the roots grow into it, they won't rot in highly oxygenated water), and also keep the air 1" above the waters surface at about 98% humidity. It also runs about 80 to 89 degrees F, depending on temp in the house. It could be made a little cooler by putting a little fan the top vent to force more air through, but the air pump seems to keep air moving just right so the upper chamber stays from 80 to 50% humidity, depending on how much you prop open the lid as well. OH, when the water level falls, because its purely due to evaporation, I re-fill it with de-ionized water, not more olivias!
Oh! I built it because I have a nice little indica mother that is one of the "hollow stem" plants. I've never gotten her to root in rock wool or those plugs, or soil. So, I read an original aeroponics article from the scientist that invented the method, and rigged this little machine. Well, it seems to be working so far! If it fails drastically in the next few weeks, I"ll come back and tell ya.
When I again am home and can safely get to my proxy.