

Intro:
Our end goal is giant cookie jars full of meds, right? It all starts in vegetative growth. For the scope of this article, I'll show you how to prepare INDOOR plants for yielding 1lb or more. Why grow one pounders? Grower rules are based on plant count, so why not get the most out of your plants?
What is our goal during vegetative growth?
The goal in VEG is to grow plants abap (as big as possible) for two months, to prepare them for flower. Most importantly, we will SHAPE (or train them) to look more like a square bush, instead of a christmas tree. WHY? Plants have auxins, a hormone that causes them to grow straight up. The plant focuses energy where the auxins are, at the top of the plant. By leveling out the top, we distribute the auxins, so the plant sends more equal energy to MANY tops, instead of just a few dominant tops. In addition, our ceilings are usually 8ft tall, we simply don't have the height to grow a tall plant, and we certainly can't illuminate it efficiently either.
How do we shape our plant in veg?
This is one of the most important things we need to do in order to get a high yield. We want to give our plant a "vanilla ice ice baby" FLAT top. This is what separates the 4oz plants from the "one pounder" plants. NOTE: Don't wait until your plant is too large before you start shaping it. The first thing will will do is top it.
Topping:
When we TOP a plant, we take off the terminal shoot; meaning, the very top of the branch that is making upward growth. When we do this, it causes the two lower branches (bud sites) to grow more equally, instead of a single dominant shoot.
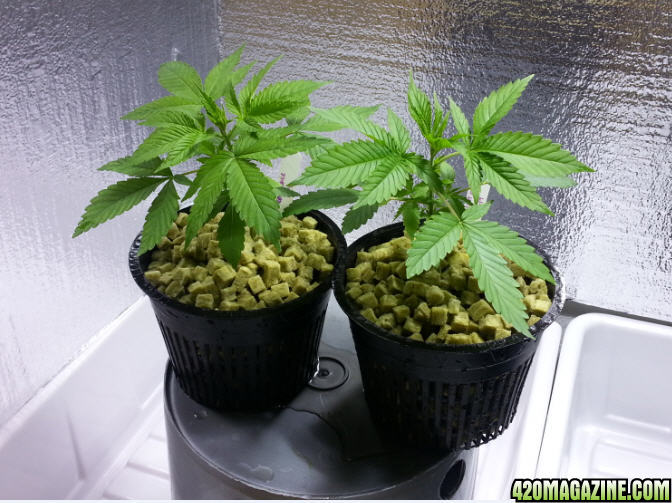
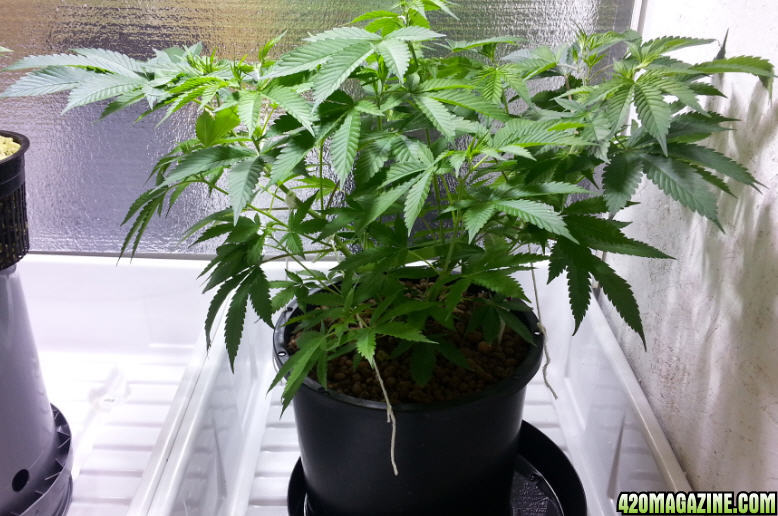
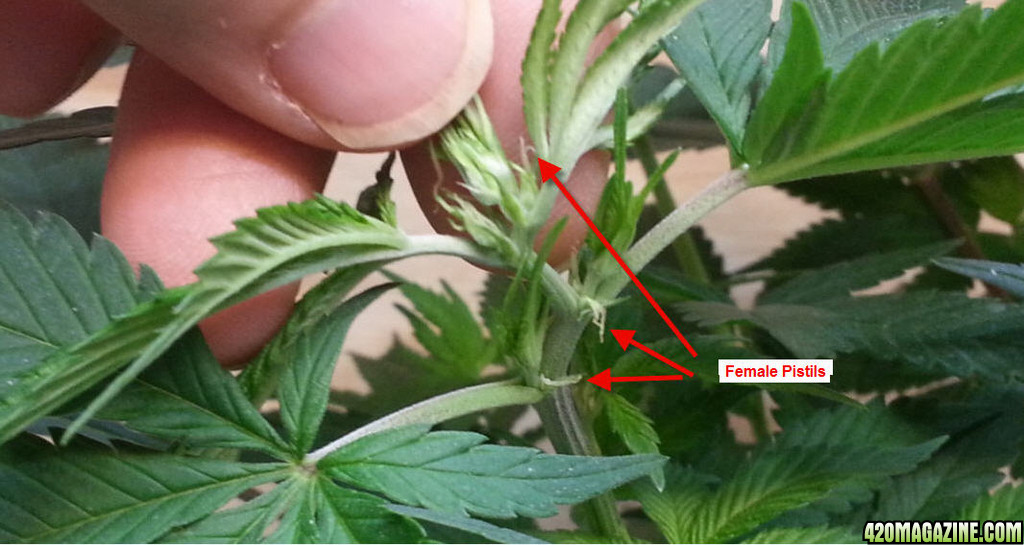
Knowing when and where to top: You will get the feel for when it is time to top your plants. Wait until the plant has about 4-5 sets of fan leaves, then top. Once the plant grows a bit, you can top it again, making even more branches. This is about the size the plant should be when we top it for the first time: (and this is how clean your growing area should be)
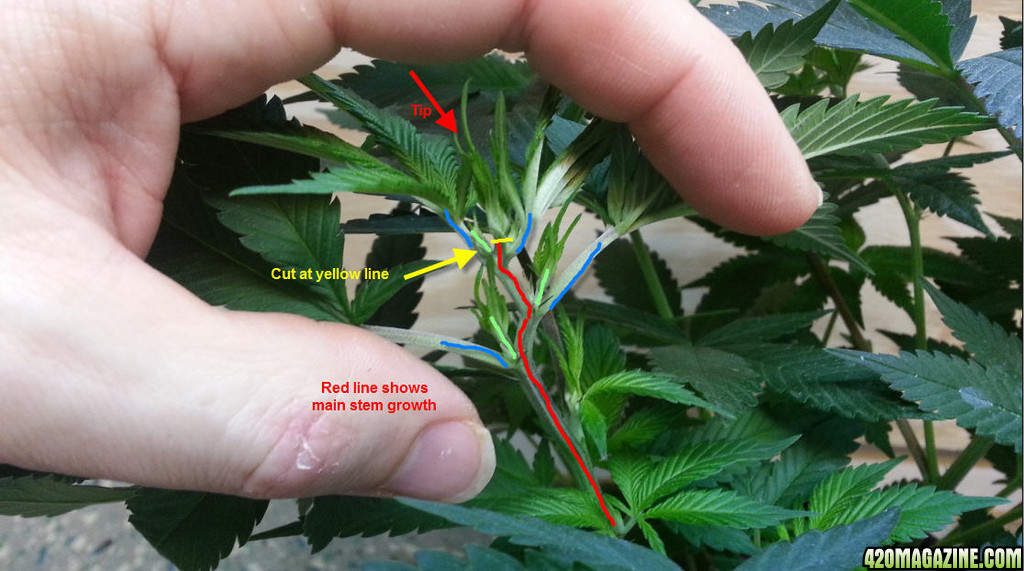
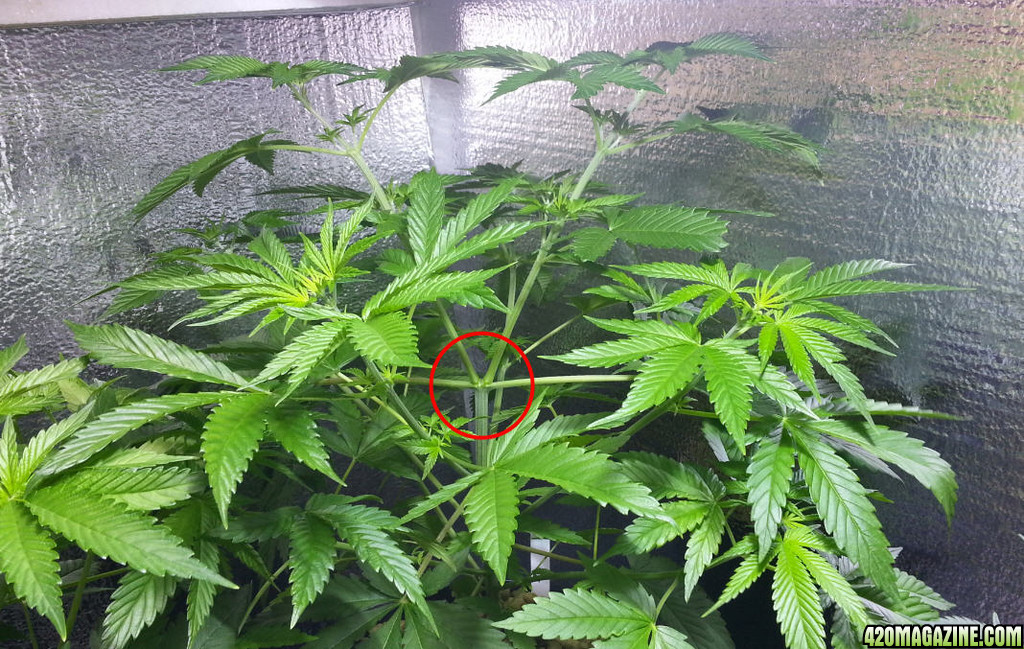
Here's how: Find the terminal shoot from the branch. On a more mature plant from a clone, it might be hard to tell which one is actually the top. On a plant from seed, it's very easy. I'll show you one a little more difficult from clone (NOTE, this is not the same plant as the one above):
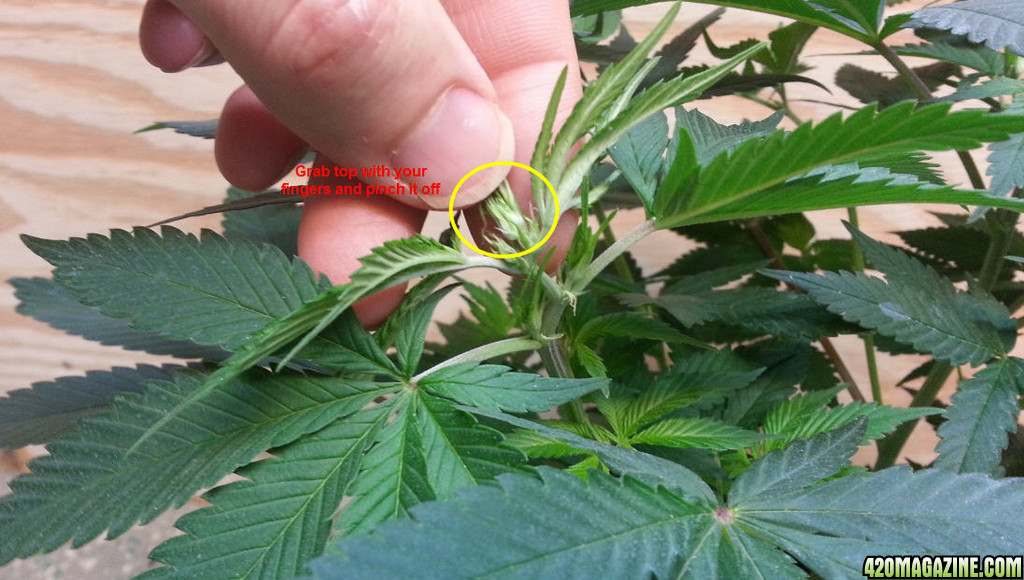
Then pinch it off. Pinching it off, instead of cutting it, tends to help close the wound a bit, rather than having it "bleed" from a fresh razor cut.
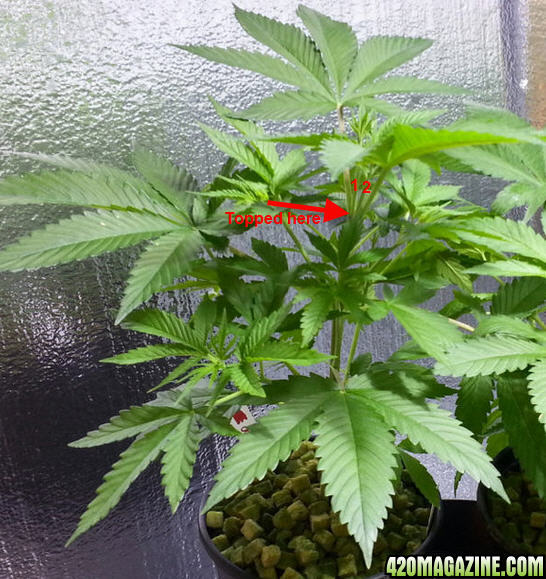
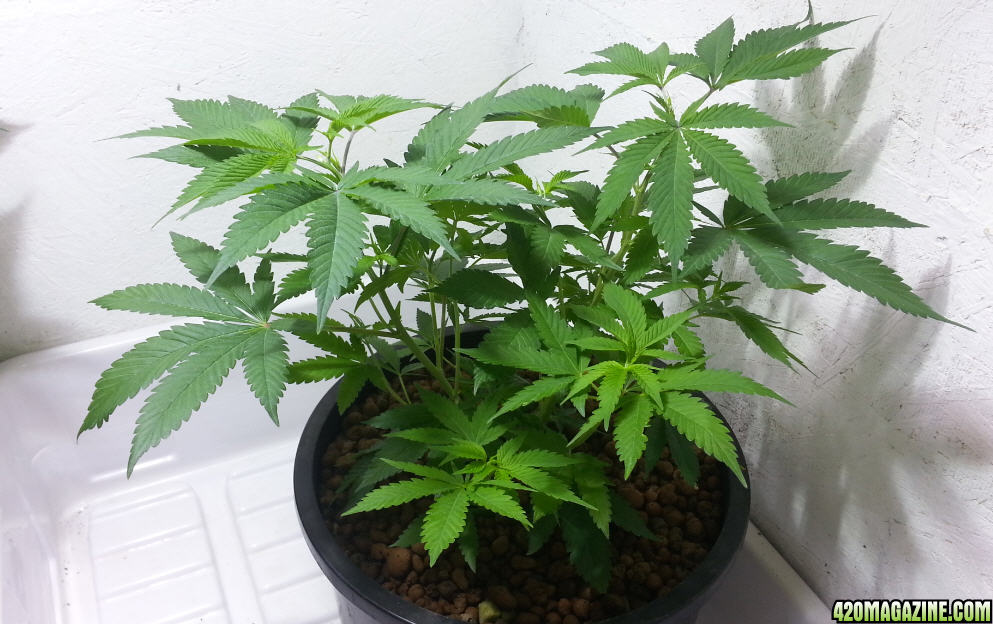
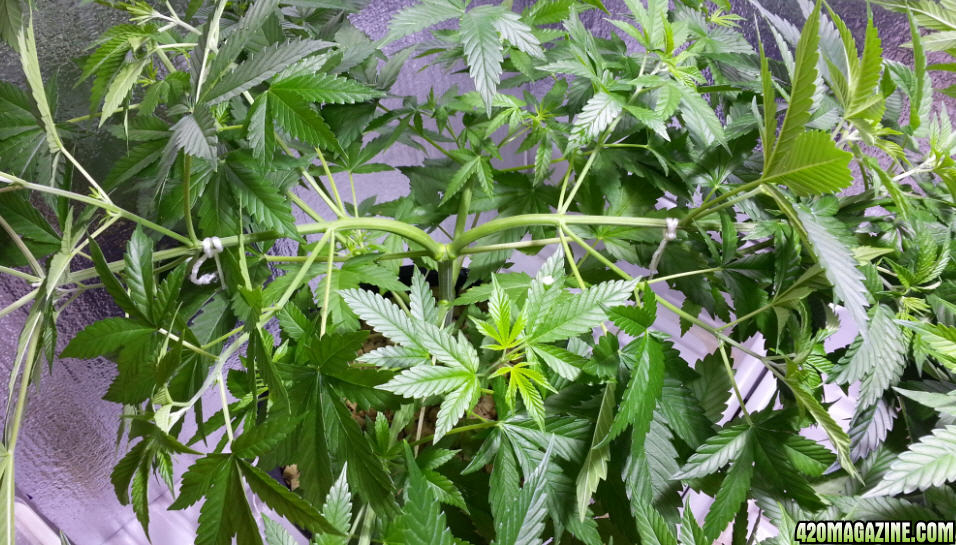
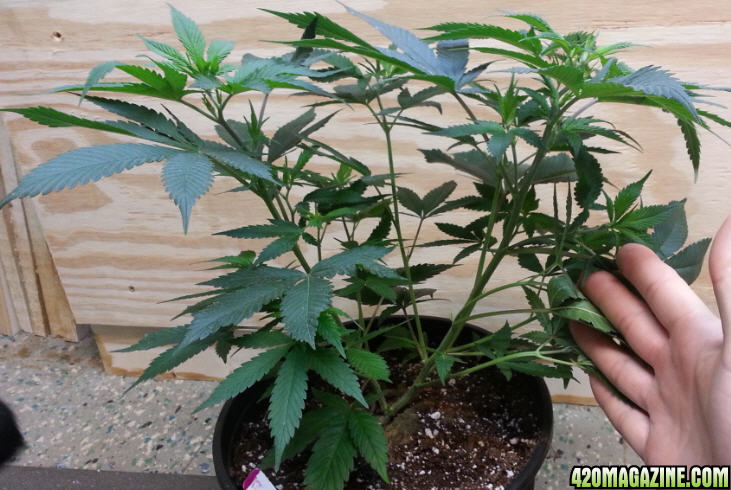
Here is what this plant looked like a couple days after topping it. See the two lower branches growing now?
And here it is again, after a couple weeks. Damn, that's pretty.
But she is getting too tall, it's time to bend her over ;-)
LST (low stress training)
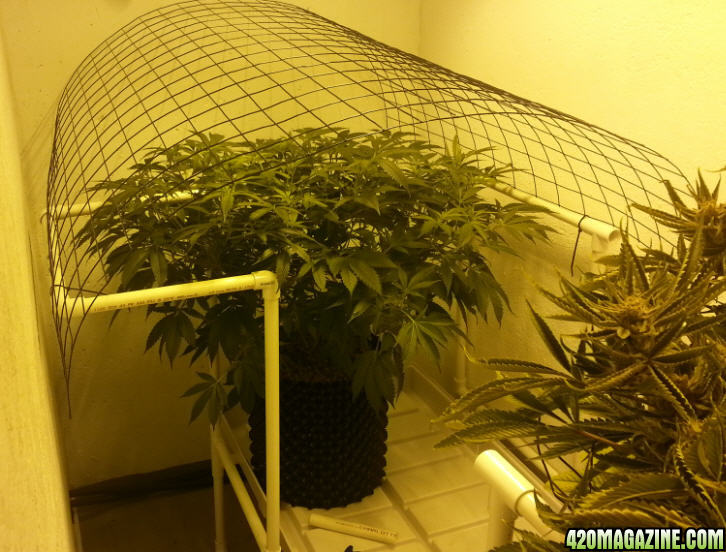
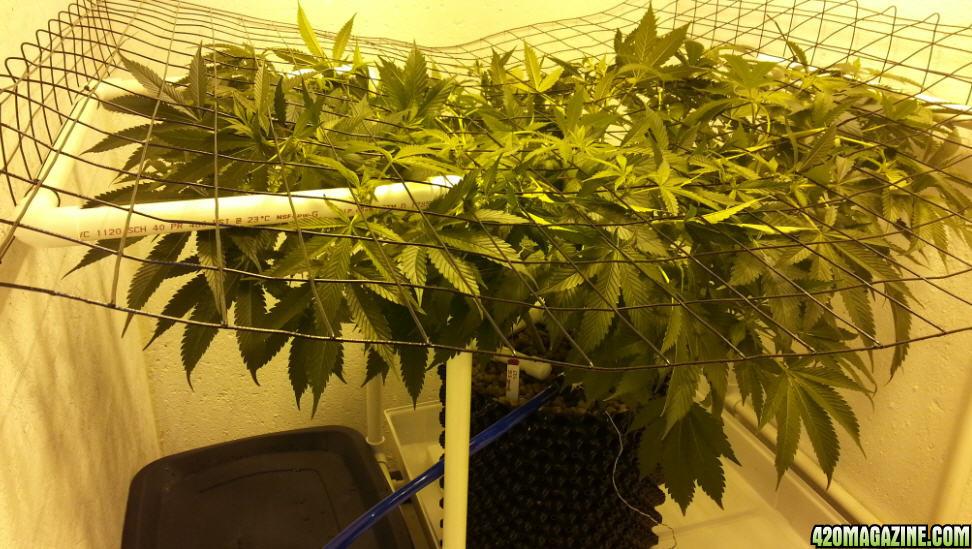
LST simply means a way of training our plants to grow a certain way, without radically hurting them. Typically, when we refer to LST, we are talking about bending or holding down branches in order to expose more light to lower future bud sites. When we level the canopy, auxins are spread out more evenly to all branches. As I said before, the end result is a few dozen colas (bud masses) of the same size, rather than a few massive colas (prone to mold because they are too big) and many little ones.
When I train my plants, I spread it out so the little branches can get more light. I don't "kink" the branches (aka super cropping). Super cropping is more of a HST method (High stress), because the plant must repair the damaged tissue. I generally do whatever it takes to spread out branches so they are not on top of each other, without kinking.
Here is an example of bending, but not kinking branches (this is a different plant I did awhile back):
Before:
During:
After:
And a few days later:
See how the middle has filled in? Plants spring back. No matter how much you bend them, they have a way of righting themselves again. This is why some people KINK or "supercrop" their branches. If your branches keep popping up, you can keep bending them down or you can tie them down. In the above picture, you can see where I tied down these two main branches.
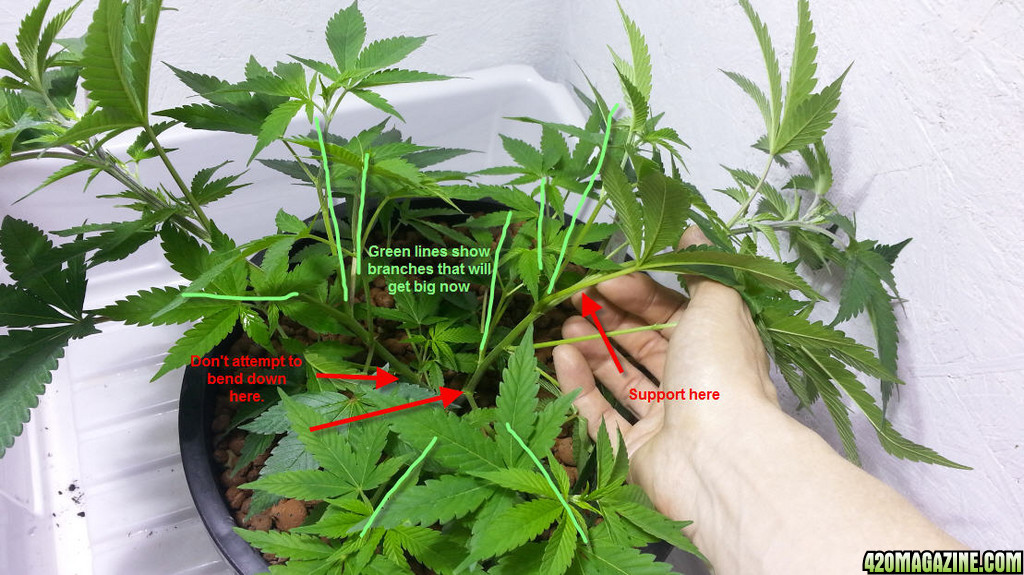
Now, let's get back to the plant we started working on. We topped it and now it has these two main branches. We can let these grow a couple nodes, and then top again, to get more branches.
Now, let's tie it down. You will need to SLOWLY bend the branch over a 4-5" area, in order to bend it without kinking the branch. In addition, BE CAREFUL not to put too much pressure on, or you will break the center stalk. Work slowly, and after a bit, your branch should stay bent over. Then you can tie it to your pot so it doesn't pop back up over night.
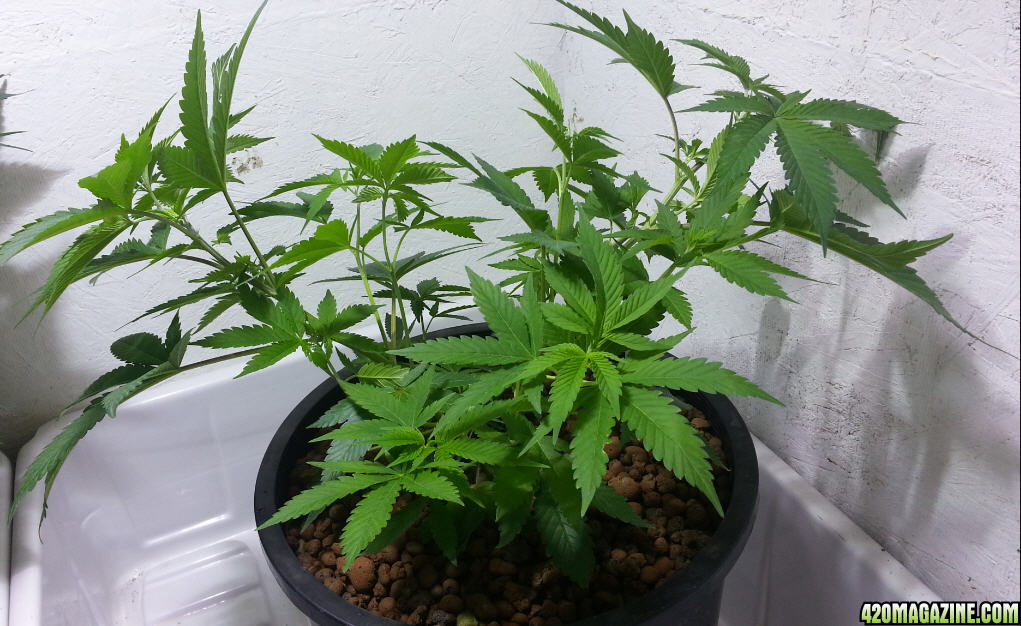
And after a couple days, we can see how the side branches of these two main stalks are pointing up and getting tons of light now.
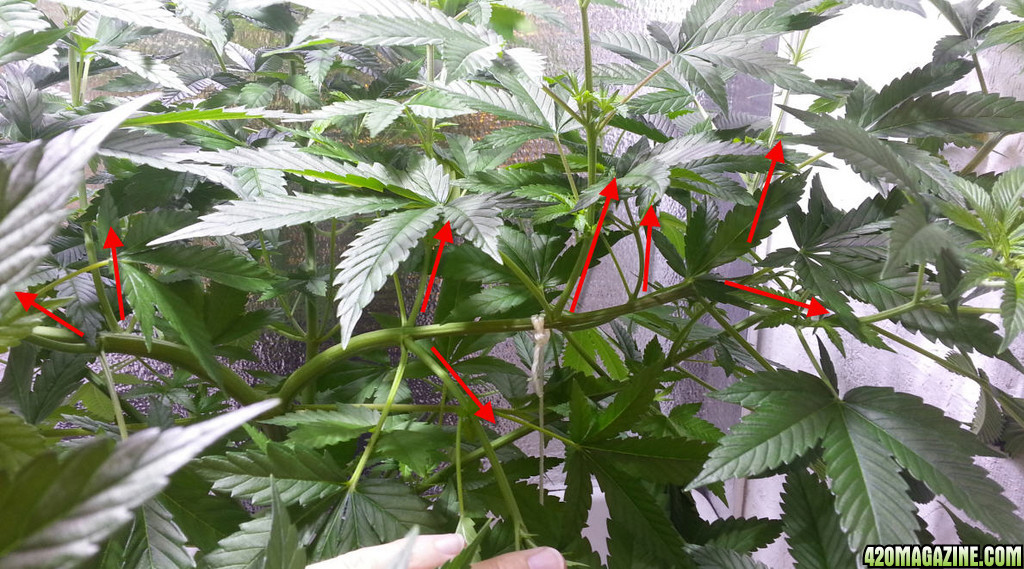
After flowering, here is an example showing the power of what we're doing. Notice the red circles where I accidentally kinked them slightly.

Now it is up to you:
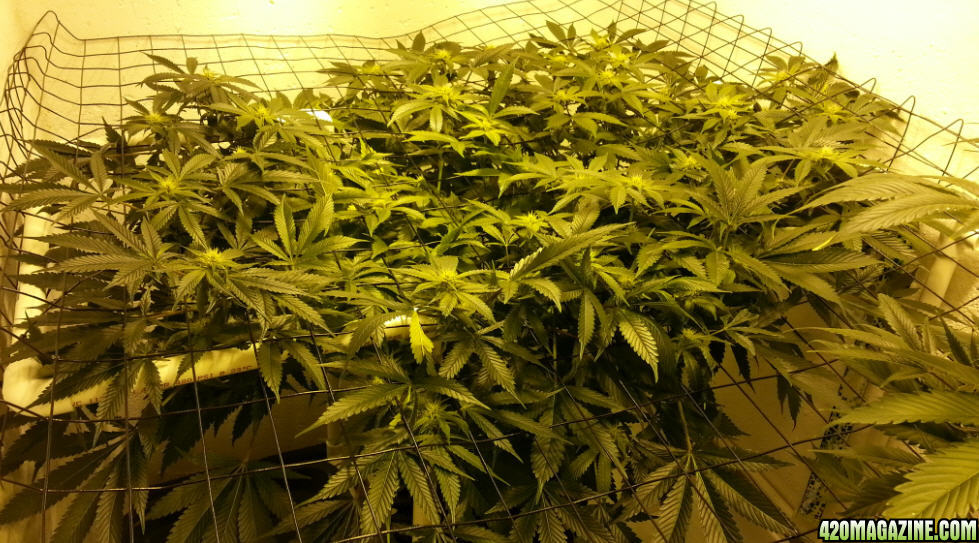
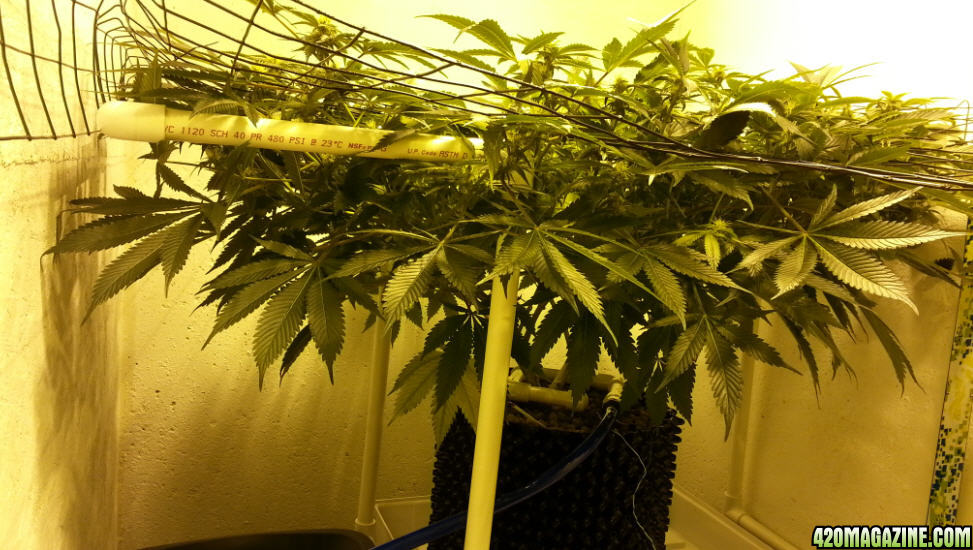
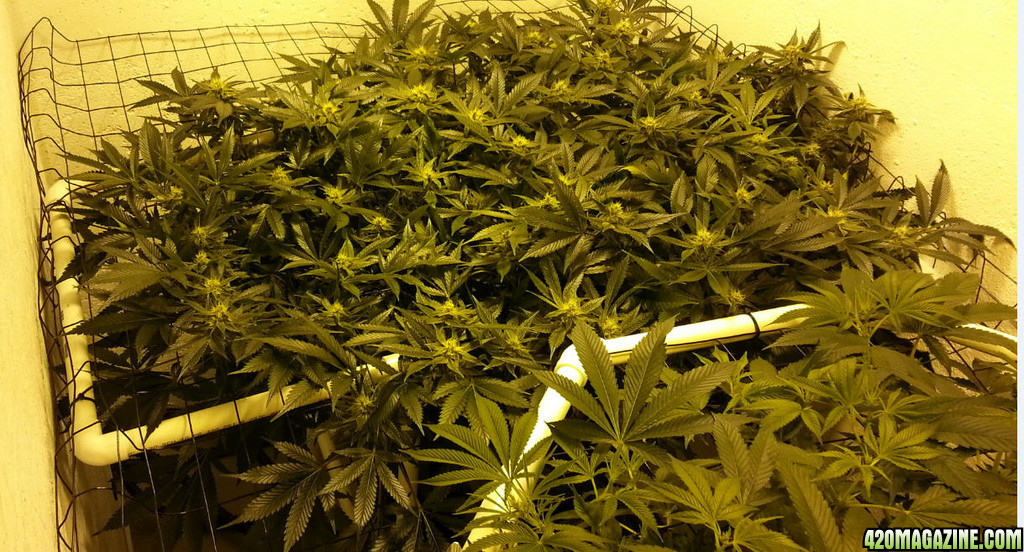
Continue to bend down branches and tie them if necessary, to keep the plant as short as possible. You will get the "feel" for it, when you see the results of all the side branches getting more light. Keep bending until it is a solid 3ft in diameter, then let branches grow up, and top the tall ones. Let it go about one more week and she will be ready for flower. Total time from seed or clone is about 2 months. At this point, it will be ready to produce about 40 - 50, 1/4-1/3oz colas.
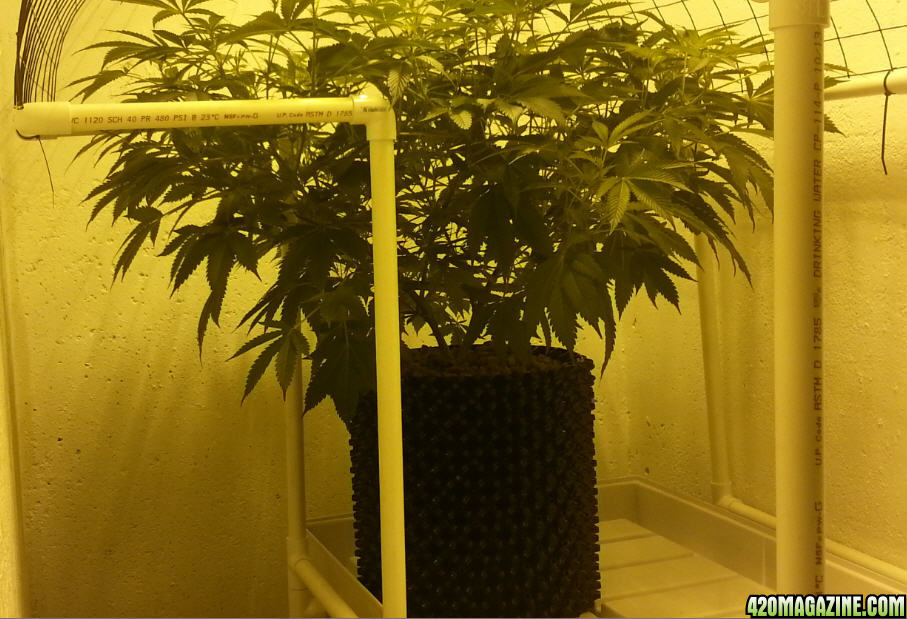
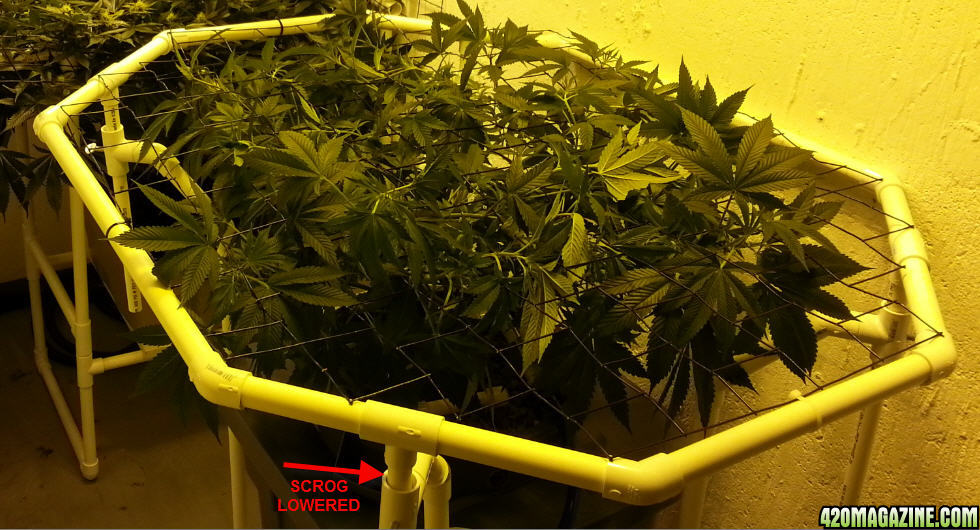
Stay tuned. Part two of this article will show you how to put it under a trellis, or as stoners call it, a "SCROG". Screen of green.
Our end goal is giant cookie jars full of meds, right? It all starts in vegetative growth. For the scope of this article, I'll show you how to prepare INDOOR plants for yielding 1lb or more. Why grow one pounders? Grower rules are based on plant count, so why not get the most out of your plants?
What is our goal during vegetative growth?
The goal in VEG is to grow plants abap (as big as possible) for two months, to prepare them for flower. Most importantly, we will SHAPE (or train them) to look more like a square bush, instead of a christmas tree. WHY? Plants have auxins, a hormone that causes them to grow straight up. The plant focuses energy where the auxins are, at the top of the plant. By leveling out the top, we distribute the auxins, so the plant sends more equal energy to MANY tops, instead of just a few dominant tops. In addition, our ceilings are usually 8ft tall, we simply don't have the height to grow a tall plant, and we certainly can't illuminate it efficiently either.
How do we shape our plant in veg?
This is one of the most important things we need to do in order to get a high yield. We want to give our plant a "vanilla ice ice baby" FLAT top. This is what separates the 4oz plants from the "one pounder" plants. NOTE: Don't wait until your plant is too large before you start shaping it. The first thing will will do is top it.
Topping:
When we TOP a plant, we take off the terminal shoot; meaning, the very top of the branch that is making upward growth. When we do this, it causes the two lower branches (bud sites) to grow more equally, instead of a single dominant shoot.
Knowing when and where to top: You will get the feel for when it is time to top your plants. Wait until the plant has about 4-5 sets of fan leaves, then top. Once the plant grows a bit, you can top it again, making even more branches. This is about the size the plant should be when we top it for the first time: (and this is how clean your growing area should be)
Here's how: Find the terminal shoot from the branch. On a more mature plant from a clone, it might be hard to tell which one is actually the top. On a plant from seed, it's very easy. I'll show you one a little more difficult from clone (NOTE, this is not the same plant as the one above):
Then pinch it off. Pinching it off, instead of cutting it, tends to help close the wound a bit, rather than having it "bleed" from a fresh razor cut.
Here is what this plant looked like a couple days after topping it. See the two lower branches growing now?
And here it is again, after a couple weeks. Damn, that's pretty.
But she is getting too tall, it's time to bend her over ;-)
LST (low stress training)
LST simply means a way of training our plants to grow a certain way, without radically hurting them. Typically, when we refer to LST, we are talking about bending or holding down branches in order to expose more light to lower future bud sites. When we level the canopy, auxins are spread out more evenly to all branches. As I said before, the end result is a few dozen colas (bud masses) of the same size, rather than a few massive colas (prone to mold because they are too big) and many little ones.
When I train my plants, I spread it out so the little branches can get more light. I don't "kink" the branches (aka super cropping). Super cropping is more of a HST method (High stress), because the plant must repair the damaged tissue. I generally do whatever it takes to spread out branches so they are not on top of each other, without kinking.
Here is an example of bending, but not kinking branches (this is a different plant I did awhile back):
Before:
During:
After:
And a few days later:
See how the middle has filled in? Plants spring back. No matter how much you bend them, they have a way of righting themselves again. This is why some people KINK or "supercrop" their branches. If your branches keep popping up, you can keep bending them down or you can tie them down. In the above picture, you can see where I tied down these two main branches.
Now, let's get back to the plant we started working on. We topped it and now it has these two main branches. We can let these grow a couple nodes, and then top again, to get more branches.
Now, let's tie it down. You will need to SLOWLY bend the branch over a 4-5" area, in order to bend it without kinking the branch. In addition, BE CAREFUL not to put too much pressure on, or you will break the center stalk. Work slowly, and after a bit, your branch should stay bent over. Then you can tie it to your pot so it doesn't pop back up over night.
And after a couple days, we can see how the side branches of these two main stalks are pointing up and getting tons of light now.
After flowering, here is an example showing the power of what we're doing. Notice the red circles where I accidentally kinked them slightly.
Now it is up to you:
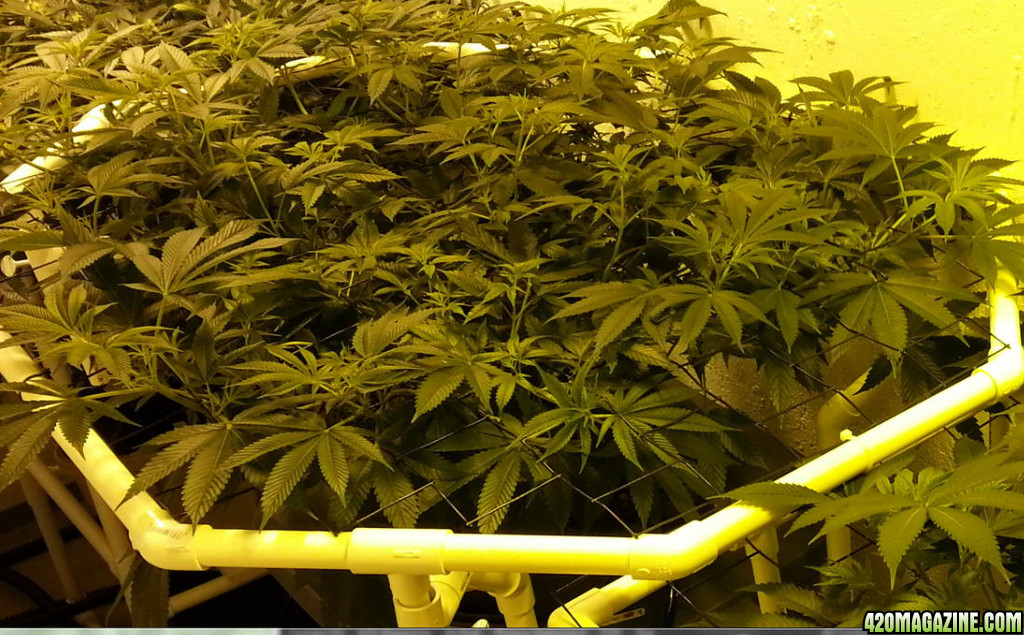
Continue to bend down branches and tie them if necessary, to keep the plant as short as possible. You will get the "feel" for it, when you see the results of all the side branches getting more light. Keep bending until it is a solid 3ft in diameter, then let branches grow up, and top the tall ones. Let it go about one more week and she will be ready for flower. Total time from seed or clone is about 2 months. At this point, it will be ready to produce about 40 - 50, 1/4-1/3oz colas.
Stay tuned. Part two of this article will show you how to put it under a trellis, or as stoners call it, a "SCROG". Screen of green.


 I, myself, am planning on setting up basically what you have done here, and also to produce over 1pound p/plant indoor in soil.
")

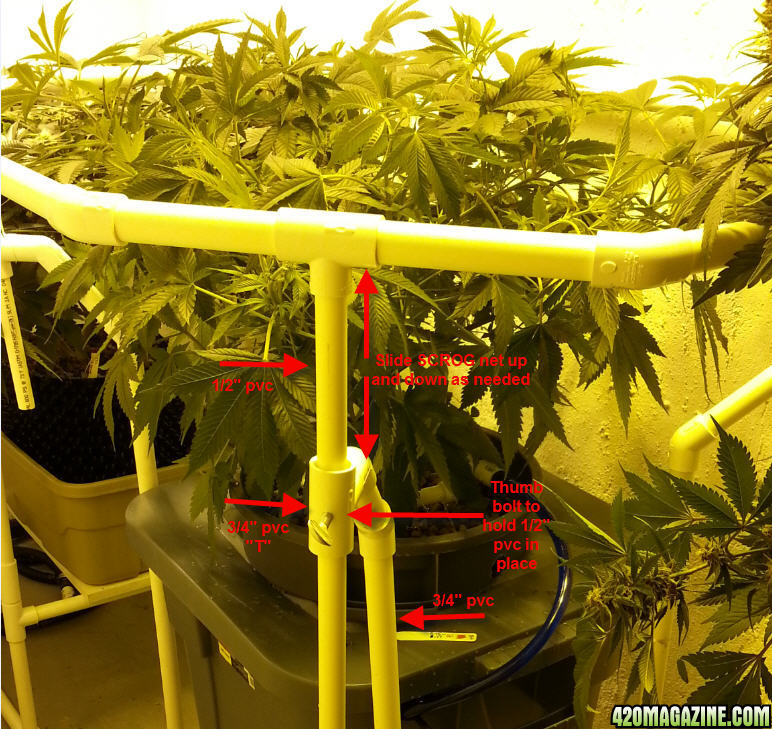
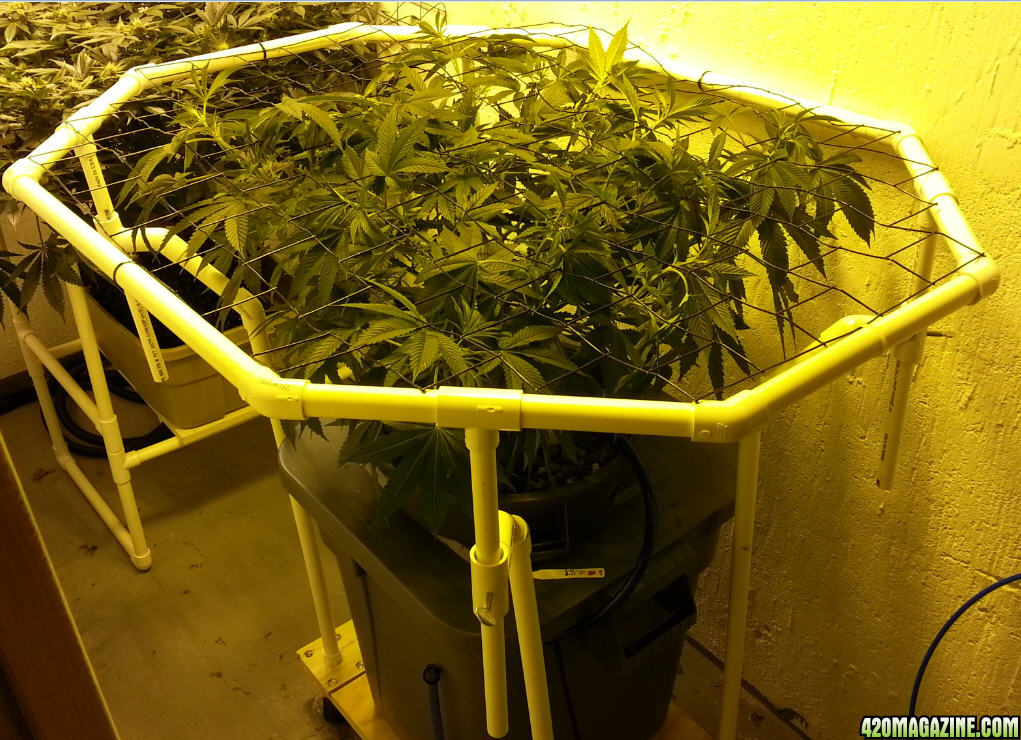
 ha ha.. you think that's funny, but I heard from another guy here, he has a cannabis friendly "farmer's market" where he lives. Seriously though, I did this so I can move it around and turn it, so I can tend to the other side of the plant. This canopy is 4' x 3'.
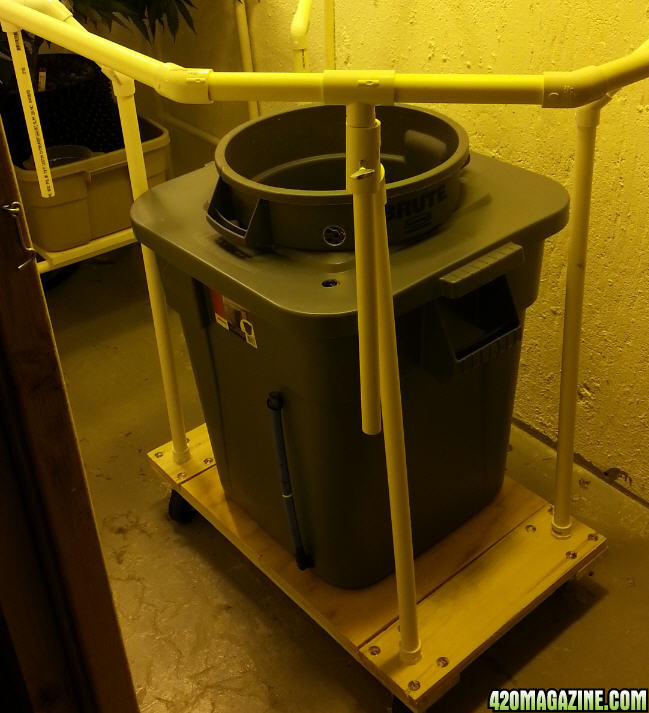
") Good Luck!
Good Luck! I just leave my little pieces of wire attached to the bucket and they are ready to go for the next batch.