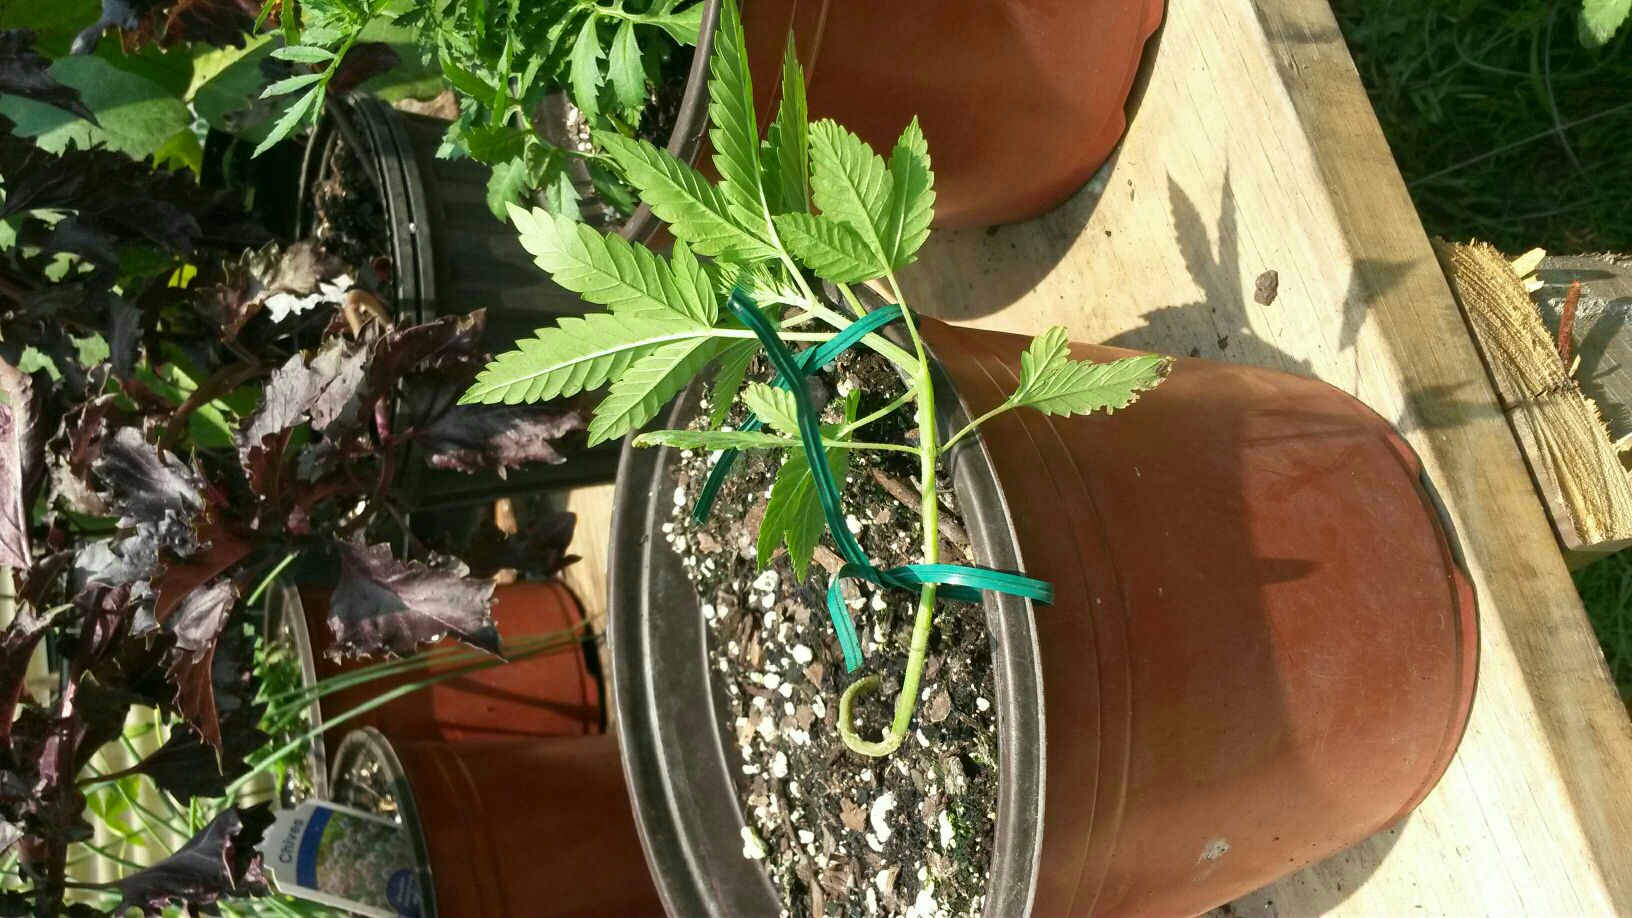
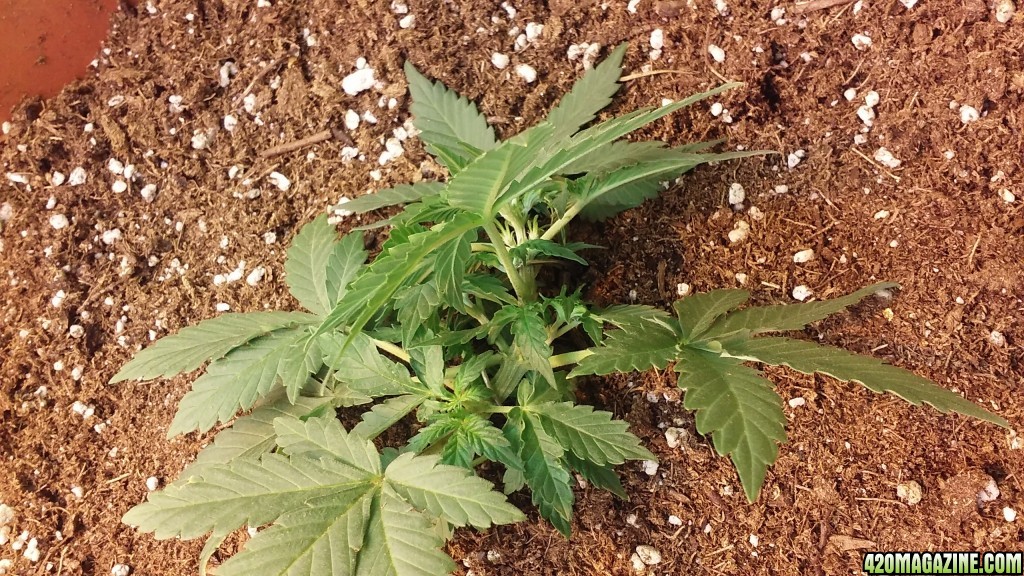
OK then, many of you asked for it and here it is. I had to grow a practice plant just for this Low Stress Training tutorial.  just kidding, but here's a little one I'm going to be putting outdoors soon. It's an og Kush S1 offspring, of my first ever grow. It's being grown out to determine its likelihood of herminess©. I've got three of them and I'll do different grow strategies for each of them. Others will follow soon. But for now here is the beginning of a properly low stress trained ONLY plant. This plant's training was started after the third node cleared.
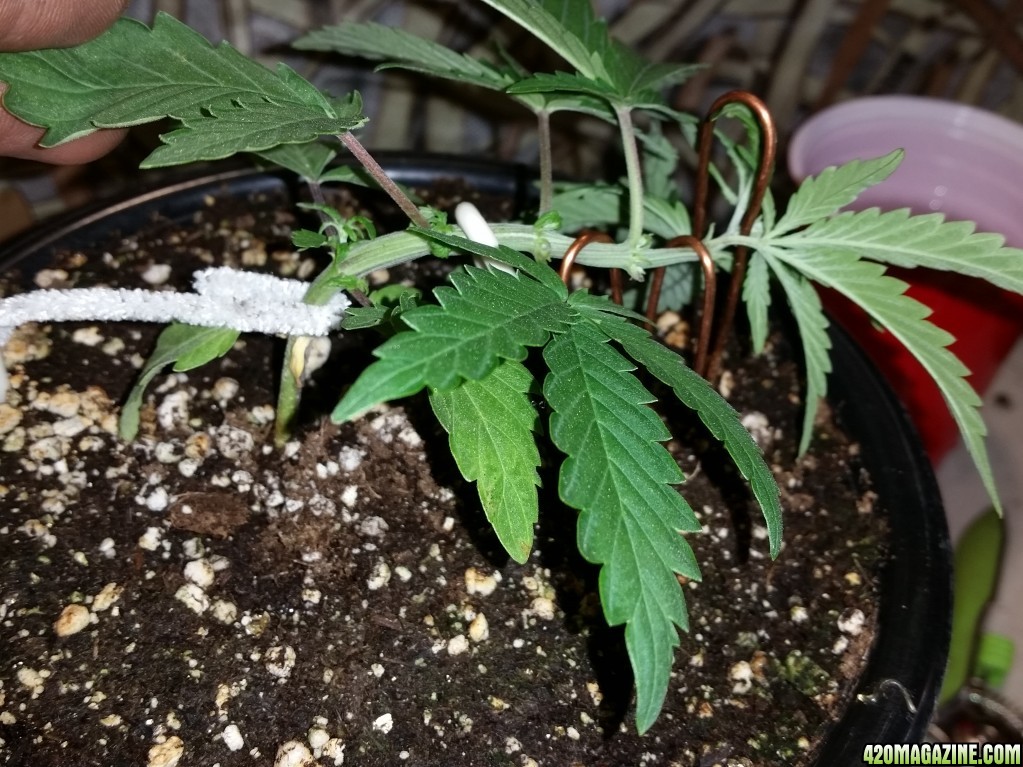
Step #1 Fasten a counter acting yarn, string, etc... to the base of the stem. I like to put it just below the first set of true leaf stems.
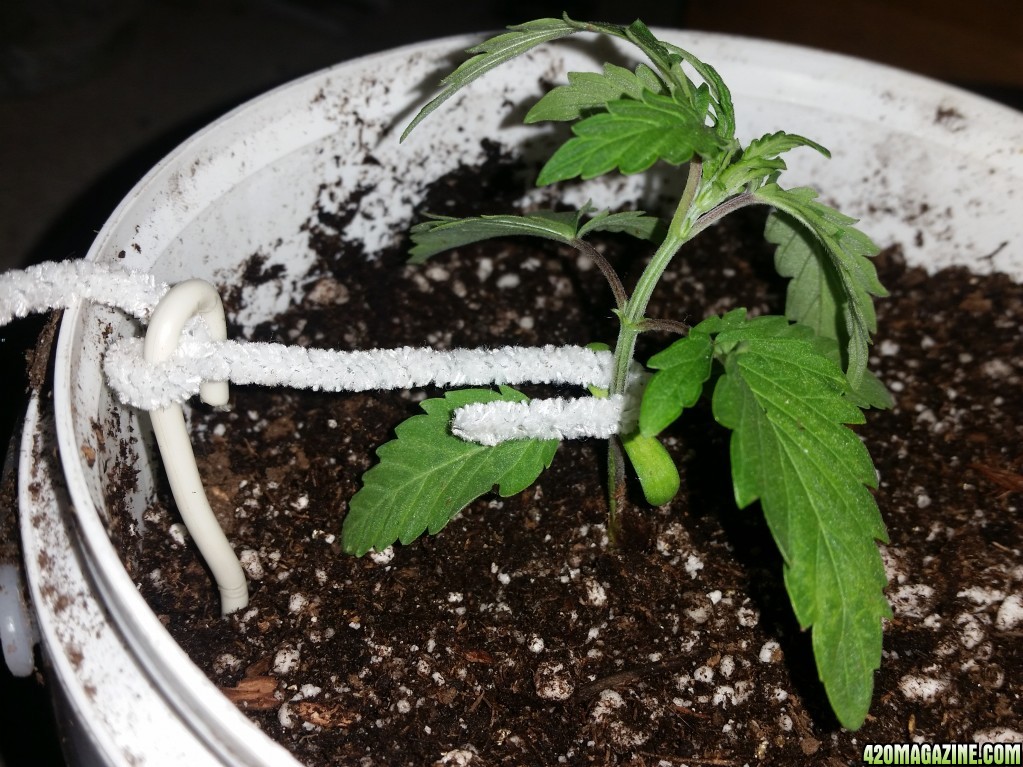
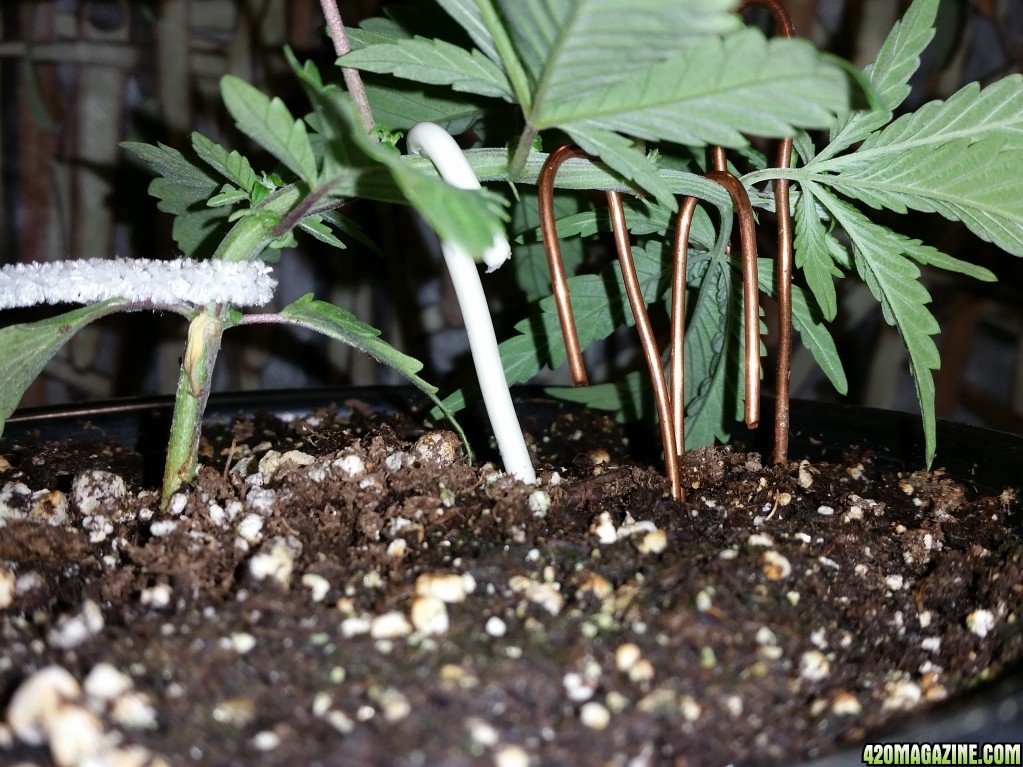
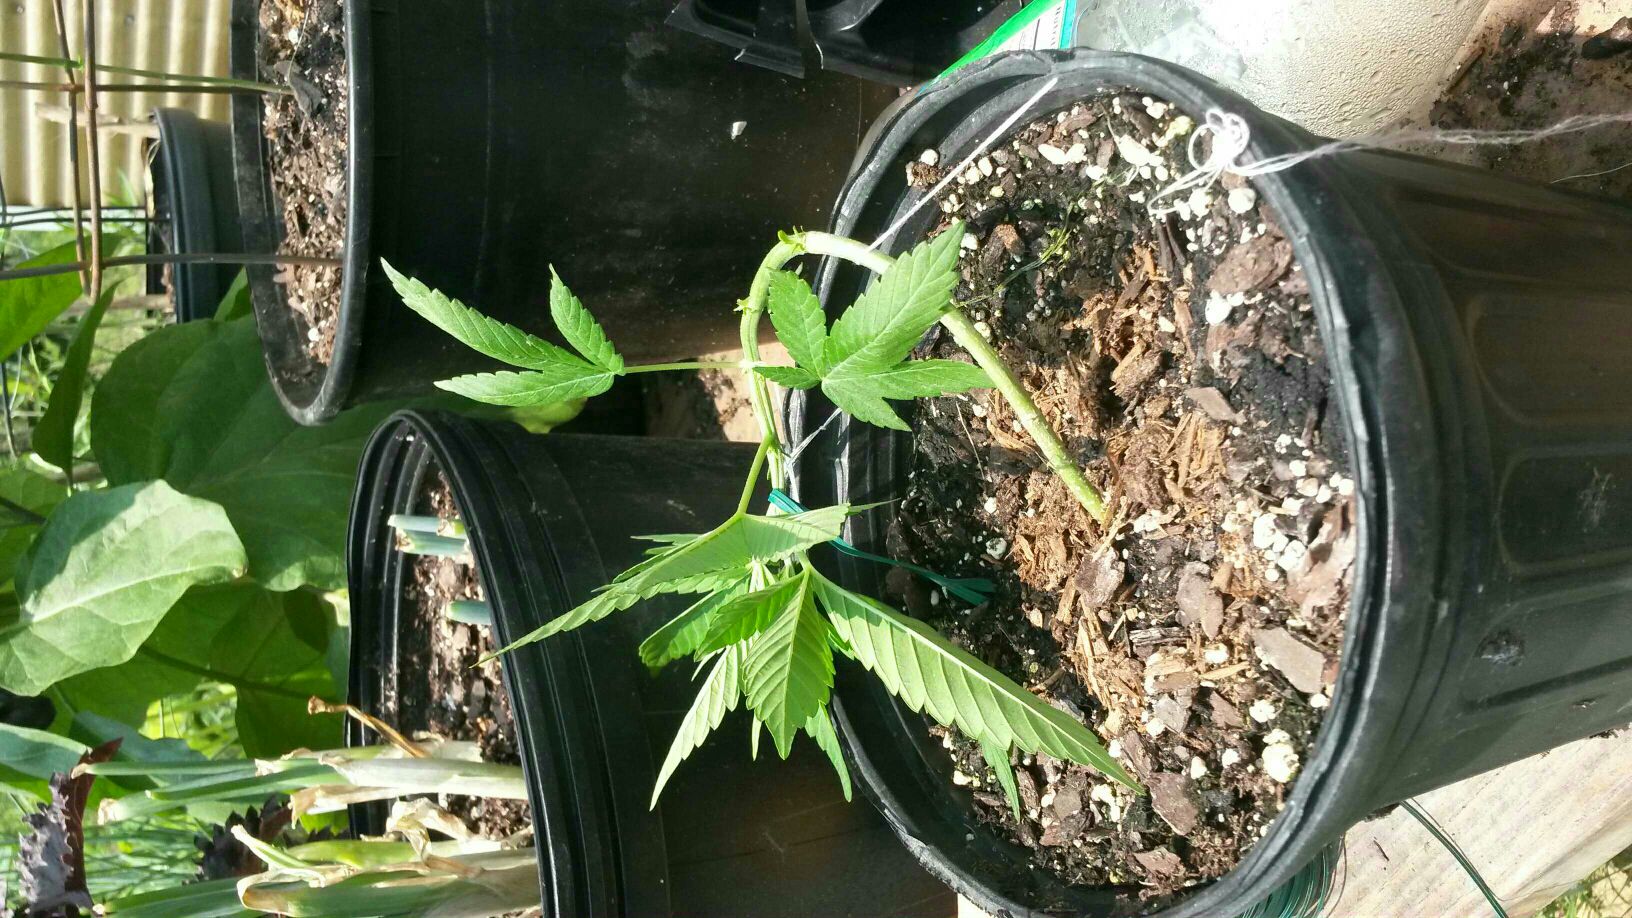
You can see I've use a stake and a pipe cleaner to secure the stem in a vertical position. I'm not bending anything yet, just creating a counter force to balance it out when you pull it the other way. This also hold the plant in place so the you don't uproot the seedling while you constantly pull the stem more and more sideways.
Step #2 The double tap... No no that later. Step #2 is limber up... (zombieland) what this means is that you just bend the stem back and forth a little eventually leaning it to the direction you're planning on guiding it around the pot.
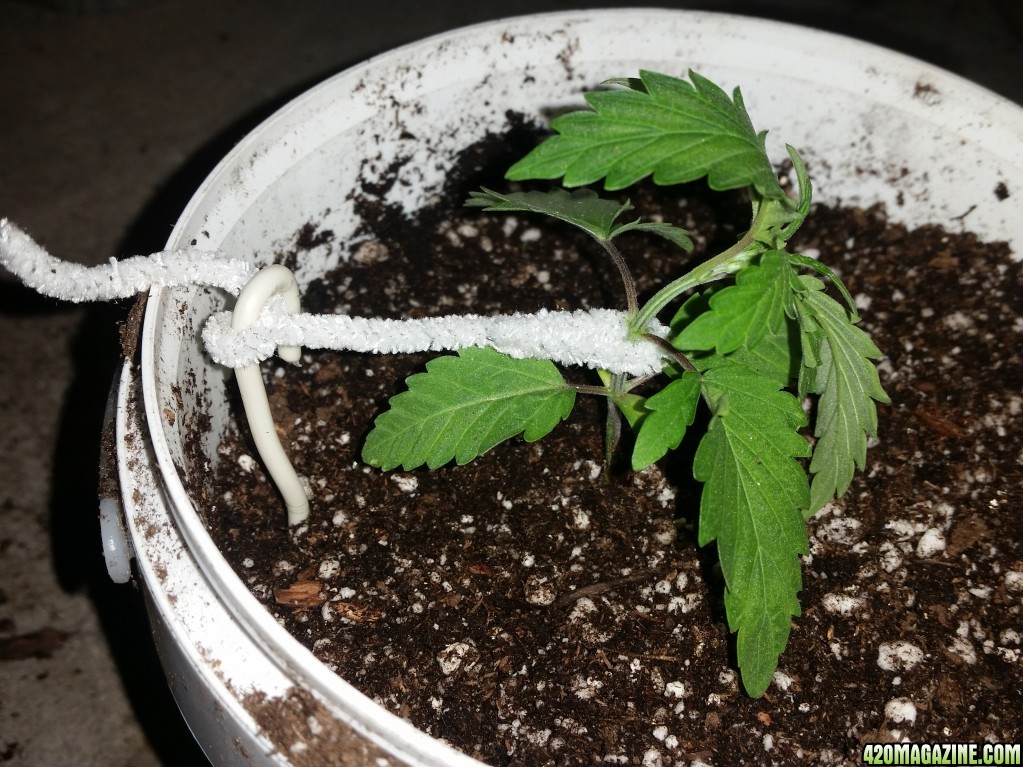
Just us a finger and bend it towards your destination. You'll see that it doesn't take much and it will want to stay bent over.
Step #3 attach counter string for larger plants or place a guide/stake to secure the stem I'm the desired position
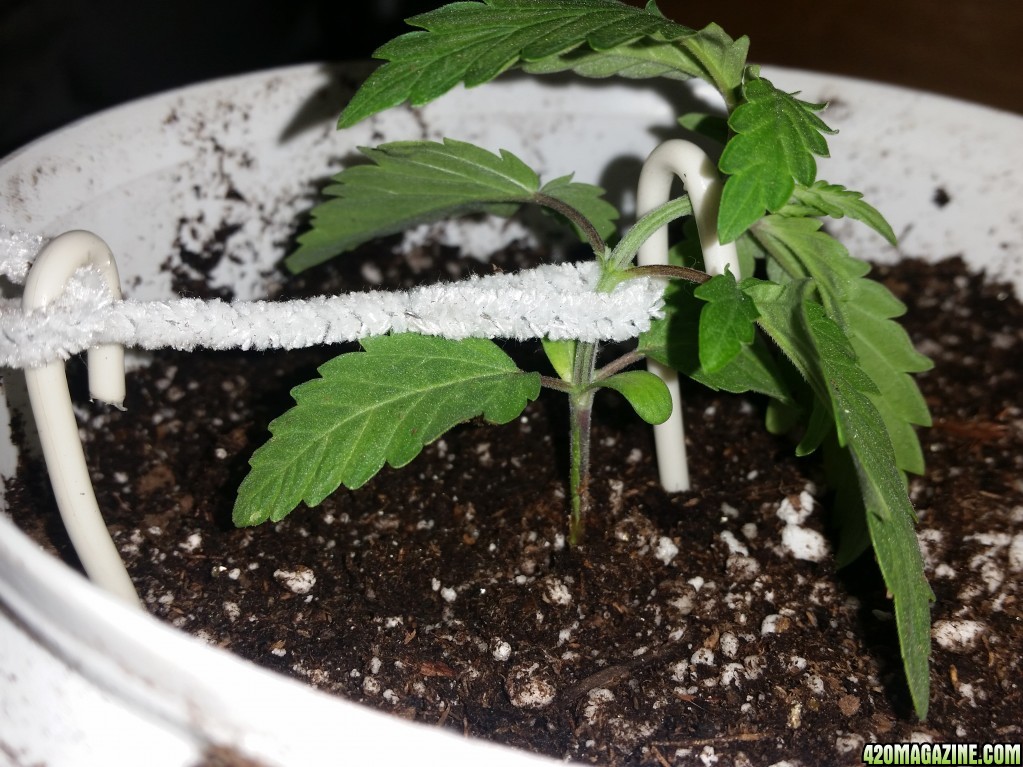
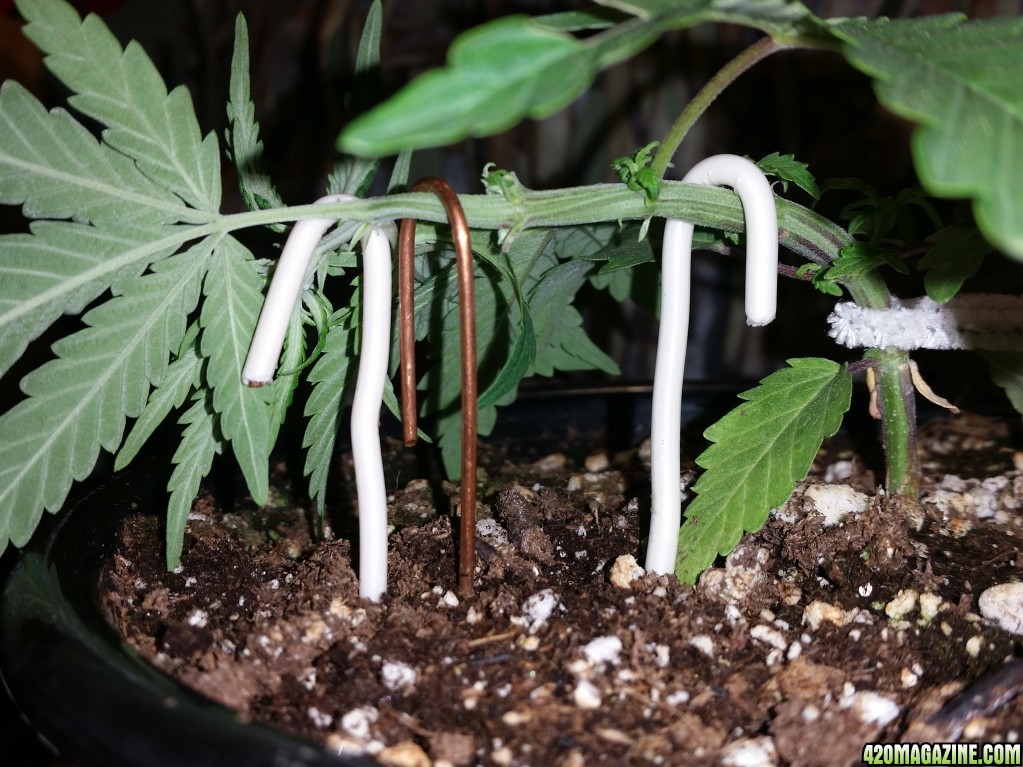
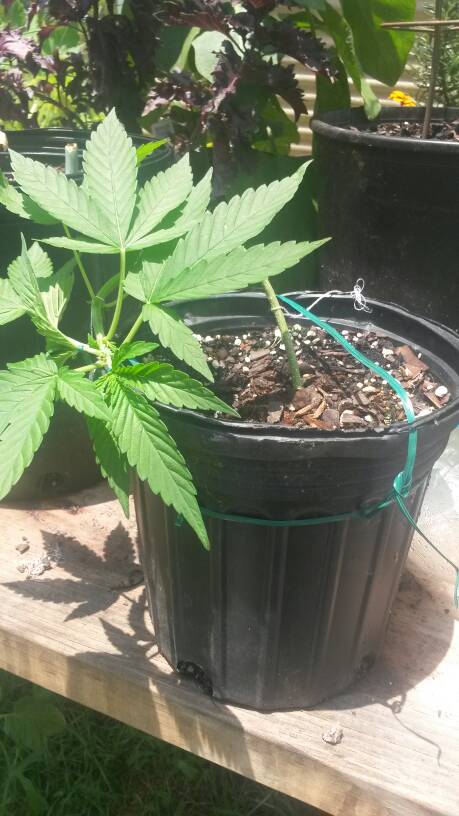
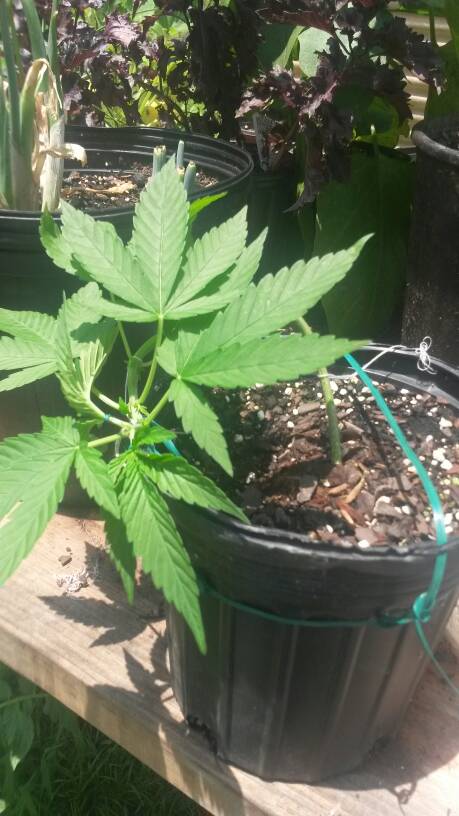
I used a length of coated wire to pin the stem near horizontally. With the next node that grows at it end is clear of the previous the stake can be moved up the stem and by then you should be growing horizontal.
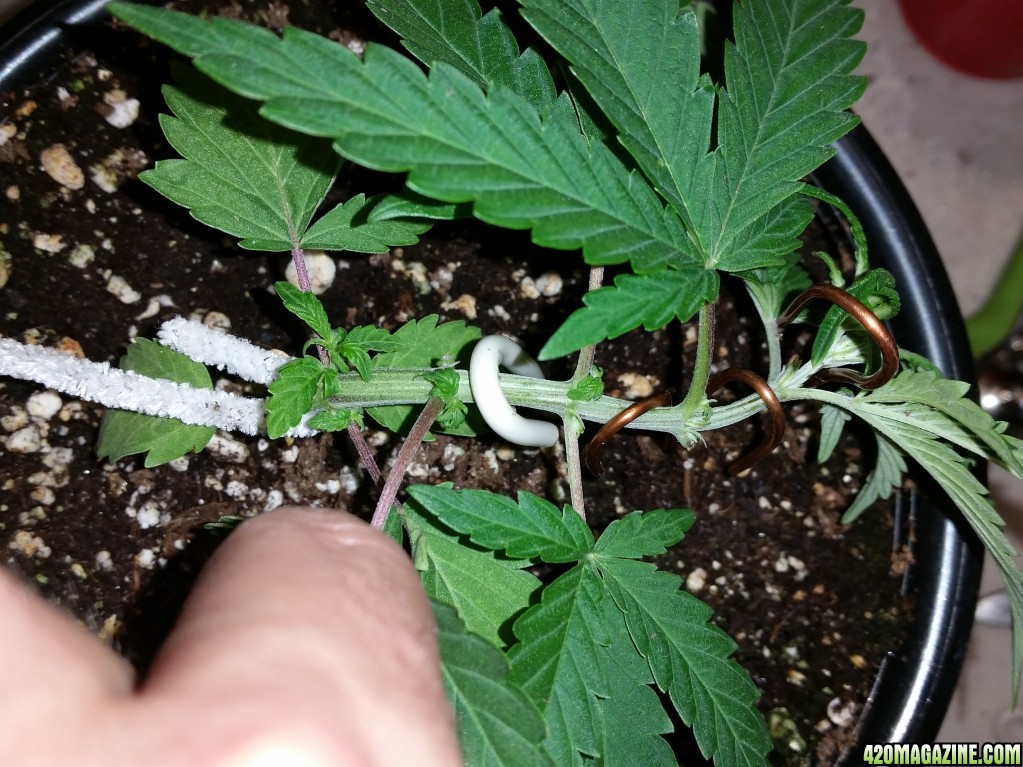
You can see that the very bottom node will become new auxiliary shoots. And the growth at the node above(at the bend) will know become my secondary shoots. The main stem will continue around the pot.
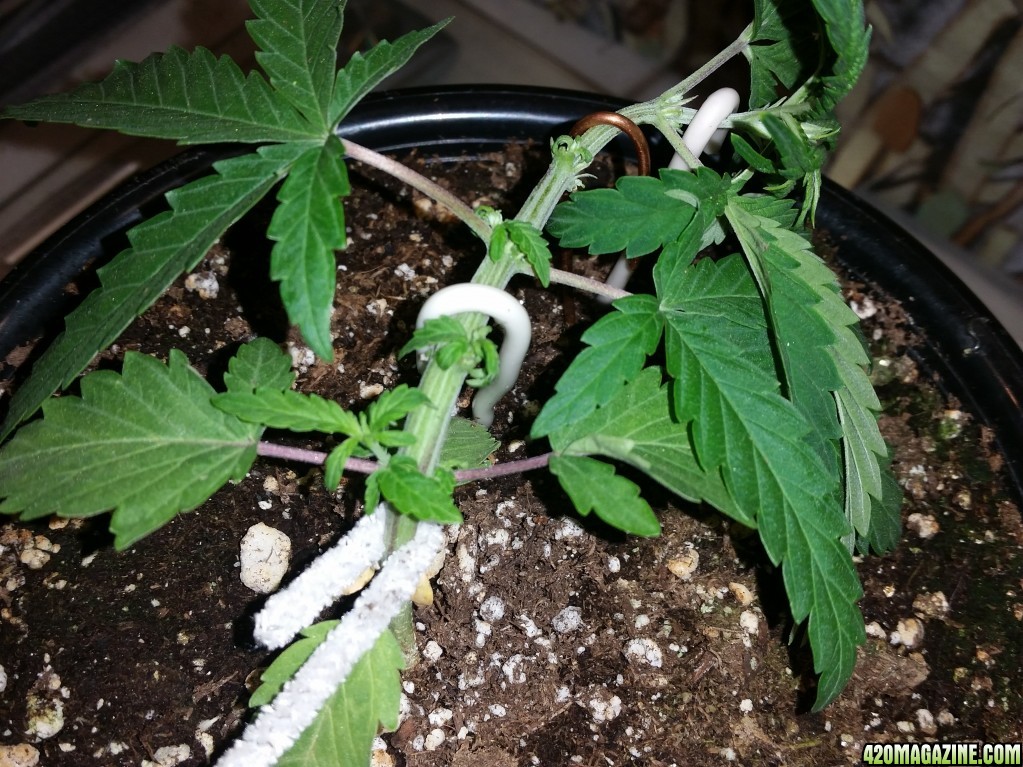
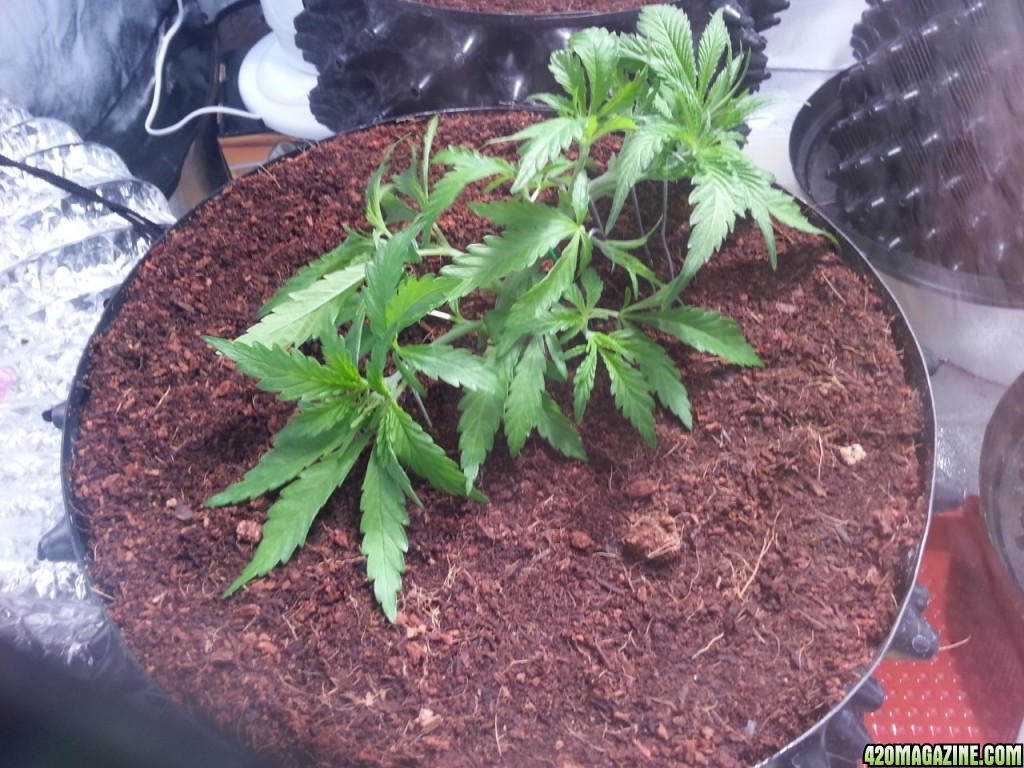
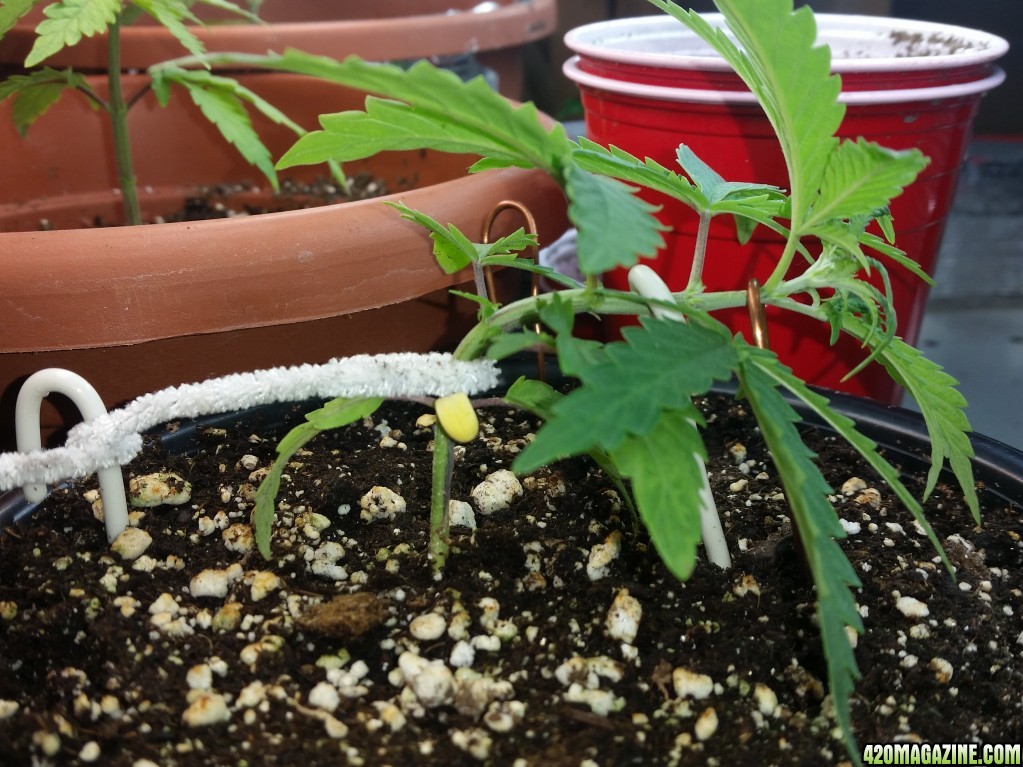
After a few more days we can add a stake further down the stem. Notice the small shoots are starting to pop out from the nodes all along the stem. It is good if you can keep the stem from twisting, I remove the leaf facing downward to prevent it from doing just that. But I leave the top leaf so that it shades the new nodes, which like to stretch in the shade to find light... Correct?
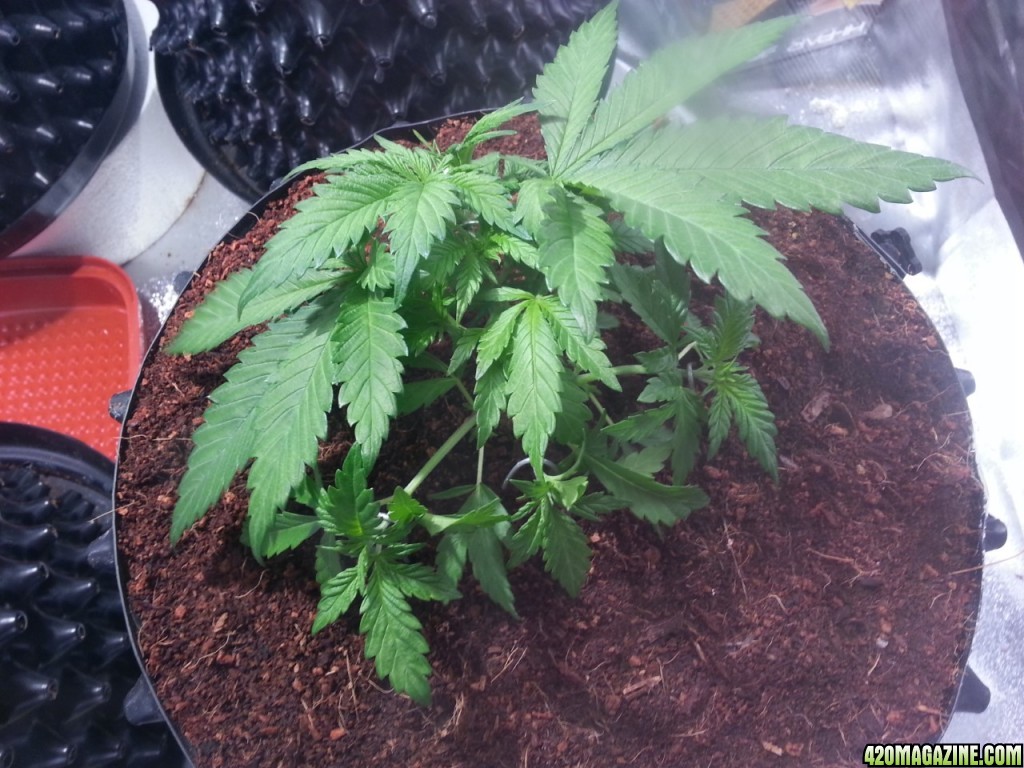
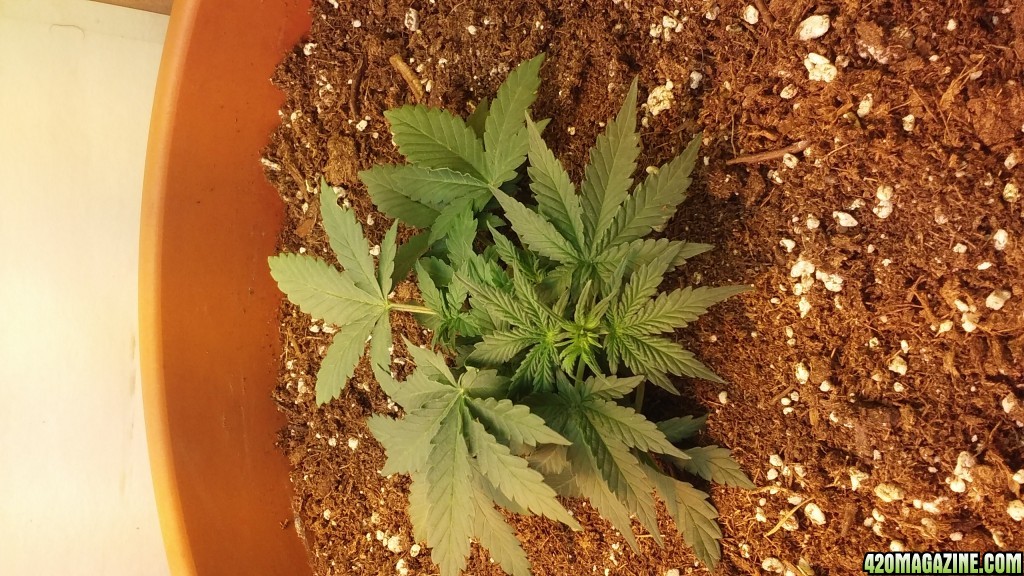
Here's a top view of the same stage
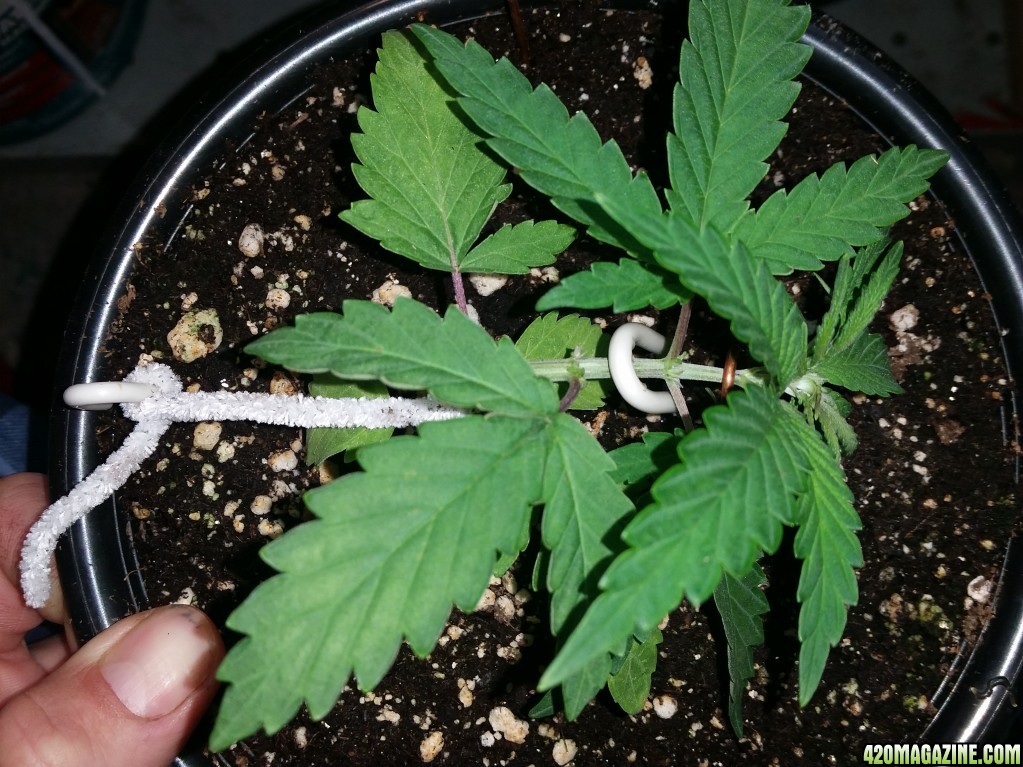
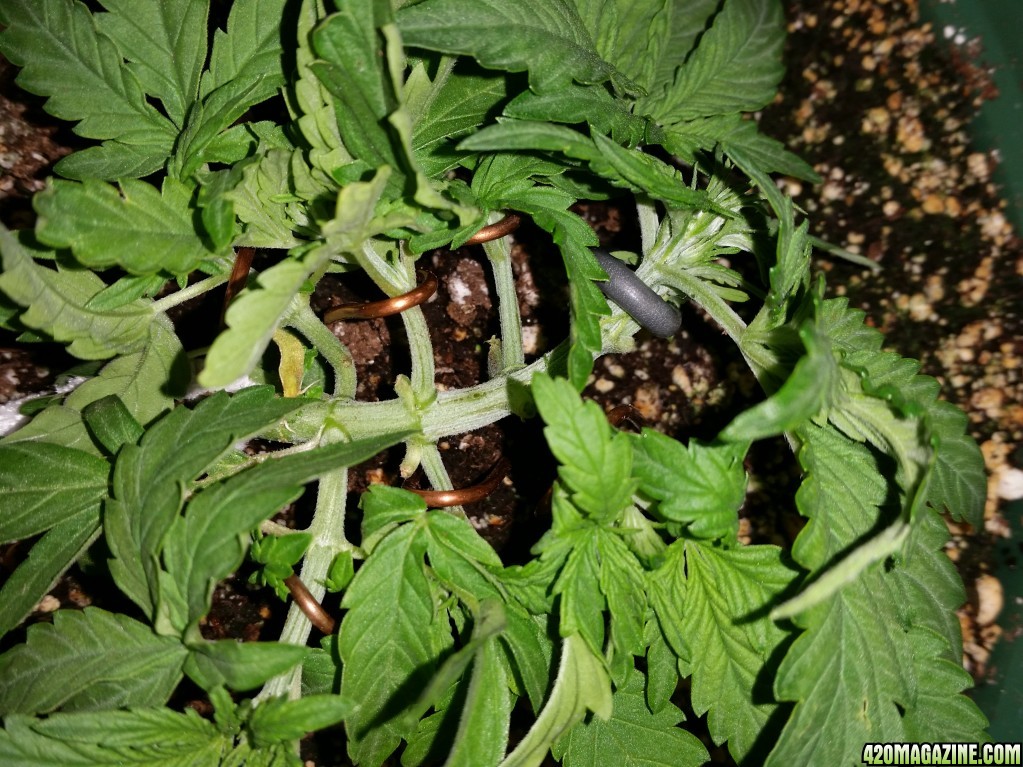
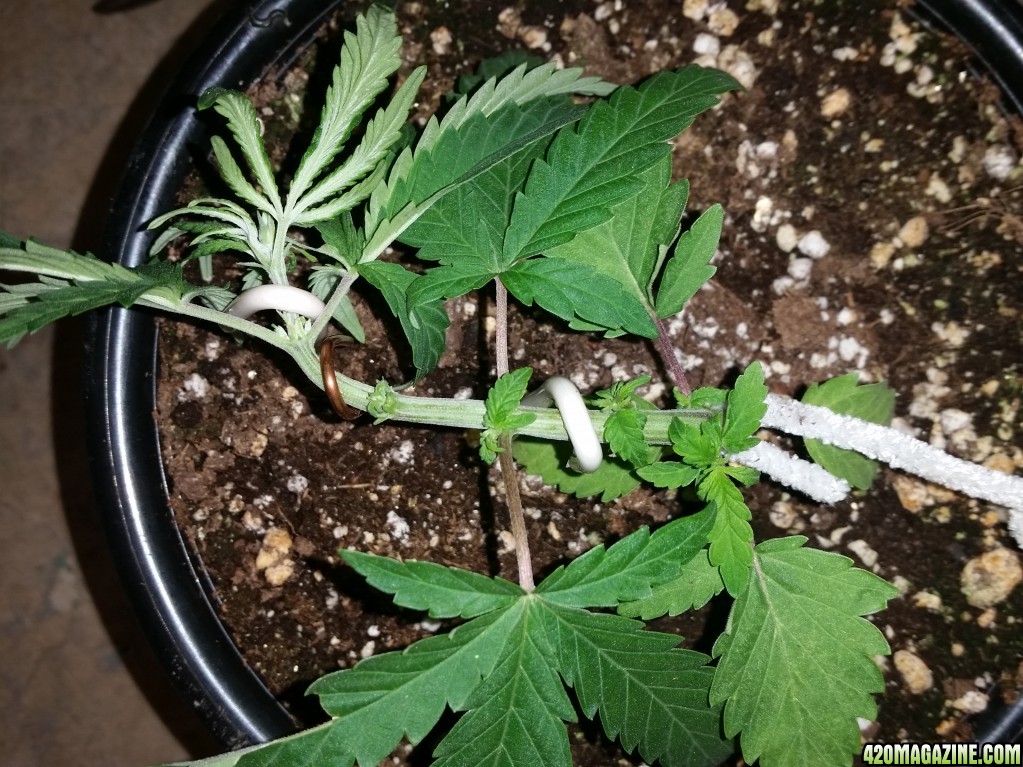
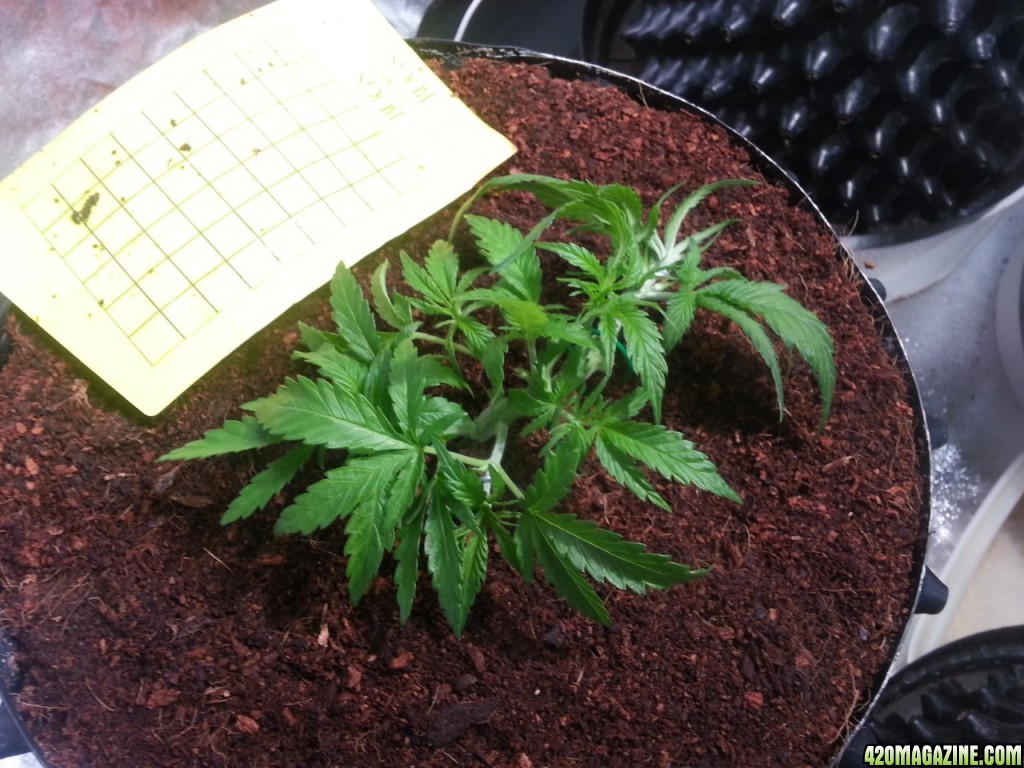
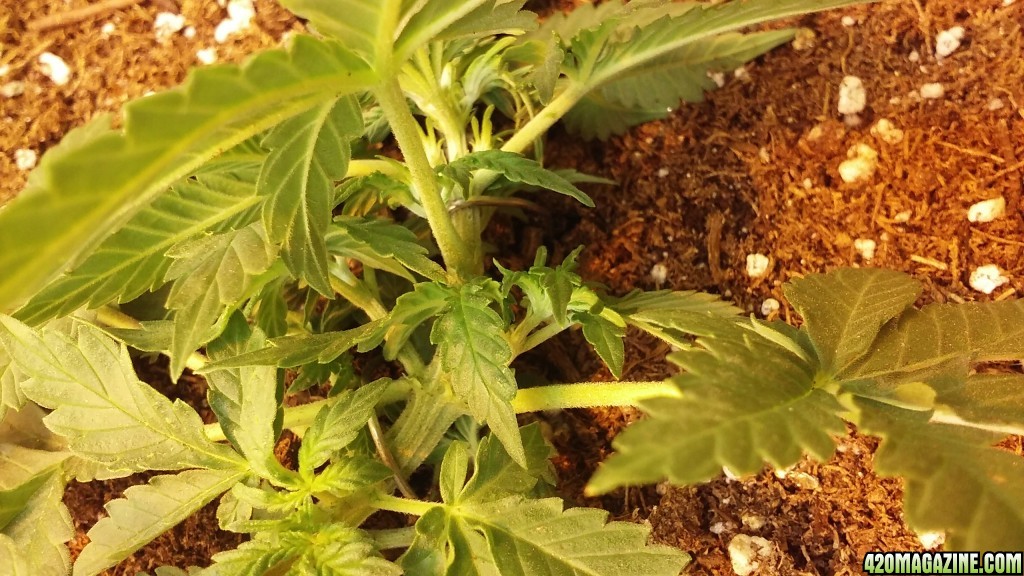
NOW were again a few days further along for this next stage of training. I've removed another downward facing leaf and I am spreading the newest leaves at the locomotive end to help keep nodes tight. Notice the "hump", this is ideal for creating temporary main shoots. The shoots coming from the top of the hump are now actually my main stems. Although the majority of energy is still going to the primary growth tip.
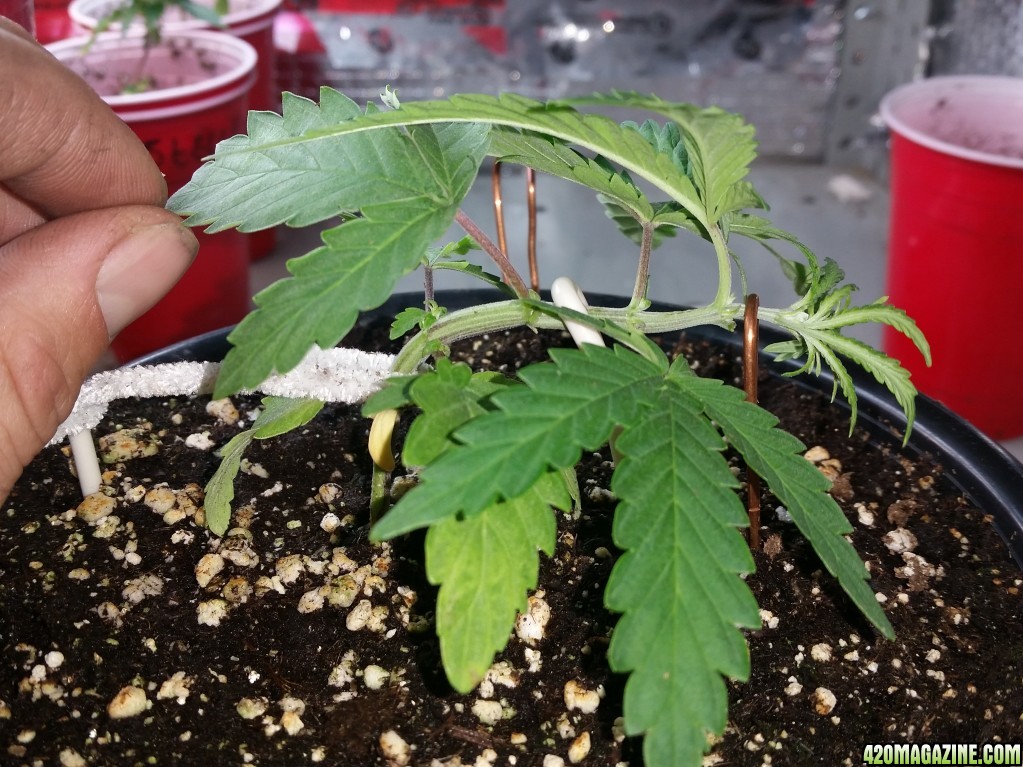
You can see the little leaves still clumped together, I use I mini screwdriver for repairing glasses to pry them open gently to expose the next set to the light.
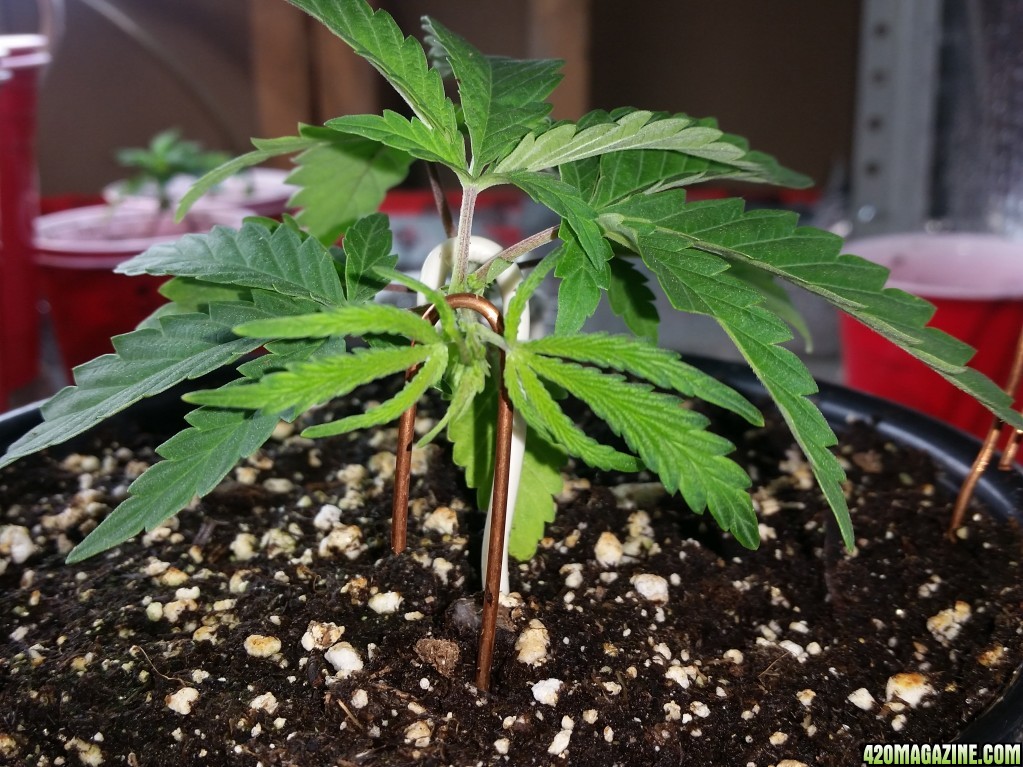
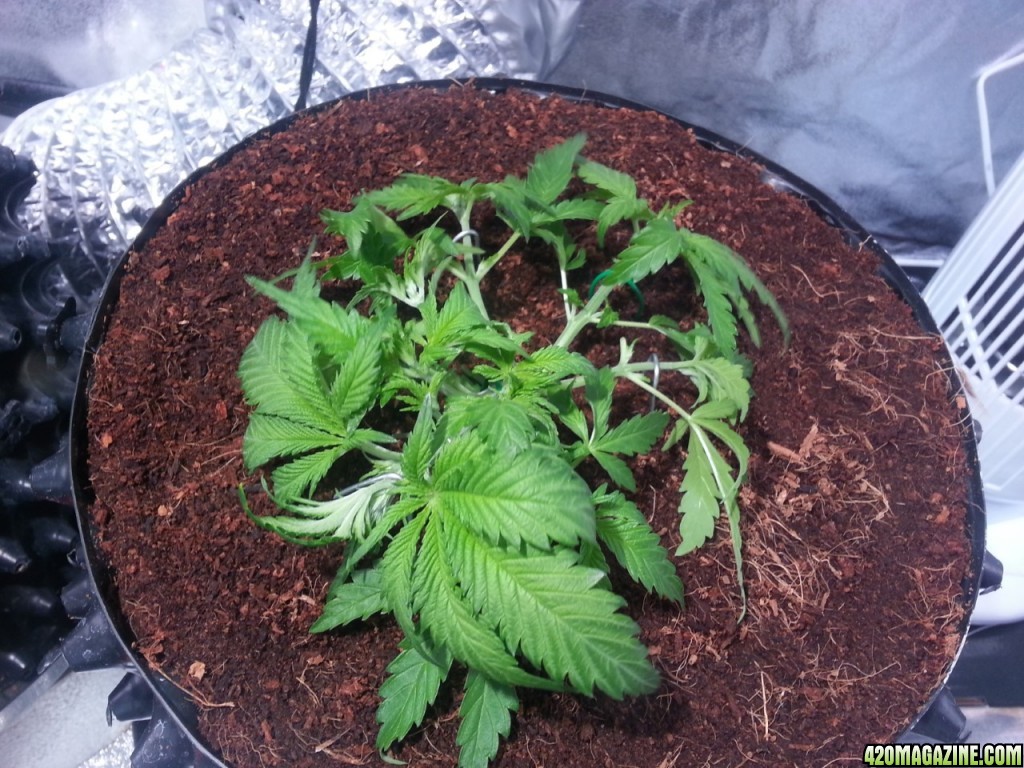
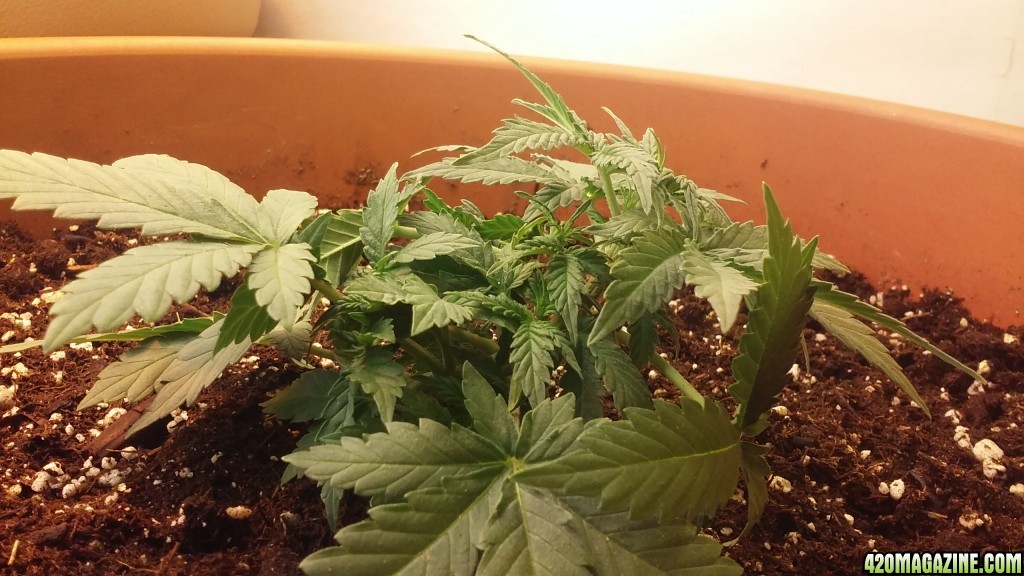
NOW I've got everything pretty much levelled out. I've added an extra stake to make it as straight as I can. Won't be long before I'm training the secondary shoots.

This is merely the beginning of this this tutorial. Hope this helps those who were wondering where and when to start.
Stay tuned for the next instalment, we're about to make a left turn around the pot. Thanks for making me do this, I'm having fun with these practice plants. Poor little thing...
KiG Everyone Cheers
 just kidding, but here's a little one I'm going to be putting outdoors soon. It's an og Kush S1 offspring, of my first ever grow. It's being grown out to determine its likelihood of herminess©. I've got three of them and I'll do different grow strategies for each of them. Others will follow soon. But for now here is the beginning of a properly low stress trained ONLY plant. This plant's training was started after the third node cleared.
 Step #1 Fasten a counter acting yarn, string, etc... to the base of the stem. I like to put it just below the first set of true leaf stems.

You can see I've use a stake and a pipe cleaner to secure the stem in a vertical position. I'm not bending anything yet, just creating a counter force to balance it out when you pull it the other way. This also hold the plant in place so the you don't uproot the seedling while you constantly pull the stem more and more sideways.
Step #2 The double tap... No no that later. Step #2 is limber up... (zombieland) what this means is that you just bend the stem back and forth a little eventually leaning it to the direction you're planning on guiding it around the pot.

Just us a finger and bend it towards your destination. You'll see that it doesn't take much and it will want to stay bent over.
Step #3 attach counter string for larger plants or place a guide/stake to secure the stem I'm the desired position

I used a length of coated wire to pin the stem near horizontally. With the next node that grows at it end is clear of the previous the stake can be moved up the stem and by then you should be growing horizontal.
You can see that the very bottom node will become new auxiliary shoots. And the growth at the node above(at the bend) will know become my secondary shoots. The main stem will continue around the pot.
After a few more days we can add a stake further down the stem. Notice the small shoots are starting to pop out from the nodes all along the stem. It is good if you can keep the stem from twisting, I remove the leaf facing downward to prevent it from doing just that. But I leave the top leaf so that it shades the new nodes, which like to stretch in the shade to find light... Correct?

Here's a top view of the same stage

NOW were again a few days further along for this next stage of training. I've removed another downward facing leaf and I am spreading the newest leaves at the locomotive end to help keep nodes tight. Notice the "hump", this is ideal for creating temporary main shoots. The shoots coming from the top of the hump are now actually my main stems. Although the majority of energy is still going to the primary growth tip.

You can see the little leaves still clumped together, I use I mini screwdriver for repairing glasses to pry them open gently to expose the next set to the light.

NOW I've got everything pretty much levelled out. I've added an extra stake to make it as straight as I can. Won't be long before I'm training the secondary shoots.

This is merely the beginning of this this tutorial. Hope this helps those who were wondering where and when to start.
Stay tuned for the next instalment, we're about to make a left turn around the pot. Thanks for making me do this, I'm having fun with these practice plants. Poor little thing...
Keep Training, Keep Learning, Keep sharing


KiG Everyone
 Cheers


 Good job on the tutorials! Will be looking forward to the next update.