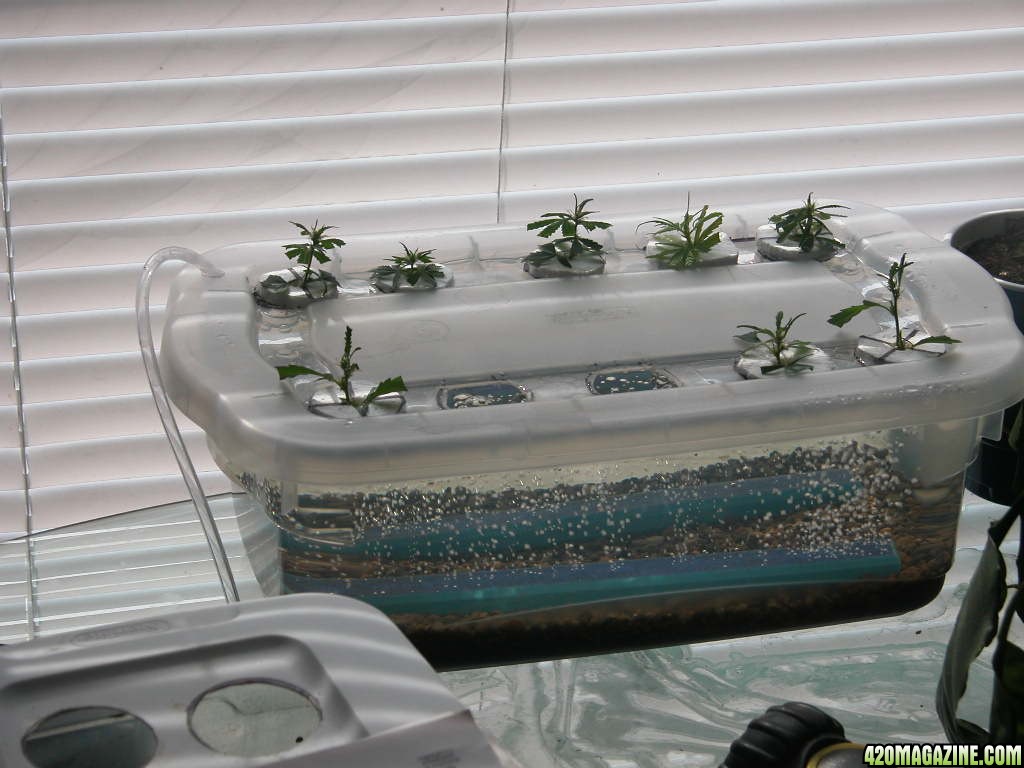
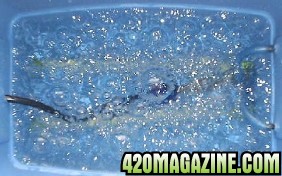
The cheapo-bubble cloner works on the "bubbling bucket" principle, where tiny water droplets are created by the action of the air bubbles bursting at the water surface, sending a mist of water flying thru the open air space above the waterline where the stems are located.
The materials list: (clockwise from top left)
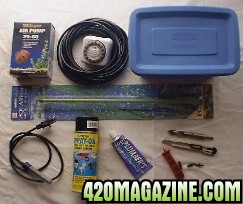
One - good quality dual outlet airpump. I recommend the whisper 20/60 or the pulsar four. both are @ $20.00
One - cheap pull up tripper type timer about @ $5.00, please dont try aero cloning without the timer, it is critical imho for fast rooting.
A short length of 1/2" rubber fuel line or vynil tubing.
Fishtank airline or (preferred) some soft flexible black vynil drip line for the air bubblers.
One - Rubbermaid roughneck 1 gallon tub with lid @ $1.00
Two - aquaculture "bubble curtain" 10" bubble wands. @ $3.50 each
Assembly tools: drill bit(s), sharp box cutter knife, drip line punch and coupler fittings (optional).
One - tube of Goop brand plumbers adhesive @ $4.00
One - Spray can of Plasti-Dip brand "Spray-On" black rubber coating @ $6.00
One - 7-1/2 watt fishbowl heater. Walmart @ $6.00
AF has great luck using the cheap heater. However, please note that the small heater has no thermostatic control, depending on your room temperature, it may need to be connected to a timer and monitored to be certain that you dont overheat the water. So, if you can find a fully submersible thermostatic controlled heater that will fit in the tub without getting in the way of the air bubbles, I highly recommend doing so. There are several on the market which will mount along the bottom of the tub, parallel to the bubble curtains, use 25 watts or smaller size. You can also use use a thermostat controlled heating mat or place the entire cloner tub in a larger tray of water with an aquarium heater if you have a submirsible unit which is too large to fit in your tub.
The bubble curtains...
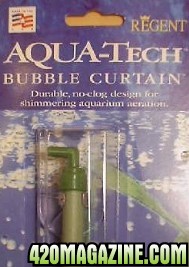
The Aqua Tech brand "bubble curtain" or equivalent are the only bubble device I'd recommend for bubble cloning. They are the least restrictive to pump air thru, and because of their hollow tubular design they produce a very uniform bubble coverage thruout the entire length of the wand.
Cut the bubble curtains to fit the length of the tub.

Remove the end cap and cut the wand to length using a sharp box cutter or razor blade knife. Replace endcaps.
One wand or two ?
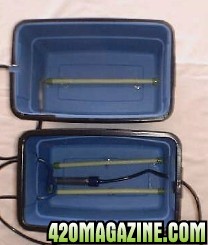
The cheapo works great with one wand or two. For this project lets use two wands. Note picture also shows the location of the little heater installed. Use a dab of goop on the heaters suction cup to hold it in place between the wands.
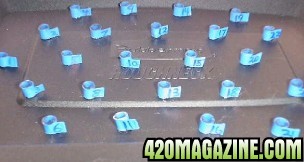
Glue in the wand holding clips
The suction cups provided with the bubble curtains are prone to failure, when the cups stop sticking the air wand floats to the surface and the bubbling action stops working, causing failed clones.
Pull the clips out of the suction cups and glue them in place using the Goop plumbers adhesive to the bottom of the tub. You should rough up the gluing surface by scratching it with a knife or coarse sandpaper for a better grip.
Allow the glue to dry for at least two days to be sure its fully cured.
The waterline
The rubbermaid one gallon tub has a ridge molded in about 2-1/2" from the top. This will be the waterline.
For a nice sanitary assembly, punch two dripline couplers thru about a 1/4" above the ridge for the airlines to exit the tub.
Spray on the plasti dip black rubber coating...
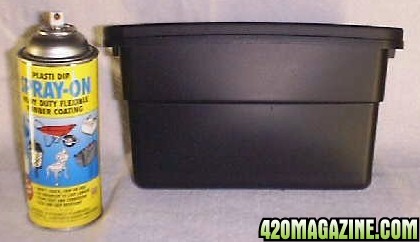
The tub needs to be coated to prevent light from penetrating the tub and slowing down the rooting process. Normal spray paint does not stick and is too light transparent. The plasti dip sticks to the rubbermaid very well and with two or three coats fairly thick and very light proof. Spray and dry in a very well ventilated area.
You can get away with a few layers of duct tape, or a layer of "anti-corrosion pipe wrapping tape". But, the Plasti-Dip I've found to be the best solution for light proofing and neatness.
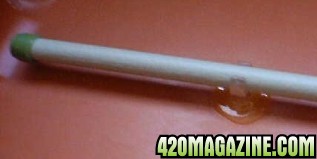
Drill the lid for the clone support tubes
underside of lid to show hole pattern used
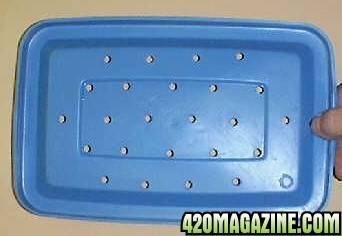
For small clones, the 1/4" o.d. x .170 i.d. flexible drip line works fine for support tubes, but rooted clones can be tricky to remove from small the lid holes. Note tape tabs to keep the smaller supports from falling thru the lid, and numbering to identify the clones.
Optional larger support tube holes (recommended).
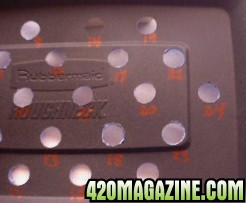
Using the 1/2" tubing for support tubes makes it much easier to remove the rooted clones from the lid. Number the holes to identify the clones later on. With either size holes, the *support tubes are cut to a maximum length of 1/2" and split down one side to be able to remove the rooted clones.
*It is important to have the support tubes cut short (@ 1/2" max). The original plans had longer tubes which caused problems on some cuttings.
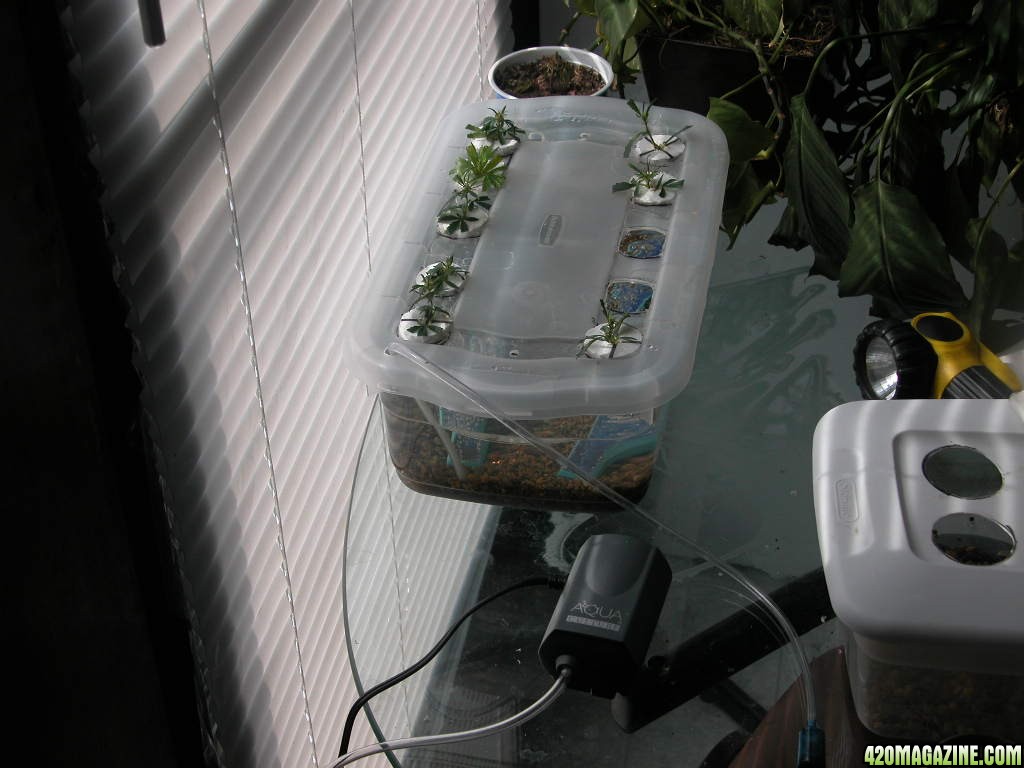
You're all done building your Cheapo-Aero cloner and happy smoking

The materials list: (clockwise from top left)
One - good quality dual outlet airpump. I recommend the whisper 20/60 or the pulsar four. both are @ $20.00
One - cheap pull up tripper type timer about @ $5.00, please dont try aero cloning without the timer, it is critical imho for fast rooting.
A short length of 1/2" rubber fuel line or vynil tubing.
Fishtank airline or (preferred) some soft flexible black vynil drip line for the air bubblers.
One - Rubbermaid roughneck 1 gallon tub with lid @ $1.00
Two - aquaculture "bubble curtain" 10" bubble wands. @ $3.50 each
Assembly tools: drill bit(s), sharp box cutter knife, drip line punch and coupler fittings (optional).
One - tube of Goop brand plumbers adhesive @ $4.00
One - Spray can of Plasti-Dip brand "Spray-On" black rubber coating @ $6.00
One - 7-1/2 watt fishbowl heater. Walmart @ $6.00
AF has great luck using the cheap heater. However, please note that the small heater has no thermostatic control, depending on your room temperature, it may need to be connected to a timer and monitored to be certain that you dont overheat the water. So, if you can find a fully submersible thermostatic controlled heater that will fit in the tub without getting in the way of the air bubbles, I highly recommend doing so. There are several on the market which will mount along the bottom of the tub, parallel to the bubble curtains, use 25 watts or smaller size. You can also use use a thermostat controlled heating mat or place the entire cloner tub in a larger tray of water with an aquarium heater if you have a submirsible unit which is too large to fit in your tub.
The bubble curtains...
The Aqua Tech brand "bubble curtain" or equivalent are the only bubble device I'd recommend for bubble cloning. They are the least restrictive to pump air thru, and because of their hollow tubular design they produce a very uniform bubble coverage thruout the entire length of the wand.
Cut the bubble curtains to fit the length of the tub.
Remove the end cap and cut the wand to length using a sharp box cutter or razor blade knife. Replace endcaps.
One wand or two ?
The cheapo works great with one wand or two. For this project lets use two wands. Note picture also shows the location of the little heater installed. Use a dab of goop on the heaters suction cup to hold it in place between the wands.
Glue in the wand holding clips
The suction cups provided with the bubble curtains are prone to failure, when the cups stop sticking the air wand floats to the surface and the bubbling action stops working, causing failed clones.
Pull the clips out of the suction cups and glue them in place using the Goop plumbers adhesive to the bottom of the tub. You should rough up the gluing surface by scratching it with a knife or coarse sandpaper for a better grip.
Allow the glue to dry for at least two days to be sure its fully cured.
The waterline
The rubbermaid one gallon tub has a ridge molded in about 2-1/2" from the top. This will be the waterline.
For a nice sanitary assembly, punch two dripline couplers thru about a 1/4" above the ridge for the airlines to exit the tub.
Spray on the plasti dip black rubber coating...
The tub needs to be coated to prevent light from penetrating the tub and slowing down the rooting process. Normal spray paint does not stick and is too light transparent. The plasti dip sticks to the rubbermaid very well and with two or three coats fairly thick and very light proof. Spray and dry in a very well ventilated area.
You can get away with a few layers of duct tape, or a layer of "anti-corrosion pipe wrapping tape". But, the Plasti-Dip I've found to be the best solution for light proofing and neatness.
Drill the lid for the clone support tubes
underside of lid to show hole pattern used
For small clones, the 1/4" o.d. x .170 i.d. flexible drip line works fine for support tubes, but rooted clones can be tricky to remove from small the lid holes. Note tape tabs to keep the smaller supports from falling thru the lid, and numbering to identify the clones.
Optional larger support tube holes (recommended).
Using the 1/2" tubing for support tubes makes it much easier to remove the rooted clones from the lid. Number the holes to identify the clones later on. With either size holes, the *support tubes are cut to a maximum length of 1/2" and split down one side to be able to remove the rooted clones.
*It is important to have the support tubes cut short (@ 1/2" max). The original plans had longer tubes which caused problems on some cuttings.
You're all done building your Cheapo-Aero cloner
and happy smoking good shit thanx im bout to try it...