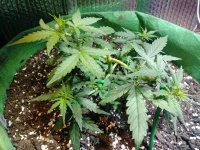
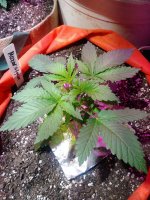
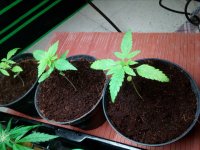
How To Germinate Seeds

ok so i have the candy cane strain from crop king seeds and they have a 92 % germination rate ok so tell me wtf why cant i get any of them to grow like day 6 and im pretty sure i kill them all had one with a tap root in a good soil but somhow it rose to the top with the root showing first like i took it out and put it back into the paper towel method the other 4 have been germinating for a week now and nothing im getting new seeds tommorow but like im almost willing to give up idk what to do anymore please help me my seeds arnt doing anything they should be doing like in all these damn videos i see where the dam root is showing after being in a cup of water for 16 hours like i did everything this card is telling me to do and i feel like im wasting money sorry about the rant but please please help!!!
Hey there my friend, have you tried to scarify the seeds prior to glass of water or paper towel? What i mean is to score the seeds on some light sand paper or put in a glass with sand in it and shake it a bit. This helps get the mother nature coating that it puts on the seed off of it which in turn helps it to germinate. try it!!..:)
 
ok so i have the candy cane strain from crop king seeds and they have a 92 % germination rate ok so tell me wtf why cant i get any of them to grow like day 6 and im pretty sure i kill them all had one with a tap root in a good soil but somhow it rose to the top with the root showing first like i took it out and put it back into the paper towel method the other 4 have been germinating for a week now and nothing im getting new seeds tommorow but like im almost willing to give up idk what to do anymore please help me my seeds arnt doing anything they should be doing like in all these damn videos i see where the dam root is showing after being in a cup of water for 16 hours like i did everything this card is telling me to do and i feel like im wasting money sorry about the rant but please please help!!!
If any thing you will learn in the germination prosses is patience and displine to alow them to grow and develop the first week or two alot is going on under ground as the roots develop your plant will start growing and your PH in the soil & Water its must that it stays stable but its sound likes you are handling them to much you got to observe them but not bother them and you need to keep them in a stable consistance inviroment it sound like your Girls are experiencing your stress & there Stressing out and if they are autoflowers it interfears with there growth cycle and they stress out and stagnates there growing development...but good luck im no scholar there got to be alot of studing that goes with this art because there is a Biology & Science to it as well...EC, TDS, PPM PH Spectrums & Mediums UV IR ...ECT dont give up more practice and experience it comes with time..Happy New Year...✌
 
hey I started to germinate my seeds I soaked them in water then put them in paper towel (toilet paper) for the last 2 days today is the 2nd day

usually my seeds would be sprouting or have a tap root coming out pretty quick but I've only noticed one tap root just peaking out of one seed this morning

it's a little concerning I have them on a plate in the moist paper towel in a dark place usually this always works for me in a couple days
should I just wait a bit longer or plant them in my peat moss plugs until I can get them in my hydration

or should I continue to wait for the tap roots to develop more (hopefully they all develop) until I plant in my plugs?

any answers help
 
I Got away from the papper towel method i burned to many seeds, what i do is i get some water i put a half a cap Hydrogen Peroxide in the water it has oxygen in it, i put my seeds in the water on my Heating pad place them in dark place and in 12 to 72 hrs taproot, then i place it directly in Pallet or Rockwool if you have a Healthy medium for seedling i just place in it,also water to soak pallet in make sure the PH level is more to Lower 6 by at this stage what they feed off it more acceptable to lower PH with in that range and sprinkle some Mycrohazae in the whole you plant your seed with taproot going down another thing during this stage the most important step is warmth keep the pallet or rockwool or medium warm not hot!!! you burn them....just my personal opinion im sure there other ways but ther the picture..#Credible...#Peace #420Family
 

Attachments

  • 20190110_160815.jpg
    20190110_160815.jpg
    845 KB · Views: 133
  • 20190110_130058.jpg
    20190110_130058.jpg
    861.8 KB · Views: 136
  • IMG_20190104_161102_235.jpg
    IMG_20190104_161102_235.jpg
    808.1 KB · Views: 160
I Got away from the papper towel method i burned to many seeds, what i do is i get some water i put a half a cap Hydrogen Peroxide in the water it has oxygen in it, i put my seeds in the water on my Heating pad place them in dark place and in 12 to 72 hrs taproot, then i place it directly in Pallet or Rockwool if you have a Healthy medium for seedling i just place in it,also water to soak pallet in make sure the PH level is more to Lower 6 by at this stage what they feed off it more acceptable to lower PH with in that range and sprinkle some Mycrohazae in the whole you plant your seed with taproot going down another thing during this stage the most important step is warmth keep the pallet or rockwool or medium warm not hot!!! you burn them....just my personal opinion im sure there other ways but ther the picture..#Credible...#Peace #420Family
That's a good idea with the heatmat. I have one but no thermostat.

What I have been doing is using a petri dish, distilled water and a paper cloth.
Wet the cloth, pop the seed in and cover, place in a small box, then put that on top of the reflector. (So it's not in direct contact).

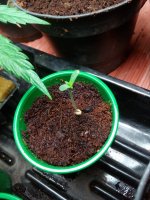
After 1-2 days they sprout then transplant into coco. I have just tried putting a germinated seed into a rockwool cube, 2 days and it popped out the top, then another day and a root had come out the side about an inch. It's that photo of the little one in a cup of coco.
 

Attachments

  • IMG_20190126_101446.jpg
    IMG_20190126_101446.jpg
    688.1 KB · Views: 181
  • IMG_20190126_101314.jpg
    IMG_20190126_101314.jpg
    650.4 KB · Views: 131
That's a good idea with the heatmat. I have one but no thermostat.

What I have been doing is using a petri dish, distilled water and a paper cloth.
Wet the cloth, pop the seed in and cover, place in a small box, then put that on top of the reflector. (So it's not in direct contact).

After 1-2 days they sprout then transplant into coco. I have just tried putting a germinated seed into a rockwool cube, 2 days and it popped out the top, then another day and a root had come out the side about an inch. It's that photo of the little one in a cup of coco.
Glad to see you successfully put those seeds in life ;-)
 
Re: How to germinate seeds ?!

has anyone used rapid rooters? im a first time grower, long time smoker, now its for medical reasons. getting older and now its for need. tried rockwool now trying rapid rooters. just need tried and true procedures.
If rapid rooters are the little brown sponge things, they are great! I used all 54 of mine and everything that i didnt screw up is growing great. Ive put those rooter things in hydroton, coco coir, and dwc and everyone looks happy so far.
 
That's a good idea with the heatmat. I have one but no thermostat.

What I have been doing is using a petri dish, distilled water and a paper cloth.
Wet the cloth, pop the seed in and cover, place in a small box, then put that on top of the reflector. (So it's not in direct contact).

After 1-2 days they sprout then transplant into coco. I have just tried putting a germinated seed into a rockwool cube, 2 days and it popped out the top, then another day and a root had come out the side about an inch. It's that photo of the little one in a cup of coco.
So i am about 1/3 of the way along my first grow and i popped some seeds the other day for a perpetual harvrst and i got the "brilliant" idea to spray the seeds with some diluted clonex as i figured it was like steroids for roots. Im pretty sure i killed the seeds cause ive seen 0 progress once i transferred to paper towel. Am i being impatient or am i a murderer? Thanks for the help
 
So i am about 1/3 of the way along my first grow and i popped some seeds the other day for a perpetual harvrst and i got the "brilliant" idea to spray the seeds with some diluted clonex as i figured it was like steroids for roots. Im pretty sure i killed the seeds cause ive seen 0 progress once i transferred to paper towel. Am i being impatient or am i a murderer? Thanks for the help

Hi Michael it's the first time I've logged in for a while. How are they doing?

With seeds the germination time can be a bit unpredictable... Some of my seeds pop a taproot in 24 hours while others can take 3-7 days. If you don't see any progress after a week or two you can write them off.

I wouldn't bother trying to complicate germinating by spraying them with stuff, a wet paper cloth in a yogurt pot will suffice. they need moisture, high humidity and 20C is a good temp to help them sprout.
 
I never had issues germinating western hemisphere landrace sativa seeds in any type of soil in the western US. However, I germinated some eastern hemisphere indica seeds this year in soil and 30% of them died from dampening off (fungus).


That is very interesting. The North American seeds would be immunized (to some degree) against North American fungus, bacteria, etc., but might be susceptible to Eastern pathogens. I had not thought of that.
 
no feedback?
not a great idea. the idea of the root reaching the edge of the plug is it air prunes them causinf alot more roots alot faster.

the paper towel method works great, the issue is when you damamge the root trying to plant them. i never wait for the tap root to really be showing unless its an autoflower. and after sprouting ALOT of different seeds through work (were talking tens of thousands) ust soaking them in cold water for 30minutes is enough to just plant them. it alsao means you aint got to do shit untill they're bigger. also air pots the smallest ones, are perfect, cant really overwater and since you take entire rootball out they feel 0 stress from transplanting
 
If you use any plugs (grodan, rapid rooters, whatever) put the pointy end of the seed down. The scar on top is where the seed was connected to the mother plant. When it germinates, the root comes out from the bottom (pointy end). The root grows and pushes the seed case up. The seed leaves (cotyledons) have the seed case around them until they reach the air. The cotyledons expand and break loose the seed case (rarely you may have to help remove it with a pair of tweezers - Very carefully). As soon as I see the cotyledons, I pour the light on them When they get good light, you'll see them starting to color to full green. That photosynthesis. The cotyledons have plenty of nutrients to keep the plant growing for a while, so don't try to feed them until you see the first set of true leaves starting, then just a very weak solution. Make the roots stretch and grow looking for food early on. I use the grodan plugs under a dome (don't have to worry about over watering), and put them in their final home as soon as they come up. No transplant issues, and the root is protected in the plug until it comes out the bottom into whatever medium it's in.
Remember, they grow wild, with no help from anyone in the wild. Adding extra steps or feedings can sometimes just lead to extra problems. There is no wrong way, unless you add something the plant doesn't like. Keep it simple. It's a weed.
 
HOW TO GERMINATE SEEDS !?

This information was produced when we realised many growers in the Netherlands are quite advanced when it comes to growing, but have no idea how to germinate and cultivate a seedling successfully.
That's inevitable in a 'clone culture' such as ours. However, the arrival of feminine seeds urges the availability of more information on this subject. Experience is more useful than anything in this matter. Here you'll find some advice and possibilities to allow your seedlings to become robust and healthy growing/flowering plants.

Growing Media: Rockwool plugs, Rockwool blocks, Pots with soil, Jiffy Pots, Outdoor

Rockwool plugs
A fine medium for germinating. The biggest problem is that you'll have to move the plug to a block or soil in a matter of two to three days. After all, you'd like to give the penroot an optimum chance of developing fully. In other words: it's preferable to directly sow into the bloc to prevent unnecessary work.

Rockwool blocks
Especially a fine medium for large-scale growers. Flush your blocks very well (with pH 5.3) to lower the pH value of the medium and put the blocks on top of each other; rockwool on rockwool. You'll notice the water is drawn away from the top-blocks, so you don't have to deal with a saturated block for at least a week. Regulating humidity is crucial. Now put 110 blocks (of 7.5 by 7.5 cm) in a so called Duma tray, or 220 on a 'Danish tray', and fill the holes in the blocks with sowing/germinating soil (read General Notes). After sowing, about 0.5 to 1 cm deep, cover everything for about two days with plastic to prevent from drying and keep the tray in a warm space. Make sure the tray gets lit after those two days, for at a temperature of 23°C the seeds will germinate within two days. Experience has shown that by doing so the plants don't lose a minute of their growing potential when you put the blocks on the slabs after 12-14 days.

Pots with soil
The most beautiful, the best, the most natural and easiest medium. Use well pre-fertilized potting soil, fill the pots to about three quarters of their volume with this soil, fill up the remaining quarter with sowing/germinating soil. Press the combined content of the pot to an even surface to prevent the water from flushing away the seeds while watering (use a small watering-can or sprayer). Plant the seeds 0.5 to 1 cm deep. Preferably use disposable plastic pots, from which you cut out the bottom later on to allow for a smooth transient to the slab or bigger pot later on. These pots can be placed directly on top of the slab. Make sure you fix the drippers at the back of the slab and not in the pot. The reason for this is that the plant releases it's waste (salts and minerals) in the top layer of the medium, and it's not a good idea to flush this waste to the drinking roots every time you water. Another benefit is that you can place considerably more (female) seedlings on a square meter than you could with clones.

Jiffy pots
A more expensive method which has both advantages and disadvantages; the pots dry out very rapidly, and are only suitable for soil cultivation. When they get too humid, molds develop quickly. A fine medium, but you have to observe them carefully and move the seedlings to their real medium as soon as possible. The biological approach will appeal to many, but on a larger scale you'll most likely encounter difficulties.

Outdoors
The most natural way, but very much depending on the wheather. Especially in countries with a sea climate, such as Holland or England, plants come through their vegetative stage pretty nicely, but get lost because of too much humidity in autumn. Don't take any risk with sowing, and sow only when you can be sure there will be no more frost. Only when temperatures increase, the plants will develop real growing speed. Don't sow any deeper than 1 cm on a soil that is as 'airy' as possible. When it doesn't rain make sure the soil keeps somewhat humid in the following days. Note that the seeds don't like to swim! Extra nutrition should not be necessary during the cycle, but if you don't use fertilized soil give the plants some water to which you have added some fertilizer every two weeks. Make sure you don't water directly along the stem to prevent unnecessary salts and minerals to reach the drinking roots. Growing indoors at first is an option, and gives you the opportunity to control the number of light-hours. If you keep the plants under 20 hours for a long time, and putting them outside when the daylight is already decreasing, you gain time and your plants will reach the flowering stage sooner. Make sure the plants don't stagnate and keep going, for that of course is essential in this case.

General Notes
Make sure you choose a sowing/germinating soil which contains a lot of fine sand. Masonry sand or sand for playgrounds as an addition is just fine. Too many fibres cause problems with germinating. If you want to be absolutely sure and create an optimum chance for each seed, sieve the soil mixture before use! The helmet (seed cover) and the film which envelopes the seed should remain in the medium when the seeds germinates. Too light a soil will hamper this process. Keep your water to pH 6.3, and keep the seedlings humid, but not TOO wet. A fine water sprayer works miracles here. Make sure the seedlings receive FULL light when they germinate and leave it like that for at least 20 hours the first couple of days. Make sure your tube lights hang as close to the seedlings as possible (a couple of centimeters)! A 400 watt lamp can be hung as low as 45 cm and a 600 watt lamp as low as 55 cm.
Don't be afraid, the seedlings can very well handle this, even though a good movement of air underneath the lamp is very important (ventilator!).

Make sure you spray in time, until the hull, that may come up when the seed germinates, has dropped off, as well as the protective film which envelopes the seed. This is necessary to prevent the hull and protective film to dry out, which sometimes result in sticking to the germinating seedling, which as a consequence, is hampered in it's development. Stop spraying water when all seedlings are overground, too allow for your seedlings to work at maximum efficiency underground. Offering too much humidity to the leaf often results in a less developed rootsystem. Contrary to clones, seedlings have a reasonable resistance to dry air. When using germinating trays, things often go wrong because of excessive heat and humidity.

Because we germinate and grow our seeds indoors on a warm medium, the plants tend to shoot up rather thinly, which causes weak and excessively high plants. This can only be prevented by hanging the lights as low as possible.

Lowering soil temperature could be an option, if it weren't for the growing speed we don't want to lose.

The biggest mistake being made is: not bringing the light close enough to the developing seedling!

Remember that the first two to three hours partly determine the rest of the plant's life!


Start giving some nutrition only after the plants have been in the light for two days. Start with a very light nutrition and keep the water to pH 6.3. Note: the ballast caused by a measurable EC in your tapwater can NOT be seen as nutrition. If you don't have a pH measuring device at hand, try to work with rainwater or add a drop of natural vinegar to the water - and be aware that your first purchase 'should' be a pH meter. Preferably use 'pure' nutrition that could also be used as leaf-nutrition. Doing so minimizes your chances of failure.

Stay cool, high and take time to fly !

Great notes on Germinating seeds.
I tried it last week and put a whole tray of seeds out in Rockwool cubes.
Soaked them in filtered water overnight and set Ph to 6.5.
I followed all the directions except I forgot to drop the light close to the cubes.
I started them out in my bedroom on a shelf for three days, then put them outside after they started to pop up.
One day there was nothing. Two days later they popped up, were six inches tall and most had fallen over.
I had them out on my porch on a table that was partly covered.
I used a plastic dome over the tray.
I could not find my heat pad for under the tray.
The weather here in San Diego has been good and not too cold.
Anyway, I checked them and some are curving upwards to get the sun.
I will turn on my 300 watt LED tonight and keep it just above the seedlings.
None of the Industrial Hemp came up.
The Jedi Og came up.
The Harle Tsu came up.
Four other Indica strains came up.
Getting ready to Germinate some FIREJUANA when they get here.
 
Don't be afraid of giving them light, in the wild they can get full tropical sunlight as soon as the seed cover falls off. Heat from the light is problematic. I keep the light as close as possible, but make sure I can't feel heat from the light. I use a timer to give them an 18/6 schedule, but some like to be go 24 hours light until 12/12 for flower. I tried both and really didn't see any difference.
If you need want to see some of the science, search youtube for Harley Smith. He has some excellent lectures on growing, including weed. I followed his tips for foliar sprays and saw a great result. His lecture on "How to maximize your yields" is really helpful.
 
A clone is ready to go, but the seed won't be hard to do either. It's a weed, don't over complicate things.
I'd go to a reliable seller (Seedsman comes to mind) and find an easy to grow plants (like White Widow) and buy 3 or 5 seeds. Try 1 at a time and see what you get. All the info you can possibly need is available here. Get feminized seeds so you don't have to deal with sexing the plant and you're ready to start.
 
Those sound like they need to be assisted. soak first in hot water for 2 hours then try a emery board ( scarifying method) and then put in a paper towel.
you should have roots in a day or 2.

Hot water method will soften the seed coat... keeping the seeds in the dark isn't recommended ( might actually cause more issues that it would solve) . A little light can help them wake.
Remember these are auto flowering seeds and are very light sensitive. Ruderalis x hybrids respond to lighting conditions very quickly as C.Sativa f. Ruderalis comes from central asia where the growing seasons are short. They're not as popular anymore in Canada as many are mediocre - poor performers.

Just want to add that the root that appeared is rather fragile, so don’t touch it as not to kill the marijuana seeds.
 
HOW TO GERMINATE SEEDS !?

This information was produced when we realised many growers in the Netherlands are quite advanced when it comes to growing, but have no idea how to germinate and cultivate a seedling successfully.
That's inevitable in a 'clone culture' such as ours. However, the arrival of feminine seeds urges the availability of more information on this subject. Experience is more useful than anything in this matter. Here you'll find some advice and possibilities to allow your seedlings to become robust and healthy growing/flowering plants.

Growing Media: Rockwool plugs, Rockwool blocks, Pots with soil, Jiffy Pots, Outdoor

Rockwool plugs
A fine medium for germinating. The biggest problem is that you'll have to move the plug to a block or soil in a matter of two to three days. After all, you'd like to give the penroot an optimum chance of developing fully. In other words: it's preferable to directly sow into the bloc to prevent unnecessary work.

Rockwool blocks
Especially a fine medium for large-scale growers. Flush your blocks very well (with pH 5.3) to lower the pH value of the medium and put the blocks on top of each other; rockwool on rockwool. You'll notice the water is drawn away from the top-blocks, so you don't have to deal with a saturated block for at least a week. Regulating humidity is crucial. Now put 110 blocks (of 7.5 by 7.5 cm) in a so called Duma tray, or 220 on a 'Danish tray', and fill the holes in the blocks with sowing/germinating soil (read General Notes). After sowing, about 0.5 to 1 cm deep, cover everything for about two days with plastic to prevent from drying and keep the tray in a warm space. Make sure the tray gets lit after those two days, for at a temperature of 23°C the seeds will germinate within two days. Experience has shown that by doing so the plants don't lose a minute of their growing potential when you put the blocks on the slabs after 12-14 days.

Pots with soil
The most beautiful, the best, the most natural and easiest medium. Use well pre-fertilized potting soil, fill the pots to about three quarters of their volume with this soil, fill up the remaining quarter with sowing/germinating soil. Press the combined content of the pot to an even surface to prevent the water from flushing away the seeds while watering (use a small watering-can or sprayer). Plant the seeds 0.5 to 1 cm deep. Preferably use disposable plastic pots, from which you cut out the bottom later on to allow for a smooth transient to the slab or bigger pot later on. These pots can be placed directly on top of the slab. Make sure you fix the drippers at the back of the slab and not in the pot. The reason for this is that the plant releases it's waste (salts and minerals) in the top layer of the medium, and it's not a good idea to flush this waste to the drinking roots every time you water. Another benefit is that you can place considerably more (female) seedlings on a square meter than you could with clones.

Jiffy pots
A more expensive method which has both advantages and disadvantages; the pots dry out very rapidly, and are only suitable for soil cultivation. When they get too humid, molds develop quickly. A fine medium, but you have to observe them carefully and move the seedlings to their real medium as soon as possible. The biological approach will appeal to many, but on a larger scale you'll most likely encounter difficulties.

Outdoors
The most natural way, but very much depending on the wheather. Especially in countries with a sea climate, such as Holland or England, plants come through their vegetative stage pretty nicely, but get lost because of too much humidity in autumn. Don't take any risk with sowing, and sow only when you can be sure there will be no more frost. Only when temperatures increase, the plants will develop real growing speed. Don't sow any deeper than 1 cm on a soil that is as 'airy' as possible. When it doesn't rain make sure the soil keeps somewhat humid in the following days. Note that the seeds don't like to swim! Extra nutrition should not be necessary during the cycle, but if you don't use fertilized soil give the plants some water to which you have added some fertilizer every two weeks. Make sure you don't water directly along the stem to prevent unnecessary salts and minerals to reach the drinking roots. Growing indoors at first is an option, and gives you the opportunity to control the number of light-hours. If you keep the plants under 20 hours for a long time, and putting them outside when the daylight is already decreasing, you gain time and your plants will reach the flowering stage sooner. Make sure the plants don't stagnate and keep going, for that of course is essential in this case.

General Notes
Make sure you choose a sowing/germinating soil which contains a lot of fine sand. Masonry sand or sand for playgrounds as an addition is just fine. Too many fibres cause problems with germinating. If you want to be absolutely sure and create an optimum chance for each seed, sieve the soil mixture before use! The helmet (seed cover) and the film which envelopes the seed should remain in the medium when the seeds germinates. Too light a soil will hamper this process. Keep your water to pH 6.3, and keep the seedlings humid, but not TOO wet. A fine water sprayer works miracles here. Make sure the seedlings receive FULL light when they germinate and leave it like that for at least 20 hours the first couple of days. Make sure your tube lights hang as close to the seedlings as possible (a couple of centimeters)! A 400 watt lamp can be hung as low as 45 cm and a 600 watt lamp as low as 55 cm.
Don't be afraid, the seedlings can very well handle this, even though a good movement of air underneath the lamp is very important (ventilator!).

Make sure you spray in time, until the hull, that may come up when the seed germinates, has dropped off, as well as the protective film which envelopes the seed. This is necessary to prevent the hull and protective film to dry out, which sometimes result in sticking to the germinating seedling, which as a consequence, is hampered in it's development. Stop spraying water when all seedlings are overground, too allow for your seedlings to work at maximum efficiency underground. Offering too much humidity to the leaf often results in a less developed rootsystem. Contrary to clones, seedlings have a reasonable resistance to dry air. When using germinating trays, things often go wrong because of excessive heat and humidity.

Because we germinate and grow our seeds indoors on a warm medium, the plants tend to shoot up rather thinly, which causes weak and excessively high plants. This can only be prevented by hanging the lights as low as possible.

Lowering soil temperature could be an option, if it weren't for the growing speed we don't want to lose.

The biggest mistake being made is: not bringing the light close enough to the developing seedling!

Remember that the first two to three hours partly determine the rest of the plant's life!


Start giving some nutrition only after the plants have been in the light for two days. Start with a very light nutrition and keep the water to pH 6.3. Note: the ballast caused by a measurable EC in your tapwater can NOT be seen as nutrition. If you don't have a pH measuring device at hand, try to work with rainwater or add a drop of natural vinegar to the water - and be aware that your first purchase 'should' be a pH meter. Preferably use 'pure' nutrition that could also be used as leaf-nutrition. Doing so minimizes your chances of failure.

Stay cool, high and take time to fly !
You always germinate with H2O2, 2 tbl spoons per gallon, and keep using for 2-3 weeks to help the roots. Works great for me. Found on YouTube, I use for transplanting, root rot, all vegetables too.
 
I've always for h2o2 in May nutrient supply but I give nothing other than fungus spores n some glucose at first. Light is tires fine. Throw em in some water and just watch they'll only not like light only they have roots.

Start with clones of a high quality they grow faster but I've got another 35 seeds to check for a decent mum
 
Back
Top Bottom