Is there a Maximum Cutting Length / Stem Diameter?

Hi everyone,

Is there a size limit to successful cloning when using a cloning machine like an EZ Cloner or Turbo Kloner? Can you root cuttings larger than what would be considered typical, with a stem diameter approaching that of a Pencil or Chop Stick?

Some background...

If you have read my grow journal recently, then you already know that I am getting ready to start my first cloning session using my new Turbo Klone T48 cloning machine.

The cuttings will be taken from my two original Blueberry clones that are just about to turn 2 months old. The plants are currently 29" and 27" tall respectively from the base of the main stalk to the top of the growing tip. I have been inspecting them over the last few days looking for some potential cutting locations and all of the branches have rather hefty stems and to get three nodes in a cutting I will end up with clones that are in the 8-9" long range.

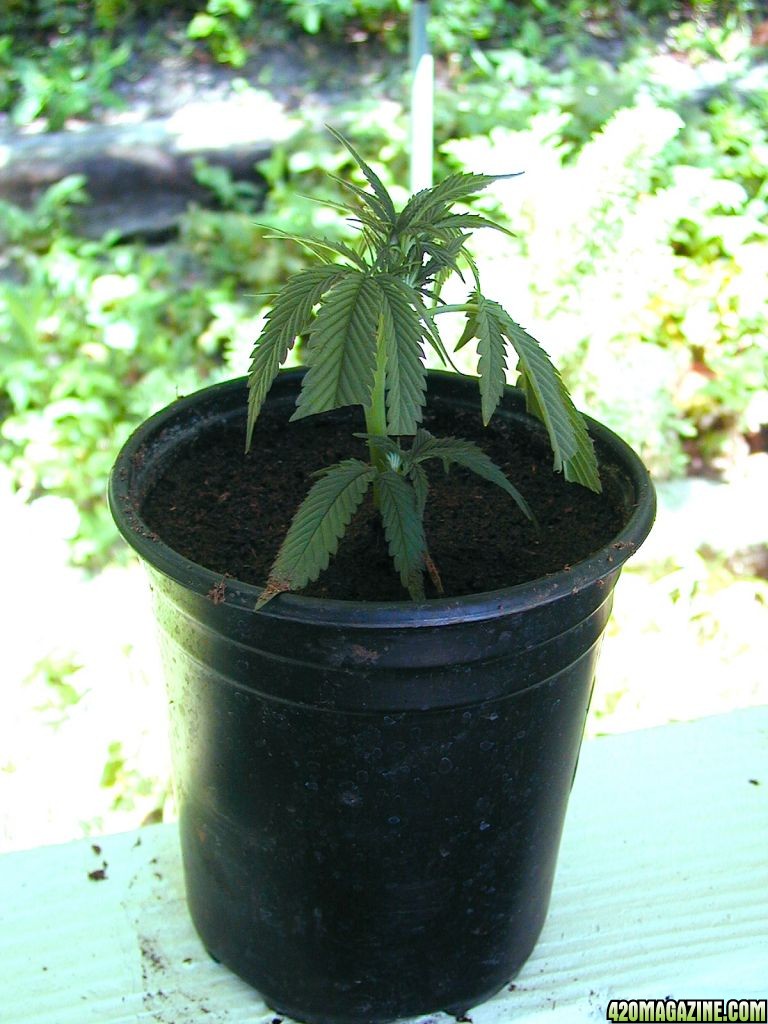
Only tried working with something this large just recently when I was able to clone the growing tip from one of these two plants taken about 10 days ago. This was before I had the machine, so I used a 1.5 inch Rockwool cube and the conventional cloning proceedure. I confirmed root buds on this one four days ago and transplanted it into soil, removing it from the Rockwool cube because there were only buds starting at that point, no actual roots.

The clone is now surviving without a humidity dome, although not quite rooted enough to stand direct sun and an 80-90 degree summer day. Very close though, but it has taken a VERY LONG TIME! ;) I would like to avoid a whole batch of clones that take this long to root.

Blueberry Growing Tip Clone Almost Completely Rooted in Soil
P1010708.JPG


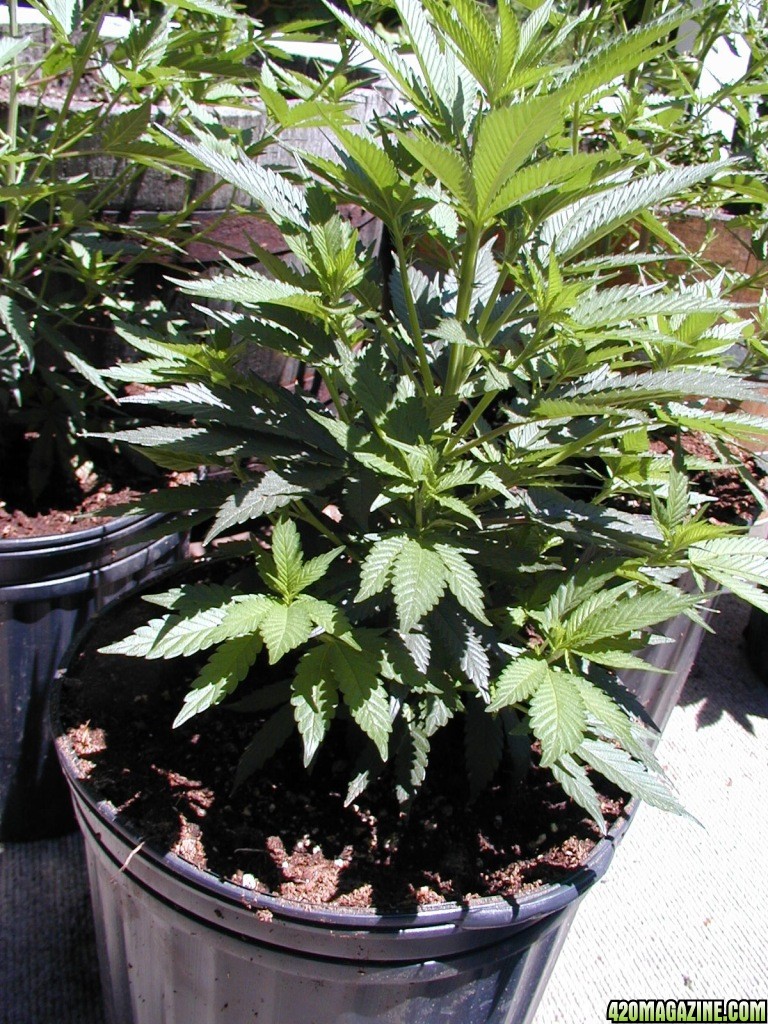
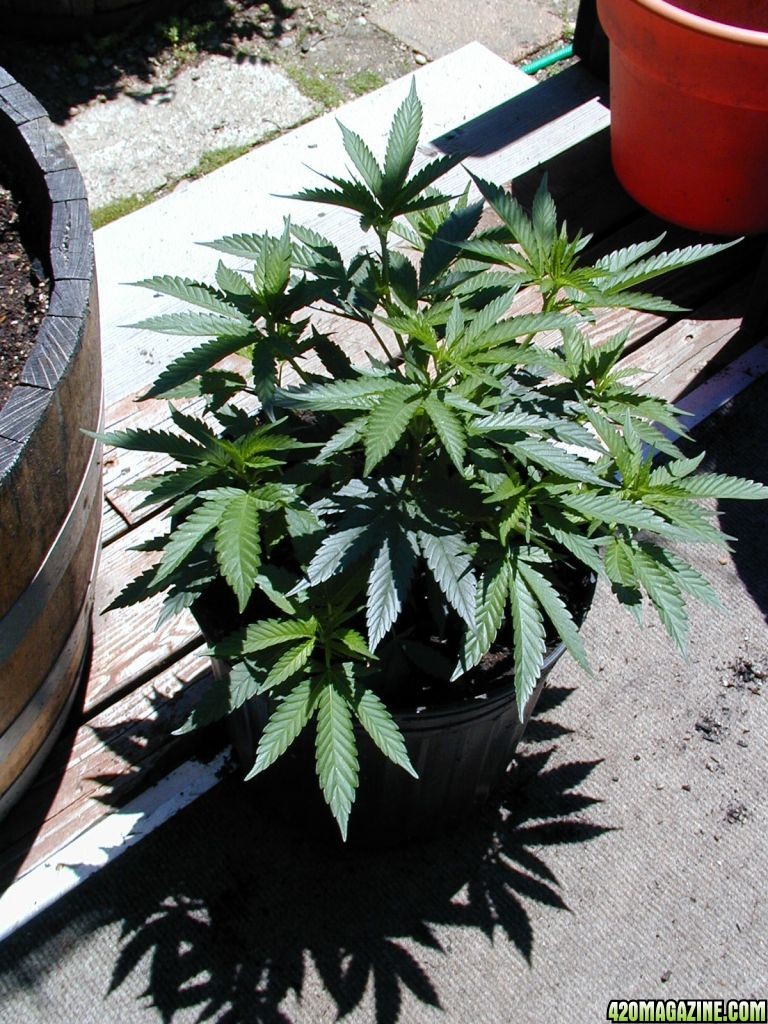
Here are a few recent photos of the mother plants:
Blueberry1_veg_week8.JPG
Blueberry_veg_P1week8.jpg


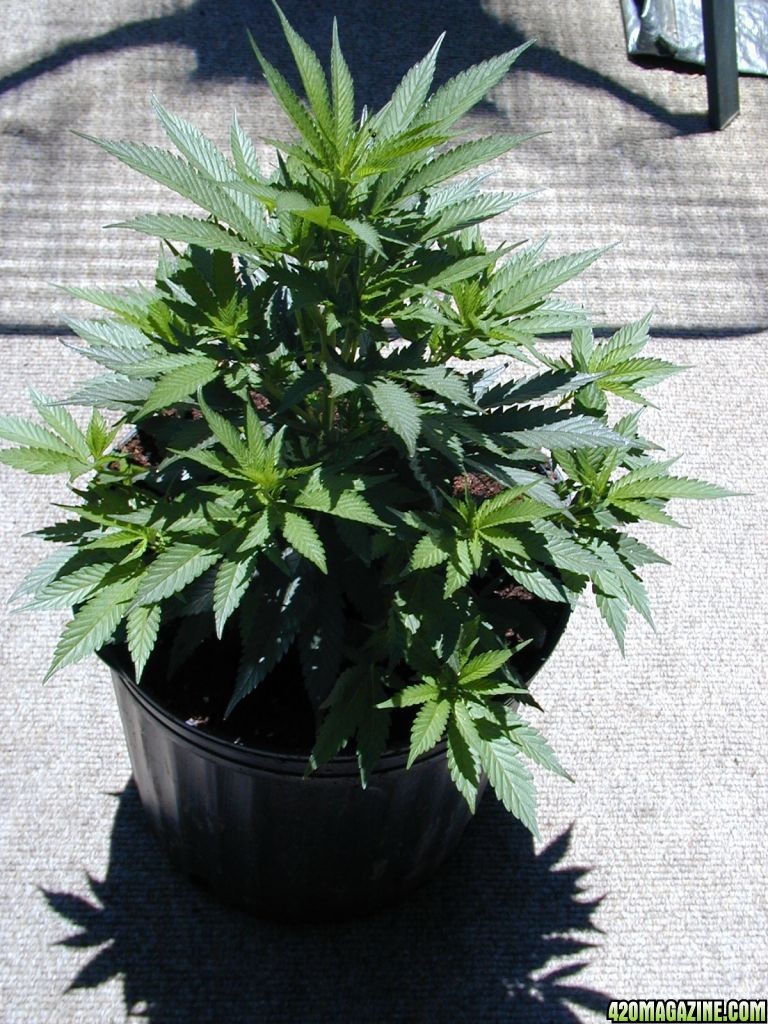
The donor of the growing tip clone
Blueberry2_veg_week8.JPG


My goal is to take 12-15 cuttings total from these two plants, but as I said, all of the branches are pretty stout with nearly pencil thick stems and to get three nodes, I am looking at an average of 8" long. I don't foresee these plants creating any smaller and thinner branches anytime soon, so this is what I will have to work with for the foreseeable future. I plan to put both of them into my "Bloom Room" to flower as soon as they both hit about 39" tall.

I would especially be interested in hearing from experienced Blueberry strain growers since this will probably sound a lot more familiar to them than to those who are growing the more typical strains. :popcorn:

Any problems trying to root a dozen or so of these larger specimens that are very likely to have hollow main stems more like a growing tip than a typical side branch cutting?

Thanks in advance everyone! :)
 
Well, if you can wait about two weeks, I'll let you know. I just took the two main leaders off my mother and subjected them to the cloning procedure. They were both larger than a cigarette in diameter. It has been over 24 hours, both have recovered from the initial shock. Will they live? It's going to be interesting. But then, you said I had unconventional ideas. Will keep you in the loop.
 
Well, if you can wait about two weeks, I'll let you know. I just took the two main leaders off my mother and subjected them to the cloning procedure. They were both larger than a cigarette in diameter. It has been over 24 hours, both have recovered from the initial shock. Will they live? It's going to be interesting. But then, you said I had unconventional ideas. Will keep you in the loop.

GREAT! Sounds good to me! :thumb:

Definitely keep us posted on your progress! You are more than welcome to use this thread for that purpose if you want! I think it would be helpful for everyone cloning out there to know the limits of what can be taken and what the drawbacks might be as you go up in size.

Ultimately, taking larger clones would seem to point towards faster intervals from veg to flower time! Seems like having a bunch of hefty 12" clones instead of tiny little 4" stick figures would be an advantage right?

However... That growing tip I took over three weeks ago now has yet to start growing out from where it was when the cutting was taken. Even though it looks healthy and green, I don't detect any new growth. At least none vertically. Kind of like the plant equivalent of a coma! :snooze:

In fact, now that I have a new warranty replacement pump for my cloner, once I start cloning a fresh batch of Blueberry in 10 days or so, any of my remaining coma clones are going to be taken off of life support since I will be bumping up against my legal limit of live plants at one time!
 
Interesting question, hopefully this helps. The idea that starting with a bigger diameter clone will lead to better results seems to be valid with a couple of caveats. First, all things being equal, larger stems require a little more green material to support photosynthesis needed to provide for root growth. These diameters require more 'energy' up top to pull water and nutrients to the new growth area. It's a ratio you'll need to determine but it's helpful to start with a little too much and if wilting occurs gradually trim material until they are self sustaining. Next, they'll probably need a little extra time in the clone dome with the vents closed then gradually hardening via air exposure over the next week. As for length, the same concerns apply, but about 10cm from the flowering top to the cut seems about right. The result should be seedlings which have excellent rooting and a nice start to the veg cycle. Good luck.
 
I figured I had better have some basics to refer to, so I took some measurements. Stem diameter where it enters the rockwool: 0.360"; height of cutting: approx. 6.5". These are not exact numbers as I didn't want to disturb the cuttings more than necessary (only 35 hrs old). They seem to be doing alright. First attempt at cloning so every day they survive is a new record.
 
Might try scarifying the stem w/ the blade to encourage new root sites. One book advised cutting some of the stem away or splitting it lengthwise to create more surface area for new roots as well.
 
Interesting question, hopefully this helps. As for length, the same concerns apply, but about 10cm from the flowering top to the cut seems about right. The result should be seedlings which have excellent rooting and a nice start to the veg cycle. Good luck.

That was the problem with my last batch of cuttings and is likely to be the same problem in the next batch. The Blueberry mother plants I am cutting from (See my latest photos in my Journal) are big stemmed and big branched, and to get a total of three nodes with one as the root base and the other two for new growth above ground, we are talking more like 20 cm in length.

I figured I had better have some basics to refer to, so I took some measurements. Stem diameter where it enters the rockwool: 0.360"; height of cutting: approx. 6.5". These are not exact numbers as I didn't want to disturb the cuttings more than necessary (only 35 hrs old). They seem to be doing alright. First attempt at cloning so every day they survive is a new record.

Thanks for taking the time to measure! Those sizes are in line with the larger than normal cuttings I had taken in the previous batch that died when the cloner broke down, and also what we will likely be getting in the next cloning session with the now repaired Turbo Klone machine. The plants continue to veg exceptionally well, but they seem to like to produce way larger than normal branches and shoots. At least compared to my other strains and other cloning project photos I have seen on here.

Keep the contributions coming guys! This is good stuff! :thumb:
 
Might try scarifying the stem w/ the blade to encourage new root sites. One book advised cutting some of the stem away or splitting it lengthwise to create more surface area for new roots as well.

I generally do that when I take cuttings. I use gardening scissors instead of a blade and gently pull the end of the cutting across the two opened scissor blades. Just to take a little of the outer "skin" off.

I haven't tried the cutting the stem in half up the center or the cutting notches ideas yet. Going to stick with the 45 degree angle cut and the scraping with scissor blade approach in the Turbo Klone this next time and see how they do.

As I mentioned... I'm just waiting for the two Blueberry mother plants to make me some more new shoots so I can get a dozen nice cuttings from them first. Currently running a pump break in test on the cloner to make sure the new pump isn't defective like the last one was. ;)
 
Out of eleven cuttings, ended up with four viable clones. The first to go south were the smallest cuttings (young growth, near the top of the mother); next were the two large "tops" ( even though these were the largest and strongest of the cuttings, it seems as if the they were unable to generate new root growth fast enough; they were still strong and vibrant "above ground", but eventually rotted inside the rock wool; death in about 10 days); the four that survived (stem size was about the same diameter as a usb cable) show very good root growth with multiple sites exiting the rock wool. Personally, I wouldn't depend on this round of cloning as a good example of what one can expect from larger cuttings. As I said earlier, this was my first attempt at cloning and I really didn't know what I was doing. What I will do different next time: let the rock wool dry out more between waterings; put the heat pad on a timer (temps inside the dome were pretty high at times). I am going to try another pair of large stem "top" cuttings in water only, and yet another pair in rock wool (mother is too thick and needs to be thinned). All in all, a good learning experience and lesson in patience.
 
Too hot and to moist are the main killers. I have the worst success rate w/ rockwool. I'm back to using seed starting soil mix. Moisten thoroughly and squeeze out excess, fill seed starting flats, poke a hole and stick in the clone. Firm up soil around clone and cover w/ a dome. Open up and mist every day. Transplant ready in about 2 weeks. Could do in cups (8 oz to 16oz) w/ a "clear" cup for a dome to do individual clones.
 
So...after successfully killing off seven of eleven, I'm going to try again. Five will be "normal" size cuttings, three are "largish". Two large and four normals are in rockwool, one large and one normal are in water fortified with SuperThrive.

I found a better place in the room for the tray, it won't be subjected to the high temps like the last attempt. I also found that I can more easily control the humidity inside the dome by pouring one litre of water in the bottom of the tray and then adding about two centimetres of perlite. The perlite, of course, absorbs the water and stays damp longer as well as releasing the moisture more slowly and evenly. So far, the humidity has stayed at around 80% for about three days. I'm not sure if it has any bearing on it or not, but the temps also seem to be moderated.

After applying the cloning gel and inserting the cuttings into the rockwool cubes, I used pipe cleaners to cinch up the cubes so that the holes closed up nice and tight around the stems. Again, not sure that the results are from this action, but the cuttings did not have the usual drooping stage. All maintained an erect posture.

@GoldenGoose - the larger cuttings weren't quite as large as the originals, somewhere around 1/4", but they were substantially taller and leafier. Will see what happens this time. Any luck with your cloner and your big cuttings?
 
So...after successfully killing off seven of eleven, I'm going to try again.

@GoldenGoose - the larger cuttings weren't quite as large as the originals, somewhere around 1/4", but they were substantially taller and leafier. Will see what happens this time. Any luck with your cloner and your big cuttings?

Sorry to hear of your continued difficulties with your cloning. :confused:

As a matter of fact, I did have some success and am just about to post an update to my grow journal specifically about the cloning session. I transplanted most of them today! :cheer:

Check out my grow journal in about 30 minutes and I should be done typing up the update.

Cheers. :)
 
I think high humidity in the clone "chamber" is not emphasized enough. I always use a dome until I can see new growth occur. I do my clones in seed starting mix and plain water. I check inside the lid each day for condensation and add a little water if they are getting dry. I always use a heat mat for seed starting during cold periods--try to keep the root zone in the 70's.
 
So...after successfully killing off seven of eleven, I'm going to try again. Five will be "normal" size cuttings, three are "largish". Two large and four normals are in rockwool, one large and one normal are in water fortified with SuperThrive.

I found a better place in the room for the tray, it won't be subjected to the high temps like the last attempt. I also found that I can more easily control the humidity inside the dome by pouring one litre of water in the bottom of the tray and then adding about two centimetres of perlite. The perlite, of course, absorbs the water and stays damp longer as well as releasing the moisture more slowly and evenly. So far, the humidity has stayed at around 80% for about three days. I'm not sure if it has any bearing on it or not, but the temps also seem to be moderated.

After applying the cloning gel and inserting the cuttings into the rockwool cubes, I used pipe cleaners to cinch up the cubes so that the holes closed up nice and tight around the stems. Again, not sure that the results are from this action, but the cuttings did not have the usual drooping stage. All maintained an erect posture.

Sorry that I didn't have the time to fully respond to your entire post yesterday...

So... Here it is now. :)

Sounds like you have everything very well in hand this time around! I will keep my fingers crossed that this time is the charm! :thumb:

OG13 makes some very good points about maintaining the proper humidity in the cloning chamber you are using.

If you still run into similar problems this time around, you might want to seriously look into getting a cloner like my T48! After seeing the kind of results I just saw on this first trial session (100% Success Rate) I'M A BELIEVER!

The cost seems a bit on the high side going in, but the amount of PERSONAL TiME this thing can save is significant! Add to that the piece of mind I now have in knowing that I am going to get clones at the end of the day, that confidence in positive results turns the whole process into something FUN instead of something you dread!

Definitely keep us posted here on your progress this time around! I am really pulling for you to get some good results! :)
 
I don't know about your clone device, but air layering should work with "stems" of any diameter since it can be used on trees.
 
I don't know about your clone device, but air layering should work with "stems" of any diameter since it can be used on trees.

Hi TS! ;)

Can you eleborate on this "Air Layering" you mentioned? I'm not familiar with that term.

As for the T48... It seems to produce the same positive rooting results with any diameter stem I had in my last batch. I had about 5 cuttings in this run that were about 1/4 inch in diameter and they rooted just as agressively as the smaller more conventional diameter stems in this batch.
 
Interesting concept. I have just the place to try that method. If it is as they say, it makes me wonder why the 420 community hasn't jumped on it.

Definitely going to attempt it.

Thanks for the heads up TS.
 
Found this on Google. Am I allowed to do this?

Original on EvergreenGardenWorksdotcom

What is Air Layering?
by Andy Walsh
Introduction by Brent Walston
Air layering is the process of removing a large branch or section of the trunk of a tree to create another tree. Before the branch is removed it is girdled, protected with peat moss or other media and the girdled section is allowed to root. After rooting the branch is removed from the tree. This is a very common practice in bonsai to obtain another tree from an unwanted branch or to save a thick trunk section that was going to be removed anyway. Andy Walsh posted a short but very informative article on the physiology of this process on the Internet Bonsai Club mail list. Knowing how a tree forms roots at an air layer site provides powerful information for not only understanding the process, but also a vehicle for answering your own questions and solving your own problems in air layering.
BW
Transport of Food, Water, and Nutrients
Under the bark of trees (dicotyledonous ones) there is a layer of cells called the phloem. This tissue transports carbohydrates and other photosynthates (including auxin) down from the leaves to the lower parts of the plant. Beneath the phloem layer is another layer called the xylem that transports water and mineral nutrients from the roots and soil up to the leafy parts of the tree. Beneath the xylem is another xylem layer called the secondary xylem. These xylem layers are thicker and deeper into the wood of the tree than the phloem layer. Lying on top of these layers just under the bark is a layer of actively dividing cells called the cambium.

The Air Layering Process
In the process of airlayering, the bark, the cambium, and the phloem layer are removed by cutting away about a 1 inch wide ring of these tissues from around the circumference of the shoot. The xylem however is left intact. This is known as girdling. Generally, synthetic auxins (in a vehicle of talc powder or by liquid) are applied to the site where the tissues have been removed. (Although applying auxin is the general practice today it is not necessary for many trees). Wet sphagnum moss (or another moisture retentive soil) is then bunched around and over this girdled site and covered with plastic and sealed.

What Happens at the Air Layer Site
The removal of the bark, cambium, and phloem, but not the xylem, prevents carbohydrates and photosynthates from flowing down the trunk past the girdling site but still allows water and mineral nutrients to flow upward to the leaves. This keeps the leafy portions of the shoot from drying out and maintains them with an adequate supply of nutrients. The removal of the actively growing cambium layer prevents the regeneration of phloem and healing over of the wound. Because of this the carbohydrates and photosynthates flowing down the trunk collect at the girdling site. The presence of these excesses of carbohydrates and photosynthates (esp. auxin) at the girdling site, plus the presence of the water in the sphagnum moss, causes dormant adventitious buds in the area to grow into roots. When there are enough roots to sustain the shoot independently the shoot is cut off of the tree and then planted or potted.

The Difference Between Air Layers and Cuttings
The propagation of plants by cuttings occurs by the same principles and has very similar circumstances. The difference is that the shoot is removed from plant at the start and water and nutrients flow up the shoot from the cut site by capillary action instead. This kind of propagation can only be done with small and thin shoots since the flow of water is insufficient for larger branches. Airlayering solves this problem and allows the creation of new plants from very large parts of trees.

return to Bonsai Articles

return to home page

copyright 1997 all rights reserved
 
Not sure, but I appreciate you posting the article! I'm sure that folks will find it useful info to have!

Since I am now getting excellent results with my Turbo Klone machine, I'm probably not going to be messing with any of the other methods again. Why screw with what works right? ;)
 
Air layering works great on woody plants, its hard to girdle, ie remove just the outer layer on MMJ. The technique does work but it is so slow. Just cut off a small branch, stick it in some soil and keep it moist and humid. It will root.
 
Back
Top Bottom