

I've had most of the parts for a year, but life interferes upon occasion. So, now that life has settled down a little, It's time to transform these parts into something I can use.
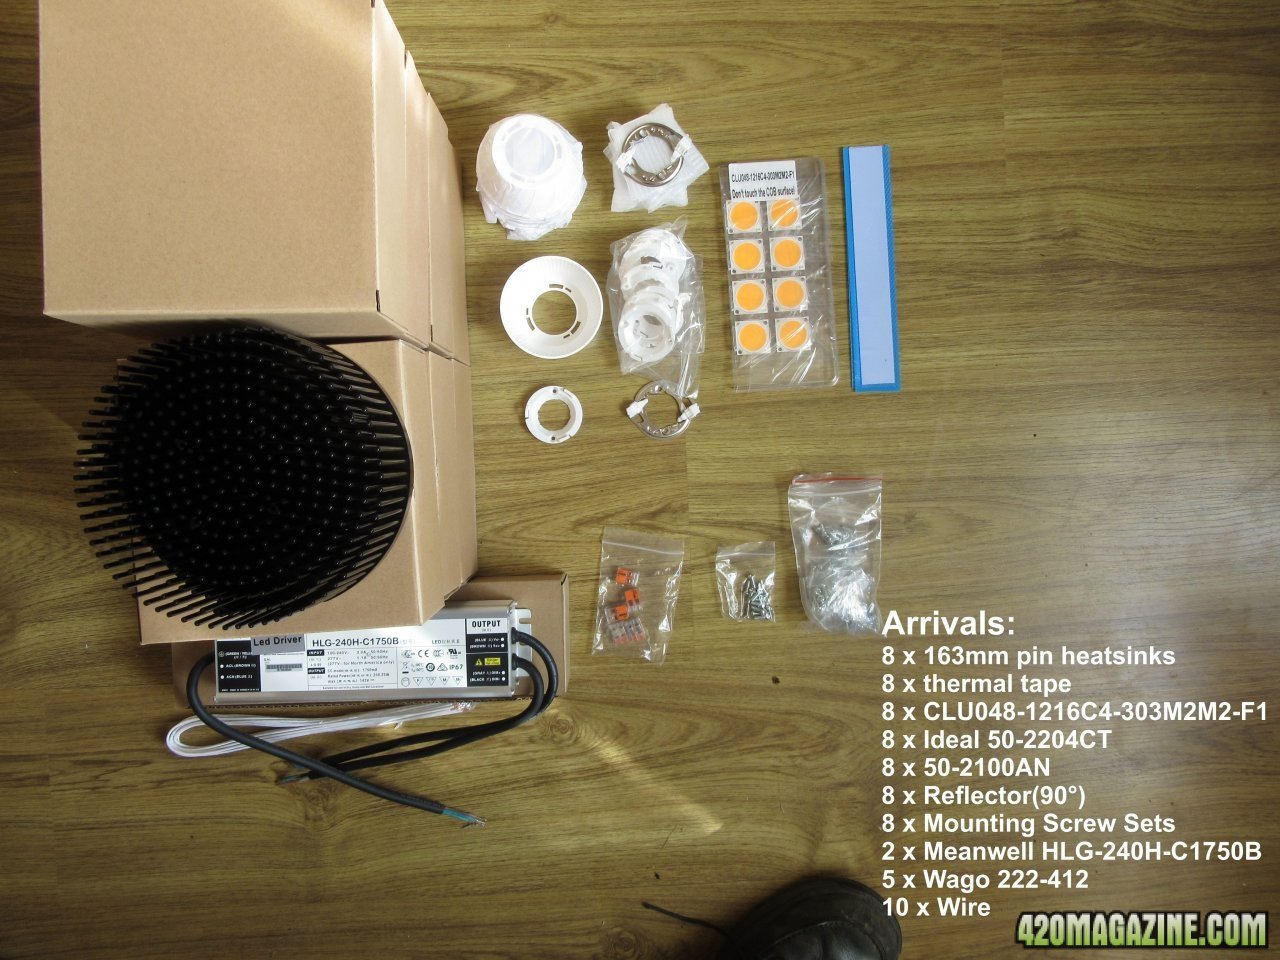
Citizen CLU48-1216 COBs and Parts
I started by laying out the frame, notching the angle aluminum, and drilling the holes required to mount everything. The ends and two center rails are 3/4" angle aluminum to provide stability, The outer rails are 3/4" x 1/8" bar stock. Mounts for the drivers are 1" x 1/4" bar stock, and the control/interconnect box mount is 1/8" sheet. These parts are also all aluminum. The hardest part of this stage is accurately drilling the holes for the pin heatsinks. I made a template for this, and drilled the holes in the angle and bar stock for each bank together. These holes are countersunk.
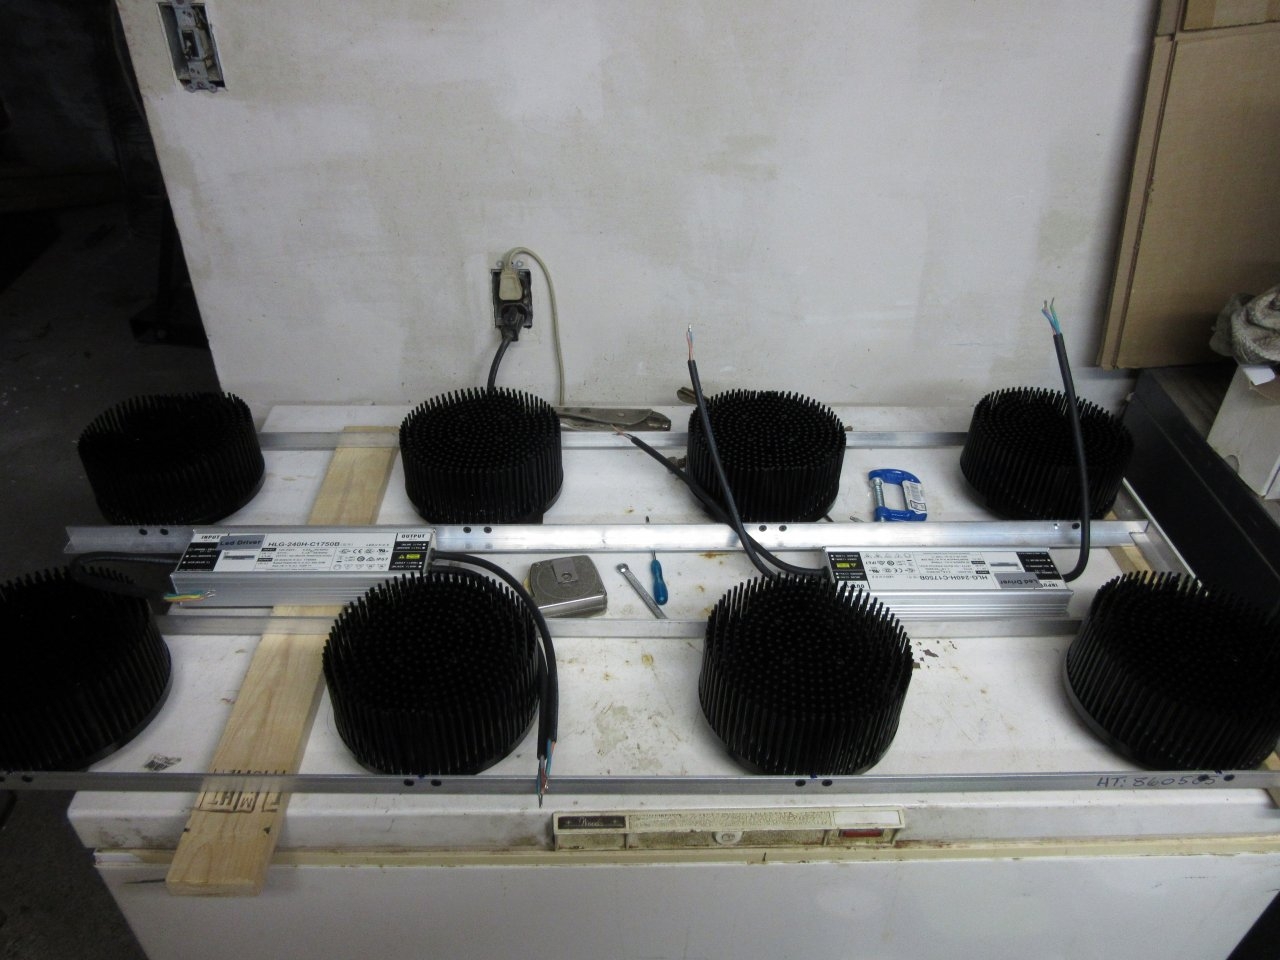
Laying out the Parts
Next I welded the aluminum frame together. It wasn't difficult using a MAP torch and aluminum welding rods. I don't know why I was surprised, but it's like soldering. If you re-heat a weld it will separate, so if you want to weld both sides of the joint it must be done in a single operation. Then it was paint the frame; outside of course. I used an epoxy spray paint to seal it against corrosion.
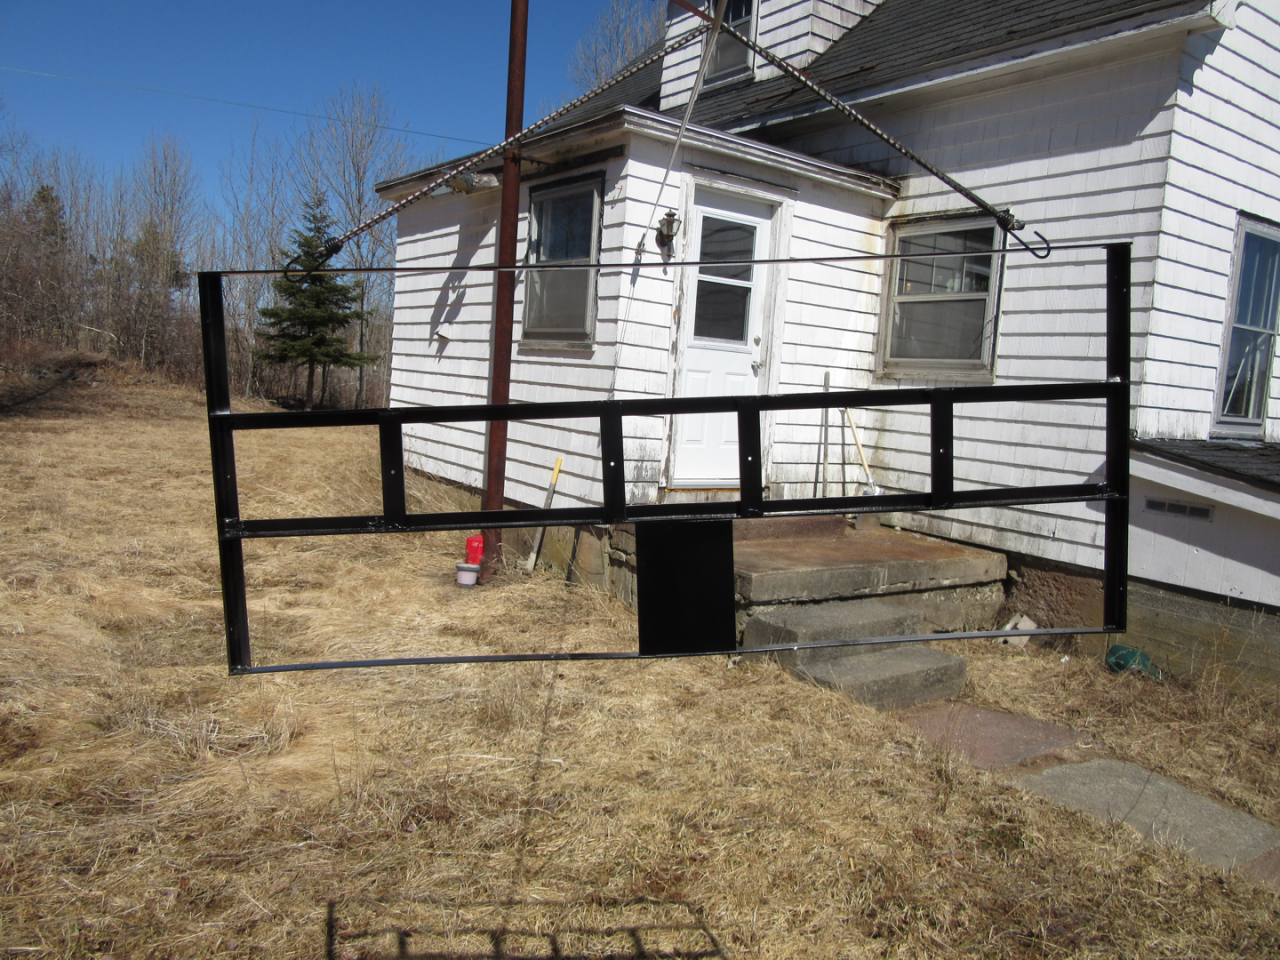
The Frame Hanging out to Dry
The control box has a steel base, and aluminum cover. I started with the base, laying out the holes, and cutting them out. My nibbler didn't work for the rectangular holes, so I used a jig saw.
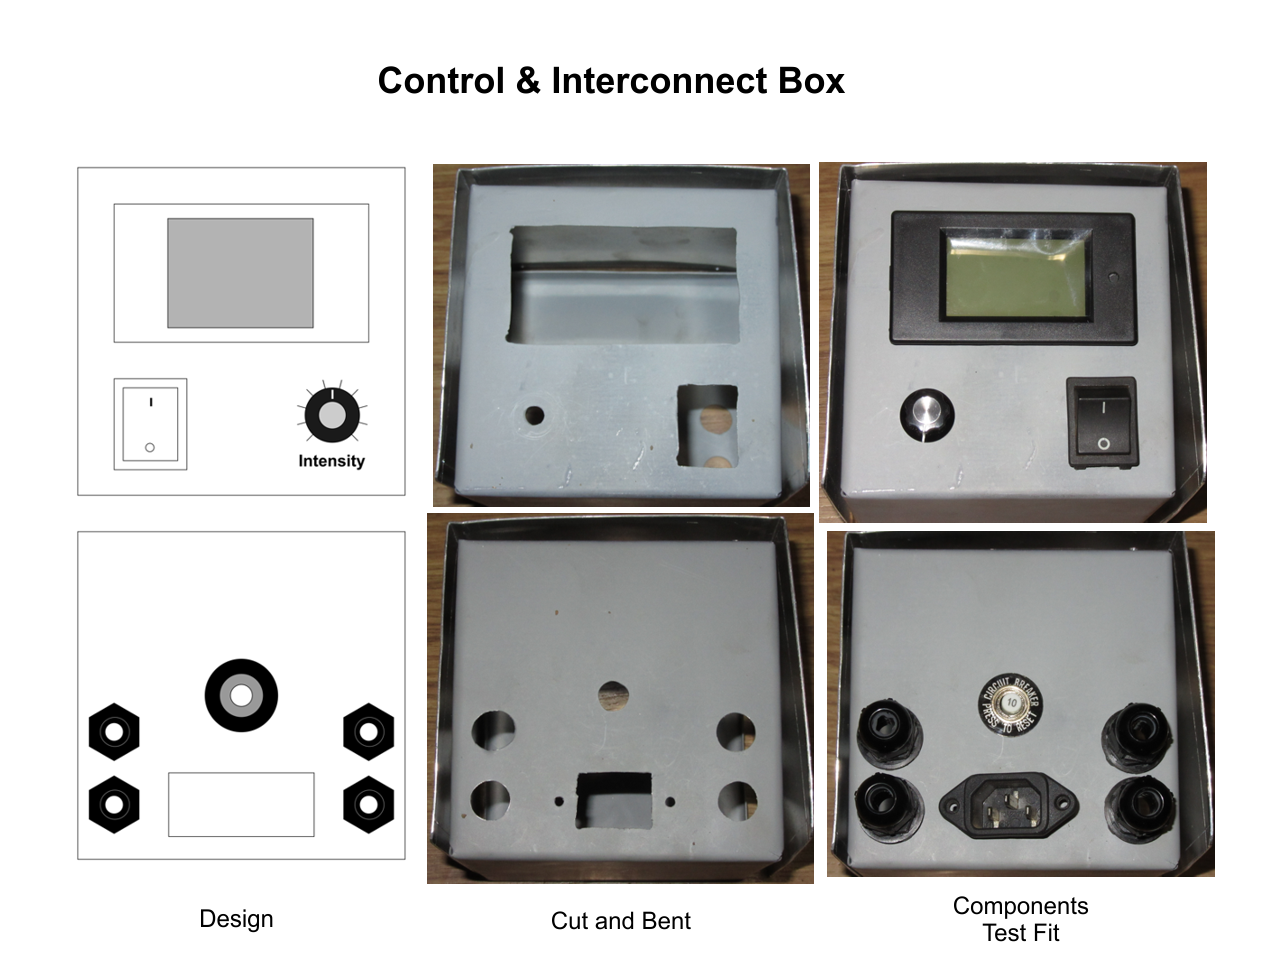
Troubles with the Control/Interconnect Box
Here you can see my design, and the current status:
Citizen CLU48-1216 COBs and Parts
I started by laying out the frame, notching the angle aluminum, and drilling the holes required to mount everything. The ends and two center rails are 3/4" angle aluminum to provide stability, The outer rails are 3/4" x 1/8" bar stock. Mounts for the drivers are 1" x 1/4" bar stock, and the control/interconnect box mount is 1/8" sheet. These parts are also all aluminum. The hardest part of this stage is accurately drilling the holes for the pin heatsinks. I made a template for this, and drilled the holes in the angle and bar stock for each bank together. These holes are countersunk.
Laying out the Parts
Next I welded the aluminum frame together. It wasn't difficult using a MAP torch and aluminum welding rods. I don't know why I was surprised, but it's like soldering. If you re-heat a weld it will separate, so if you want to weld both sides of the joint it must be done in a single operation. Then it was paint the frame; outside of course. I used an epoxy spray paint to seal it against corrosion.
The Frame Hanging out to Dry
The control box has a steel base, and aluminum cover. I started with the base, laying out the holes, and cutting them out. My nibbler didn't work for the rectangular holes, so I used a jig saw.
Troubles with the Control/Interconnect Box
Here you can see my design, and the current status:
- The cover is too large and needs to be re-made. That happened while bending it.
- The box was bent backwards, so the switch and control are reversed. I can live with that.
- The switch and power connector are re-cycled from a computer power supply.
- The circuit breaker is 10A about double what the light will draw.
- The black and green box is a power monitor.
")
") .
.
