- Thread starter
- #581
Thank you!Hey Jandre,
Excellent review!
HugeThis is a great feature!! I think having meters may have meritsto reduce mold conditions is a big thing.
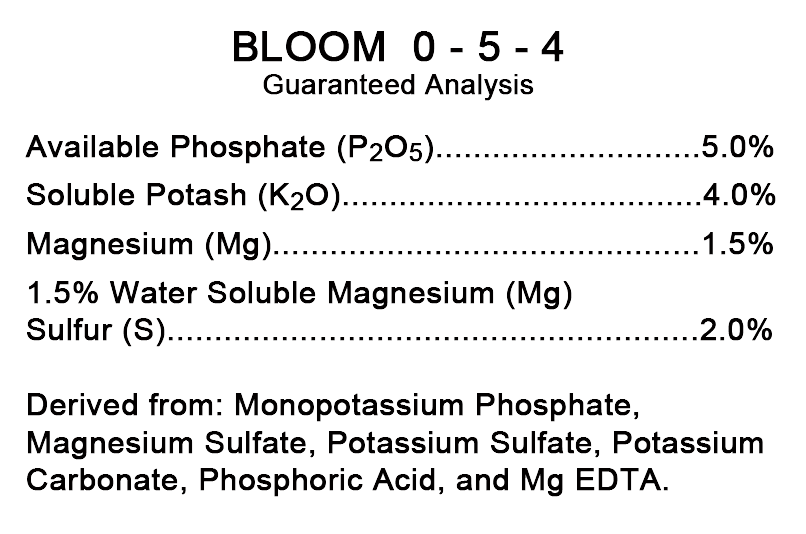
Yeah, I used a little stronger nutes, AND lowered the pH down to 5.5 I had a pit of trouble with "purple stem" throughout the grow, but adding a bit of "BLOOM" and reducing the running pH to 5.5 did the trick.I said in my reps I was gonna argue... not really, just share that my results in veg were different. Maybe I should ask why you felt you needed to give more nutrients... because over the years I have used less and less. The shades greener from the excess nitrogen? Also I have had very different leaf structure with varying types of light and LED grown seedlings were way further along than any other type of light (full power flower lights were used at one point and veg only spectrum was used too)
5 flowers a year?! I'll take it!This is something I knew but never documented... this is huge!!! it increases yield over time by giving an "extra" harvest. Cool!!!
well, you have to realize that I'm coming from marbles, and going to pom-poms... it's just a bit airy for me, but the flavor and aroma more than makes up for it.This is not the case with some of my panels... for some yes, but others make hard dense nuggets that impress folks that know HPS nuggets
Congratulations...
Really nice review
Thank you very much. I'm so glad that I tried LED, and actually tried a good brand instead of some of the FLEABAY brands out there. I read a quote somewhere: "Good, Fast, Cheap: Pick TWO."Wow! Thank youBeautiful job you did on this grow and what a conclusion write up!!! That is probably the best format of test grow conclusion I have seen!!! definitely very detailed, unbiased, informational and detailed!!! ( I may have to borrow your format in the future,)
These Gen 2's are really playing havoc on the camera... I'm thinking about putting a clamp-lamp in for pituresCan't wait to see the new grow with the I-gro lights! My Gen 2's are really putting on a show so far")
6oz... not a very impressive pull this time. I'm guessing that the troubles we had with that HPS box caused an underwhelming harvest.Hey, was curious, what was the weight you pulled from HPS in comparison to the LED?