JASPL's First Grow — Durban Poison, Big Bud, Kalashnikova — Outdoor 2012
MyGrow— A little history
I started smoking at an early age back in the mid 70's. Most of the weed around at that time was "Acapulco Gold," "Panama Red," "Thai Stick," or "Columbian." Who knows what it really was. Seriously, the days of smoking choice buds with known genetics hadn't arrived — at least to my neck of the woods. I'd rarely seen a bag without seeds and a few stems. It was a routine part of getting a new stash to pour it out on the inside of an album cover and using a playing card to sift out the seeds (which promptly went into a 35mm film canister). Hash was a rare luxury. Much later on I learned that nobody really smokes the leaves. Go figure.
Anyway, I made it out of college, married and raised two girls who are now away at school. I never really gave up smoking entirely, but you reach an age and circumstance in life where risk comes to mind and you begin taking less chances and playing your cards a bit closer to the vest.
With the economy being what it is I've recently taken the opportunity to begin growing a great deal of our food. Along the way I decided to try my hand at cannabis. I still need to take a little risk, right? This is my first grow in about 35 years. It seems strange saying I haven't done something in that long. Time sure has a way of flying by.
Back in late-November I decided on three strains and I secured the following 10-packs of feminized seeds:
- Durban Poison from Dutch Passion — DP is a sativa/indica blend but mostly sativa of medium height suitable for indoor or out, taste described as sweet licorice or sweet aniseed (I'm thinking Sambvca?), planted in April and ready in mid-September.
- Big Bud from Sensei Seeds — BB is an indica/sativa blend of medium height usually grown indoors but many sources say outdoors ok too. A big producer with sweet fruity flavor requires an 8-14 week flowing period. Yields are supposed to be great.
- Kalashnikova from Greenhouse Seeds — Kalashnikova is an indica with short 7 week flowering time, fruit-spice flavor, and hard hitting body high.
From what I could gather, these strains were OK for a new grower, suitable for an outside grow, offered a mix of indica and sativa, and otherwise sounded interesting to me. Time will tell.
I've spent about a year reading the forums of various grow sites (420 is the best!), as well as books by Jorge Cervantes and S.T. Oner, and watching YouTube videos trying to gather as much information as possible to improve my chances of success. I like to think I researched everything and have it all figured out but I know that's not true. Much of what I do will be trial and error, but I figure the journey will be fun.
My Grow - Germination
I began trying to germinate my seeds in late-March. With a last frost date in my area of mid-May, I realize I started too early but the weather was real nice and I suppose I was a bit anxious. This worked out OK for me because my first attempt was a complete bust. Prior to now I always used Jiffy peat pellets with great success in my vegetable garden. I activated a dozen pellets with water, added four seeds from each variety, placed the pellets in a humidity dome and set them on a germination warming mat on a shelf. I waited four weeks for these seeds to break the surface and nothing happened. The post mortem on the seeds showed they opened and started showing a tap root but never progressed past that stage. I'm guessing perhaps they were a bit too warm?
By now I'm a bit worried. Ya'll know what these seeds cost and not counting the freebies I just blew nearly half my load. It's nearing the end of April and I don't have anything started. I figured no need to panic - let's regroup and go to plan B. I make a visit to the local hydro shop to check out the rockwool cubes. The guy there assures me that rockwool will make any seed pop. I put down my cash and set out to prove him right.
I added two tablespoons of concentrate lemon juice per gallon of warm water, let the cubes absorb all they want, set the seeds in the predrilled holes, placed them back in the humidity dome and set them on the warming pad. THREE DAYS later eight of those babies broke ground. I was stoked. Finally, I was on my way to my first grow.
Germination Lessons Learned: *Patronize your local grow shop — they have the knowledge and experience to set you straight and give you a little confidence boost. *Rockwool is da bomb! - no more Jiffy pucks for me. *Warming mat plus T5 lights (on a bottom shelf) probably make seeds a little too warm — next time have handy a small digital thermometer.
My Grow — Seedlings
I waited till the seedlings grew the first set of true leaves and I started to see roots growing from the bottom of the rockwool cubes before transplanting. I had a package of 12 oz. Solo cups that I would use as a preliminary container. While at the hydro shop the week prior I settled on a bag of Fox Farm Ocean Forest. I filled the cups about 1/3rd the way full, dropped the rockwool cube and seedling into the cup, and then carefully filled the remaining space with the soil mix. This resulted in the stem of the seedlings being buried right up to the first leaves. I'd read where the stem would develop roots when buried similar to a tomato and thought I would give it a try. It worked just fine. I removed the heating mat at this time.
For lights I had a 4', 4-bulb HydroFarm T5 fixture and bulbs. I hung it using two small sections of chain and "S" hooks so I could adjust the height as the seedlings grew. Following advice from this forum I withheld any fertilizer for the first two weeks. I watered them with plain tap water as needed, always allowing the surface to dry between watering. I kept the light within 4" of the top growth.
Seedlings Lessons Learned: *Be careful with using cups without drainage holes. Lurking beneath that crusty surface is too much water ready to suffocate your roots. Poke a couple of holes if you need to use the cups. *Also consider using the larger 4x4 or 6x6 rockwool cubes.
MyGrow — Vegetative Stage (Indoors)
After about the third week of growth (I'm guestimating times) the seedlings reached a height of about eight inches from the top of the cup. They were very bushy and not at all leggy, which I attribute to keeping the light so close. I went back to the local hydro shop and purchased enough one gallon pots and Ocean Forest to transplant the seedlings. In addition, since I was still a couple of weeks away from being safely able to move outside, I purchased two more HydroFarm fixtures to hang from the sides of my shelf. I should also note I was keeping my HydroFarm lights on 24-hours per day.
I transplanted the seedlings to the one gallon pots using the same burial technique I used before — sinking them up to the first set of leaves. I noted the seedlings had a very nice foundation of strong, white roots. I also gave my first feeding using Fox Farm Grow Big and Big Bloom. I mixed one teaspoon of each into one gallon of tap water and watered the eight one gallon containers with three gallons of mix. Also at this time I placed a 16" oscillating pedestal fan near the end of my shelf set on low speed. I did this to start training the stems to grow stronger.
By the fourth week I started seeing what I suspected was a magnesium deficiency. I added ½ teaspoon Epsom salt, ½ teaspoon of pulverized lime, and one teaspoon of sulfur free molasses (all per gallon) to my every week feeding schedule. I also misted with a ½ teaspoon of Epsom salt in a one quart spray bottle. Sadly, the condition I suspected to be a magnesium deficiency in two of my plants progressively worsened until about 60% of the leaf surface appeared burnt. pH tested out at 6.5 so this wasn't a problem. Despite trying to flush these plants with plain water I never solved the problem with them and ultimately lost the battle at the end of the sixth week. My best guess is I overfed them. New growers don't overdo anything, right? I took a couple of pictures with my phone but they are truly unsuitable for publishing. I need to buy a camera. Down to six plants and it's time to make plans for moving outdoors.
Vegetative (Indoor) Lessons Learned: *Light is a good thing but don't let them get too close or you will get crispy leaves. *That fan made stems into trunks — having grown many pepper plants which are similar in structure and stature at this stage I'm very impressed with the effect. *Less is more when it comes to ferts. Feed according to how your plants look and not according to some schedule you found online. *Don't feel it necessary to react to every leaf blemish or droopy stem. Much like raising children, these plants seem remarkable resilient despite our best efforts to over diagnose and over medicate. Keep It Simple Stupid!
MyGrow — Moving Day!
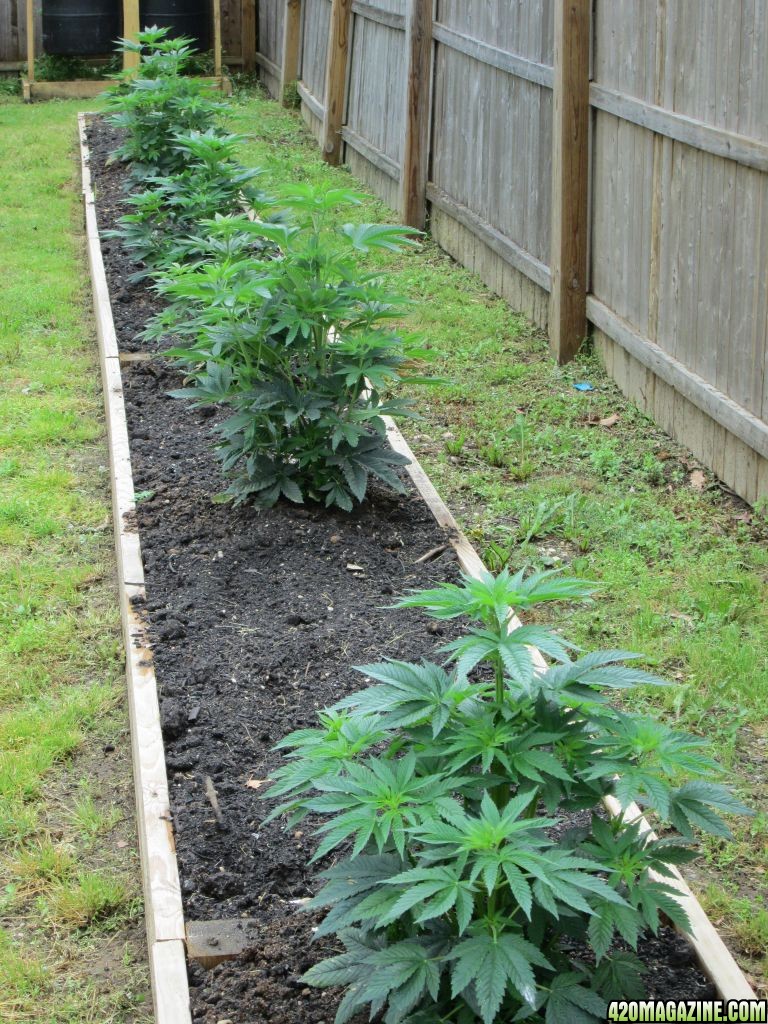
Late last fall I built three new raised beds in my garden. They are outlined with 2x8 boards and are 48' long. The first bed contains a new planting of blackberries, the second red raspberries. The third would be the spot of my first marijuana grow. Each bed received a layer of semi-composted horse manure from a reputable local stable known for the excellent care they provide their horses. Yes, there are quality issues when it comes to most manures. Expecting good results with manure from some old nag fed mostly grass and little grain is not going to produce quality manure. On top of this manure I placed a mix of local topsoil mixed with leaf compost. This was covered with black plastic and allowed to set over the winter. This spring I gently turned over the beds with a fork and topped them off with a compost mixture I make out of maple leaves, grass clippings, and chicken manure. The worms just love my compost piles!
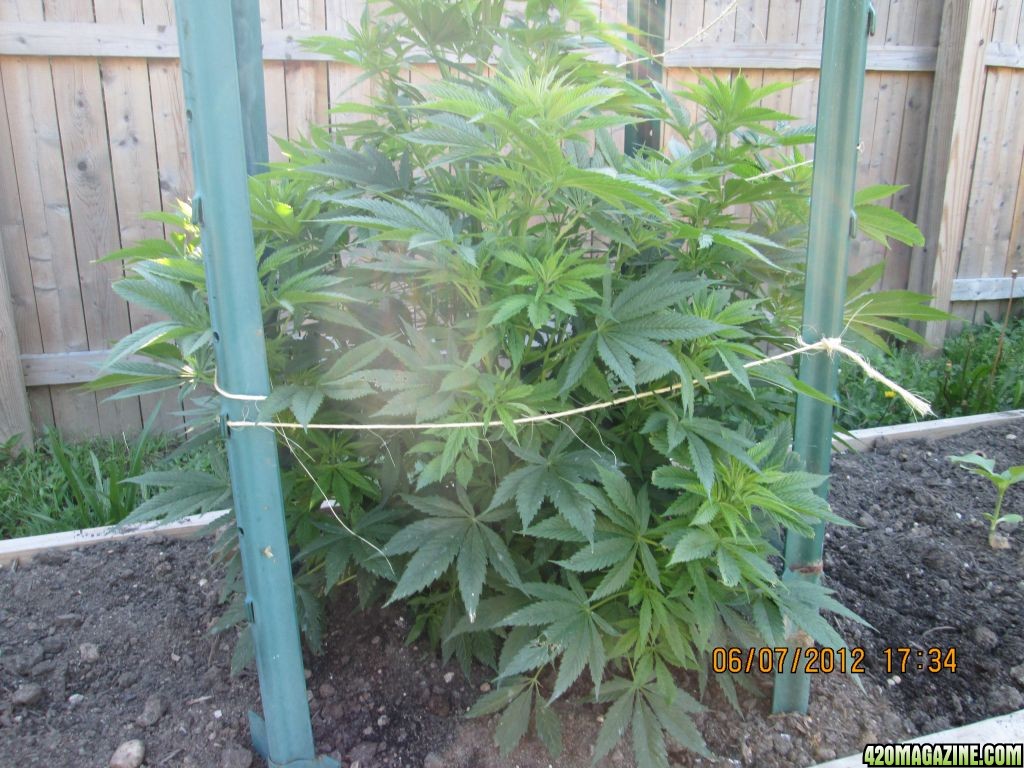
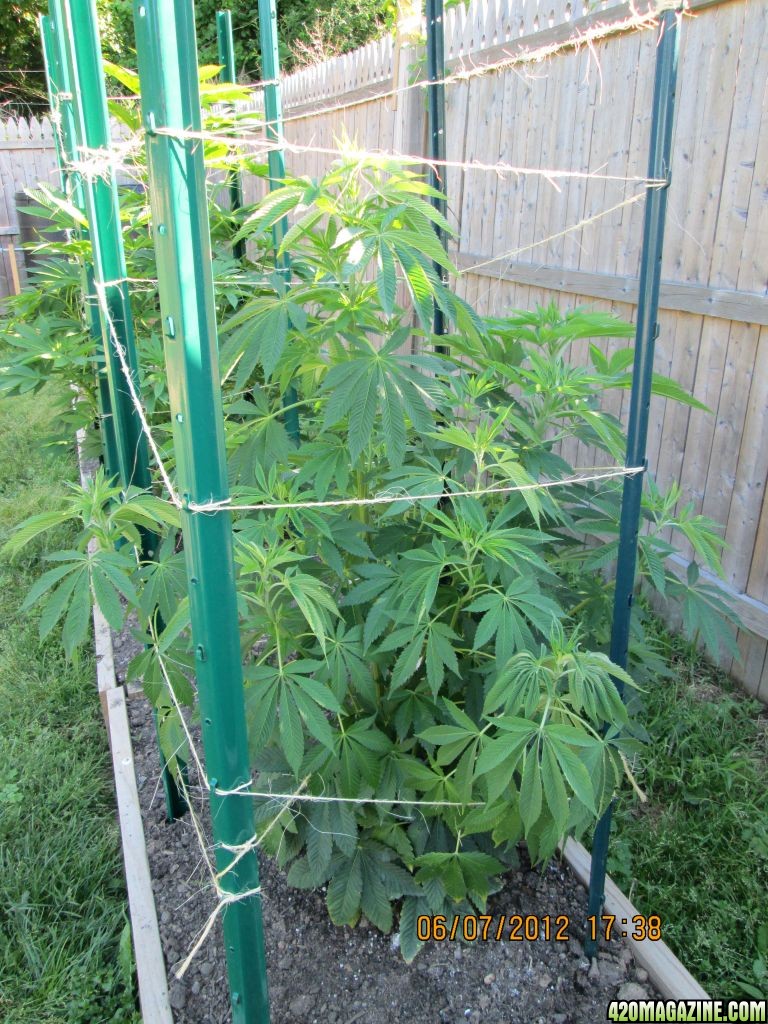
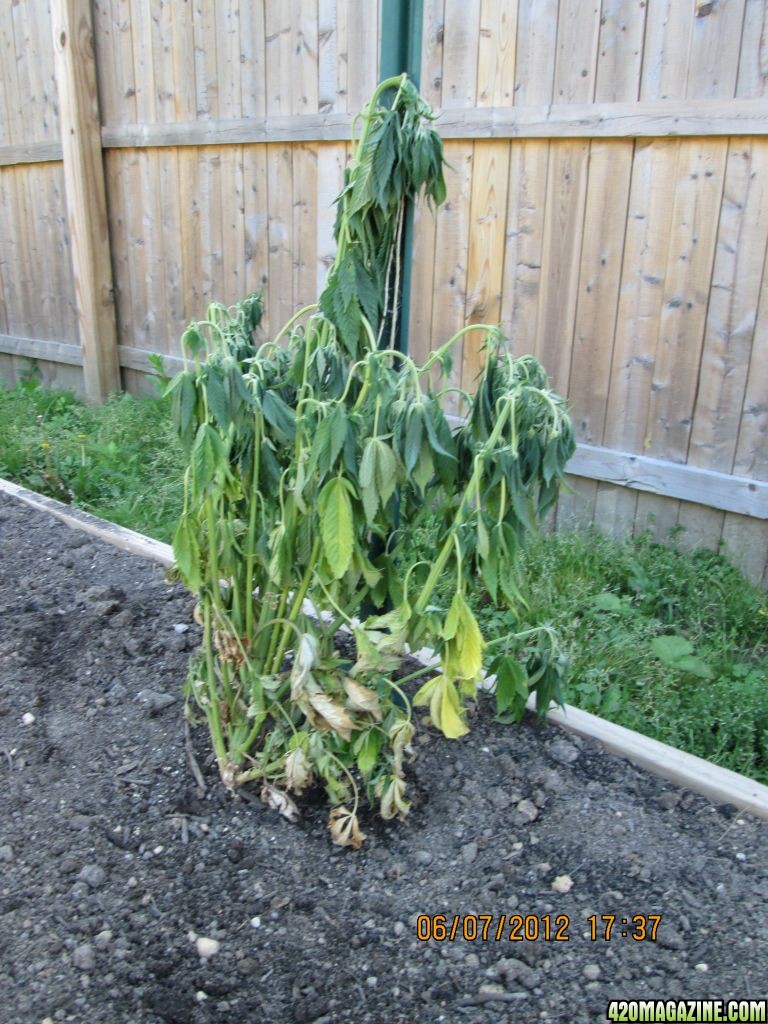
It is the day before Mother's day and after acclimating my plants to the outdoors for a few days it is now time to move to the garden. I set out the plants in the bed where I want them. It has been my intention to control plant height by gently and gradually bending the stalks over and tying them to stakes in the ground. Spacing will be about every six to eight feet so I have plenty of room. I dig holes about twice as deep and twice as wide as my one gallon pots, and once again bury the plants right up to the first set of leaves, same as before. I carefully backfill around the plants while building a small ridge around them to help contain water. I never use pesticides in my garden so I take the opportunity now to release 1,500 lady bugs in a nearby garlic patch. All the plants are watered in with tap water. Soil pH is 6.8. I'd like to see that a little lower but I will resist the urge to micromanage to the smallest detail and continue to monitor.
Moving Day Lessons Learned: *Pay a little bit closer attention to the path of the sun during the growing season. The fence next to my bed blocks direct sun from about 4:00 on. This should improve a bit over the next few weeks. They have direct sun from about 0900 till then so no big deal but in another month that will be at least three hours of direct sun lost per day. Perhaps during the heat of summer this might be a good respite from the late-day heat?
MyGrow — Vegetative (Outdoors)
My plants have been outdoors for two weeks. I stopped and bought a small digital camera today so I can finally introduce all of you to the ladies.
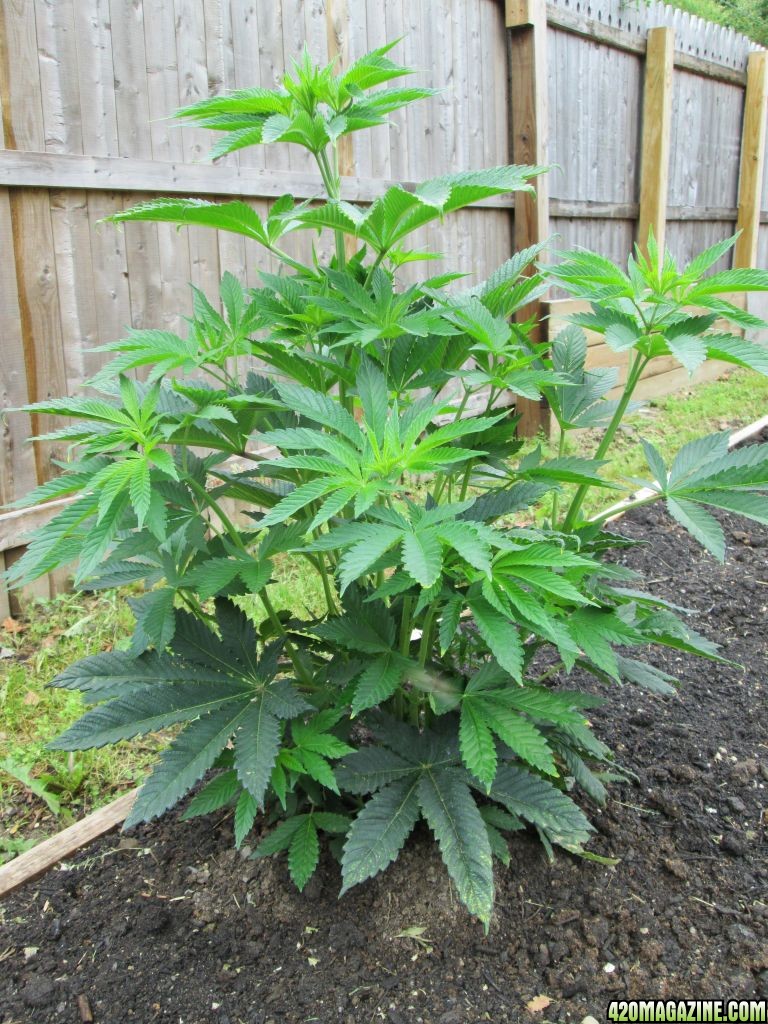
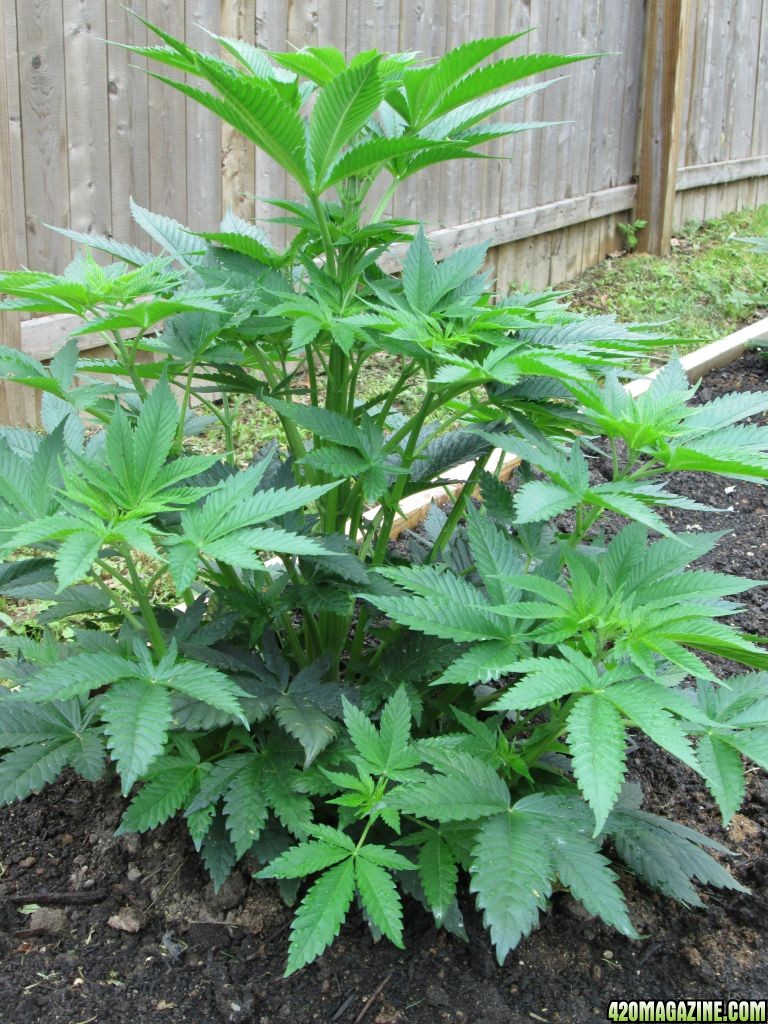
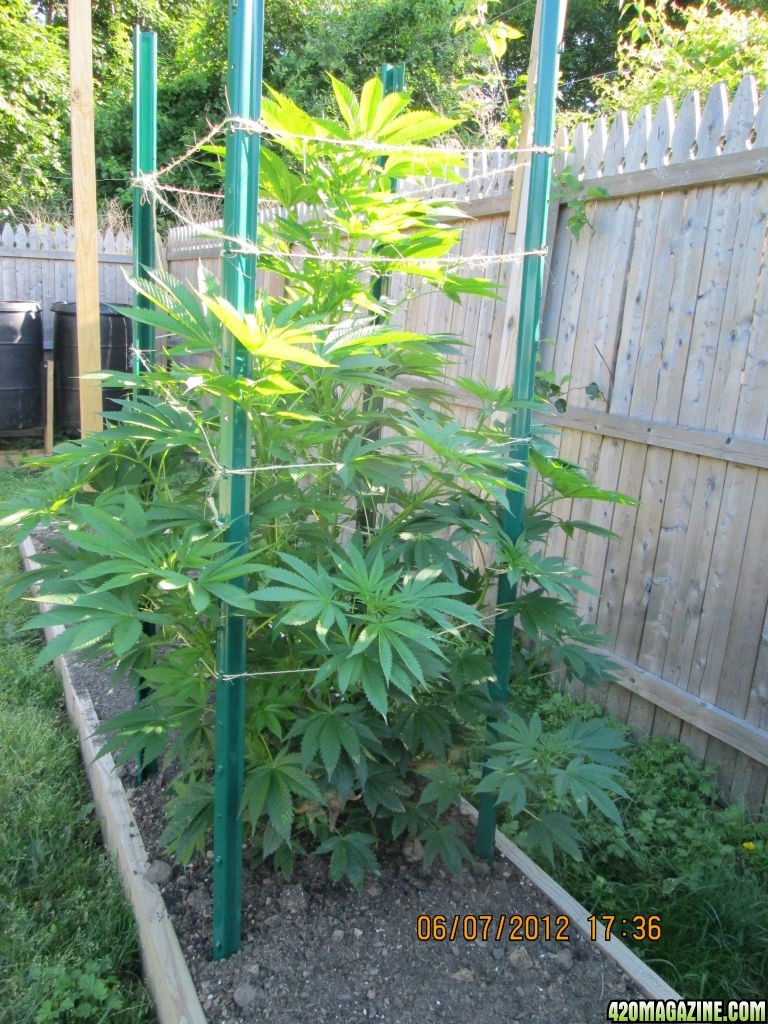
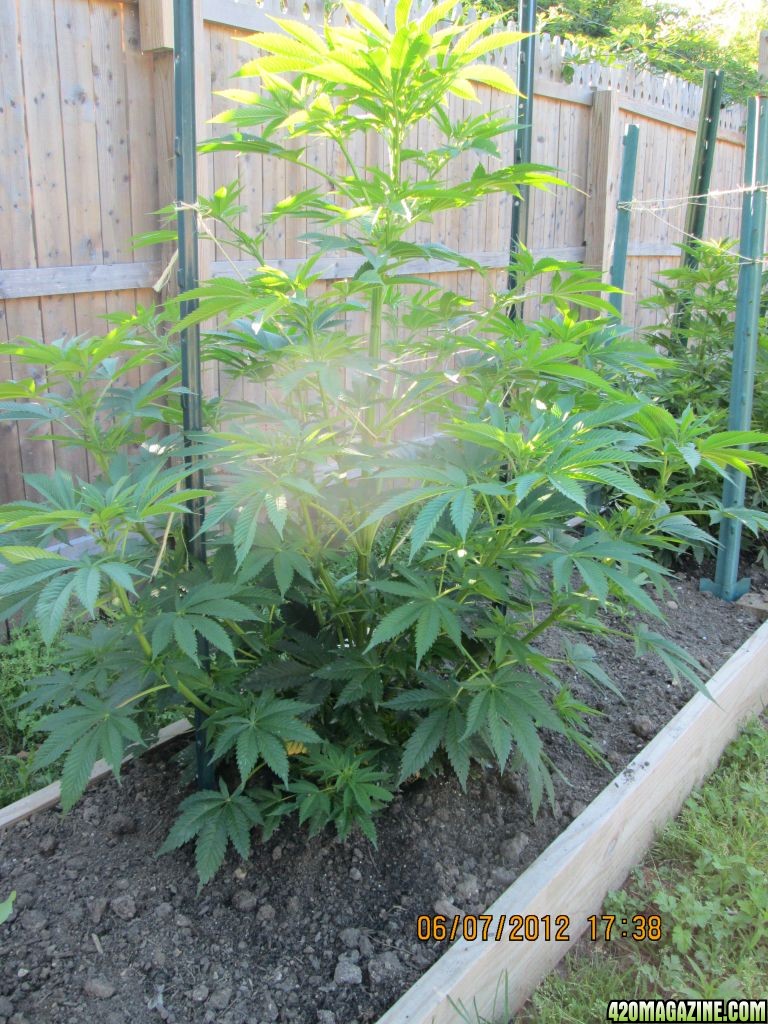
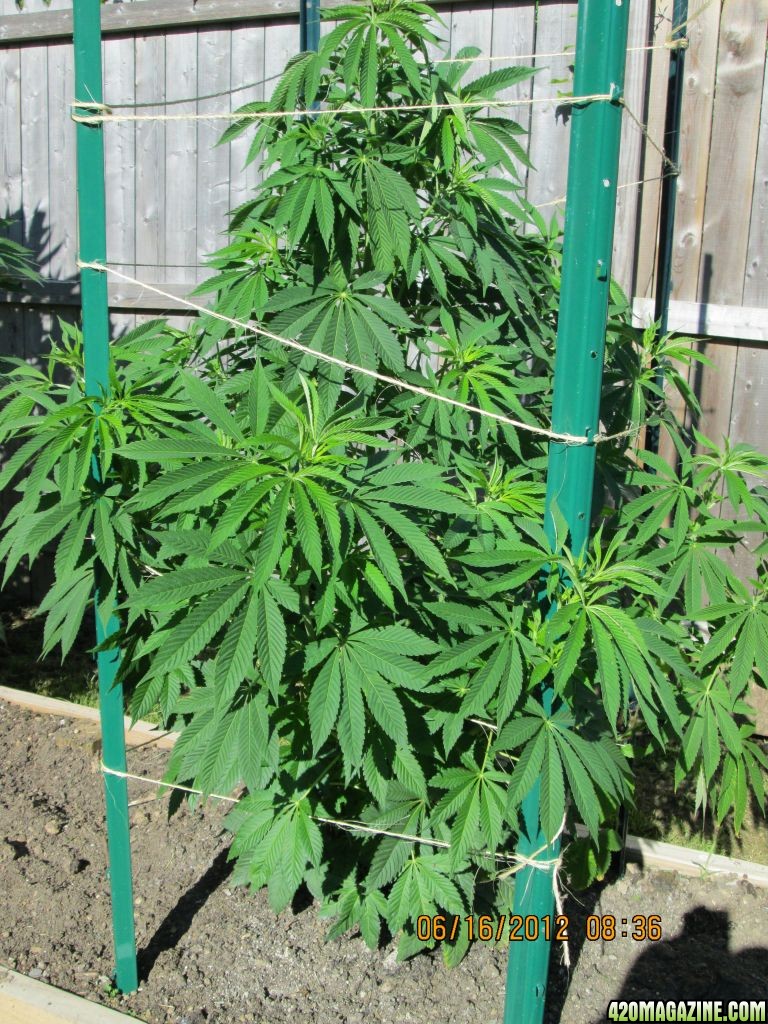
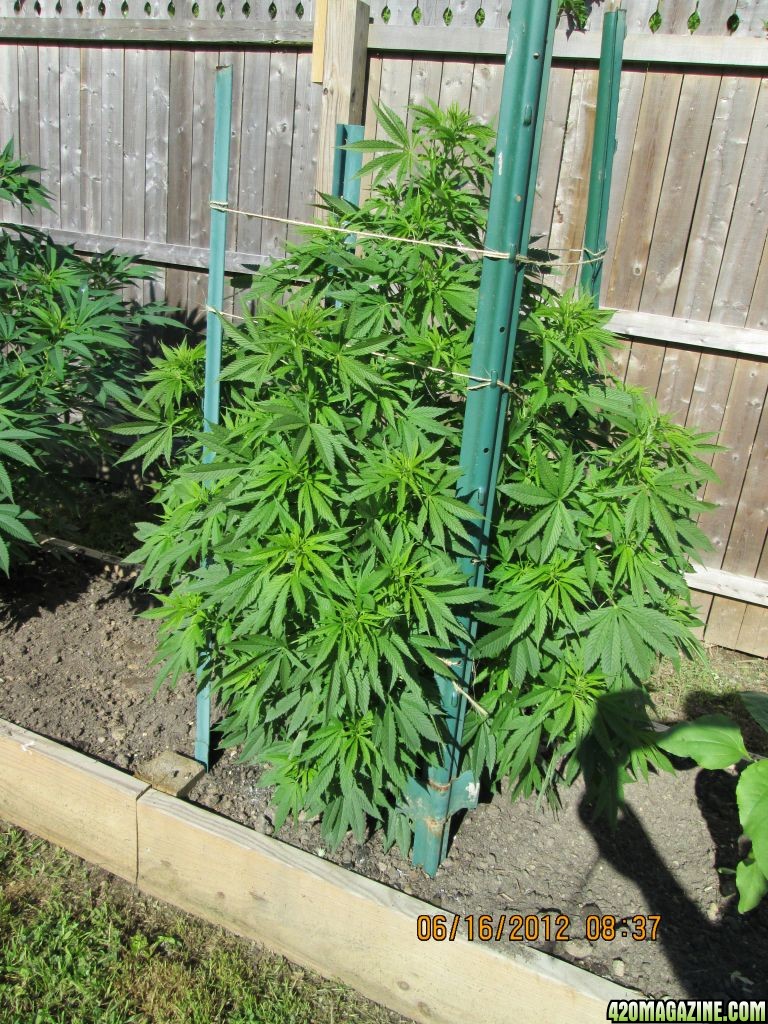
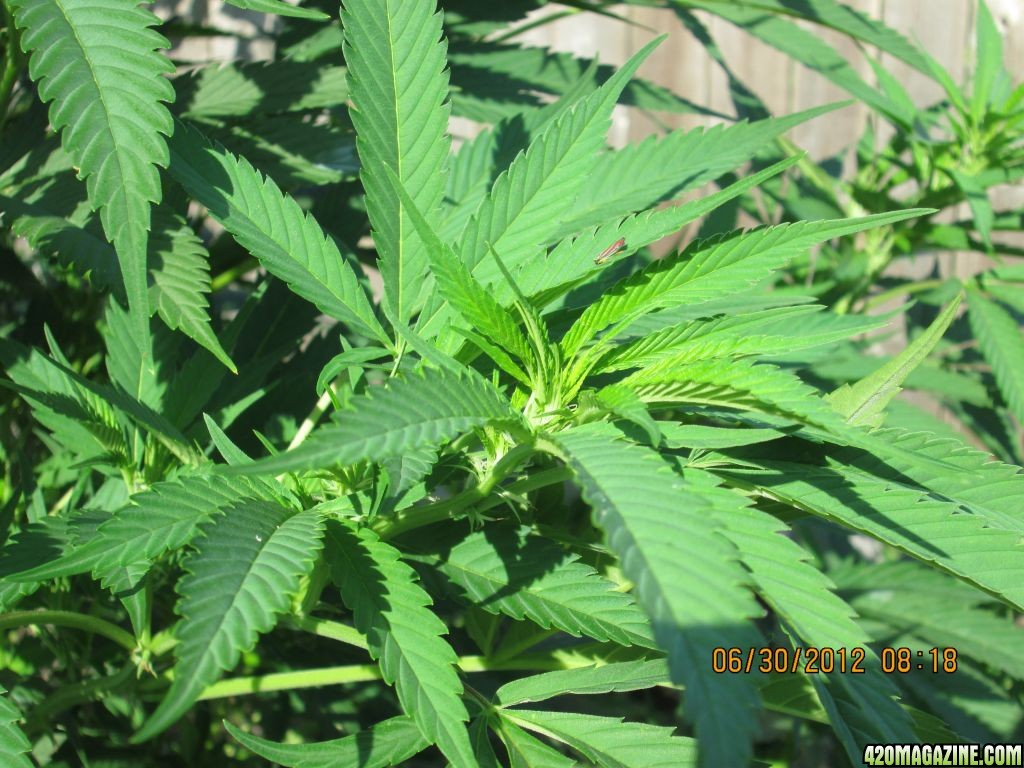
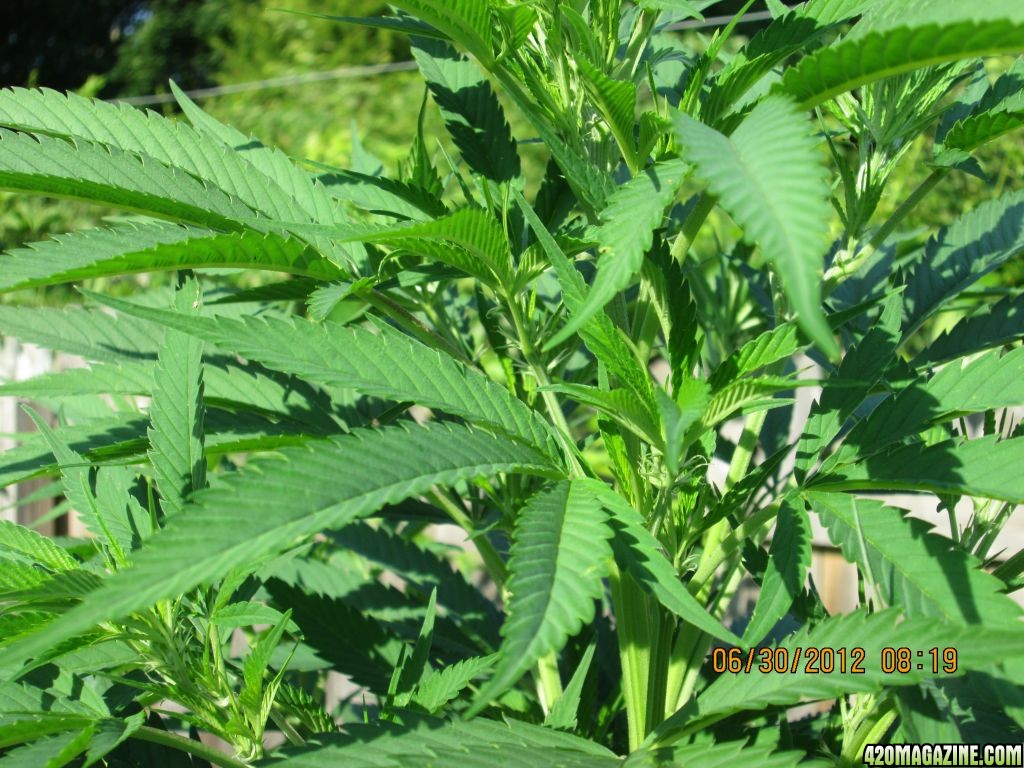
I've ended up with three Durban Poison, two Big Bud and one Kalashnikova. Of course, I wrote the names with a sharpie on each pot and failed to transfer the names with the transplant. I'm going to assume the three plants that are 4-6" taller than the others are the Durban's given their sativa tendencies (height and leaf shape) and the one shorter one is the Kalashnikova's. Perhaps this will become clearer as they grow. It doesn't matter - so long as they are all healthy I will love them all the same!
I have continued using the Fox Farm nutrients along with the molasses about every 8 to 10 days. pH is stable and rain has been consistent enough so they haven't required any watering. That fence is six feet high so the tallest plants are right around the 28-30" mark with nothing shorter than 24". We are about one month from the summer solstice so I don't expect to see overt sexual traits till after then. My goal is to continue to support vegetative growth. I'm a big believer in shallow cultivating between plants once a week. Overall I'm happy with my progress thus far.
I will update this log every two to three weeks or sooner if something changes. I welcome your comments, suggestions and questions.
Hope this wasn't too long of an introduction but I enjoyed writing for you.
JASPL
MyGrow— A little history
I started smoking at an early age back in the mid 70's. Most of the weed around at that time was "Acapulco Gold," "Panama Red," "Thai Stick," or "Columbian." Who knows what it really was. Seriously, the days of smoking choice buds with known genetics hadn't arrived — at least to my neck of the woods. I'd rarely seen a bag without seeds and a few stems. It was a routine part of getting a new stash to pour it out on the inside of an album cover and using a playing card to sift out the seeds (which promptly went into a 35mm film canister). Hash was a rare luxury. Much later on I learned that nobody really smokes the leaves. Go figure.
Anyway, I made it out of college, married and raised two girls who are now away at school. I never really gave up smoking entirely, but you reach an age and circumstance in life where risk comes to mind and you begin taking less chances and playing your cards a bit closer to the vest.
With the economy being what it is I've recently taken the opportunity to begin growing a great deal of our food. Along the way I decided to try my hand at cannabis. I still need to take a little risk, right? This is my first grow in about 35 years. It seems strange saying I haven't done something in that long. Time sure has a way of flying by.
Back in late-November I decided on three strains and I secured the following 10-packs of feminized seeds:
- Durban Poison from Dutch Passion — DP is a sativa/indica blend but mostly sativa of medium height suitable for indoor or out, taste described as sweet licorice or sweet aniseed (I'm thinking Sambvca?), planted in April and ready in mid-September.
- Big Bud from Sensei Seeds — BB is an indica/sativa blend of medium height usually grown indoors but many sources say outdoors ok too. A big producer with sweet fruity flavor requires an 8-14 week flowing period. Yields are supposed to be great.
- Kalashnikova from Greenhouse Seeds — Kalashnikova is an indica with short 7 week flowering time, fruit-spice flavor, and hard hitting body high.
From what I could gather, these strains were OK for a new grower, suitable for an outside grow, offered a mix of indica and sativa, and otherwise sounded interesting to me. Time will tell.
I've spent about a year reading the forums of various grow sites (420 is the best!), as well as books by Jorge Cervantes and S.T. Oner, and watching YouTube videos trying to gather as much information as possible to improve my chances of success. I like to think I researched everything and have it all figured out but I know that's not true. Much of what I do will be trial and error, but I figure the journey will be fun.
My Grow - Germination
I began trying to germinate my seeds in late-March. With a last frost date in my area of mid-May, I realize I started too early but the weather was real nice and I suppose I was a bit anxious. This worked out OK for me because my first attempt was a complete bust. Prior to now I always used Jiffy peat pellets with great success in my vegetable garden. I activated a dozen pellets with water, added four seeds from each variety, placed the pellets in a humidity dome and set them on a germination warming mat on a shelf. I waited four weeks for these seeds to break the surface and nothing happened. The post mortem on the seeds showed they opened and started showing a tap root but never progressed past that stage. I'm guessing perhaps they were a bit too warm?
By now I'm a bit worried. Ya'll know what these seeds cost and not counting the freebies I just blew nearly half my load. It's nearing the end of April and I don't have anything started. I figured no need to panic - let's regroup and go to plan B. I make a visit to the local hydro shop to check out the rockwool cubes. The guy there assures me that rockwool will make any seed pop. I put down my cash and set out to prove him right.
I added two tablespoons of concentrate lemon juice per gallon of warm water, let the cubes absorb all they want, set the seeds in the predrilled holes, placed them back in the humidity dome and set them on the warming pad. THREE DAYS later eight of those babies broke ground. I was stoked. Finally, I was on my way to my first grow.
Germination Lessons Learned: *Patronize your local grow shop — they have the knowledge and experience to set you straight and give you a little confidence boost. *Rockwool is da bomb! - no more Jiffy pucks for me. *Warming mat plus T5 lights (on a bottom shelf) probably make seeds a little too warm — next time have handy a small digital thermometer.
My Grow — Seedlings
I waited till the seedlings grew the first set of true leaves and I started to see roots growing from the bottom of the rockwool cubes before transplanting. I had a package of 12 oz. Solo cups that I would use as a preliminary container. While at the hydro shop the week prior I settled on a bag of Fox Farm Ocean Forest. I filled the cups about 1/3rd the way full, dropped the rockwool cube and seedling into the cup, and then carefully filled the remaining space with the soil mix. This resulted in the stem of the seedlings being buried right up to the first leaves. I'd read where the stem would develop roots when buried similar to a tomato and thought I would give it a try. It worked just fine. I removed the heating mat at this time.
For lights I had a 4', 4-bulb HydroFarm T5 fixture and bulbs. I hung it using two small sections of chain and "S" hooks so I could adjust the height as the seedlings grew. Following advice from this forum I withheld any fertilizer for the first two weeks. I watered them with plain tap water as needed, always allowing the surface to dry between watering. I kept the light within 4" of the top growth.
Seedlings Lessons Learned: *Be careful with using cups without drainage holes. Lurking beneath that crusty surface is too much water ready to suffocate your roots. Poke a couple of holes if you need to use the cups. *Also consider using the larger 4x4 or 6x6 rockwool cubes.
MyGrow — Vegetative Stage (Indoors)
After about the third week of growth (I'm guestimating times) the seedlings reached a height of about eight inches from the top of the cup. They were very bushy and not at all leggy, which I attribute to keeping the light so close. I went back to the local hydro shop and purchased enough one gallon pots and Ocean Forest to transplant the seedlings. In addition, since I was still a couple of weeks away from being safely able to move outside, I purchased two more HydroFarm fixtures to hang from the sides of my shelf. I should also note I was keeping my HydroFarm lights on 24-hours per day.
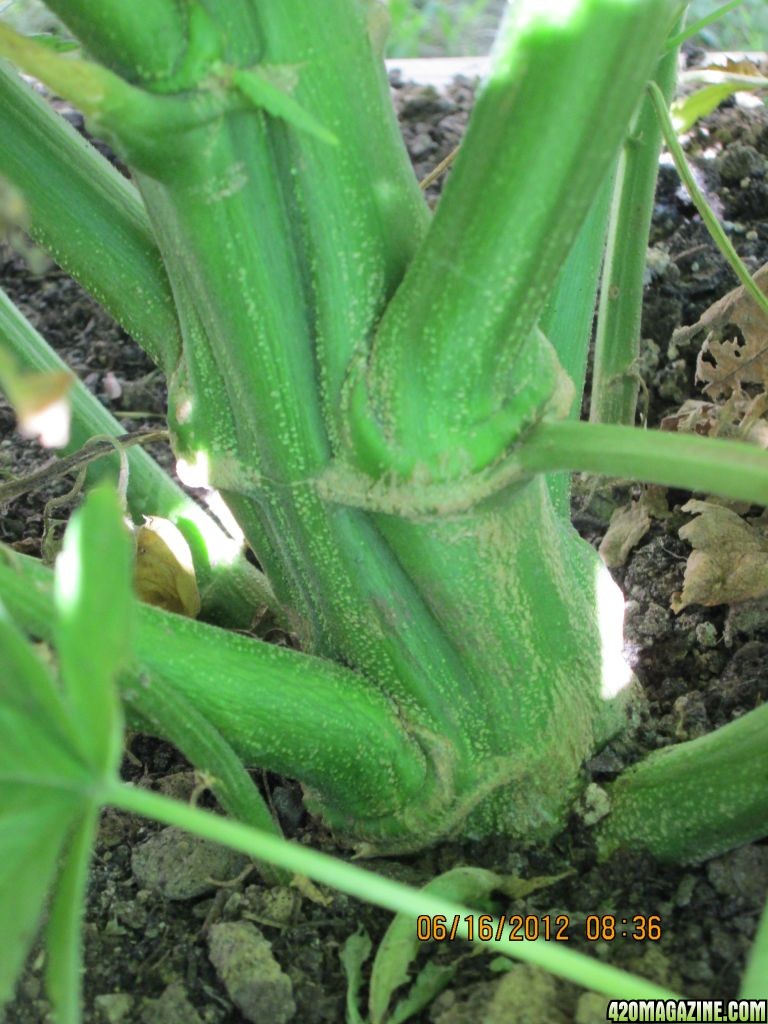
I transplanted the seedlings to the one gallon pots using the same burial technique I used before — sinking them up to the first set of leaves. I noted the seedlings had a very nice foundation of strong, white roots. I also gave my first feeding using Fox Farm Grow Big and Big Bloom. I mixed one teaspoon of each into one gallon of tap water and watered the eight one gallon containers with three gallons of mix. Also at this time I placed a 16" oscillating pedestal fan near the end of my shelf set on low speed. I did this to start training the stems to grow stronger.
By the fourth week I started seeing what I suspected was a magnesium deficiency. I added ½ teaspoon Epsom salt, ½ teaspoon of pulverized lime, and one teaspoon of sulfur free molasses (all per gallon) to my every week feeding schedule. I also misted with a ½ teaspoon of Epsom salt in a one quart spray bottle. Sadly, the condition I suspected to be a magnesium deficiency in two of my plants progressively worsened until about 60% of the leaf surface appeared burnt. pH tested out at 6.5 so this wasn't a problem. Despite trying to flush these plants with plain water I never solved the problem with them and ultimately lost the battle at the end of the sixth week. My best guess is I overfed them. New growers don't overdo anything, right? I took a couple of pictures with my phone but they are truly unsuitable for publishing. I need to buy a camera. Down to six plants and it's time to make plans for moving outdoors.
Vegetative (Indoor) Lessons Learned: *Light is a good thing but don't let them get too close or you will get crispy leaves. *That fan made stems into trunks — having grown many pepper plants which are similar in structure and stature at this stage I'm very impressed with the effect. *Less is more when it comes to ferts. Feed according to how your plants look and not according to some schedule you found online. *Don't feel it necessary to react to every leaf blemish or droopy stem. Much like raising children, these plants seem remarkable resilient despite our best efforts to over diagnose and over medicate. Keep It Simple Stupid!
MyGrow — Moving Day!
Late last fall I built three new raised beds in my garden. They are outlined with 2x8 boards and are 48' long. The first bed contains a new planting of blackberries, the second red raspberries. The third would be the spot of my first marijuana grow. Each bed received a layer of semi-composted horse manure from a reputable local stable known for the excellent care they provide their horses. Yes, there are quality issues when it comes to most manures. Expecting good results with manure from some old nag fed mostly grass and little grain is not going to produce quality manure. On top of this manure I placed a mix of local topsoil mixed with leaf compost. This was covered with black plastic and allowed to set over the winter. This spring I gently turned over the beds with a fork and topped them off with a compost mixture I make out of maple leaves, grass clippings, and chicken manure. The worms just love my compost piles!
It is the day before Mother's day and after acclimating my plants to the outdoors for a few days it is now time to move to the garden. I set out the plants in the bed where I want them. It has been my intention to control plant height by gently and gradually bending the stalks over and tying them to stakes in the ground. Spacing will be about every six to eight feet so I have plenty of room. I dig holes about twice as deep and twice as wide as my one gallon pots, and once again bury the plants right up to the first set of leaves, same as before. I carefully backfill around the plants while building a small ridge around them to help contain water. I never use pesticides in my garden so I take the opportunity now to release 1,500 lady bugs in a nearby garlic patch. All the plants are watered in with tap water. Soil pH is 6.8. I'd like to see that a little lower but I will resist the urge to micromanage to the smallest detail and continue to monitor.
Moving Day Lessons Learned: *Pay a little bit closer attention to the path of the sun during the growing season. The fence next to my bed blocks direct sun from about 4:00 on. This should improve a bit over the next few weeks. They have direct sun from about 0900 till then so no big deal but in another month that will be at least three hours of direct sun lost per day. Perhaps during the heat of summer this might be a good respite from the late-day heat?
MyGrow — Vegetative (Outdoors)
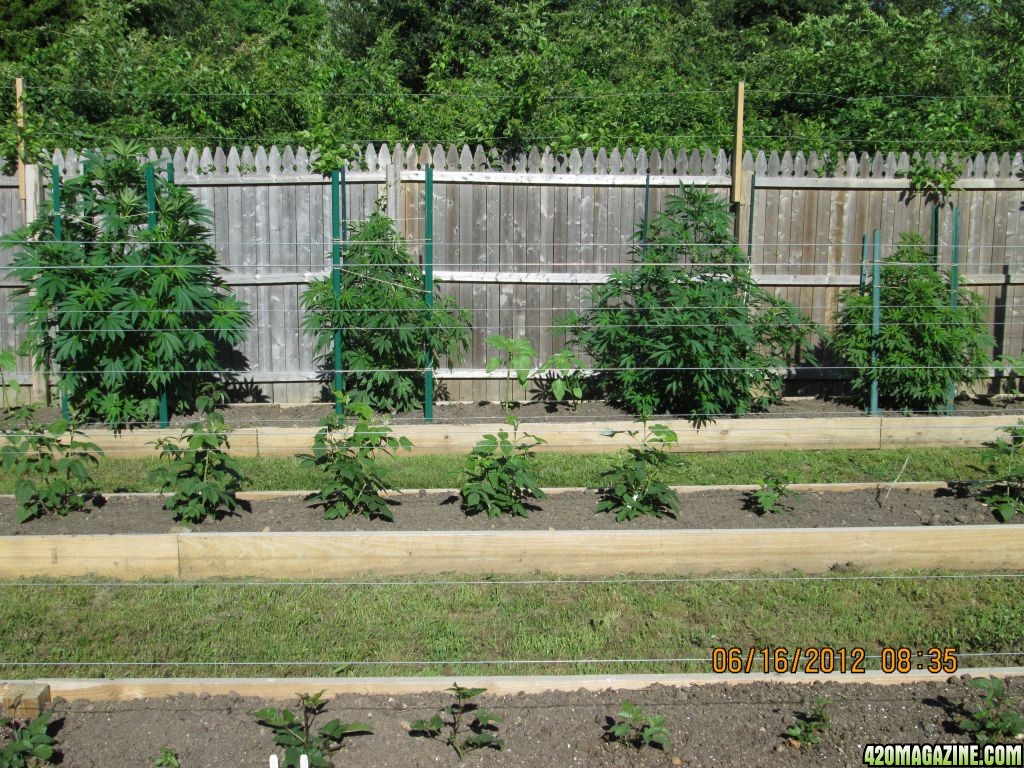
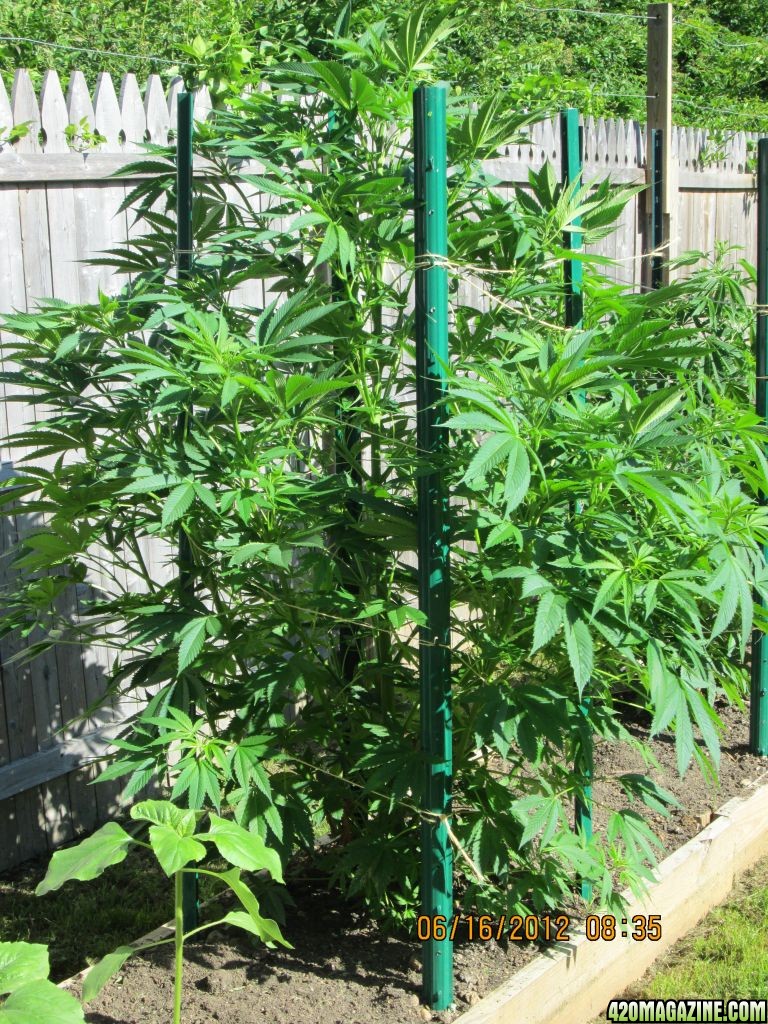
My plants have been outdoors for two weeks. I stopped and bought a small digital camera today so I can finally introduce all of you to the ladies.
I've ended up with three Durban Poison, two Big Bud and one Kalashnikova. Of course, I wrote the names with a sharpie on each pot and failed to transfer the names with the transplant. I'm going to assume the three plants that are 4-6" taller than the others are the Durban's given their sativa tendencies (height and leaf shape) and the one shorter one is the Kalashnikova's. Perhaps this will become clearer as they grow. It doesn't matter - so long as they are all healthy I will love them all the same!
I have continued using the Fox Farm nutrients along with the molasses about every 8 to 10 days. pH is stable and rain has been consistent enough so they haven't required any watering. That fence is six feet high so the tallest plants are right around the 28-30" mark with nothing shorter than 24". We are about one month from the summer solstice so I don't expect to see overt sexual traits till after then. My goal is to continue to support vegetative growth. I'm a big believer in shallow cultivating between plants once a week. Overall I'm happy with my progress thus far.
I will update this log every two to three weeks or sooner if something changes. I welcome your comments, suggestions and questions.
Hope this wasn't too long of an introduction but I enjoyed writing for you.
JASPL
") awesome job so far!
awesome job so far!