LiquidJade
New Member
Whats up everyone!!
I was posting on the main site and i had to make a forms posting because there will be alot of questions and i will be tossing out alot of info for people if they want it.
So here we go with the start! Are you excited? because i am.
Im still pretty new to the growing thing, but for some reason i am pretty good at this.
The design starts... The room will sit on a 13x9 concrete slab.
The frame work has some tricky designs in it to keep it as air tight in the summer months as possible. Now i say as possible because i live in a 4 season area. Which means i have harsh summers and winters.. It sucks but its ok i had to come up with a plan. Now the Frame is a 2x6 none treated lumber price tag for 30 16ft peaces jumped into the 210$ range. I called a couple of buddies of mine that work with wood and they are pros because i have never done frame work before. I just made the design on some blueprints. After it was all said and done many beers later we came up with a strong frame that is ready for plastic and start insulating.
This build will be trying to cut down on AMP draw and i hope showing everyone how to build a good area/home for there babies.
What i needed:
30 2x6 16ft
deck screws star bit 5lbs box
Staple gun
600 staples 2 boxes
100 foot roll of 4mm plastic vapor lock
bought some other stuff on sale needed later in the build
Total price: (im soo not lying i was laughing) 420$ hahaha
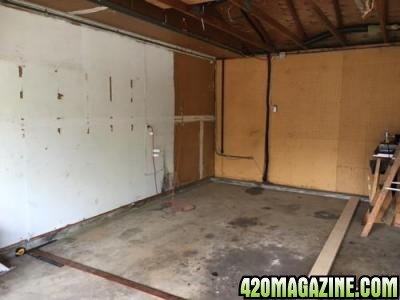
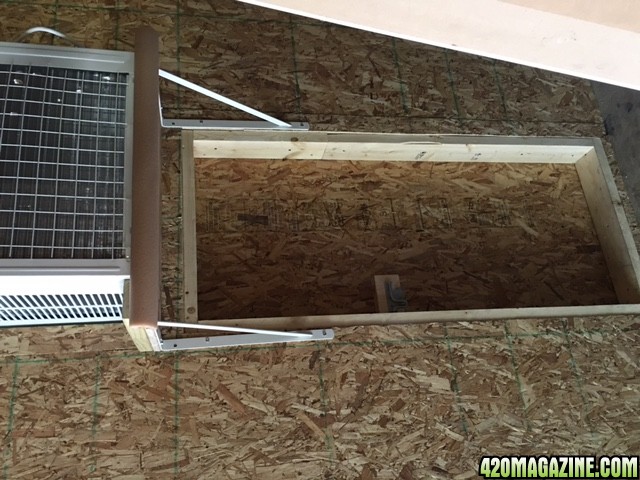
This is my space i will be using concrete slab i was laying out the base floor to get a good idea of what we were going to do.

This main wall with door is up on the right i tied it to the rafters so it would not fall while we were mocking up the wall that would go on the exterior wall. You will see the wall on the floor i have to 4mm plastic the back side of that wall so i can have a good air lock. i will not be able to get to that side of the wall after i mount it into place. Staple gun putting in work there. since it is a exterior wall that wall will have R-19 for the building then my vapor lock then another set of R-19 and then inside the room. It gets cold here...
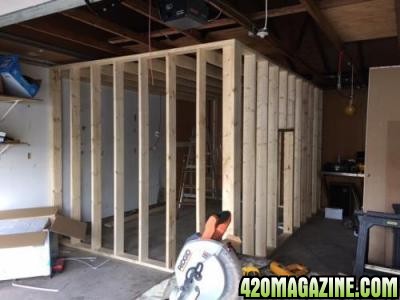
This is my finished room frame work. Please take notice of the leprechaun door i am very happy about that. Smile I call it that because its only 5ft tall door hahah
So this is the start of the day 8am!
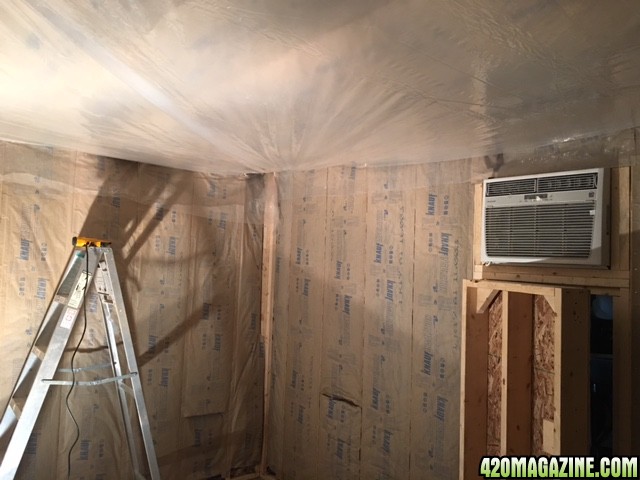
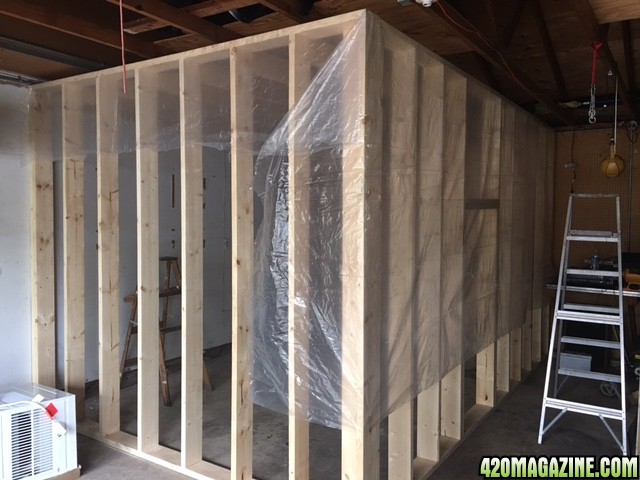
Again with the 4mm plastic. Now i try to keep it as one peace as possible! So i went from the top all the way down to the side. This is the outer bubble! so as you can see i am trying to keep it tight.
Right after i got that plastic done on the top i wanted to get the roof on. Now for this i made the choice to use chip board. 2 reasons 1. i can get this at 1/2 the cost on REAL ply wood i think this ran 10$ per sheet and i bought 12. The thickness is 7/16, i was going to go with 1/4 but when i got there i thought it was too weak so i went higher. 7/16 was perfect i think because it was not too think and it felt like it would make a tight seal once i screwed it down. I went with 2inch decking screws again, and pushed them in as to cover up the head of the screw.
After the top was on i started covering the sides this is the door area. Again i used 1 full sheet as to not chop it up into parts. i personally think it makes for a better seal. I did staple this all down to the 2x6. I did my best to keep it nice and tight but not so tight that it would rip the plastic. There has to be some give.
So this is the room complete out bubble. As you can see that is my friend in there haha.
One thing i do want to note is that any extra plastic that was over the out sides of the walls i did not cut off. I folded and wrapped it around the sides. I felt it cant hurt but only make the out side bubble more air tight. So i stapled it down.
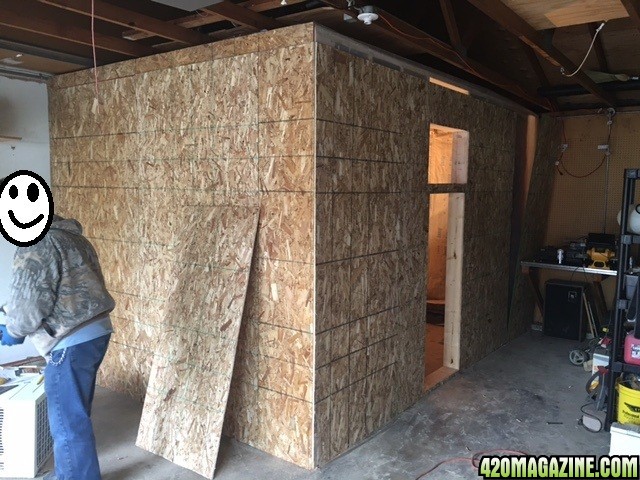
Now this is where it starts to get exciting!! The out side walls are going up!!
It is starting to look like something good here i really enjoying this!
So again here around the whole thing i am using 7/16 Chip Board with 2 inch deck screws.
NOTE: it does not matter if the chip board is not perfectly level as long as its not broken. The screws will bring it super tight to the 2x6 frame. Just make sure you measure 2 times and cut once!!!!
Ok here is where it gets important!!!
the REASON i went with 2x6 is to use this insulation.
You can get this at Menards its R-19 wall insulation this runs around 12$ a roll if you get it on sale!! which it was!! i got 8 rolls.
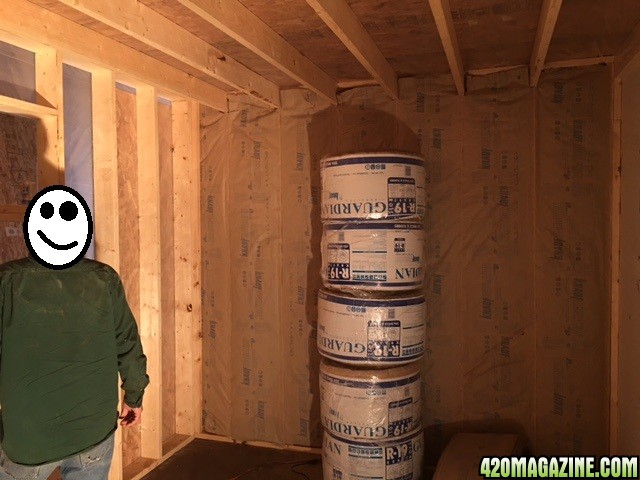
The important part is that you can stable this 2 ways. First and most common way is to push it inside the walls between the 2x6 and stable it to the insides of the 2x6.. This is the most common on all houses. The better way "i think" for more air tight and to allow it to expand as much as possible is to stable it on the face of the 2x6 as to make a full surface that is even. This will help with the air lock inside the room. SO notice it looks like a complete wall of nothing but insulation and you cans see the 2x6. This stuff comes with a lip over each side about 1 inch all the way down to allow you to do this. You want as much air lock as possible!
My buddy is hard at work!! Smile
My other friend is hard at work mounting the 7/16 inch Chip Board and doing a very good job of it as well i must say. I am bouncing in and out of the room helping both of them. It honestly is starting to looking like something worth talking about.
What we are doing is just facing the chip board on the wall tracing the out line of the door and the AC hole. Now be careful with this one what we did is plunge cut these holes out. I have done this before a couple times it might be better for most people to just a tooth saw or something and do it by hand.

Notice again we are looking like its one full peace of insulation all the way down the wall stapling on the face of the 2x6 not the inside. The corners i save until last because we might have to make special peaces to go inside there.
NOTE: if you build your wall right you will have to stuff insulation into the corners it will still fit a full peace of insulation BUT 1/2 will be covered and the other 1/2 you staple down as we talked about.

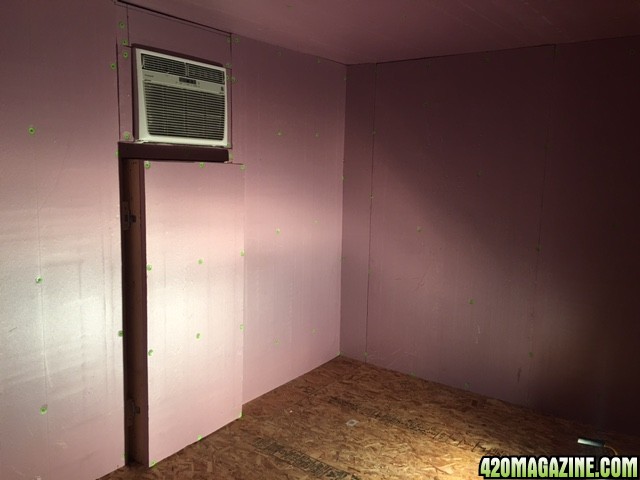
In finishing for the night i wanted to mount the AC unit inside the wall. I cut the opening big enough so i can fit 2 2x6 on both sides of the unit and make a tight seal. The most common way of doing this is to make a box and mount the box inside the wall. i did this peace by peace for a perfect snug fit!
NOTE: This AC unit is a 15100btu window unit. Whats good about this one is low amp start up!! The formula i used to choose my BTU is (4000BUT X 1000Watts) + 10% = X. On a 110 standard plug i got lucky and this one is perfect plus i dont have to run 220..
AMP draw is VERY important people. IF you are popping fuses or breakers all the time your room could go down at any moment and you would never know. Plan out your AMPs well!!
Well thats it for this weekend guys and gals!
Ask your questions if you need to Smile i tried to explain the best i can.
If you need a photo of something specific let me know i will try to run out and take it and reply back!
Liquid Jade out!
I was posting on the main site and i had to make a forms posting because there will be alot of questions and i will be tossing out alot of info for people if they want it.
So here we go with the start! Are you excited? because i am.
Im still pretty new to the growing thing, but for some reason i am pretty good at this.
The design starts... The room will sit on a 13x9 concrete slab.
The frame work has some tricky designs in it to keep it as air tight in the summer months as possible. Now i say as possible because i live in a 4 season area. Which means i have harsh summers and winters.. It sucks but its ok i had to come up with a plan. Now the Frame is a 2x6 none treated lumber price tag for 30 16ft peaces jumped into the 210$ range. I called a couple of buddies of mine that work with wood and they are pros because i have never done frame work before. I just made the design on some blueprints. After it was all said and done many beers later we came up with a strong frame that is ready for plastic and start insulating.
This build will be trying to cut down on AMP draw and i hope showing everyone how to build a good area/home for there babies.
What i needed:
30 2x6 16ft
deck screws star bit 5lbs box
Staple gun
600 staples 2 boxes
100 foot roll of 4mm plastic vapor lock
bought some other stuff on sale needed later in the build
Total price: (im soo not lying i was laughing) 420$ hahaha
This is my space i will be using concrete slab i was laying out the base floor to get a good idea of what we were going to do.
This main wall with door is up on the right i tied it to the rafters so it would not fall while we were mocking up the wall that would go on the exterior wall. You will see the wall on the floor i have to 4mm plastic the back side of that wall so i can have a good air lock. i will not be able to get to that side of the wall after i mount it into place. Staple gun putting in work there. since it is a exterior wall that wall will have R-19 for the building then my vapor lock then another set of R-19 and then inside the room. It gets cold here...
This is my finished room frame work. Please take notice of the leprechaun door i am very happy about that. Smile I call it that because its only 5ft tall door hahah
So this is the start of the day 8am!
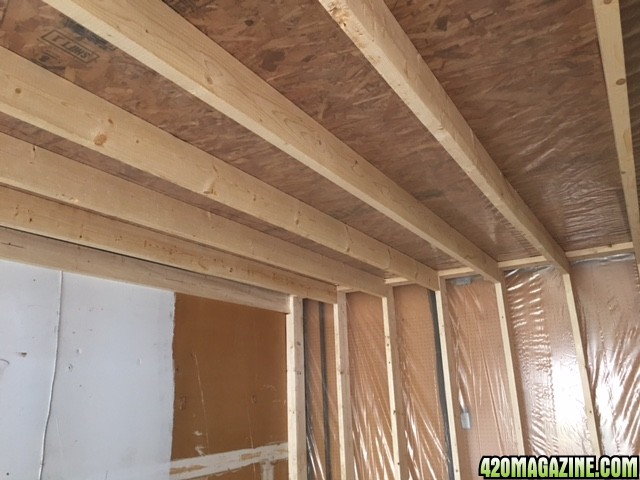
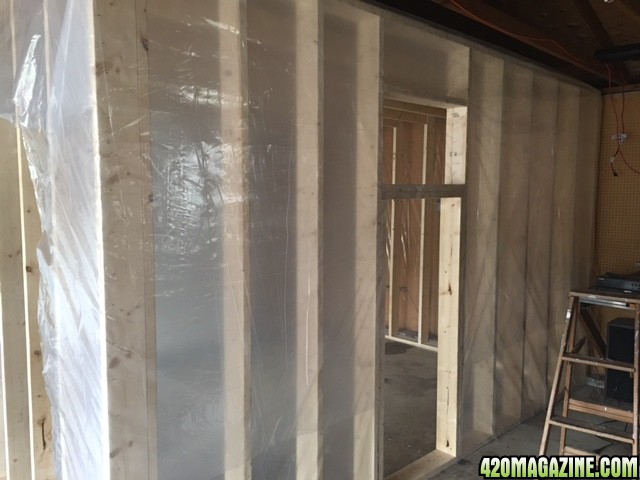
Again with the 4mm plastic. Now i try to keep it as one peace as possible! So i went from the top all the way down to the side. This is the outer bubble! so as you can see i am trying to keep it tight.
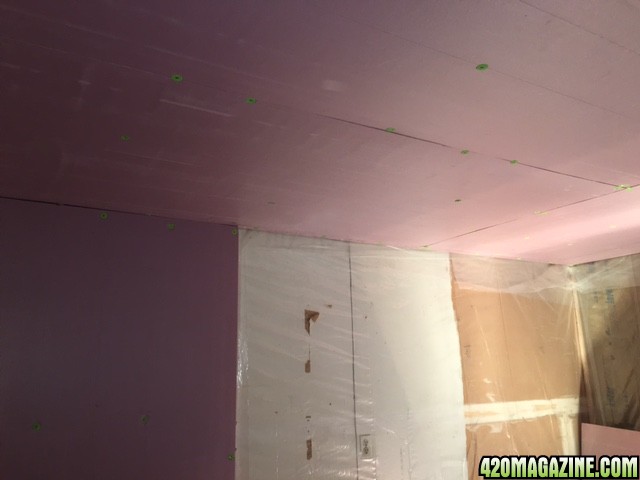
Right after i got that plastic done on the top i wanted to get the roof on. Now for this i made the choice to use chip board. 2 reasons 1. i can get this at 1/2 the cost on REAL ply wood i think this ran 10$ per sheet and i bought 12. The thickness is 7/16, i was going to go with 1/4 but when i got there i thought it was too weak so i went higher. 7/16 was perfect i think because it was not too think and it felt like it would make a tight seal once i screwed it down. I went with 2inch decking screws again, and pushed them in as to cover up the head of the screw.
After the top was on i started covering the sides this is the door area. Again i used 1 full sheet as to not chop it up into parts. i personally think it makes for a better seal. I did staple this all down to the 2x6. I did my best to keep it nice and tight but not so tight that it would rip the plastic. There has to be some give.
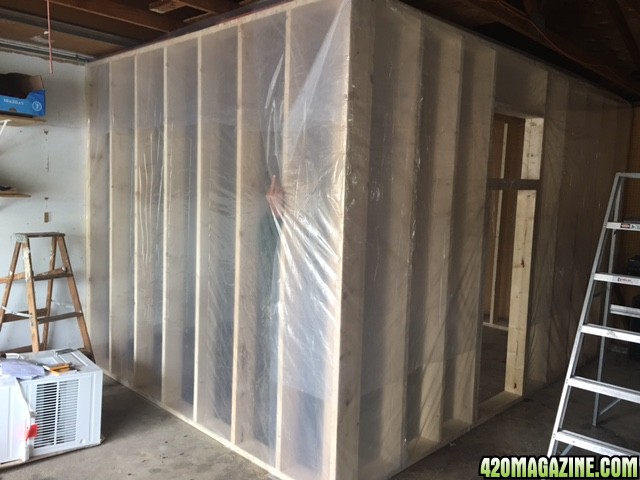
So this is the room complete out bubble. As you can see that is my friend in there haha.
One thing i do want to note is that any extra plastic that was over the out sides of the walls i did not cut off. I folded and wrapped it around the sides. I felt it cant hurt but only make the out side bubble more air tight. So i stapled it down.
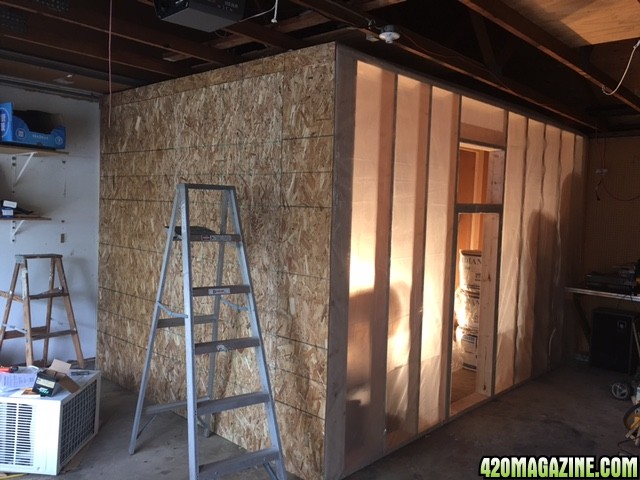
Now this is where it starts to get exciting!! The out side walls are going up!!
It is starting to look like something good here i really enjoying this!
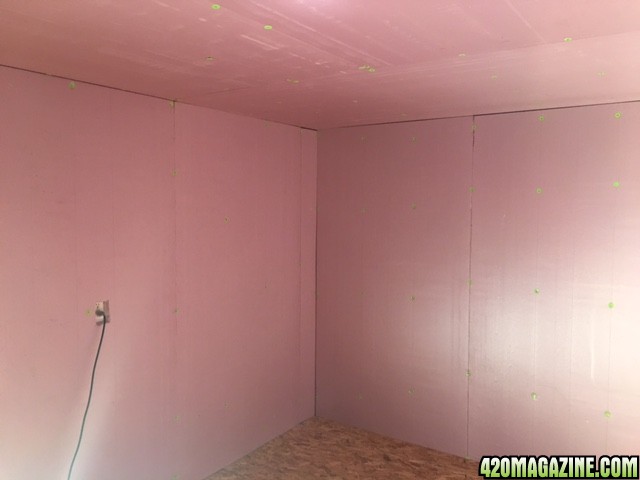
So again here around the whole thing i am using 7/16 Chip Board with 2 inch deck screws.
NOTE: it does not matter if the chip board is not perfectly level as long as its not broken. The screws will bring it super tight to the 2x6 frame. Just make sure you measure 2 times and cut once!!!!
Ok here is where it gets important!!!
the REASON i went with 2x6 is to use this insulation.
You can get this at Menards its R-19 wall insulation this runs around 12$ a roll if you get it on sale!! which it was!! i got 8 rolls.
The important part is that you can stable this 2 ways. First and most common way is to push it inside the walls between the 2x6 and stable it to the insides of the 2x6.. This is the most common on all houses. The better way "i think" for more air tight and to allow it to expand as much as possible is to stable it on the face of the 2x6 as to make a full surface that is even. This will help with the air lock inside the room. SO notice it looks like a complete wall of nothing but insulation and you cans see the 2x6. This stuff comes with a lip over each side about 1 inch all the way down to allow you to do this. You want as much air lock as possible!
My buddy is hard at work!! Smile
My other friend is hard at work mounting the 7/16 inch Chip Board and doing a very good job of it as well i must say. I am bouncing in and out of the room helping both of them. It honestly is starting to looking like something worth talking about.
What we are doing is just facing the chip board on the wall tracing the out line of the door and the AC hole. Now be careful with this one what we did is plunge cut these holes out. I have done this before a couple times it might be better for most people to just a tooth saw or something and do it by hand.
Notice again we are looking like its one full peace of insulation all the way down the wall stapling on the face of the 2x6 not the inside. The corners i save until last because we might have to make special peaces to go inside there.
NOTE: if you build your wall right you will have to stuff insulation into the corners it will still fit a full peace of insulation BUT 1/2 will be covered and the other 1/2 you staple down as we talked about.
In finishing for the night i wanted to mount the AC unit inside the wall. I cut the opening big enough so i can fit 2 2x6 on both sides of the unit and make a tight seal. The most common way of doing this is to make a box and mount the box inside the wall. i did this peace by peace for a perfect snug fit!
NOTE: This AC unit is a 15100btu window unit. Whats good about this one is low amp start up!! The formula i used to choose my BTU is (4000BUT X 1000Watts) + 10% = X. On a 110 standard plug i got lucky and this one is perfect plus i dont have to run 220..
AMP draw is VERY important people. IF you are popping fuses or breakers all the time your room could go down at any moment and you would never know. Plan out your AMPs well!!
Well thats it for this weekend guys and gals!
Ask your questions if you need to Smile i tried to explain the best i can.
If you need a photo of something specific let me know i will try to run out and take it and reply back!
Liquid Jade out!