Mr. Bubbles Brix Journal

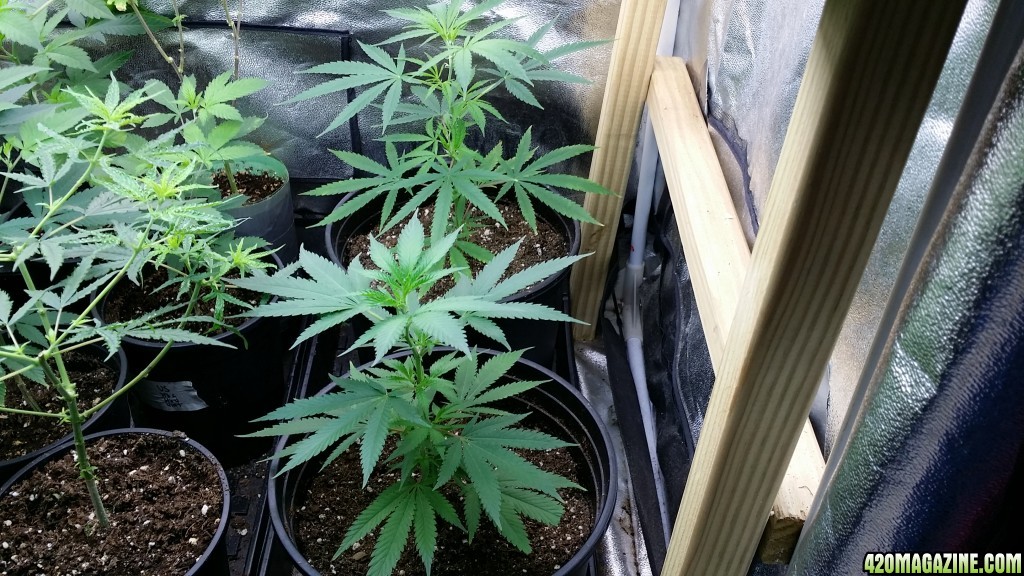
Question - Why is it recommended to veg for a short amount of time? Due to the amount of material in the kit? Possibly getting your gears adjusted to the HB aspect?
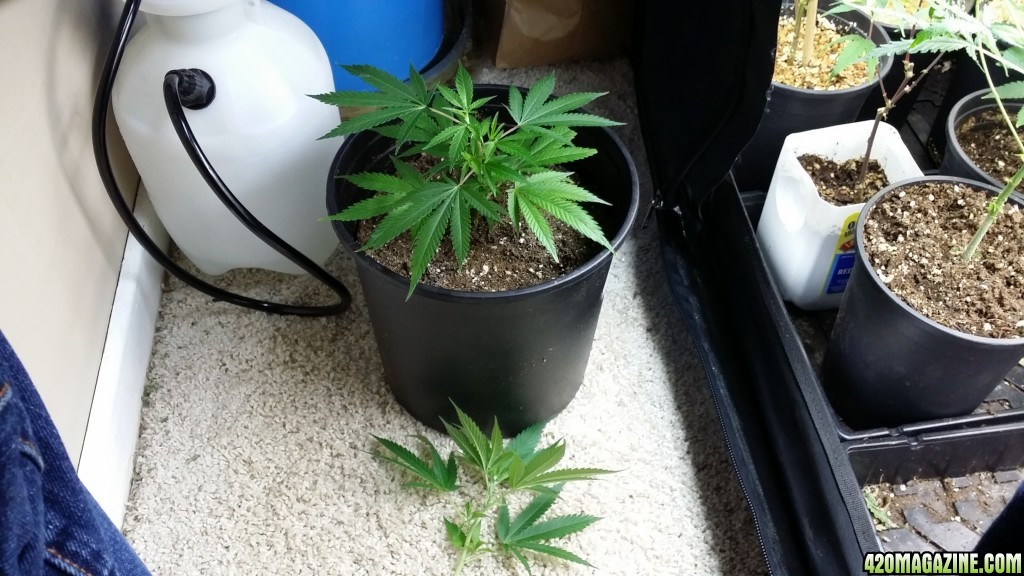
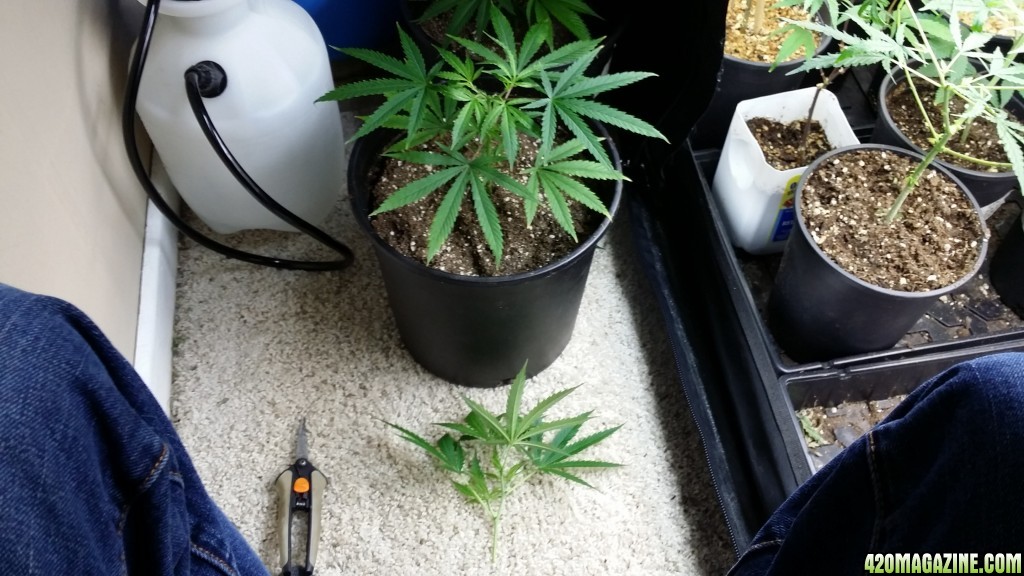
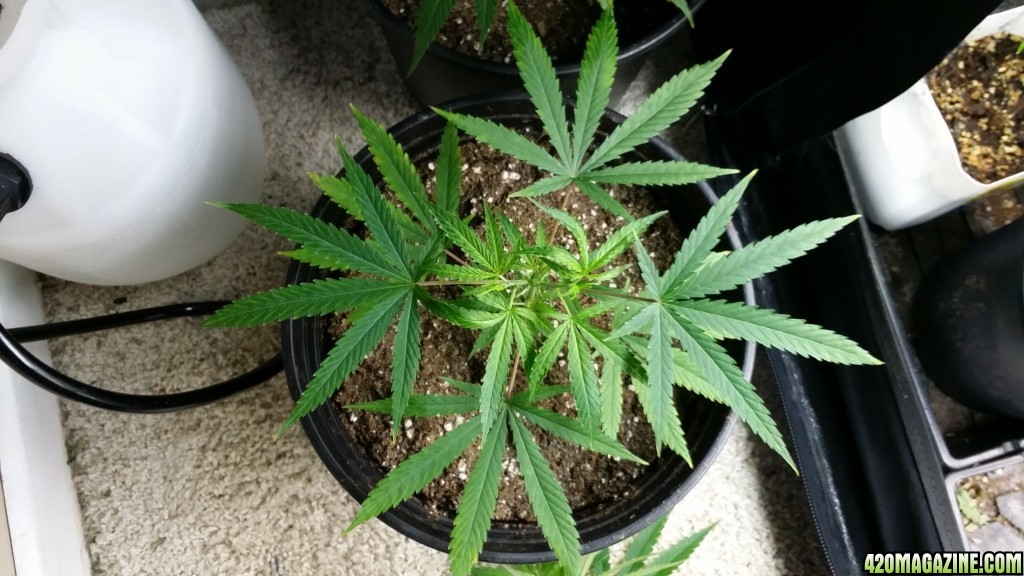
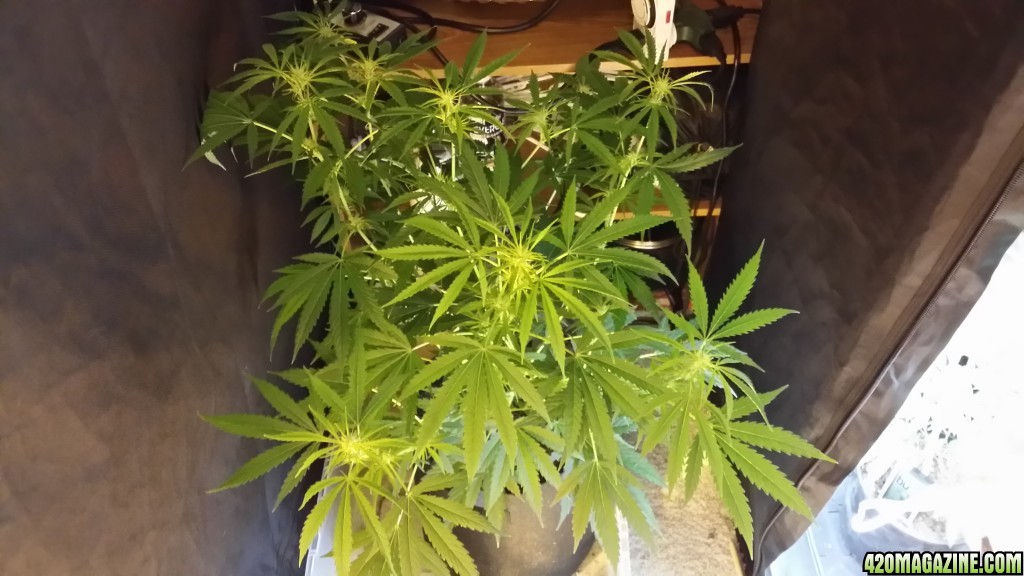
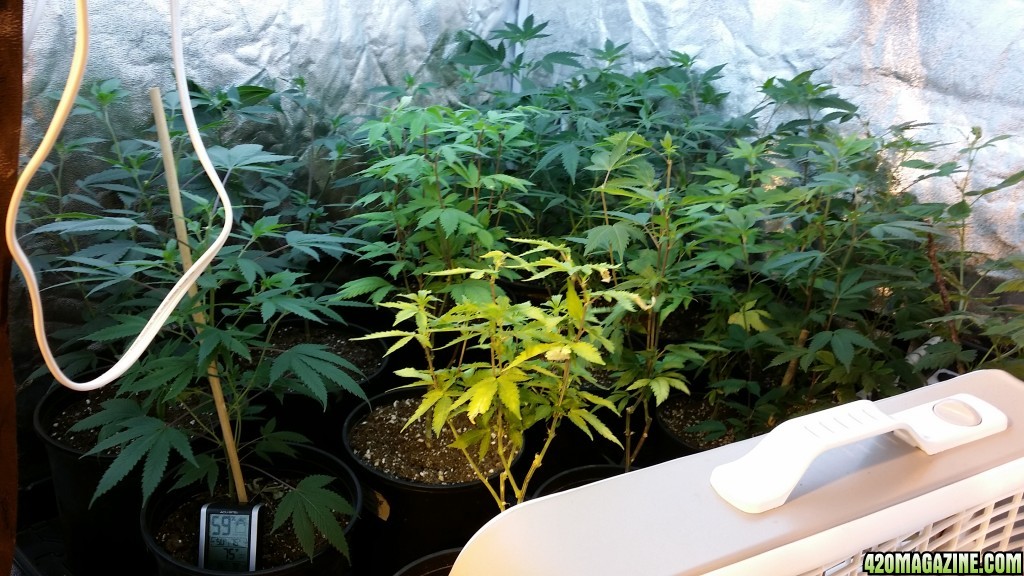
They are looking mighty healthy mrbub :)

I'll have to go back through the instructions. Honestly that's the hardest thing about this kit so far. The process is actually very simple there's just so much info on here about it that it gets overwhelming. The last set of instructions were a big improvement but still they still need more refinement IMHO. And that's coming from someone in the insurance industry where written communications are the difference between a lawsuit and claim being paid.

Got to hand it to doc tho hes really done an exceptional job with this kit. I've research organics and soil building tons as you know and this is the easiest method I've found so far. What I love the best is how you can look back at docs journals when he first started and see where he's at now. That's one of the best parts of this forum is seeing everyone success. With that said I think doc needs to create a dedicated website to his kit with video tutorials.

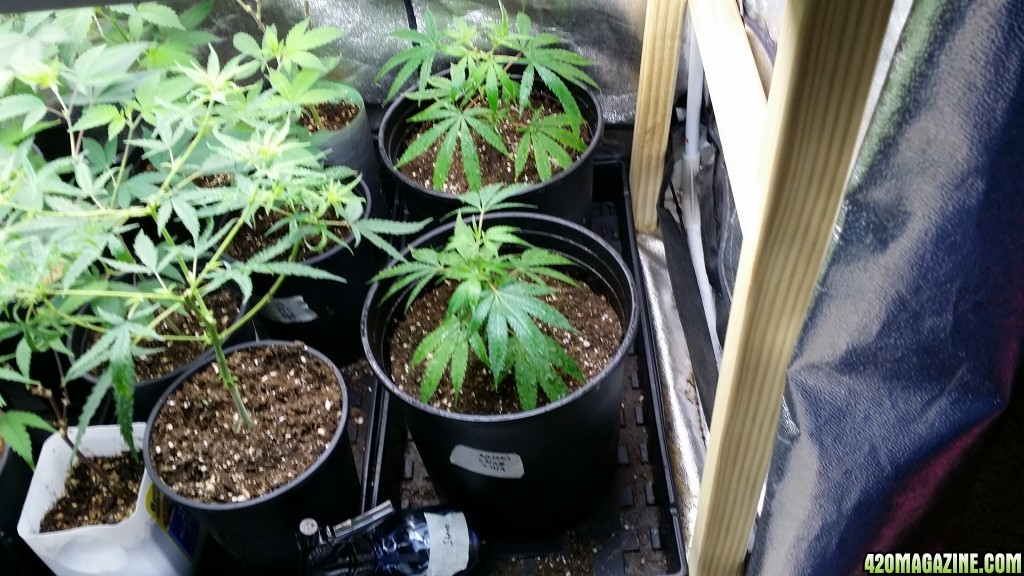
As far as veg time I know he said 10 in tall with 1 topping then flower. When I asked he said flower growth will be explosive with the kit. So we're aiming for 10 in with 1 topping. Guessing that 7/14 should work well. Especially cuz my cloned usually take 10-14 days :)
 
Sorry I missed this journal when you started it, Mrbubbles. Great to see you putting the kit it in action!

I veg my plants to 12-16 inches and they typically double in stretch, but I train for 8-12 tops. Looking great so far! :thumb:
 
Just going to post the instructions here for easy reference. Looks like I need to Brix spray and top today then straight water in a few days followed by energy/tea a few days later.

Re: "In the Lab" with Doc Bud
Complete Instructions for the Kit.

I'll try to get a moderator to post this on the first page of the journal, but until then, just remember it's on page 5!

How To Use the High Brix Gardening Kit


This kit, used properly, will grow herbs, fruits and vegetables in such a way to produce the best flavor, highest nutrient density and healthiest, pest-free plants possible. Everything in this kit is a result of detailed soil tests and meticulous feeding schedules formulated by a lab that specializes in High Brix gardening.


What you will need:


1.)The kit. You have that already if you're reading this!


2.)Six pots of about 7 gallons each, OR seven “smart pots” in the 5 gallon range. Do not use smaller than 5 gallons. You will not have the success you should have if you use smaller pots.


3.)A small, graduated measuring glass, up to one ounce.


4.)An eye dropper, preferably marked in .5ml increments. The cheap, disposable ones are perfect.


5.)a very good spray bottle that puts out a fine mist.


6.)a proper, climate controlled growing area. IE, you can't grow tomatoes outside in the dead of winter, even with this kit. You can't grow a nice herb garden in a closet that gets over 100 degrees and up to 80%rh....even with this kit.


7.)One bale---3.8 cubic feet---of ProMix HP. Do not use another soil. It won't work. Everything in this kit is designed around ProMix HP. Don't be a jackass and use another soil, stick with what's recommended and be blown away.


8.)Optional: 20 pounds of organic worm castings. NOT composted worm manure.....real castings.


9.)Garbage cans, large tank, etc. 60 gallons in size, or two 40's, etc. You'll need enough for about 60 gallons of soil.


What is included in the kit:


1.)Soil amendment. Minerals, plant food, etc. There is one large bag of this marked, “Amendment”


2.)Soil re-charge. Similar to the amendment but with a a few additions. There is a bag marked “re-charge.)


3.)Root Mycorrhizal inoculate. This is added to the transplant hole, or the hole where seeds are germinated. This bag is marked “Root Zone.”


4.)8 oz foliar spray “Brix”


5.) 8 oz foliar spray called “Stress”


6.) 6 oz fertilizer called, “Energy”


7.) 1 oz soil conditioner called, “Conditioner.”


1 oz concentrated microbial boost called “Tea”

1 oz Organic Nutrient Extract, called “transplant”


A word of advice:


Everything in this kit is synergistic. The soil is perfectly balanced with every mineral in perfect ratio. Don't do something stupid like adding a product your Uncle's friend recommended. Don't fall for the “more is better” trap. Use the products exactly as instructed, stand back, and amaze yourself, your family, and all the new friends you'll make when they try your produce. Do not use any other products in conjunction with this kit! They will not help, and will only hurt.


Step One: Soil Prep


Thoroughly mix the following:


1.)ProMix HP
2.)Amendment
3.)Worm Castings


This will fill a 40 gallon barrel and spill over to halfway fill another 40 gallon barrel. Put half the mix in the barrel and water with .5 oz of Conditioner in 1.5 gallons of water. Put the other half of the mix in the barrel and water with another .5 oz of Conditioner in 1.5 gallons of water.


(note: If you're using 40 gallon cans water the first half with one gallon, the second half with one gallon, and use the one remaining gallon in the partially full can.)


Ideally, this mix sits covered in a trash can for one month, during which time visible fungus will be seen as white, wispy cotton on the surface of the soil. Don't worry if you don't get visible fungus on top. Everything will still work fine.


Step Two: Transplanting/germination


Using a starter pot ½ to 1 gallon in size....


If transplanting cuttings, skip step 4. For seed germination, do not skip step 4.


Fill with the soil from step one.
Make a hole large enough to accommodate the cutting
Coat inside of hole with “Root Zone” Be liberal, but don't run out till you've covered every plant. There should be ample amount in the kit.
If germinating seeds, make the hole and apply Root Zone and deposit seed AFTER watering in step 5.
water each cutting/seed with 1 pint of Transplant Water. Recipe for Transplant Water: 1 oz “Transplant” per 1 gallon of water. After wetting the soil with regular water, finish watering with Transplant Water, 1 pint per pot.


Step Three: Vegetative Growth


We're going to build some roots. We don't care so much about leaves at this point, although they'll start looking really nice too.


The first watering after transplant can be with with straight water.
If the plants look healthy, the next 1 or 2 watering are also done with straight water.


Every third watering, use the following:


One half ounce (.5oz) of “Energy” in one gallon of water.
2ml of “Tea.” Add this to a small amount of water, like an 8oz cup and let it sit for a few minutes before pouring it into the gallon of “Energy.”


The above mix is ample for the size of garden recommended. More is NOT BETTER!


The idea here is to take that gallon of feed water and evenly distribute it to each plant. If you use five gallon buckets, you'll need two of them, ½ gallon in each bucket, just make sure the gallon of feed water is evenly fed to all plants.


Foliar Spraying:


When cuttings are established, or when seedlings have 5 sets of leaves, it's time to spray. This is the heart and soul of High Brix growing. Pay close attention!!!


Once a week give them a boost of “Brix.” 1 ounce per quart of water. IE, 1 ounce per spray bottle. Spray a light mist on the plants, trying to get the underside of the leaves as much as possible. You'll find that you have spray left over. Save it in a cool, dark place for next week, but check carefully to make sure nothing is "growing" in your spray.


Spray with “Brix” weekly, right up to harvest.


Remember! We're not trying to duplicate a rainstorm! We just want a fine mist on the leaves.


For Fresh cuttings: spray with “stress” daily. 1 oz. Stress per quart of water.


In between sprayings of “Brix” or anytime the plants look a bit stressed, give them a spray of “Stress.” Again, concentrate on the underside of the leaves.


I find that the plants get a spraying about 3 times a week. Twice with “Stress”, once with “Brix.”


Step Four: The Blooming/Fruiting Phase


After the second week of bloom, re-charge the soil with a top dressing of “Re-Charge.” Just evenly distribute it to all the plants and water/feed and spray as you did during vegetative growth. This will give the plants a slightly different balance of minerals that will support vigorous fruiting, resin production, etc.


Stand back and watch.


Enjoy!


Frequently Asked Questions:


Can I use another soil that my cousin's friend, who has been gardening for a long time says is the best?


No. This kit is formulated precisely for ProMix HP. Every mineral and element is in perfect balance. Don't mess with it!


What about defoliation?


Good question! I tried defoliating two plants and I couldn't get the brix over 10. The plants right next to the defoliated plants were at 17. Same light, same soil, same sprays. It seems Foliar Feeding requires foliage to work.....


What about using a product like Snowstorm?


No problem. It will not interfere with High Brix production, but the jury is still out on whether it is safe to consume.


What if I see a deficiency? What should I do?


Spray with “Stress” daily until the problem clears up. Stress contains a broad spectrum of trace minerals, L-amino acids, and natural plant growth regulators.


What about checking pH?


This is a good question! ProMix is pH balanced with buffers. The soil amendment is a powerful buffer as well. The pH of the amended soil is 6.4 and you'd have to water with bleach or pool acid to change that. There is a LOT of buffering rock powders in this mix. PH isn't an issue!


But what about those grow guides on the Internet that do nothing but stress the importance of pH and blame any and all problems on pH “lockout” or some other thing pH related?


Well, those folks get hydroponics mixed up with soil. We're not growing hydroponically with this kit. The hydro rules do not apply.


Bottom Line: There is no need to check or adjust pH. Adjusting pH will ruin your grow, because you'll have added too much P or too much K to the soil and brix will be lower. You just screwed everything
up!


But if you're worried, here's what you can do:


1.)Get a pair of needle-nosed pliers.


Every time you get the urge to check pH, either the runoff, or the feed water, take the pliers and yank out as many nose hairs (your nose hairs, not someone else's) as you can.


If that doesn't stop you from going down the pH rabbit hole, or you ignore that advice and you wake up one day and find you're actually adding phosphoric acid (pH down) or Potassium Hydroxide (pH up) in an attempt to adjust pH, lower brix and overall take your grow down a level, do the following:


1.)Get a solid rake.
2.)Measure the distance from the ground to your scrotum. RECORD THIS MEASUREMENT!!
3.)Measure from the business end of the rake to the handle the exact distance you got in number 2 above and cut off the rake handle at that place.
4.)put the rake on the floor, prongs up, handle facing away from you.
5.)Jump on the rake prongs as hard as you can.


If you don't have a rake, just ask a friend to kick you in the nuts.


If you don't have “nuts” just use an unaltered rake and make the jump.


Happy Gardening!!


This product is 100%, money back guaranteed to work. If not fully satisfied, please contact me for a full refund, minus shipping.
 
Sorry I missed this journal when you started it, Mrbubbles. Great to see you putting the kit it in action!

I veg my plants to 12-16 inches and they typically double in stretch, but I train for 8-12 tops. Looking great so far! :thumb:

It really just got started so your right on time :)

Thanks for the reference. That's my usual method with my current plants but doc said he wants me to try less tops and only 10in tall. Docs a genius so I'm gonna try his recommendation lol. It may have to do with my setup, 2 600 hps for a 4x8 tent. A 3rd light and I could veg longer I'm sure.

The strains I'm using are opposites. The kerala x skunk 1 is a sativa dominant with a 10 week flowering time and I know hb can take longer so shorter veg will be necessary lol. The north lights x skunk 1 is an indica dominant 8 week strain so a longer veg might be needed.

Thanks for stopping by! I appreciate any help I can get. I'm in unchartered waters here :)
 
I grew three Kerala x Skunk in mineralized soil early in my journal. They didn't turn out all that well, but it can give you a reference.
 
I grew three Kerala x Skunk in mineralized soil early in my journal. They didn't turn out all that well, but it can give you a reference.

Well that sucks lol Any particular reason you feel like it didn't turn out well? I have a regular soil one in flower now that looks amazing. It's in early flower though.
 
I was still getting my legs under me so it may have been that, but the 6-5-3 mineralized soil just didn't perform very well for me. The third one turned out well and I enjoyed the smoke. They ran about 13 weeks from the flip. I'm sure it'll do well in kit soil - nice and vigorous with the Skunk#1 cross - fat sticky buds. It'll be good. :cheesygrinsmiley:

:thumb:

Thanks for the explanation :)

I had 2 regular seeds of the Kerala x Skunk from the herbie freebie a mos ago. One grew vigorously and is now one of my largest and healthiest looking females in flower. While the other seedling has been a deformed runt. Curling leaves and slow spindly growth. I've kept it around more as an experiment in my veg tentat this point but it makes me wonder if there's bad/good pheno of this strain.

I saw something similar with my wild thai. One pheno is compact light green and tan colored hairs while the other pheno is dark green airy with dark red hair. Still can't decide which i like most. The fruity flavor and munchies from the first pheno or the spicy soaring sativa pheno lol.

They are loving the soil so far. I'll post an update tomorrow and try to do a pic of my 7gal version for a comparison. I'll do the same with my skunk x nl. Figure it'll be a great way to see the difference between my normal method and docs kit.
 
Day 8 Update


I topped them, sprayed them with stress and gave them a little water which is the first time since transplant. I will probably veg them for 14 days then move them to 7 gal fabric pots for flower. I am noticing a little browning tips on the Kerala x Skunk. Not sure how to even diagnose this. Normally I'd guess nute burn. Any ideas?


20140504_182123.jpg
20140504_182227.jpg
20140504_182301.jpg
20140504_182310.jpg
20140504_182319.jpg
20140504_182507.jpg
 
Looks like a touch of burn to me. Keep an eye on her. Doesn't look too bad though at the moment.

I thought the same but how do you fix that on a high brix? Lol

I haven't "fed" the plant since 2 pints of transplant water 8 days ago when I first transplanted. I did spray with stress and high brix per docs instructions.
 
I don't know. Maybe the plants were a bit too young to handle the spray. It's not bad though. I push my flowering gals to look almost like that in regards to the tips.

Some strains can't tolerate as much nutrients as others. Those are typically longer flowering Sativas. Haze comes to mind. Can't recall which two you picked...I think NL x S#1 was one. Skunk can be Sativa heavy.

I'm heading down to my girls. I noticed about what you show on at least one of my plants. I wonder if it's my NL x S#1. I let you know. I've fed at 2000 and 1900 ppms the last waterings. Not supposed to go over 1900. The Indica loving plants, heck all of them, are liking it.
 
I just ran down stairs. Yeah-no B.S. Of the six flowering strains that show a hint of nute burn.

Maybe you could dilute a little bit. :hmmmm:

She's coming around nicely now. Just a little finicky on the start :)

Looks ok bro I wouldn't worry yet, stick with the plan. Water twice between drenches. What's your water like?

I've had to water once since the transplant water on day 1. Getting close to another watering and will do the energy feeding then I think. Doc reviewed my cities water report and said it was good. :)
 
Took a few pics of my regular soil Kerala Skunk that's currently in flower. Also a few of the flower tent, 4x4 veg tent, and some concentrate I made today from lemon Thai kush trim/larf nugz.

The HB plants are doing great. Should be giving them their first feeding soon. I'll post pics hopefully tomorrow.

20140504_201812.jpg
20140504_201830.jpg
20140504_202101.jpg
20140504_202114.jpg
20140507_100844.jpg
 
Back
Top Bottom