My Continuous Auto Closet Grow - Pink Salad!

toker69

New Member
Hi everyone! :ciao:

I want to start my own grow journal here to share ideas, and my grow photos.
My goal is to grow just enough fresh herb for my own medicine. About an oz a week!

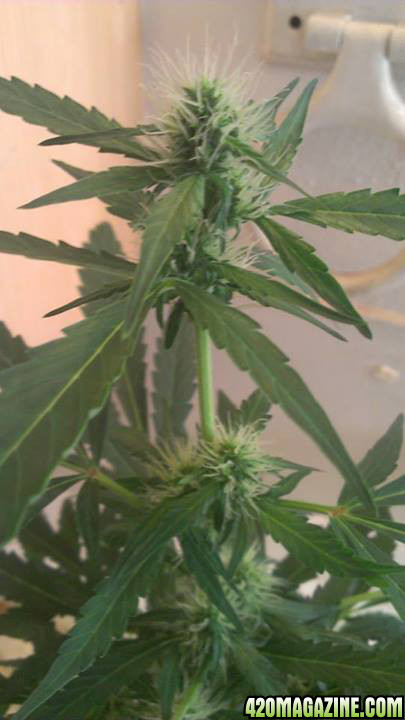
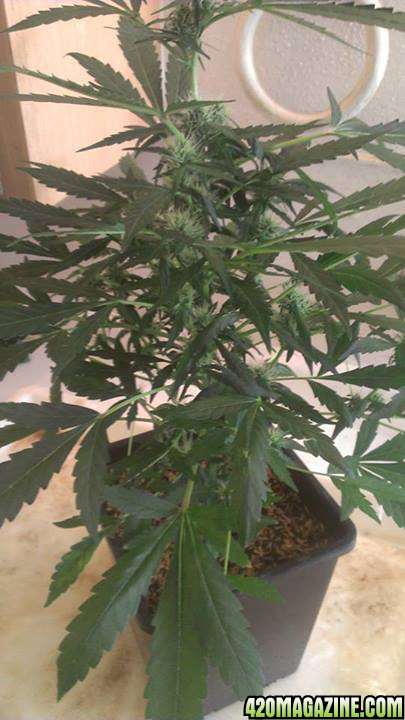
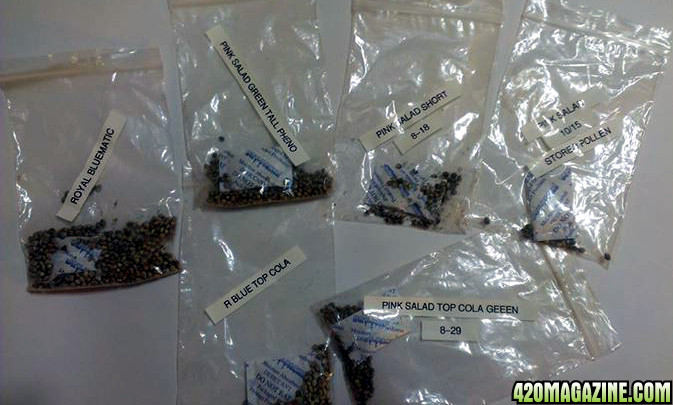
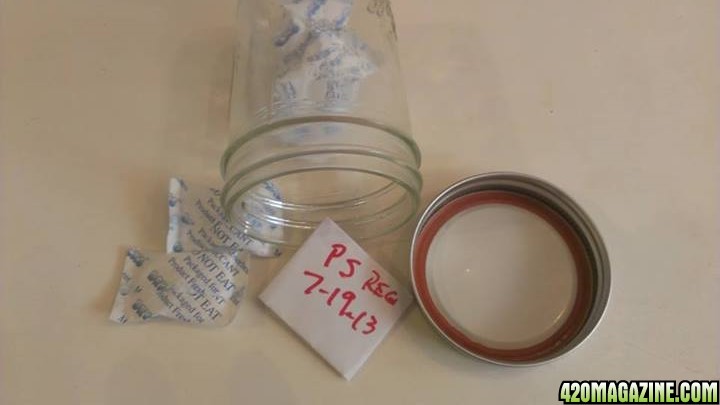
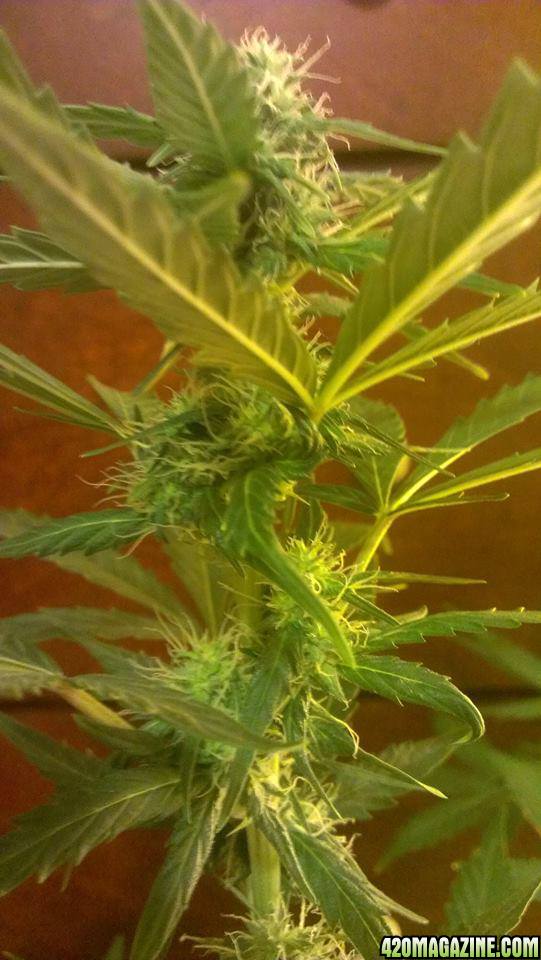
I choose an autoflower strain called "Pink Salad" because it was a regular (not feminized) strain with a low smell factor.

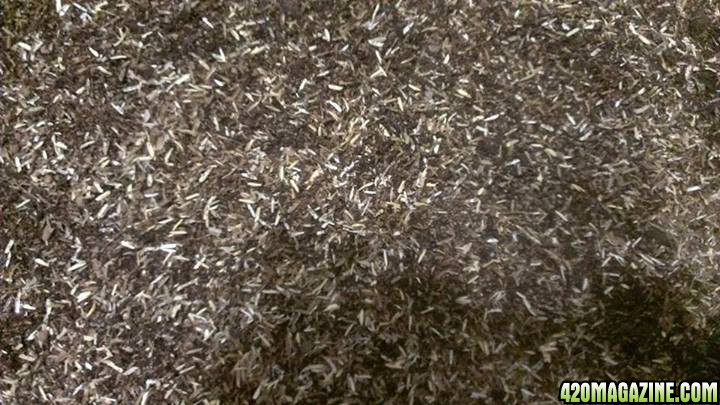
I was successful at making seed on my first run, and now have a few thousand seeds! :thumb:

Details of my grow:

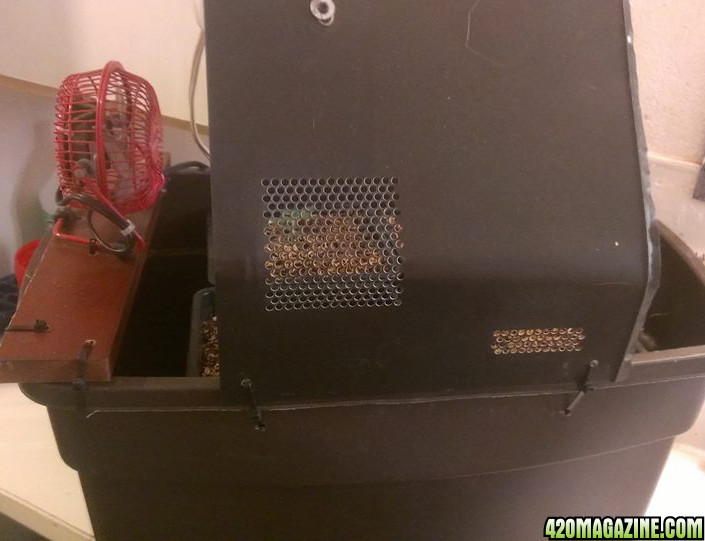
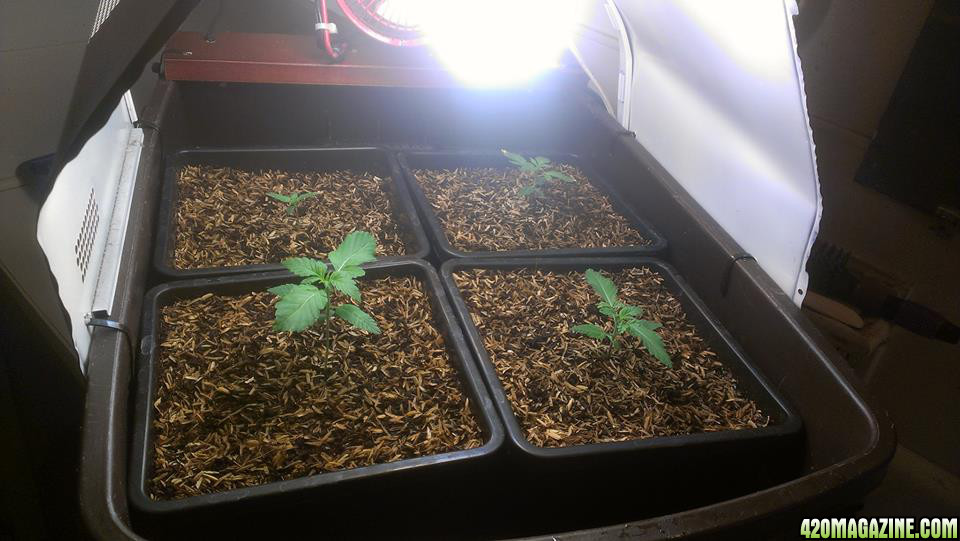
I'm growing in my bedroom closet, and it's only 2" x 4" haha

I use two Hydrofarm 150-Watt Mini Sunburst's for a total of 300 watts.
(I use two because of the varied plant heights.)

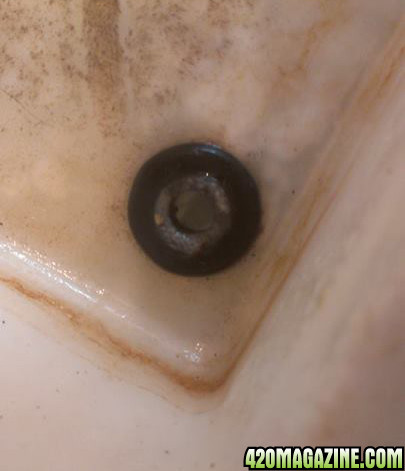
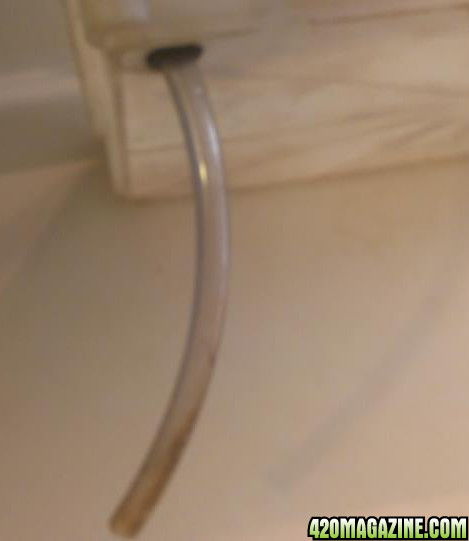
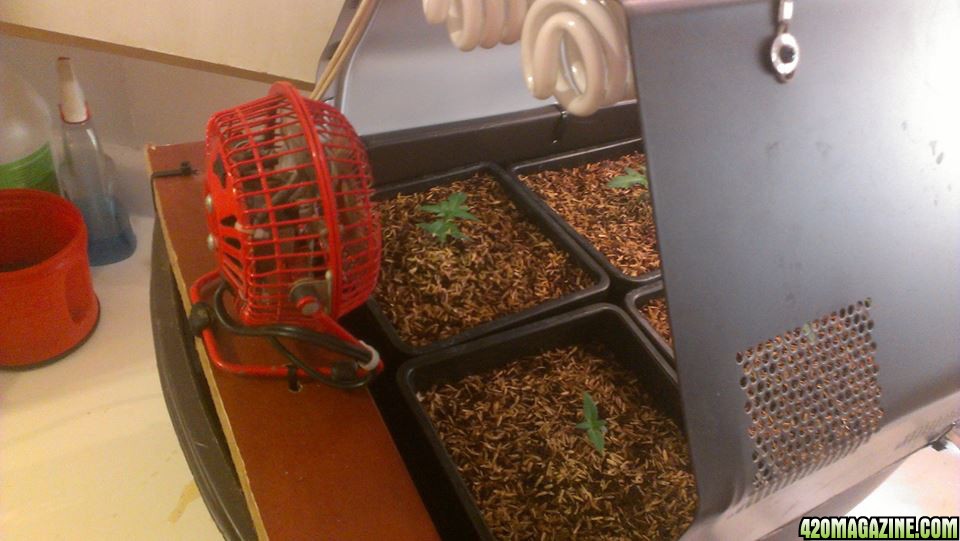
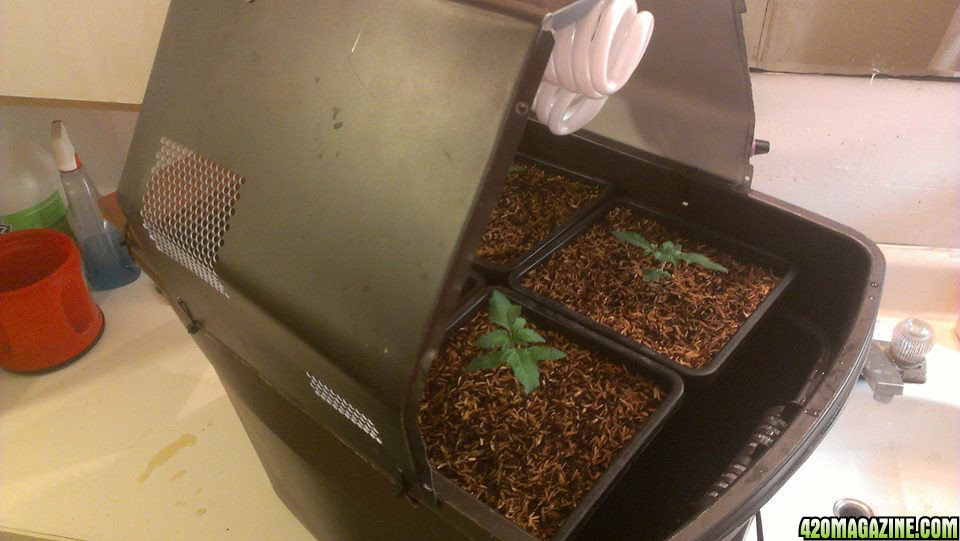
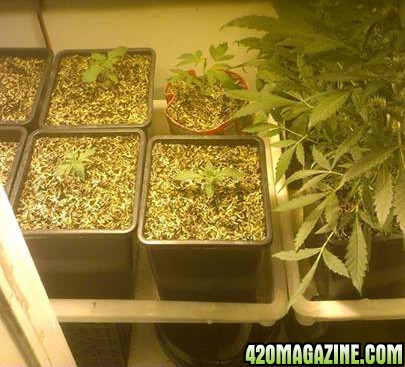
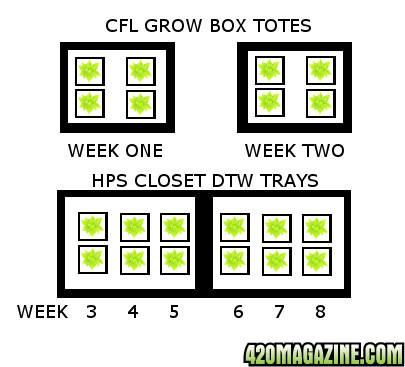
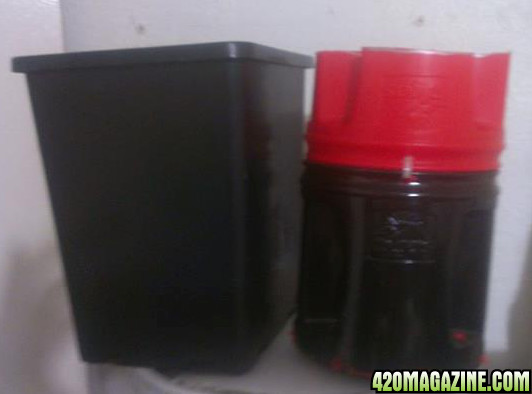
I have 12 Rose Bucket's on two homemade drain trays. Plus four homemade buckets made from plastic coffee cans.
(Only 12 buckets fit on my trays. Six on each one. I use the four extra buckets to start new seeds under CFL's)

I use CocoTek Coco Coir brick mixed with 25% PBH Rice Hulls as my substrate, and hand water the plants myself daily. (I do recommend a full rinse of this brand coco!)
The one 11# coco brick mixed with 25% rice hulls filled all 16 buckets. :cheer:

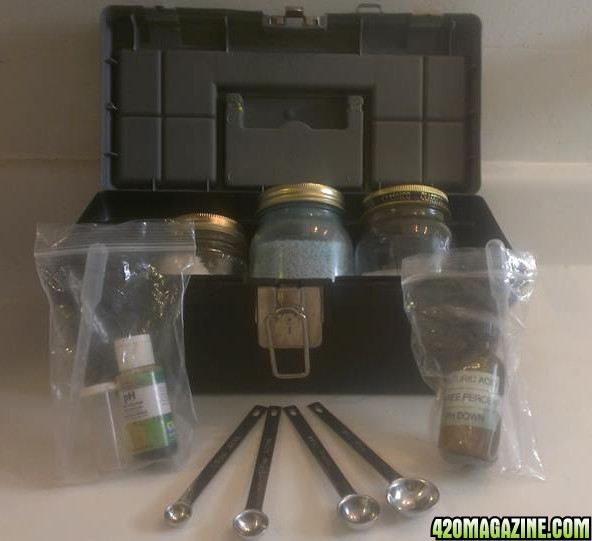
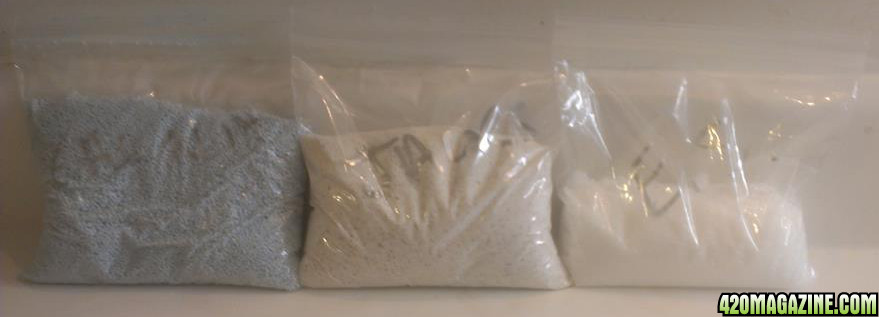
My nutrient is the two part dry formula "Jacks Pro Hydroponic 5-12-26, and Calcium Nitrate."
(I bought a 25# bag of each, and have calculated they will last 7 years of continuous closet growing.)
I use tap water, and may one day buy a RO system, but this has worked great so far.
I kinda use the 3/2/1 formula with my Jacks nutes, but have modified it to suit auto strains, and hard water.

Here's the original formula:

1.8 grams/ gallon jacks hydro 5-12-26
1.2 grams/ gallon calcium nitrate
.5 grams per gallon epsom salt

Here's what I'm using now:

1.8 grams/ gallon jacks hydro 5-12-26
.6 grams/ gallon calcium nitrate
.25 grams per gallon epsom salt

A cheapo light timer, and I'm on a 16/24 day cycle.
(I sleep in my bedroom, and leave my closet open. No worries about light leaks, but I gotta sleep!)

One thing I came up with myself is a dual blade window fan at the top of the closet blowing out the hot air.
A second 20' fan on the floor blows in. It keeps heat from building up, and moves air around the plants.

One day I'll buy PH, and TDS pens, but for right now I only have GH PH drops. haha

My goal is to pull about two plants out every week.
This won't really happen until I get, or make about four more buckets tho.

That's why I'm making my own outta plastic folger coffee cans. lol
I've made four so far, and will make four more as I drink more coffee! haha
The cans are kinda short so I cut the bottom outta one can, and cut it in half.
I zip tie the half on top of another can to make it taller.
They come out about as high as my rose buckets which are 1.7 gallons.
Probably fit about 1.5 gallons of my coco mix.

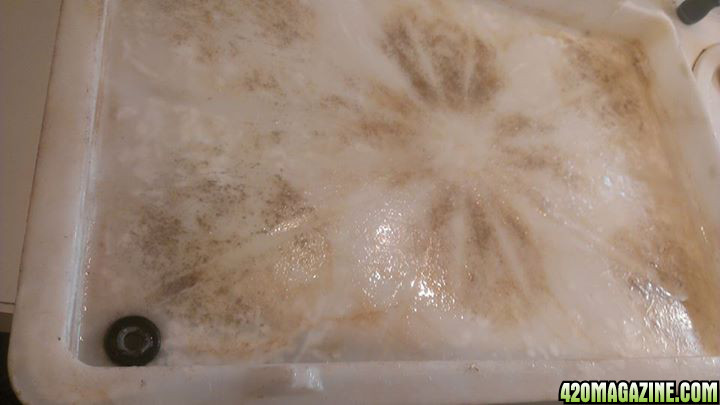
The biggest problem I've overcome so far was my dirty coco, and I'm now officially recommending a full flush before use. I could see salt buildup in the coco before the end of my first coco grow, and was getting brown water runoff. The pink salad still made it thru, but I rinsed every bit afterward. That's one of the great things about autos is in the two month lifespan it's hard for things to build up, because it's just so short.

I'll be sure to upload some photos soon with updates to document at least one cycle of my continuous grow.
(I've never posted to a forum before tonight, and am still learning how this works! haha)

buds59.jpg
 
Re: My continuous auto closet grow. Pink salad!

My crazy exit fan idea!

I was worried about heat build up in my little 2" x 4" closet so I added a shelf that creates a box at the top with a window fan to draw air to the top back, and out of the closet.
fan01.jpg


Here is a close up of the bottom of that shelf. I cut the rounded hole in the back to pull any rising hot air out.
shelf01.jpg


I stuffed a memory foam pillow in the gap between the fan and the shelf to fill the space. One day I'll pull that shelf out, and paint it flat white. I might even cover the pillow with a white cloth. haha
 
Re: My continuous auto closet grow. Pink salad!

My ghetto coco buckets:

Heres one of my rose buckets, and one of my coffee can buckets.
buckets2.jpg

I ordered 12 of my rose buckets because I knew that's how many would fit in my trays.
Later I realized I'd need eight more if I wanted to harvest two plants a week.
So I've been making these rather then spend the extra forty bucks. haha
 
Re: My continuous auto closet grow. Pink salad!

My nutrient toolbox:

I put together a toolbox for my nutes to make it easy to use.
Each dry nute has it's own mason jar.

Jacks hydro 5-12-26
Calcium nitrate
Epsom salt

Also in my kit is:
PH test drop kit from GH
Homemade PH down from sulfuric acid.
Stainless steel teaspoon measuring spoons kit.

nutetoolkit.jpg


I bought my nutes in 25# pound bags so I divided the right mason jar size portions into ziploc baggies.
And sealed up all the smaller baggies into a larger ziploc bag. (I've only got six pounds of Epsom salt)
I pulled out these three baggies of nutes just for this photo.
Warning! Dry nutes suck in water!!
If you buy them like I did find a way like this to keep them sealed, and dry.
Otherwize by the time you want to use them they may be a sloppy spoiled mess.

basofnutes.jpg


As I use up a jar of nutes I wash it, and dump fresh nutes into the clean dry jar.

Heres a guideline I use for my teaspoon set:

5 grams = 1 teaspoon
3 grams = .6 teaspoon closest I can get is 1/2 teaspoon + 1/8 teaspoon
2.5 grams = 1/2 teaspoon
2.0 grams = .4 teaspoon 1/4 + 1/8 teaspoon
1.25 grams = 1/8 teaspoon

I eyeball the epsom salt when mixing a gallon, and use a half of the 1/8th teaspoon. :)
 
Re: My continuous auto closet grow. Pink salad!

My crazy grow ideas:

I'm writing my grow journal to share my way of doing things, and not to upset others who may not like my ideas. I haven't posted at all to other forums, but do read them non stop to gain more insights to growing, better cheaper ways.

Many of the things I choose to do are seen as controversial, and I've read many posts for, and against both sides.

Things like:

1. Growing auto strains.
(I mainly like having an open environment, and no grow tent, but there are many other reasons.)

2. Using dry nutes from JR Peters.
(Cheaper nutes than miracle grow! I like the long term savings, and works great for me!)

3. Using sulfuric acid as PH down.
(Again I like the long term savings, and it works great for me. I've even bought some lye to use for PH up, but haven't had to use it yet. haha)

4. Using tap water.
(I may buy a RO filter one day, but I am successful in growing enough meds for now, so why bother.)

5. Using coco coir.
(Pretty well proven, but still the DWC users like to hate. DWC is great, but I feel coco is best for auto grows. Not much sense in growing two foot tall plants in DWC.)

6. Using rice hulls instead of perlite.
(If you ever tried them in your coco you'd know why. I love it!!)

7. Lack of carbon filtration.
(The strain I grow is a low smell strain. At least the way I'm growing it. You can scratch, and sniff tho. haha)

8. Hand watering.
(I water twice a day by hand. Once in the morning, and once in the evening. Just a water pot, and no expensive watering gear.)

9. To save money!
(I don't sell anything, and only spend money doing this stuff.)

My goal is not to piss off fellow growers, but just to share my current way of doing things. I'm not writing this journal as a guide to others, but more of a document recording my own ideas. One of my main goals is to save money. Sure you can get great results by buying lots of expensive gear, and nutes, but I've always been a swag smoker, and the meds I'm growing now beat that all to hell. I'm into new info, and ideas, but I'm mostly interested in ideas that improve quality while saving MONEY. Hate if you like. There are always conflicting ideas in journals, and I won't be surprised when the haters come outta the woodwork on my radical grow ideas.
 
Re: My continuous auto closet grow. Pink salad!

Sulfuric acid as PH down:

Yes this is copy and paste for the convenience of passing along the info. Probably one of the most dangerous parts of what I do!!

"Ok so all you hydro growers out there that are on a budget I'm sure you are tired of paying for pH down and you've thought about trying to use things around the home. Well what would you say if I told you that you could make the SAME pH down that sells in the store for 20 bucks a liter (or whatever it is) for pennies a liter. Here's what you do....

SAFETY NOTE: Wear safety glasses (tight fitting sunglasses will do the trick) as acid is a bad thing to get in your eye. Also old clothes (if you plan on being messy I used a syringe and didn't spill a drop) will come in handy.

Here's what you will need.
A clean plastic 1 liter jug (or two liter just double the formula below)
DISTILLED WATER not spring water distilled 0ppm water.
A jug of sulfuric acid (also known as battery acid)

I got my plastic jug from an old bottle of pH down and cleaned it out.

I went to a motorbike repair shop and asked for some sulfuric acid for a "battery I was building in my shop" yeah right. 5 bucks got me 1.5 liters of pure sulfuric acid.

2 bucks for a 4 liter jug of distilled water.

Ok so get all your stuff and head back to the lab. Once home all you need to do is put 950mL of DISTILLED water into whatever container you will use to hold your pH down solution (must be all plastic as metal will corode and glass has a nasty habit of breaking)

Next we will measure out 50mL of sulfuric acid ( I used a syringe but a measuring cup will do just fine becareful not to spill)

Ok now add the sulfuric acid TO THE WATER NOT THE WATER TO THE ACID.

If you you introduce water into pure concentrated sulfuric acid it will explode, you have been warned.

Ok so add the sulfuric acid slowly to the water while stirring. Ok now say the magic words hocus pocus and voila you have 1 liter of pH down solution for the price of a stick of gum. w00t enjoy and be careful folks."

End of copy and paste.

I got mine at an auto parts store, and it was a full quart for 8 bucks. (four cups.) Enough to make four gallons, because there are 16 cups in a gallon. Pore one cup of water outta your gallon water jug, and fill the water jug back up slowly with your acid. Adding the acid to your water, and NOT WATER TO ACID!! It's best to mix all four gallons one at a time until done than to try and store your half used jug of pure acid. Once watered down it's much safer. Still not safe for your eyes, or anything tho. Store your mixed jugs down low to the ground, and well marked for danger. You don't want to accidentally pull it down off an overhead shelf one day by mistake. Even the small glass bottle in my kit is well marked "sulfuric acid" If you mix it at 15 to one your final solution is under 3% acid, and is about as safe as bleach, or any other PH down acid tho. Don't want those in your eyes either!!
 
Re: My continuous auto closet grow. Pink salad!

My homemade DTW trays:

I saw these trays sticking outta the trash can at a local restaurant. I'm not sure what they're used for, but there were a lot in there when I looked inside. I grabbed some, and stuffed them in my trunk before leaving. haha

I just drilled the right size hole, and glued in some rubber grommets, and clear vinyl tubes.

000003.jpg

000002.jpg

00000001.jpg


Each tray holds six rose buckets with room to spare. Both tubes go to the center bottom of my closet.
I have a catch pan I dump out getting the runoff.
 
Re: My continuous auto closet grow. Pink salad!

I'm having problems shooting photos of my closet when the HPS lights are on, so I pulled one plant outta there, and set it on my bathroom counter. This one is exactly 31 days old. I'll have to shoot some photos when the light cycle ends, and maybe I'll light up the little grow room with some CFL's just for photos. haha

buds003.jpg

buds0021.jpg


This plant is a half breed.
My grower friend gave me a Royal Bluematic fem seed he received as a freebie.
He's not interested in growing auto's, so he was happy to hand it over.
From that one plant I crossed it with my Pink Salad, and made a few hundred seeds!
I'm checking it out to see how I like it. :)
 
Re: My continuous auto closet grow. Pink salad!

Thanks Jimmy! I'll be sure and check it out! I'm still working on this journal for now. haha
 
Re: My continuous auto closet grow. Pink salad!

My mini seed starting grow room:

I made a walmart tote into a mini grow room!
I start the four seeds in here before they move to my closet. haha
It's got four 23 watt cfl's installed by me into a bent up old PC case zip tied to the top.
I painted the inside white, and even installed a small fan.
They sit in here until I sex them, and move them into my HPS grow closet.

a-grow0001.jpg

a-grow0002.jpg

a-grow0003.jpg

a-grow0004.jpg


You can't see it, but in the bottom is a upside down empty 20 oz coca-cola holding tray.
Strangely upside down it's an exact fit, and it holds the planters above the draining water.
One day soon I'll add a grommet drain pipe like on my DTW trays. :)
I start four plants at a time to get an average of two females every two weeks.
When I get four more buckets made I'll make a second one of these tote grow rooms.
If I stagger start four plants in each grow box tote every week I'll produce an average of two females a week.
 
Re: My continuous auto closet grow. Pink salad!

I found that if I cover the top half my camera lens I can shoot a photo of my plants without wavy lines. haha
It's kind of an acrobatic feat, but I managed to snap this photo, and have cropped out the blackened upper half.

dtw-trays.jpg


I move my plants over from left to right as new females are discovered in my mini tote grow box.
So the new females take the far left space, and older plants move on over to the right.
The average is two at a time, but the reality is often anything from zero to four. :)
I had four males just a while ago, and that's why there's a dramatic age gap in the left and right trays.
Sometimes when I get lucky I'll keep the smaller of the females in the grow box waiting for space to open up.
But plant new seed in any newly found, and removed male seeded buckets, or freshly harvested buckets.
Keeping the empty buckets seeded, and the rotation moving.
 
Re: My continuous auto closet grow. Pink salad!

Grow plan diagram:

Haha now I've made a grow diagram to help explain my perpetual grow cycle plan.

GROWPLAN.jpg


The second seed starting grow box tote still has yet to be built,
but I've added it to my diagram because it's part of my ultimate grow plan.
In the diagram it shows the first tote is week one, and second week two,
but really each week I seed new plants in one tote, and the opposite tote is in week two.
The lower part is my closet diagram, and it shows the movement through the room.
The two plants are almost ready for harvest in week eight,
and are being flushed the last week before removal.
 
Re: My continuous auto closet grow. Pink salad!

My little seedbank:

I keep making seeds.
I've even stored some pollen, and use it to dust a few nicer plant buds sometimes.
In case you don't know you don't clone auto strains.
The short life span, and lack of control over flowering means you must start from seed.

seed-bank.jpg


One day I'll get some other auto strains going, but for now it's just Pink Salad, and a Royal Bluematic cross. :)
I keep each phenotype in separate bags. This is my attempt at breeding.
I don't toss out any phenos, but I can keep working toward a pinker Pink Salad
Or taller, or shorter plants, or whatever by separating, and labeling my seeds.
I actually want all the pheno colors of my Pink Salad.
It comes in Green, Purple, and Pink.
Each one is cool, and is a little different smoking wize. lol
I even separate, and label the seeds that have come from the top cola.
My logic is the best bud on the plant is going to have the best most hardy seeds.

In case anyone wants to know I got my first Pink Salad auto seeds on Seedbay.
It was 43 bucks for 12 regular seeds. That's including the shipping.
My feminized Royal Bluematic was a free seed given to me by a friend.
Those 13 seeds are what I used to make all these.
 
Re: My continuous auto closet grow. Pink salad!

I use porous containers to store pollen. Actually I fold a small envelopes outta white printer paper, and after adding some pollen inside I place them into a mason jar with some silica gel desiccants. (I always write a date, and pollen type on the envelope before loading the pollen.) I do use small plastic bags to store my seeds tho. I add one silica gel desiccant inside each baggie, and stuff them all into a clean white sock, and place the seed sock bundle into a mason jar also. (The sock is insulation from the cold glass of the jar.) I keep my jars stored in a little college dorm type fridge. I do keep a smaller quantity of seeds handy in a dresser drawer for my weekly plantings. When that bag runs out I pull more outta my cold storage. You gotta give things time to warm up before use tho. Don't try to use near frozen pollen on a bud, or you're most likely outcome will be dead pollen, or a low seeding count.

pollen6.jpg


The PS stands for Pink Salad, and I date each one so I use it up oldest first.
I try, and be quick about getting a pollen envelope out, so other envelopes don't warm up.
Once you pull one out you may as well use it all, or toss the rest.
It's most likely not going to refreeze, and still be good.
That's why when I'm harvesting pollen I make a lot of these little envelopes.
And put small amounts in each one. Loading a big amount is kinda a waste.
The REG stand for regular male pollen.
One day I'll make female pollen, and I don't want to mix things up.

evelope.png


Just tuck one side flap into the other. Pop it open, and dump in some pollen.
Fold the little top down, and tuck in also.
 
Re: My continuous auto closet grow. Pink salad!

Rice Hulls:

I use Rice Hulls, and Coco, and will be for many years to come.
I bought a 50 pound bag of rice hulls, and had it delivered.
It cost me 48 bucks for 7 cubic feet.
I really wanted to try it tho, and am happy I did.
I mix them with coco, at about 25%.
I also bought 20 cubic feet of coco just to have about the right amount of both on hand.
The brand of coco I bought is called Cocotek from GH. It's kinda crappy.
It's full of salts, and fine coco grinds. Nothing but brown water came out.
It needed a full flush, and a good sign of that is the brown water runoff.
How could they have flushed the salts, and left in the brown color?
The bag the coco bricks come in say low salt content.
I should have guessed that meant unflushed coco.
It had the texture of oatmeal mush until I added the rice hulls.
Now it's like super coco! haha. but really tho. Now it's springy, and sponge like. It's got bounce!!
The rice hulls do kinda end up on top a bit. Not really floating. More like the coco sinks down.
Still perlite is much worse. It really does float up.
I think the rice hulls are way better. It's even a renewable resource too!

Rice_hulls.jpg


Here it's is mixed. I bought the Cocotek coco because it was the best price on coco I found.

rice-coco.jpg
 
Re: My continuous auto closet grow. Pink salad!

Yeah I used it before in a soil mix that worked out great. That's why I was into getting it again, but soil is another ballgame than a straight coco grow. I'm actually happy with the Cocotek tho, or happy with the end result I've gotten after fully flushing it, and mixing in the rice hulls. A well known problem with coco is salt pre built up because it's part of the conditioning process preparing it for sale. Many companies rinse it now as a last step, because of problems salt buildup cause growers. The bag it comes in says "low salt content," but does not say "pre rinsed." You can tell no rinsing was done by all the brown water runoff. I flushed until the brown water went clear, and haven't seen any brown water ever since. I'm not sure what the brown color even was, but suspect it was super fine coco particles, because it is a fine coco. I think in the flush I might have washed out a pound, or so of my 11 pound brick. haha

I don't think of the brown water as a problem really, but more like an indicator. That a rinse was never done.

I think the mixing of coco into a soil mix is great, and by mixing your mixing down the amount of salts of total end product. If you use it at a third of your mix you now have one third of the salt problem. Using a straight coco means you have a 100% problem. Rice hulls don't really interact with the water, (other than add drainage) so your still left with a 100% problem. I think it should still be well rinsed if used in a soil mix also, because that's why the term is called "salt buildup" with time it builds up. So starting out with salts can't be good.

Also these conclusions I've come to are based on the very first brick I've used outta my 10 brick order. I'll have a better idea whats really up after I've gone though a few bricks, but that's going to be years away. I like to stock up rather then place many smaller orders year after year. I've even got a ton spare hps bulbs.
 
Re: My continuous auto closet grow. Pink salad!

Heres a guideline I use for my teaspoon set:

5 grams = 1 teaspoon
3 grams = .6 teaspoon closest I can get is 1/2 teaspoon + 1/8 teaspoon
2.5 grams = 1/2 teaspoon
2.0 grams = .4 teaspoon 1/4 + 1/8 teaspoon
1.25 grams = 1/8 teaspoon

I eyeball the epsom salt when mixing a gallon, and use a half of the 1/8th teaspoon. :)

I added the last part of my spoon guide right before I posted, and now see it's wrong.

"1.25 grams = 1/8 teaspoon" is really "1.25 grams = 1/4 teaspoon"

.625 grams = 1/8 teaspoon

Really the weights I'm stating are all approximate. A spoon full of feathers is going to weigh much less than a spoon filled with gold. The same is true with these powder fertilizers. The calcium nitrate is kinda fluffy balls like laundry soap, the Jacks hydro 5-12-26 is a heavier blend full of specks of different stuff, and the epsom salt is like a course sea salt.

Here is a fuller corrected spoon guide.

5 grams = 1 teaspoon
3.75 grams = three 1/4 teaspoons
3.125 grams = 1/2 teaspoon + 1/8 teaspoon
2.5 grams = 1/2 teaspoon
2.0 grams = 1/4 + 1/8 teaspoon
1.25 grams = 1/4 teaspoon
0.625 grams = 1/8 teaspoon

Heres a copy, and paste I read from the JR Peters Lab blog:

"The 5-12-26 + Calcium Nitrate is a great vegetative fertilizer if you need to modify your nitrogen needs or to fit in with your specific water types. This combo can be used to grow a wide range of crops from lettuces, herbs, and fruiting crops. In its simplest formula you can mix ½ tsp. of each product in a gallon of water. I generally do not recommend this rate, but if you only need a small amount, it works. To make 10 gallons of solution follow this formula:
In 10 gallons of water, dissolve 1.3 ounces of 5-12-26, when that is totally dissolved add 1 tablespoon of Epsom salts for extra Magnesium and Sulfur. Finally add in .86 ounces of Calcium Nitrate. This will give you 150ppm of Nitrogen, which is the perfect rate for growing hydroponically."

I've modified my formula from this guide by first cutting it in half, (because I'm growing autos) and than lowering the Calcium Nitrate, and Epsom salts, (because I use hard tap water) as per the quote "a great vegetative fertilizer if you need to modify your nitrogen needs or to fit in with your specific water types."

The Nitrogen the quote refers to is the Calcium Nitrate, and because hard tap water is mostly high in Calcium, and Magnesium I've reduced the portions of those even further.

There is no guarantee this is the real makeup of mine, or your hard water tho. JR Peters does water testing if you want to spend the money doing so. I think about 90% of the time these will be the top minerals found in most cases tho.

I haven't yet sent in the water, but got the free kit. The test is 36 bucks.
They say they give technical phone recommendations of your results.
I'm just not ready to spend the money.
 
Back
Top Bottom