Princess Second Northern Lights Grow - All Welcome!

Re: Princess second northern lights grow-all welcome!

no sprout yet. cant even see her. she fell in somewhere on the side so i sifted through it and couldnt find her so i just figured she'd find a way up. auto flowers do need nutrients though. and depending on whether its sativa or indica will tell its height. and technically with autos your playing god so a strict light schedule is necessary.
 
Re: Princess second northern lights grow-all welcome!

Let me fiel this one, Princess.

I was thinking of growing autoflowers before my current grow, so I've read a fair bit about them. I also have a friend who grew them outdoors.

As I was trying to find an autoflower I wanted to grow, I stumbled across the G13 Haze I am growing now. I love sativa strains but they are notoriously tall and take a long time to flower. This strain is relatively small (for a sativa) and matures relatively quickly (again for a sativa).

So I never got to grow an autoflower. Here's what I know about them.

They are a hybrid strain of either indica or sativa AND ruderalis. Ruderalis is a strain of cannabis that has little potency, like hemp, and isn't very interesting from that perspective. However, as it grows in nothern latitudes with short growing seasons, it has adapted by flowering early and finishing early. It is crossed with indica and sativa to get a strain that is potent AND flowers regardless of the level or duration of light.

Here's some info from other sites:

How To Grow Auto Flowering Marijuana Seeds Indoors

Plenty of growers are choosing auto-flowering marijuana seeds for their continuous harvest setups. These fast growing marijuana strains, from seed to bud within two months, are perfect at supplying an enthusiast with weed all the time.

Unlike traditional continuous harvest setups requiring multiple grow rooms, auto-flowering marijuana seeds can be grown in the same space because the light cycle does not need to be changed. Making auto-flowering marijuana plants perfect for continuous harvesting or people with very small spaces to grow grass in.

How is this achieved?

Eighteen hours of light per day is recommended from start to finish. Switching light cycles down to twelve hours will diminish auto-flowering marijuana yields.

It's important you stagger the planting of your auto-flowering marijuana seeds.

Plant new seeds immediately when males are removed or marijuana buds are harvested. This ensures your grow room is always full and always producing fresh buds.

Male marijuana plants will show themselves within 17 - 20 days. About a week earlier than female plants. Remove these male plants and replace with marijuana seeds.

Auto-flowering marijuana seeds grow very well in soil or soil-less systems. If you are considering growing sea of green you can't grow wrong with auto-flowering marijuana strains.

For best results plant your auto-flowering marijuana seeds directly into 1-2 gal.pots. Using smaller pots will simply result in smaller yields. Auto-flowering marijuana strains present amazing new possibilities. These marijuana seeds usually grow no taller than 16-20 inches. 12-16 inches is typical. Light intensity, pot size, and marijuana fertilizer all play an important role in determining the size of your marijuana plants at maturity.
The better the conditions. The bigger the yield.

How to use marijuana fertilizer on auto-flowering plants?

After the first two weeks of growth, auto-flowering marijuana seeds should begin a light feeding of a grow type nutrient solution, with micronutrients. When the marijuana plants pass into full flower, they should be started on a bloom regime. About weeks 4 through 6.

Root stimulator have shown to increase growth dramatically. Remember when using marijuana fertilizers that less is more. And don't forget to flush.

Given it's quick growth it's important to pay extra attention to marijuana fertilizers. You should consider two weeks of vegetative fertilizer and four weeks of bloom fertilizer.

Auto-flowering marijuana seeds grow one main cola. Though with plenty of great light they are known to develop some side branching.

Marijuana buds are compact with excellent bud/leaf ratio. Thick pistils with orange coloration, and medium-sized, individual calyxes. Yield and height are dependent on obvious growth factors. For example, marijuana plants kept in small peat cups on a windowsill may yield as little as 1 g. and grow no taller than 6 inches, with no branching whatsoever; while a plant in a 4-gallon container under high-intensity lighting and good cultivation methods, can turn into a profusely branched, two-foot wide 45-gram bud monster.

What is the marijuana high like?

Awesome.

There are several different kinds of auto-flowering marijuana strains that taste and have an amazing high. The original Lowryder and Lowryder #2 have hints of Northern Lights and Williams Wonder, while Automatic AK47 and Masterlow both live up to their original strain pedigree.

AND

How to Grow Marijuana with Auto-Flowering Cannabis Seeds

What are Autoflowering Weed Seeds?
Auto-flowering cannabis seeds differ from regular cannabis seeds in that their flowering phase is not governed by photoperiod. This means that, unlike regular cannabis seeds, auto-flowering seeds will commence flowering after a certain period of time, regardless of whether you have switched the lighting to 12/12 or not. It is this quality that makes auto-flowering cannabis seeds ideal if you require a constant supply of marijuana.

Autoflowering strains are typically very short in stature, as you might expect from a plant with such a limited vegetative phase. This makes them particularly useful for stealth grows. The small stature often means a relatively low yield, but this is compensated for by a very rapid turnover. It is up to the grower to decide if auto-flowering seeds are suitable for his/her needs and circumstances.

With their ruderalis heritage, auto-flowering cannabis seeds are quite often suitable for outdoor grows in northern climates, but check with your seed supplier that this is the case before planting them outside.

What is the History of Auto-Flowering Seeds?
Auto-flowering is a natural trait, inherited from wild growing ruderalis species. Ruderalis species are a subspecies of Cannabis Sativa that have naturalised in the northern wildernesses, mostly in Russia and Eastern Europe. In northern climes, where the summers are short, summer days can be very long with up to 24 hours of light per day. Under these atypical light conditions it is crucial for wild plants to flower and spread seed as early as possible before the onset of winter. Ruderalis, unlike other types of cannabis, has adapted to make the most of the long days of short northern summers by developing the ability to flower in a short period of time, regardless of the length of daylight available.

The availability of auto-flowering versions of quality cannabis species is the result of intense and diligent breeding programmes. By crossing the auto-flowering properties of ruderalis with the THC production of other varieties, breeders have developed potent strains that will commence flowering within a month of planting (sometimes as little as a fortnight) and finish in as little as 8-10 weeks, all under 18hrs of light. The auto-flowering trait is recessive however, and isolating the trait through hybridization requires a great deal of time and experience.

How to Grow Auto-Flowering Seeds
Many cannabis growers use auto-flowering cannabis seeds as part of continuous grow systems. With a bit of planning it is easily possible to set your grow room up to produce a continuous supply of buds from auto-flowering seeds.


One of the greatest advantages of auto-flowering seeds is that they avoid the need for separate grow rooms and nurseries. Because the lighting regime doesn't change throughout the grow, it is possible for all plants to share the same room regardless of what stage of growth they are at.

With such a short grow cycle, pot size, light quality and nutrients all play a crucial role (even more so than normal) in defining the size of the yield.

So with your grow room under a continuous 18 hour light cycle what you need to concentrate on is keeping it full and productive. Stagger planting new seeds by a couple of weeks to keep a continuous supply growing. Plant new seeds each time you either harvest buds or remove a male. Male plants of auto-flowering strains will show themselves between 2 and 3 weeks after germination, about a week before females.

Auto-flowering cannabis strains work well in both soil and hydro systems. For best results plant the newly germinated seeds directly into their final pots (1-2 gallon or 5-10 litres) and place them directly under 18 hour lights. Beware, smaller pots can result in smaller yields.

Start young plants on a veg phase nutrient regime at about 1-2 weeks. Switch to flowering phase nutrients as soon as you see flowers begin to form, usually at about 4 weeks. This is also the right time to switch from MH to HPS lighting if that is what you are using.

For outdoor grows in the northern hemisphere, May — August is the optimum time for growing auto-flowering cannabis strains, although with a bit of planning you can organise successive harvests right through to November.

Mature auto-flowering cannabis strains are normally no more that 20" (50cm) tall, this makes them ideal for high density, compact grow systems similar to Sea of Green set-ups.

What Auto-Flowering Strains are Available
There are several varieties of auto-flowering cannabis seeds available on the market. Perhaps the most famous is the original Lowryder from The Joint Doctor, one of the first auto-flowering strains to become commercially available. Lowryder is also responsible for a whole range of hybrids including Lowryder#2 and Easy Ryder.

Other auto-flowering cannabis strains of note include Blue Barrel AK, Auto Bubbleicious and Afrodite Automatic.

This is from a user commenting on one of the above posts:
Things I love about the Lowrider 2 strain....

First I would say that for a newb. like me, the autoflower was perfect.

I germ in papertowel, goes to a beer cup with sunshine #4, then in to 8" pot to finish there life out in.

18/6 the first 50 days and 12/12 the last 15 to really harden the buds.

Second I love that they are producers, you are sure to get 20 or 30 grams apiece.

And for a plant that is 17 inches tall that is pretty good.

Good resin plants as well, even more than my MasterKush plants.

Nice heady party buzz. Gotta love that.

All around I would give the Lowrider#2 strain a 7.25

The minus's would be that there several different phenotypes, and there was a high male/female ratio.

But other then that I would say this strain would be great for anyone.

Notice that he says to go 12/12 for the last two weeks, while the author of the first post says NOT to as it will decrease yield. I would stay with 16/8 the whole time. Pot plants put on a lot of weight in the last two weeks and using less light means less photosynthesis, less THC, etc.
 
Wow, I think you convinced me to grow autos now. Is there any prob with doing an auto in a 3 gal pot? Or would a 2 be better for its size?
 
Re: Princess second northern lights grow-all welcome!

damn. that was a long post lol good news! I found our little chameleon! She somehow ended up in the middle. I thought maybe she would open up a bit more in soil but when i see her taproot is BARELY out so shes back to the paper towel haha Guess its time to order my 1 and 2 gallon pots.
 
Re: Princess second northern lights grow-all welcome!

If you already put it in the soil and it has a taproot, why would you put it back in the paper towel? The less you mess with it the better.
 
Re: Princess second northern lights grow-all welcome!

It may have been that she was lying on the surface.

As I mentioned the roots don't like light. If the taproot starts coming out, put it back into the soil. Use your fingers this time. A seed is not that fragile, so you can handle it. Bury it 1/4 below the surface. All it needs is enough soil to cover the roots and it will burrow into the soil.

My seed has just popped the surface. The helmet is still stuck on the seed, but I can see the stem starting to unfurl.

When it finally emerges, I'll post it on my journal.

By the way, you can germinate a seed entirely in soil if you want - you don't need the soaking in water or paper towel method - Mother Nature does it all the time!

But I think one of those methods insures a greater chance of germination.
 
Re: Princess second northern lights grow-all welcome!

Hey Princess,

BlazinThat asked me about auto seeds. It made me realize that I left part of my last post out (as if it wasn't long enough already)!

You can't clone an autoflower as it will not go into vegetation (that's what a clone needs to do to grow larger). If you take a cutting, it will just stay in flower and not grow any bigger or it will just die.

So, if you want to propogate these babies and never have to buy autoflower seeds again, do this:

ive been growng autos since they hit the market. one suggestion. unless you enjoy getting robbed every so often buying new seeds, i always recommended to everyone wanting to grow autos to use your first batch of seeds (whether purchased or acquired from friends) to MAKE A SEED CROP. don't cull your males. if you grow an auto right, leave the males and nurture and encourage seed growth, youll not need to purchase seeds ever again. my first auto grow i acquired 16 seeds from a friend. I GREW THEM ALL OUT AT ONE TIME (16 plants under 400watts.) and out of the 16 i got 1 single male about 10 inches tall. i let him go and now ive got in the range of 10,000+ seeds from that one single crop. no worrying about "will customs get them" or anything else from ordering seeds from overseas, etc.

This was a reply to one of the major articles I posted above. It seems the incidence of males in autoflowers is small, but if you get one, you can use it to produce a lifetime's supply of seeds.
 
Re: Princess second northern lights grow-all welcome!

Wow all that autoflower info :) Thankyou ggrant

And yay princess you found your seed now its time to get it growing!
 
Re: Princess second northern lights grow-all welcome!

Man! I honestly thought you could clone autos? Even if you take cuttings during veg it still won't work?
As for the seed she's being difficult! She hasn't opened up anymore or even stuck out her little taproot. I have no clue what to do. Should I still plant it?
 
Re: Princess second northern lights grow-all welcome!

It may have been that she was lying on the surface.

As I mentioned the roots don't like light. If the taproot starts coming out, put it back into the soil. Use your fingers this time. A seed is not that fragile, so you can handle it. Bury it 1/4 below the surface. All it needs is enough soil to cover the roots and it will burrow into the soil.

My seed has just popped the surface. The helmet is still stuck on the seed, but I can see the stem starting to unfurl.

When it finally emerges, I'll post it on my journal.

By the way, you can germinate a seed entirely in soil if you want - you don't need the soaking in water or paper towel method - Mother Nature does it all the time!

But I think one of those methods insures a greater chance of germination.

Wait a minute! could it be the taproot isnt comming out because shes by the window in the light? If so i feel incredibly silly. last time when i germinated i made sure to tape around a solo cup so it was completely dark and i put the wet paper towel in there and she popped fast! however being that my room is so cold i have to keep her by the vent (by the window where its super bright).
 
Re: Princess second northern lights grow-all welcome!

You should keep the seed in the dark until you plant it. If you use paper towels, put the towels in a drawer or cover them up somehow.

The cup method is really easy. Just put the seed in a cup of water and cover it up. I use a beer coaster. Then I put it in a drawer in my veg room which is fairly warm.

It usually starts floating on the surface. If it doesn't sink in a day, push it under the water. You can see when the taproot emerges. When it does, plant it. I just did that with one of mine. It took two days for the taproot to emerge, then two days to pop out of the soil.

I would put the seed back in the soil and keep it damp and see what happens in a few days. You can gently remove the top layer of soil in a couple of days and if the taproot hasn't emerged, it's probably a dud. I had one of those before I sprouted my current one. The husk swelled open but no taproot ever emerged. I think the seed starts to open the way a kernel of rice will open when placed in water. That is just the core swelling with water. It doesn't mean the seed is viable. If no taproot emerges, it isn't viable and it's time to move on to the next seed.
 
Re: Princess second northern lights grow-all welcome!

Yeah, it's a dud, Princess.

This is a surefire way to germinate a seed. I've germinated quite a few and only had one dud (the one I told you about).

Take another seed and do it exactly this way:

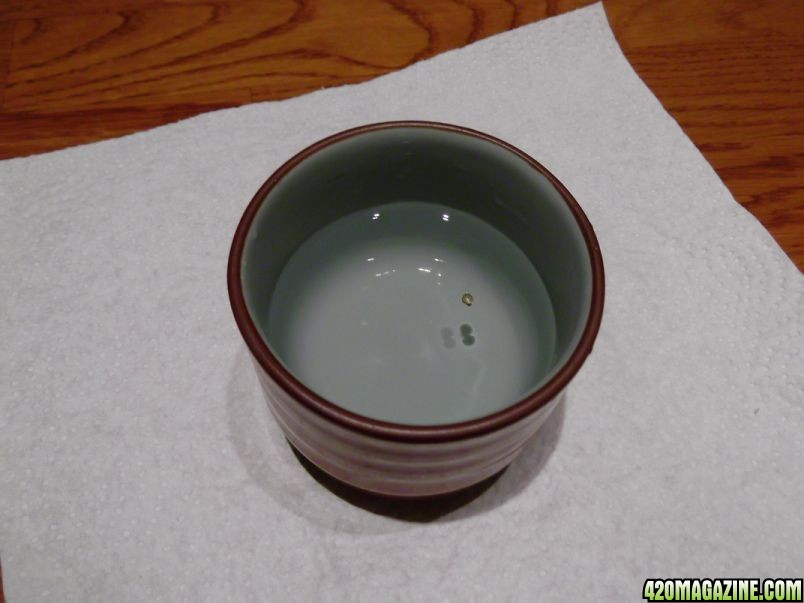
1) Take a cup or glass and fill it with water halfway, like this:


Seed In Cup

SeedInCup.jpg


2) Cover it up - I use a beer coaster - anything to keep the light out.

3) Put it in a warm place - I use a drawer in my growroom. Don't put it on a window sill. It's hard to keep bright light out of anything. There has to be somewhere warm in your house - the top of the fridge, your bedroom, a furnace room, an electric blanket.

4) The seed will probably float on the surface. If it doesn't sink in 4 - 12 hours, put it under the surface. It should sink to the bottom if it hasn't already.

5) Check on it in 24 hours. The seed should have swelled and split.

6) Keep checking until you see the taproot has emerged. This takes anywhere from 1 - 3 days.

7) Before you plant it, fill the pot you are going to use with soil.

8) Pour boiling water over it until it drains out the bottom. It will probably look like mud.

9) Let it stand for an hour or so. The soil should be warm, not hot. This step will compact and hydrate the soil as well as kill any harmful bacteria.

10) Use a chopstick to punch a hole 1/4" deep into the soil.

11) Carefully empty the cup containing the seed slowly into your hand over a bowl and let the water drain through your fingers leaving the seed in your hand. If it falls into the bowl, pick it up gently with your fingers. It's not that fragile.

12) Using your fingers, drop the seed into the hole you dug in the pot. If you can get it in taproot down, all well and good. If not, don't worry - it will get to the surface even if you plant it upside down.

13) Cover it with soil - don't tamp it down. You only need to cover it so the taproot isn't exposed to the light.

14) Place it under your CFL about one foot away. Keep the soil moist but not soggy. I mist the soil on the top several times a day.

15) When the seed pops (this can take from one to three days), move it about 6" from the CFL until it is fully opened and the first leaves appear. Then you can move it closer to the lamp, so that it doesn't start stretching.

If you're not comfortable about using a cup to germinate your seed, stick with the paper towel method. That works, too.
 
Back
Top Bottom