

Hello Beez, I have been following your various posts and would just like to say thanks for all of your adventures! How to grow seeds was particularly exciting. Thank you very much!I bought like 20 bean bags so there should be a bunch of them left. It's beer and munchies I didn't buy much off not know how many would show up.
Navigation
Install the app
How to install the app on iOS
How To Use Progressive Web App aka PWA On 420 Magazine Forum
Note: This feature may not be available in some browsers.
More options
You are using an out of date browser. It may not display this or other websites correctly.
You should upgrade or use an alternative browser.
You should upgrade or use an alternative browser.
Seedsman Sponsored Grow: Peyote Wi-Fi By Beez
- Thread starter beez0404
- Start date
- Thread starter
- #42
Good to have you with us, MrQuick. I hope we all learn something new during this grow.
im in beez
Seedsman JH is one of my faves
I have two going right now....beautiful plants. I have had great luck with the seedsman stuff.....glad to hear that their Jack is great as well!

I also grew Greenhouse Jack Herer gifted to be my Sweet Sue, a little more stretchy, paler green, but good.
I prefer the more compact emerald green full cola stonier Seedsmans.
We'll see how this one turns out in a few weeks. There's not a bad leaf on her.
Now that I remember, mine are from a Seedsmans gift certificate for a photo contest.
from this
to this
I prefer the more compact emerald green full cola stonier Seedsmans.
We'll see how this one turns out in a few weeks. There's not a bad leaf on her.
Now that I remember, mine are from a Seedsmans gift certificate for a photo contest.
from this
to this
- Thread starter
- #45
@Hash Hound so that plant above is Seedsman Jack Herer? I've got a 6 pack of them here. That plant looks amazing. I would not have much of a clue how to train it like that but it would probably do okay just topping it once when it hits about 15 inches.
Curiousnoob
Well-Known Member
Good Luck Mr Beez! 
@Hash Hound so that plant above is Seedsman Jack Herer?
ya beez thats the Seedsman JH at 7 1/2 weeks. Promix Organic, worm castings, amended with Happy Frog Fruit and Flower powdered organic and Dr Earth Life All Purpose organic pellets. Fed water only but for 3 teas.
I topped and left the third and fourth nodes, after allowing a few nodes to form on the mainline i topped again.
Those colas are full all the way down.
Here are my two Jack's from Seedsman. Just flipped em about a week ago. Smell is already amazing on them!
I grew out an Auto Jack Herer from Greenhouse Seeds. It was good, looked very similar to yours in color and frost but the colas were more like golfballs. Had lots of em though! Think it yielded at 6 zips for an auto...not bad. Still have maybe 5 grams left from it. Doesn't have the same pop it used but its not bad.
I grew out an Auto Jack Herer from Greenhouse Seeds. It was good, looked very similar to yours in color and frost but the colas were more like golfballs. Had lots of em though! Think it yielded at 6 zips for an auto...not bad. Still have maybe 5 grams left from it. Doesn't have the same pop it used but its not bad.
As someone that loves to train plants, that is a beautiful lady Hash Hound! Well done sir!ya beez thats the Seedsman JH at 7 1/2 weeks. Promix Organic, worm castings, amended with Happy Frog Fruit and Flower powdered organic and Dr Earth Life All Purpose organic pellets. Fed water only but for 3 teas.
I topped and left the third and fourth nodes, after allowing a few nodes to form on the mainline i topped again.
Those colas are full all the way down.
Hey Beez! I'll pull up a chair in the back if that's ok. I also won a credit with seedsman from the photo contest and their big Halloween sale starts this Monday! I plan on getting a few things including a pack of Ace's Killer A5. Looking forward to watching your Peyote Wi-Fi!
Excuse me, Weens. Your chair is on my tail. Cheers. Nice to see you, by the way.
Hi Beez")
Hi Beez
Your chair is on my tail.
Sorry, at least it's not on your other long appendage!

- Thread starter
- #53

He haw, I mean started it.
- Thread starter
- #55
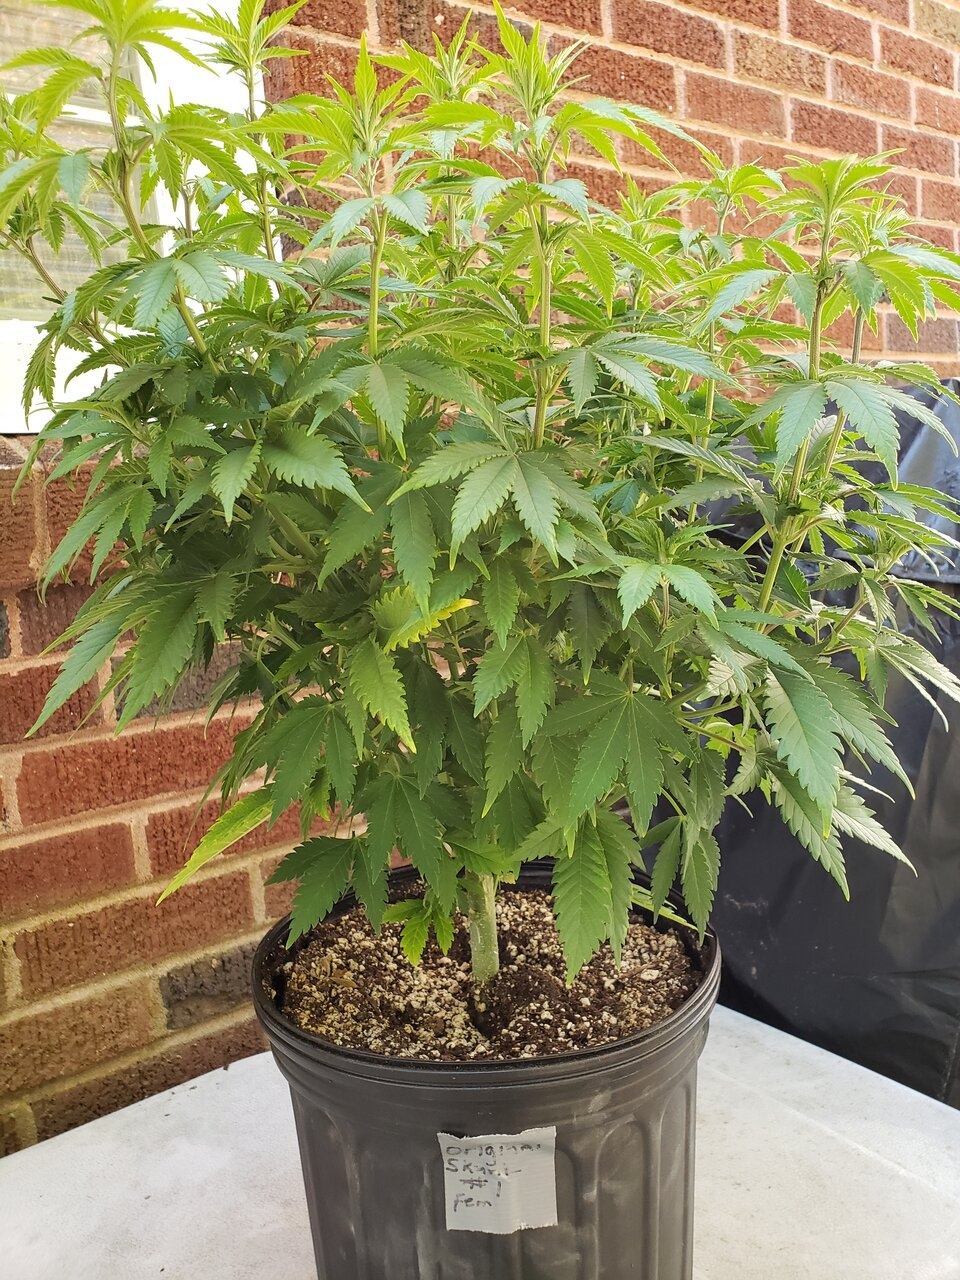
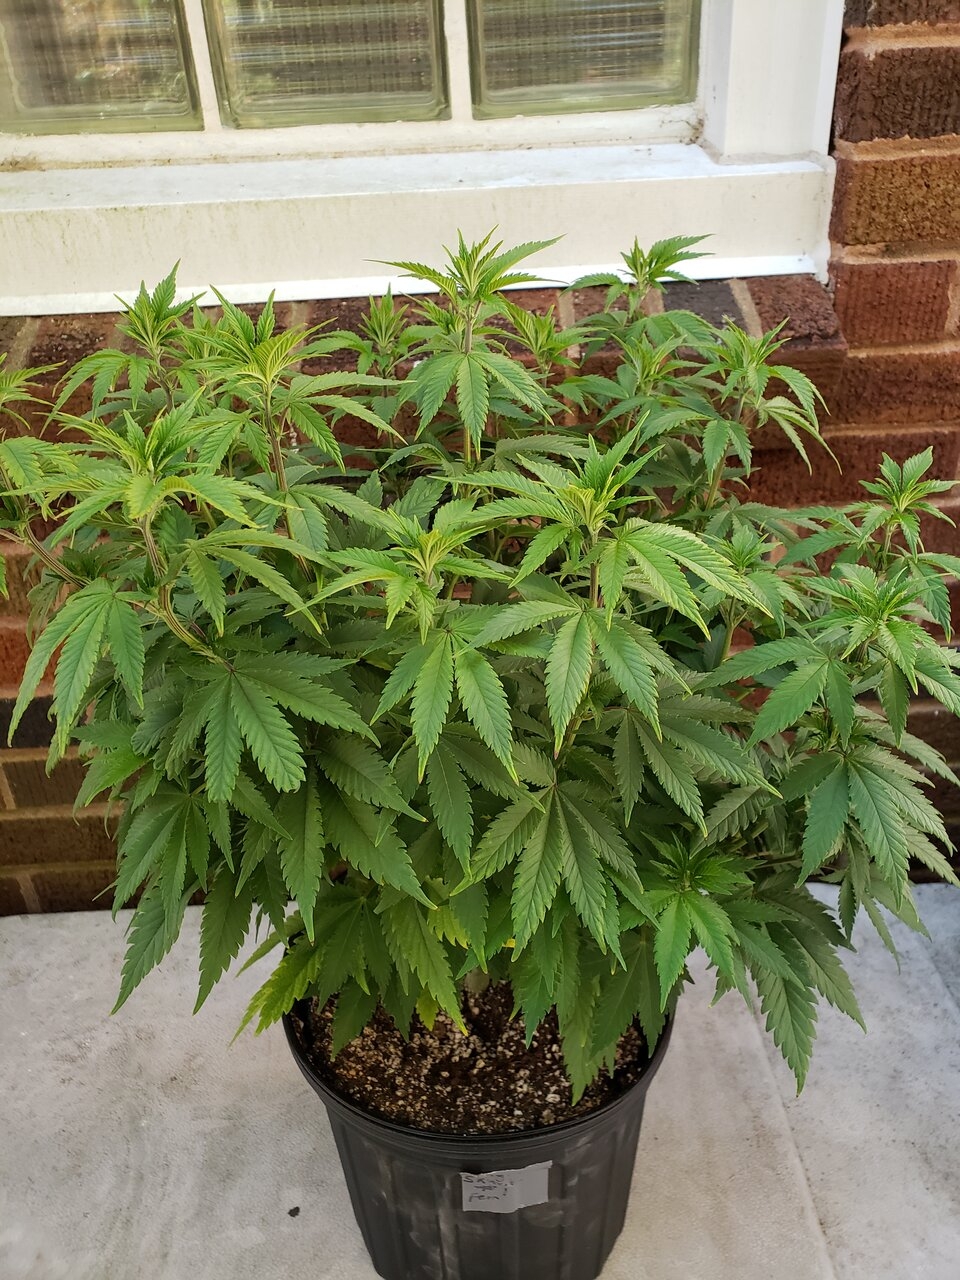
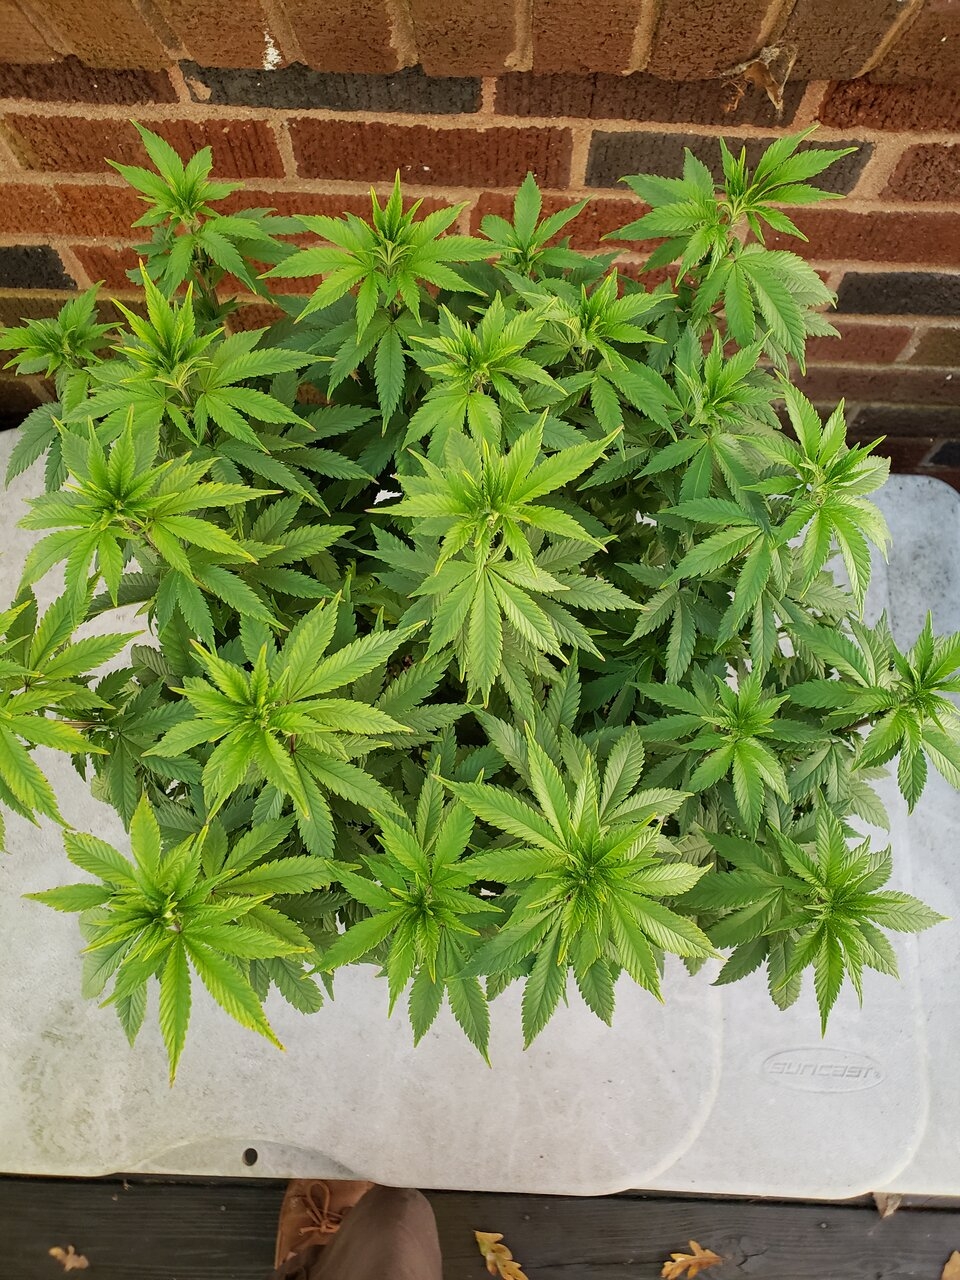
Any of you guys currently growing a strain from @SeedsMan feel free to share photos of it here. Today I up-potted my Seedsman Original Skunk #1 plant and got her tied down. Tomorrow I'll take the two lower branches I left on to make clones. I find the closer to the bottom my cuttings come from the easier they are to root and become clones. I have been working to keep this girl short/small as I really don't have a place for her in the flowering tent. But I'll be harvesting a Jellium plant in about 10 days to 2 weeks and she'll move into that slot. Here are a few photos.
A few photos prior to up-potting.
Here she is in her new pot alongside her old pot. I've never measured the size of the red pot but would guess it to be in the 6-7 gallon range.
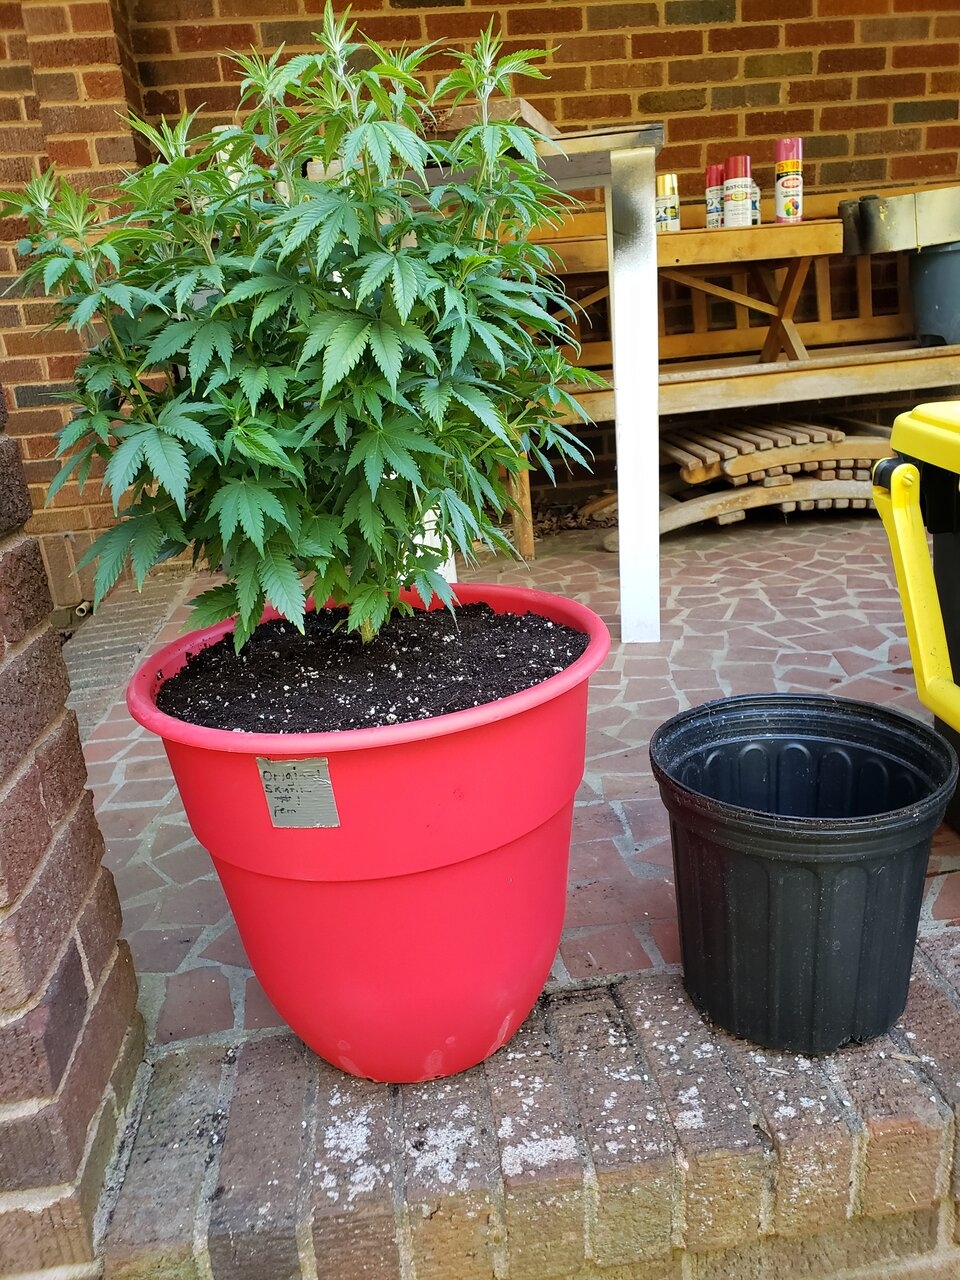
All along I've been bending this plant (no tie downs) each day two or three times a day. And I have time to do this because....I am retired. But once I up-potted her I decided to break out the pipe cleaners and give her a proper tie down.
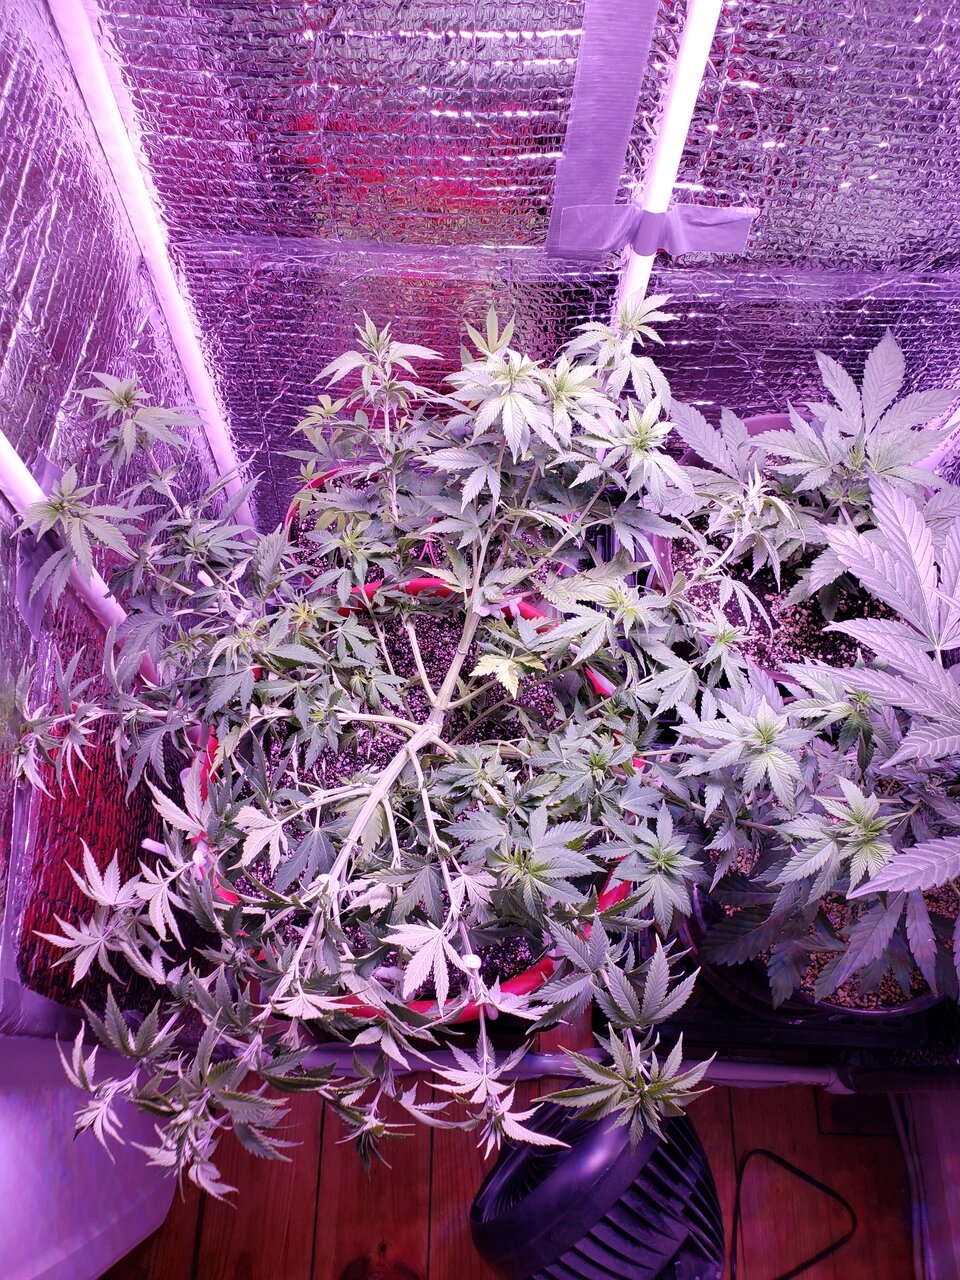
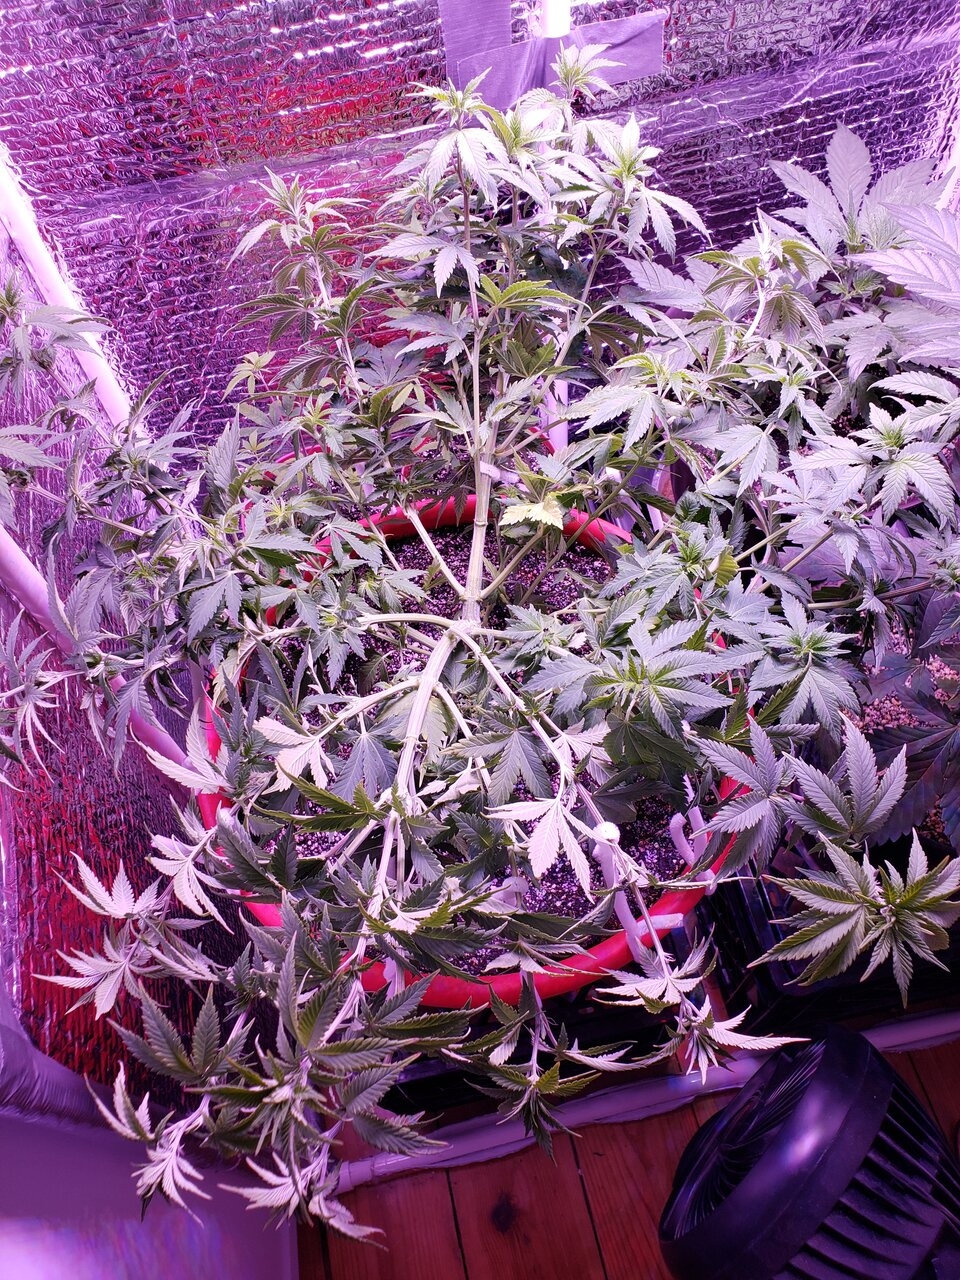
One day I'll learn the correct way to train a plant but until then I just bend everything over towards the outside and tie it down. Then whatever happens happens. I've been told the Original Skunk #1 can get quite tall and my tent is not very tall so I am doing the tying down to keep her shorter.
A few photos prior to up-potting.
Here she is in her new pot alongside her old pot. I've never measured the size of the red pot but would guess it to be in the 6-7 gallon range.
All along I've been bending this plant (no tie downs) each day two or three times a day. And I have time to do this because....I am retired. But once I up-potted her I decided to break out the pipe cleaners and give her a proper tie down.
One day I'll learn the correct way to train a plant but until then I just bend everything over towards the outside and tie it down. Then whatever happens happens. I've been told the Original Skunk #1 can get quite tall and my tent is not very tall so I am doing the tying down to keep her shorter.
You’re training looks great to me @beez0404 !! Doesn’t matter what you do as long as your canopy ends up pretty even, right? That skunk is going to be a monster.. all you do is grow monsters huh??
- Thread starter
- #57
The two Seedsman Peyote Wi-Fi are getting too tall even being close enough to the lights. I have to transplant them today from the perlite cups into solo cups with a mild version of my organic soil. Not sure what I'll be able to do for photos to show the process as it takes two hands. But I'll see what I can do. Be back later with an update when they're transplanted.
- Thread starter
- #58
The two Seedsman Peyote Wi-Fi seedlings have been very carefully and delicately transplanted. Remember I mixed up a small batch of organic soil with much less nutrients in it to allow them to hopefully thrive and put out lots of roots. As always now I water using the method I learned from @Emilya which works really quite well. I've gone ahead and labelled the seedlings #1 and #2 to keep track of them. At some point we, all of us, will have to decide which one is grown out for this journal. Here now are a bunch of pictures with a description which hopefully will help anyone interested understand how I transplant from a perlite/hempy solo cup into soil.
- Thread starter
- #59
Transplanting from Hempy/Perlite solo cup into Soil
Starting off with PWF #1 pictured here next to the solo cup with soil into which she will be transplanted. It's important that the soil be dry when doing this. It makes it so much easier and gentler for the seedling as you'll see.So to gently remove the seedling from the perlite/hempy solo cup you do a step called floating the perlite. Notice in these photos that the perlite is about 1-2" below the top of the solo cup. This allows me to add water to the cup until the perlite is literally floating in the water.
Step #1 is to cover the hole with some type of tape that will prevent the water from leaking out of the hole. I use regular old duct tape for this. Here you see the duct tape covering the hole. Next step is to add water until the perlite is floating.
Here you can see that the level of the perlite on the inside of the cup is quite a bit higher. This is because I've added water and it is floating in the cup.
Next is where you want to be very patient and gentle. Also, I sanitize my hands well when I start this step. This is where we remove the seedling from the perlite. What I do is squeeze the plastic cup moving the perlite inside. I turn it a 1/4 turn and squeeze it gently again. All the while I am VERY GENTLY pulling up on the plant's stem. If it's not moving I keep spinning and squishing the perlite. Eventually (or at least every time I've done it) the seedling will start to come out for you. Here is seedling #1 at sprout +3 days out of the perlite and ready to go into her soil solo cup.
I do not worry the least little bit about the small pieces of perlite the roots have grabbed on to. I plant her just like you see her.
Next step is making the hole in the soil to accommodate the seedling. I use the handle of an artist's paintbrush to make the hole. I make it precisely as deep as I want/need it to be by holding the brush against the stem and root to measure. I then make the hole wider then the root mass so it slips into the hole unfettered. Remember we're trying to be as gentle as possible. Once the seedling has been placed into her hole, without letting go of the stem I use the paintbrush to push soil against the sides of the roots. Just enough to hold her upright and then I'll use both hands. I go around the seedling pushing the paintbrush nearly to the bottom about 2 inches outside of the plant. I then gently push the soil inward towards the center of the cup/seedling trying to gently pack the soil into contact with the taproot. I go all around the cup doing this making probably about 8 holes total. Here are a couple pictures that hopefully will give you a good idea of what I mean.
20191025_105915.jpg
When the seedling is in place push soil towards the center against the taproot. GENTLY!
20191025_105909.jpg
Make the hole in the center larger then needed so no trauma to the seedling
I then use my fingers to gently even out the soil and work it till the seedling is standing nice and straight. The last step is watering the seedlings. The ultimate goal is to create an abundance of healthy roots which will help your plant flourish. This is part of the method I've learned from Emilya.
Right now the seedlings have basically their main taproot going straight down. You can see in the photos that they have started putting out small side roots. These are what we want to encourage to grow. Here is the photo of PWF #2 showing her taproot and start of her side roots.
Compare her roots to those on PWF #1 who is only 1 day ahead of her above ground. They move quick, much quicker then I used to realize. But you can see here on seedling #2 the beginnings of side roots. To encourage the plant to put out more lateral roots I've learned to water towards the edge of the solo cup. The plant will send out lateral roots because she can "smell" that water and needs it to survive. So she will send roots to the sides of the cup to capture the water. Here you can see how I'm watering around the edge of the cup.
I also like to use a clear solo cup inside a colored solo cup with seedlings and clones. This allows me to monitor the health of the root system. It also helps me to know when she is ready to be up-potted. In this case you can see the moisture which has run down along the inside of the clear cup. The plant is already sending out lateral roots to get to this water.
I DO pour a very small amount of water down the center with the initial wetting of the soil. I do that for two reasons. First, I want the water to help remove any potential air pockets and move the soil into contact with the roots. Second, I want to be sure the plant has some moisture. I pour a very minimum amount down the center, just enough to get things going.
And that's pretty much it for now. Both girls I feel were successfully transplanted with a bare minimum of trauma. I expect both of them to flourish from here out. Here are a couple photos of them in their new homes.
As always, any questions please feel free to ask. Oh, and questions about what we've done so far. If you don't understand something we've done to this point Just ask and someone will answer your question.
A Beez original technique! Excellent write up with photos Beez!
Similar threads
- Replies
- 498
- Views
- 28K
- Replies
- 147
- Views
- 18K
- Replies
- 884
- Views
- 33K
- Replies
- 1
- Views
- 505