Snack420's 3rd - Critical Kush - Indoor Grow - Coco - 600W MH/HPS - 2016

snack420

Well-Known Member
Hi all,

Welcome to my 3rd grow journal here at 420magazine.com!
This website has been so inspirational for me and a huge source of valuable growing information. I want to give back to the community what I can by sharing my experiences while I continue learning about the wonderful world of growing cannabis!

I hope you share this journey where I will attempt to grow some really potent Indica-dominant MJ. I'll try to be brief when possible, but usually I have a lot to write about my grows, so there ya go :)

Here are the details of my botanical voyage, which is planned for April.

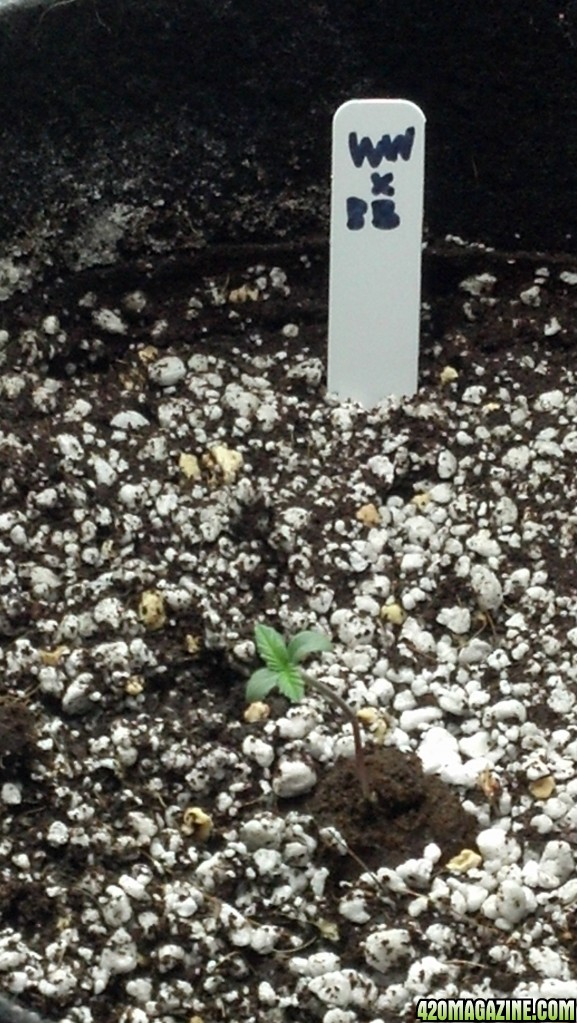
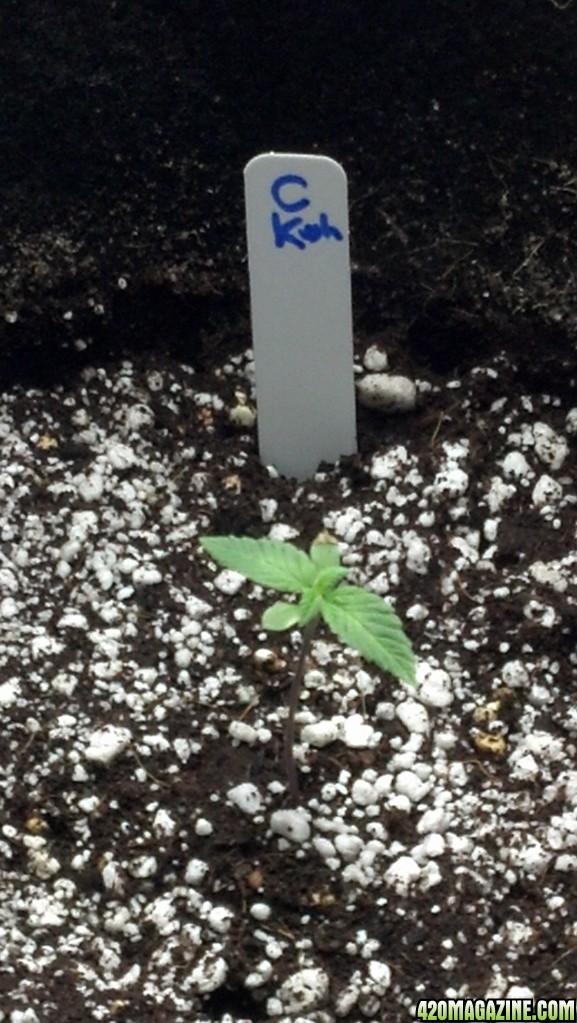
What strain is it? Critical Kush from Barney's Farm (2 plants)
Is it Indica, Sativa or Hybrid? What percentages? Indica hybrid; my understanding is about 75% Ind / 25% Sat
Is it in Veg or Flower stage? Will start in April
If in Veg... For how long? Hoping to veg for 6-8 weeks
If in Flower stage... For how long?
Indoor or outdoor? Indoor (4x4 tent)
Soil or Hydro? Coco (Botanicare) with Perlite and some crushed volcanic rocks/ash
Size of light? 600W MH for veg, 600W HPS Hortilux for flower
Is it aircooled? Yes
Temp of Room/cab? current ambient temps between 53-85F (w/o cooling); will use a heater during lights off until
not needed
RH of Room/cab? current ambient RH between 37-52%
PH of media or res? will adjust to 5.8
Any Pests ? expecting fungus gnats and will employ preventative measures (yellow stickies, mosquito dunks, diatomaceous earth)
How often are you watering? probably once daily
Type and strength of ferts used? will use H&G Coco A+B w/Roots Excelurator & Drip Clean

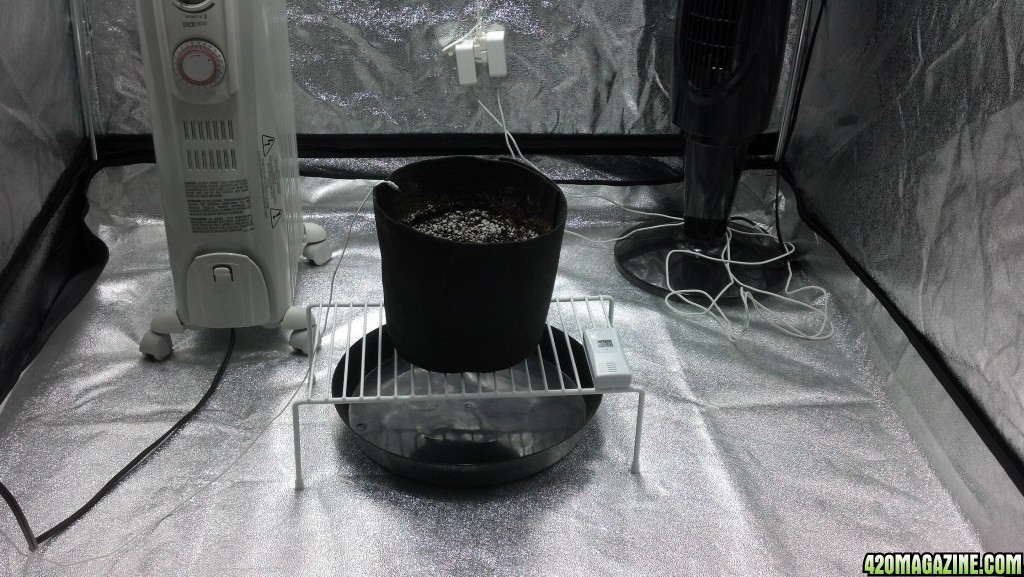
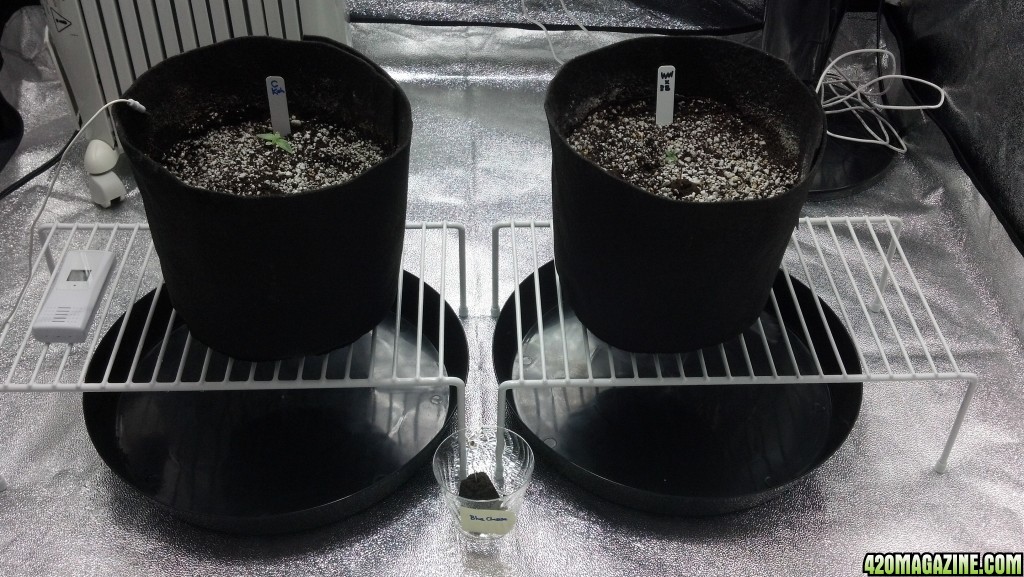
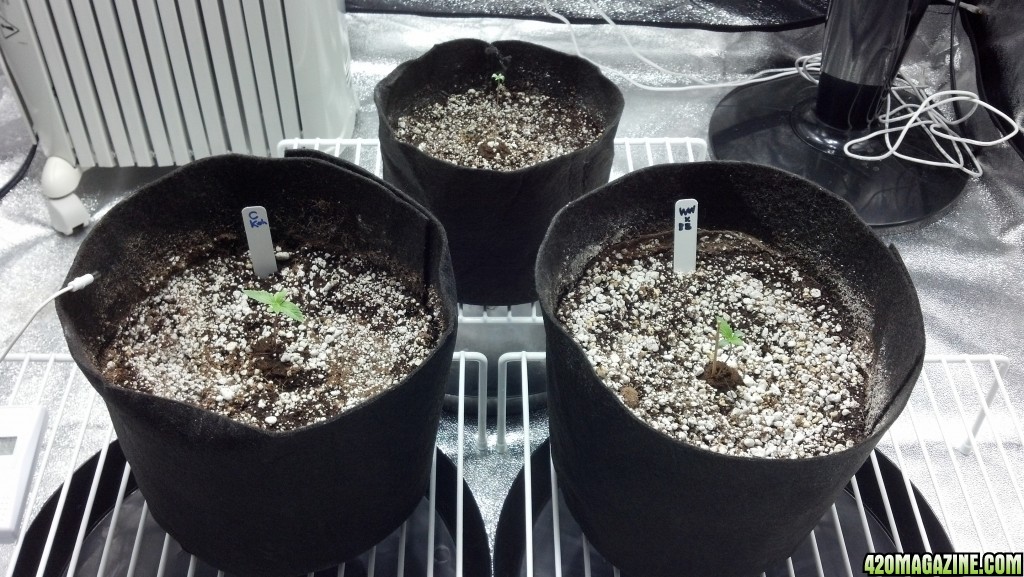
One thing I want to highlight is how this grow will differ from my previous two grows. One thing that seems evident from other journals is that adequate oxygenation of the roots is essential for optimum growth. It apparently all starts with the roots, and this makes a lot of sense to me. So, this time around I'm planning to use smart pots instead of plastic pots. I'm also going to have the smart pots resting on a slotted platform or shelf a few inches above the saucers so that water flows naturally out the bottom and the roots do not sit soaking in drainage water. These two changes should hopefully create a much healthier root system, which I hope in turn will create a more vigourous and productive plant. One thing I am concerned about though is how much water is going to drain out the outer edges of the smart pot. I do wonder if they saucers are large enough to catch all the water or whether I'll find a lot on the tent floor? Anyone have experience with that?

Another notable change I'll be making is with the nutrients. For my first two grows I used General Hydroponics, which seemed to work fairly well. However, some of those nutrients are now two years old and I also wanted to try something that is specifically made for Coco growing and gets great reviews. Both House & Garden (H&G), Advanced Nutrients (AN), Canna, and some others got great reviews, but I opted for H&G.

For lighting, I'm using a 600W MH bulb that I used with the first two grows. I was thinking of getting a new one, but was told it should probably still be fine since it has only been used about 4 months total. For flowering, I'll switch to a Hortilux 600W HPS bulb that has been used only 1-2 months. I'm strongly considering using the Gas Lantern Routine (GLR) during veg and will plan to use a diminishing light schedule during flower starting at 12/12 and winding down to probably 8 on / 15 off over a period of 8 weeks or so. Will be curious to hear from others who have tried GLR.

Finally, this time I'll grow 2 plants instead of 4 last time and 1 the first time (though 2 were planned the first time). I learned from my 4 plant grow last time that since I like to hand water, it was difficult to access the plants in the back of the tent, and a decent harvest from 2 plants should actually yield me plenty of bud for quite some time - at the very least past two other grow cycles. So, I want to try and keep things as simple as possible (KISS principle!) so I can spend time focusing on optimizing conditions for the plants so they are as fruitful as possible. For me, quality is more important than quantity.

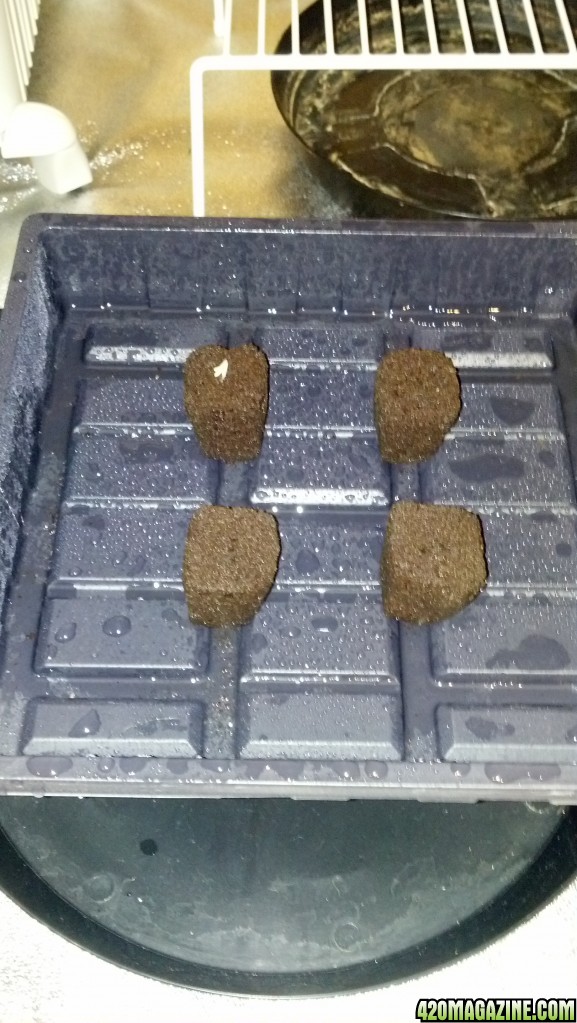
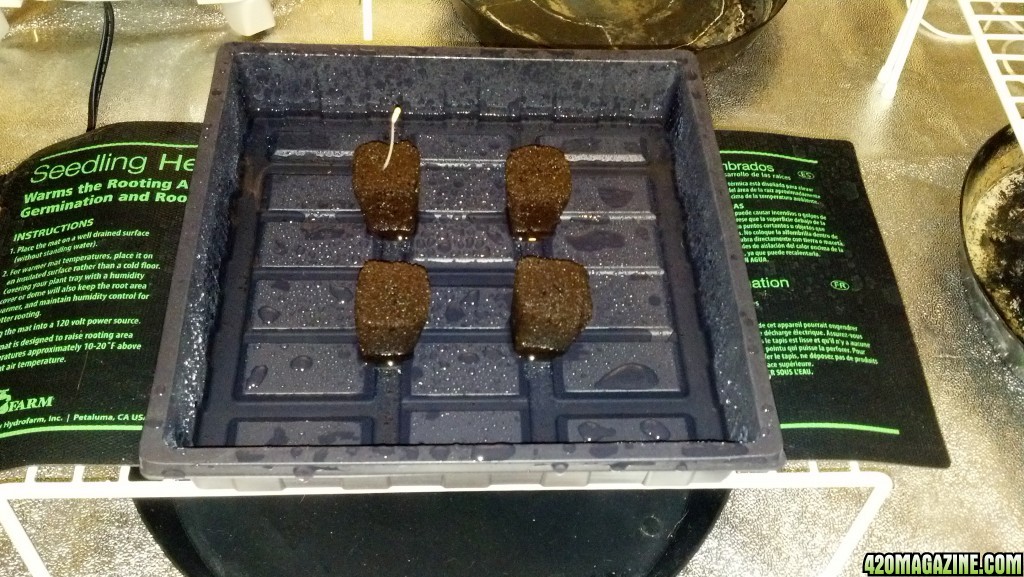
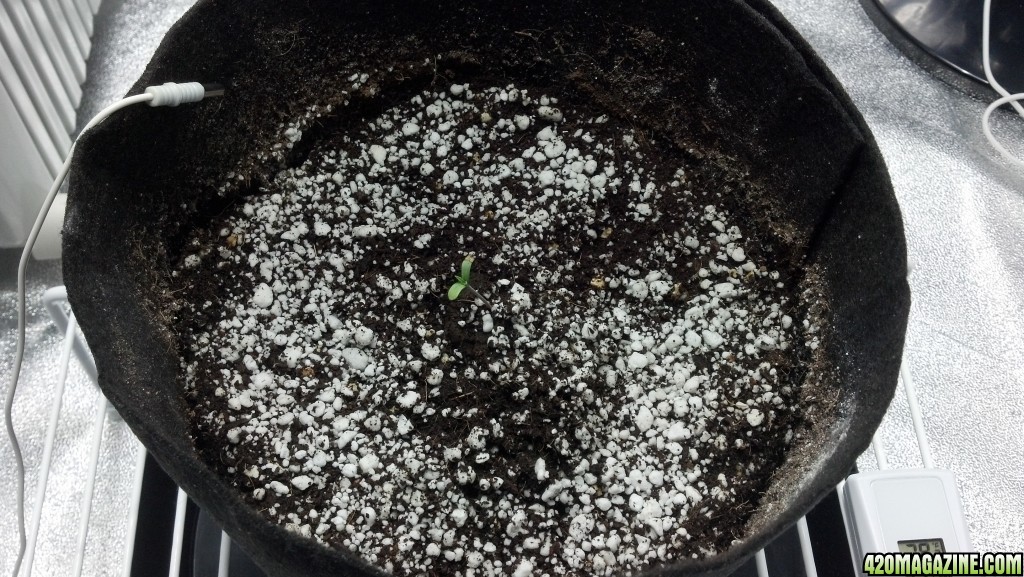
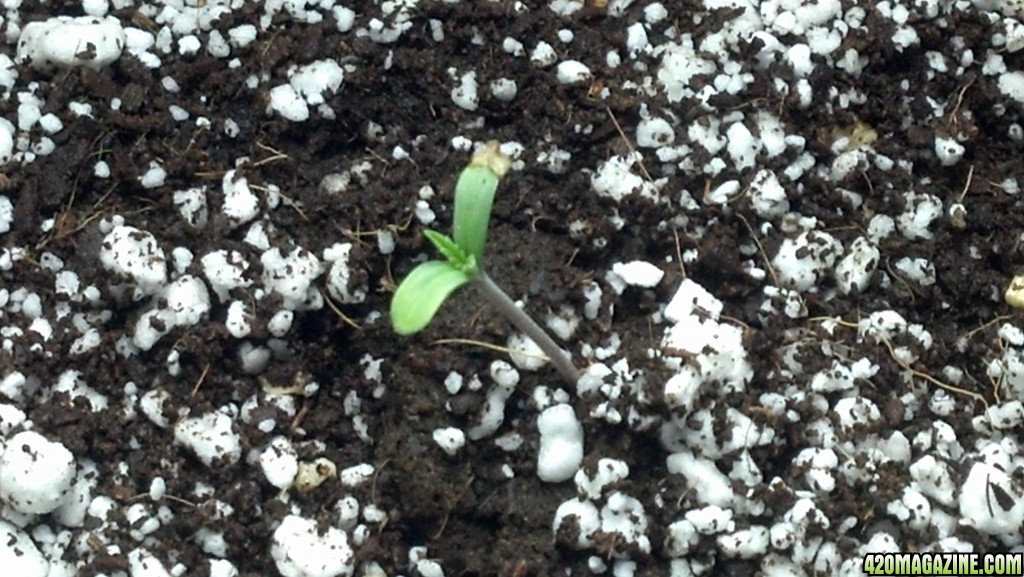
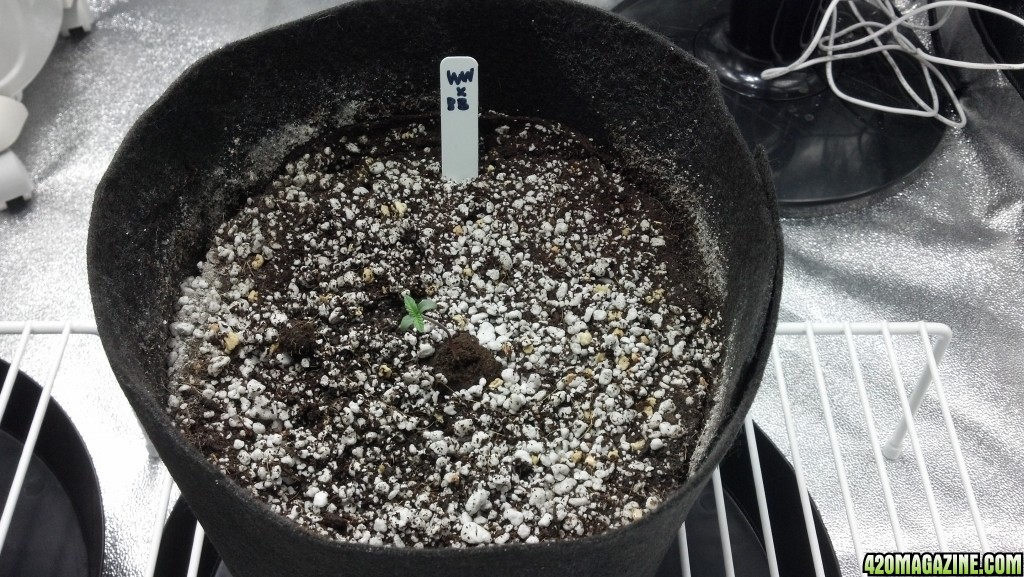
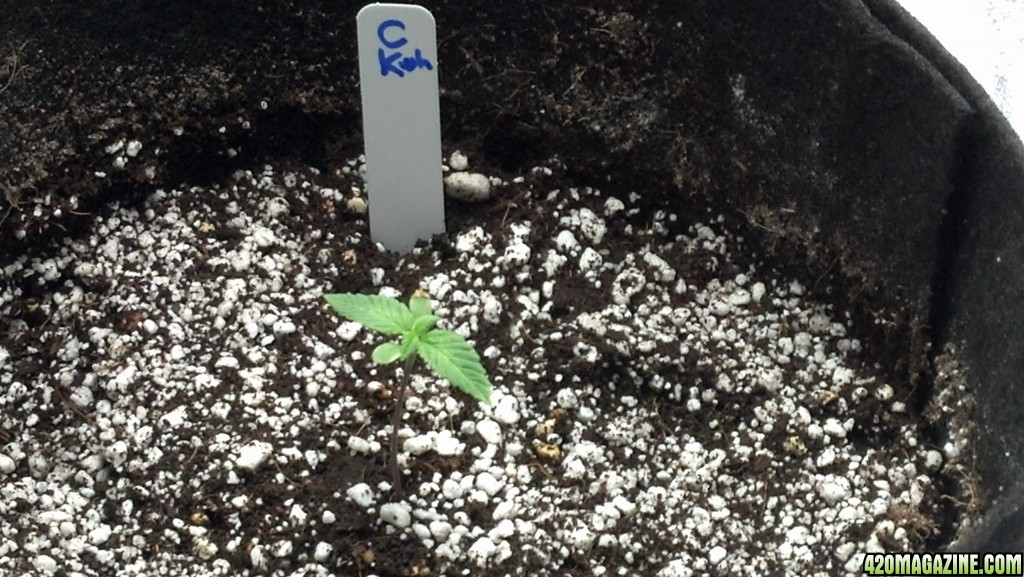
The seedlings will start in rapid rooter plugs and I'll plant 3 or 4 and transfer the 2 strongest looking ones into 1g smart pots filled with a mix of about 60% Botanicare Coco, 30% Perlite, and 10% Volcanic rock/ash. After 2-3 weeks I expect I'll want to transplant them into 5g or 7g smart pots. Any suggestions on when and/or how to transplant from one smart pot to another are appreciated! In the meantime, I'll look around for tips.

As far as training techniques go, I'm planning to start some LST early on and top and supercrop a bit as they mature. I'm hoping to create an even manifold of maybe 8 colas so they all are roughly the same distance from the light most of the time.

Any constructive comments or suggestions are greatly welcomed, especially if you have any direct experience with any of the things I mentioned. I will try to post as much as possible, but might be limited to once a week when life gets busy. Looking forward to hearing from some fellow growers.

Peace!
snack420
:volcano-smiley: :Namaste: :circle-of-love:
 
Looking forward to following your progress.
A few points to ponder...
. Seedling stage: take your time. The milestone to look for is when they stand on their own.
. Cube's first home: consider smart pot Transplanters. They come in 1 & 2-gal. If you anticipate a vigorious veg, you might be better off with a 2-gal transplanter from the get-go. Veg in this container all the way through. Skip the step-up.
. Use a velcro strap to keep the transplanter seams from opening. Use the rough side of the strap on the inside of the transplanter. The velcro strap will also make a more durable plant label.
. Take your time in veg--it's all about the veg. You're planning to LST, so I'm pretty sure I'm preaching to the choir on this one.
. One trick I've learned to help my veg while using coco is to add House & Garden's Rhizo Force (1tbs/gal of media) + Dr. C's Biophos (1/2 tsp per 2-gal container) + Plant Success Granular (1 tsp per 2 gal container). Why? To maximize nutrient uptake, ensure a disease-free and abundant root system, and reduce chances of deficiencies (never had any while using these amendments).
. A couple of days before flip, transplant from the 2 gal transplanter to your final container size.
. In the past I've switched from Cocos A&B in veg to H&G's Bio 1-Component for Soil in flower. It will require Ca supplementation. If you have Rhizo Force, just add a bit to your final transplant mix, there's enough Ca in the granules to support a flowering. Or add Cutting Edge's Plant Amp instead. For a great finish, consider enzyme, kelp & Sugaree the last two weeks; a "passive flush". Enzymes break old roots and make rootborne mineral deposits now more available for uptake, thus reducing the need to base-feed. Kelp has cytokinins needed for bud tightening and K & S for ripening, and Sugaree helps immensely with flavor. Try it on one plant--it will become your "where did you get this?" stash.

Best of luck; keep us posted!
 
Hey Cilantrillo, thanks for sharing these tips!

I thought I saw some smart pot transplanters and definitely will be checking those out, as I do want to try and ensure a stress-less transplant, at least as much as possible. Also, I agree that veg is going to be very important in terms of building a solid structure and foundation before flipping into flower. My goal is to get the plant trained in veg to the point where it has multiple colas of similar length so they can all get great light. I'll be looking into the other supplements and nutrients you mentioned too - sounds very interesting!

If you don't mind, I might want to ask some questions as I get closer to veg in the coming weeks...

:thanks:
 
Well, things have been moving a little slower than I had hoped. I planted four seeds 5 days ago in rapid rooters and so far only one has sprouted. The rooters are in a plastic tray covered with a humidity dome most of the time and I've been keeping the temps mostly between 68 and 82 F. The RH has been mostly between 40-85%. I'm using a small humidifier to try and keep it on the high side since seedlings like that.

I have read and heard that rapid rooters will often take longer than other methods such as the paper towel method. If I don't see sprouts in the next day or two from the others, I may pull the rooters carefully to inspect the seeds to see if they've broken or seem like they aren't viable. Supposedly it can take up to 10 days to sprout, so I guess I should be more patient. My first grow I seem to recall them sprouting after 3-4 days, though only one survived. With my second grow I started with clones, so I guess it's been a good couple of years since I had to go through germination phase.

Here are some pics from day 5:

morning:
day5-morning-first-seedling.jpg


evening:
day5-evening-first-seedling.jpg
 
. You might want to keep Temps below 78F. If the mat has no thermostat, look for a warm spot on top of your refrigerator (If it's an older model) and set the tray there.
. Keep the dome cracked just a bit
(These two points ts are to prevent rot)

. Since you're growing in coco, you might have better results germinating in moist paper towel and then transferring the germinated seedling to a solo cup with holes, then to wherever container you wanna veg in. This is done so that you might get a better root system from the get-go. Frankly, I only use cubes if i'm cloning, but this is more a preference than a rule. It's an alternative.

Good luck; keep us updated!

"Argument is sugar, and the rest of us are flies"
-Richard Wald
 
What is yellow stickies.
Thank you

Sent from my SCH-R530X using 420
They're like fly paper but for gnats and aphids (yellow) or thrips (blue). The color attacts the corresponding pest. Although they work well by trapping adult gnats, it's more of an assessment tool to let you know how big the problem might be. They work best if you also target the larva in the soil with one of the aforementioned methods.

You can find them pretty much anywhere.
 
You could try small rockwool plugs in a heated propagator just to get em going, then pop em into the media in pots you want to grow in, its a pretty easy way to get em going and you can change the media without too much disturbance to the seedlings.

Gas lantern is a good way to veg, I've tried it a couple times now because it saves on the bills and the plants actually look bigger healthier and well rested, some people use a separate light to do the single hour after 5.5 hours dark because it saves the ballast on your light, some even use a weaker light but I've found the light ballast can take the switching and keep it all on the same 400w halide light.

Thanks to Cilantrillo for the good advice too.

Red.
 
Yeah for early veg (right after pop) I use a Hydrofarm Jump Start on my fridge. Not promoting Hydrofarm over any other brand, it's just that I haven't seen any other distributor market a similar product yet. Smaller model is 27 watts, fits a tray, and lasts a lifetime. I've had mine for 7 years already and it's still like new.

My only difficulty has always been when seedlings neck out--that stage between seed pop and stem establishment. They're so finicky at that point! I end up using popsicle sticks and loose velcro straps to keep them from collapsing under their own height. Even when I watch my nitrogen, some varieties would tend to elongate. Occupational hazards... That's why I suggested the light system, so they stay compact from the get-go. Finicky, finicky! Too much water or humidity? Damping-off. Too dry? They dry out amd die. If I inoculate with mycorrhizae too early, gnats lay eggs and the larva mess up my roots. So it's a very delicate stage where one must do just enough, but not too much.
To ensure having enough specimens from the very beginning, I always germinate 30% more of what I'll need. Sounds amateurish, but as they grow, one can pick and choose the best individuals. This is especially useful when you know a strain tends to have two or more phenos--you have better chances of landing the one you're after, and work on stabilizing it, if that's something you wanna pursue. When seeds are limited, I tag every successful seedling, over-veg the first run, and clone them before flowering. Whatever's male gets tossed (unless I'm doing a breeding project--another story for another time), and I have plenty of healthy femmes for the rest of the year or until I decide to grow another variety. Mothers are picked from first batch of clones and not from the plant from seed. This might be contrary to general practice, but assures a timely first harvest and produces future clones with minimal generic drift.
But i digress...again.

Good luck on the next phase! :thumb:
 
Hey Cilantrillo, thanks for sharing some great info. You clearly have a lot more experience and I appreciate your tips! It does seem like the germination stage is very finicky and I'd like to get a working system down that I can rely on time and time again.

My seeds have been struggling to sprout and I think I may have overcomplicated things trying to get the temp and RH just right, and as a result, I think things were either too humid at times, or too dry at other time, and some of the rapid rooters have dried out. I did have one Critical Kush seed sprout and I've transplanted the rapid router plug into a 2g smart pot tranplanter. The medium is comprised of Botanicare Coco Coir, Perlite, and some Volcanic ash. Unfortunately, I forgot to add a little Great White when transplanting the rapid rooter into the smart pot :-(

2016-04-09_19-46-49_189.jpg


2016-04-09_19-46-38_570.jpg


2016-04-09_19-47-02_604.jpg


Yesterday I read XLR8's post on germinating in rapid rooters and am going to try following that general method with two additional seed strains - Blue Cheese (also from Barney's Farm) and WWxBB (not sure of the breeder but the seeds came from Herbie's). So far, I've soaked two rapid rooters over night in tap water (starting ppm ~75) with H&G Roots Excelurator (2 ml/g) and Hygrozyme (2 ml/g). I've then brought the pH down to approximately 5.8. I used sterilized tweezers to put each seed into a shot glass full of distilled water and will let them soak for a few hours. Later I plan to gently place the seeds into the rapid rooters, using the sterilized tweezers, and covering the plastic cups they are in with plastic wrap for a couple of days. They'll stay in a dark closet and with a little luck, hopefully they will pop in a few days.

Sadly, the rest of my Critical Kush seeds didn't pop, so that's why I'm trying a couple of other Indica-dominant strains that I happen to have on hand. I'll let you all know how it goes... :Namaste:

As always, any comments or constructive criticism are greatly appreciated.

:thanks:
 
Hey, no biggie if you didn't add the inoculant. In fact, I'm in the habit of waiting until their stems harden before I start adding micorrhyzae. You can add some to your nutrient later and top-feed.

I'd try germinating them in paper towel and then propagating them in cups full of coco--roots go crazy. Besides, the coco won't dry up as quickly as the cubes will, and as a medium, coco is very clean. Sometimes when the radicle goes through the cube, it snaps at the tip. Injury of an emerging radicle has been associated with an increase in incidence of males and herms on a batch. Unlike animals, dioecious plants do have the ability to switch gender if there is seedling trauma early in the game. Because of this, I'm partial to germinating in loose media first (coco), and save cubes for clones, when gender is already well-established. Besides, coco has trichoderma, which works fantastically well in promoting root health when we use humics, kelps, or other organics. Just a thought ;-)

Here's a scan of an Urban Garden Magazine article on seed germination. It helped me a great deal to sharpen my popagation skills. Some tips, like adding Superthrive and sea kelp, can be omitted, really. All you need is plain water unless you're growing other plant seeds like guavas, etc, which might benefit from a little extra auxin (superthrive amd kepl are auxin-rich). The rest is pretty straightforward. The photos are from the author's social media page. It took a bit of digging to find them but I'm glad they're still out there because my scans of these pages didn't go through. Check it out...

12985419_10205715211674004_8086600982492457519_n.jpg


13000342_10205715211754006_7055890141134124831_n.jpg


12961533_10205715212074014_8960207034809105889_n.jpg


13001177_10205715212274019_8562977694242744311_n.jpg


12990978_10205715212474024_8644648318456773222_n.jpg


Holy shit, it worked! :yikes:

Well, there it is! :thumb:

* personal note: on that last page, step 6: it is best to leave the lid slightly ajar. It prevents sweltering in the container which helps prevent seed rot. I've learned this the hard way. It might require more monitoring and misting the paper towel, but the extra work is worth it. If the radicle goes through the paper towel, simply cut around with scissors. A few paper towel fibers aren't gonna mess things up.
That's pretty much all I have; hope it helps.
 
Hi Cilantrillo, that's a great article you shared! I had a little trouble reading the bottom of each page because of the green seed background, but I got most of the info. Very interesting stuff for sure.

So, I've been experimenting with germinating seeds and was able to get a couple more germinated in rapid rooters: one White Widow / Big Bud cross and one Blue Cheese, though the BC hasn't shed its seed sheath yet. Since I have a bunch of blue dream seeds from my first hermied plant, I decided to put three of those in a wet folded over paper towel and placed that on a plate which I covered with plastic wrap and poked a couple of smalls holes using a toothpick. I put those in 6 days ago and honestly forgot about them until now, but I just checked and all three germinated. So, next time I think I will take that suggestion and sprout in a paper towel and then transfer into a solo cup or something similarly sized.

Since I really only want to grow two plants this time, and the Critical Kush, which was my main goal is doing alright, and the WWxBB sprout is looking alright too, I'm going with those two. Hopefully they'll both work out OK!

One little snag I ran into though was when I was mixing up a batch of nutrients. I use my normal tap water, mixed with about 2ml/g of H2O2 and left for 12-24 hours. Then, I added 2ml/g of Roots Excelurator, mixed, then 2ml/g of Hygrozyme, mixed, and finally, 1 tsp/2 gal of Great White and mixed it all up. The snag was that I think my expensive pH meter is on the fritz :-( It's a Hanna unit and cost about $200. Anyway, I noticed recently that it wasn't properly working on a pH 7.0 solution. The meter was bouncing around and giving me crazy figures. This is a brand new bottle of pH 7.0, so I was pretty sure the solution was fine. One issue was that the pH probe had dried out from not being used for a few months and I learned that I could revive it by dipping it into cleaning solution for about 5 minutes. I did so, but it still wasn't reporting 7.0 on the 7.0 solution correctly. So, I recalibrated it to 7.0, but then when I turned it off and on or removed it from the 7.0 solution and re-added it, it would show 7.4. I recalibrated a few times but am not confident in now because it is not being consistent. It was reading consistently in my nutrient solution though, so I thought it was fine. My nutrient solution was 7.4 before I pH'd it down to 5.8, but all of recalibration was sadly done AFTER I had mixed up and pH'd my nutrient solution, so if the pH meter really is calibrated correctly now, the nutrient solution is closer to 5.0 than 5.8 :-( I wasn't sure this was going to be a huge problem at this early stage since almost no nutes are being used, but I'm not sure. And I really didn't want to start from scratch mixing up a new batch, especially since I didn't have some tap water that had been sitting around for 12-24 hours. I do now though, so tomorrow I could mix up a new batch if necessary.

I do know that pH is very important over the life of the plant for proper feeding and nutrient uptake, so I am eager to get a fresh meter very soon. I do not, however, want to spend another $200 if I don't have to. I've been looking online a bit and see there are some decently rated pen-type units on Amazon in the $20 range. Are these really alright? Does anyone have experience with them? Thanks for any feedback on that!!!

And here are some pics of the two start sprouts...

2016-04-17_11-51-59_240.jpg

2016-04-17_11-52-08_964.jpg

2016-04-17_11-52-19_185.jpg

2016-04-17_11-52-35_181.jpg

2016-04-17_11-52-45_313.jpg


:thanks: for reading and any thoughts!
 
I'm probably gonna be the least popular guy in the classroom for this, but hey, I never was and as time proved, the joke was on my classmates. What comes next is not what one wants to hear, but what needs to be said...

. I wouldn't perpetuate anything that came out of a herm. Once a plant herms, there's no win/win--gene pool's fucked. Once hermed, it means that 50% of the seeds will be herms and 50% females (which will carry the herm trait further down the line). Essential oil production will NOT be optimal--the plant can get itself pregnant--no need to produce more sticky to retain pollen. It is a result of adaptation--blame Darwin. If the counterargument is "but I've grown killer plants out of seeds from herms, bro", my retort would be "have you grown it out of a seeds from plants that never hermed?" Relativity at play. Anything resulting from a herm I toss, UNLESS a flowering plant gifted me with one or two tiny seeds at the end of harvest. Those are usually XX selfed females. But a plant that hermed and gave way to many seeds....those seeds end up down the toilet. That's it on that issue--there really is no other way around it. In a grow room, there simply is no room allowed for a transgender bathroom. Also consider that pollen travels. I despise very few things, but amongst the ones I do is the outdoor grower who flowers herms without pulling them because their pollen will shit all over and ruin everyone else's genetic purity. But you're indoors, so I still love ya. Pull them out...
ok, jesting aside..

. H2O2 will kill the beneficials in Great White and Roots Excelurator. Don't use it if you're using either one of those two. Use H2O2 only if you're running into an infection or if you want to oxygenate a poorly-aerated, sterile grow. But to use H2O2 with Roots Excelurator or Great White undoes the goodness these products have to offer.

. pH probe needs to stay wet at all times and with a pH solution. The optimal thing to store it in would be a KCl storage solution (offered by Bluelab) or pH Calibrating solution at 4.0pH on the dot. Notice that KCl is alkaline and the 4.0 calibrating solution is acidic. Why does it need to be extreme? Ion migration--ions inside your probe bulb would leave the bulb through the glass and out into a storage solution like plain or RO water. It's osmosis--not my rule, blame Niels Bohr for that one. How can it leave the solid glass? Because although atoms are in bond, there is a lot of empty space between the electron bonds that keep matter together. They do get through. Dipping a damaged probe in cleaning solution will NOT redo all the damage done by having it dry up: it's a myth. Sorry to be brutal, but reality often is. Solution? Time to replace the pH probe and get a storage solution. I recommend the Bluelab solution; it's kept my one-year-warranty probe up and running for four years straight, and as accurate as the day I bought it.

. My recommendation for a good meter would be the Bluelab Combo Meter. Now, I can already hear the groans in the room because it's expensive. My reply: so what? You get what you pay for. Why Bluelab? Consider this:
1. The Meter has 3 year warranty.
2. The pH probe has a 1 year warranty. If it goes bad, disconnect and buy another one. Mine, as I mentioned, is four years old and properly maintained and I've had no need of changing it...or the meter for that matter
3. The TDS probe is like a bluelab truncheon. That shit will last a lifetime. I know store owners who have a 7 year old truncheon and it still measures right on. The TDS PROBE IN THE COMBO METER IS AS HIGH-quality as a Bluelab TDS truncheon, so, why not go full combo?

If you want a cheap alternative for a TDS pen, I recommend an H-M TDS-1 pen. I cannot recommend a pH pen equivalent from H-M (or any other brand) and I will certainly NOT recommend the cheaper Bluelab pens because they'll last only a year and that's it. Why spend $200 for a year's worth of measuring accuracy when you can pay a bit more and get a combo meter than when properly maintained can last you longer than the stated warranty?
(I don't work for Bluelab. Fuck no, lol. But they do make a quality product. That, I cannot deny.)

If one must go el cheapo for pH measuring, though, there's nothing better than the General Hydroponics pH liquid test kit. $15. Lasts you about a year of constant measuring. "6 is sweet; yellow is mellow" will be the phrase to recall when using this alternative. Clear, golden yellow, that is. Always wash the little test cylinder with soapy water and a bottle brush right after testing, then triple-rinse with plain water (I was a QC lab tech at one point in my life--old habits die hard). Dry with the cap off. This is important! Any humidity and biological residue will alter the next test's values, especially if what you're testing (or have teated) has Great White or any organics in it. Microbes encapsulate when they dry off, that's one. Furthermore, bacteria grow in humidity, encapsulate when it's dry, and secrete enzymes that alter pH readings. Another reason why cleanliness is next to godliness.

So...um, yeah, those are the basic points I wanted to share with you and everyone else, and there really isn't much room in them for dissent. It is what it is. If my tone is a bit more "yeah yeah yeah", I meant nothing by it, really--it's Anheuser Busch's fault. (Boy, I'm shifting blame left and right today, aren't I? Carefree spring weekend here, and the grill is hot.)

I hope this helps. I'm not in the habit of saying something without offering a solution, but when it comes to genetics, I'm a purist and think herms have nothing to offer. I stopped growing a Burmese Kush x Thai cross once, precisely because of the Thai's innate proclivity to herming. That Blue Dream is a good variety, sure! But if it hermed, consider a next-run finish at 720ppm or les...or switch to growing Cannatonic--that variety can usually take a higher TDS at finish and the strength is just phenomenally strong. There's always alternatives...on the pH probe maintenance issue, there's little counterargument--an erratic reading is typically a sign of a faulty probe. If the probe dried up and the machine reading is all over the place, that's 100% chance that it's busted. Get a liquid pH test kit and start saving for the high-tech stuff. Or stay solid-state with the liquid test. Nothing wrong with that in my book. I can't offer an opinion on a budget pH probe because they did not perform to my expectations and I'd rather have someone protest at me for suggesting an expensive item than having them protest because I suggested a shitty item. And as far as no H2O2 with organic additives...H2O2 is an oxidizing agent. It does not discriminate between good or bad microbes, aerobic or anaerobic--it fries everything. It's meant to do that. So no mixey with organickey.

Now...about those beautiful babies you've got going there: they look beautiful! Keep up the good work and let them crowd the pot with roots real good. Tease them into seeking moisture by not overwatering. At this early in the game, they ought to--they'll grow stronger. As more foliage develops, more waterings will be needed. They'll let ya know.
And consider solo cups with straight coco for the next seed-popping session once they're out of the paper towel. It's just gentler on the roots than having them go through the pores of a cube. Cubes for cloning, coco for "from seed". Just a thought.

Looking real good--real good! Keep it up :thumb:

Best of growing success.
 
Hey Cilantrillo,

You're becoming quite the wealth of info for guiding my journal and future endeavors! :) Much appreciated!!

As far as the herm seeds go, I can see the logic and sounds like you're probably right about that. I had read a few people say I was lucky when my plant hermed because I would be graced with fem seeds, but I was a little skeptical. Anyway, I wasn't really planning to use those seeds for any real plants, at least not in the near term. I was mostly keeping them just in case, and it turns out they make an excellent (and cheap) way to experiment with different germinating techniques. I can simply throw them away after my test is done, which I did in the case of the paper towel test. I appreciate the insight on the genetics though. That does sound reasonable and vaguely brings back memories of Darwinian science in school.

For the H2O2, I do realize it will kill beneficials (and really everything else), but my understanding is that the H2O2 dissolves and evaporates within 12 hours, and I never use the water with the H2O2 in it before that time. I only use it to kill any organisms that might be in the water, but maybe that isn't necessary? I can certainly plan to stop that part of nutrient prep cycle, but I am in the habit of leaving the tap water stand for 12-24 hours anyway to let any excess chlorine evaporate. I guess I'll stop with the H2O2 since I didn't use it for my first grow. That one hermied, but I'm fairly sure that was due to stress and/or light leaks and not water issues.

Sucks that my pH probe is dead. So no way to revive it at all, huh? I did actually have the probe sitting in a storage solution in the cap, but it appears to have still dried out over time. I guess I should've been checking it weekly or something? Maybe a better way to store the probe is to let it sit in a shot glass or storage solution, instead of using the cap which can leak and maybe evaporate too quickly?

I ordered a cheapie (about $20 pH meter online) that I can at least use while I think about getting a more expensive and better quality unit. I really need something fast, so hopefully this will be fine for now. This one gets great reviews by many people, so we'll see how my experience goes. I guess at $20, even if it lasts only one grow cycle, I'll be happy. I have heard great things about BlueLab's equipment - just not sure I can stomach the cost at this time, though that being said, I do recognize the great importance of accurate pH for our nutrients! I will save up and give it some serious thought, especially after seeing how this cheapie meter performs.

As far as the GH liquid test kit goes, I won't be going down that road again. I started with that a couple of years ago and I just don't think it's accurate enough for my liking. Plus, and this is probably just me, but I had some trouble matching the liquid color to the precise color on the bottle. So, all I could be sure was that I was within +/- 1.0 units, which is of course a much bigger margin than we want. Can't argue with the price though.

Thanks again for your comments and perspective. It's great to hear!

:Namaste:
 
Hi all :yummy:

Since my Blue Cheese seed sprouted and looked nice, I decided to transplant it into a 1g smart pot and join it with the two other sprouts (in the 2g smart pots - Critical Kush and WWxBB). Critical Kush was really the strain I was initially after, but this grow is really about trying to generate some Indica-dominant buds, so I'm fine with having some other similar strains of that ilk.

Currently, I'm still using lighting of 18/6, but I plan to switch to a GLR routine of 12/5.5/1/5.5 soon as I want to take advantage of the cost savings in electricity, as well as some benefits some folks have claimed using that light regimen.

Here's the gang at the moment...

2016-04-19_08-17-27_327.jpg


Next, I need to start thinking about when will be the best time to start LST, and also when to do some topping...
 
:thumb: subbed how did your last critical kush go? i have some going right now as well 4 weeks into 12/12

Sounds great dude, I'll be curious to hear how flowering goes. Is that in your 2nd Organic Indoor Grow Journal?

Sorry, I don't have any experience with Critical Kush yet. This will be my first attempt at growing it, but I've heard and read great reviews of the strain.

:thumb:
 
Back
Top Bottom