Lord Hydros
New Member
Hello! I would like to share with everyone a method of hang dry and cure that involves many,many parts and expense (and tons of work to set-up but afterwards almost no work at all) yet guarantees a perfect dry and cure regardless of weather. With this method, there is no reason to even look at your drying room for months after you hung the ladies up to dry. They will dry to the RH% that you dial in and when the drying stage is over, the closet will initiate a curing mode and keep the RH% of the closet constant without costing you more than 5 watts of electricity!! Dry and cure, no burp, no touch and everything is totally enclosed and odor tight.
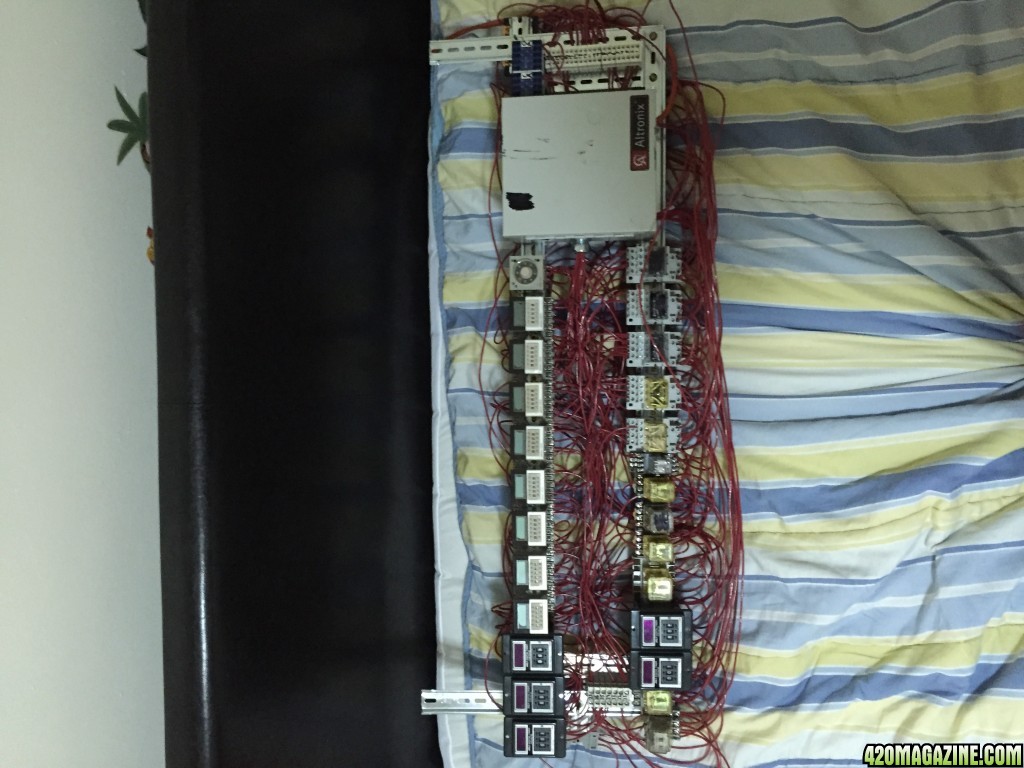
You must be (at the very least) something close to a Master Electrician just to understand the electrical explanation of the controller (sorry...I'll give you the process sequence but I won't draw wiring schematics because if you don't understand how to manipulate time delay relays and small electrical contacts according to the demand of a specific process than you shouldn't be building this regardless of weather or not I provide a spoon fed dictator-ial) and you must be willing to spend thousands for the parts. You must have years of experience in electrical controls involving ice cube relays and you should also know of, worked with and also know the difference between all the different types of contact used for motor control and power applications.
It also helps to have a very long attention span and the patience of a saint because this is not easy to explain how to build out. I will give you a short explanation of the parts (NOTE: True players of the game are able to build this just from the "short" list you are about to read. Those who are not worthy will become angry that they have not seen any pics.
SHORT EXPLANATION:
1.) 4' wide x 8' long x 6' high closet built from 3 layers of 3/4" polystyrene (glued together) with aluminum/kraft paper backed sauna vapor barrier glued to the inside of the closet. Silicone and Nashua 324A tape to perfectly seal the seams and make the entire inside of the closet aluminum faced (no paper exposed to the inside of the closet whatsoever) and impervious to the ambient(outside) moisture.
2a.) If you might ever need heat , you zig zag a standard 1/2" ID radiant heat (from a house boiler) pex tube through a wood platform (the wood is not coming into environmental contact with the air inside the closet). The wood platform is made from 2" x 4" and 4' x 8' x 1/2" flakeboard and of course it is the support for the floor you will walk on. The radiant heat is done with a TACO circulator , a zone valve and a very expensive OMEGA CNITH thermostat/humidistat which has a super fast response time.
2b.) If you need cooling, get a small mini split AC and just use the remote as a thermostat. If you can't find a mini split AC that turns back on automatically after a power failure, you simply modify it so it will. If you can't do that, please don't attempt this or even ask me how. Thanks. Just remember to take into account that an AC is also a dehumidifier, so you want to calculate the rate of air moisture removal (from the AC) against a temperature curve (meaning days of experimentation with a humidifier and an AC whilst fluctuating the ambient (outside the box but not outside the house) temp and the environmental (inside the closet) temps.
3.) You will empty a can filter 100 or 125 (use the carbon for a re-fill on a spent filter or just use a spent filter housing) and you will fill it with roughly 120 pounds of white (non-indicating) 4 x 8 mesh silica gel. You'll spend over $300 bucks on the silica gel alone if you do it this way but you can regenerate it for many years to come. You will fit your "Variable Speed Dehumidifier" with a tiny 4" HO can fan or something close to that. Build a separate yet attached chamber for this drying filter. That chamber has very interesting 100% fully closing dampers that isolate the silica gel (which would utterly destroy your product if left in environmental contact with the closet air for too long) when it needs to be taken out of the equation. These dampers must be built by you. They don't exist pre-packaged. These dampers are the reason why this method works. Fully closing dampers that also allow precision control of airflow volume.
4.) The 2 dampers that control the volume of airflow through the desiccator (or Variable Speed Dehumidifier) are each a coupling of 6" stroke 24 vdc linear actuator (about 200 lbs. force) and a 4" round steel duct damper with a Belimo LMB24-3-T actuator. Use the appropriate diameter of DOM shaft to adapt the damper vane shaft to the Belimo actuator. So, if you build these dampers you have a typical automatic round damper (the kind that doesn't simply open and close but precisely controls the amount of airflow) with a linear actuator in front of the hole. The linear actuator has a premium neoprene foam sheet (1" thick) disc sandwiched between two thin discs of HDPE that act as a plug for the desiccator air intake and output holes. The linear actuators allow total shutoff of airflow, to prevent over desiccating, to pace the desiccation slowly over time and to terminate desiccation when you reach (for example) 62% RH (for Boveda users or even Kitty Litter users for that matter). The linear actuator cannot control airflow volume by itself, that's why you need an ARD with a Belimo actuator.
5.) An 18" stroke 24vdc linear actuator will be hung from the ceiling and it will hold down an 18" diameter galvanized steel "cover" that seals to the floor of the closet. When it detracts, it will pull up the cover and expose 60lbs. of 62% RH calibrated Kitty Litter Pearls. This happens after about 10 days . This happens after you have slowly dried with your silica gel fan driven desiccator which was calibrated to turn on and off with a repeat cycle timer (regardless of the 2- OMEGA CNITH humidistats making or breaking control power at that moment) so that you would slowly desiccate with a room air RH of 50% over the course of 10 days +/- a day.
When the process is done your stuff is held in stasis exactly where you want it. The material list is quite scary. Although, it beats buying a Stability Room, which is morbidly out of reach of anybody.
LIST OF MATERIALS (for a 4' x 8' closet that is the actual missing link in true growing automation that saves you the trouble of having to be in the same country as your drying room while your stuff is actually drying):
44- 3/4" thick 4' x 8' sheets of mylar faced white polystyrene building insulation
18- Cans of 3M 78 Adhesive spray (24 oz. cans)
4-Rolls (60yd length) of Nashua 324A tape
20- Tubes of GE kitchen and Bath (10.1 oz.) silicone
2-rolls of Aluminum/Kraft backed sauna vapor barrier (approx. 500sf)
3-55lb. bags of white (non-indicating) 4 x 8 mesh silica gel (regenerable)
1-Can Filter 125 (or just the housing, you don't need the carbon) w/ 4" flange
1- 4" HO Can Fan ( or equivalent cfm/static pressure capability )
1-4' x 8' sheet of 1/2" thick flake board
5- 2" x 4" x 8' dry studs
As much 1/2" pex tubing as it would take to zig zag underneath the wood platform form the boiler and back again(if you need heat)
1-TACO circulator (if you need heat)
1- Honeywell (or TACO) zone valve (if you need heat)
1- small mini split ac (if you need cooling)
1-ultrasonic humidifier (only used to calibrate the Kitty Litter Pearls to your desired final curing RH target. 2- pairs of linear actuator mounting brackets
3- 6"stroke 24 vdc linear actuators
1-18"stroke 24vdc linear actuator
1- 24vdc/20 amp (output) regulated power supply , 90-240 vac input
2-OMEGA CNITH thermostat/humidistats (get the 33's with the simple relay outputs, these two will cost about $1200.
2-WAAAAAYYYYY less expensive humidistat controllers (you still need the 2 OMEGAS besides these) the black one with the orange clips and the 3% of the full scale accuracy. Use these 2 to detect when the closet is for example 62% RH. When you seal out the desiccator , after a time delay for the room to stabilize these 2 humidistats (they are both set at the same RH, simply use 2 for redundancy) will sense when you are done desiccating. They cost about $25 each.
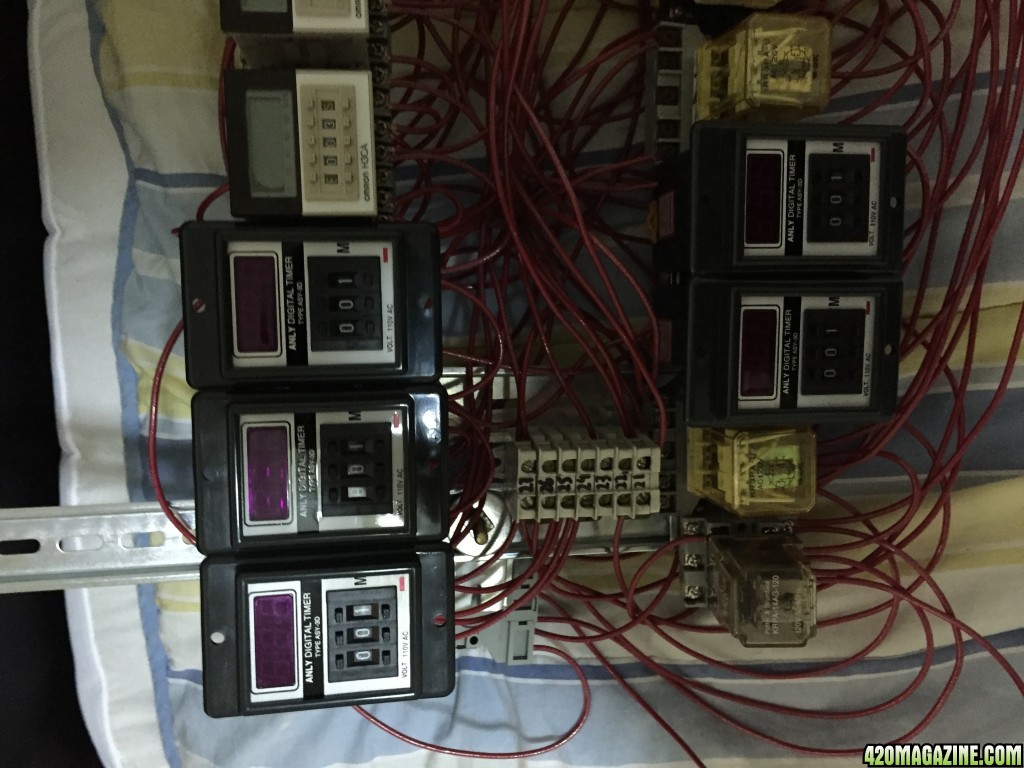
4-OMRON H3CA's (the ones that plug into an 11 pin octal relay socket)
2-IDEC or OMRON repeat cycle timers
A bunch of 10 amp general purpose 110vac ice cube relays (the contacts can't actually handle 10 amps reliably. If you don't know what I'm talking about discontinue reading)
At least one 24 vdc ice cube relay ( ANSI 27 for the 24 vdc power supply if you want to have another one for a redundant standby)
At least one 24 vac ice cube relay (ANSI 27 for the Belimo damper power supply if you chose not to use 24 vdc to power it)
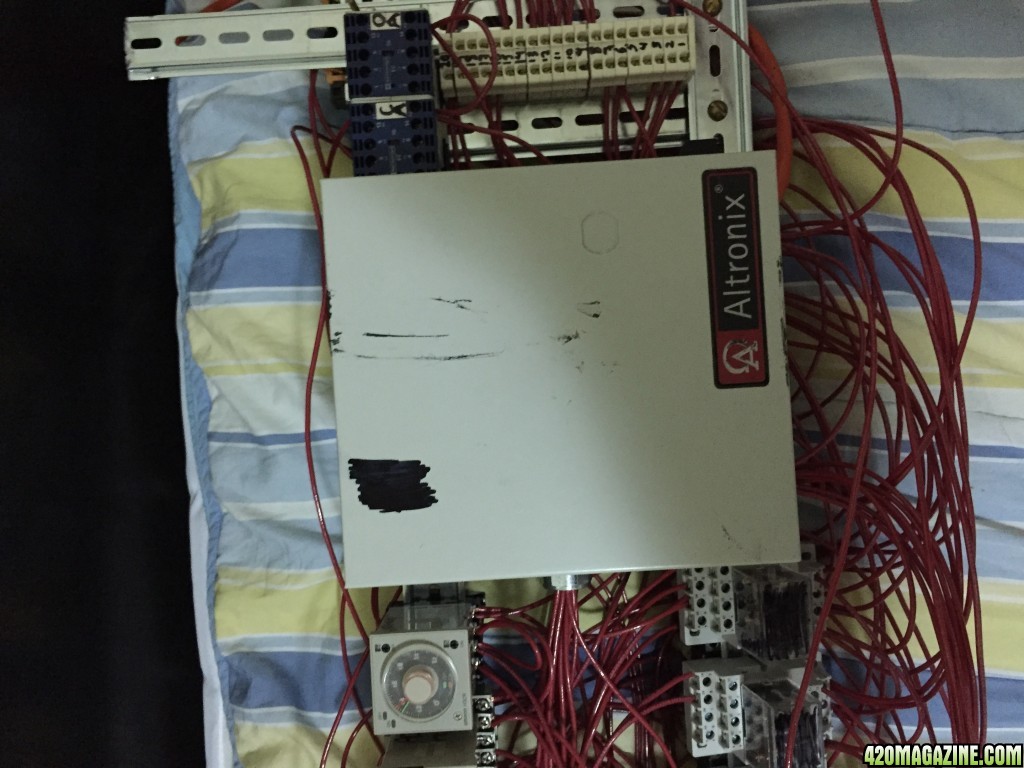
1-4 output 24 vac (output) Altronix fused regulated power supply
3-4" round honeywell ARD's or equivalent round galvanized steel duct dampers of 4" diameter
3- Belimo LMB24-3-T actuators
1-Foot length of DOM shaft to fabricate the Belimo actuator adaptor shafts. Or just spend too much on the adapters that are ready made. The Inner Diameter of the DOM shaft is determined by the actual Outer diameter of you damper vane axle (shaft).
3- Hex (allen key) head 2" long black 1/4-20 machine screws
9- 2" long stainless steel 1/4-20 machine screws with nuts and lock washers
1-small piece (about 12" x 12" or less) of 1" thick premium neoprene foam rubber sheet
1- small piece of thin HDPE
Last but not least... The patience of a saint because I will never tell you how to make this work. I gave you more than enough info already to create an easily patent pending process controller and enclosure that would make you a millionaire no matter which way you choose to use it, either manufacturing it to sell to other growers or just by using it for what it does... eliminating all the work of drying and curing. Those last 2 stages are negligible factors of the process because of this.
The reason why I am putting this out there is because I actually feel bad for people who have a hard time with drying and curing. It's gotta suck to lose the pungency (and sometimes even the potency) because the final step wasn't controlled. Also, with this you can go on a 3 month long (maybe even much longer) vacation during and long after the dry and cure process and come back to over the top labor free perfection every time. Let's call this a cannabis stability room. I will only answer the questions of those who can prove that they are electrical troubleshooting think tanks. If I'm approached by a like minded individual I will slowly but surely guide that person through the process of building it and I will not need to draw that person any wiring schematics. He should know how to wire it based on the actual process sequence:
1.) Energize the controller. It starts out with all 4 process dampers closed (one of the dampers is to allow an ultrasonic humidifier to calibrate the kitty litter and that damper is only opened and closed before the actual process of drying , that is the 4th damper and isn't used for the process, only for preparation of the kitty litter humidity content) During this time the humidity stabilizes to around 100% if filled to capacity or even somewhat less (capacity is around 8 lbs. dry weight harvest) than full . After the 5 minute time delay if the RH is 62% (or whatever you set the curing RH% to be) the controller will go into CURING MODE and simply lift up the kitty litter lid and allow a 62% RH curing environment. If the RH is above 62% then the desiccator fan and damper/linear actuator combos will fully open. The intake damper will slowly inch more and more closed (no fan speed control necessary ) until there is a steady 50% RH environment with the fan running. The fan cycles on and off as much as possible to make the drying process last about 10 days ( when the fan is off the linear actuators will plug the intake and output dampers of the desiccator shut) and that cycling is regardless of the 2 humidistats. One of the outputs on one of the OMEGA controllers will control the radiant underfloor heating. One of the outputs on the other OMEGA will allow the mini split AC to function and be controlled by its remote control. One of the outputs on one of the OMEGA controllers will raise humidity (I like a 50% RH setpoint for drying room air) by inching closed the intake damper ( slowly with a repeat cycle time delay), the other will do the opposite.
2.) This 55 minute desiccation cycle is only repeated if during the 5 minute "dehumidifier shutoff" cycle the RH is still above the setpoint for curing.
You must be (at the very least) something close to a Master Electrician just to understand the electrical explanation of the controller (sorry...I'll give you the process sequence but I won't draw wiring schematics because if you don't understand how to manipulate time delay relays and small electrical contacts according to the demand of a specific process than you shouldn't be building this regardless of weather or not I provide a spoon fed dictator-ial) and you must be willing to spend thousands for the parts. You must have years of experience in electrical controls involving ice cube relays and you should also know of, worked with and also know the difference between all the different types of contact used for motor control and power applications.
It also helps to have a very long attention span and the patience of a saint because this is not easy to explain how to build out. I will give you a short explanation of the parts (NOTE: True players of the game are able to build this just from the "short" list you are about to read. Those who are not worthy will become angry that they have not seen any pics.
SHORT EXPLANATION:
1.) 4' wide x 8' long x 6' high closet built from 3 layers of 3/4" polystyrene (glued together) with aluminum/kraft paper backed sauna vapor barrier glued to the inside of the closet. Silicone and Nashua 324A tape to perfectly seal the seams and make the entire inside of the closet aluminum faced (no paper exposed to the inside of the closet whatsoever) and impervious to the ambient(outside) moisture.
2a.) If you might ever need heat , you zig zag a standard 1/2" ID radiant heat (from a house boiler) pex tube through a wood platform (the wood is not coming into environmental contact with the air inside the closet). The wood platform is made from 2" x 4" and 4' x 8' x 1/2" flakeboard and of course it is the support for the floor you will walk on. The radiant heat is done with a TACO circulator , a zone valve and a very expensive OMEGA CNITH thermostat/humidistat which has a super fast response time.
2b.) If you need cooling, get a small mini split AC and just use the remote as a thermostat. If you can't find a mini split AC that turns back on automatically after a power failure, you simply modify it so it will. If you can't do that, please don't attempt this or even ask me how. Thanks. Just remember to take into account that an AC is also a dehumidifier, so you want to calculate the rate of air moisture removal (from the AC) against a temperature curve (meaning days of experimentation with a humidifier and an AC whilst fluctuating the ambient (outside the box but not outside the house) temp and the environmental (inside the closet) temps.
3.) You will empty a can filter 100 or 125 (use the carbon for a re-fill on a spent filter or just use a spent filter housing) and you will fill it with roughly 120 pounds of white (non-indicating) 4 x 8 mesh silica gel. You'll spend over $300 bucks on the silica gel alone if you do it this way but you can regenerate it for many years to come. You will fit your "Variable Speed Dehumidifier" with a tiny 4" HO can fan or something close to that. Build a separate yet attached chamber for this drying filter. That chamber has very interesting 100% fully closing dampers that isolate the silica gel (which would utterly destroy your product if left in environmental contact with the closet air for too long) when it needs to be taken out of the equation. These dampers must be built by you. They don't exist pre-packaged. These dampers are the reason why this method works. Fully closing dampers that also allow precision control of airflow volume.
4.) The 2 dampers that control the volume of airflow through the desiccator (or Variable Speed Dehumidifier) are each a coupling of 6" stroke 24 vdc linear actuator (about 200 lbs. force) and a 4" round steel duct damper with a Belimo LMB24-3-T actuator. Use the appropriate diameter of DOM shaft to adapt the damper vane shaft to the Belimo actuator. So, if you build these dampers you have a typical automatic round damper (the kind that doesn't simply open and close but precisely controls the amount of airflow) with a linear actuator in front of the hole. The linear actuator has a premium neoprene foam sheet (1" thick) disc sandwiched between two thin discs of HDPE that act as a plug for the desiccator air intake and output holes. The linear actuators allow total shutoff of airflow, to prevent over desiccating, to pace the desiccation slowly over time and to terminate desiccation when you reach (for example) 62% RH (for Boveda users or even Kitty Litter users for that matter). The linear actuator cannot control airflow volume by itself, that's why you need an ARD with a Belimo actuator.
5.) An 18" stroke 24vdc linear actuator will be hung from the ceiling and it will hold down an 18" diameter galvanized steel "cover" that seals to the floor of the closet. When it detracts, it will pull up the cover and expose 60lbs. of 62% RH calibrated Kitty Litter Pearls. This happens after about 10 days . This happens after you have slowly dried with your silica gel fan driven desiccator which was calibrated to turn on and off with a repeat cycle timer (regardless of the 2- OMEGA CNITH humidistats making or breaking control power at that moment) so that you would slowly desiccate with a room air RH of 50% over the course of 10 days +/- a day.
When the process is done your stuff is held in stasis exactly where you want it. The material list is quite scary. Although, it beats buying a Stability Room, which is morbidly out of reach of anybody.
LIST OF MATERIALS (for a 4' x 8' closet that is the actual missing link in true growing automation that saves you the trouble of having to be in the same country as your drying room while your stuff is actually drying):
44- 3/4" thick 4' x 8' sheets of mylar faced white polystyrene building insulation
18- Cans of 3M 78 Adhesive spray (24 oz. cans)
4-Rolls (60yd length) of Nashua 324A tape
20- Tubes of GE kitchen and Bath (10.1 oz.) silicone
2-rolls of Aluminum/Kraft backed sauna vapor barrier (approx. 500sf)
3-55lb. bags of white (non-indicating) 4 x 8 mesh silica gel (regenerable)
1-Can Filter 125 (or just the housing, you don't need the carbon) w/ 4" flange
1- 4" HO Can Fan ( or equivalent cfm/static pressure capability )
1-4' x 8' sheet of 1/2" thick flake board
5- 2" x 4" x 8' dry studs
As much 1/2" pex tubing as it would take to zig zag underneath the wood platform form the boiler and back again(if you need heat)
1-TACO circulator (if you need heat)
1- Honeywell (or TACO) zone valve (if you need heat)
1- small mini split ac (if you need cooling)
1-ultrasonic humidifier (only used to calibrate the Kitty Litter Pearls to your desired final curing RH target. 2- pairs of linear actuator mounting brackets
3- 6"stroke 24 vdc linear actuators
1-18"stroke 24vdc linear actuator
1- 24vdc/20 amp (output) regulated power supply , 90-240 vac input
2-OMEGA CNITH thermostat/humidistats (get the 33's with the simple relay outputs, these two will cost about $1200.
2-WAAAAAYYYYY less expensive humidistat controllers (you still need the 2 OMEGAS besides these) the black one with the orange clips and the 3% of the full scale accuracy. Use these 2 to detect when the closet is for example 62% RH. When you seal out the desiccator , after a time delay for the room to stabilize these 2 humidistats (they are both set at the same RH, simply use 2 for redundancy) will sense when you are done desiccating. They cost about $25 each.
4-OMRON H3CA's (the ones that plug into an 11 pin octal relay socket)
2-IDEC or OMRON repeat cycle timers
A bunch of 10 amp general purpose 110vac ice cube relays (the contacts can't actually handle 10 amps reliably. If you don't know what I'm talking about discontinue reading)
At least one 24 vdc ice cube relay ( ANSI 27 for the 24 vdc power supply if you want to have another one for a redundant standby)
At least one 24 vac ice cube relay (ANSI 27 for the Belimo damper power supply if you chose not to use 24 vdc to power it)
1-4 output 24 vac (output) Altronix fused regulated power supply
3-4" round honeywell ARD's or equivalent round galvanized steel duct dampers of 4" diameter
3- Belimo LMB24-3-T actuators
1-Foot length of DOM shaft to fabricate the Belimo actuator adaptor shafts. Or just spend too much on the adapters that are ready made. The Inner Diameter of the DOM shaft is determined by the actual Outer diameter of you damper vane axle (shaft).
3- Hex (allen key) head 2" long black 1/4-20 machine screws
9- 2" long stainless steel 1/4-20 machine screws with nuts and lock washers
1-small piece (about 12" x 12" or less) of 1" thick premium neoprene foam rubber sheet
1- small piece of thin HDPE
Last but not least... The patience of a saint because I will never tell you how to make this work. I gave you more than enough info already to create an easily patent pending process controller and enclosure that would make you a millionaire no matter which way you choose to use it, either manufacturing it to sell to other growers or just by using it for what it does... eliminating all the work of drying and curing. Those last 2 stages are negligible factors of the process because of this.
The reason why I am putting this out there is because I actually feel bad for people who have a hard time with drying and curing. It's gotta suck to lose the pungency (and sometimes even the potency) because the final step wasn't controlled. Also, with this you can go on a 3 month long (maybe even much longer) vacation during and long after the dry and cure process and come back to over the top labor free perfection every time. Let's call this a cannabis stability room. I will only answer the questions of those who can prove that they are electrical troubleshooting think tanks. If I'm approached by a like minded individual I will slowly but surely guide that person through the process of building it and I will not need to draw that person any wiring schematics. He should know how to wire it based on the actual process sequence:
1.) Energize the controller. It starts out with all 4 process dampers closed (one of the dampers is to allow an ultrasonic humidifier to calibrate the kitty litter and that damper is only opened and closed before the actual process of drying , that is the 4th damper and isn't used for the process, only for preparation of the kitty litter humidity content) During this time the humidity stabilizes to around 100% if filled to capacity or even somewhat less (capacity is around 8 lbs. dry weight harvest) than full . After the 5 minute time delay if the RH is 62% (or whatever you set the curing RH% to be) the controller will go into CURING MODE and simply lift up the kitty litter lid and allow a 62% RH curing environment. If the RH is above 62% then the desiccator fan and damper/linear actuator combos will fully open. The intake damper will slowly inch more and more closed (no fan speed control necessary ) until there is a steady 50% RH environment with the fan running. The fan cycles on and off as much as possible to make the drying process last about 10 days ( when the fan is off the linear actuators will plug the intake and output dampers of the desiccator shut) and that cycling is regardless of the 2 humidistats. One of the outputs on one of the OMEGA controllers will control the radiant underfloor heating. One of the outputs on the other OMEGA will allow the mini split AC to function and be controlled by its remote control. One of the outputs on one of the OMEGA controllers will raise humidity (I like a 50% RH setpoint for drying room air) by inching closed the intake damper ( slowly with a repeat cycle time delay), the other will do the opposite.
2.) This 55 minute desiccation cycle is only repeated if during the 5 minute "dehumidifier shutoff" cycle the RH is still above the setpoint for curing.