farmer.ed

New Member
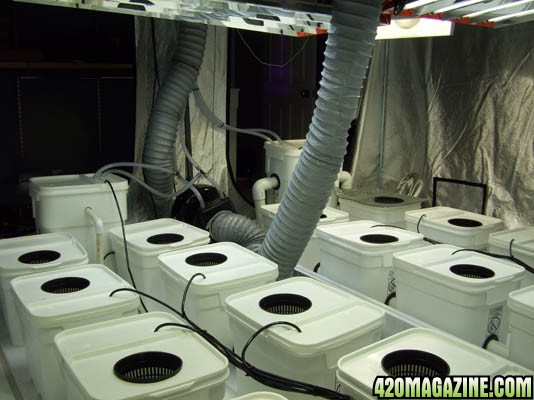
I see a lot of people are still a bit confused between DWC and recirculating DWC. I will set up and run a negative pressure recirculating deep water culture system NOT standard bucket type DWC. I hope to provide a bit of info to show how easy it is to run one of these systems and to obtain optimum yields.

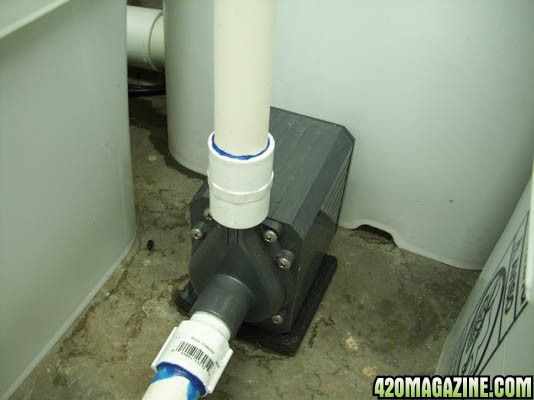
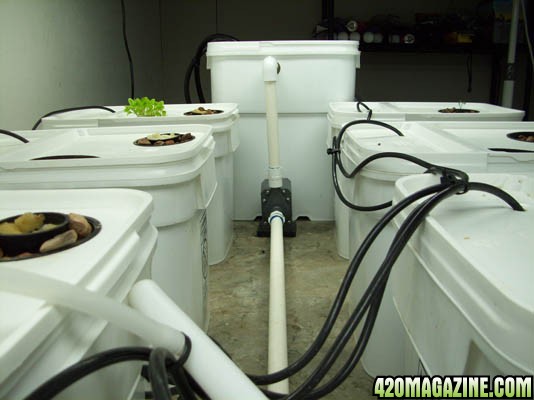
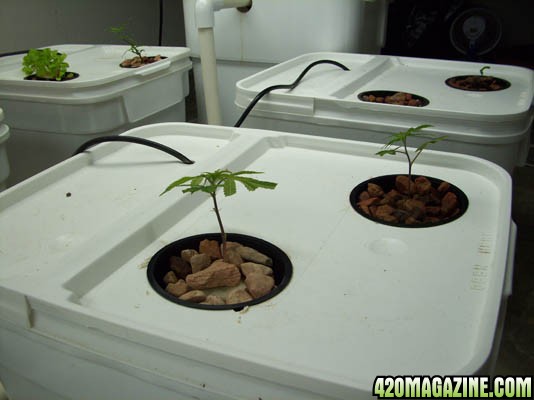
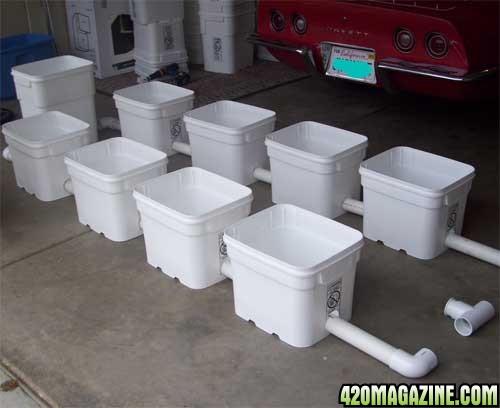
The system - 8 x 8 gallon EZ-Stor containers with lids, piped together with 2" schedule 40 PVC and bulk headed together with UNISEAL's. The main reservoir is a 13 gallon EZ Stor container with same footprint as the 8 gallon units. The pump is a magdrive 1200 gph, the air pump is an econo 22 lpm, will be replacing with an Alita AL80 when it arrives from backorder.

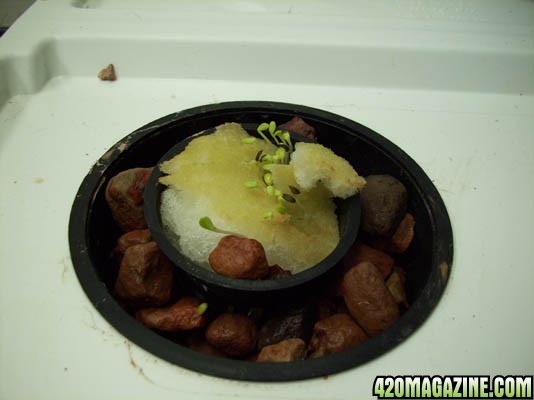
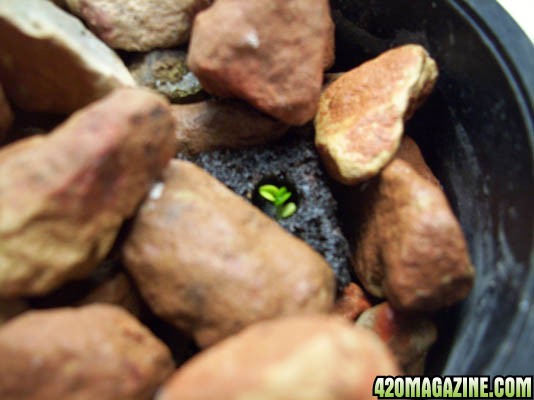
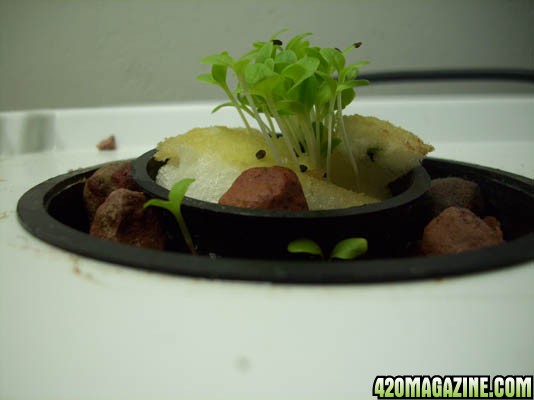
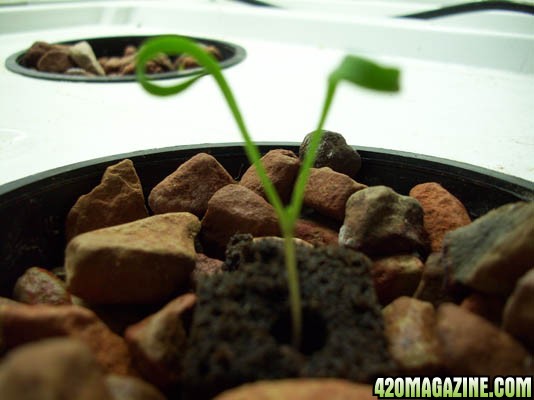
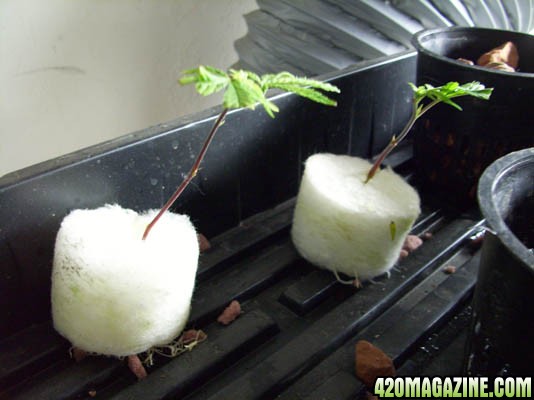
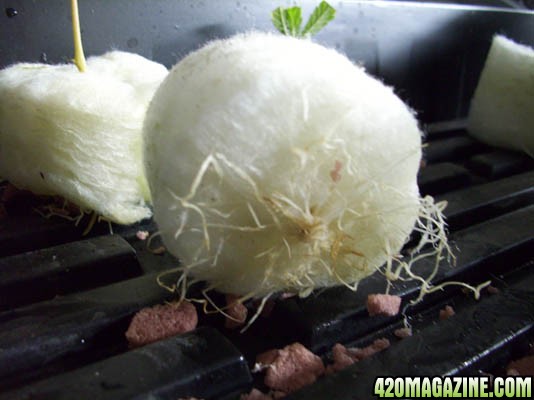
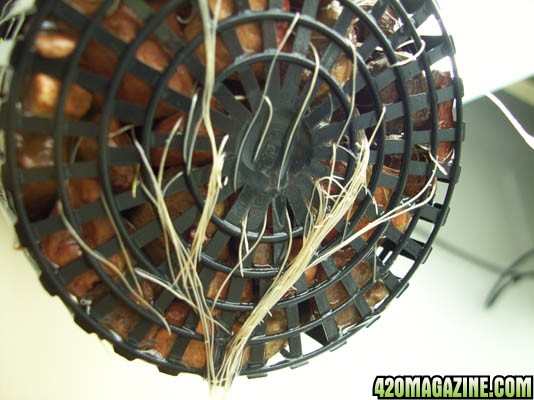
Grow Medium - Rapid Rooter (starter plug) Hygromite (Silica Rock) Biochar (Active Charcoal)

Nutrients - Clonex Rooting gel (for cutting), Rhizotinic (for first week of cuttings), pre-veg Heavy 16 veg A & B 2ml per gallon, full veg -Heavy 16 veg A&B 4ml per gallon, Flower Heavy 16 Bud A&B

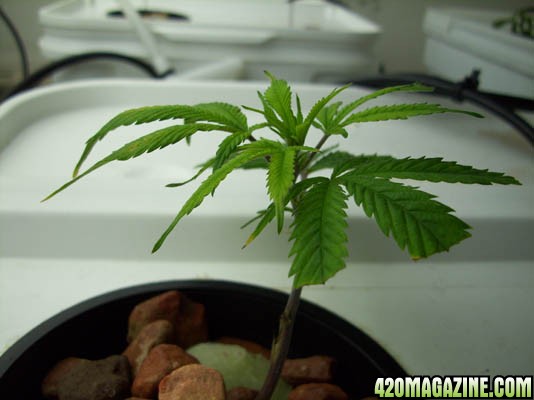
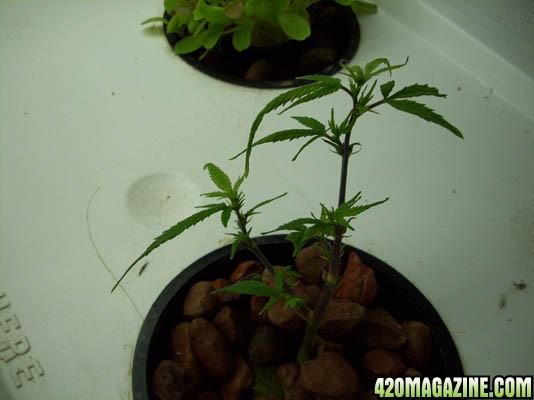
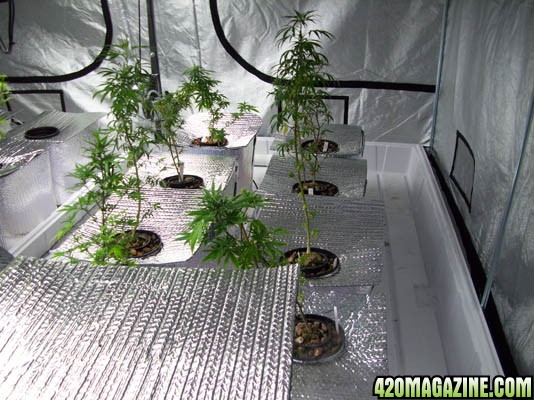
Strains - Sour Diesel - Dr. Grinspoon

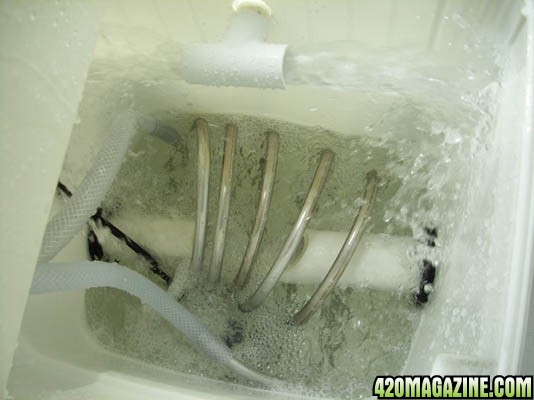
Other equipment - Swimming pool (chiller)


This is the system layout before it is wrestled together with lots of Dawn dish soap.
layout.jpg


I will get back to the journal in a few days, I have some pipe to run to my pool.....

Here is a link to this system above running before delivery, you can see how much Dawn is needed to plumb the pvc. We always run the system for a few days to clean everything out of seals etc.

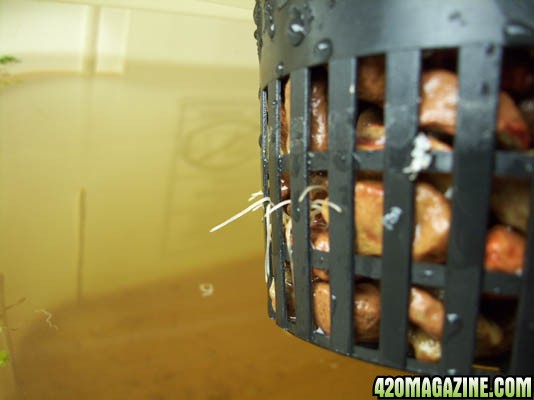
Our final rinse is with probiotics to coat all surface areas, this helps prevent any algae growth within the system. Further probiotics are used later on to create a large bio tank out of the entire system.


YouTube - Undercurrent recirculating dwc

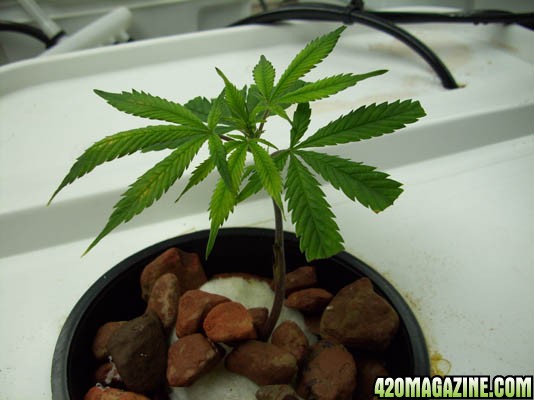
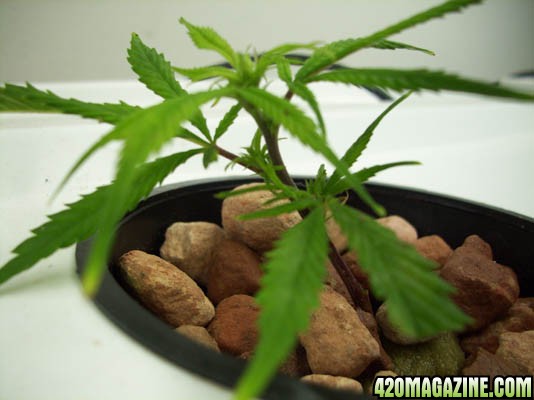
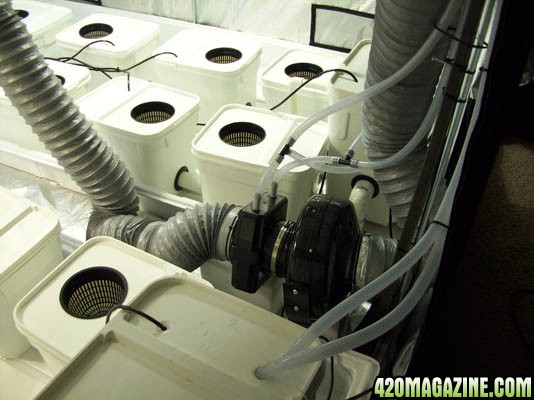
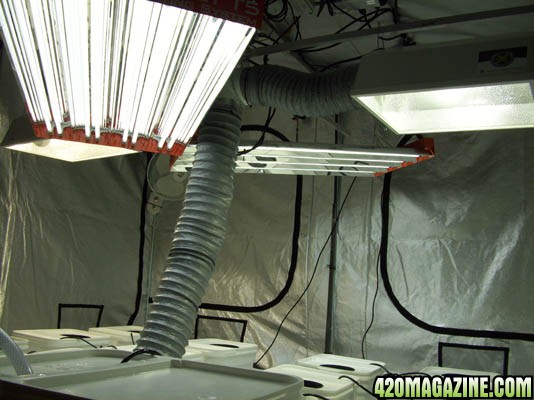
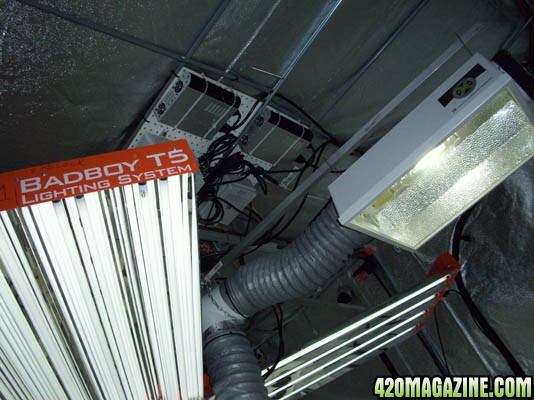
Here are a few photos of the system and tents being dialed in, each tent is a 10 x 10 Secret Jardin Dark Room with a custom light rack which supports a solar revolution light spinner, a 3.5 rail light mover, 2 x 600w MH with full Extreme hoods, 2 Quantum T-5 badboys and 1 x 6" Icebox heat exchanger. The tents are also equipped with Full greenhouse controllers from CAP, nexgen digital ballasts, humidifier, fuzzy logic Co2, 1 x 6" 500 cfm fan with a 6" Icebox hanging off it to keep the tent around 78f.
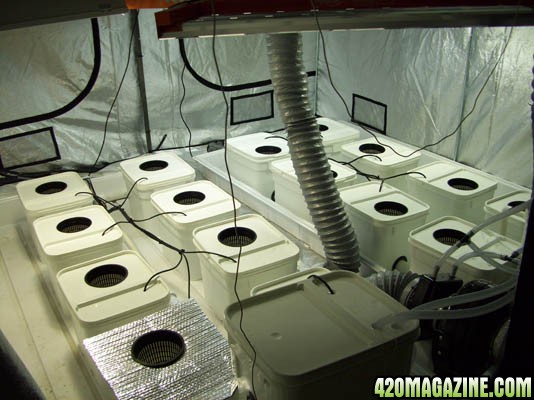
tent13.jpg

tent22.jpg

tent31.jpg

tent41.jpg

tent51.jpg

tent61.jpg

tent71.jpg
 
Okay now that the system is laid out we can start wrestling it all together with lots of soap. I have included some pics of the bulkhead Uniseal

The bulkhead accommodates a 2" pipe into a 3" hole without any leaks. Be sure to smooth all edges around the hole for the bulkhead fitting. Now insert into hole.

Once inserted it will look like this from the inside of the bucket.

Now comes the fun part, lube up the pipe and the bulkhead with hot soapy water and gently work the pipe into the bulkhead, without tearing the edges of the seal.

Now do that a few more times and you will have a system like this in a few short hours.

Cut some 3.75 holes in the lids, add a netpot for each hole and add Higromite or hydroton to support root growth.

The net pots should be submerged halfway in the water to begin, then raised according to root development after 1 week in the system. I have dual airstones in each bucket to charge the water directly in the root zone.I have a piece of grow media to see what the wicking is like in order to judge water levels.

The reservoir receives the same treatment, lots of fresh oxygen to the system via an airbladder which has it's own air pump source.

That is all the updates I have for today, I have also uploaded another video of this new system already running.
 
If you don't mind, where did you find such bulkheads? Do they have apart number? And is there one that would work for the returning line into your res bucket? I see you don't have one installed. I'm looking to build a similar system. Thanks and props.
 
I do not have a part number for them, I find them online, UNISEAL 2" usually a local aquarium supplier can order them for you. I have not found a steady supply of the 2" or 3" bulkheads, so I have to shop where they are in stock. The manufacturer requires a $10k order to deal direct. I do not use one on the res return, I have a tee inside which I take off and turn around the return line and add a hose attachment to drain the system. It does not mean it cannot be done. Uniseals come in 1/4 - 6", some industrial suppliers like Grainger have them, here is a link to ones I have purchased before, sometimes you can get a discount 50+ units. 2" UNISEAL Flexible Bulkhead Tank Adapter - AquaCave
 
Hi all sorry for no updates, I will post them tonight after I am done cleaning the system. The buckets and lids again are also found online as Ez-Stor from Ropak. The buckets are 8 gallon and the res is 13 gallon. I find them on Amazon with free shipping for $6-9 per lid and 8gl bucket $9-16 and 13 gl $12-20. They are usually discounted for 25 and more pieces. I would suggest getting them from CCH2O.com, Their heavy weight lids are great and he has several layouts to choose from. CCH2O has lids for $12.95 blank DIY , I see they also have the 2" uniseals for $5.25, that is a good price if he has them in stock.

13 x 3" holes
24 x 1.5" holes
4 x 5.5 " holes
etc etc.
 
That is one hell of a grow area there. +reps on the design and set-up Farmer, maybe I'll learn a few things along the way as well..

I'm subscribed and ready to watch what happens..

Best of luck to ya..
 
Sorry for the delayed updates, I had a busy holiday weekend and wrenched my back. Anyway at the end of the last session I added some set up seeds to help dial in the system before anyreal plants enter. So I made the wife happy and planted some Basil, Spinach and Lettuce (on one side) and a few seeds from the summer of 1979. Yes these seeds are amazing, still 60% viable after all these years.

The photos below are of one week of growth so far. The system is pretty much ready for production once I get my larger air pump. So far the water has been stable at 72f, 5.8 ph, 256 ppm (r/o to 10ppm)

added so far,

200ml SoCal Biochar Bugs (liquid probiotics)
50ml Rhizotonic
25ml Compost tea

The photos below are from day 4 after planting seed on 11/22 (thrown on top of growzorb media and in future garden 140 starter plugs). Last photo taken today. I will be moving my cuttings into the system this weekend, so far the root development is a bit slow, so I may have to warm the water a bit till they start shooting better.

100_17282.jpg

100_1730.jpg

100_17933.jpg

100_17954.jpg

100_18121.jpg

100_18141.jpg

100_18162.jpg

100_18172.jpg


I know boring, wheres the weed.........it will be along shortly stay tuned.
 
I almost forgot, the pump I am using is a Supreme Classic Model 12 Magdrive 1200 gph and is available online, I purchase mine locally at Discount Hydroponics, the pump is from Danner manufacturing, I have found them much more reliable than any of the discount pumps. I suggest a superior quality air and water pump since they are the heart of the system. Even if one pump goes down or the power is off, your plants won't shock right away, no need to test the boundaries.

100_18182.jpg

100_18192.jpg
 
The negative flow aspect is what makes the system unique. The res drains the water into the bottom pipes connected to the first buckets on each side, the following buckets are connected via uniseal bulkhead, once the water has passed through all grow ares, it is returned to the res through the 3/4 pipe which separates the rows of buckets. The 3/4 line is attached to the 1200 gph pump which acts as a giant straw, drawing the water from the res, through the buckets, then returning the water back to the res from the pump as shown in the photos above. The only positive pressure in the system is once the water is forced from the pump back into the res. The water draining from the res is a negative flow as it is being drawn by the pump via 3/4" straw. I hope that answers any questions on the system flow.
 
I am a legal medical marijuana patient in Oregon. I am 4 almost 5 weeks into flowering in my DWC. I did a mixxed bag for this last recent grow I did. Some in soil in Smart Pots, 1 in a GH Water Farm, and a couple in DWC. I used AN premium 2 part hydro nutes called Connoisseur and my plants are coasted in frosting. I decided from here on out to go all DWX because I like how cheap it is to build a "bubble bucket" and also, the plants have plenty of room to spread their roots out. The buds are amazing and I plan on adding a network of drainage PVC pipes to make changing the nutrient solution much easier. I had a question though. I want to add a drip collar to my 5 gallon bucket DWC that I got from an old water farm. If I add a second airline and cut a whole for the straw type thing to go...should I have a problem modifying my DWC and making a home made water farm? Should I drill a hole in the top lid part? Or should I slide it down and cut a hole in the bottom of the netpod? I have the netpots that are black, made by NGW and cover the whole lid of the 5 gallon pot. Also, I was thinking of making a 5/1 mix of hydroton and soilless solution so my Sensizym and compost tea, and beneficial enzymes have a place to hang out. Any recmmendations?
 
Hey 247, I have worked with the siphon DWC systems from hydrofarm, they are great little units. I have modified a few by adding a coil drip line, same size tube just coiled 2 x with drip holes. That addition certainly provided more feeding opportunities for the plant so i just dialed back the nutes a bit more to 25% of recommended dosage. This method worked well for standalone plants, but did not work well chained together. I find this type of growing more NFT than DWC, With DWC you should never have to top water, just provide enough oxygen to the roots and keep water temps low for best results.

As far as bacterial / beneficial colony areas, I use biochar (https://www.socalbiochar.com) and Higromite (https://www.higromite.com/) they have the desired porosity for major colonies to survive. Even with DWC, the upper portion of the net pot stays out of the water, thereby providing a non washout zone for the colony to colonize. If the media is constantly being flushed, it is breaking down all the work of the colony. So finding a media which will keep colonies alive and together is very important in biogrowing. The use of teas will help feed the colonies and reduce nutrients for sub-ionic uptake by the plants.

Creating the perfect hydro colony is not a very easy thing to do, but once dialed in, the system is fairly maintenance free, this includes not changing water on a regular basis. Once water is biotuned and free of synthetics, the water does not need to be replaced unless it forms solids that can't we removed by filtering or clarifying.

Not to get off the subject, DWC has further cousins which have a full fish pond in the res, the fish provide all needed nutes and the active bacteria eats the solids. Here are a few Aquaponics videos regarding the subject, not the best presentation but you will get the point.

My next project grow will be in a 2 x 8 raft system, I don't think I will add the fish just yet, but the raft, well let's just say I am hooked on DWC here in SoCal so it is my next logical step for a new grow.

YouTube - First Aquaponics System at Vancouver Island University
YouTube - New Raft Aquaponics System at Vancouver Island University
 
Here are todays updated photos of the system running my set up / dial in plants. Todays inspection has noted rapid root development and superior growth, the clones were added to the system on 12/01.You will be able to see the root structures of 8 day old cuttings in photo 1. The photos are in chronilogical order. I am very happy with the current system status, pretty much dialed in, under 10 days. So you can see by the photos I have added a few clones, Querkle, Sour Diesel so far and one Panama Red summer of 79 seed has popped. I will run the system as is and just add make up water and stabalize ph and bring ppm up to 325.

Todays readings

Ph 5.78 ( no adjustment)
ppm 295 @500 (added 50ml compost tea)
temp 71f
added 1.5gal 5.8 ro water

Clones in Sure to Grow media in tray before transplant
100_1847.jpg


Here is a closeup of the roots
100_1848.jpg


100_1850.jpg

100_18511.jpg

100_18521.jpg

100_18542.jpg

100_18601.jpg

100_18611.jpg

100_18622.jpg

100_18651.jpg
 
Back
Top Bottom