Smokin Moose
Fallen Cannabis Warrior & Ex Moderator
The system described here is the product of an experiment ('speriment according to irish) to build an effective, inexpensive, high tech MJ machine. Irish and webfish are the primary proponents, though much of the hydroponic community has contributed in one way or another.
SYSTEM ESSENTIALS
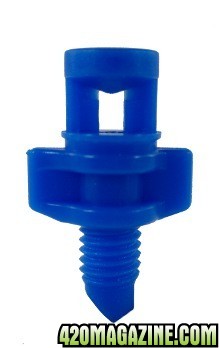
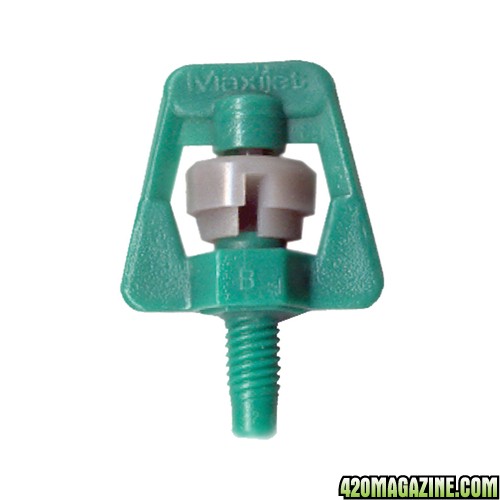
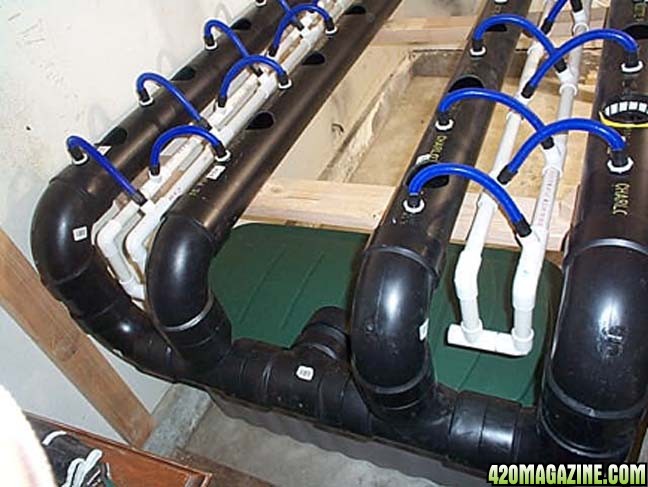
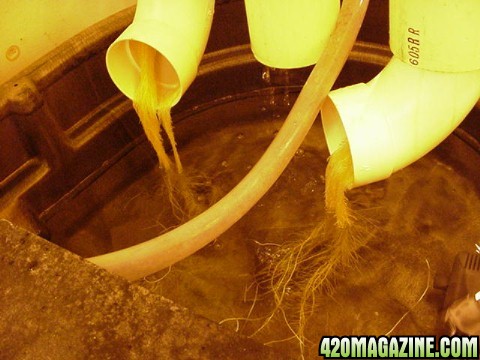
The basic design is a series of 4" pvc (schedule 40) tubes that are sealed on one end and drain back into a central reservoir on the other. Plants are held in net pots set into the tubes. Each plant is fed by a sprayer set in the tops of the tubes. This placement keeps the sprayers from becoming root clogged. The system encourages root growth into the tubes and even back through the drain and into the reservoir. The system combines the benefits of aeroponic, ebb and flow, NFT and deep water culture setups.
The sprayers are fed through manifolds that run parallel to the 4" tubes and branch off through either elbowed 1/2" pvc (Irish) or 1/2" flexible tubing (Webfish). A 1450 gph pump feeds webby's 4 tube system (pictured below), with 2 twin manifolds which emerge from the res and supply each sprayer site.
DESIGN CONSIDERATIONS
When designing your aerotubes, please keep in mind the following:
You want to be able to access all of your plants during the grow. At a bare minimum, that means being able to crawl under the system and go up between the tubes.
The recommended spacing between net pots is 10 inches. That can be narrowed to 6-7 inches if you are growing a sea of green, single cola plant. Conversely, bushy, branchy plants demand up to 11 inches of separation.
The system will easily support a SCroG application. Simply drill holes in the tubes for the screen supports. Again, access is critical.
By using separate reservoirs, a grower can propagate a perpetual garden or grow profoundly different phenotypes.
The system may be increased or reduced by simply adding or removing tubes and either capping or disconnecting their manifolds.
SYSTEM BENEFITS
The debate about spray particle size in aero systems can be overlooked with this system. The benefit of using the sprayers here is not the way they feed the roots, but rather, how all of that spraying and splashing aerates the nutrient solution. Irish reports that you can actually see the plants twitch as they grow during feeding time. The systems use an average 500 ppm nutrient mix fed in five minute on cycles every fifteen minutes. Webby says that he never goes over 800 ppm.
MEGA ROOTS
Note that the sealed ends of the 4" pvc are elevated to promoted drainage. Also, the two outer most 4" pvc tubes are elevated above the inner 4" tubes for the same purpose. Further, the roots tend to extend from the net pots and down hill until finally they grow to the reserviour. Webby warns that the plants can bust a 3" net pot. Make sure that you have some way of keeping growrocks out of your pump!
INTEGRATED SUPPORT
Each plant site is 11" on center and offset 5" from the plant site accross from it in the adjoining tube. Irish devised this integrated method for supporting plants during heavy flowering (with yields of better than 3 oz's per plant, we can see that necessity is truly yo mama of invention).

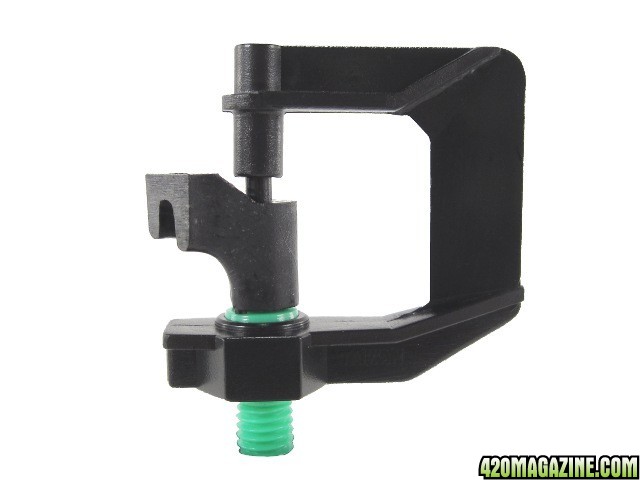
Irish's SPRAYER FEED LINE ALTERNATIVE
Apparently not satisfied with the relative simplicity of Webby's design, Irish devised the following method for constructing his sprayers.
Tools used here were:
(1) 9/64" drill
(1) 10-32 threaded tap
(2) rainbird full circle micro spray jet #360JET010
(1) 1/2" female pvc threaded cap with "nut" molded to the end
(1) 1/2" pvc elbow (slip thread x 1/2" male thread)
(1) 1/2" pvc slip cross
(1) small stick of pvc 1/2"
(1) pvc cutter
(1) 1 1/8" hole saw
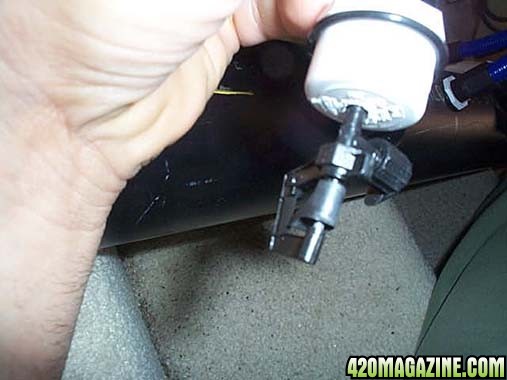
* attach fem cap to male elbow
* drill hole with the 9/64" drill bit into the cap (here you may do two as done, or one would probably work)
* tap the hole(s) you just drilled with the 10-32 tap, this is the thread size of the sprinkler
* insert sprinkler
* take the hole saw and drill the 1 1/8" hole where you have decided it should go. Web's suggestion is to place one hole on each side of the 3" netcup holes.
* insert cap and sprinklers into the hole, should fit snug, you can purchase an O-ring to seal the fit better, but it should be okay
Remember, all connections should be sealed with the pvc glue to prevent leakage. The o-rings for the sprinklers can be bought in the same irrigation aisle.
The pvc cross is used to make a connection to the main manifold. One extension from each side, leading to the "feeder holes"
SYSTEM ESSENTIALS
The basic design is a series of 4" pvc (schedule 40) tubes that are sealed on one end and drain back into a central reservoir on the other. Plants are held in net pots set into the tubes. Each plant is fed by a sprayer set in the tops of the tubes. This placement keeps the sprayers from becoming root clogged. The system encourages root growth into the tubes and even back through the drain and into the reservoir. The system combines the benefits of aeroponic, ebb and flow, NFT and deep water culture setups.
The sprayers are fed through manifolds that run parallel to the 4" tubes and branch off through either elbowed 1/2" pvc (Irish) or 1/2" flexible tubing (Webfish). A 1450 gph pump feeds webby's 4 tube system (pictured below), with 2 twin manifolds which emerge from the res and supply each sprayer site.
DESIGN CONSIDERATIONS
When designing your aerotubes, please keep in mind the following:
You want to be able to access all of your plants during the grow. At a bare minimum, that means being able to crawl under the system and go up between the tubes.
The recommended spacing between net pots is 10 inches. That can be narrowed to 6-7 inches if you are growing a sea of green, single cola plant. Conversely, bushy, branchy plants demand up to 11 inches of separation.
The system will easily support a SCroG application. Simply drill holes in the tubes for the screen supports. Again, access is critical.
By using separate reservoirs, a grower can propagate a perpetual garden or grow profoundly different phenotypes.
The system may be increased or reduced by simply adding or removing tubes and either capping or disconnecting their manifolds.
SYSTEM BENEFITS
The debate about spray particle size in aero systems can be overlooked with this system. The benefit of using the sprayers here is not the way they feed the roots, but rather, how all of that spraying and splashing aerates the nutrient solution. Irish reports that you can actually see the plants twitch as they grow during feeding time. The systems use an average 500 ppm nutrient mix fed in five minute on cycles every fifteen minutes. Webby says that he never goes over 800 ppm.
MEGA ROOTS
Note that the sealed ends of the 4" pvc are elevated to promoted drainage. Also, the two outer most 4" pvc tubes are elevated above the inner 4" tubes for the same purpose. Further, the roots tend to extend from the net pots and down hill until finally they grow to the reserviour. Webby warns that the plants can bust a 3" net pot. Make sure that you have some way of keeping growrocks out of your pump!
INTEGRATED SUPPORT
Each plant site is 11" on center and offset 5" from the plant site accross from it in the adjoining tube. Irish devised this integrated method for supporting plants during heavy flowering (with yields of better than 3 oz's per plant, we can see that necessity is truly yo mama of invention).
Irish's SPRAYER FEED LINE ALTERNATIVE
Apparently not satisfied with the relative simplicity of Webby's design, Irish devised the following method for constructing his sprayers.
Tools used here were:
(1) 9/64" drill
(1) 10-32 threaded tap
(2) rainbird full circle micro spray jet #360JET010
(1) 1/2" female pvc threaded cap with "nut" molded to the end
(1) 1/2" pvc elbow (slip thread x 1/2" male thread)
(1) 1/2" pvc slip cross
(1) small stick of pvc 1/2"
(1) pvc cutter
(1) 1 1/8" hole saw
* attach fem cap to male elbow
* drill hole with the 9/64" drill bit into the cap (here you may do two as done, or one would probably work)
* tap the hole(s) you just drilled with the 10-32 tap, this is the thread size of the sprinkler
* insert sprinkler
* take the hole saw and drill the 1 1/8" hole where you have decided it should go. Web's suggestion is to place one hole on each side of the 3" netcup holes.
* insert cap and sprinklers into the hole, should fit snug, you can purchase an O-ring to seal the fit better, but it should be okay
Remember, all connections should be sealed with the pvc glue to prevent leakage. The o-rings for the sprinklers can be bought in the same irrigation aisle.
The pvc cross is used to make a connection to the main manifold. One extension from each side, leading to the "feeder holes"