Hello 420 family 
It's taken far too long, but I'm finally starting a new journal to document all the changes that have happened in my basement. I'm a geek, so I'm into gear and hardware. Pictures of pretty plants and flowers are nice to look at, but I gravitate towards journals that talk about the actual 'growing' as much, or more, than the plants themselves. That being said, I WILL include pictures of plants, but realize my intent for this journal is to help others growers with ideas on how to setup their space. I'll also talk about my philosophies towards growing and many of the "why's" behind the way I do things. I hope you all find something useful here and thanks for stopping by.
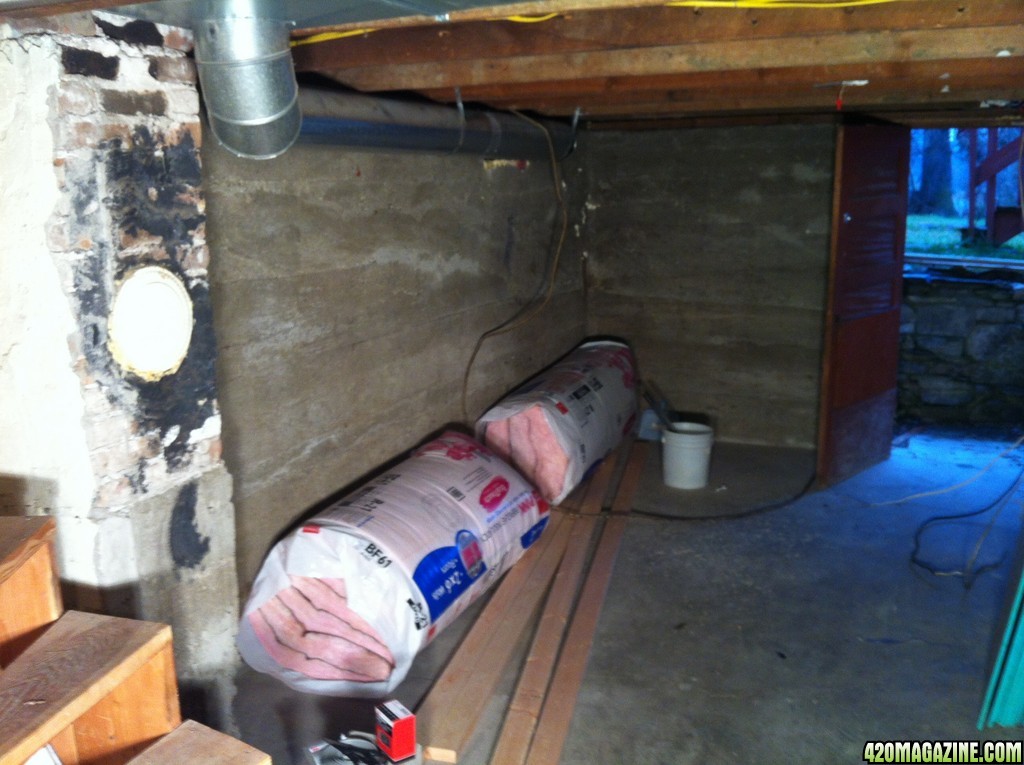
Can you believe it started like this?
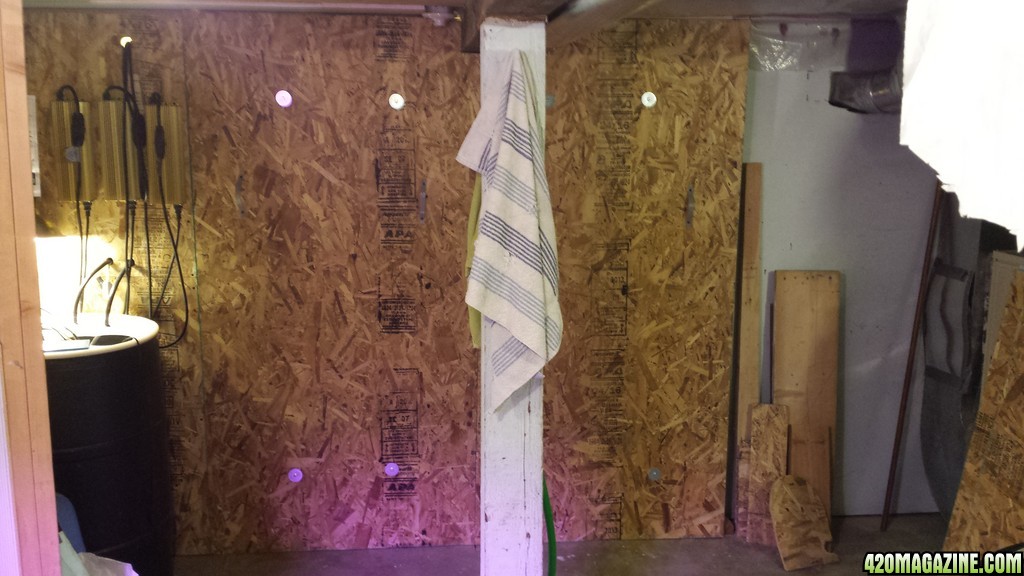
Now it looks like this!

Well that's the view from roughly the same spot. That's the doors to the flower room. More later...
First, I want to give credit to the book that got me started
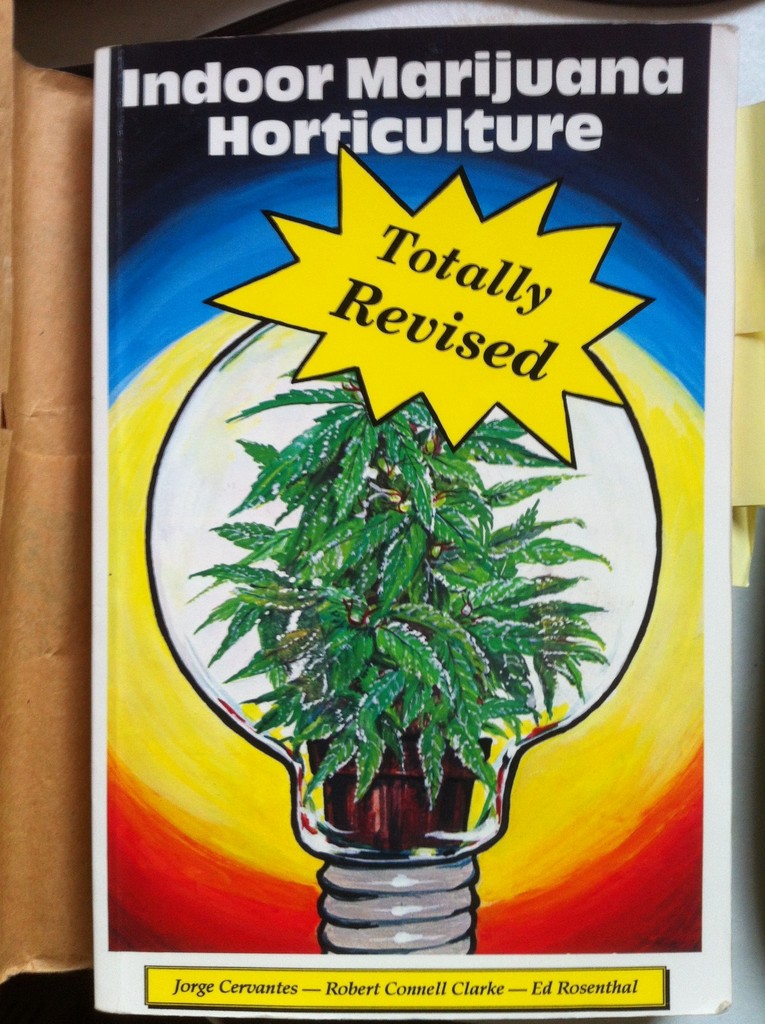
Jorge, Bob, and Ed... Thank You
If you look closely, you can see a bunch of post-it notes sticking out. Those are my same bookmarks from the 90's, when I bought this book.")
You can also see that I removed the book cover for the picture. I bought it while in college, so I covered ALL my books at the time. It seems to have helped this little gem survive 25+ years so far.
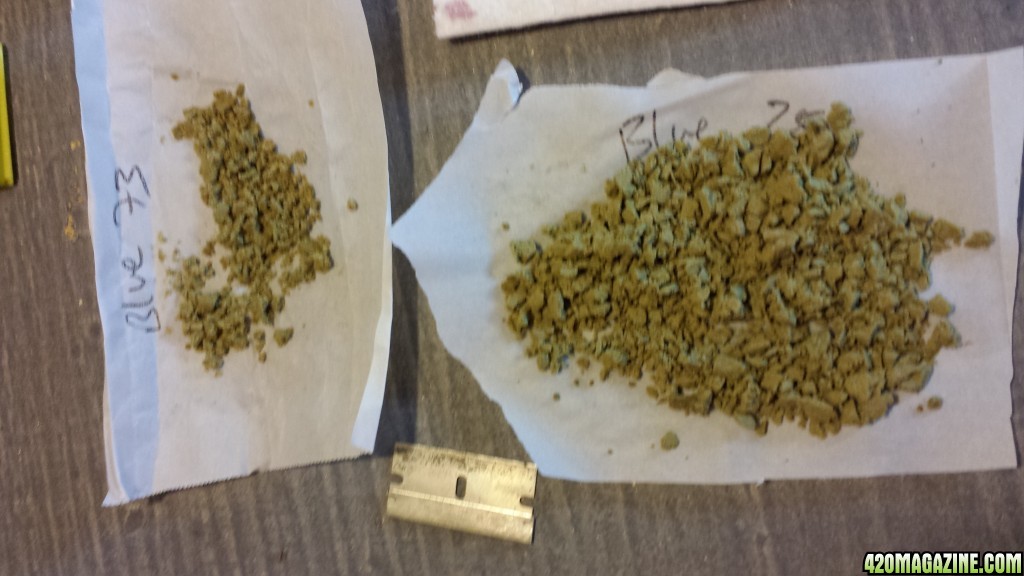
Many of you like to know what strains a journal features.
I'm working with: Blueberry, Critical, AK-48, Bubba Kush, and Apollo 13 x Vortex
This is a perpetual grow, so plants are in many different stages of growth.
I will go through each stage in detail, but a brief overview of the tech or hardware involved...
Cloning is done in 2 DIY cloners. They get no special environmental considerations other than I soemtimes insulate the totes from the cold floor. They get lighting from the veg trays nearby.
Vegetative growth occurs in 2 trays with a DIY flood & drain ystem, under 2 T5 fluorescent lights w/8 bulbs each.
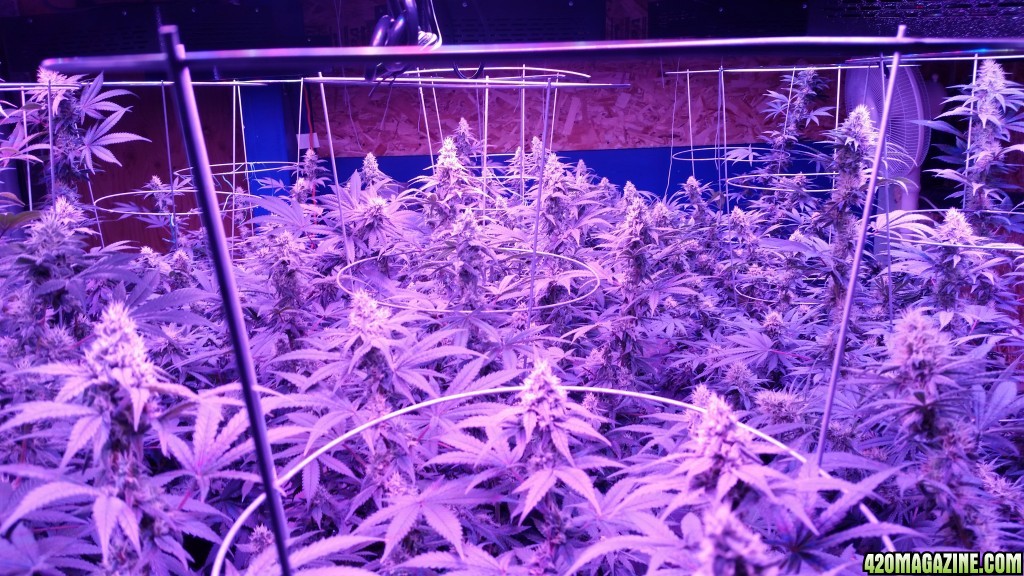
Flowering is a separate room. There are 2 CAP Ebb & Gro systems with 12 sites each (24 plants total).
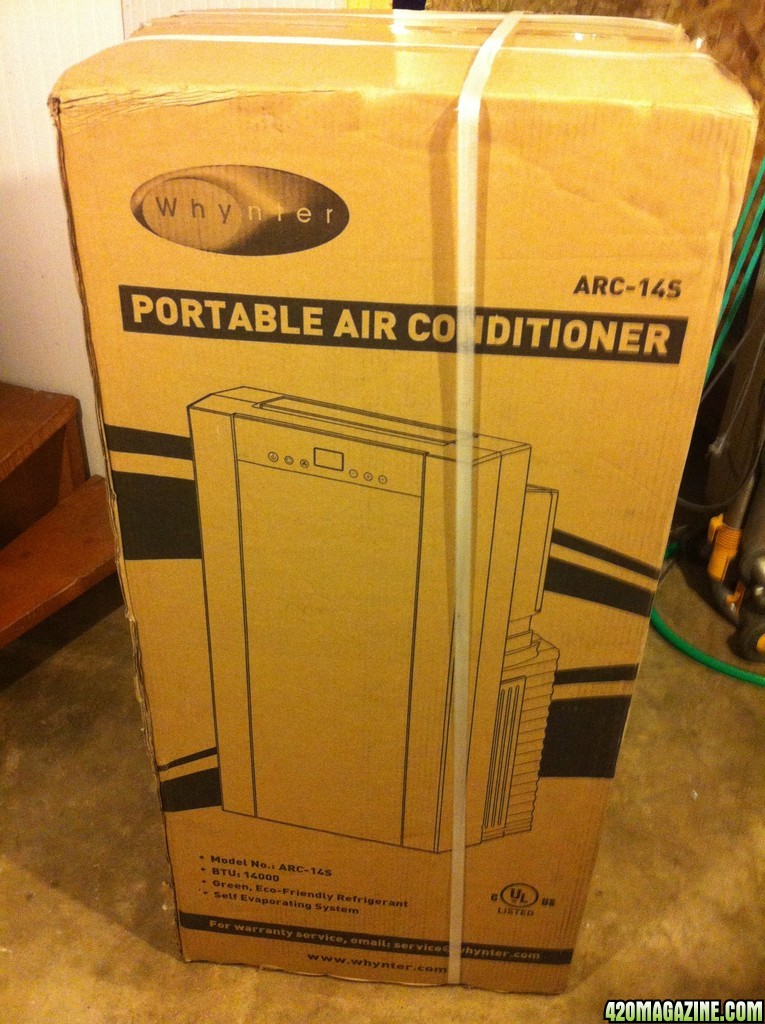
It was pretty exciting when all this new gear came in. Guess what is in these boxes? There are 6 more already down that hatch in the background.

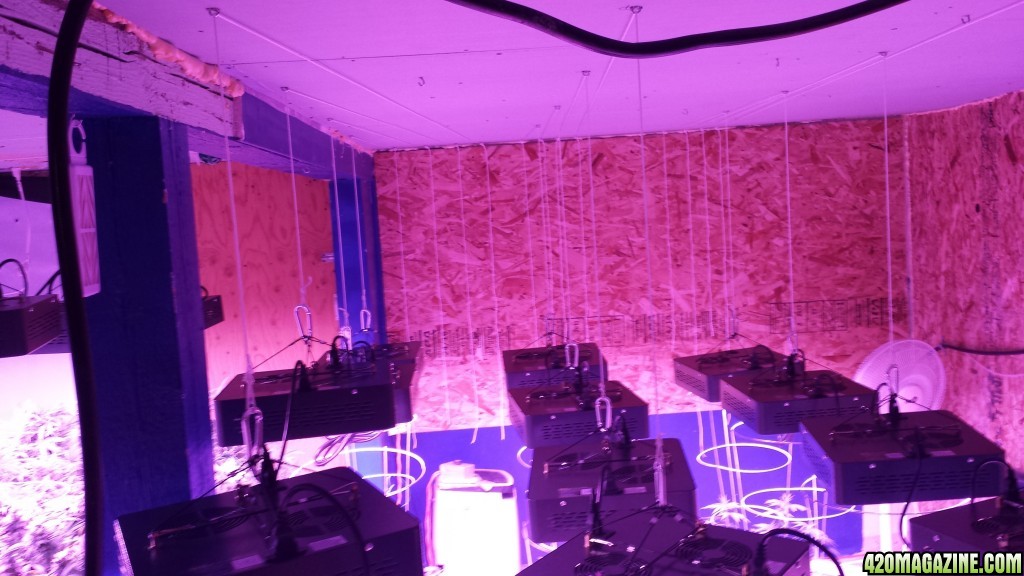
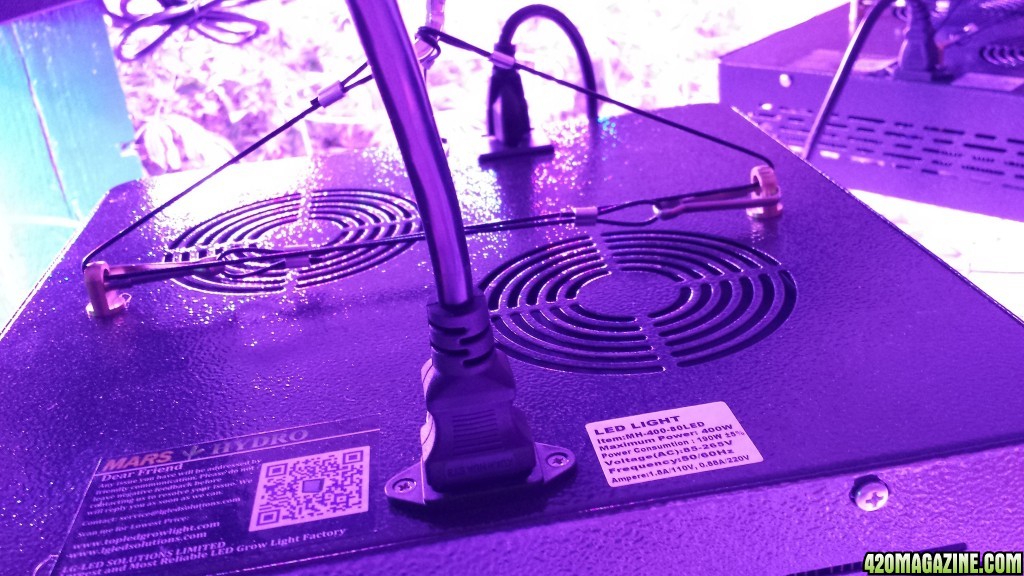
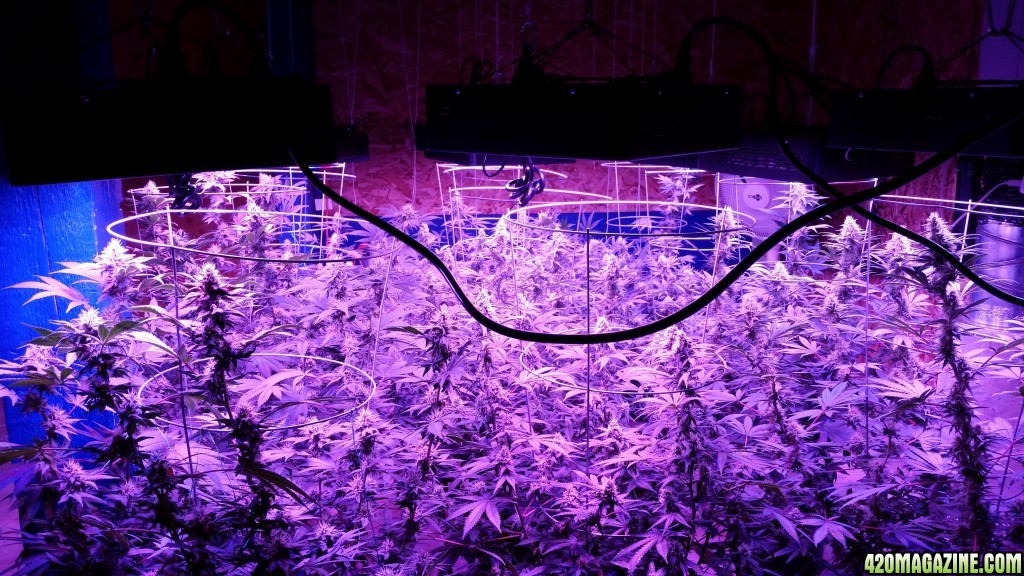
Lighting is 24 Mars II 400W lamps.


The environment is maintained with an AC,
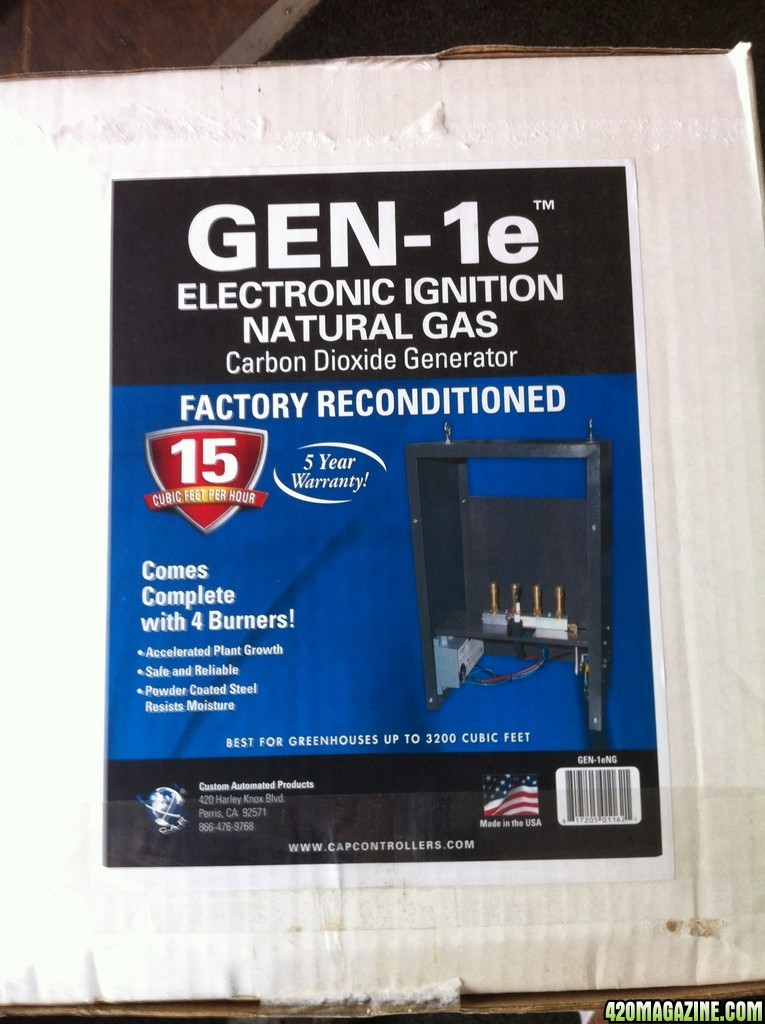
CO2 generator,
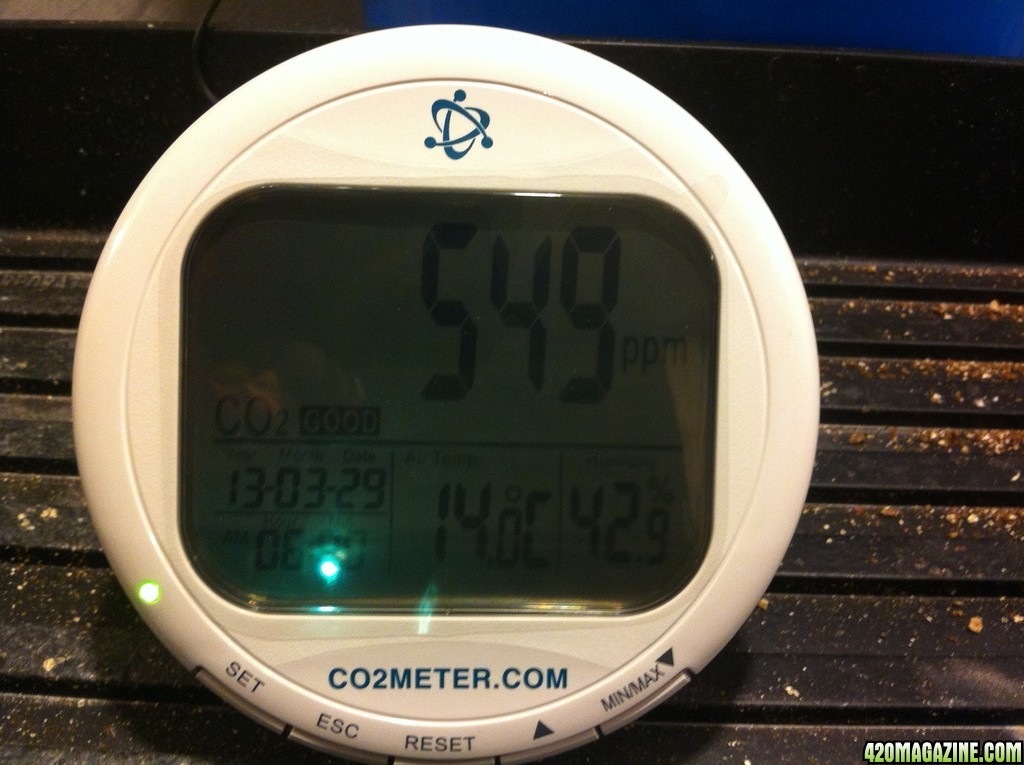
dehumidifier,

and various fans all controlled with timers.
My nutrient line is mostly General Hydroponics Flora, but I use products from several companies. I'm considering moving to their organic line as I'm using some of the products and like them, but I've been getting good results and am reluctant to make too many changes.
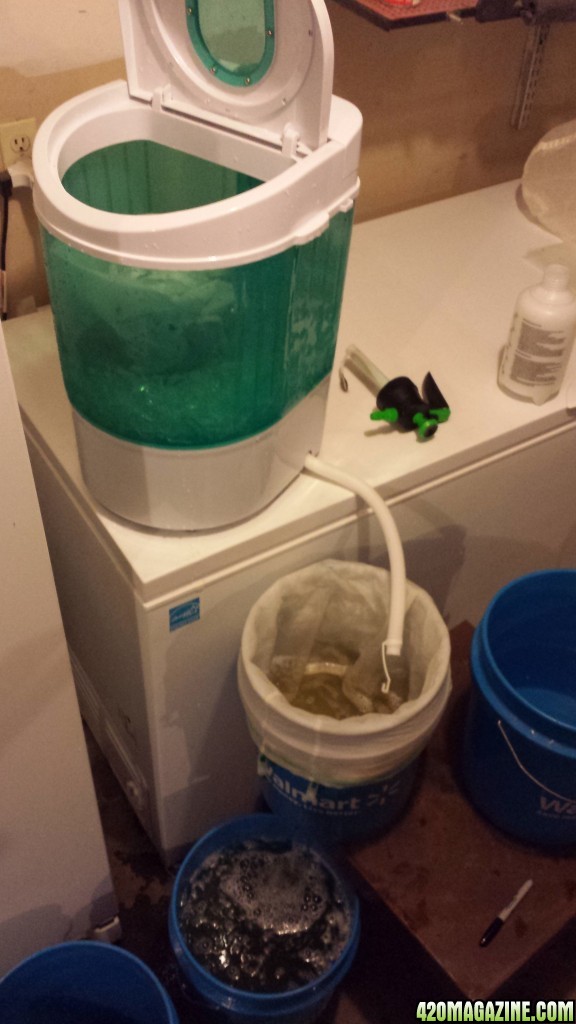
I have an RO system from the filter guyz that supplies all the water used for growing, and drinking.
It feeds it's own barrel with a float valve. I have a pump inside and a long hose that comes out the top. I just control the pump with a power strip (shared with drain bucket pump). I'm realizing now I have no pictures of this.

Cloning
I make bare root clones. There are LOTS of very good write ups about this. I'll assume you've read some of them and are somewhat familiar with the process. I would like to make a couple comments where my technique differs from some of the more common advice.
I don't think an obsession with sterility has any benefit. I don't even use a new razor blade most of the time, and I get 100%, or very close, all the time. I write the strains on some plastic cups filled with RO. Then I just cut my clones and pop them into their cup. Larger clones seem to get larger plants faster, but how big really depends on your setup and schedule. When looking for a clone, I want 4-6 actively growing nodes and about 2-3" of stem below them. I simply slice the branch off longer than I need and pop it into the cup while I cut the others.
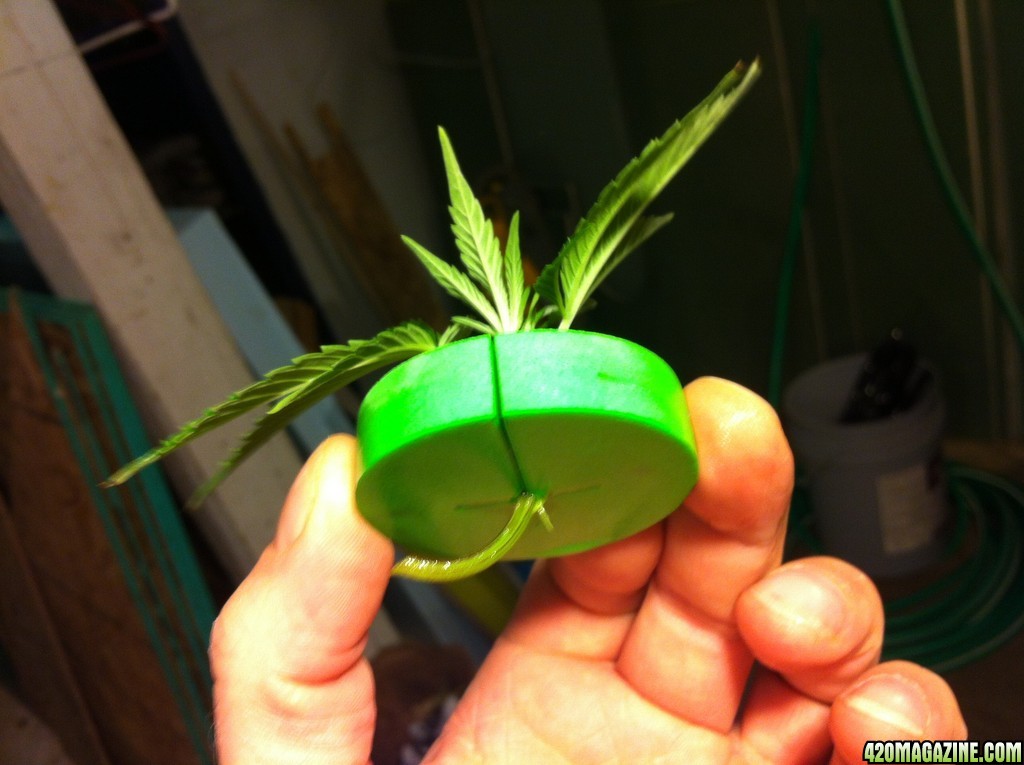
After all the clones are in cups, I put them into the cloner. I will usually recut the stem at an angle making sure to get into the water immediately to avoid any air bubbles (although I'm lately questioning if the 'bubble' theory has any basis in reality). I'll also scrape along the stem on both sides before putting it into the neoprene disc.
Inside the cloner is just plain RO until I see roots, then I will add some transplant food at a very very low concentration. The stuff I use is Lily something or other from sprawlmart's garden section. I got it for the houseplants, but it's got vitamins and hormones that help promote rooting. The Superthrive has some similar ingredients to promote root development. I may be wrong, but I get good results. Roots usually start to appear in 5-7 days and I like to remove them from the cloner at 18-24 days old.
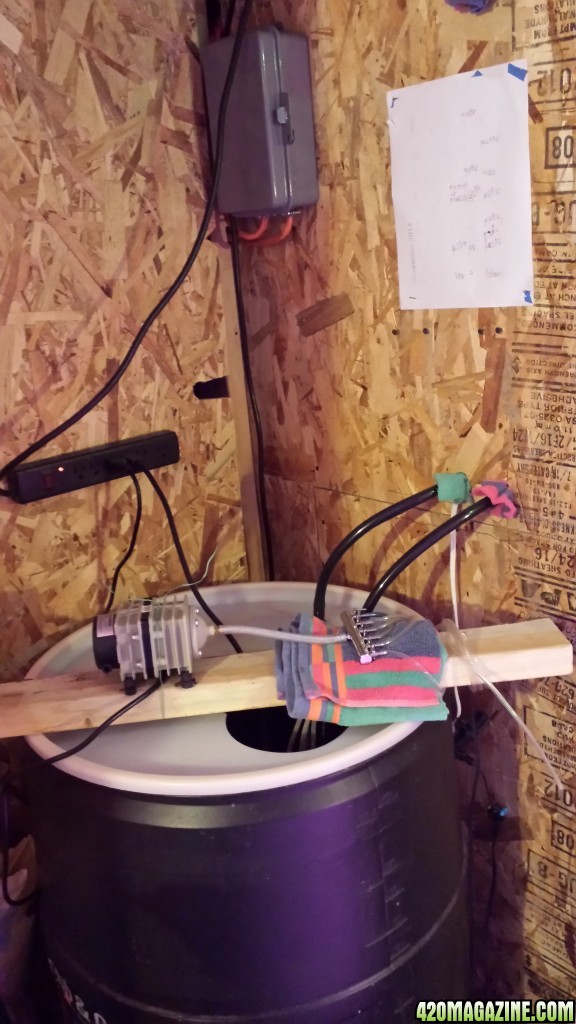
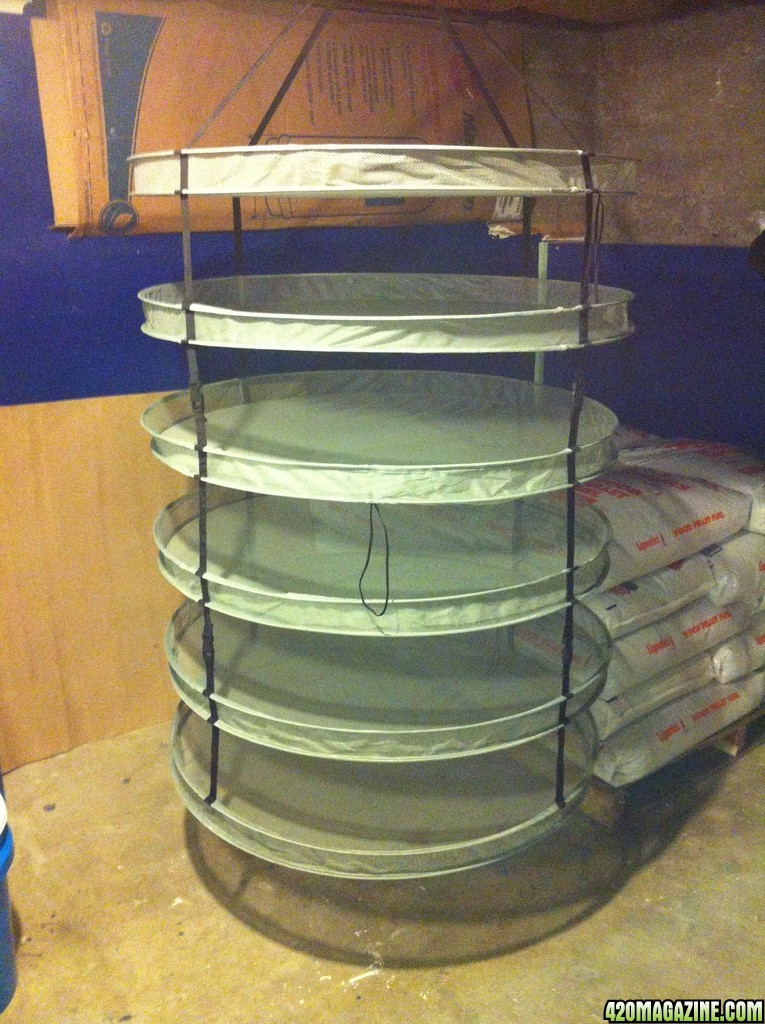
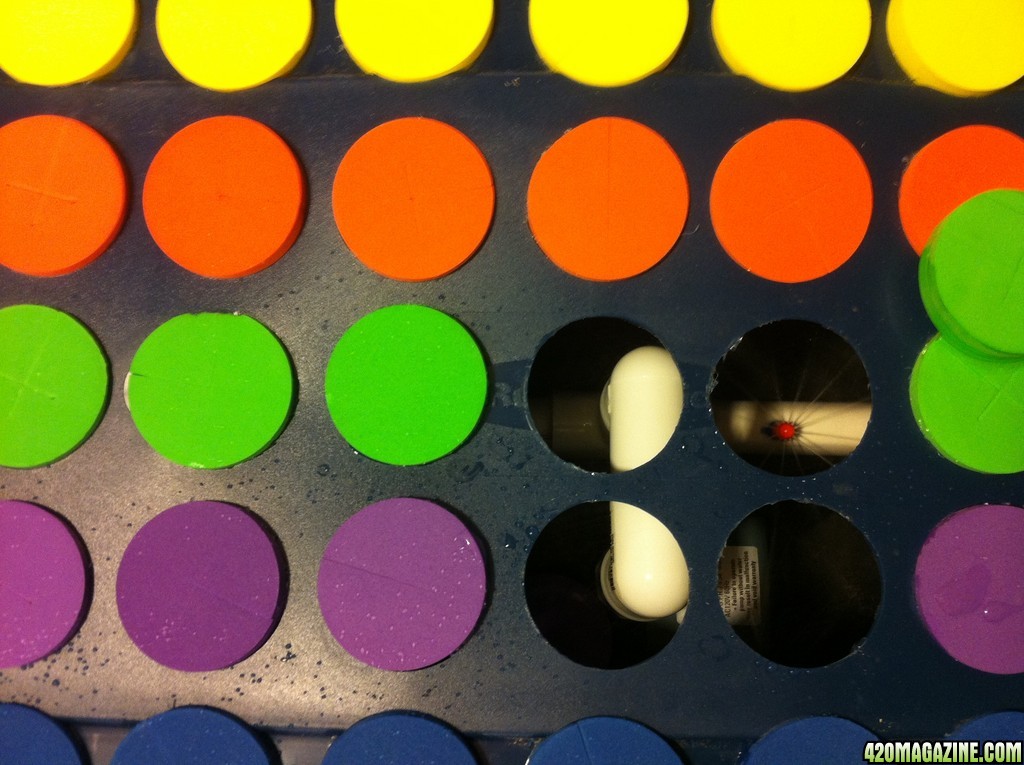
Pics of the cloner and clones.

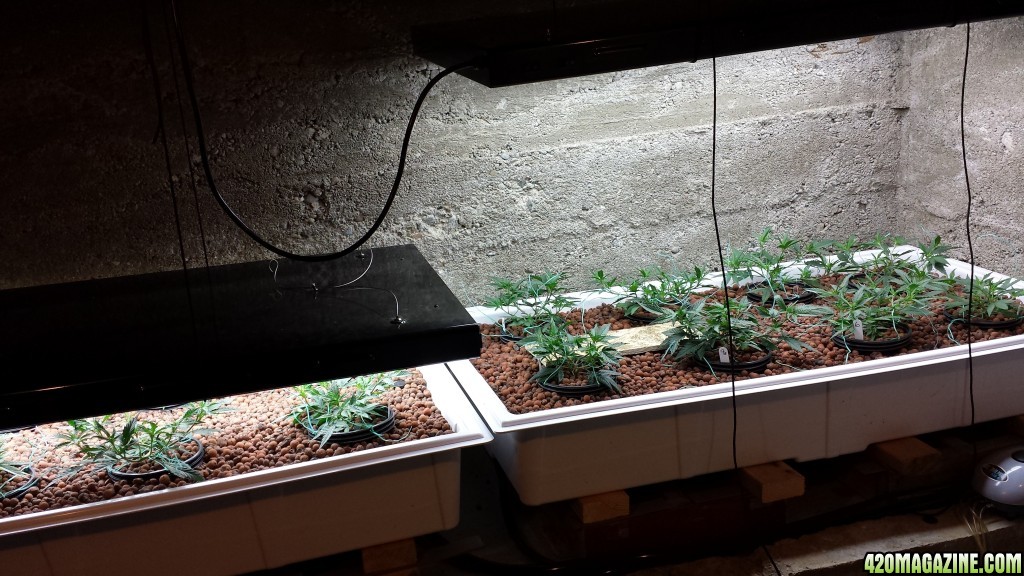
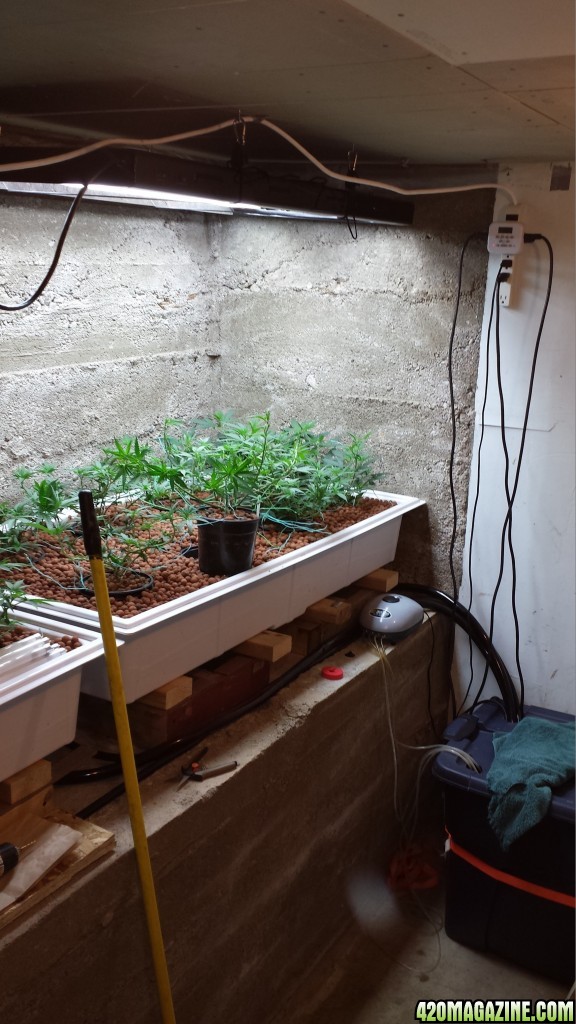
Veg Area
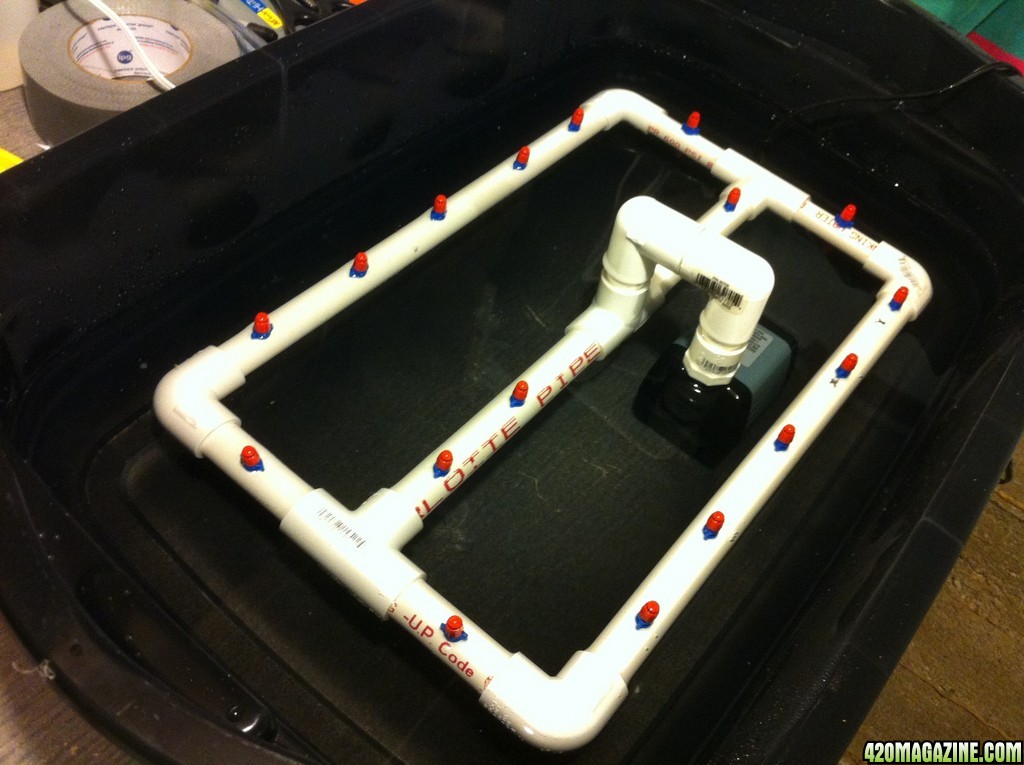
This is my veg area. It's a standard flood and drain tray system. For those that are not familiar with hydroponics, I'll briefly explain how this works...
Each tray has 2 drain fittings and it's own pump. One drain is 'tall' and controls the water depth, the other sits at the bottom of the tray with the pump connected to it. When the tray is in flood, its pump turns on and nutrients are pumped in. The water level will rise until it starts to spill down the 'tall' drain. When the flood cycle ends, the pump turns off and the trays drains out through the pump.
I use one reservoir to feed both trays as they are at the same growth stage. I found this great timer that lets you control 2 outlets independently. Note: in this picture the 2 pumps are NOT plugged in to the timer. This was transplant day and the reservoir was not filled yet. It's also why there are no plants.
My T5 fixtures are not hung using the hardware provided (those wires you can see attached near the corners. I wanted the ability to get them closer to the ceiling, so I couldn't use the hanger that is attahed to the lights. I tried shortening the hanger, but the lamp was not stable. Using the yo-yo ratchets this way works really well.
Clones @ ~1 week
@ ~2 weeks
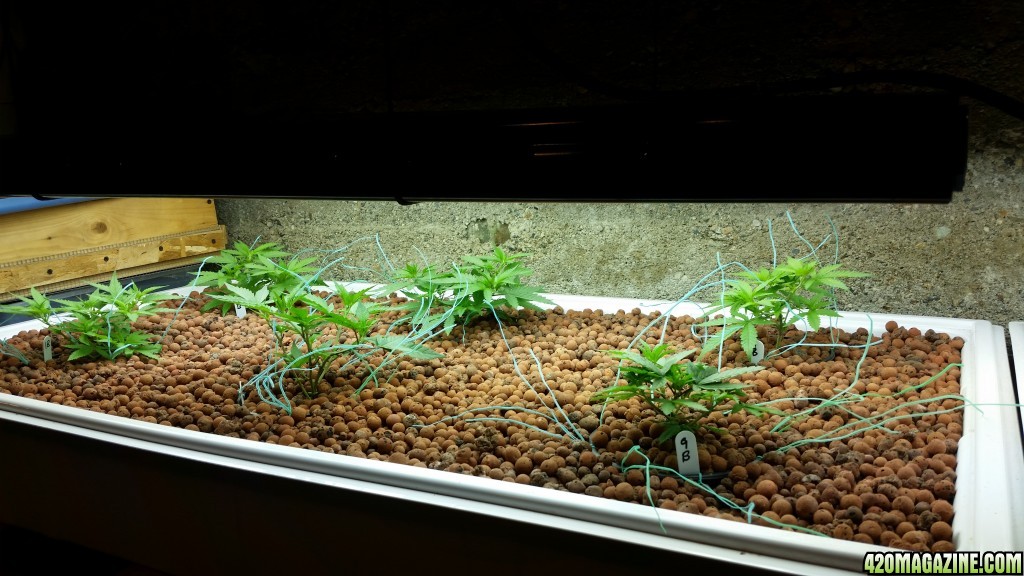
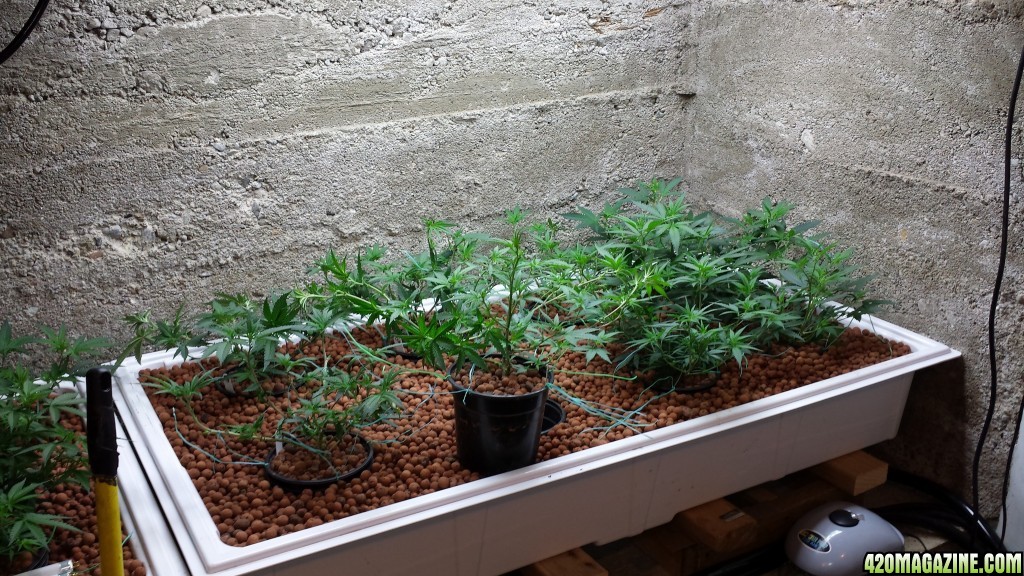
Here they are on transplant day! ~4 weeks in the trays

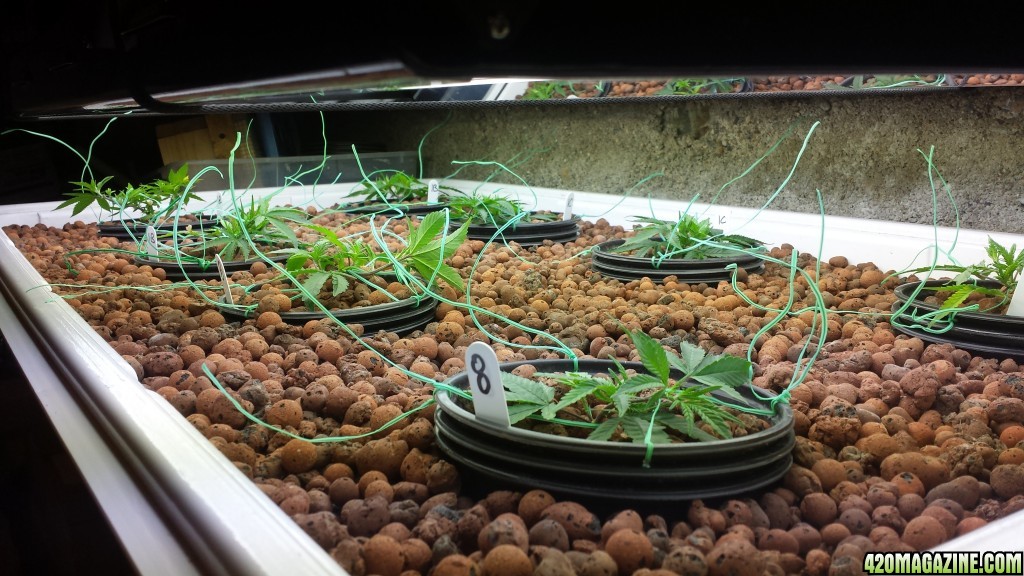
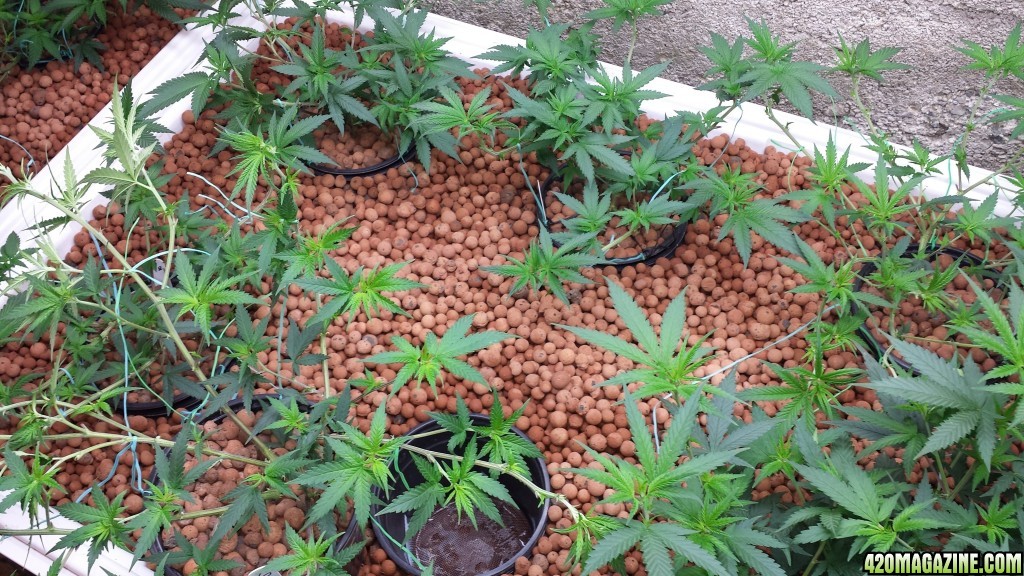
There is one other detali about the veg trays I want to share. My goal with my veg area was to allow transplant into my ebb&gro with the least amount of transplant shock. This meant I needed the plants to be in rock, and I needed each plant seperate.
My solution was to put each plant into it's own pot. This works OK, but of course the roots just grow down through the bottom of the pots and into the tray. My first solution was to put a piece of copper mesh at the bottom. This helped, but did not solve the problem. This is what I came up with.
I now use 3 pots for each site, along with 3 pieces of copper mesh at the bottom of each. This is working very well. I will periocically twist or spin the pots inside each other to help break up any roots working their way through the copper mesh obstacles. The copper doesn't stop the roots, but it definitely slows them. The nice thing about using multiple pots is I can move the plants around and I don't lose my "holes" in the rock.
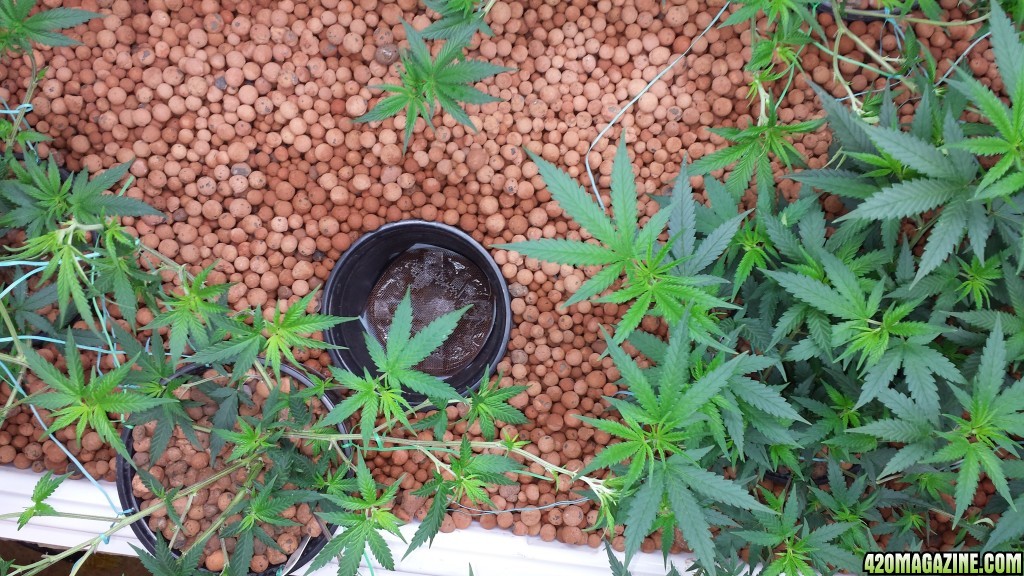
Transplant Day! These plants are going into the flowering room.
to be continued in next post...
It's taken far too long, but I'm finally starting a new journal to document all the changes that have happened in my basement. I'm a geek, so I'm into gear and hardware. Pictures of pretty plants and flowers are nice to look at, but I gravitate towards journals that talk about the actual 'growing' as much, or more, than the plants themselves. That being said, I WILL include pictures of plants, but realize my intent for this journal is to help others growers with ideas on how to setup their space. I'll also talk about my philosophies towards growing and many of the "why's" behind the way I do things. I hope you all find something useful here and thanks for stopping by.
Can you believe it started like this?
Now it looks like this!
Well that's the view from roughly the same spot. That's the doors to the flower room. More later...
First, I want to give credit to the book that got me started
Jorge, Bob, and Ed... Thank You
If you look closely, you can see a bunch of post-it notes sticking out. Those are my same bookmarks from the 90's, when I bought this book.
You can also see that I removed the book cover for the picture. I bought it while in college, so I covered ALL my books at the time. It seems to have helped this little gem survive 25+ years so far.
Many of you like to know what strains a journal features.
I'm working with: Blueberry, Critical, AK-48, Bubba Kush, and Apollo 13 x Vortex
This is a perpetual grow, so plants are in many different stages of growth.
I will go through each stage in detail, but a brief overview of the tech or hardware involved...
Cloning is done in 2 DIY cloners. They get no special environmental considerations other than I soemtimes insulate the totes from the cold floor. They get lighting from the veg trays nearby.
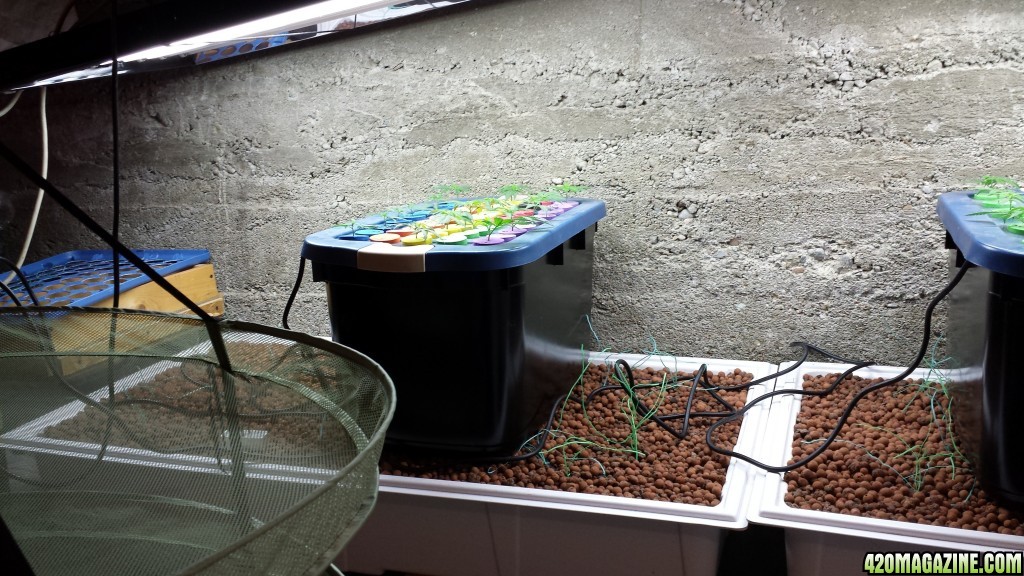
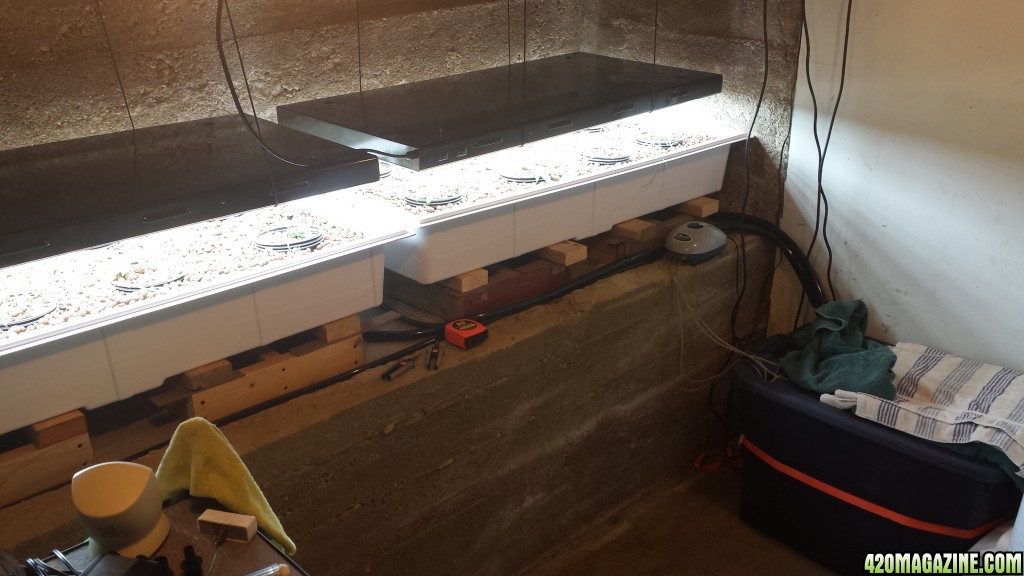
Vegetative growth occurs in 2 trays with a DIY flood & drain ystem, under 2 T5 fluorescent lights w/8 bulbs each.
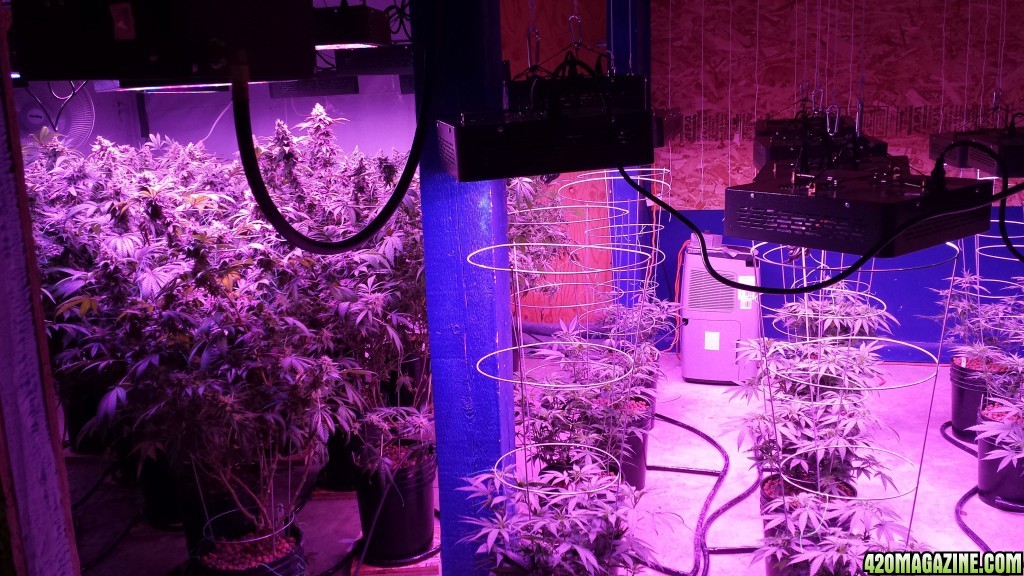
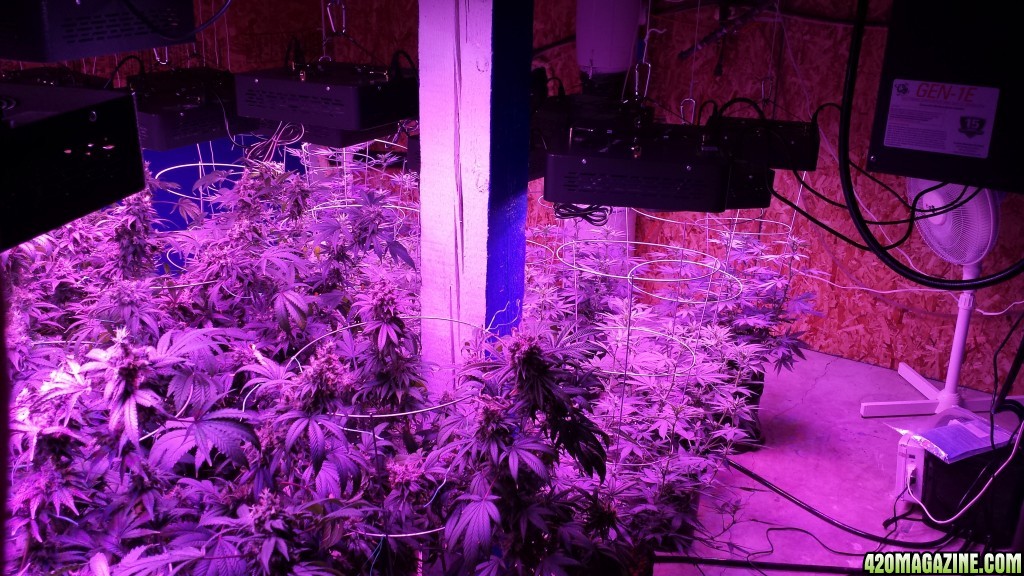
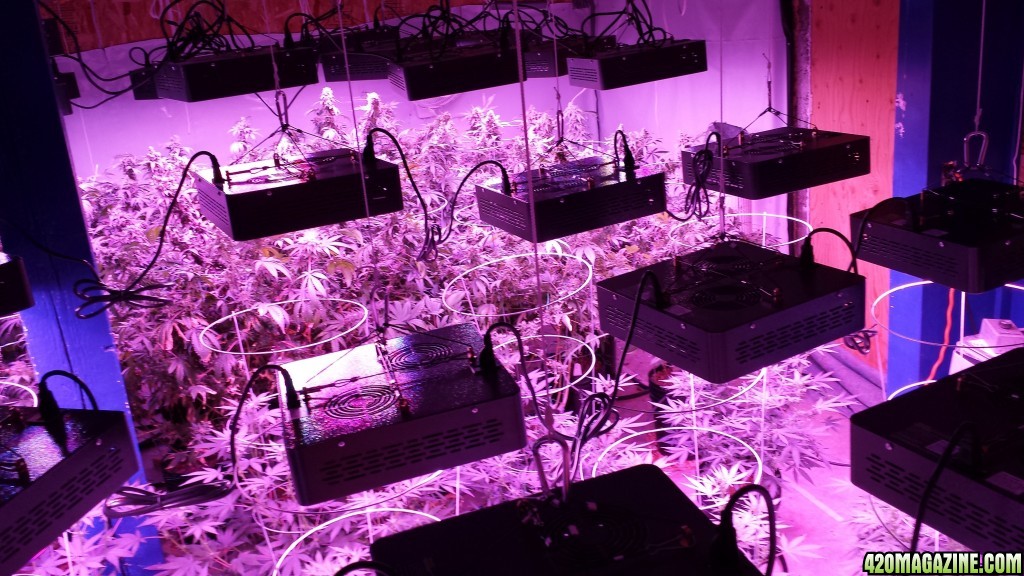
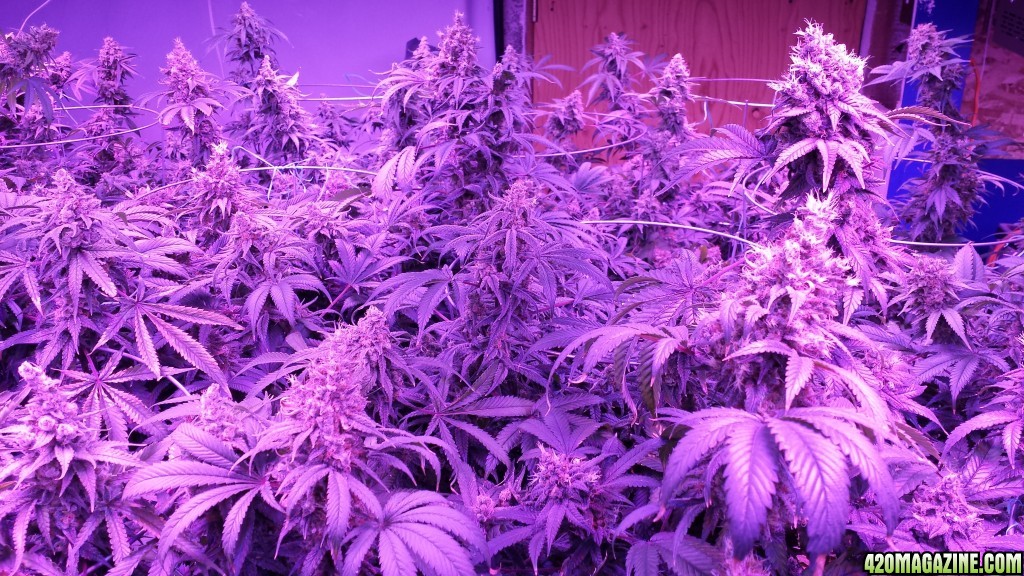
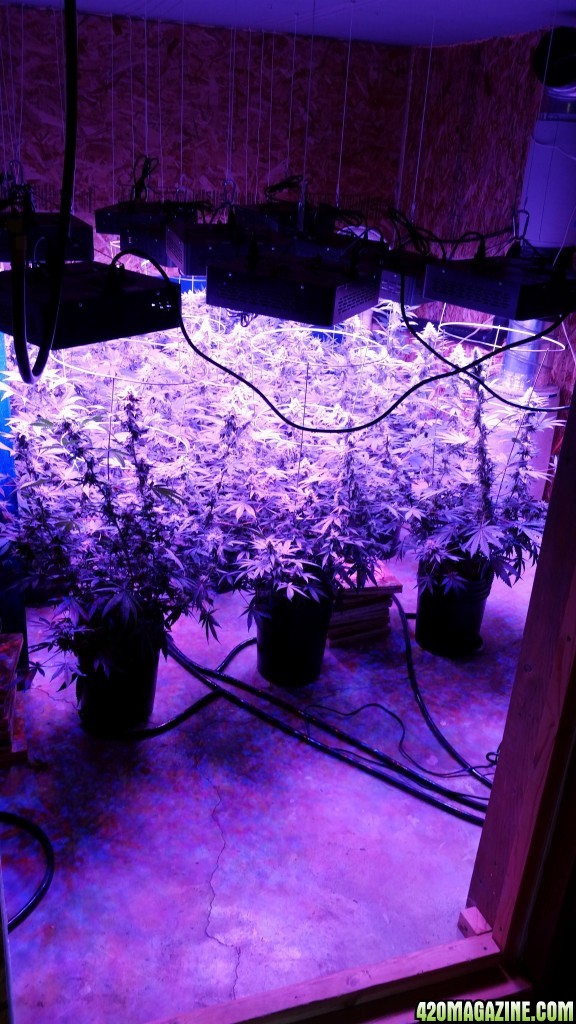
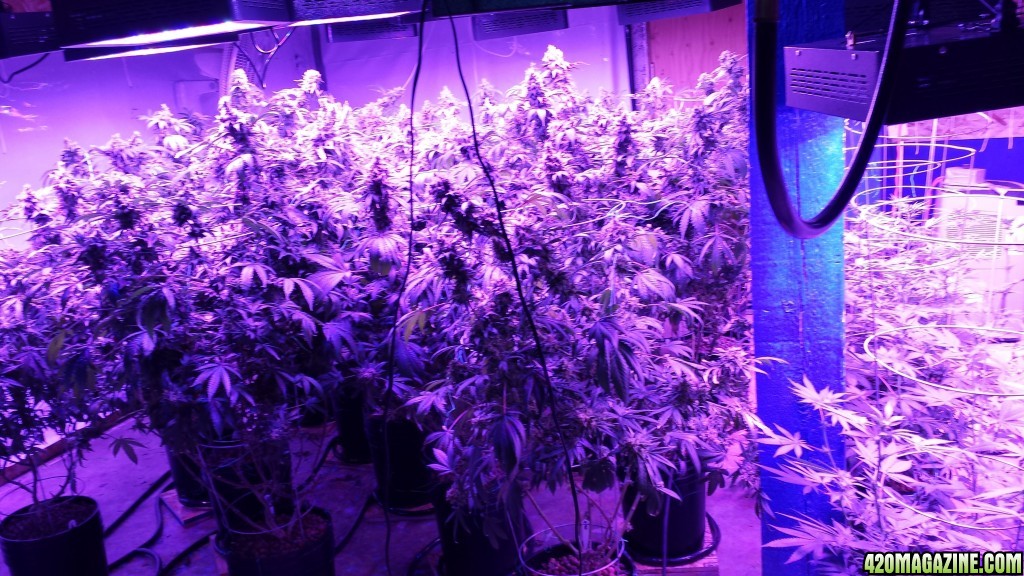
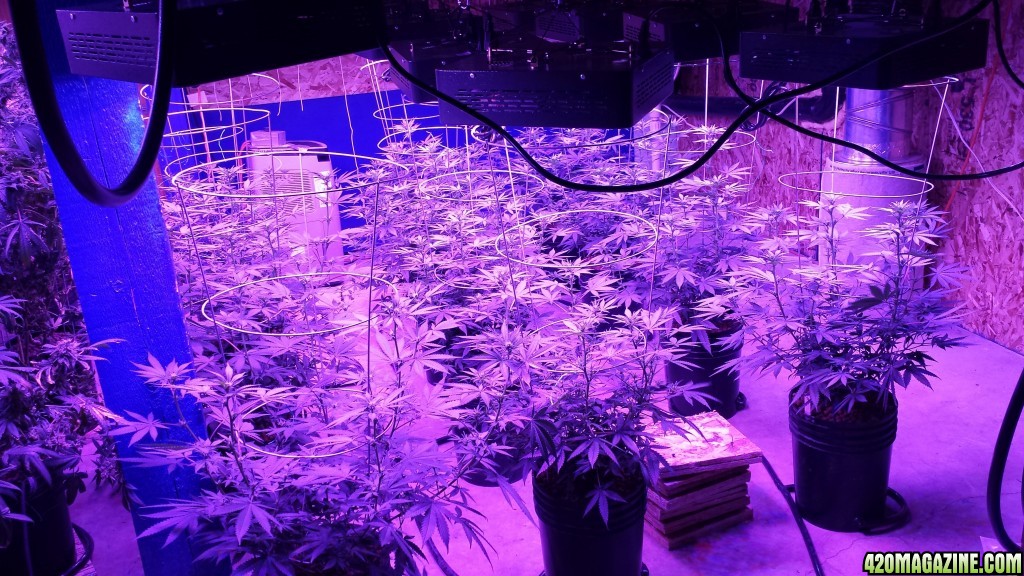
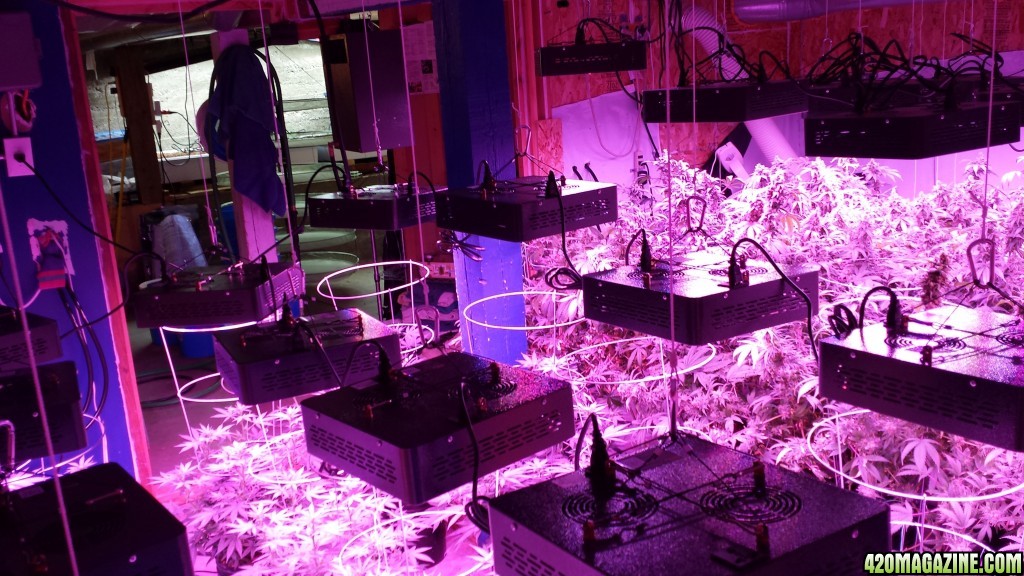
Flowering is a separate room. There are 2 CAP Ebb & Gro systems with 12 sites each (24 plants total).
It was pretty exciting when all this new gear came in. Guess what is in these boxes? There are 6 more already down that hatch in the background.
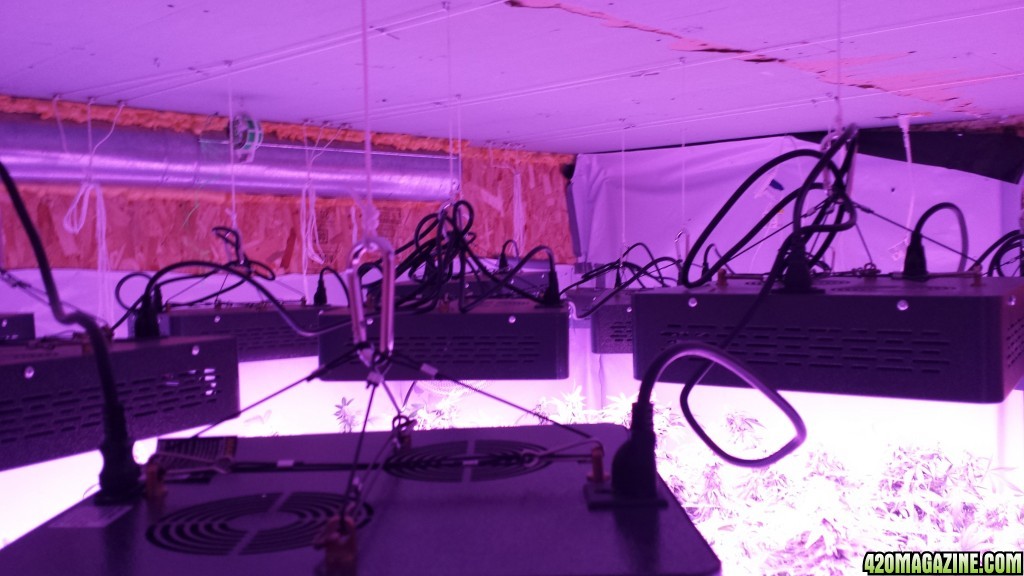
Lighting is 24 Mars II 400W lamps.
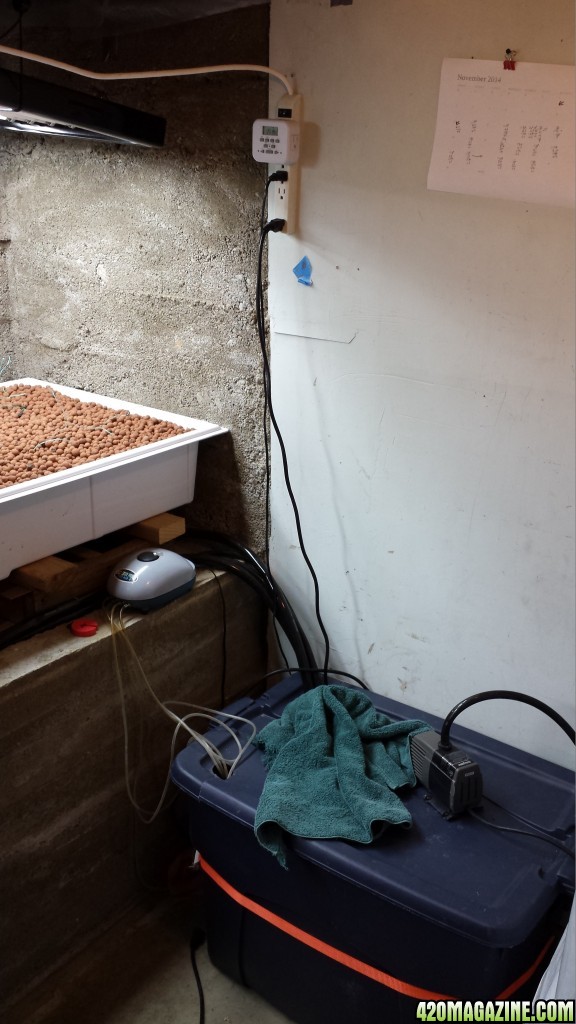
The environment is maintained with an AC,
CO2 generator,
dehumidifier,
and various fans all controlled with timers.
My nutrient line is mostly General Hydroponics Flora, but I use products from several companies. I'm considering moving to their organic line as I'm using some of the products and like them, but I've been getting good results and am reluctant to make too many changes.
I have an RO system from the filter guyz that supplies all the water used for growing, and drinking.
It feeds it's own barrel with a float valve. I have a pump inside and a long hose that comes out the top. I just control the pump with a power strip (shared with drain bucket pump). I'm realizing now I have no pictures of this.
Cloning
I make bare root clones. There are LOTS of very good write ups about this. I'll assume you've read some of them and are somewhat familiar with the process. I would like to make a couple comments where my technique differs from some of the more common advice.
I don't think an obsession with sterility has any benefit. I don't even use a new razor blade most of the time, and I get 100%, or very close, all the time. I write the strains on some plastic cups filled with RO. Then I just cut my clones and pop them into their cup. Larger clones seem to get larger plants faster, but how big really depends on your setup and schedule. When looking for a clone, I want 4-6 actively growing nodes and about 2-3" of stem below them. I simply slice the branch off longer than I need and pop it into the cup while I cut the others.
After all the clones are in cups, I put them into the cloner. I will usually recut the stem at an angle making sure to get into the water immediately to avoid any air bubbles (although I'm lately questioning if the 'bubble' theory has any basis in reality). I'll also scrape along the stem on both sides before putting it into the neoprene disc.
Inside the cloner is just plain RO until I see roots, then I will add some transplant food at a very very low concentration. The stuff I use is Lily something or other from sprawlmart's garden section. I got it for the houseplants, but it's got vitamins and hormones that help promote rooting. The Superthrive has some similar ingredients to promote root development. I may be wrong, but I get good results. Roots usually start to appear in 5-7 days and I like to remove them from the cloner at 18-24 days old.
Pics of the cloner and clones.
Veg Area
This is my veg area. It's a standard flood and drain tray system. For those that are not familiar with hydroponics, I'll briefly explain how this works...
Each tray has 2 drain fittings and it's own pump. One drain is 'tall' and controls the water depth, the other sits at the bottom of the tray with the pump connected to it. When the tray is in flood, its pump turns on and nutrients are pumped in. The water level will rise until it starts to spill down the 'tall' drain. When the flood cycle ends, the pump turns off and the trays drains out through the pump.
I use one reservoir to feed both trays as they are at the same growth stage. I found this great timer that lets you control 2 outlets independently. Note: in this picture the 2 pumps are NOT plugged in to the timer. This was transplant day and the reservoir was not filled yet. It's also why there are no plants.
My T5 fixtures are not hung using the hardware provided (those wires you can see attached near the corners. I wanted the ability to get them closer to the ceiling, so I couldn't use the hanger that is attahed to the lights. I tried shortening the hanger, but the lamp was not stable. Using the yo-yo ratchets this way works really well.
Clones @ ~1 week
@ ~2 weeks
Here they are on transplant day! ~4 weeks in the trays
There is one other detali about the veg trays I want to share. My goal with my veg area was to allow transplant into my ebb&gro with the least amount of transplant shock. This meant I needed the plants to be in rock, and I needed each plant seperate.
My solution was to put each plant into it's own pot. This works OK, but of course the roots just grow down through the bottom of the pots and into the tray. My first solution was to put a piece of copper mesh at the bottom. This helped, but did not solve the problem. This is what I came up with.
I now use 3 pots for each site, along with 3 pieces of copper mesh at the bottom of each. This is working very well. I will periocically twist or spin the pots inside each other to help break up any roots working their way through the copper mesh obstacles. The copper doesn't stop the roots, but it definitely slows them. The nice thing about using multiple pots is I can move the plants around and I don't lose my "holes" in the rock.
Transplant Day! These plants are going into the flowering room.
to be continued in next post...