Greenislands 5 Gallon Upgrade Ebb & Gro TEK

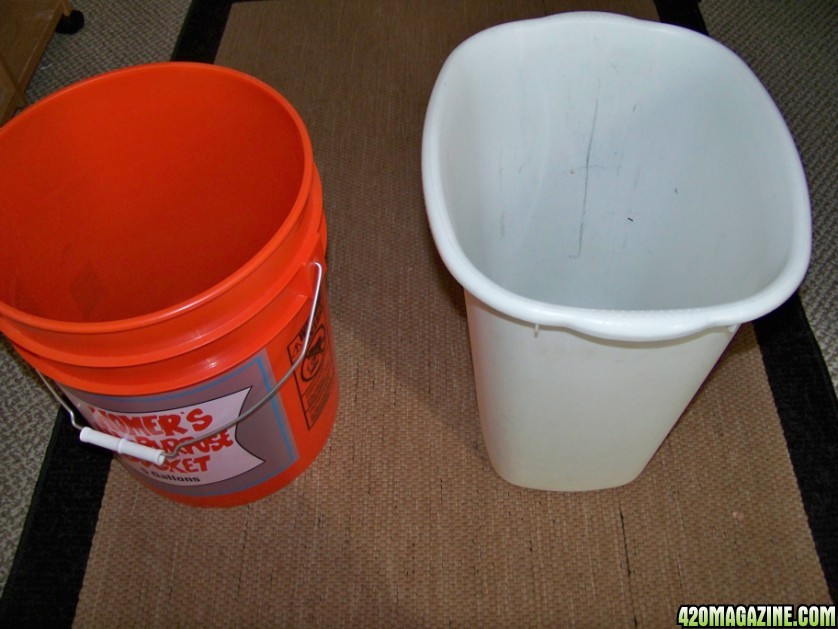
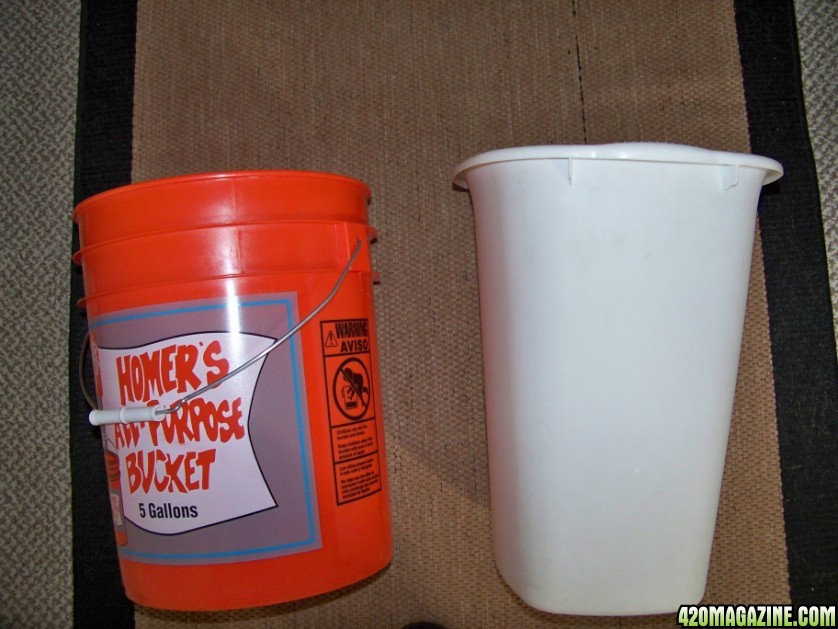
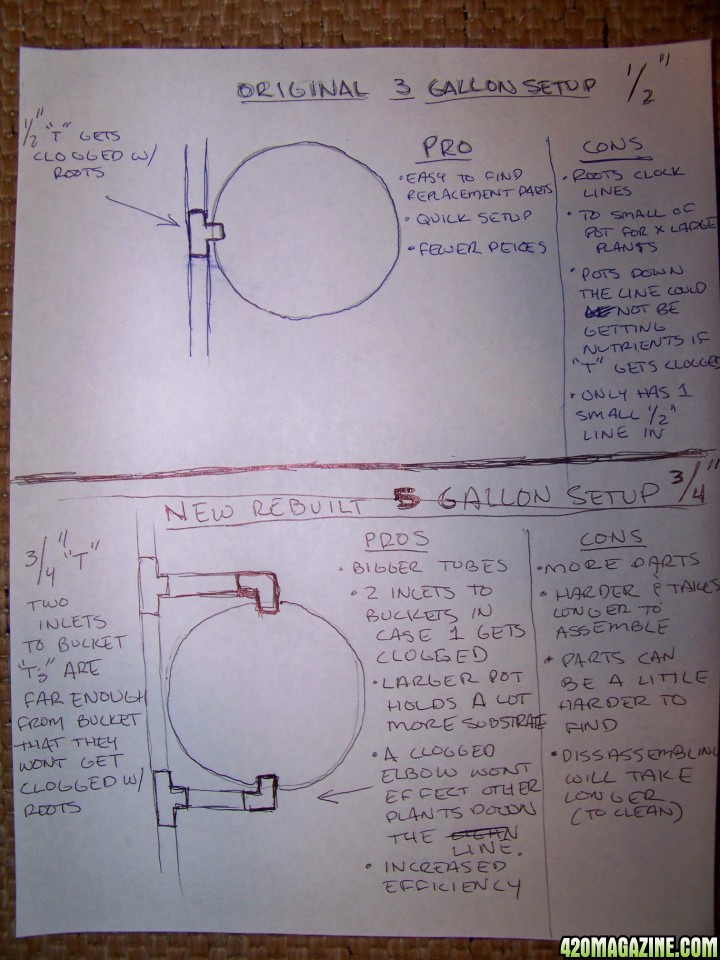
So this is the new thread I started to split my other thread entitled Greenislands Grow Journal Aug. '09. Enjoy the ride as I try and build a more efficient 5 gallon Ebb and Gro set based on the original by CAP using 3 gallon buckets. I hope we all as a community profit from the knowledge this build will give us. Thanks for veiwing. It might seem kinda choppy because some posts have been ripped from my other journal, sorry about that. And also keep in mind that after the build is done I will conclude this thread with a very detailed pictured TEK of the entire build, in it I will try and answer any and all questions someone could ask but if anyone has any they would like to ask me now, FEEL FREE! This TEK is here for YOU!


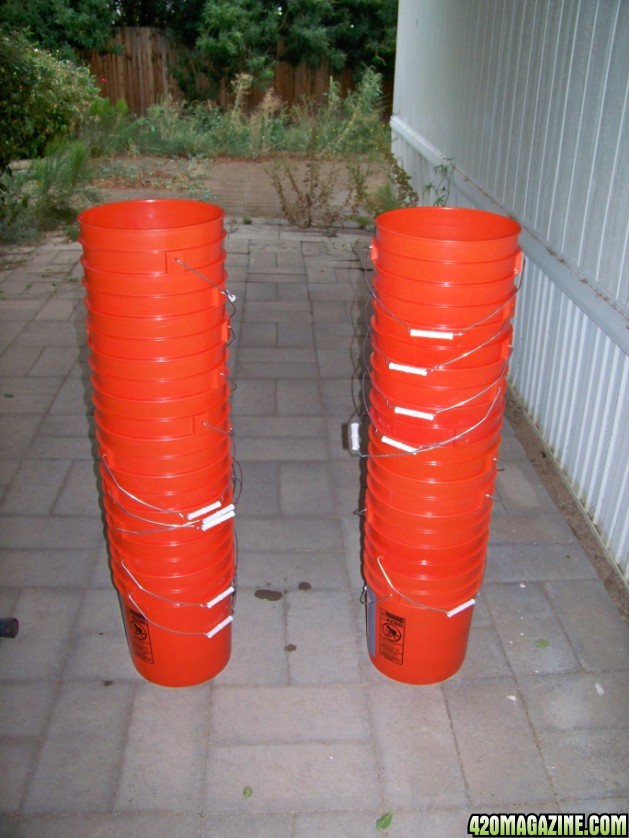
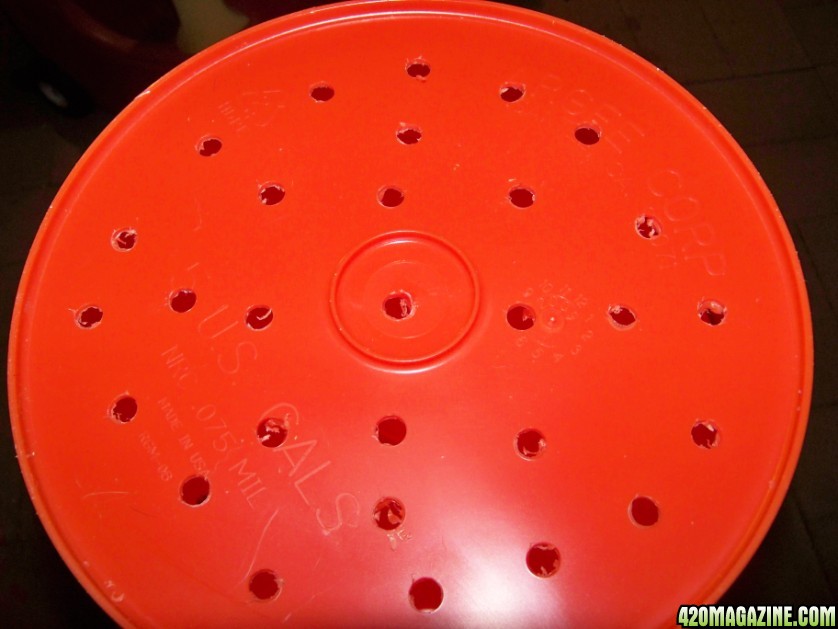
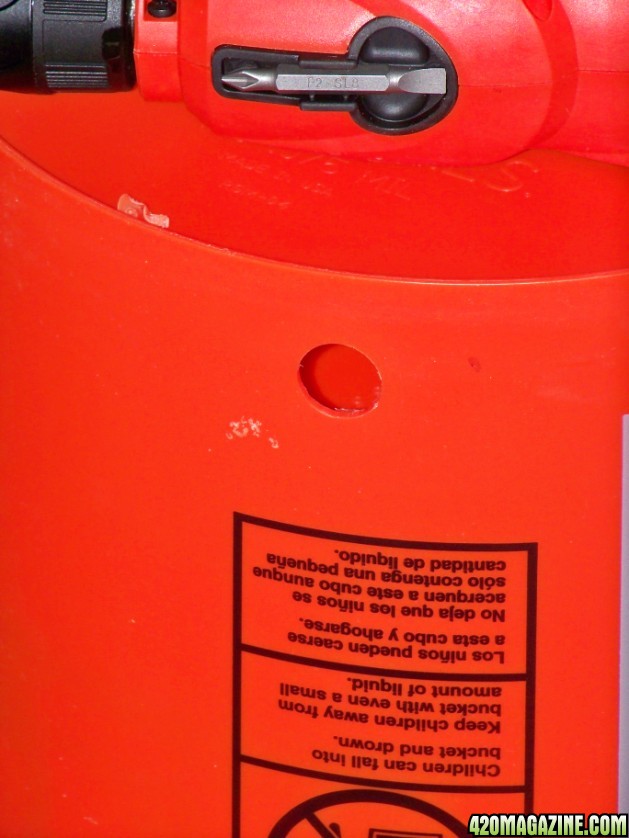
Alas, I have dissapointing news once again. I get to the hydro store and what do ya know, they have the wrong size, uuuggghh!! Anyhow I found a store that should carry every part I need to finish the TEK, and I should FINALLY be able to get this started. Ive had the holes drilled in the 5 gallon buckets for like almost 2 weeks now! I hate down time! Anyhow... if all goes well I should have the first of a few posts showing the TEK of my new ebb and gro unit up tommarrow.... heres to hoping! ..again!
 
Re: Greenislands grow journal 09' #2

So I feel like I owe the community something, especially since my ebb and gro TEK was supposed to be up 2 weeks ago! Anyhow Im still missing the grommets I need. I have everything else just about besides the CAP controller unit with floats and pumps and stuff. So Im including pics of what I have done so far and what I was able to aquire from the stores here. Grommets are damn near impossible to find here in the 3/4 in inside diameter I need. So heres whats done so far. Im sure you can see how it going to be going together. Also in the pics are my new SunSystem XL 8" air cooled hoods that I will have on 1000watt Lumatek dimmables with a lightrail 3.5 and slave trolley setup. All of which will be the lighting system for this new ebb and gro set if it ever gets done, uuuggghh!! Anyhow heres some pics to sooth some curiousity for now. The completed version of the TEK will be much like my *bubble hash* TEK as far as pictures and step by step instructions go. That way its easier for someone else to duplicate than it was for me to make originally. Finding all the right parts and stuff has been a huge chore, way more of a chore than it should have been...just some damn poly elbows and tees with grommets...who wouldve thought they would be so hard to find!? (oh and from what Im told GH doesnt make the 3/4" grommets anymore, go figure!). So dont go thinking this is my TEK, because its not. I will have step by step instructions and pictures as well as materials list, list of places to find the parts and anything else that might help someone else do the same as I have. This is just a few pics to hold every one over until the real TEK is up. There has been a lot of interest lately in tweeking the already fabulous ebb and gro set by CAP, so Im hopefully going to demonstrate how it can be improved upon, and through me we can find out how efficient and everything the unit is. And if its good maybe more people will build their own Ebb and Gro semi-homemade unit. Anyhow, here they are.

First is all the buckets after I drilled them out. I want 10 buckets in the end so I start with 20, cause in the end its 2 buckets per plant.(last few sentences were for the newbs here, if there is any, lol)

100_1075_-_Copy.jpg


Holes in the bottom of the inside bucket, 1/4 "

100_1082_-_Copy.jpg


Holes cut for outer bucket. currently they are cut at 3/4" but that will have to ge enlarged to probably 1" or even a little more to fit the rubber grommets in correctly. The final TEK will have all the specs. And list of the tools needed.

100_1079_-_Copy.jpg


And heres a couple pics of one of the bucket setups, one 3/4" tee, 1 3/4" elbow, 35' of 3/4" ID poly tubing (beefy stuff!), and 1 of the 5 bags of hydroton I bought for the buckets media (wanted to use higromite but higromite has shrank in size over the last couple months to pee sized rocks as apposed to the large rocks you used to get, and I cant have them falling through the bucket and clogging lines, so I am using hydroton instead). And kinda out of place are the hoods that will be used, but they made a nice display table, lol.

100_1158_-_Copy.jpg
100_1159_-_Copy.jpg


And a couple pics of my last crop, just to keep everyone interested, lol. In person they look white, in the pictures they look not so great, hmmmmm. Just trust me, their white and frosty!, would I lie to you?....lol...... Enjoy!

105_1134_-_Copy.jpg


105_1135_-_Copy.jpg


Until next time, (hopefully a day or two and the TEK will FINALLY be up) stay high everyone!
 
Re: Greenislands grow journal 09' #2

No problem 420fied! Its my pleasure to help! I finally picked up some grommets today. They only had 6 on hand so I have to wait till later today or tommarrow to get the rest. But so far Ive put one whole bucket together and its looking great so far. Everything fits well and is water tight! If I get the rest of the grommets today I will post the progress to date. But really its coming together nicely. Thx DGMGH and 420fied!
 
Re: Greenislands grow journal 09' #2

Think about all of the great growers on this forum.....

we really do have a huge knowledge pool that we all can draw from. I've learned a lot about this plant we love so much from this site which is the best on the net, hands down.

Really excited to watch this come together. I plan to use this as a blueprint for my build so be as detailed as you like GI. (hint hint) :)

Keep the pics coming, I love em.
 
Re: Greenislands grow journal 09' #2

Heres a pic of my progress at the end of today. Once again I will post the entire full bodied TEK when Im finished. (Probably about a wk and a half away still cause Im waiting on the control module...sorry guys). So in this pic you can see all the buckets I had plumbed, their upside down to show the 3/4" plumbing. Also I added a quick draw up of the differences between the old and my revised version of the ebb and gro "flood" bucket system. Enjoy!

100_11891.jpg


100_1191.jpg


Thanks for viewing everyone. And I should have a new pic up tomorrow of the current grow room. I hope the plants are done being transplant shocked...fingers crossed (i like to not go in the room for a few days at a time to keep the CO2 in and so it seems like they grew more, lol) thats why I dont know how they look really right now. Plus by the time I get home from work it already late as hell and i just want to go to sleep, ya know?...speeking of sleep, goodnight everybody!

EDIT: In the picture above I meant clog lines not "clock" lines. Sorry about the horrible drawings and spelling....my bad.
 
Re: Greenislands grow journal 09' #2

amazing DIY, great job and can not wait to see the rest.
 
Re: Greenislands grow journal 09' #2

looks like i've got some shopping to do now..i like the tutorial..thanks.My wife asked me to maybe cuts come numbers down, so i think i may go your route.Havent decided either scrog or your ebb-n-gro.
+ Reps on the D.I.Y and tutorial
 
Re: Greenislands grow journal 09' #2

looks like i've got some shopping to do now..i like the tutorial..thanks.My wife asked me to maybe cuts come numbers down, so i think i may go your route.Havent decided either scrog or your ebb-n-gro.
+ Reps on the D.I.Y and tutorial

You don't have to decide between ScrOG and ebb-n-gro; both can be employed simultaneously.
 
Re: Greenislands grow journal 09' #2

yeah thats what i was thinking.But i just have to see how much room i'm going to use this run.I think even though she asked to cut the numbers down i may have a hell of alot more space to work with.meaning a bigger room..i've been looking at pitvipers and greenislands journal using the ebb-n-gro.i'm going to re read thier entire journals to figure what i'll need if i do.but i will consult with the great ones here before o go for it.but we'll see.its all a thought at the moment.
 
Re: Greenislands grow journal 09' #2

GI,

What about epoxying some fine screen over those holes on the inside of the buckets? That will eliminate your root clog problem won't it?

Yeah, I actually did think about that, but It would have to be incredibly incredibly fine mesh for roots to not be able to grow through it. And it would make cleaning the buckets more difficult than its already going to be. This will be a work in progress so once Im done there may be things that other people see and want to change. Thats whats so great about this community, we all work together and help one another out! I love it! So Im going to see how this goes, and if I still have problems with roots I might have to try out the screen thing you were saying. But Im hoping that with all the changes Ive made the roots wont be an issue any more. Thanks for all the comments everyone. I greatly appreciate everyones input.:thanks::peace:
 
Re: Greenislands grow journal 09' #2

I wonder if a coarse copper screen could be employed. Roots hate copper; pots lined with copper paint can prevent roots from becoming root bound, at least from what I had read in the past.
 
Re: Greenislands grow journal 09' #2

Cool setup man..

Couple questions come to mind..

Are you using the original controller unit or have you made some type of modification? The original will not allow the 5 gallon buckets to fill as much as the originals fill. My guess is it will fill anywhere from 1/2 to just under 2/3 especially if elevating the buckets .5-1" to help send the bottom bucket water back to the controller.

What size reservoir do you intend on using and for how many 5 gallon sites?

Great work
 
Re: Greenislands grow journal 09' #2

Mcbuds, Yes I am using the original control module, just in another taller bucket or trashcan. I am buying the control module by itself. It doesnt come with the control bucket (atleast I dont think it does). It does however come with all the float switches and 2 pumps (from what I read, if I remember right atleast). Which is perfect because when it does come with the black bucket its connected to it permanently, and I would have to cut it off! Plus just the fact that its even connected to something that you will want to rinse off later seems idiodic to me, because it would be so much easier to clean (the way their assembled from the wharehouse has the electronics right next to where you want to spray) if it wasnt attatched. The fittings for the floats are different than the grommets in the bucket, (for those who didnt know this)they are threaded hard plastic, and that is why they use square buckets for the "control bucket". And that is why I have to follow suite. I was thinking of using a rectangle trashcan,

100_1192_-_Copy.jpg


but the sides arent straight up and down usually and that could have a negative effect on the float switches.

100_1193_-_Copy.jpg


So Im going to be looking for a straight sided trashcan to use as the control bucket. I have seen kitchen trashcans before that are tapered only on two sides and perpindicular to the ground on the other two sides, and that would work great. Also Im goping to make my controller able to come off the bucket so I can clean it, uuuggghhh, finally. So yeah, Ive already thought of that factor and trashcans is what Im thinking...anybody else have an idea of something better? Im open for suggestions always! Oh and Im only going to have 10 buckets/plants as usual, sometimes its 8 (they get big! even in the original system). And as far as a reservoir goes I could probably use the original 50 gallon drum but I think instead I will be using a 55gallon rubbermaid roll around reservoir. Its just like the usual big rubbermaids you buy at walmart or whatever accept its like 3 times thicker, barely flex's when filled to top with water (other cheaper ones contort pretty bad under the weight of the water). And what I like most about these rubbermaids is they have 8 inch wheels on one side, and there strong enough to hold the weight of the water and still roll! Ive been using them for a while. If you look earlier in my journal you can see one that I used to put all the old rootballs in.

And Munki, I have never heard that about copper before. Thats crazy. My guess is that if theres water on the other side of the screen it will grow through just about anything, BUT I have never heard of the whole copper thing your talking about. Thats absolutally forighn to me, never heard of it. It would be an interesting thing to try out though. Like I said earlier though for now Im going to try and live without any screens, and if I run into problems with the roots still I will have to change my strategy and then Im all ears, copper would be something I would try for sure. As of right now its been a huge pain in my ass just to get the GROMMETS so Im trying to not buy to much for this. Im trying to keep things (as backwards as it sounds) simple. Cause I want it to be as easy as possible for someone else to replicate, and the more peices you add the more you have to clean in the end, and anyone who has ever had to flush all the lines and buckets of this system knows its a huge pain in the ass. Im so glad so many people are reading this journal. Thx guys. And keep the comments coming. You never know what I may have forgotten. I WILL however go over every little detail of the setup when the finished TEK is posted, and trust me there are a lot more little details than even I would have ever imagined. Later yall. I hope to have pics up later today of the current grow, cause this journal has been all about the TEK recently I want to make sure everyone doesnt forget there is still a grow going on in the backround which is really the main focus of this journal...Actually I might ask a moderator to split this in two so they dont clogg each other...uugghhh I dunno yet. Peace out guys! And thx for all the comments!:thanks:
 
Back
Top Bottom