Gazoo
Member
BUILD INSTURCTIONS
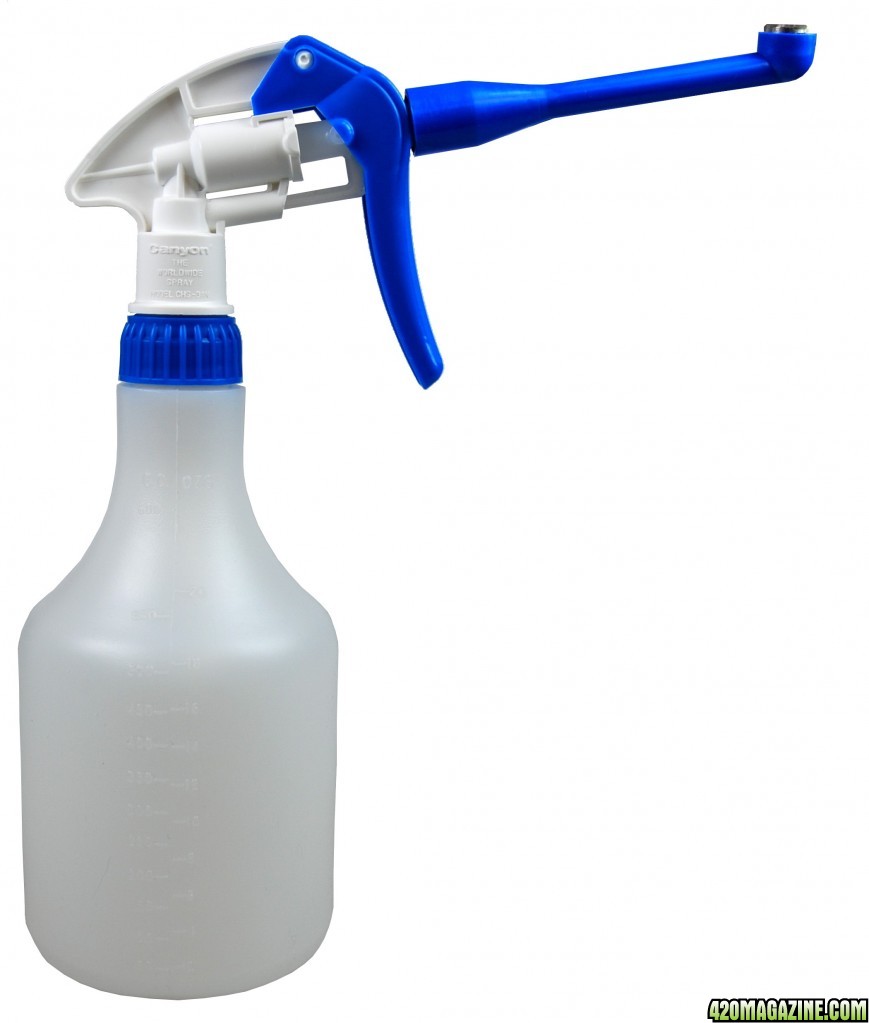
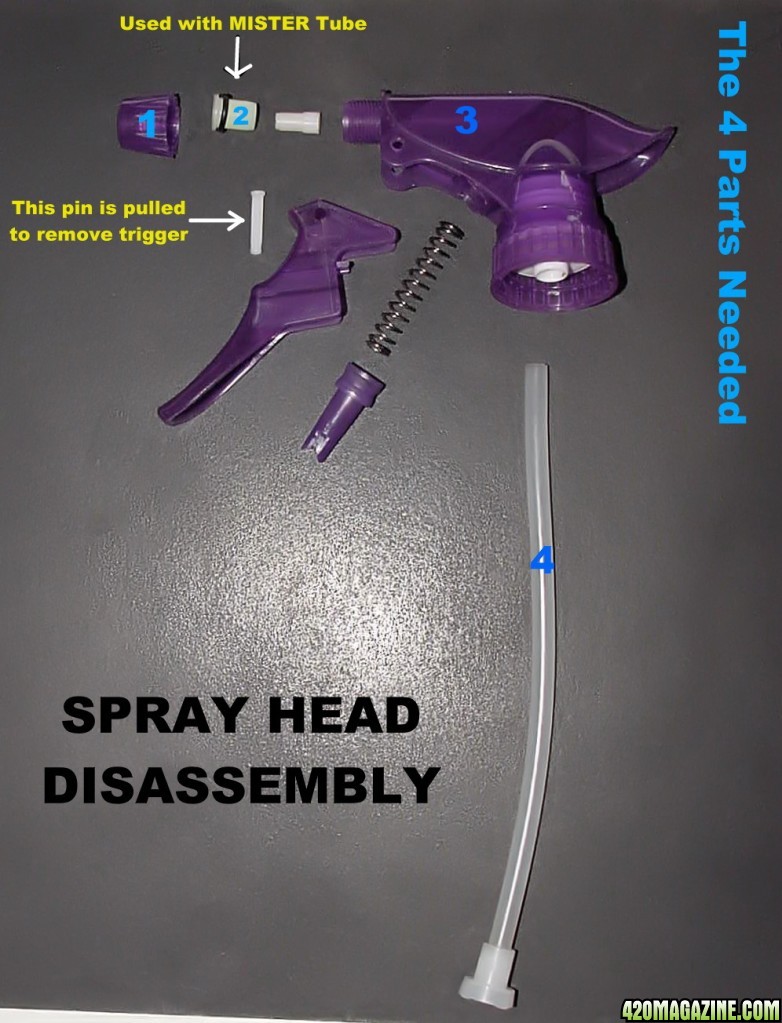
Under Leaf Foliar Sprayer
Under Leaf Foliar Sprayer
I wanted to make sure this was repeatable so I BUILT another one,
Works better than the First
 I also included Some improvements
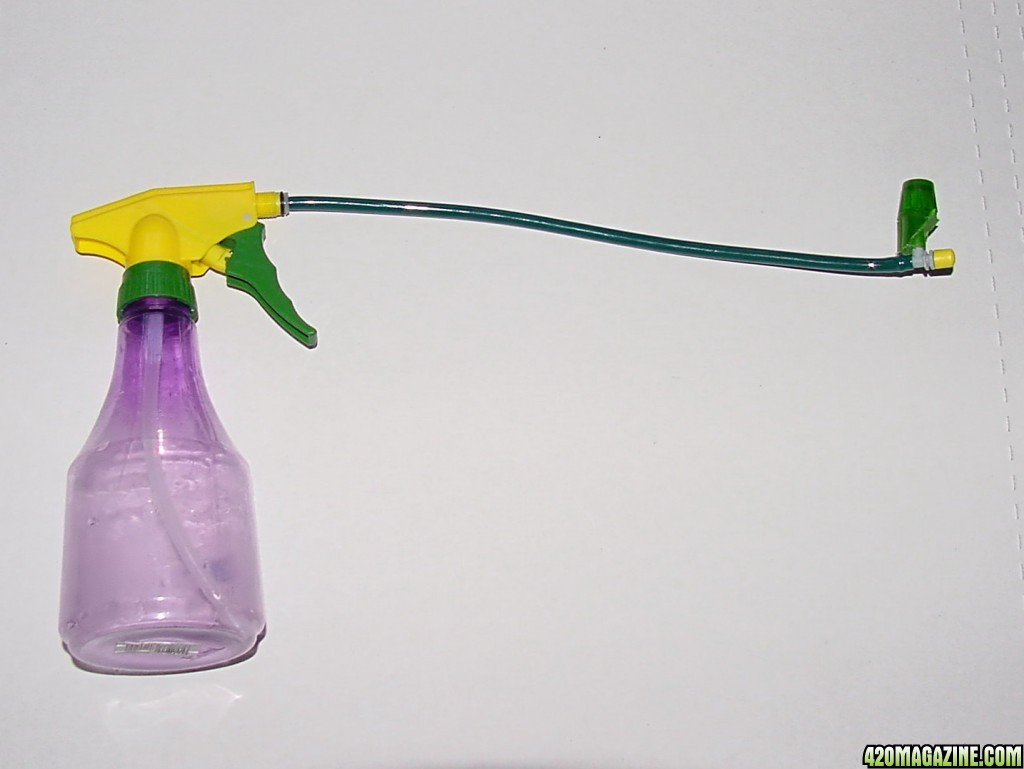
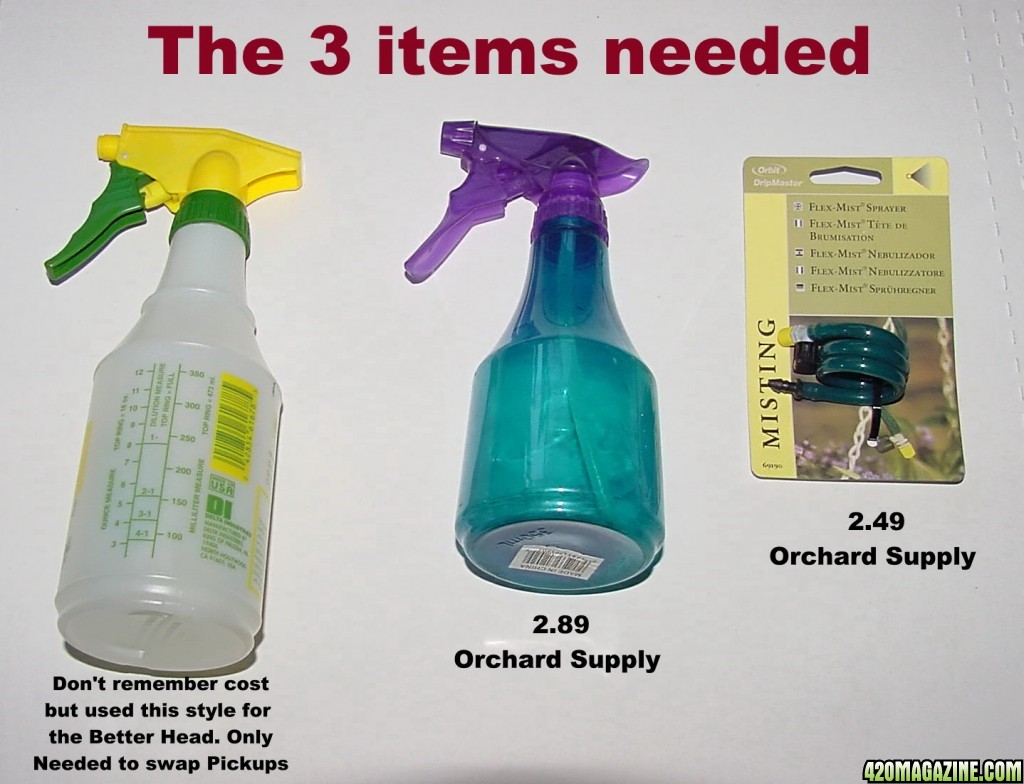
ITEMS NEEDED
1. Spray Bottle from Orchard Supply, just saw same one @ DALES 2.99
(this specific model will need to be used as my build is built around it)
2. Flex —Mist Sprayer @ Orchard Supply 2.49, Again same model needed
3. Spray Bottle any type, only need the Triggered spray head Dollar Store 1.00
NOT NEEDED
But makes things easier
But makes things easier
4. 12-24 Tap - DALES HARDWARE 4.99
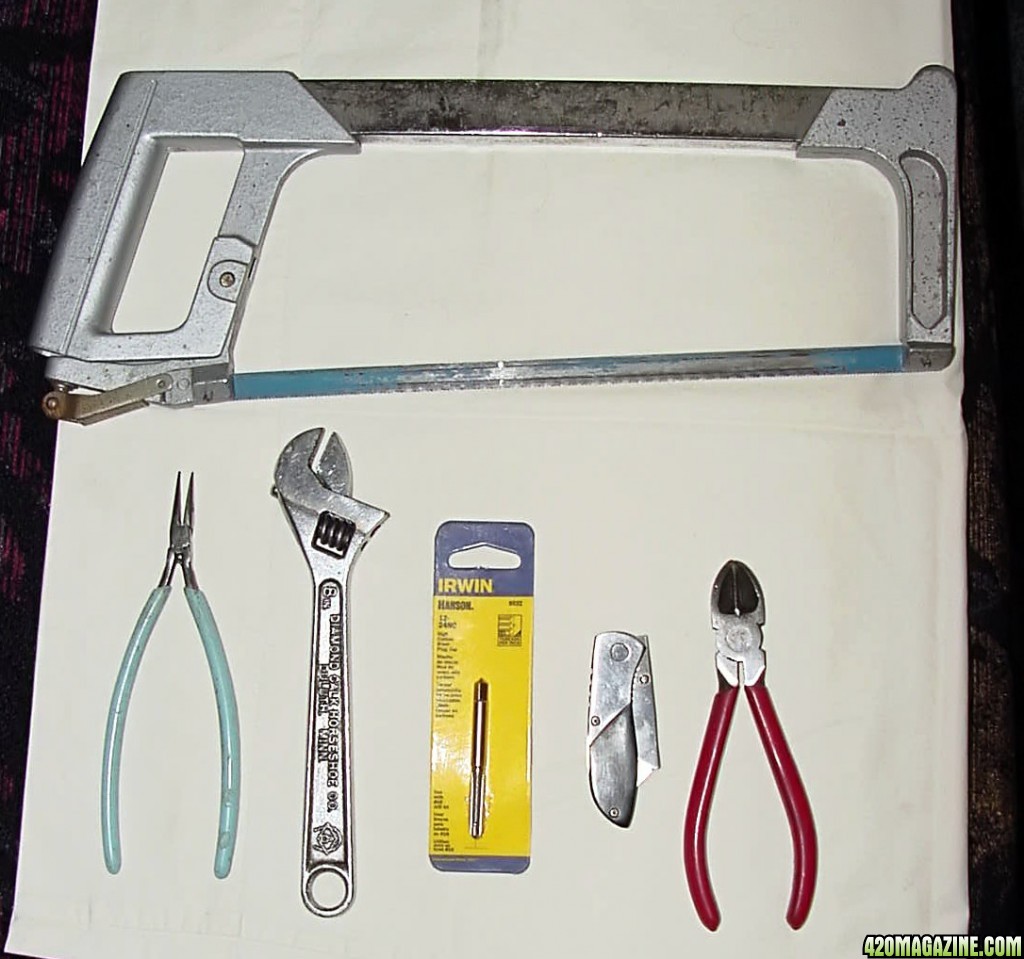
TOOLS NEEDED
- Hacksaw — Used to Cut Spray Head- Wire cutters — Used in more than one process
The Following Tools Not Required but WILL make things easier
- Box Cutter — Only used to clean up hacksaw & wire cutter rough cut edges
- Tap Handle — Only used to hold Tap but a crescent wrench will work also
- Needle Nose pliers — Only Used to pull out the copper wire
Step 1:
DISASSEMBLY:
OCHARD SUPPLY SPRAY BOTTLE
OCHARD SUPPLY SPRAY BOTTLE
Use Wire cutters to pull the little white Pin that holds the Trigger in Place.
One side has a Head like a nail, Use the sharp side of the wire cutters placed
under the edges of the pin head, DON'T cut it off, just use the cutter to pull it out.
Once removed the trigger will come off next pull out the push tube and spring
that is behind the trigger ( CAUTION Spring May EJECT without notice).
Next Remove/Unscrew the spray nozzle adjustment cap. This will reveal a white
plug with black O'Ring, USE finger nails behind the white plastic in the same way
you used the wire cutters and pull out this pressure fitted plug *** STOP ***
READ BEFORE PULLING OUT THE PLUG
There are 2 pieces, One is inside of the first !!!When you pull out the plug there is a very good chance the second piece will
Fly/Fall Out - BE CARFULL we need these parts.
ALSO PLEASE NOTE:
There is another part deep inside of the head, it should not of come out but
wanted to point it out just in case.
Last part to take off is the pick up tube, just pull it out, its only press fit.
You will need this if your second spray bottle is not the same size.
Step 2:
CUTTING THE PARTS:
Once the Spray Head has been disassembled
CUT 1Once the Spray Head has been disassembled
Take the Wire Cutters and cut up the sides like pictured, only cut up as far
as the cutters can reach, You are only making a cut not removing anything yet,
do this on both sides.
CUT 2
Now use Hacksaw and make 1 straight cut as Pictured.
CLEAN UP
Use Box cutter to clean out edges of the hole like shown in photo. At this time
it won't hurt to clean up the rough cuts as well. Be Careful its hard to hold.
We should now have a spray end just like the one pictured.
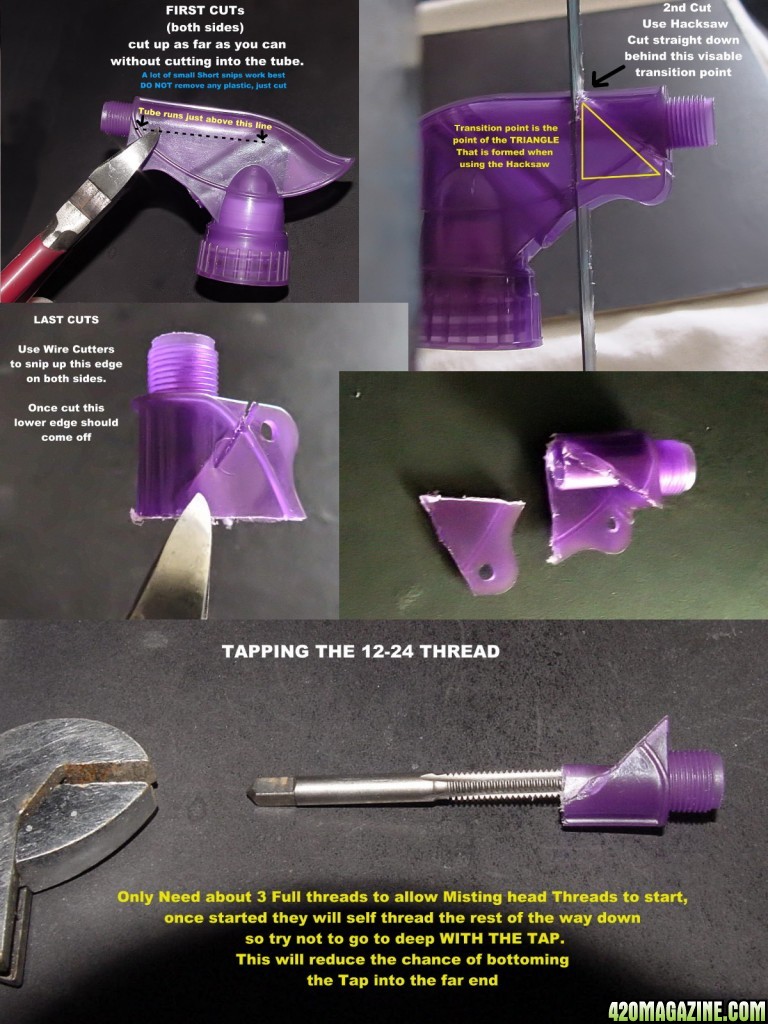
TAPPING THE NEWLY CUT
SPRAY HEAD
PLEASE NOTE:SPRAY HEAD
The first one I made, I used Heat to soften-up the plastic first and then force
threaded the Flex-Mister threads into the spray head.
It worked but I don't recommend it
BETTER to use a 12-24 Tap and Tap the hole. Much easier
DO NOT TAP ALL THE WAY TO THE BOTTOM See note below
NOTE: I could not find a BOTTOM Tap So used a standard tap with the
typical long tapered pointed end, I only threaded it in maybe 3 full threads.
I did not want to mess up the bottom end of this hole, its part of the spray head.
This worked well, it gave me just enough thread so that it self-threaded the rest
of the way down. But watch close when assembling, make sure its actually going down
and not stripping out the new threads.
LAST:
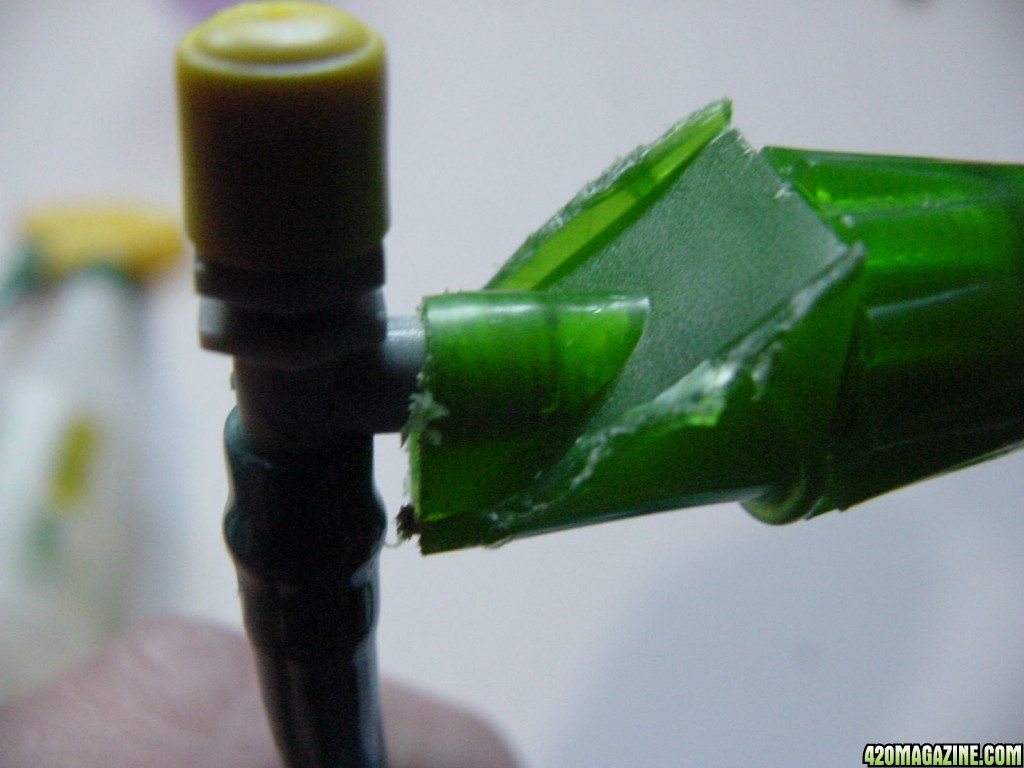
When threading the Flex-Mister onto the new spray head try and screw it down
all the way and orientated just like the one pictured.
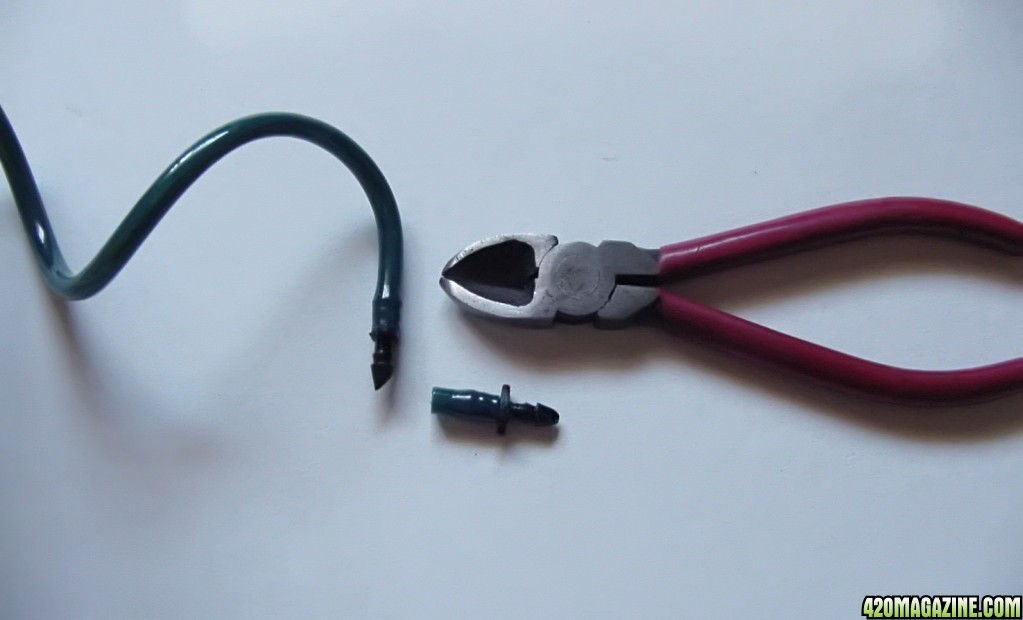
PREPAR THE FLEX — MISTER TUBE
STEP 1: Straighten out the tube as best you can.
Next Take the wire cutters and cut off Black Plug End, Cut as close to edge of the
black plug as you can. Note there is a Copper Wire in the Tube so it will take some
pressure to cut through it.
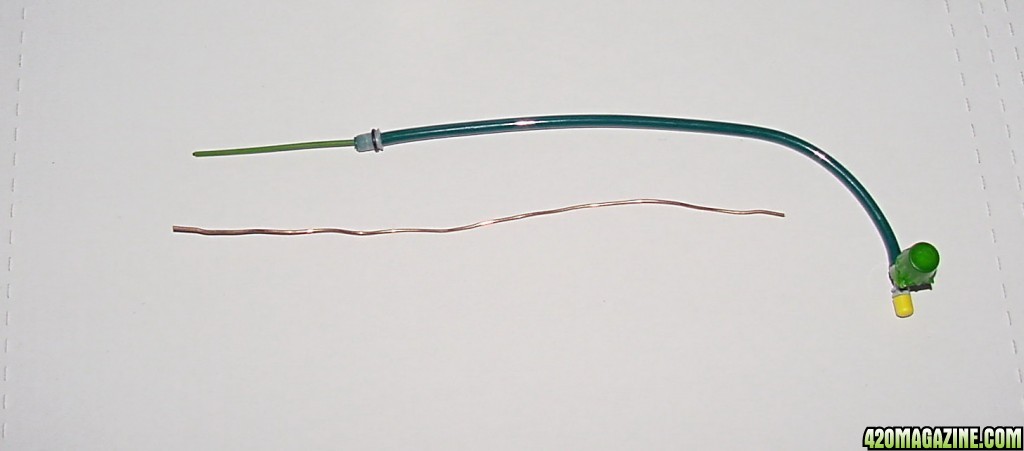
Once the black Plug End is removed Pull out the Copper Wire ONLY if you are
going to replace it with something a little stiffer? If removing use the needle nose pliers
to get a grip and pull out. Replace with something stiffer for better support.
ADDITIONAL Support: I found using a McDonald's Straw over the soft tube gave it
some extra support as well, so if you want to add this additional step, before you go
any further, you will want to run the Tube through the straw. Once the white plug end
is on the tube you wont be able to run it through the straw.
STEP 2: Now take the White End Plug.
It's The Part with the Black O'Ring (number 2 in the photo), that we removed from the
spray head (Take off the O'Ring and save it for later)
This is going to be the hardest part.
We need to get the Flex-Mister TUBE through this white plastic plug/sleeve.
NOTE: The Plug/Sleeve has a larger end that goes onto the tube first.
HELPFUL HINT:
I used Heat to soften/shrink the tube end before pushing through the White Plug.
I Held it over our Electric Range with end straight down near electric burner until
Soft, GO SLOW, I Tried a few times before it worked. Pushing through in a twisting
motion seemed to work best, push until it just passes through the end.
Once all the way through trim with box cutter flush with White plug End Edge.
This will need to press fit all the way down when pushed back into spray head,
otherwise it will pop out when sprayed.
STEP 3:
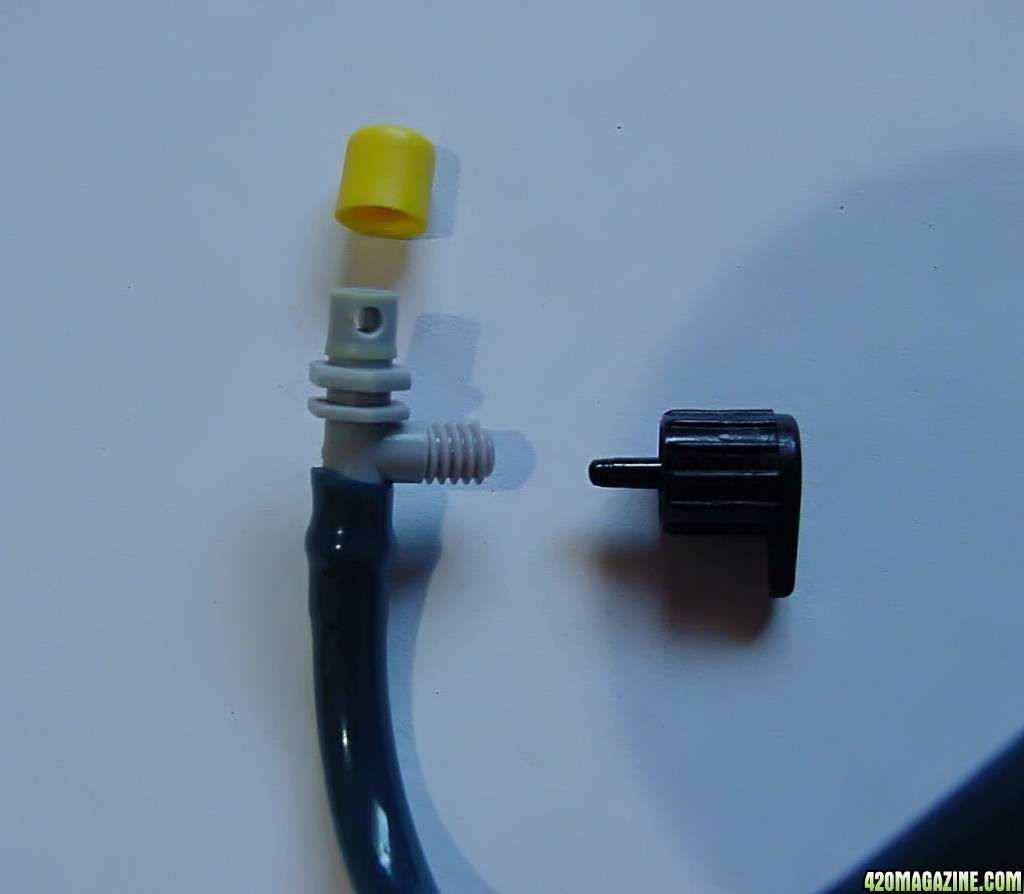
Remove the black adjustment cap on the side of the FLEX-MISTER, This will
reveal the 12-24 threaded end that needs to be screwed into the newly made
Spray head.
The new spray Head should have been tapped so all that needs to be done
now is to screw it onto the side of the FLEX-MISTER. Watch to make sure
it is going down (don't want to strip out the threads). Screw it all the way down
as shown in photo.
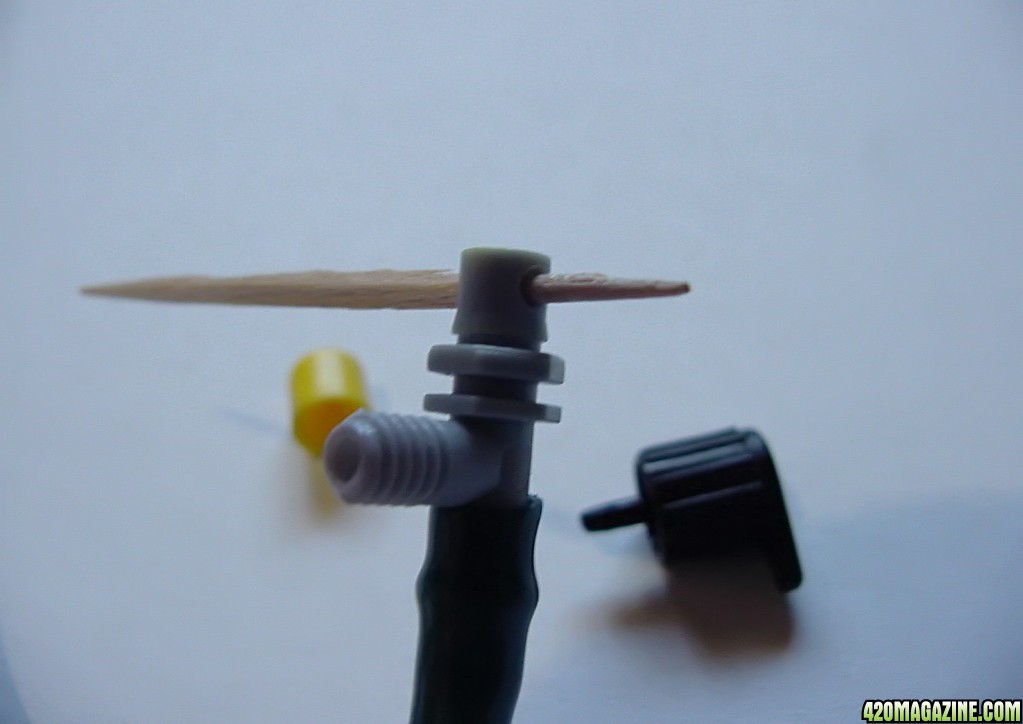
STEP 4:
Remove the yellow end cap from the end of the FLEX-MISTER, Just pull
it off, you will see a through hole that needs to be plugged with something.
A piece of Tight fitting plastic, would be best, but I simply used
a toothpick forced through and cut flush on both sides and then replaced
the Yellow cap.
FINAL ASSEMBLY
You will need to remove the SPRAY adjustment cap on the SECOND Spraybottle, remove the center white plug with O'ring and the second little
white part that is inside of the white plug.
Take these extra spray head parts and insert them into your NEW spray,
(White plug with O'Rind and the Smaller white part). Replace the Adjustment cap on end.
The only thing now needed is to insert the NEW Extended SPRAY TUBE
into the second spray head and bottle
READY FOR TEST and spray mist adjustment, turning the cap will adjust
the spray mist. Should be very fine
")