PopoPipo
420 Member
Hey Friends and Family! 
I am pleased to finally have some time to sit down and start this second grow journal. For everyone who hasn't seen my first grow yet, check it out. It might be helpful to understand some of the stuff I'm about to mention =)
300W LED - Hydroponic - Moby Dick - First Grow - With Love
But let's get right to it!
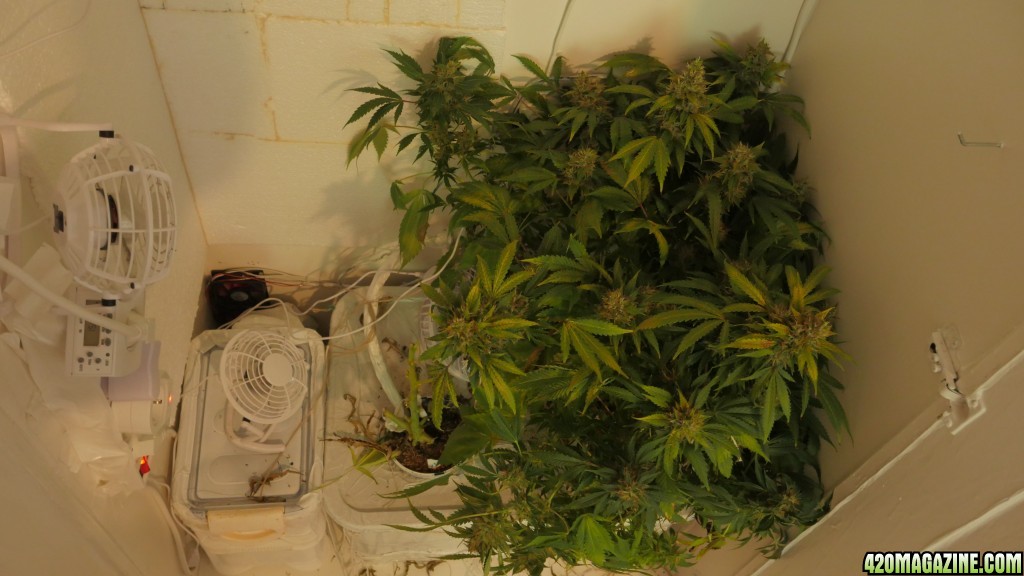
This time I'm trying to grow two plants at once, since the last time I actually had quite a bit of room left in my closet.
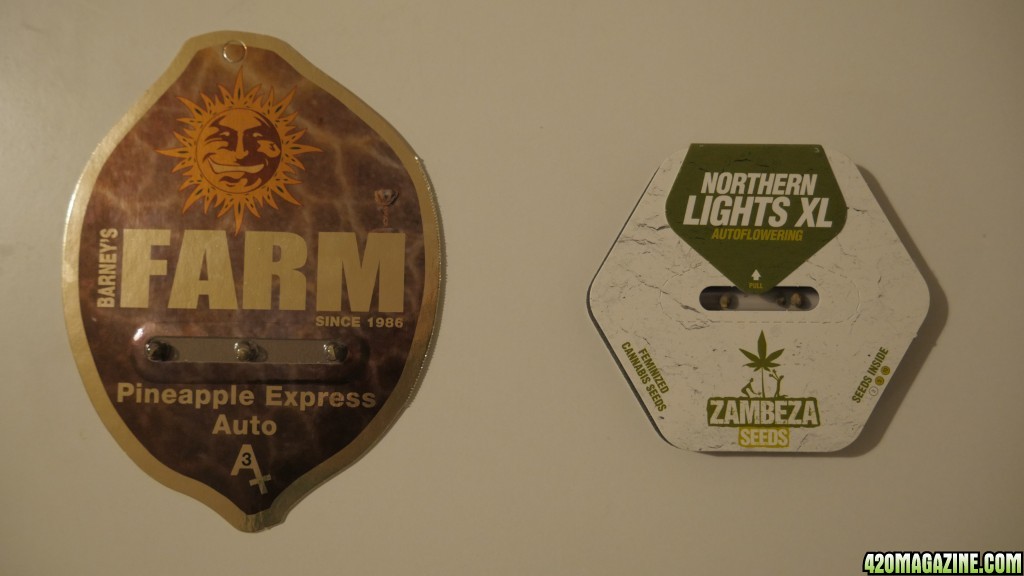
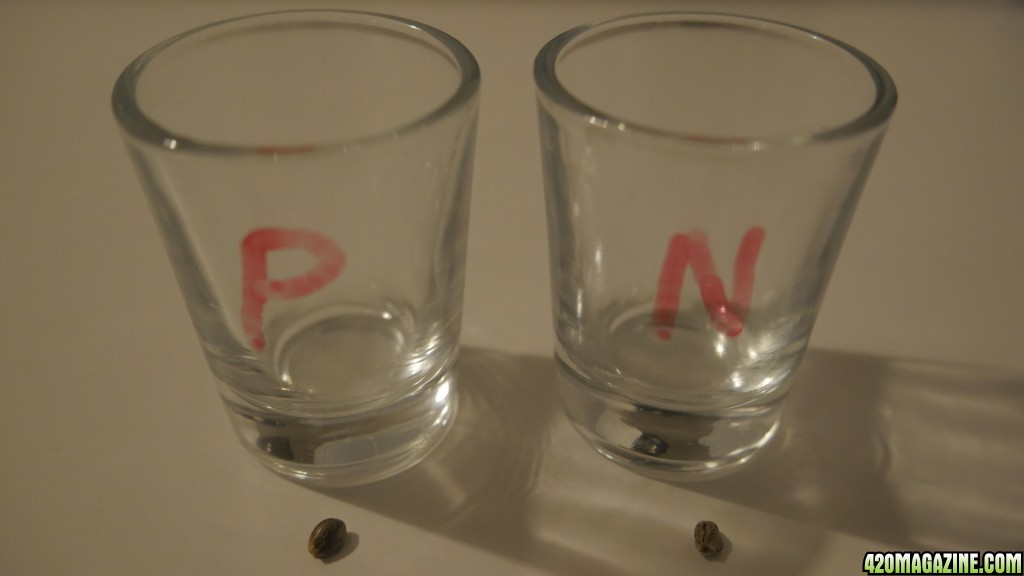
The first choice of auto strain was Northern Lights, which is simply one of my favourites and usually gives me very vivid, visual impressions during my high! And the second one was out of sheer excitement for my setup. Pineapple Express! I've never had it, but since I can grow my own bud, and reviews praise it, I decided this was the right one to go for.
So, I started off the same as last time, by putting the seeds in water.
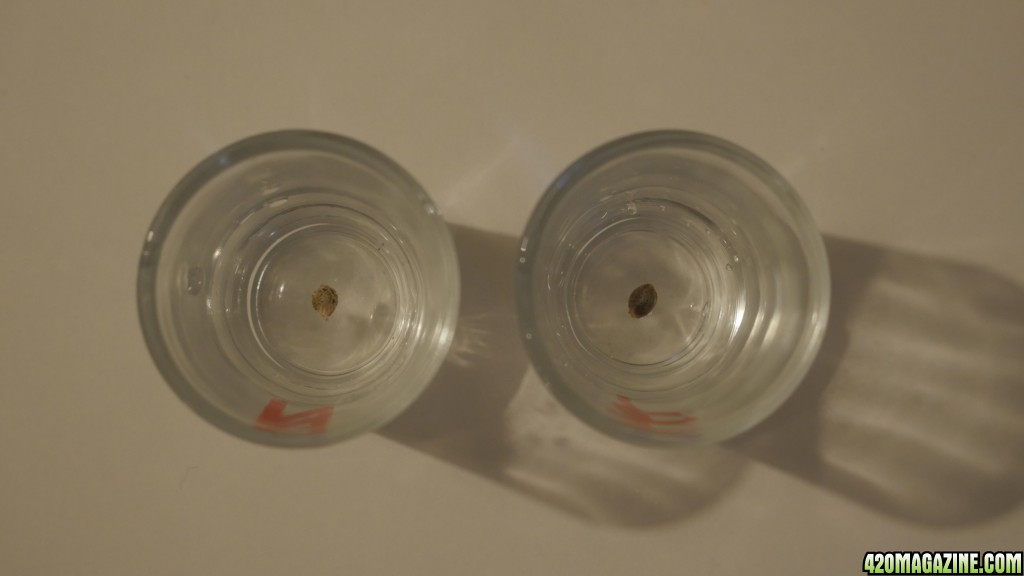
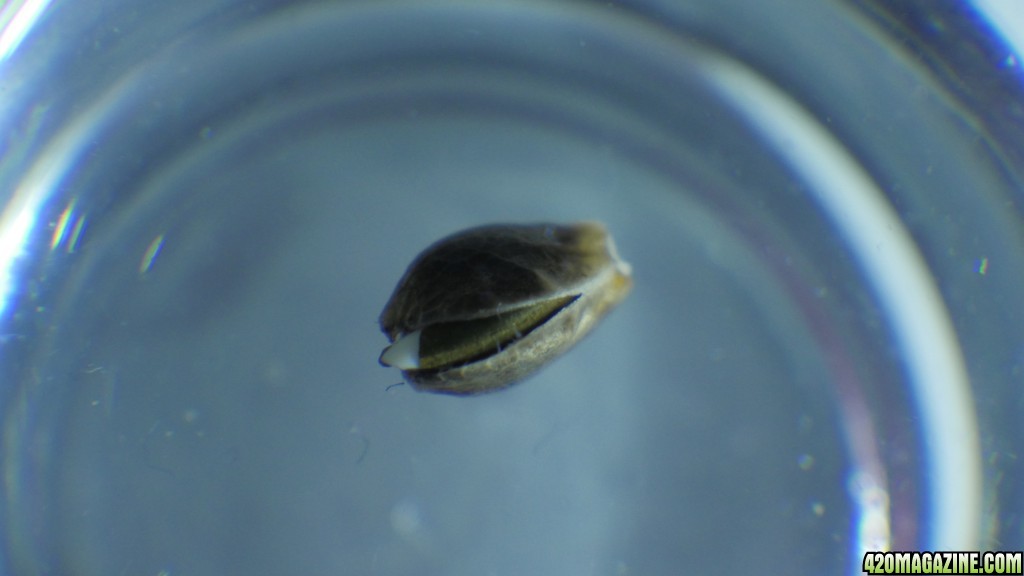
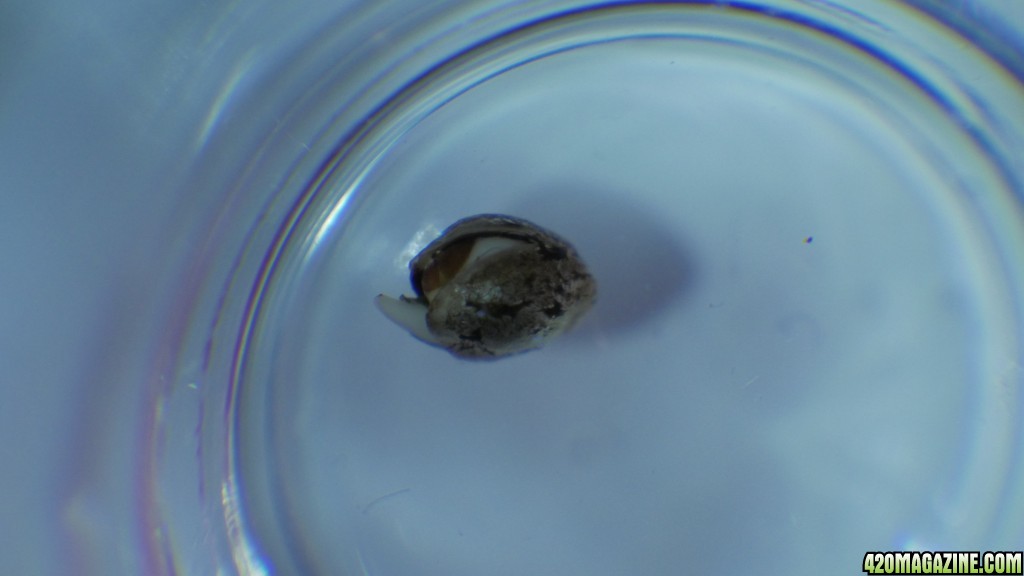
Then, about 24 hours later, I saw them opening up.
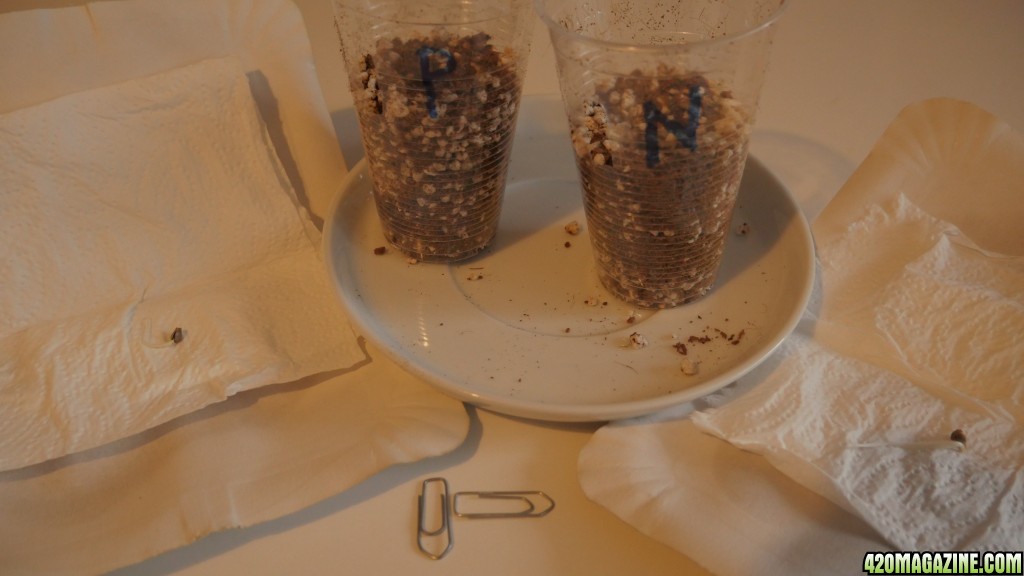
It was time to move them onto a demp paper towel, inside a paper plate.

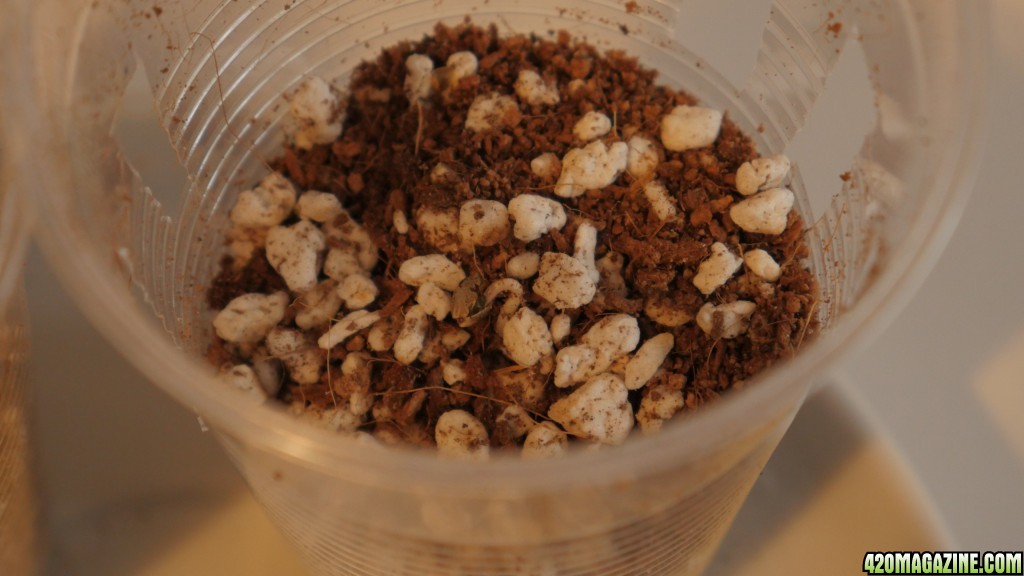
Three days later the roots were long enough to transfer them into a 50/50 mix of coco coir and perlite.
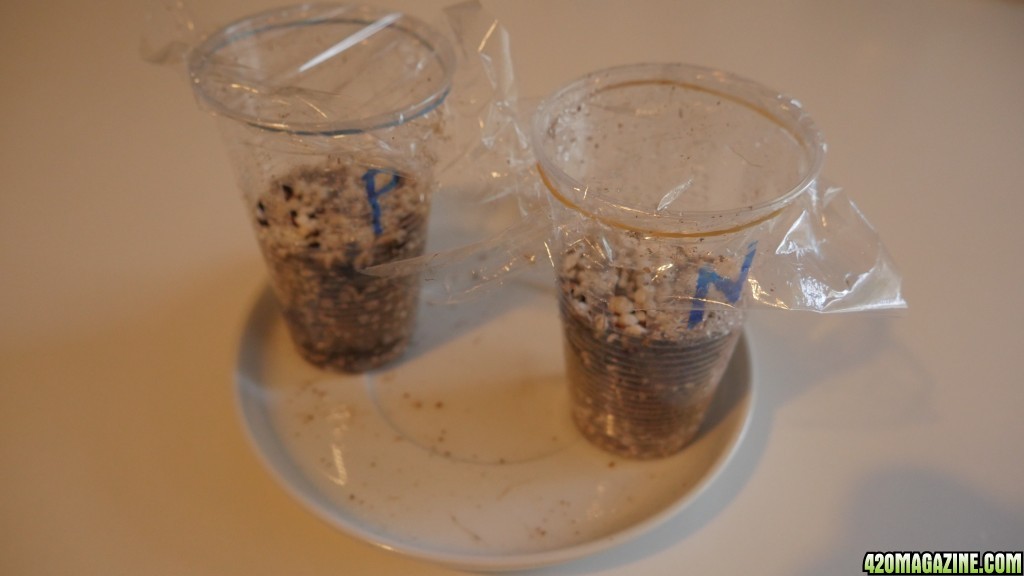
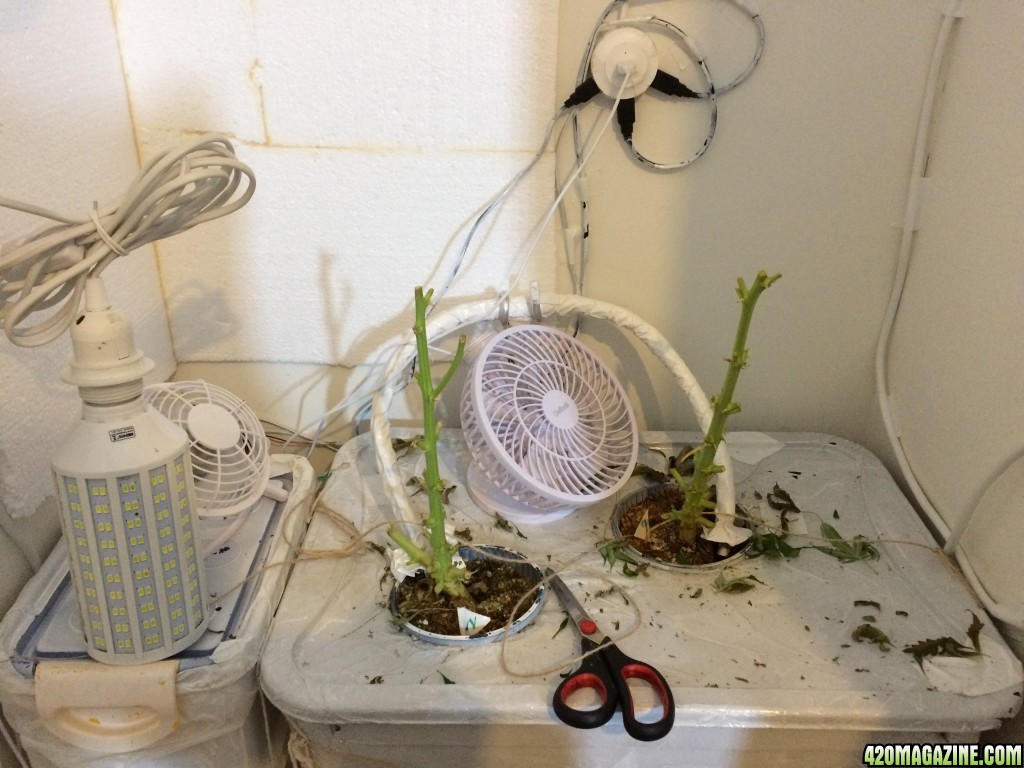
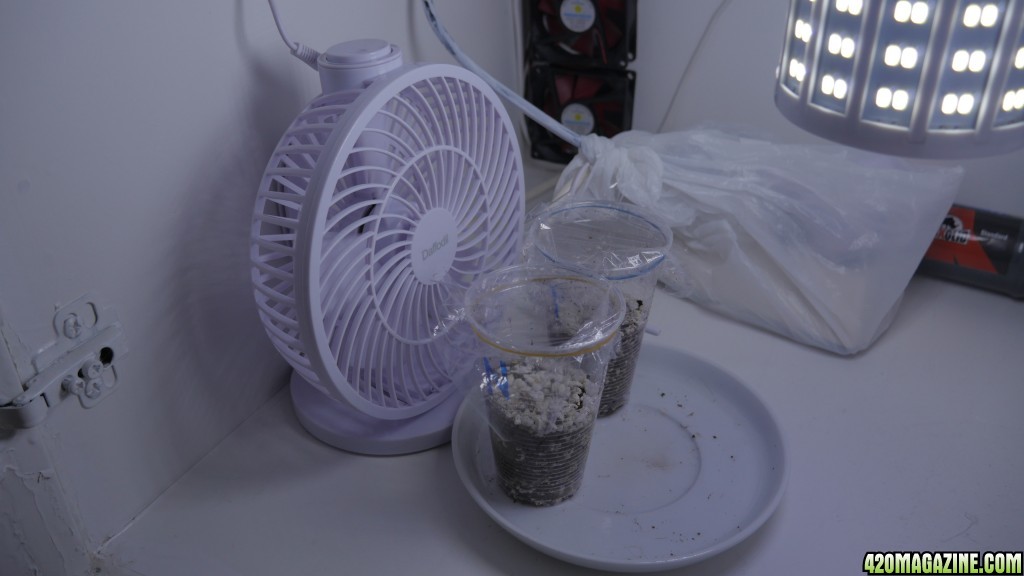
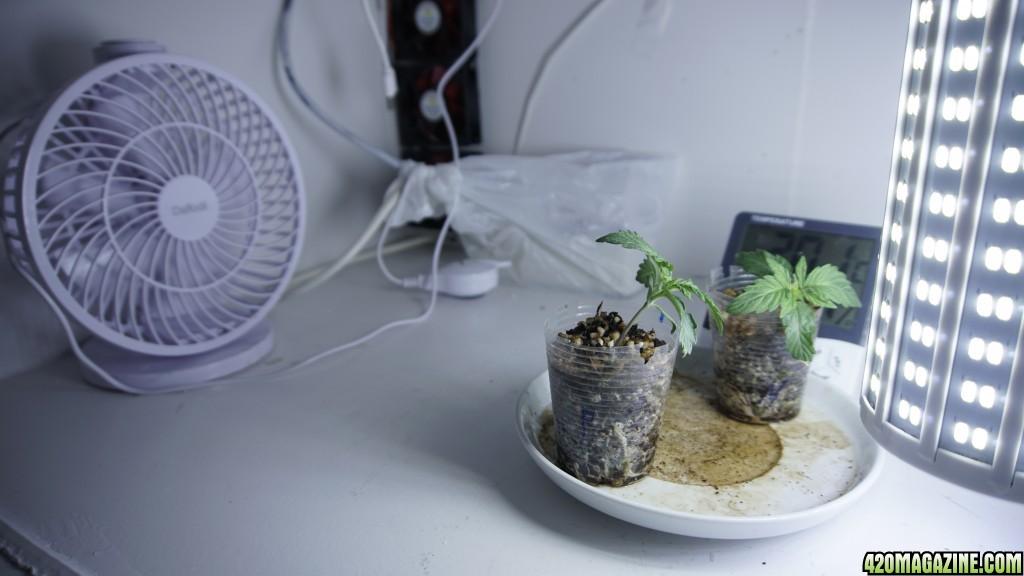
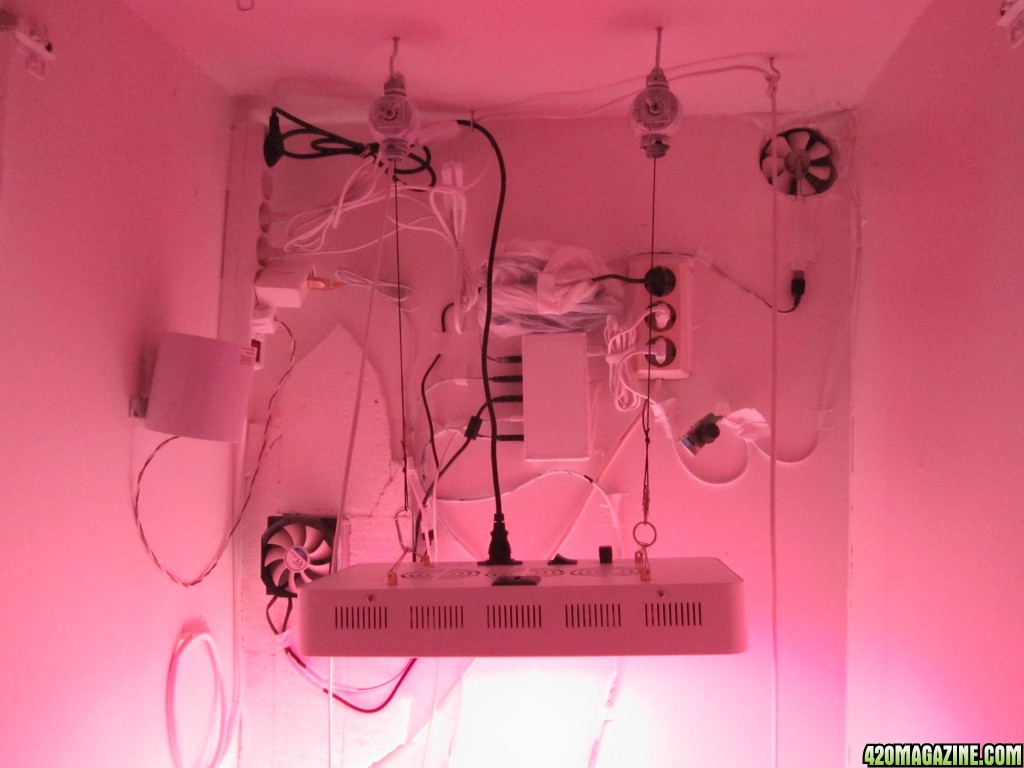
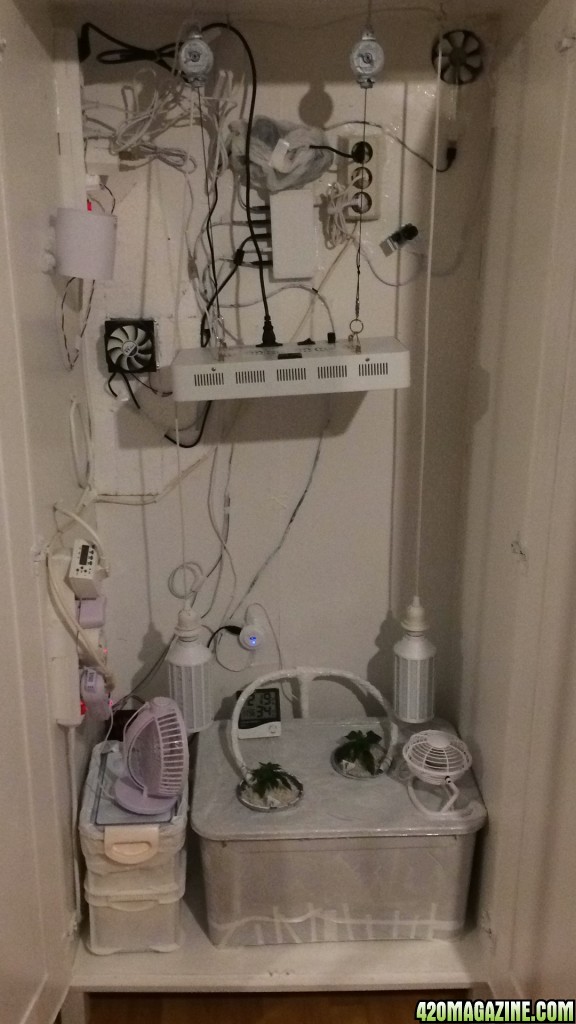
My last baby actually suffered quite a bit in the beginning, so I learned from my mistakes and cut slits in the side of the plastic cups for fresh air exchange. then I put them inside my (empty) grow closet next to a dialed down fan and my 50W 6600k LED corn cob light.
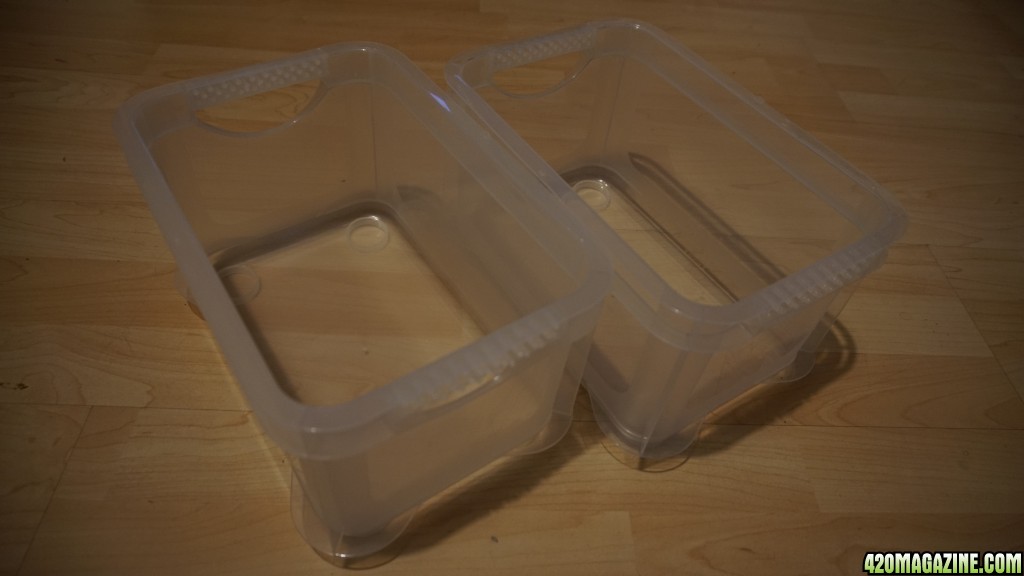
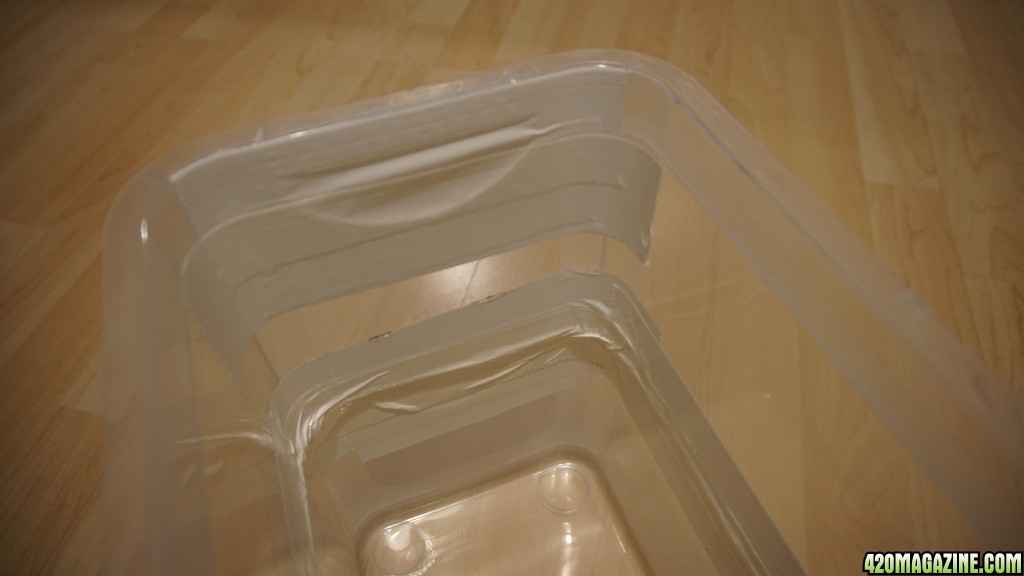
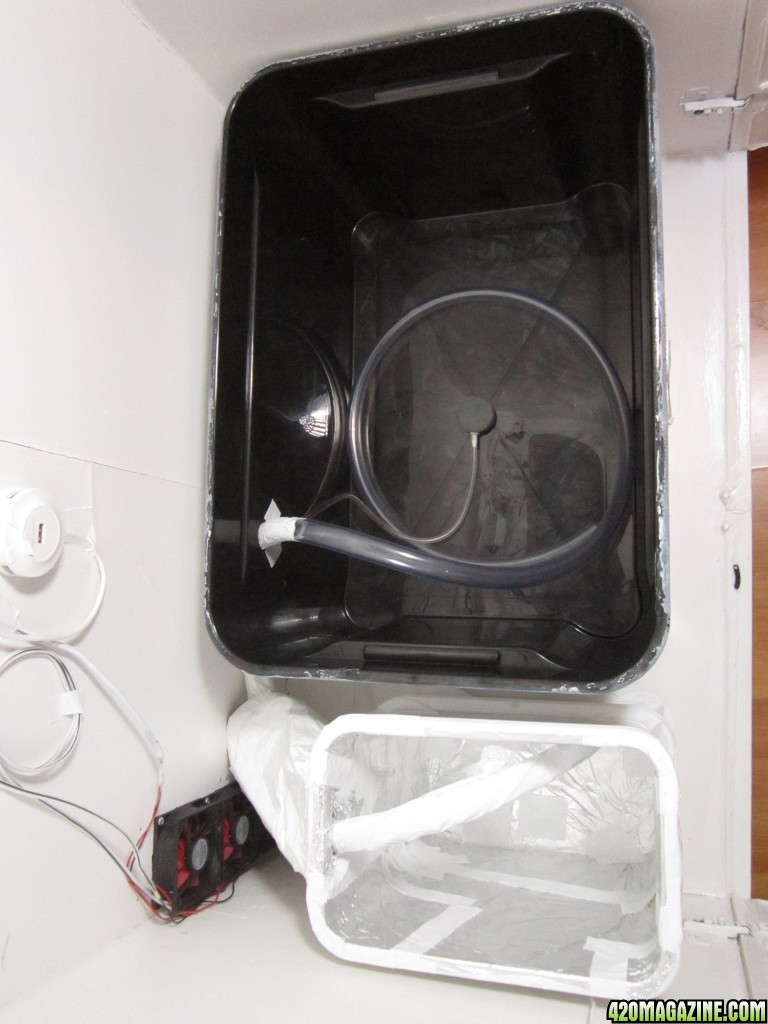
The closet was empty, because I had to make some crucial changes to my setup! The first thing I upgraded was the water container, or to be more precise, the way to access it. My idea was to somehow have the water move through two containers. One for the weeds and one for simple access to check PH and give nutrients.
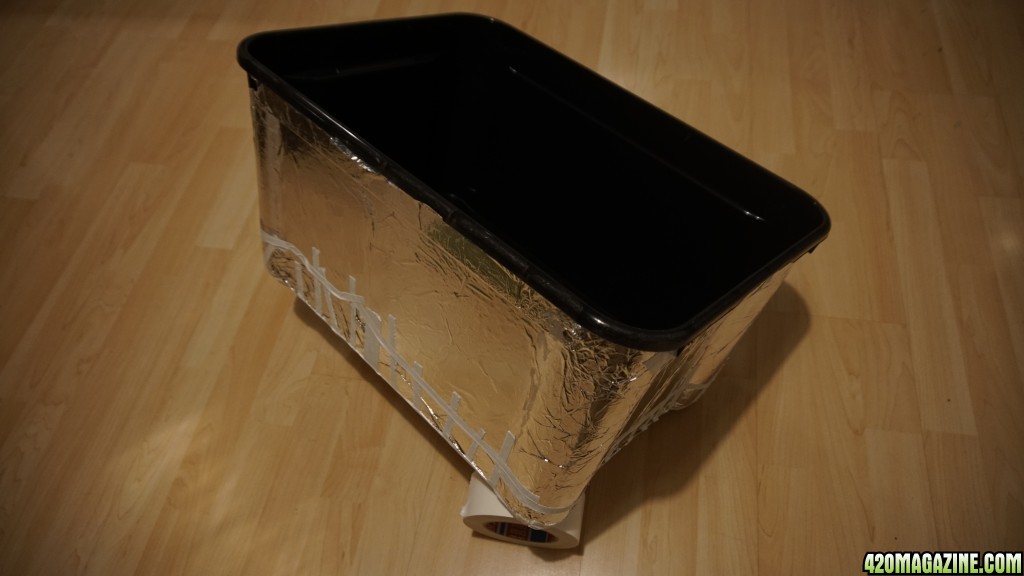
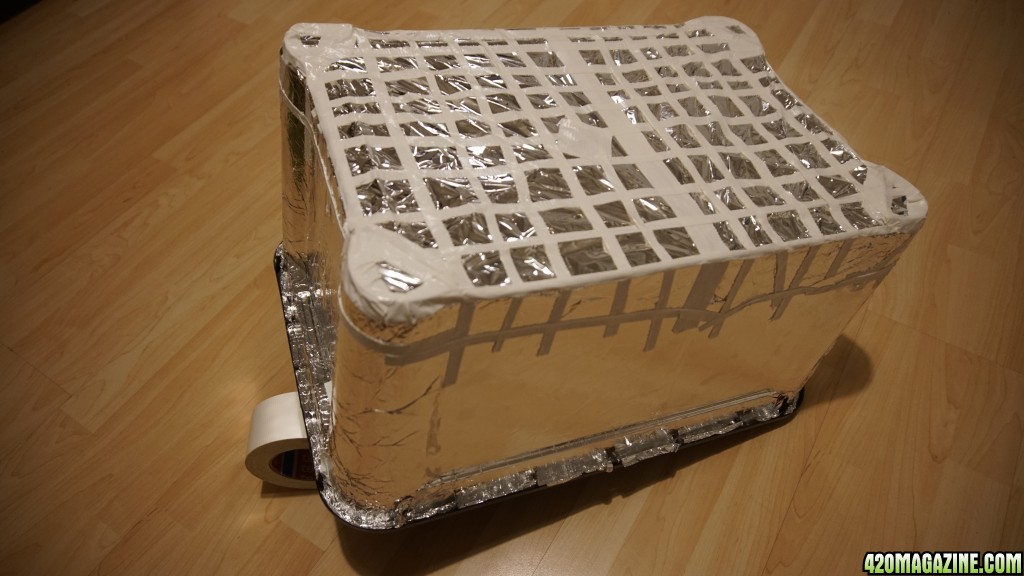
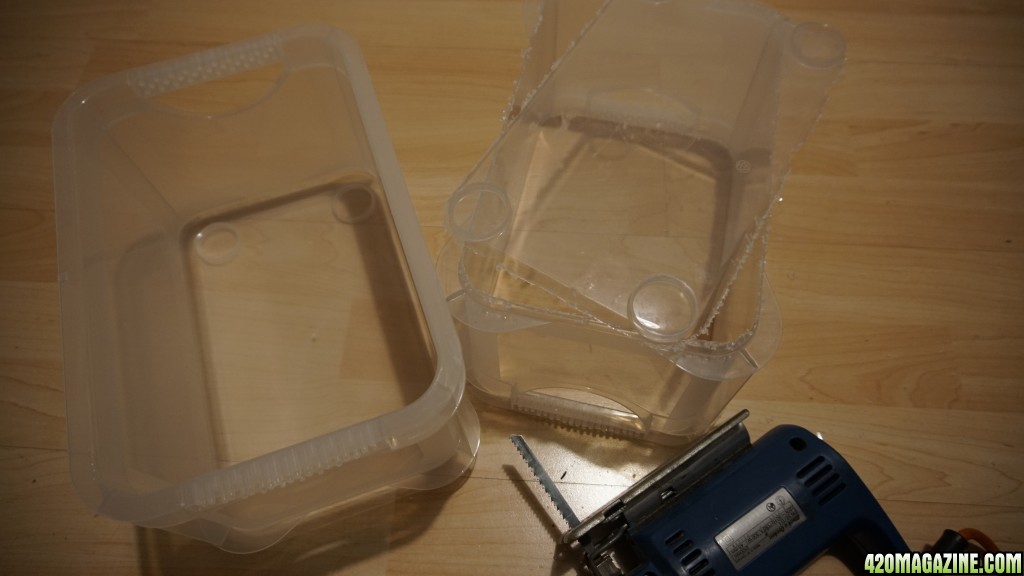
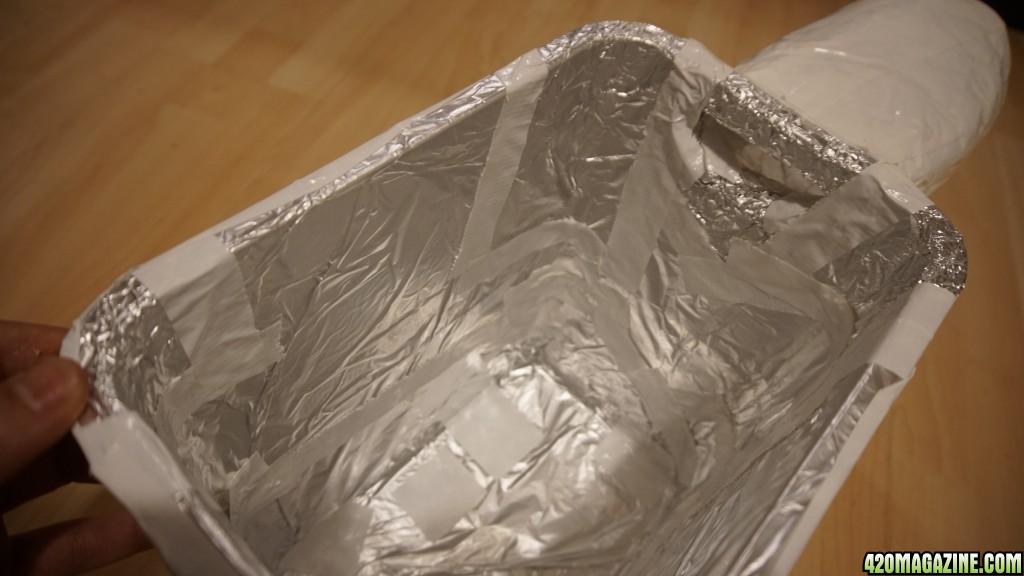
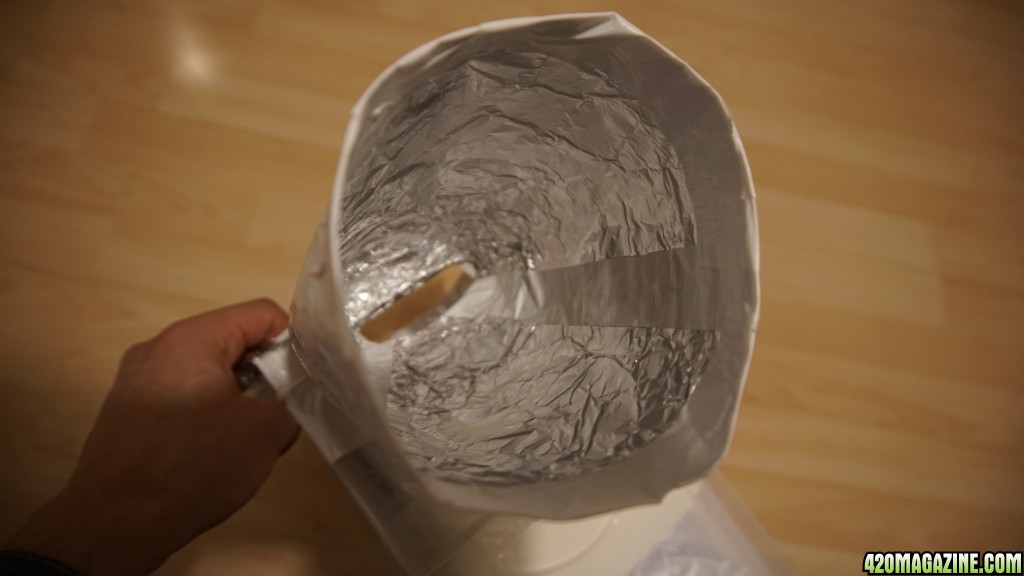
I got the right sized containers and modified thema bit. During my last grow I noticed severe algae growth inside the bucket, which could result in clogging of tubes, or pumps. Thus I decided to cover the entire water cycle as good as possible with aluminium foil (and tape to prevent rips).
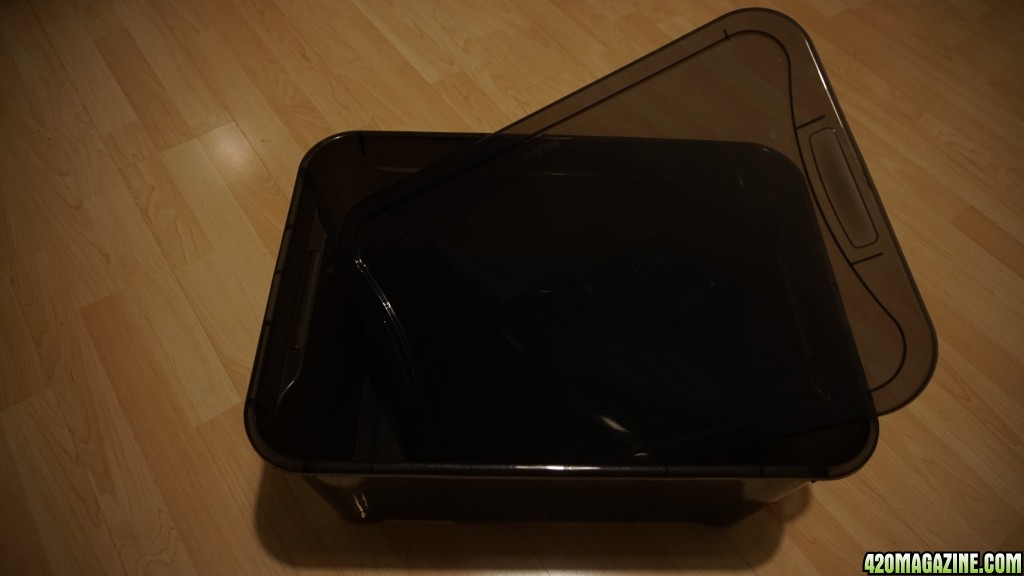
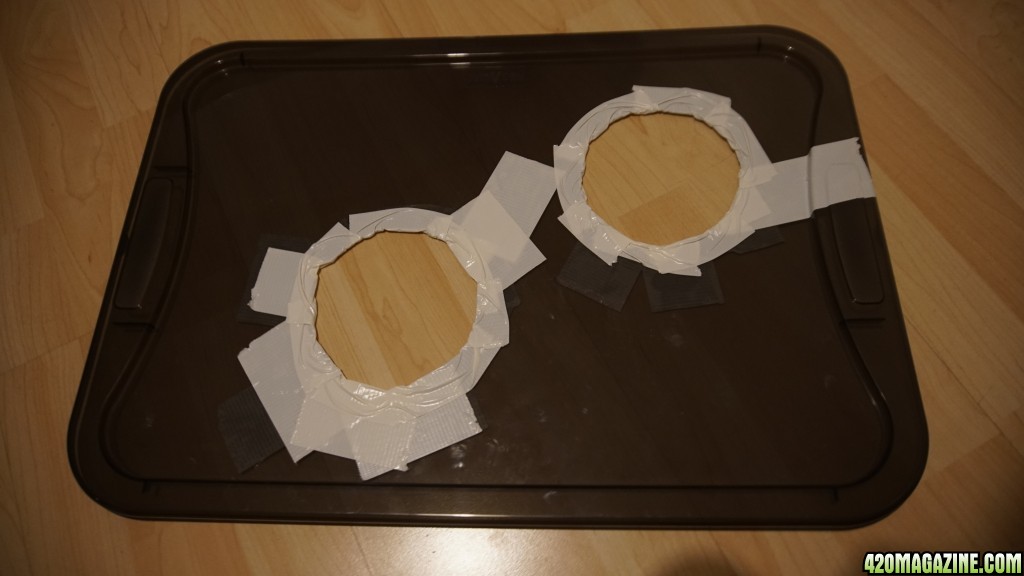
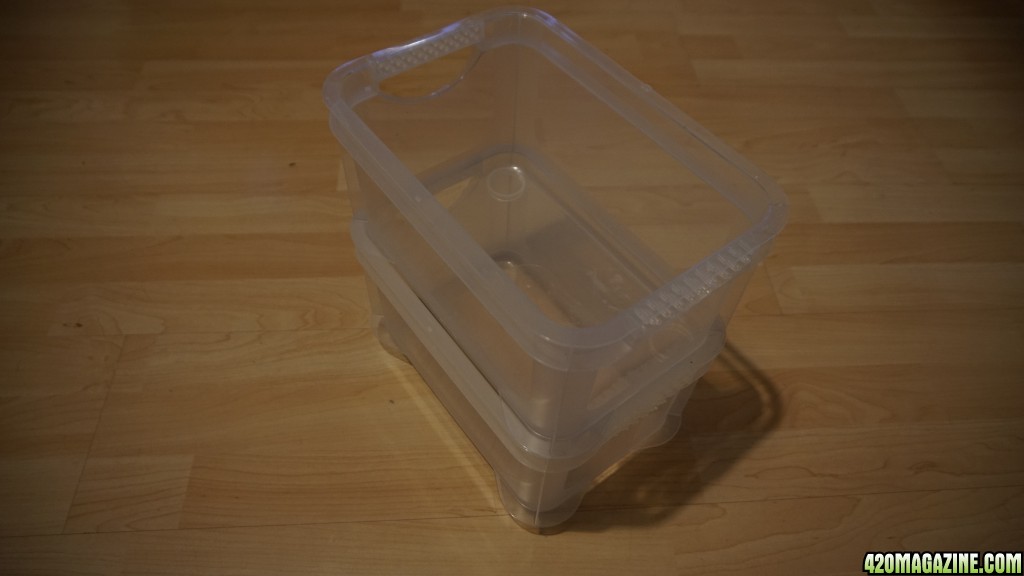
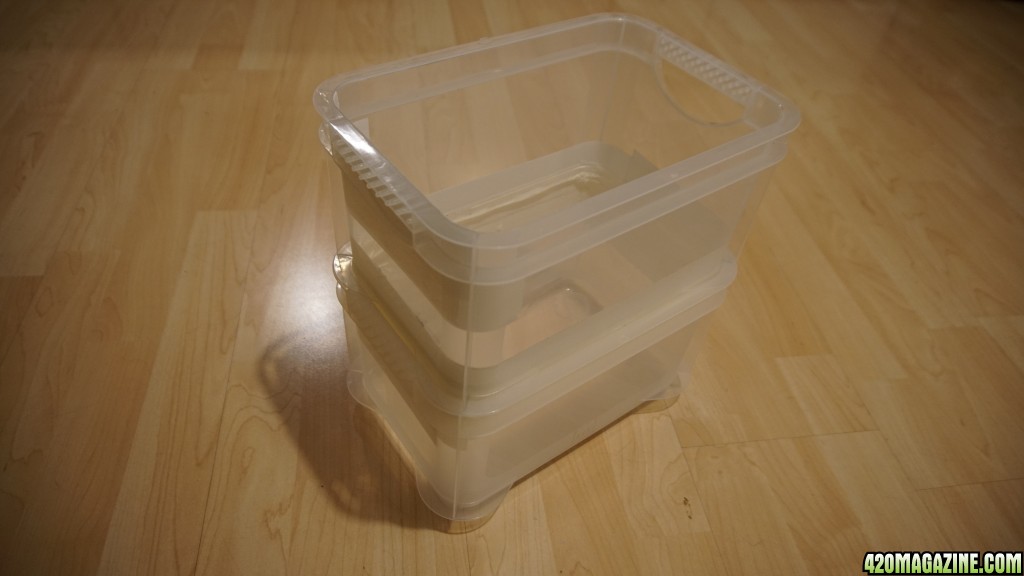
The smaller container needed a non-see through "trunk" to cover the the opening where the tubes would enter/exit.
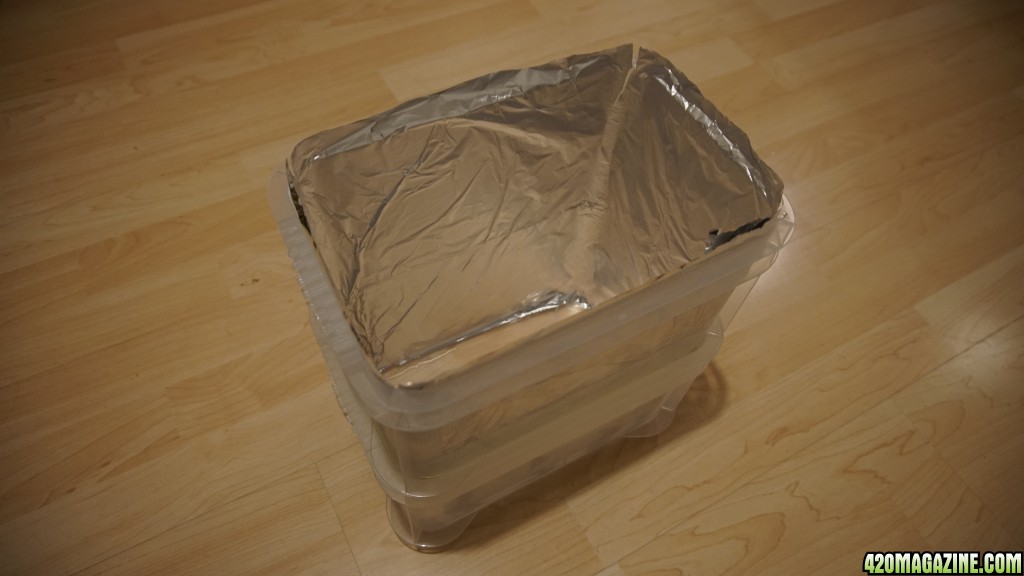
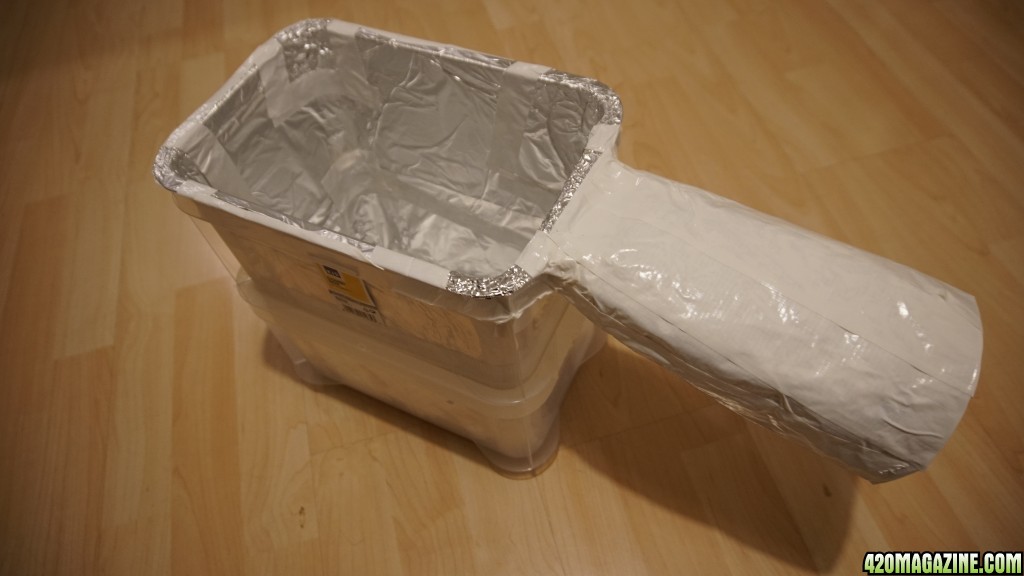
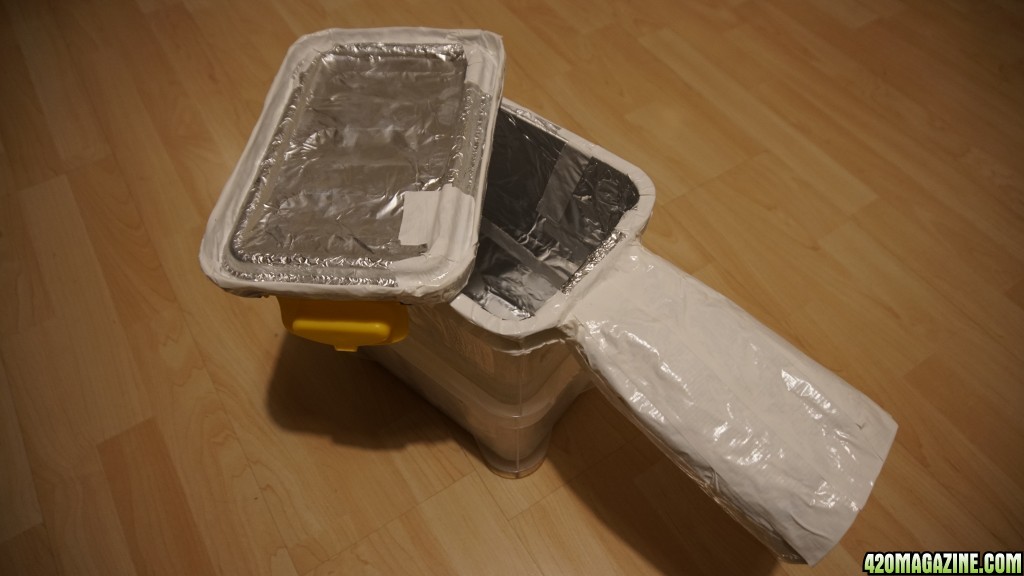
Afterwards I spraypainted everything white and moved onto the next problem I had before - cooling -
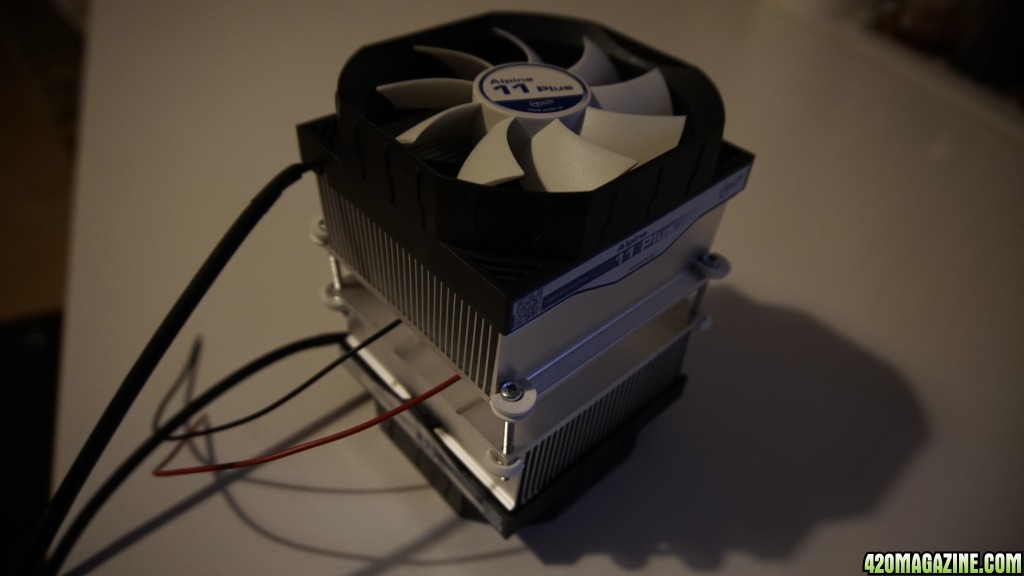
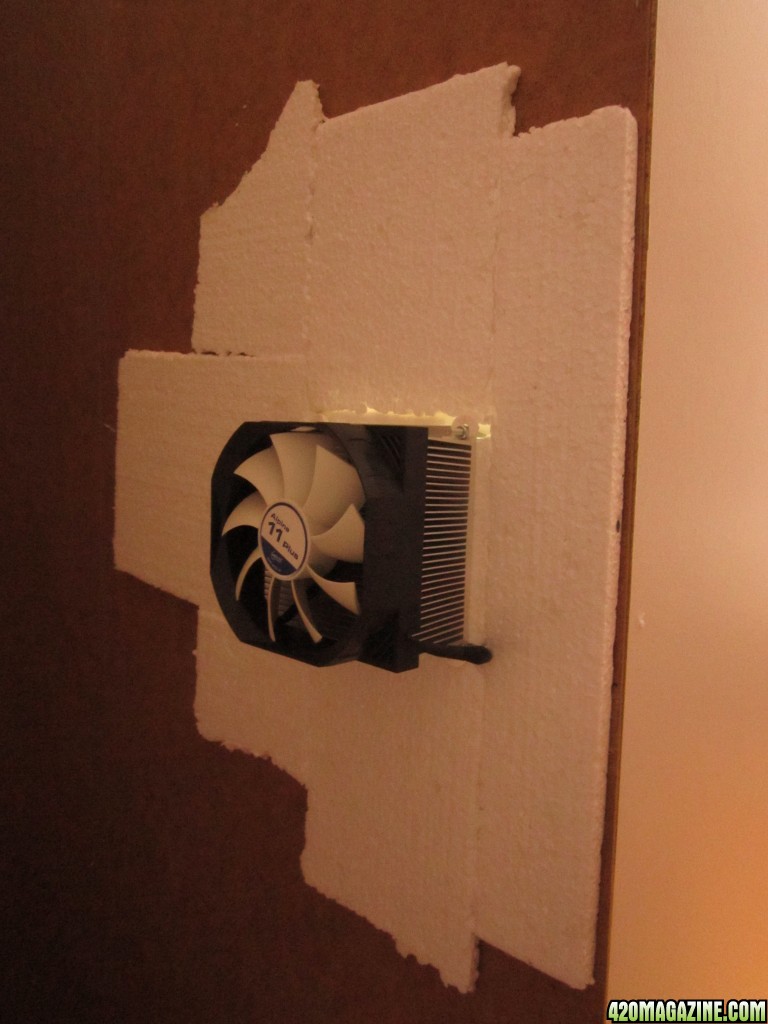
I did some research online and found out about Peltier cooling/heating. It's basically a chip which heats up one one side and cools down on the other, when you run electricity through it.
Just check out this video for more info.:
www youtube com/watch?v=Ipt8xqKbCSw
I actually just stuck to that tutorial and put together this cooling device.
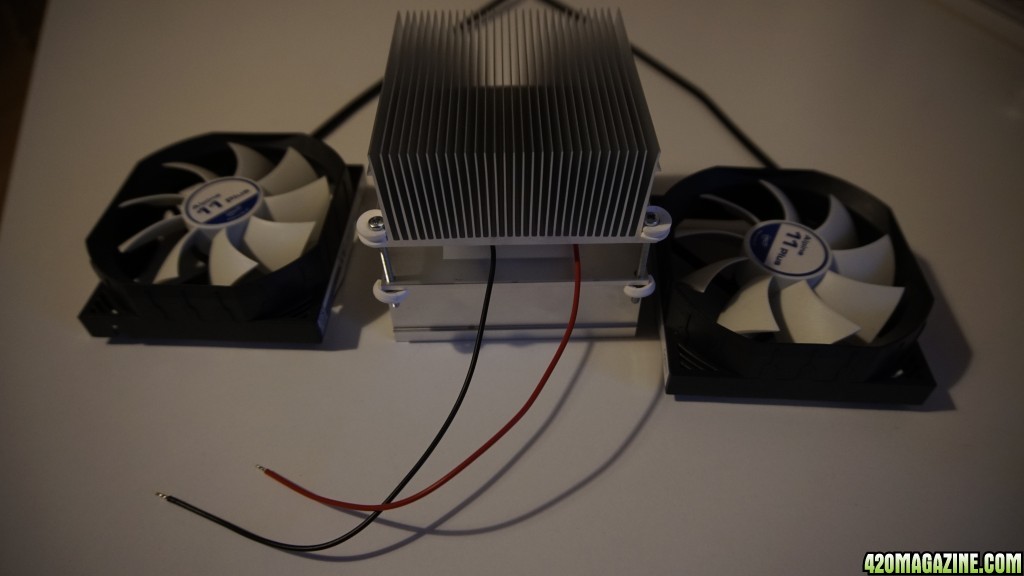
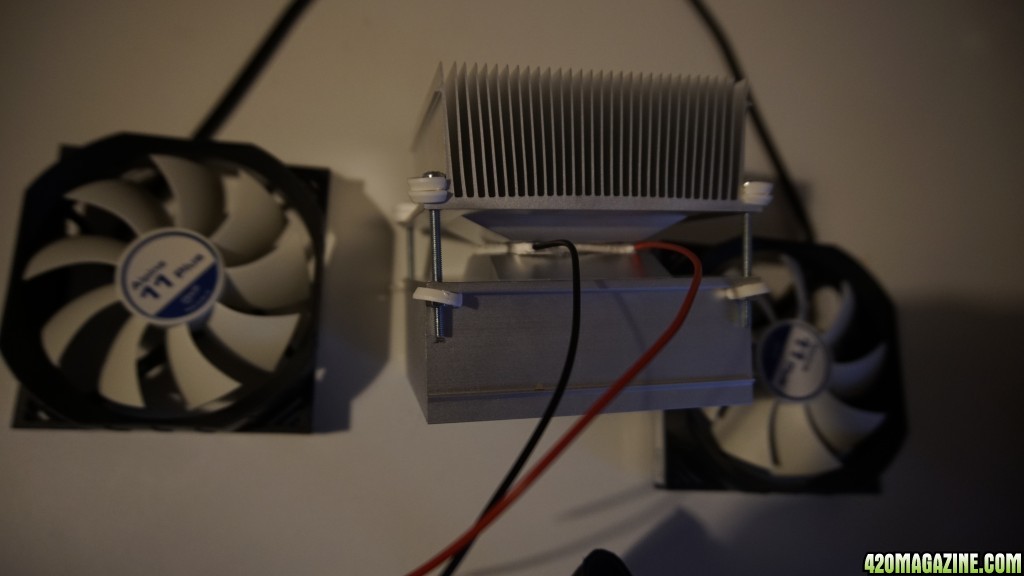
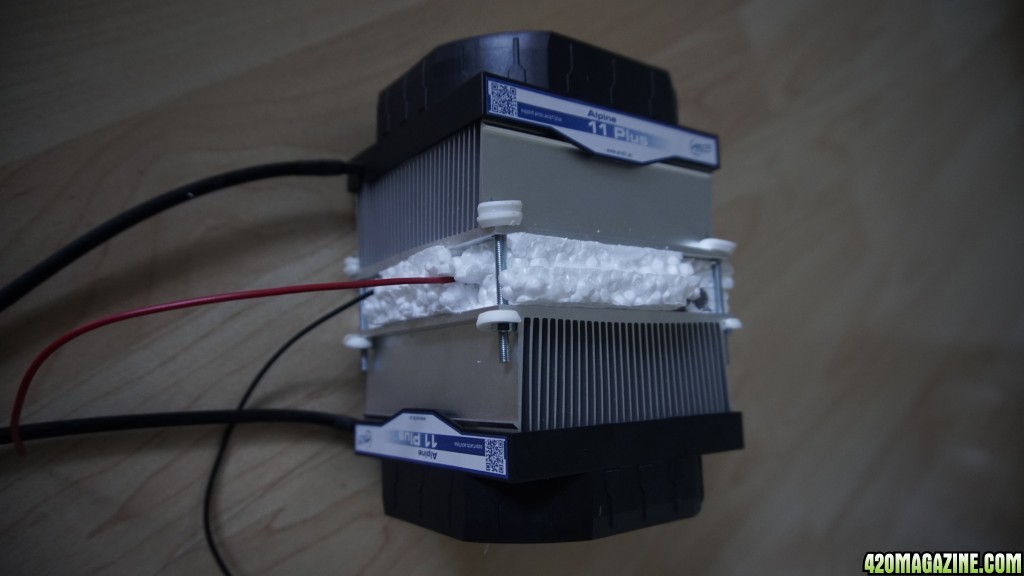
I enhanced the idea though, by insulating the coolers with styrofoam.
Then it was time to install it all veeery professionally with toothpicks and double sided tape ^^
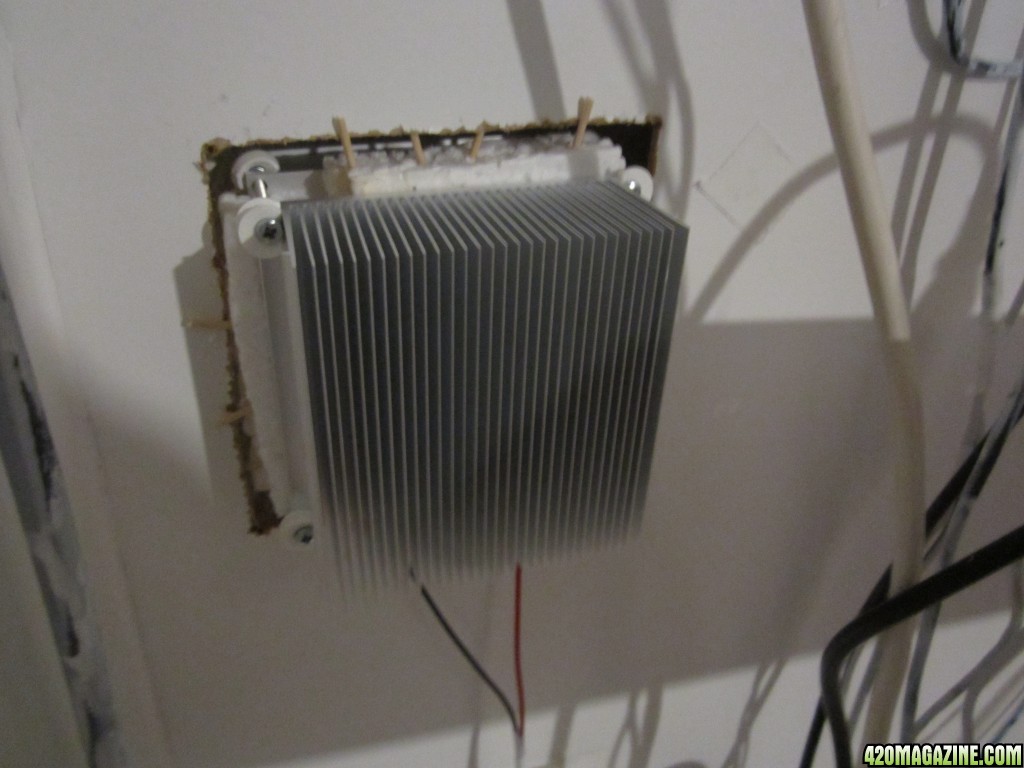
Notice the styrofoam. The back wall of the closet is actually so thin, it would be constantly fighting a battle of cooling down from the inside and heating up from the outside if the styrofoam wasn't there. So, if you're planning of copying any of this, make sure you take some time to think about heating dispersion and direction of air flow. SUPER IMPORTANT!!
A few days later (day 19 after putting the seeds in water) I decided my babies had become big enough to say hello to their new home.
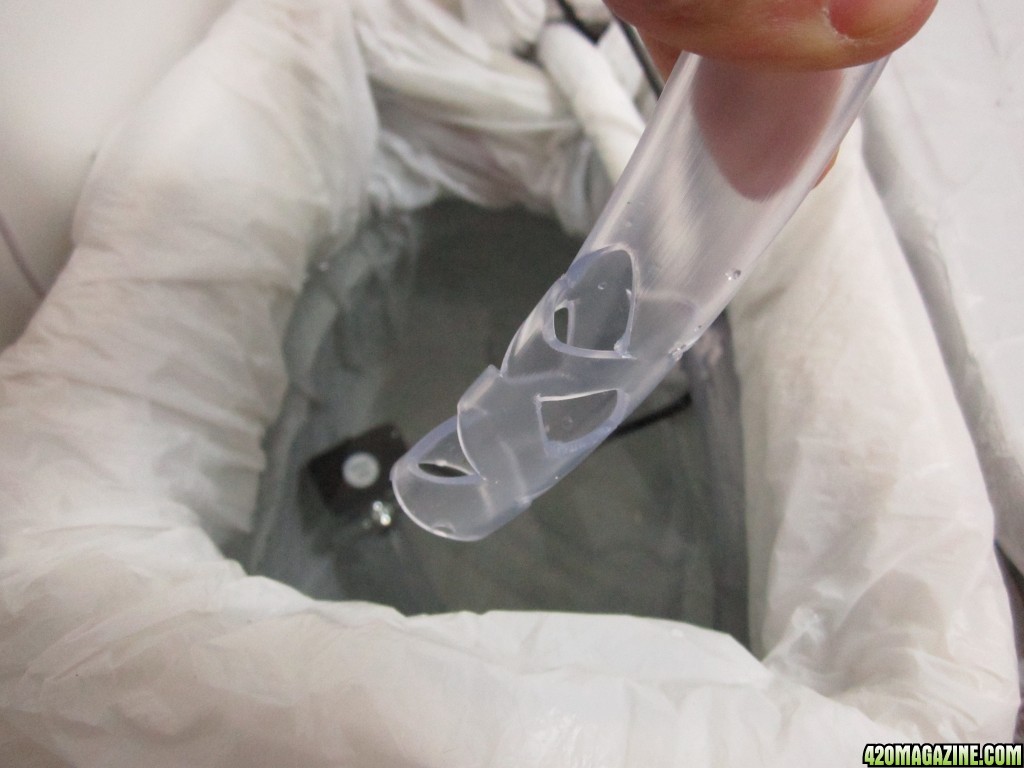
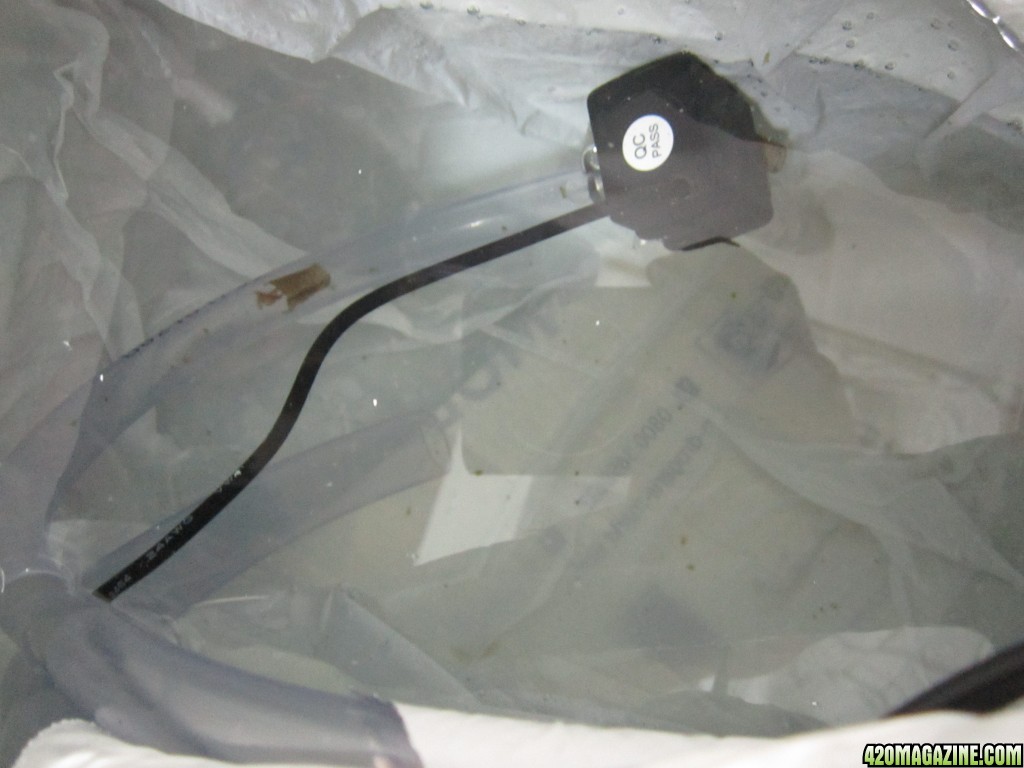
I started by putting 4 plastic bags inside the smaller container, because it was put together from two smaller ones and I didn't want to risk any leakeage.
Next, I added an extra tube on the intake of the water pump and cut a few holes in it, because I didn't want a piece of the plastic bag to clog the whole thing.
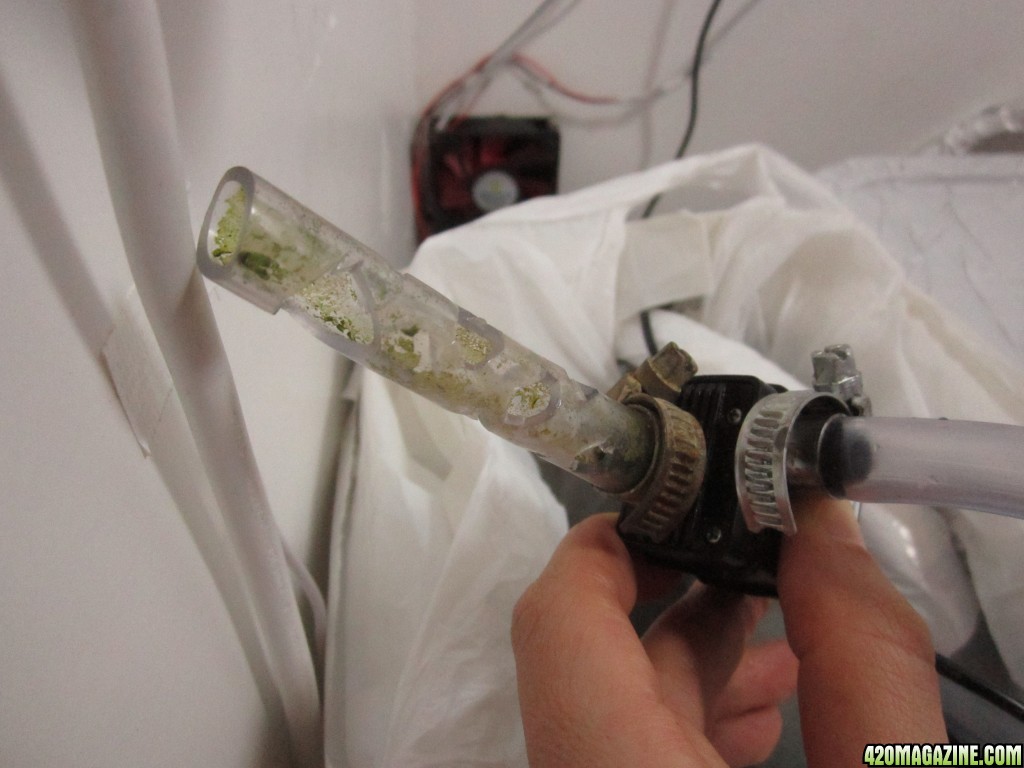
I also did the same to the end of the "compensation tube" (I'll explain it in a second)
Okay, so basically waterpump and the end of the "compensation tube" sit in the smaller container...
The water pump will pump the water through an added splitter to each of the flower pots. There it will drip down into the big tank and raise the water level. Inside of the big container is the intake of the "compensation tube" which is on both ends submerged in water and fully filled with it (no air, important!). Whenever the pressure on one side rises, the water will automatically flow through the tube and intend to create equal pressure on both sides. (google "Siphon" if this is hard four you to understand. It's a neat concept, especially if you're thinking of growing hydroponically)
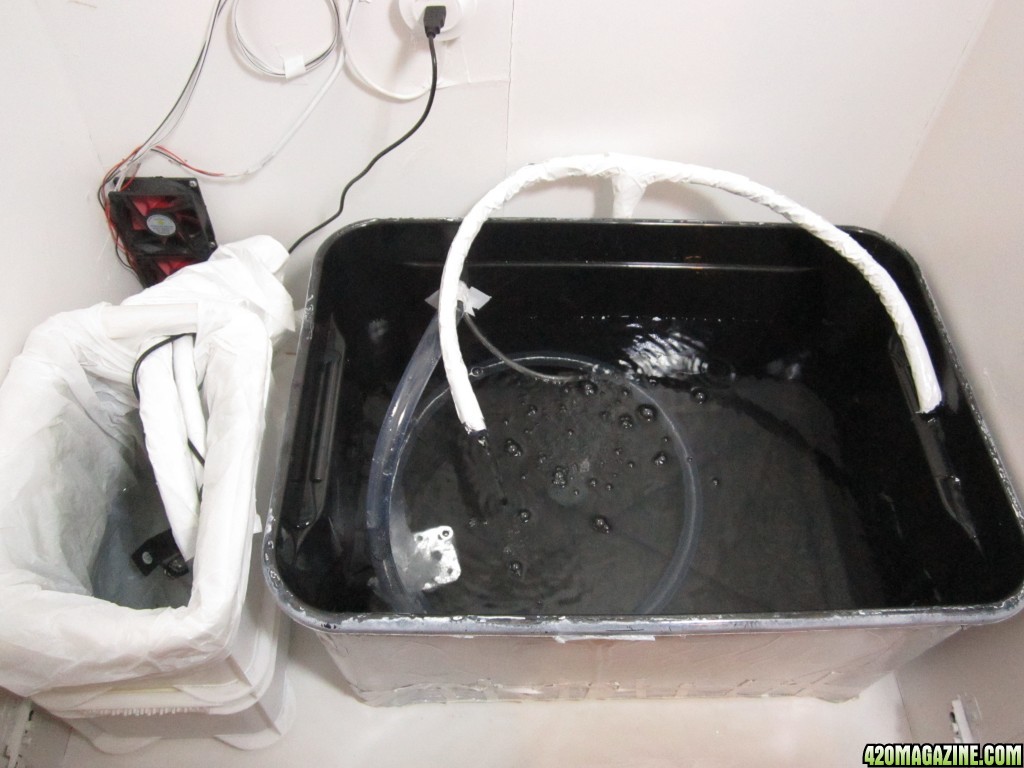
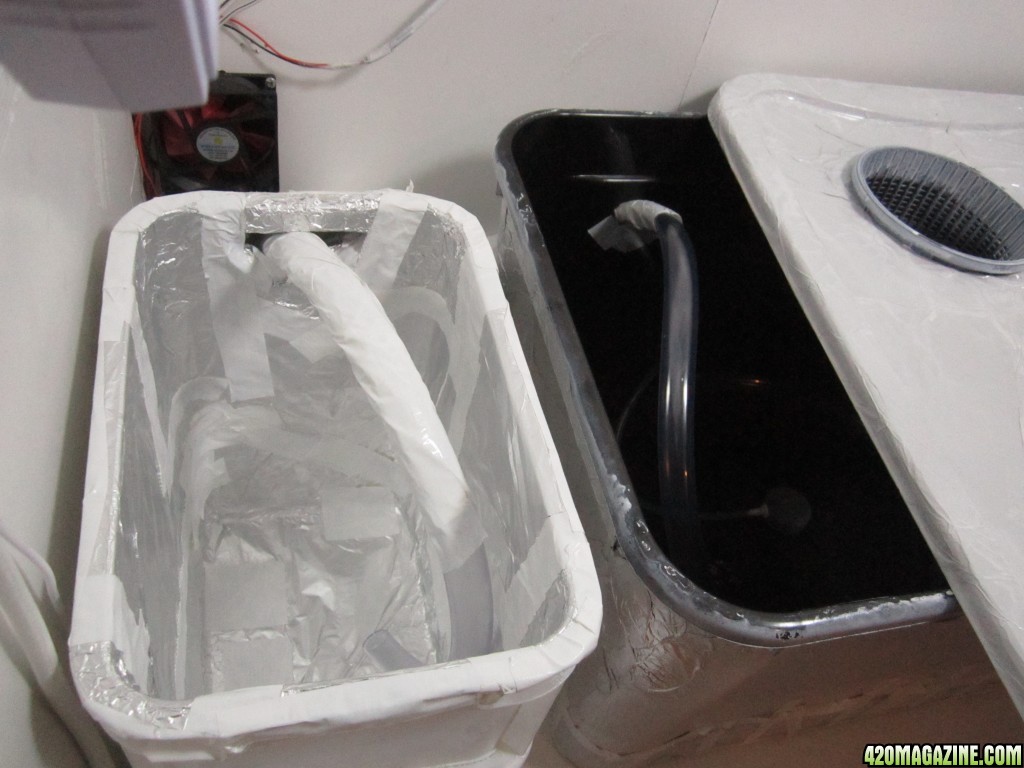
Next to the "compensation tube" you can also see the stone of the air pump, which helps oxygenize the water. I also applied silicone to the hole where both tubes access the tank, to prevent leakeage in case the "compensation tube" gets clogged by roots or anything. Also worth mentioning:
The water needs to rise a bit in the big tank until the pressure is high enough to flow back to the smaller tank, so keep that in mind, if you plan to build a similar setup!
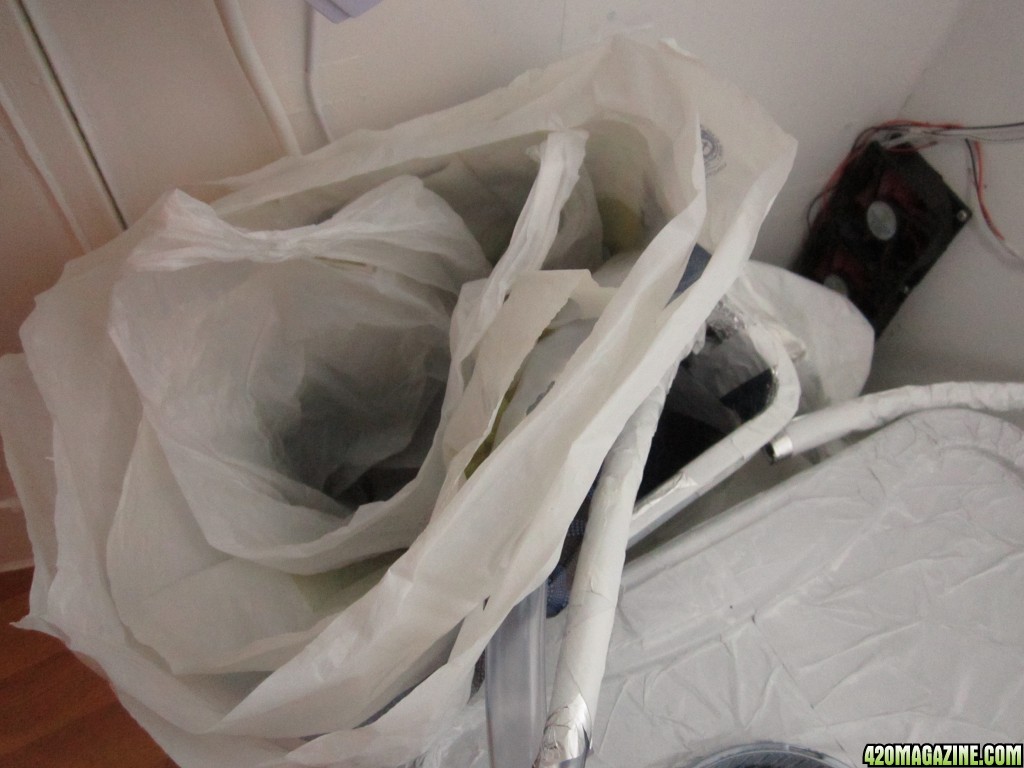
All the tubes that have water run through them are covered in a layer of aluminium foil and tape, to keep light out of the whole cycle.
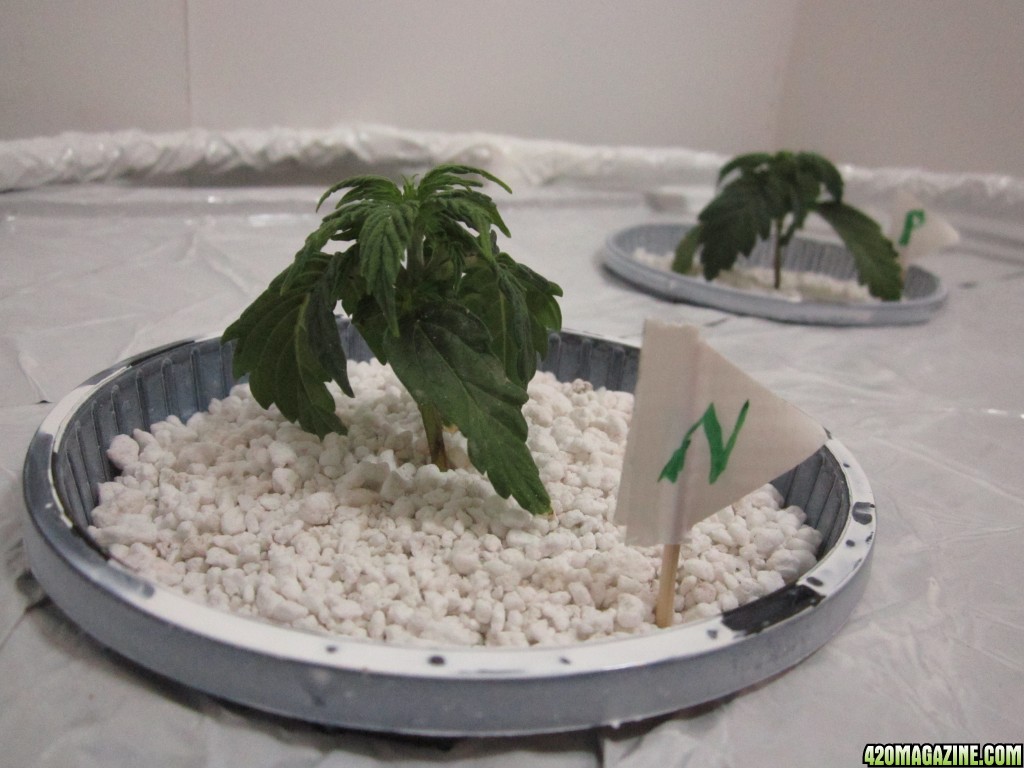
After figuring out these things it was finally time to put my babies into the bigger pots. I added perlite and put them in the holes of the lid, which I prepared.
(I will switch to using pebbles in the future. The perlite is too small and gets everywhere where it's not supposed to!)
And my setup was so far finished! I was anxious for a few days, if the whole thing would leak or the siophoning would work, but so far I only had a bit of trouble with the splitted tubes that go to the pots and apparently needed smaller nozzles, or else the water would only come out on one side.
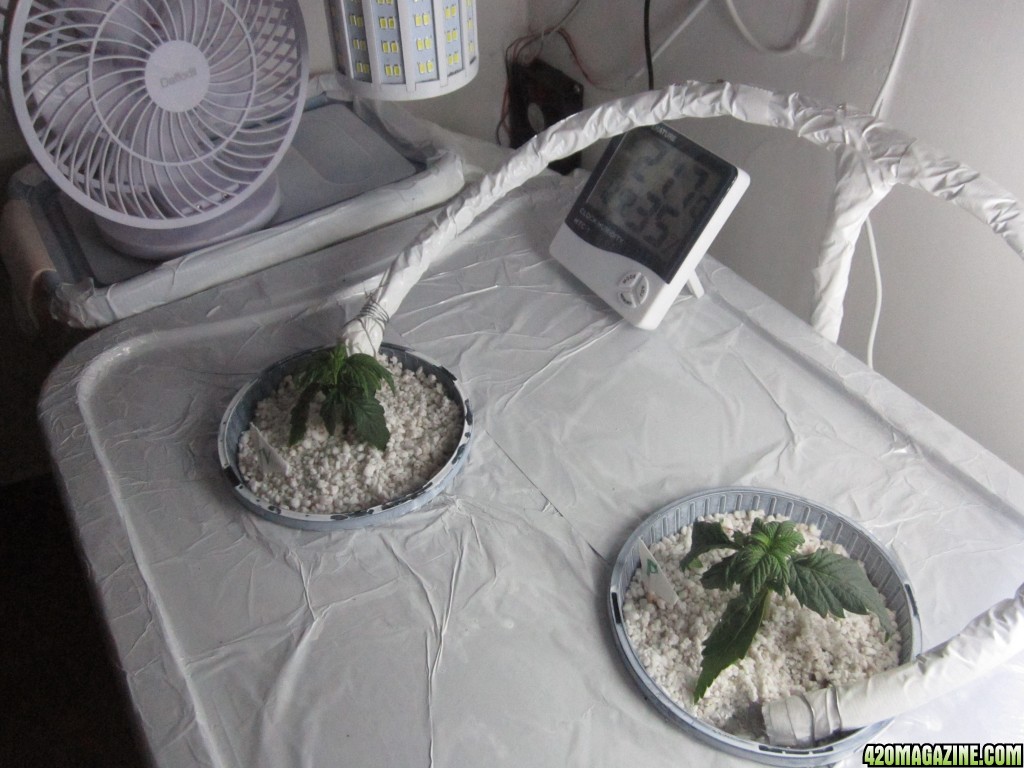
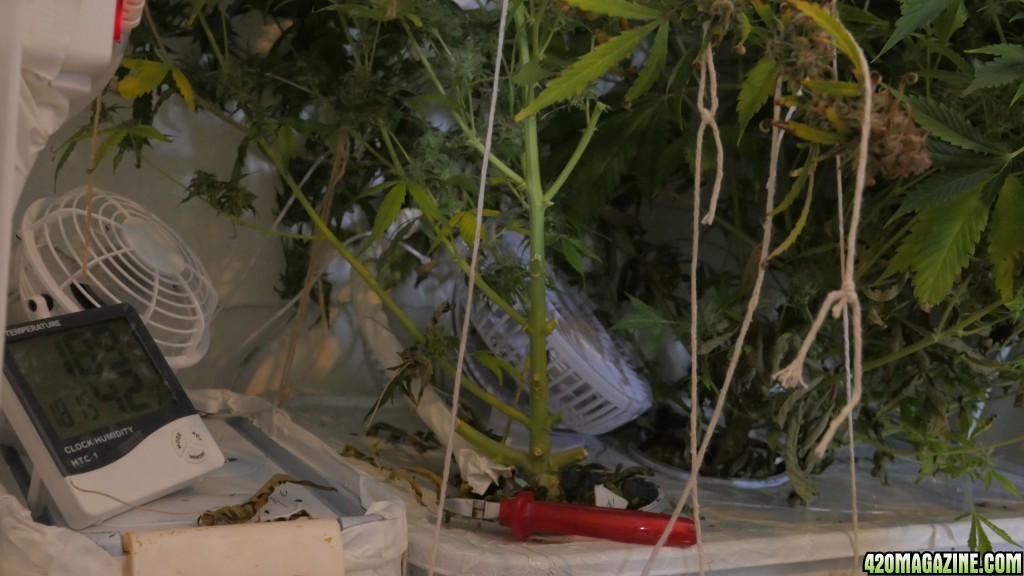
I also added some wire to the tubes, to have them stay in place a bit better and a holder which you see in the pictures later.
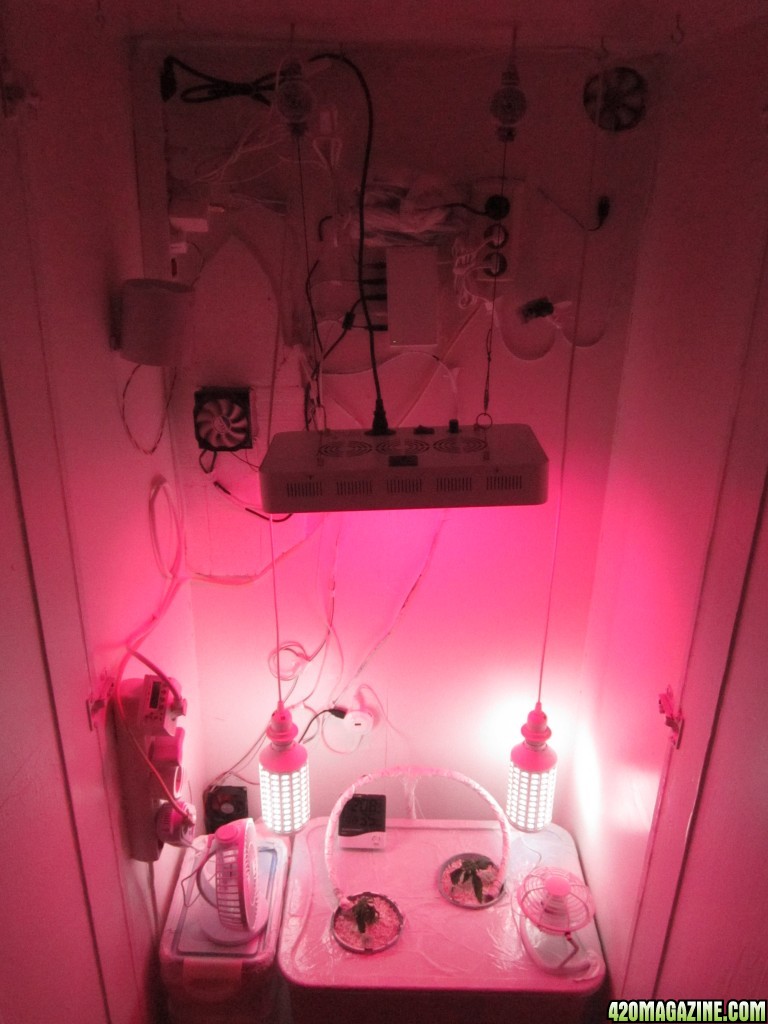
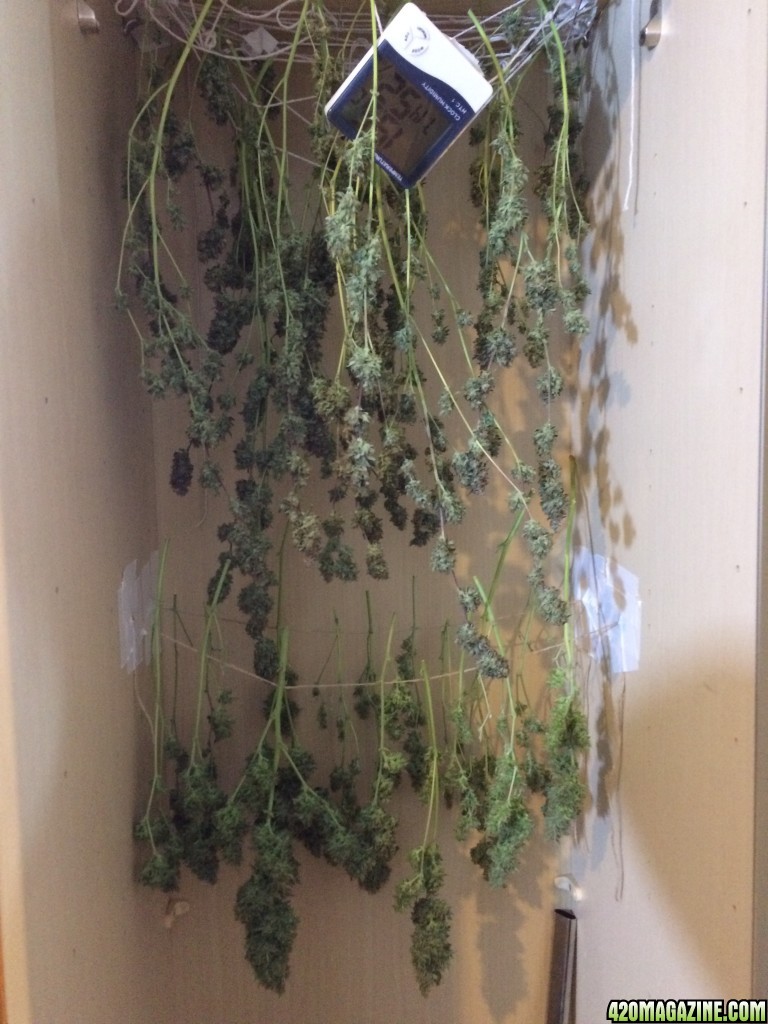
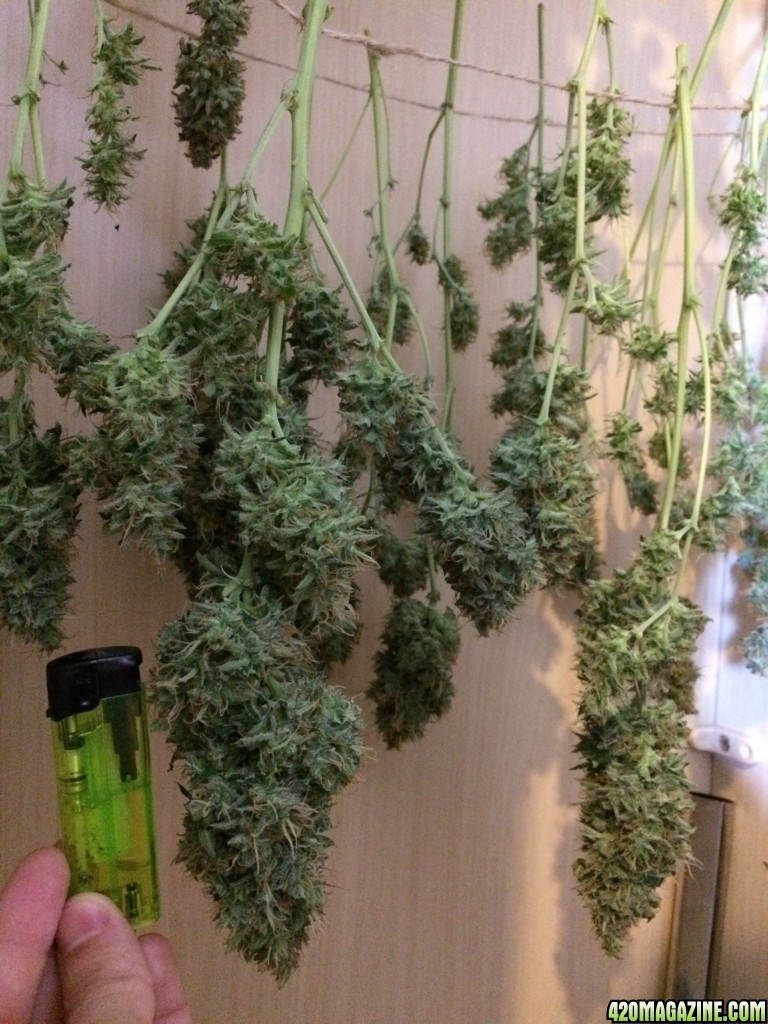
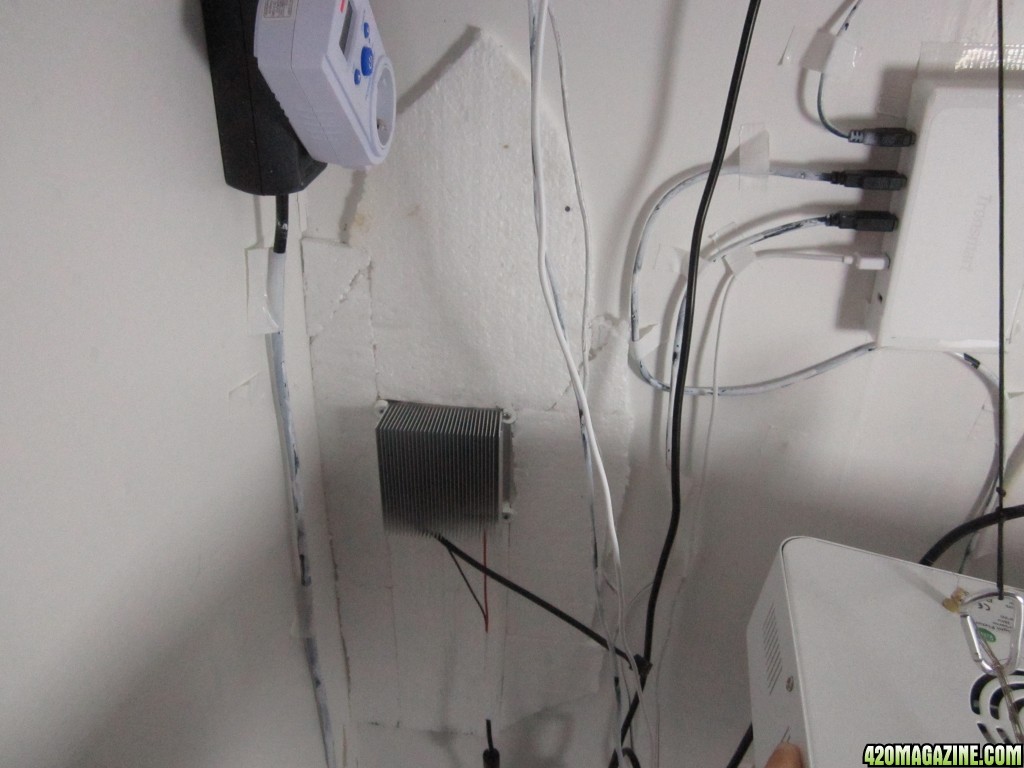
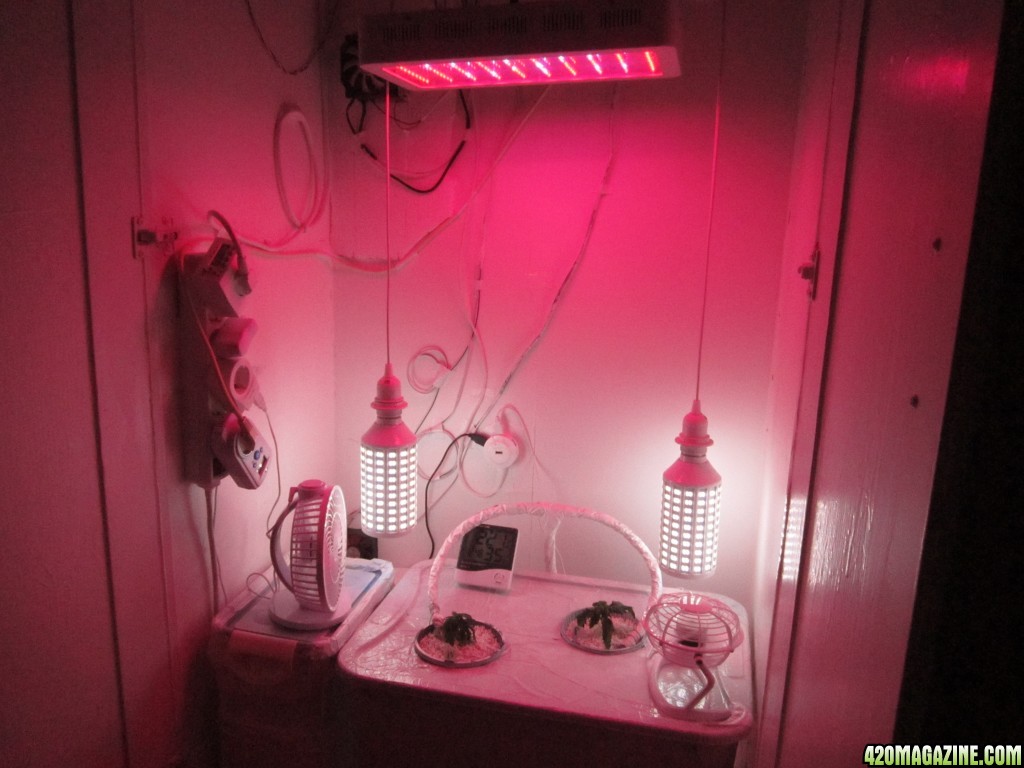
The peltier cooler works quite well. It's connected to the temperature regulated fans, that start up when it gets over 24°C / 75°F
Some of these pictures were taken a week later (I messed up the dates on my pics a bit)
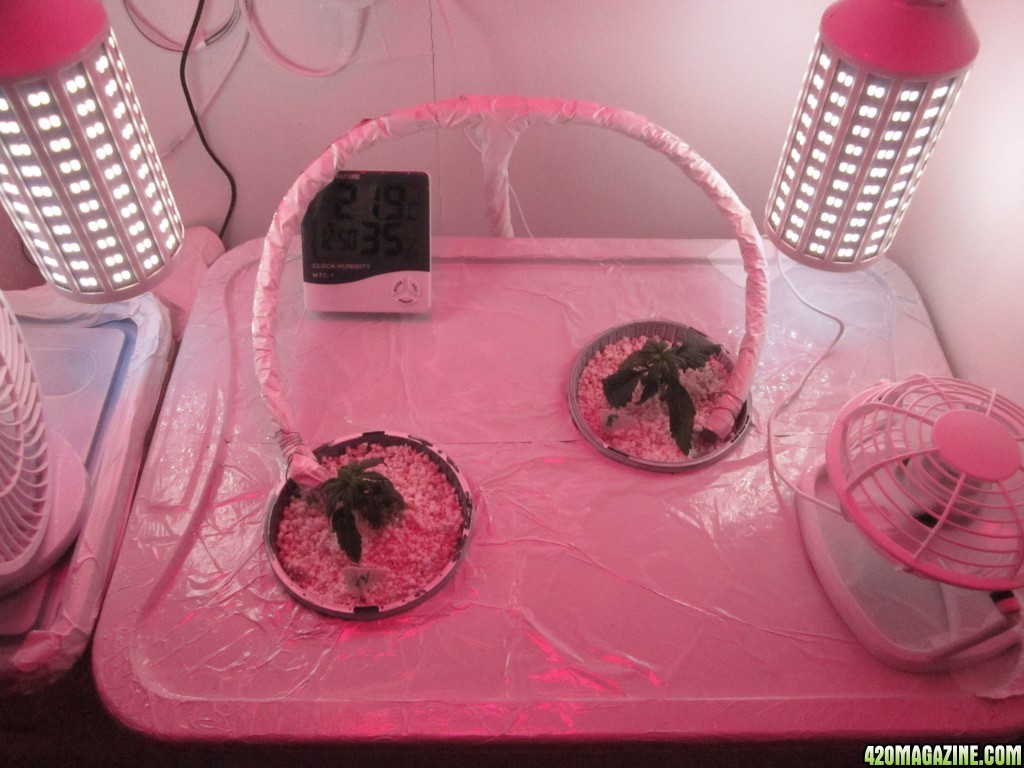
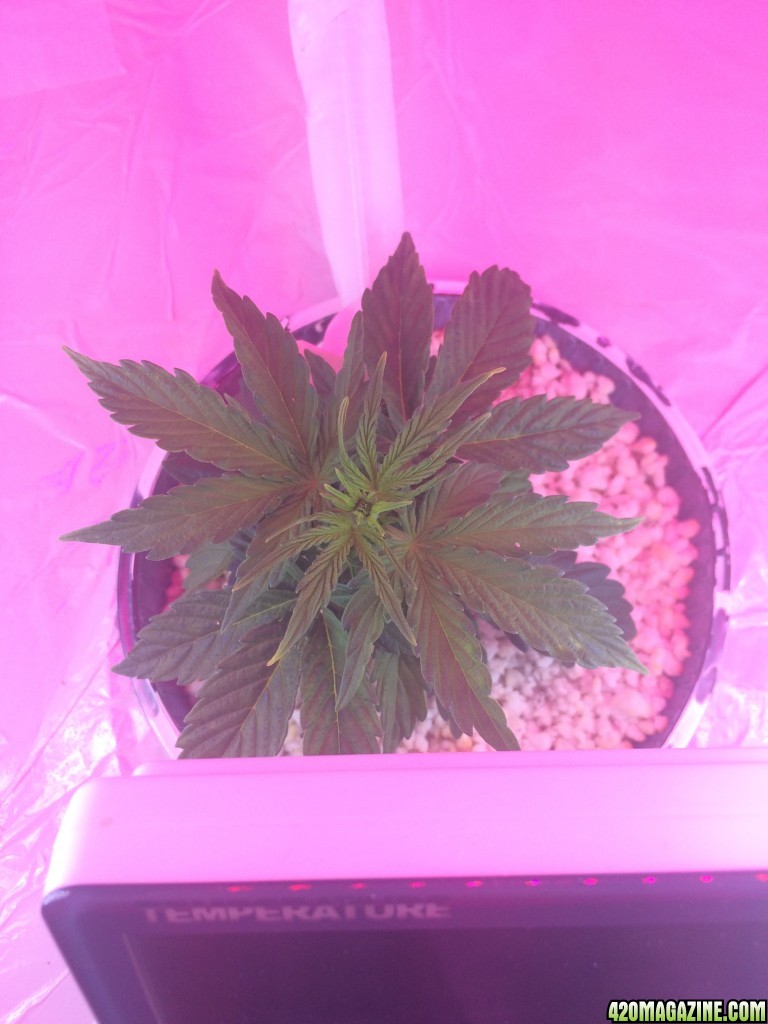
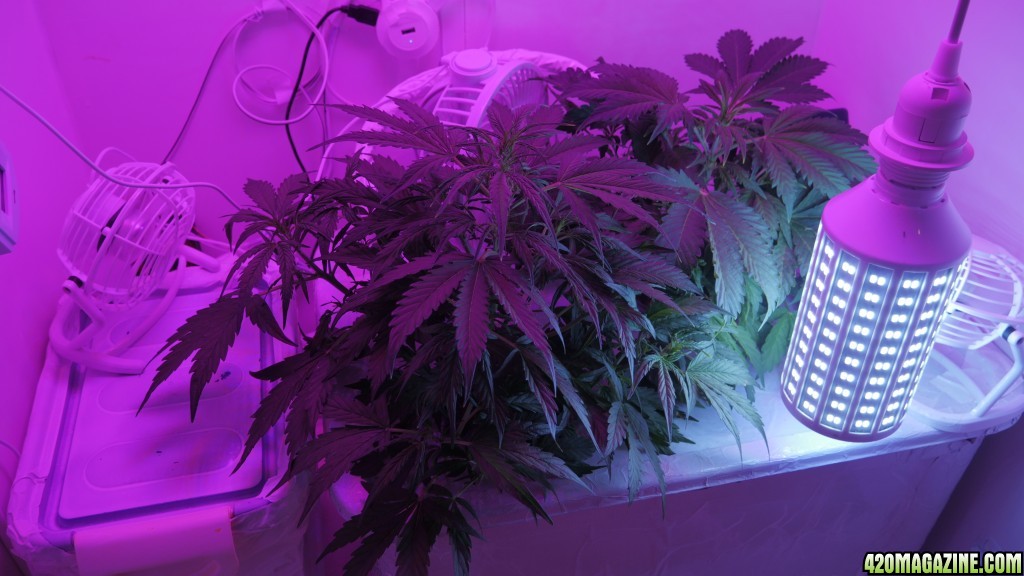
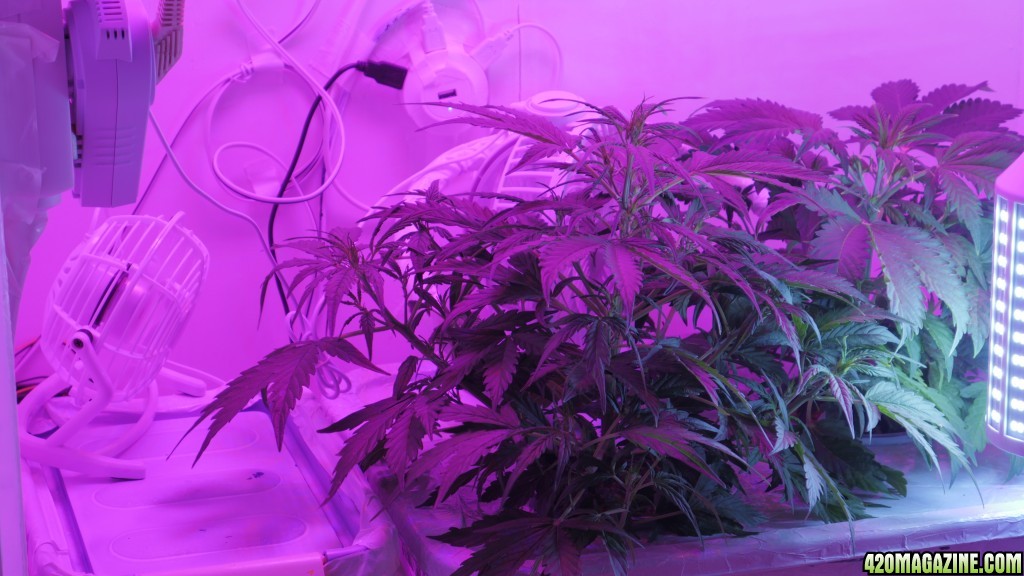
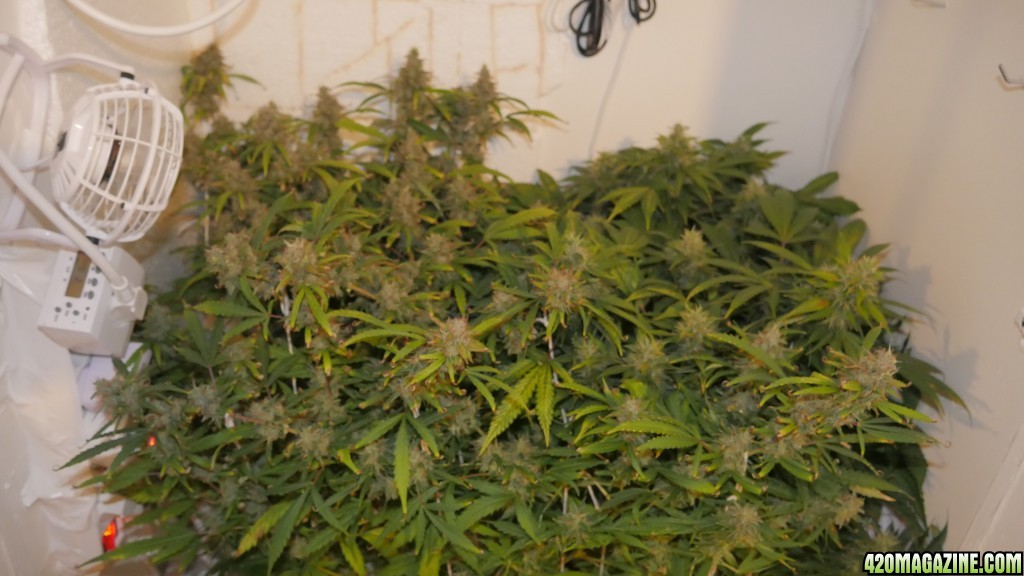
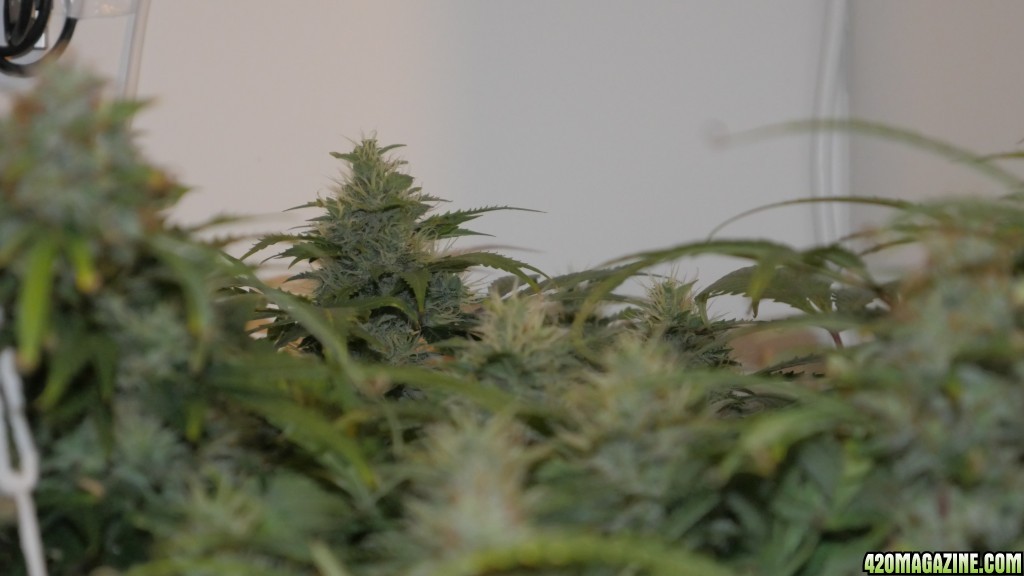
(Day 26 after germination) and as you can see, the plants are healthy, but not growing quite as fast as one would hope.
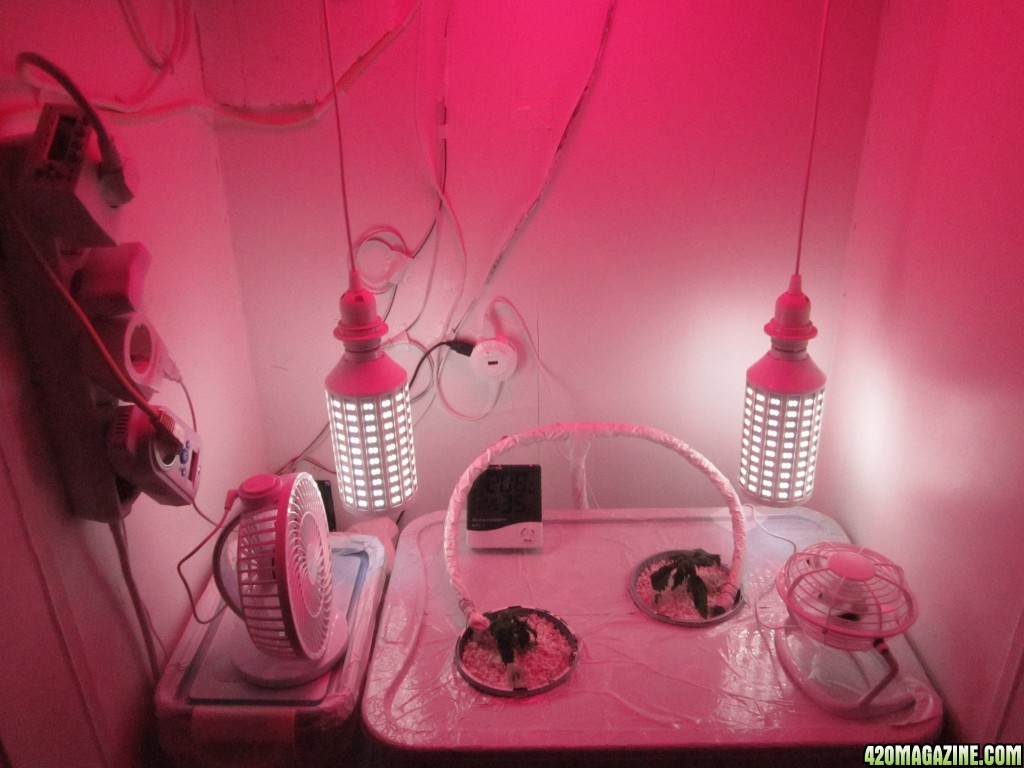
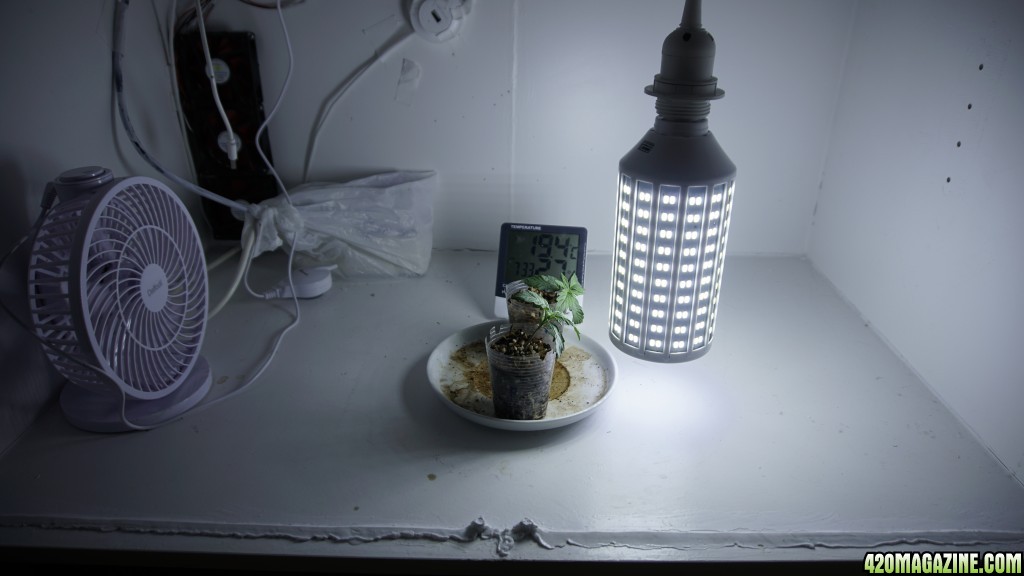
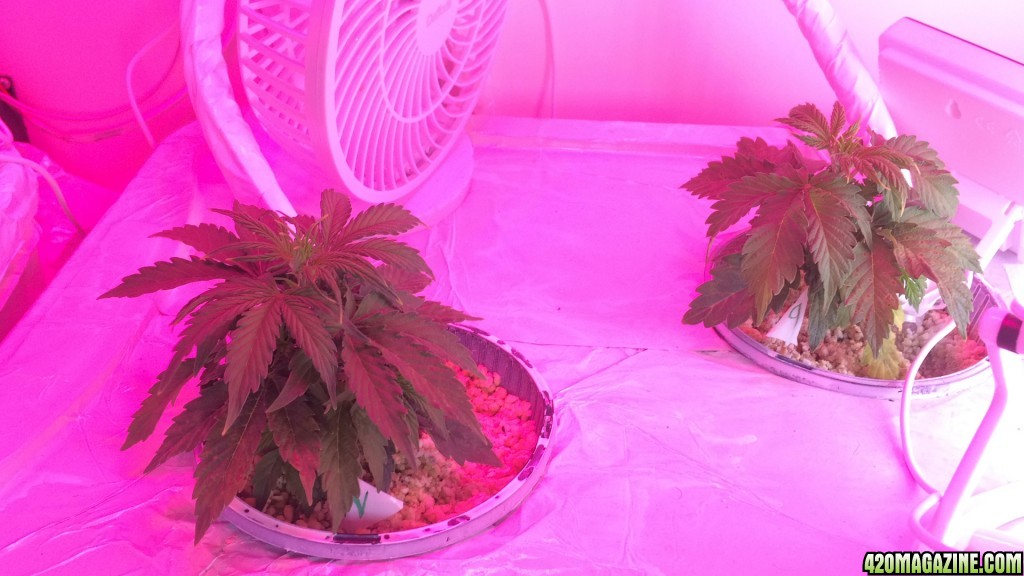
This is the Northern Lights three days later. (Day 29 after germination)
A few days later I noticed brown spots again!! This was the same pattern of weak growth which I had seen on my Moby Dick before and I searched the internet one more time to look for an answer. I had before tried out adding more magnesium, keeping the PH more steady, lowering the overall temperature, but nothing worked. Then I found out about calcium deficency, which looks very similar to all of those other plant problems.
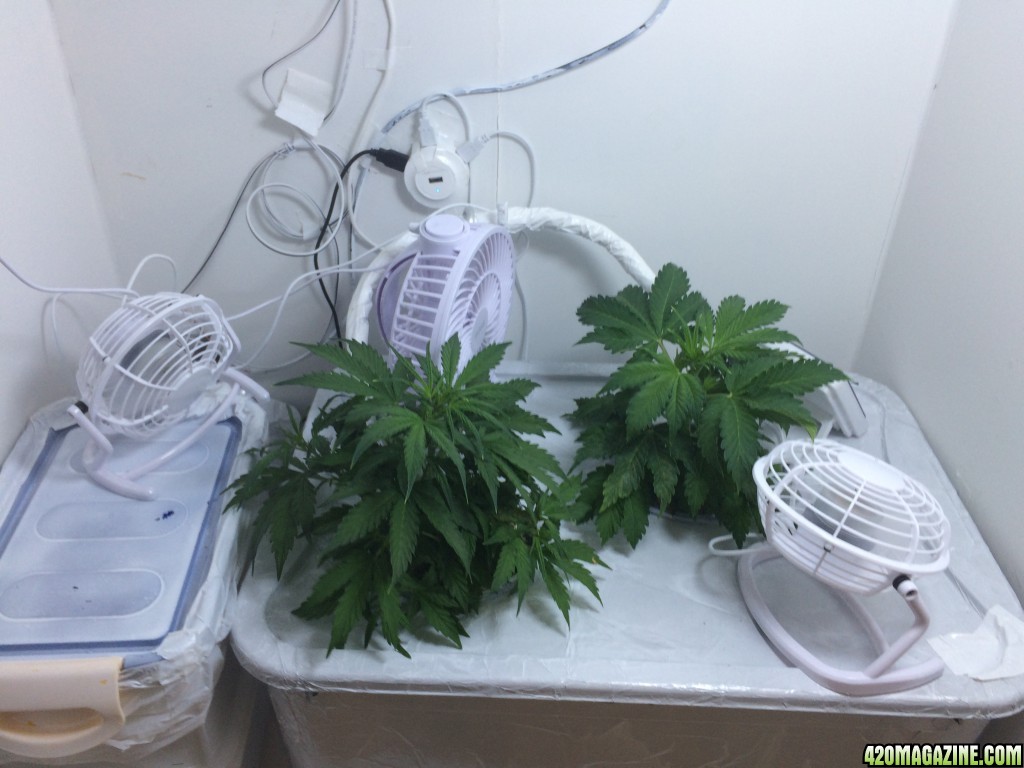
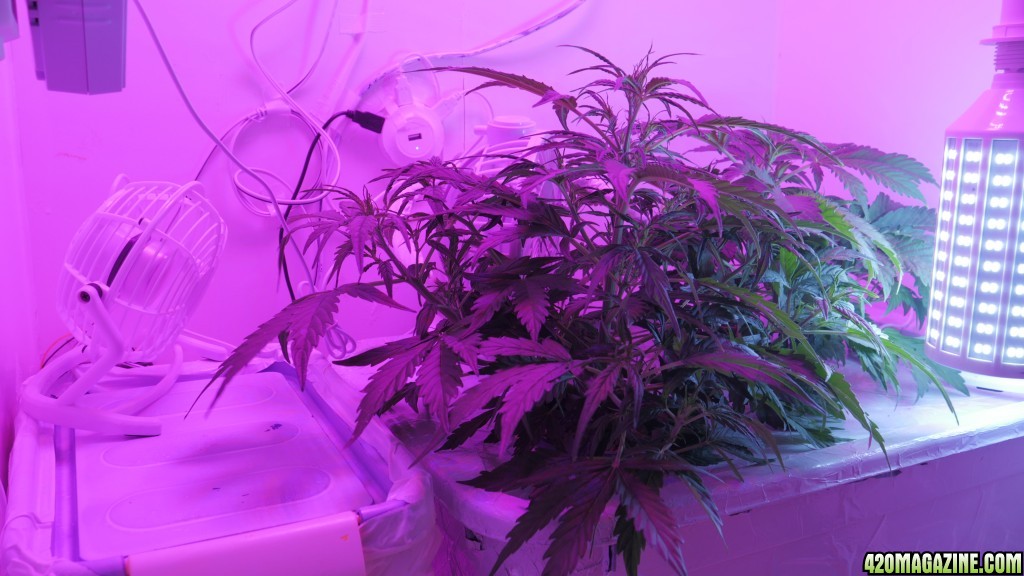
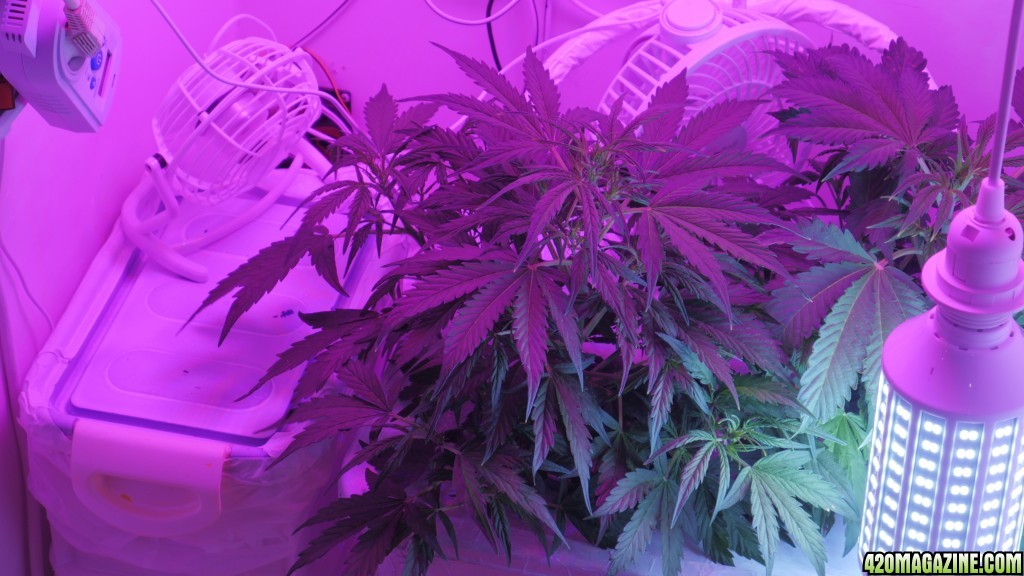
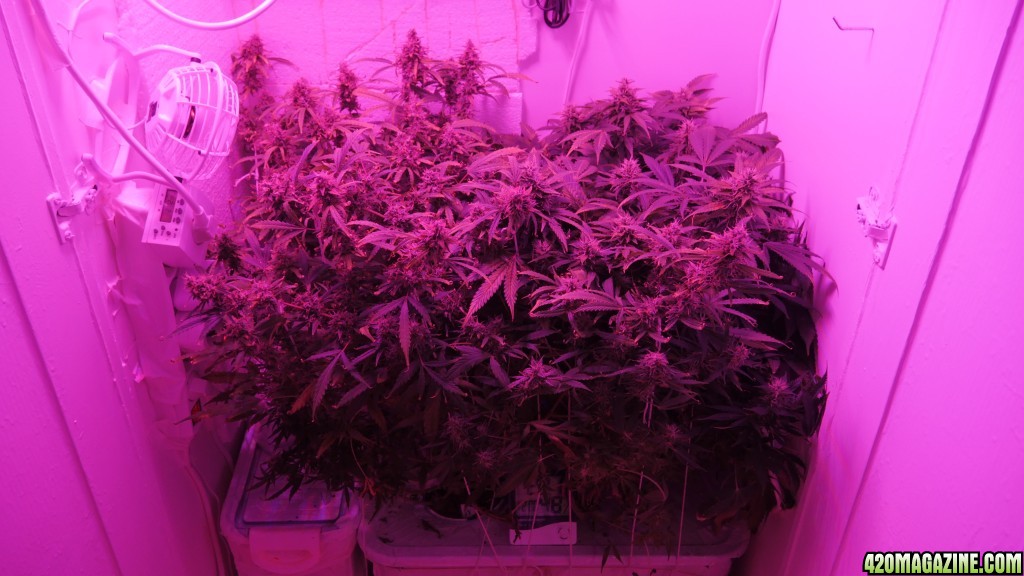
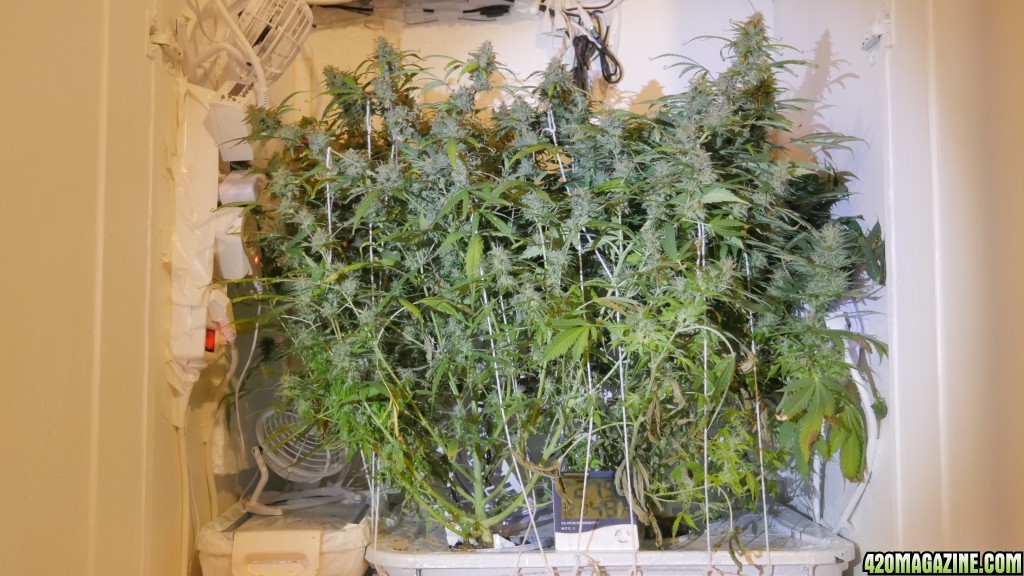
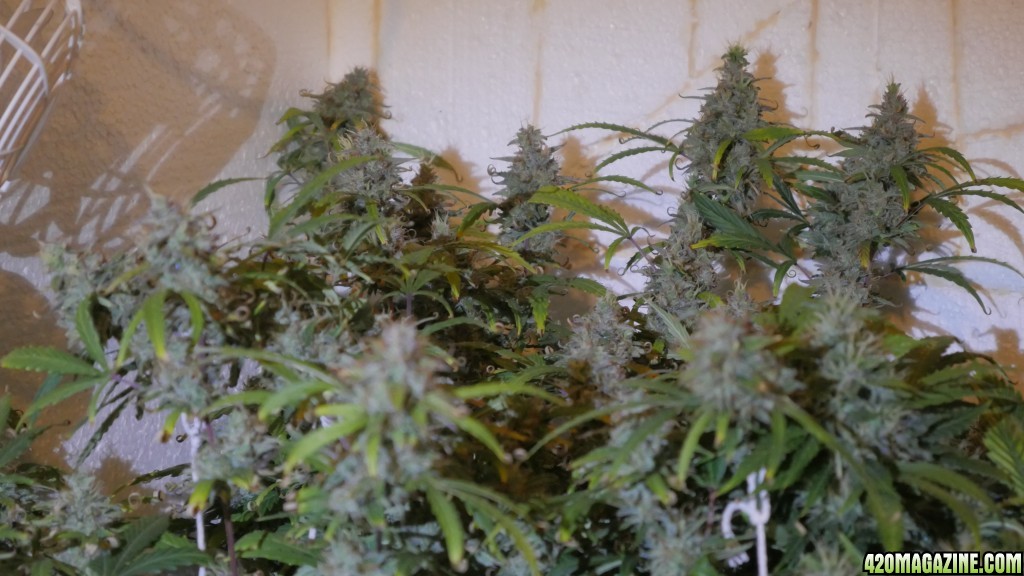
Hence, I decided to add (way) more MagneCal than my general hydroponics nutrient chart from growweedeasy dot com had suggested and holy shit you guys... This fixed the problem!! Just a few hours later I could tell, they were doing much better. This is them only five days later (Day 36 after germination)
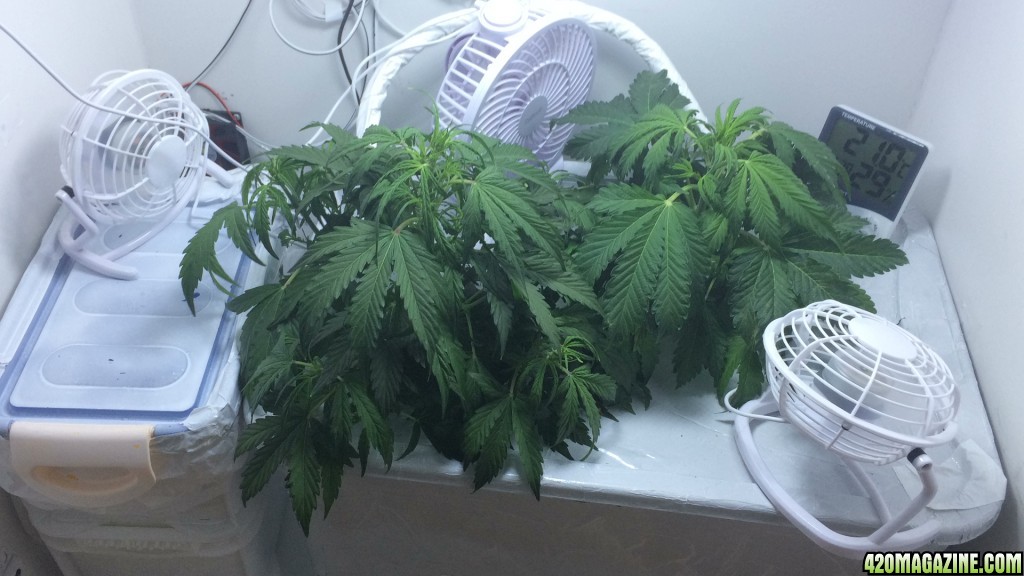
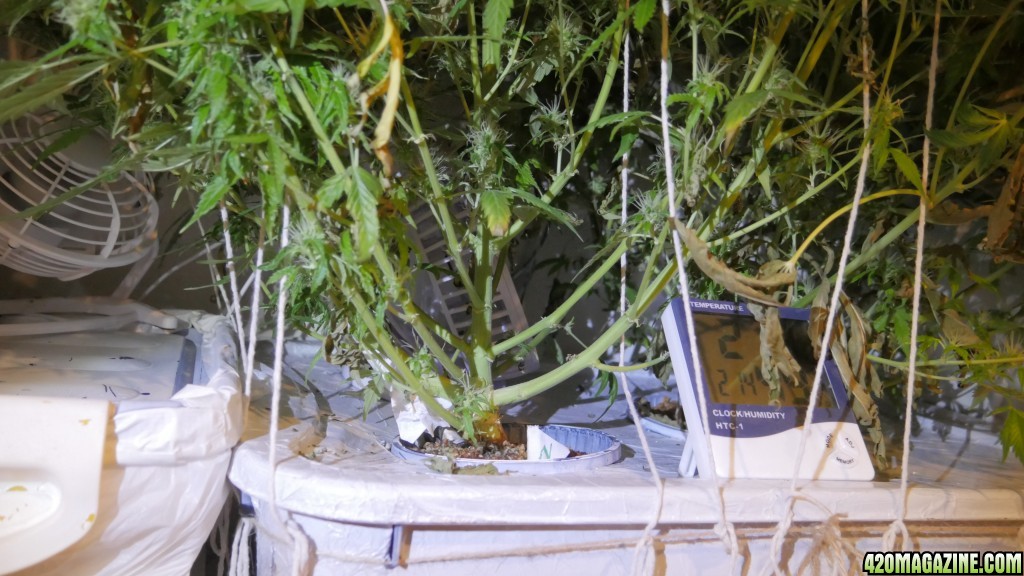
The brown spots stopped occuring since I give them more calcium and apparently it is also crucial for stem development and coping with higher temperatures.
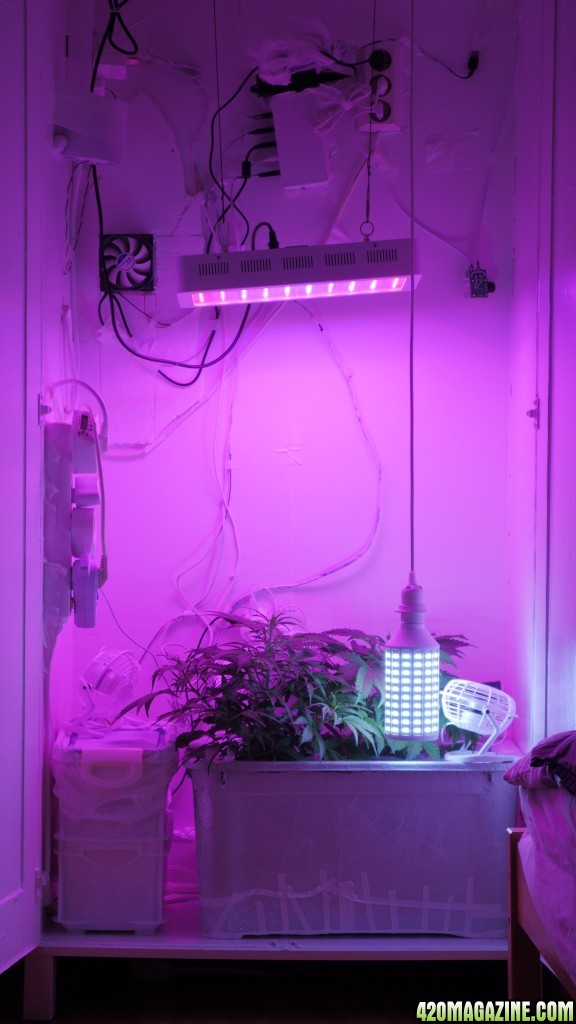
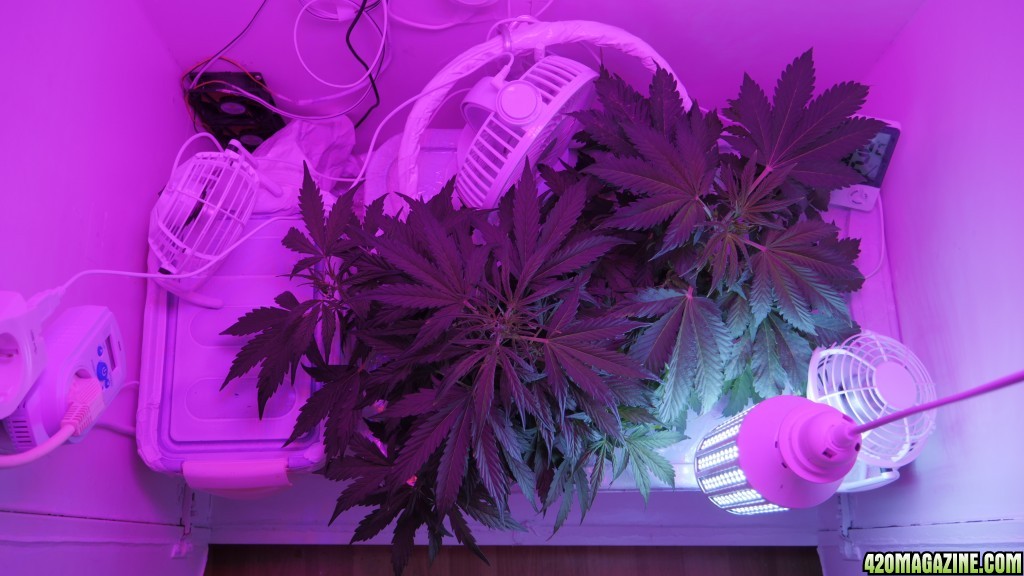
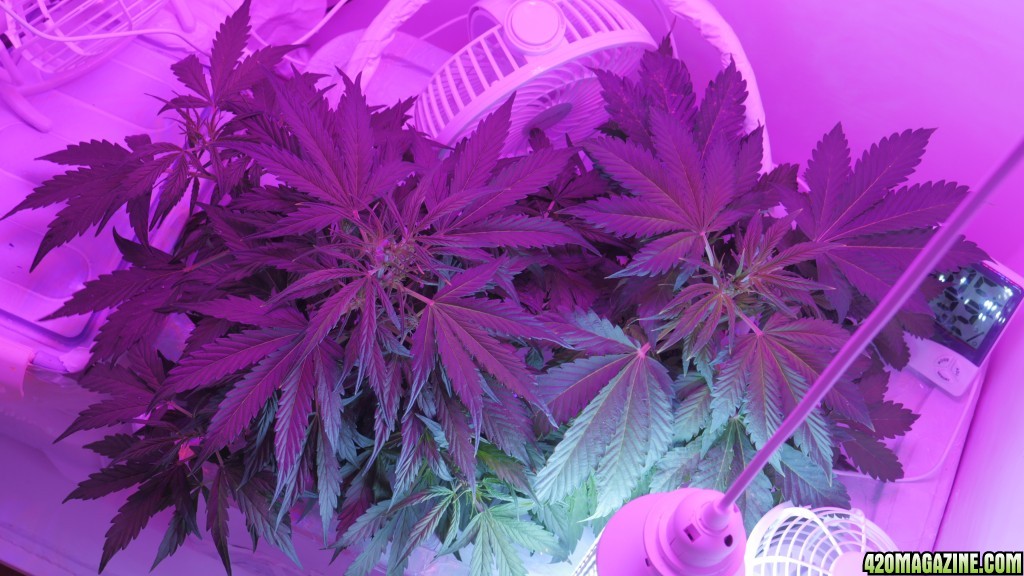
Day 39 after germination)
(Notice the hanging leaves at nighttime)
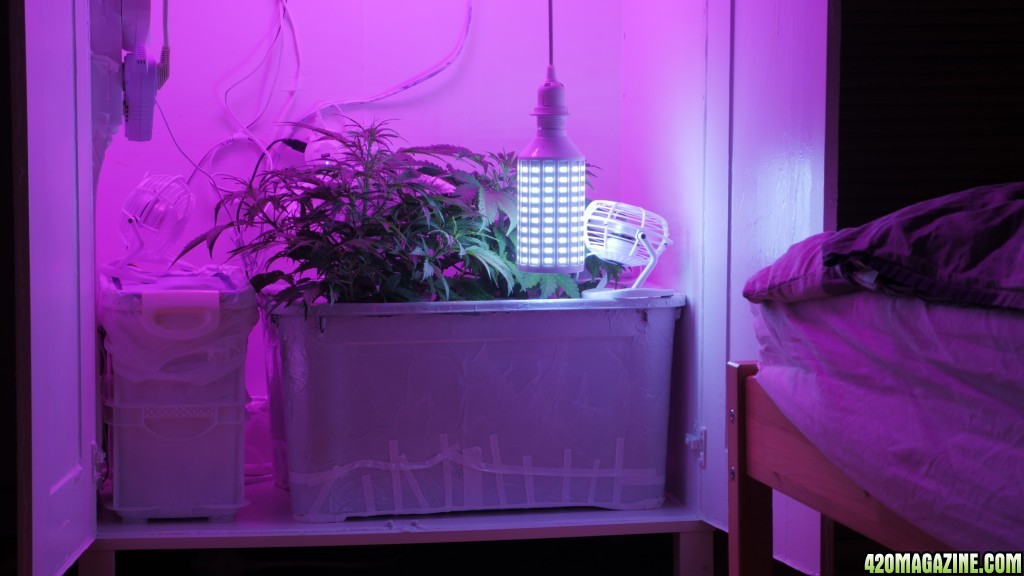
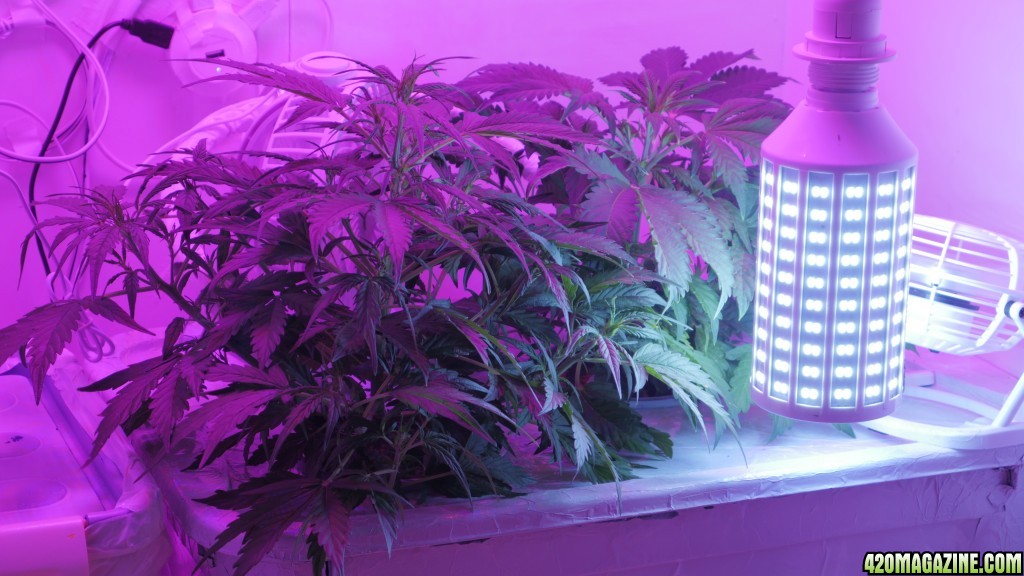
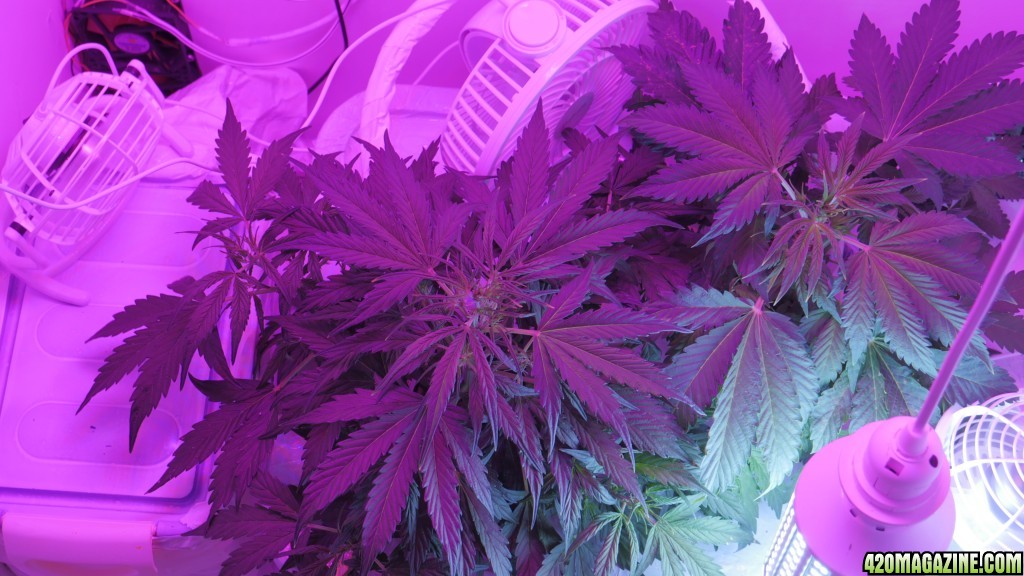
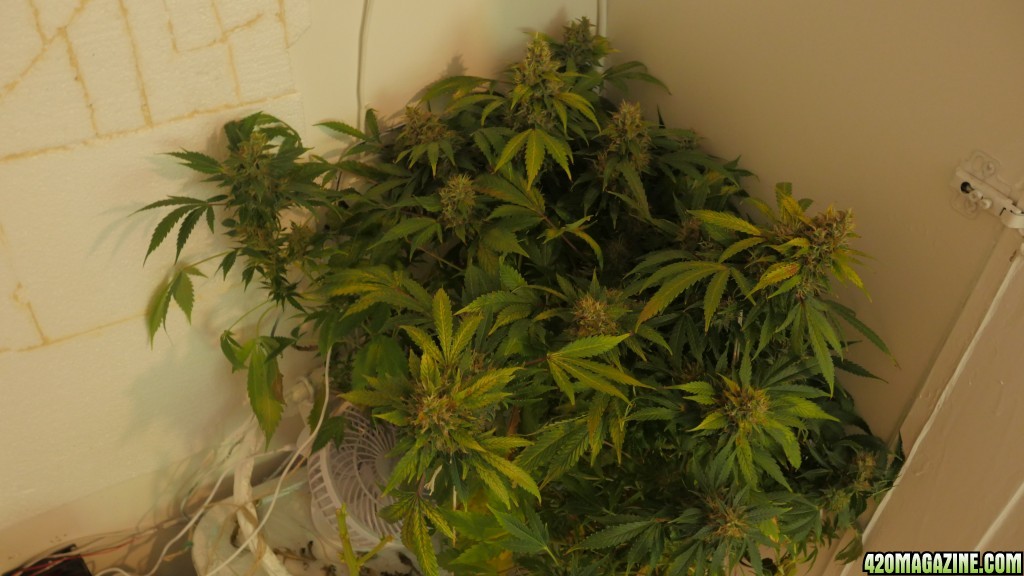
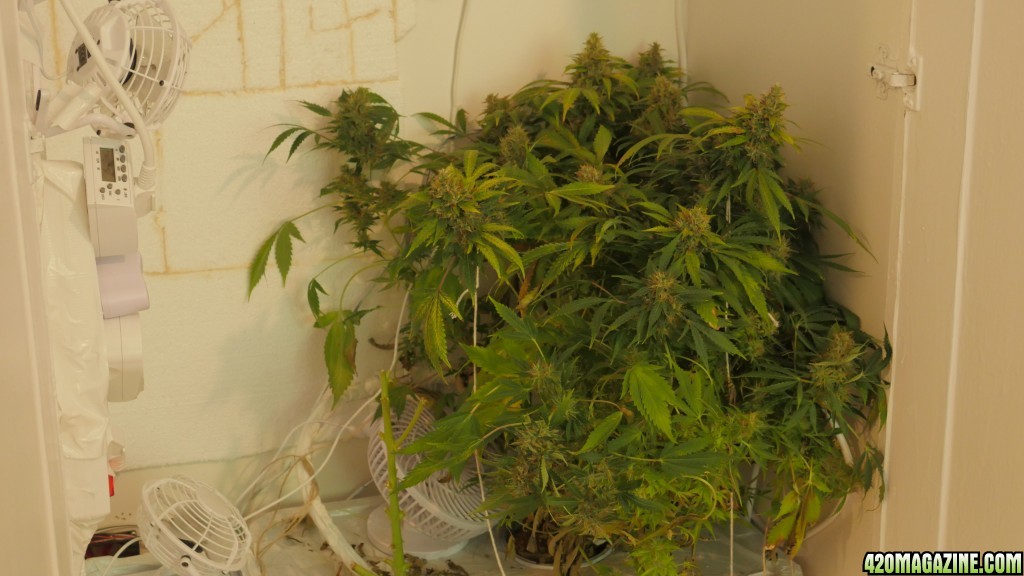
After a bit more research, this actually seems to be a ccommon problem for hydro growers who keep the PH low. I have mine at around 5.75, but honestly I am just happy I figured it out in time and can watch my babies grow a few centimeters each day! (Day 41)
(don't hate me for all those pics, I smoked some Moby Dick and am desperately in love with my new babies!)
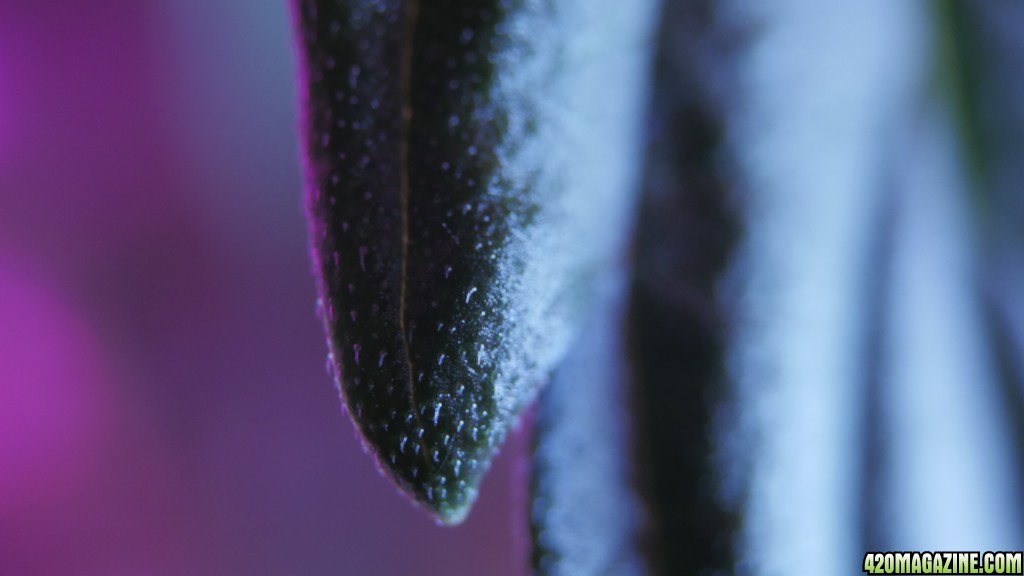
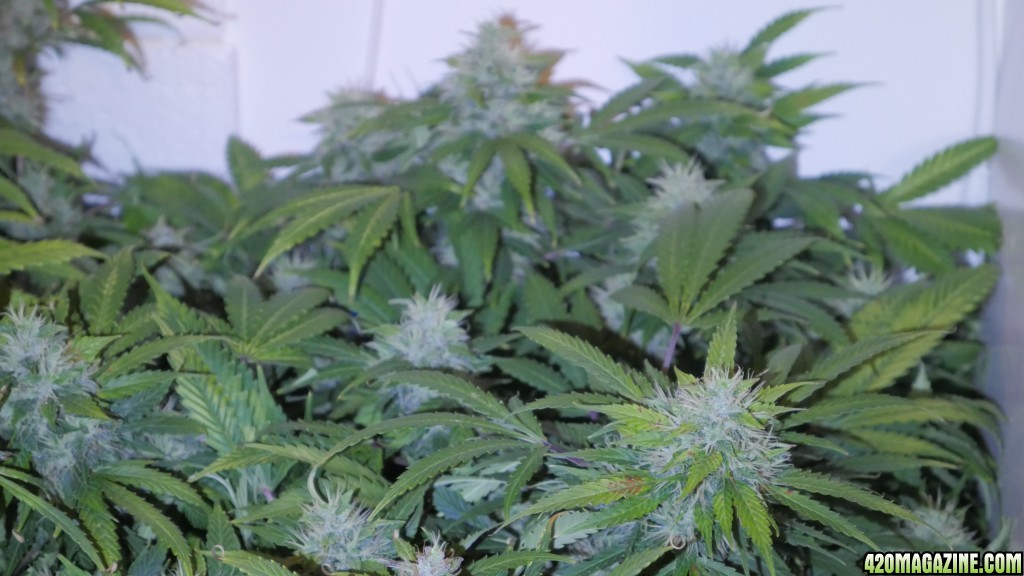
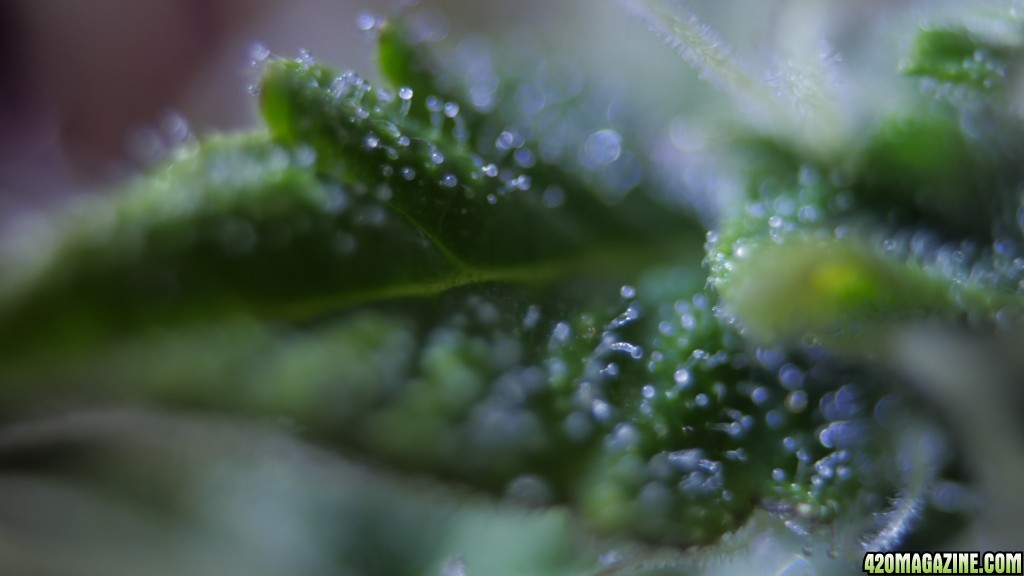
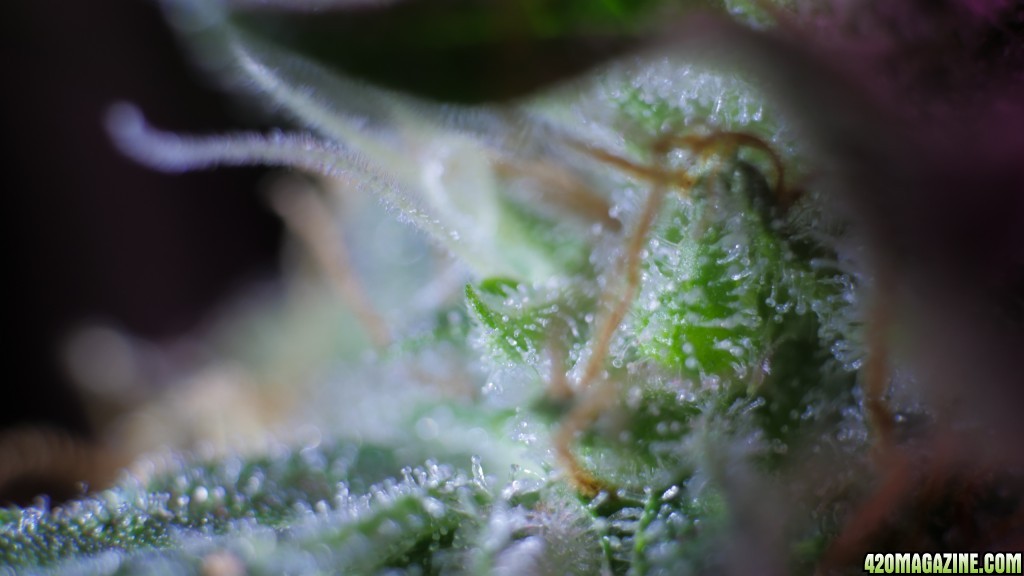
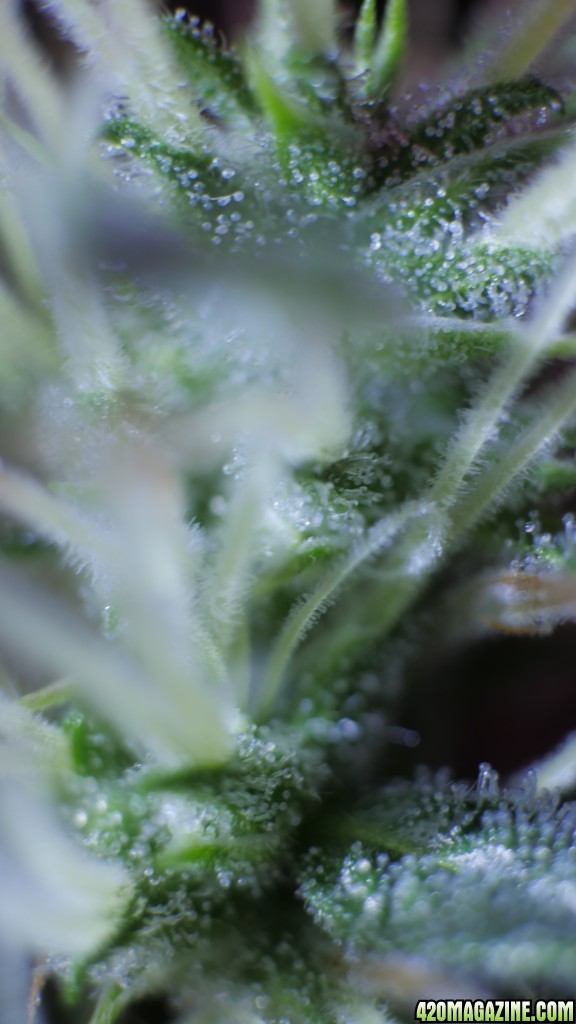
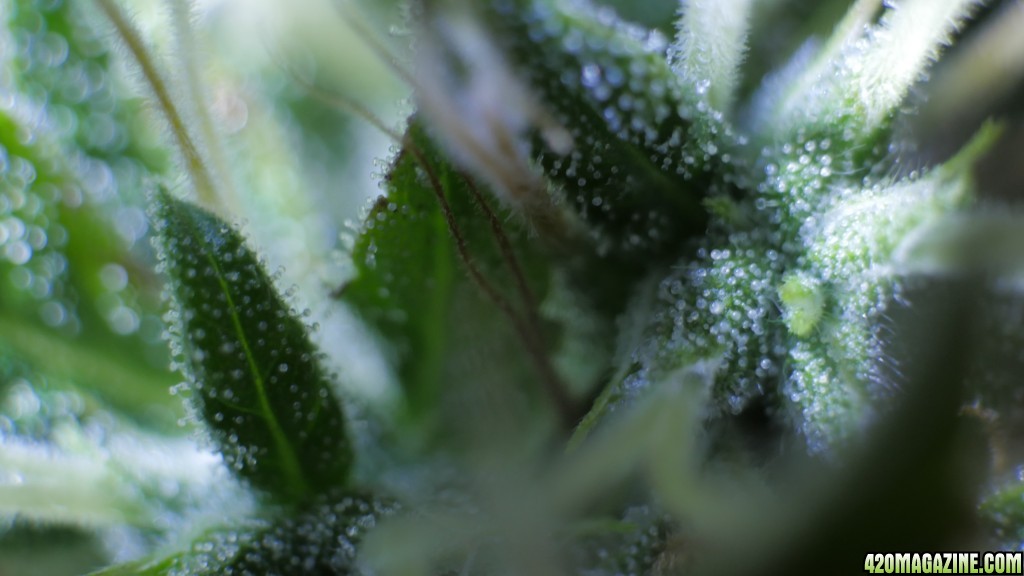
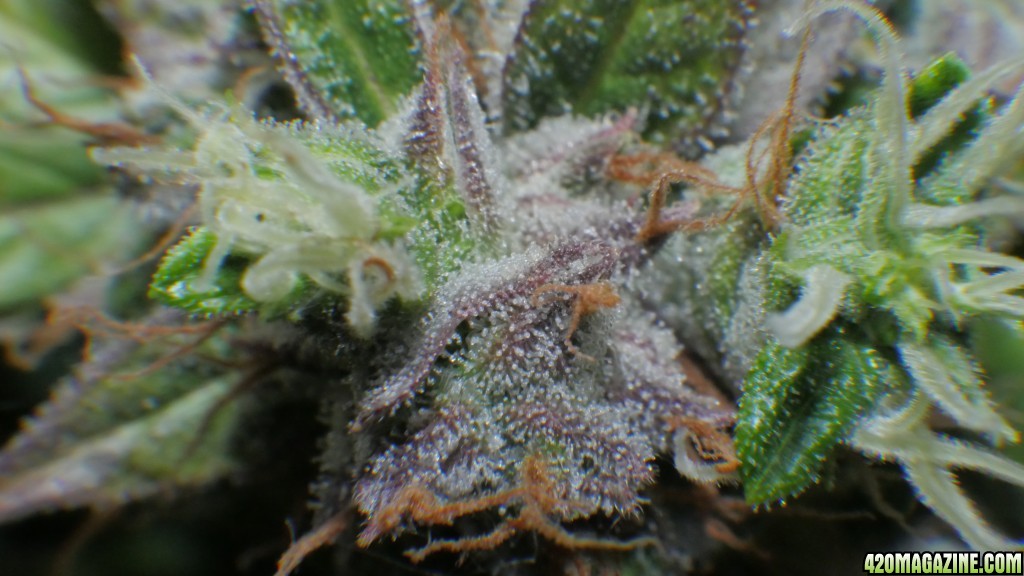
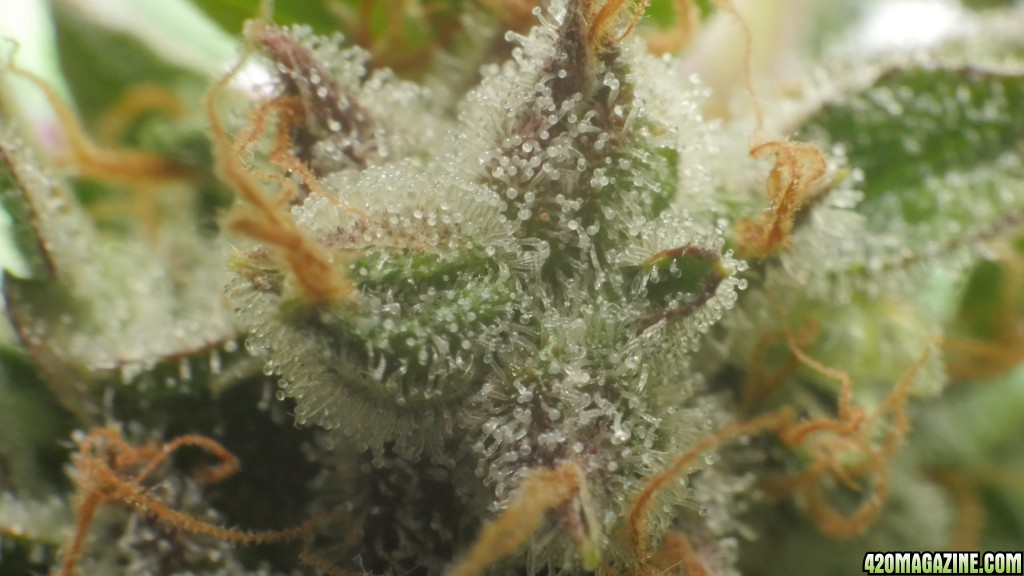
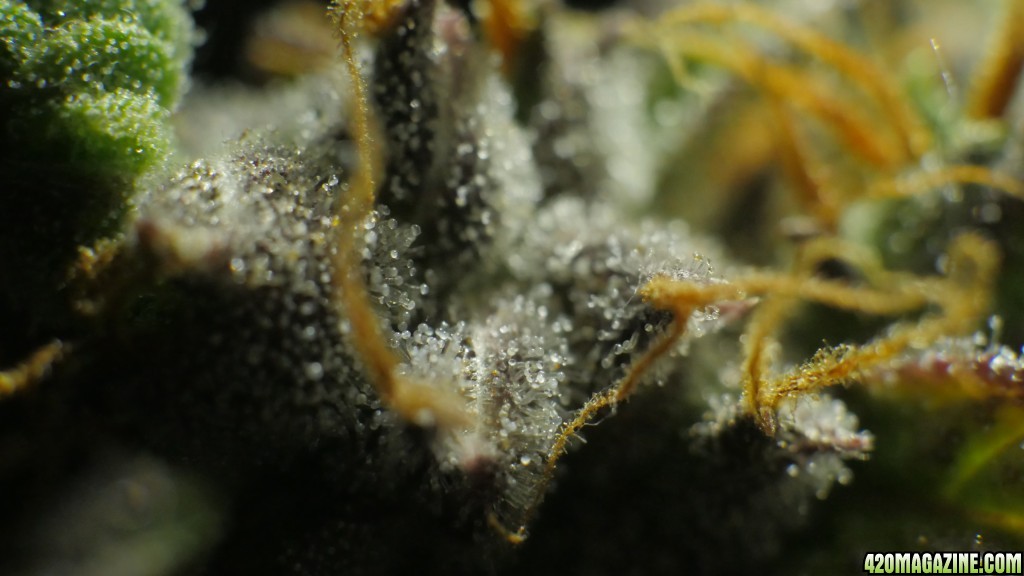
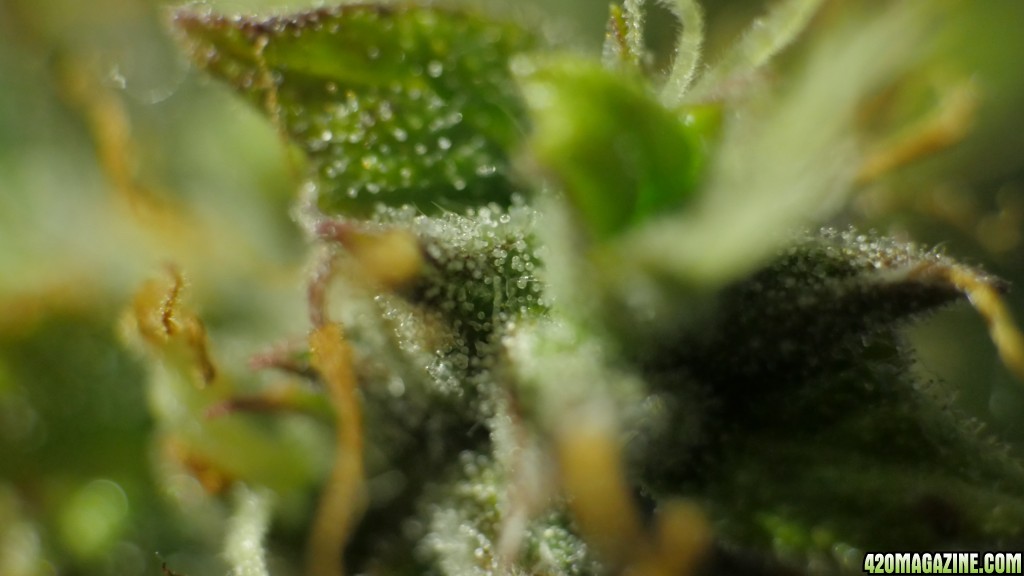
Here are some closeups of the leaves. I just wanted to test the limits of my macro lens


Other than that, I haven't really been very active. Just adding nutes every day and watching out for any problems. There are a few more things I'd like to upgrade on my setup, but as long as everything works, there is no rush really. Either way I will keep you up to date.
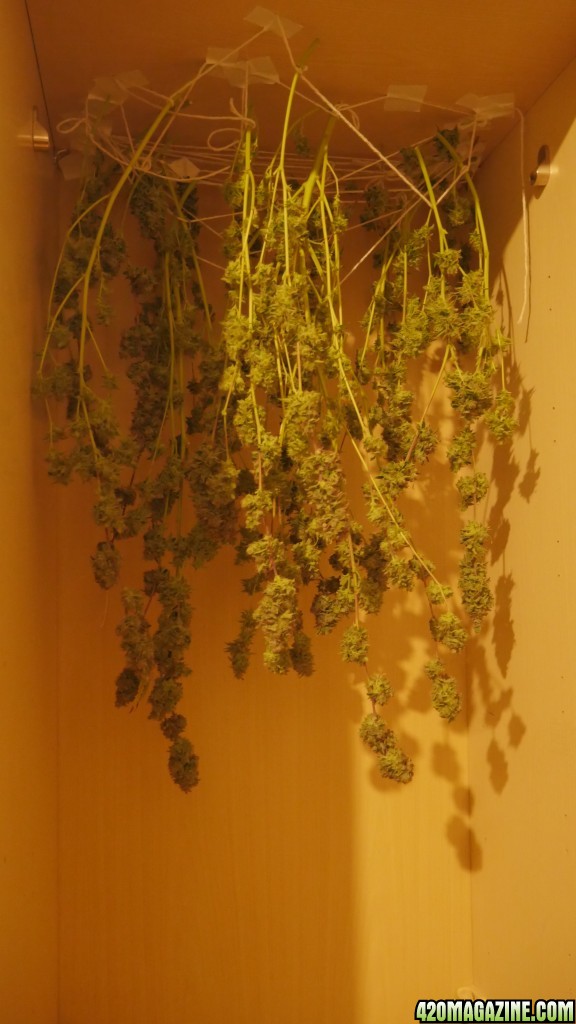
Okay, that's it so far. I think the experience I gained during these past four months have helped me quite a bit and I hope to be able to show you a greater yield and fatter buds this time! =)
In case of suggestions, or questions please shoot, I'd like to hear your thoughts on what I have going on at the moment.
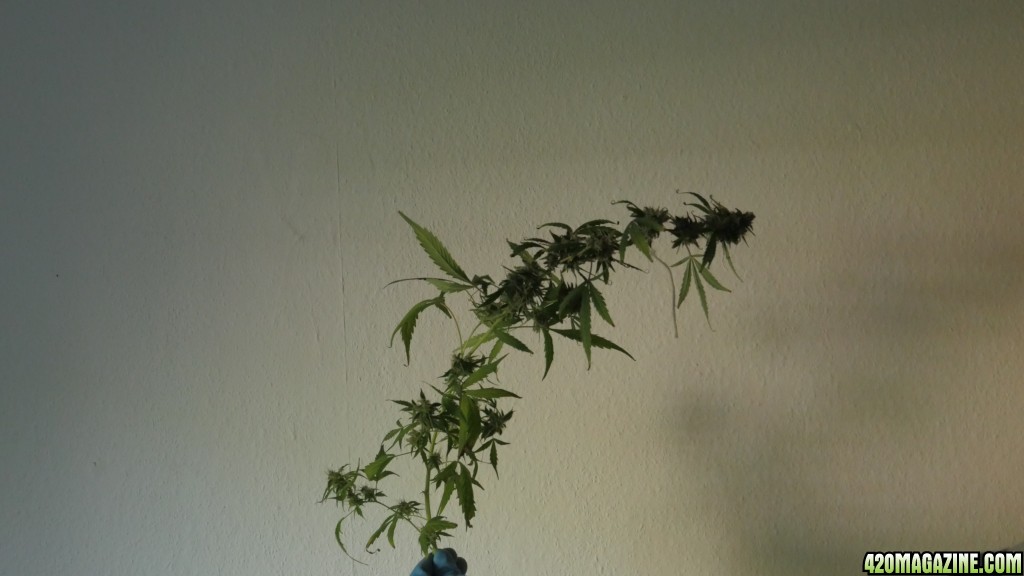
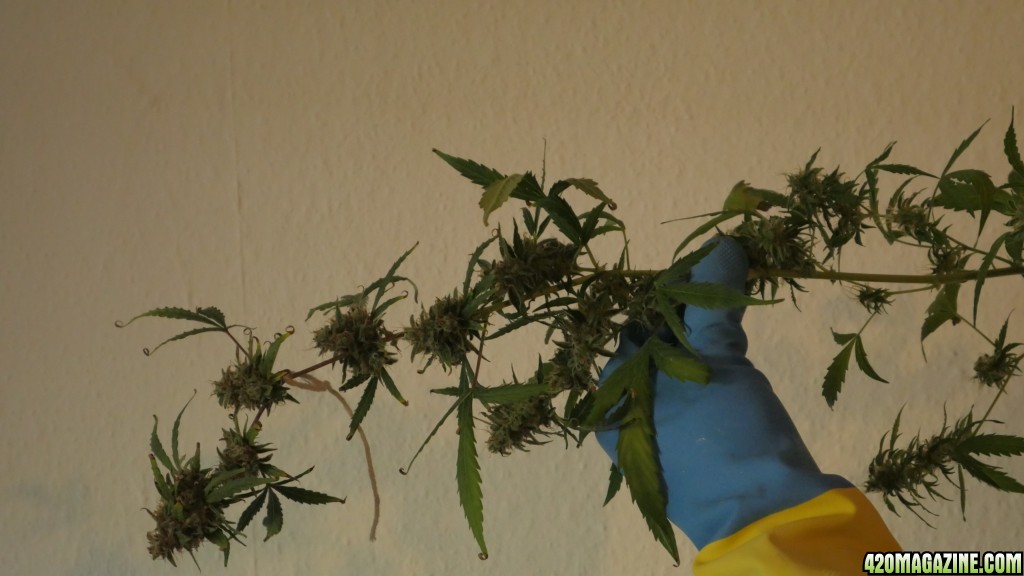
For example, I also want to try trimming some of the smaller, lower buds in advance, to have less but bigger ones in the end. - Thoughts on trimming autos?
Much Love,
- Pipo
I am pleased to finally have some time to sit down and start this second grow journal. For everyone who hasn't seen my first grow yet, check it out. It might be helpful to understand some of the stuff I'm about to mention =)
300W LED - Hydroponic - Moby Dick - First Grow - With Love
But let's get right to it!
This time I'm trying to grow two plants at once, since the last time I actually had quite a bit of room left in my closet.
The first choice of auto strain was Northern Lights, which is simply one of my favourites and usually gives me very vivid, visual impressions during my high! And the second one was out of sheer excitement for my setup. Pineapple Express! I've never had it, but since I can grow my own bud, and reviews praise it, I decided this was the right one to go for.
So, I started off the same as last time, by putting the seeds in water.
Then, about 24 hours later, I saw them opening up.
It was time to move them onto a demp paper towel, inside a paper plate.
Three days later the roots were long enough to transfer them into a 50/50 mix of coco coir and perlite.
My last baby actually suffered quite a bit in the beginning, so I learned from my mistakes and cut slits in the side of the plastic cups for fresh air exchange. then I put them inside my (empty) grow closet next to a dialed down fan and my 50W 6600k LED corn cob light.
The closet was empty, because I had to make some crucial changes to my setup! The first thing I upgraded was the water container, or to be more precise, the way to access it. My idea was to somehow have the water move through two containers. One for the weeds and one for simple access to check PH and give nutrients.
I got the right sized containers and modified thema bit. During my last grow I noticed severe algae growth inside the bucket, which could result in clogging of tubes, or pumps. Thus I decided to cover the entire water cycle as good as possible with aluminium foil (and tape to prevent rips).
The smaller container needed a non-see through "trunk" to cover the the opening where the tubes would enter/exit.
Afterwards I spraypainted everything white and moved onto the next problem I had before - cooling -
I did some research online and found out about Peltier cooling/heating. It's basically a chip which heats up one one side and cools down on the other, when you run electricity through it.
Just check out this video for more info.:
www youtube com/watch?v=Ipt8xqKbCSw
I actually just stuck to that tutorial and put together this cooling device.
I enhanced the idea though, by insulating the coolers with styrofoam.
Then it was time to install it all veeery professionally with toothpicks and double sided tape ^^
Notice the styrofoam. The back wall of the closet is actually so thin, it would be constantly fighting a battle of cooling down from the inside and heating up from the outside if the styrofoam wasn't there. So, if you're planning of copying any of this, make sure you take some time to think about heating dispersion and direction of air flow. SUPER IMPORTANT!!
A few days later (day 19 after putting the seeds in water) I decided my babies had become big enough to say hello to their new home.
I started by putting 4 plastic bags inside the smaller container, because it was put together from two smaller ones and I didn't want to risk any leakeage.
Next, I added an extra tube on the intake of the water pump and cut a few holes in it, because I didn't want a piece of the plastic bag to clog the whole thing.
I also did the same to the end of the "compensation tube" (I'll explain it in a second)
Okay, so basically waterpump and the end of the "compensation tube" sit in the smaller container...
The water pump will pump the water through an added splitter to each of the flower pots. There it will drip down into the big tank and raise the water level. Inside of the big container is the intake of the "compensation tube" which is on both ends submerged in water and fully filled with it (no air, important!). Whenever the pressure on one side rises, the water will automatically flow through the tube and intend to create equal pressure on both sides. (google "Siphon" if this is hard four you to understand. It's a neat concept, especially if you're thinking of growing hydroponically)
Next to the "compensation tube" you can also see the stone of the air pump, which helps oxygenize the water. I also applied silicone to the hole where both tubes access the tank, to prevent leakeage in case the "compensation tube" gets clogged by roots or anything. Also worth mentioning:
The water needs to rise a bit in the big tank until the pressure is high enough to flow back to the smaller tank, so keep that in mind, if you plan to build a similar setup!
All the tubes that have water run through them are covered in a layer of aluminium foil and tape, to keep light out of the whole cycle.
After figuring out these things it was finally time to put my babies into the bigger pots. I added perlite and put them in the holes of the lid, which I prepared.
(I will switch to using pebbles in the future. The perlite is too small and gets everywhere where it's not supposed to!)
And my setup was so far finished! I was anxious for a few days, if the whole thing would leak or the siophoning would work, but so far I only had a bit of trouble with the splitted tubes that go to the pots and apparently needed smaller nozzles, or else the water would only come out on one side.
I also added some wire to the tubes, to have them stay in place a bit better and a holder which you see in the pictures later.
The peltier cooler works quite well. It's connected to the temperature regulated fans, that start up when it gets over 24°C / 75°F
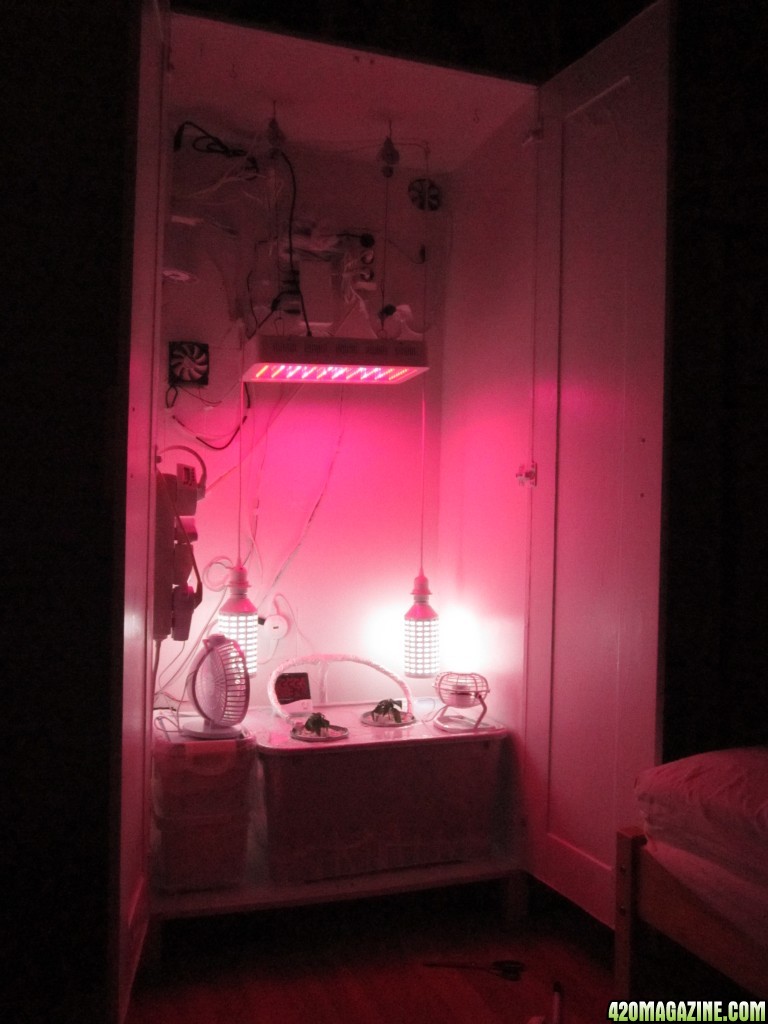
Some of these pictures were taken a week later (I messed up the dates on my pics a bit)
(Day 26 after germination) and as you can see, the plants are healthy, but not growing quite as fast as one would hope.
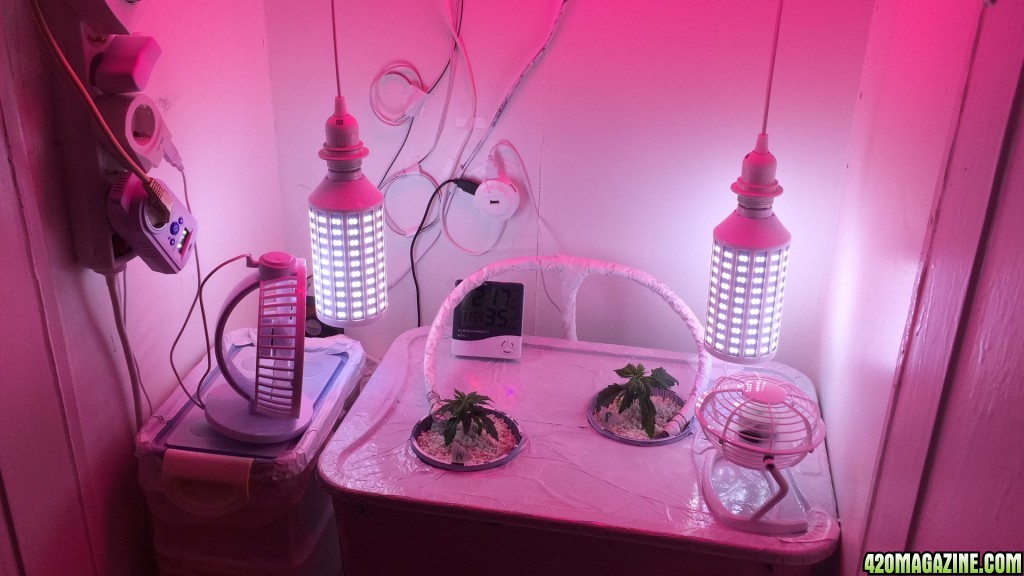
This is the Northern Lights three days later. (Day 29 after germination)
A few days later I noticed brown spots again!! This was the same pattern of weak growth which I had seen on my Moby Dick before and I searched the internet one more time to look for an answer. I had before tried out adding more magnesium, keeping the PH more steady, lowering the overall temperature, but nothing worked. Then I found out about calcium deficency, which looks very similar to all of those other plant problems.
Hence, I decided to add (way) more MagneCal than my general hydroponics nutrient chart from growweedeasy dot com had suggested and holy shit you guys... This fixed the problem!! Just a few hours later I could tell, they were doing much better. This is them only five days later (Day 36 after germination)
The brown spots stopped occuring since I give them more calcium and apparently it is also crucial for stem development and coping with higher temperatures.
Day 39 after germination)
(Notice the hanging leaves at nighttime)
After a bit more research, this actually seems to be a ccommon problem for hydro growers who keep the PH low. I have mine at around 5.75, but honestly I am just happy I figured it out in time and can watch my babies grow a few centimeters each day! (Day 41)
(don't hate me for all those pics, I smoked some Moby Dick and am desperately in love with my new babies!)
Here are some closeups of the leaves. I just wanted to test the limits of my macro lens
Other than that, I haven't really been very active. Just adding nutes every day and watching out for any problems. There are a few more things I'd like to upgrade on my setup, but as long as everything works, there is no rush really. Either way I will keep you up to date.
Okay, that's it so far. I think the experience I gained during these past four months have helped me quite a bit and I hope to be able to show you a greater yield and fatter buds this time! =)
In case of suggestions, or questions please shoot, I'd like to hear your thoughts on what I have going on at the moment.
For example, I also want to try trimming some of the smaller, lower buds in advance, to have less but bigger ones in the end. - Thoughts on trimming autos?
Much Love,
- Pipo


")