GrEeNdAyZ - DIY CFL - White Widow - Indoor Soil - No Tent - Winter '17

GrEeNdAyZ

Well-Known Member
Hey,
Long time listener, first time caller!

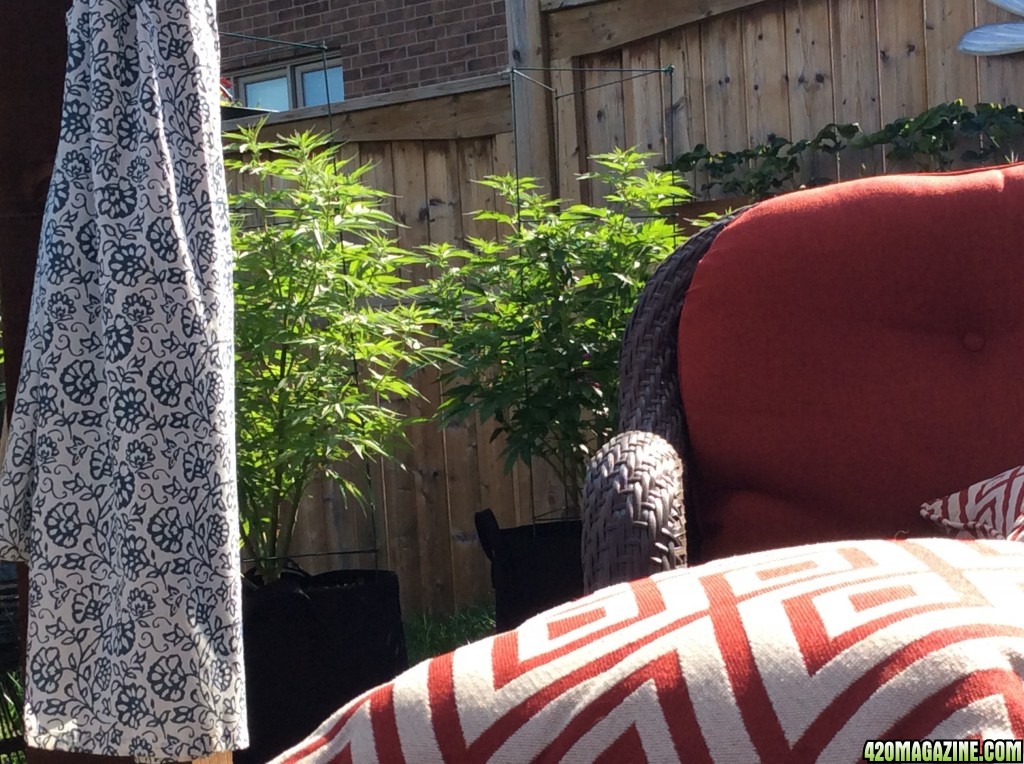
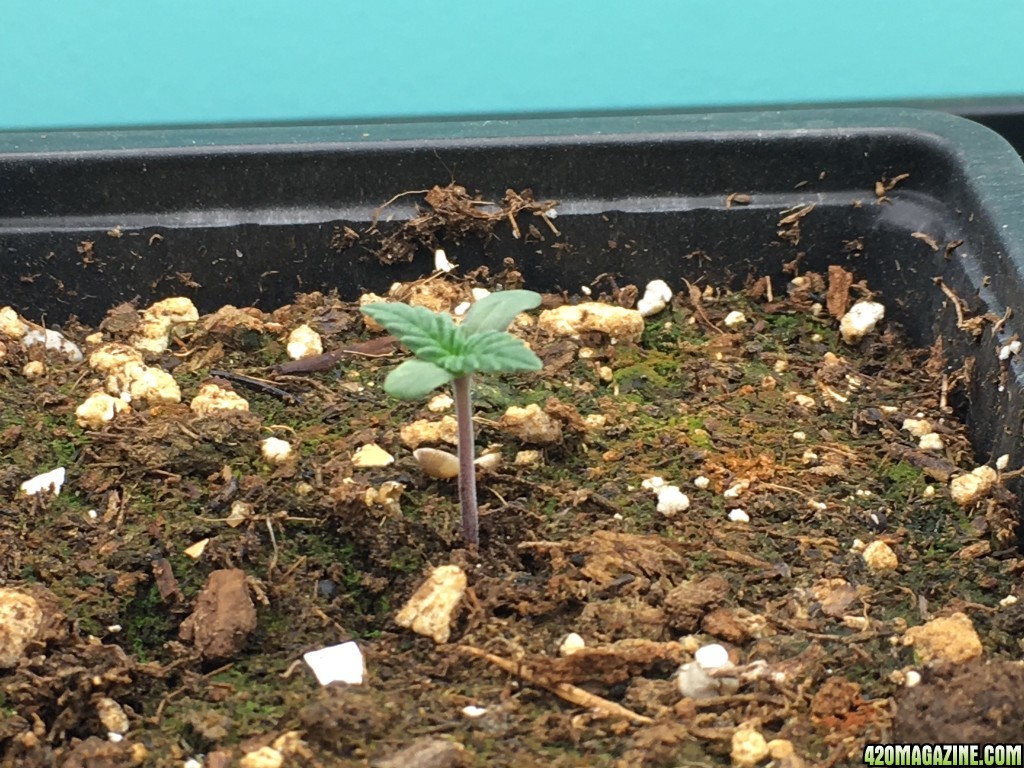
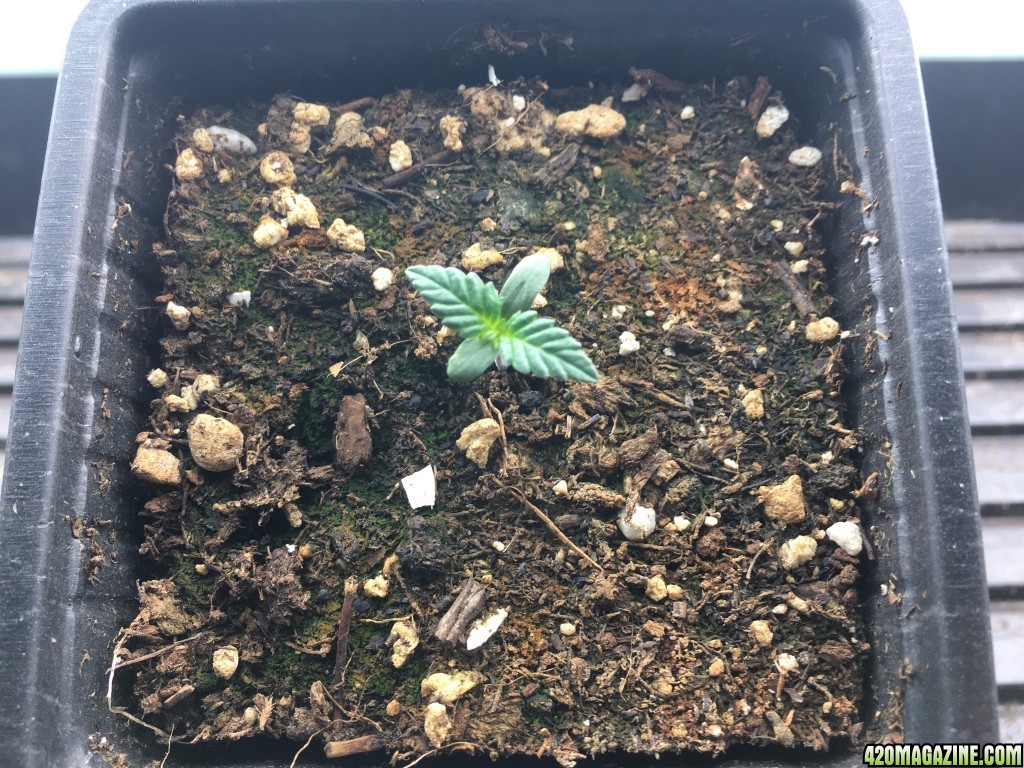
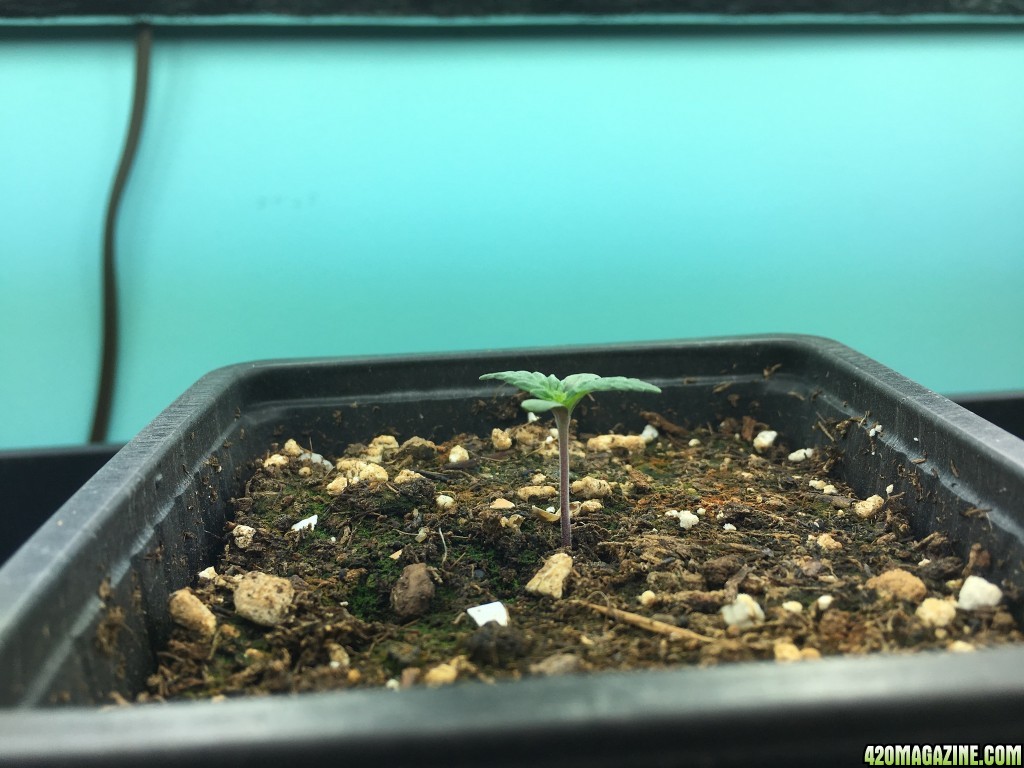
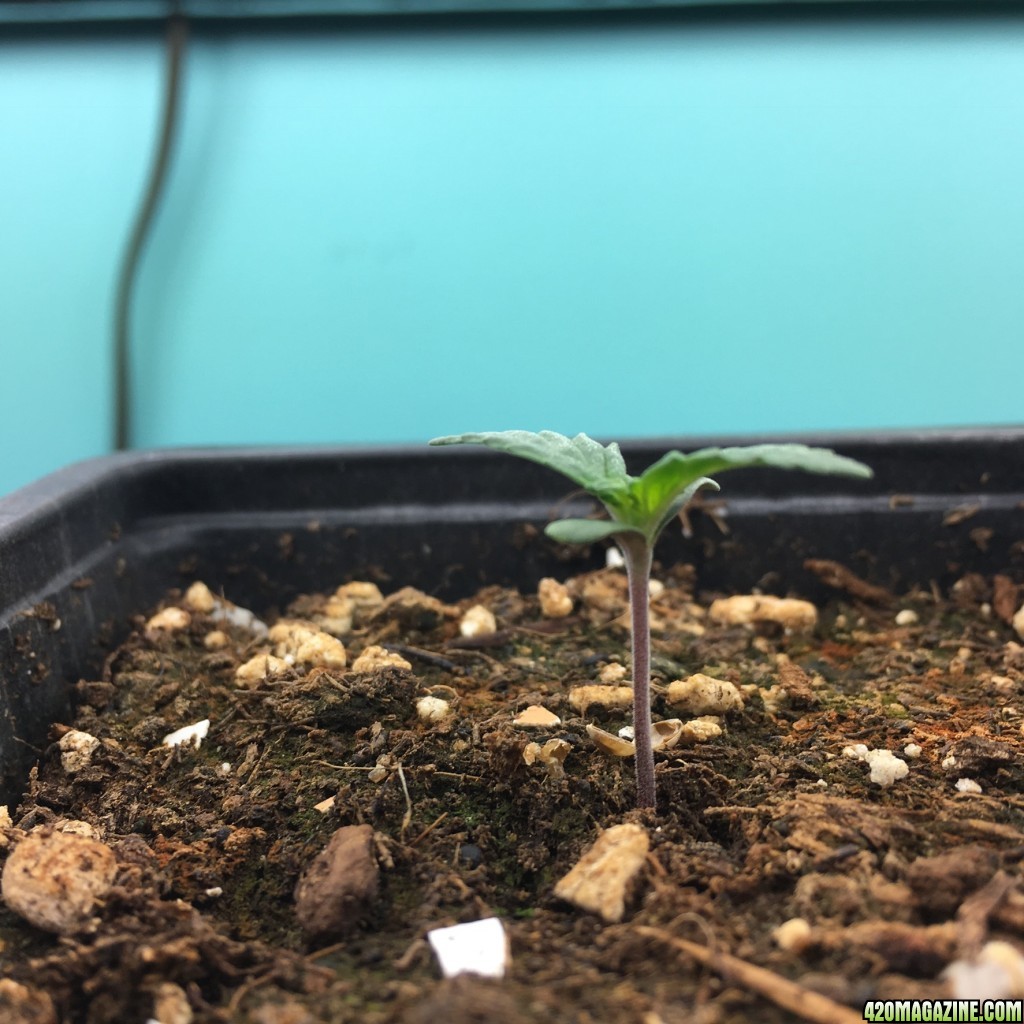
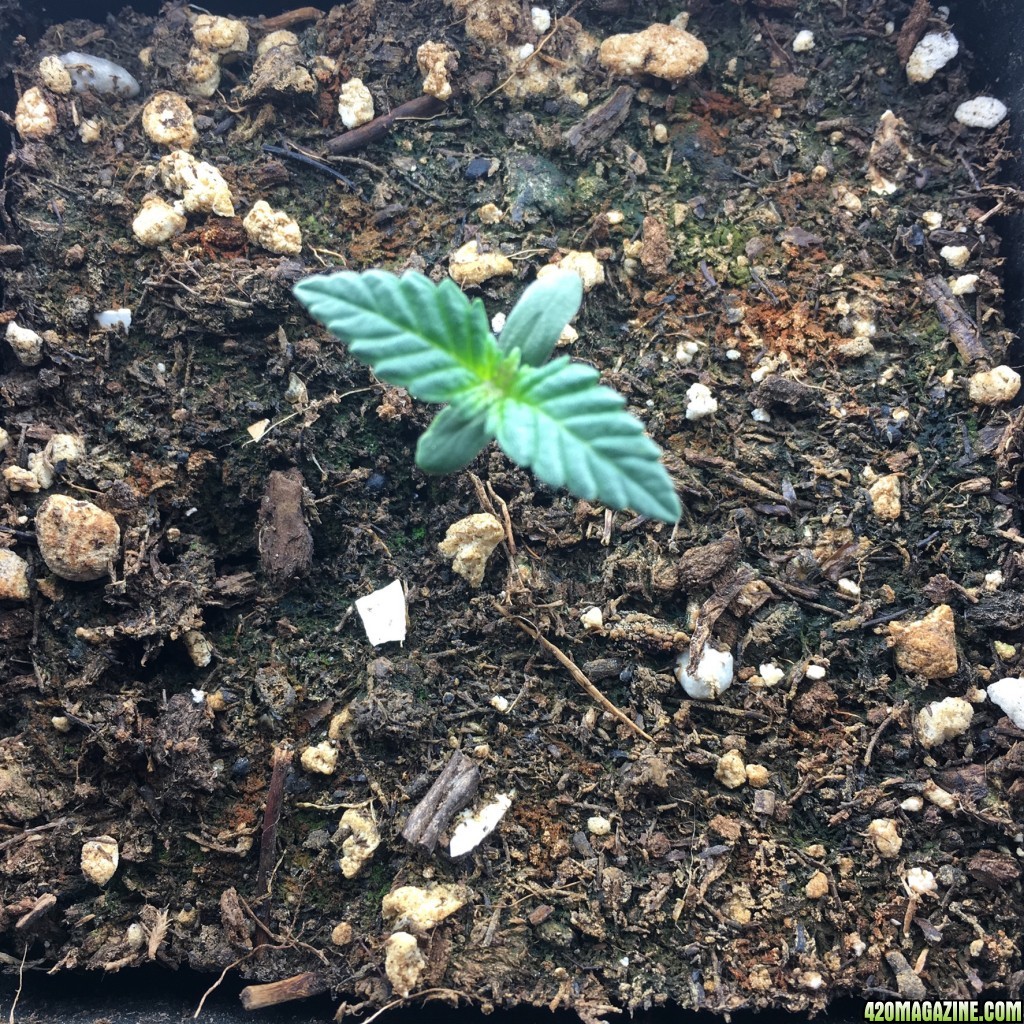
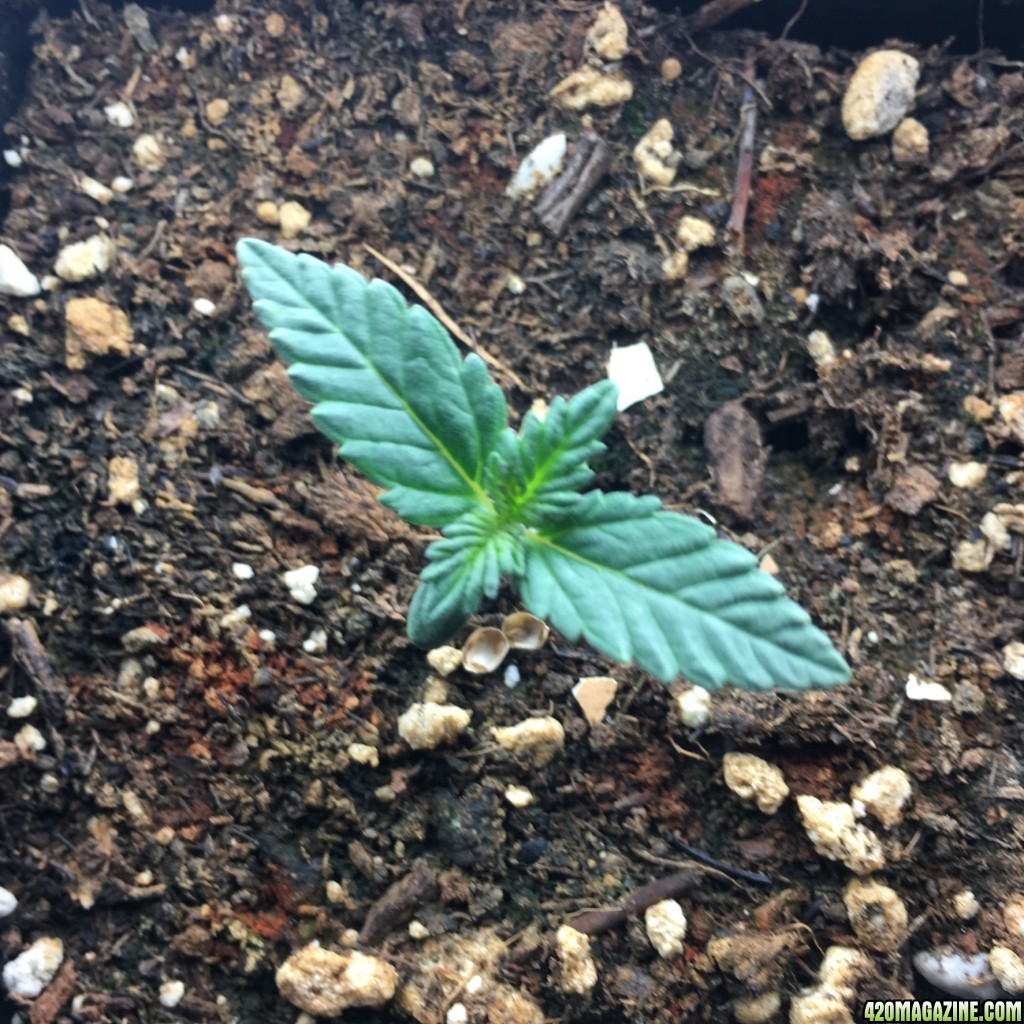
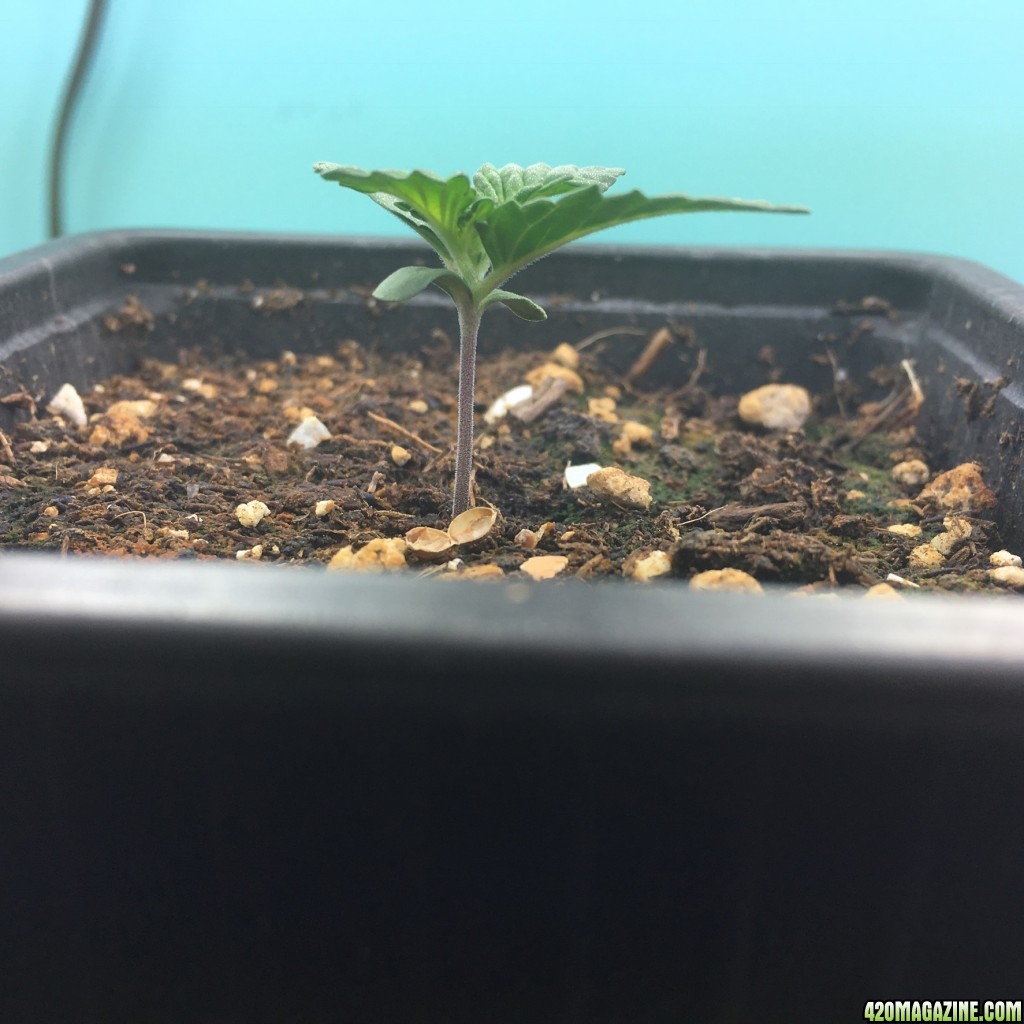
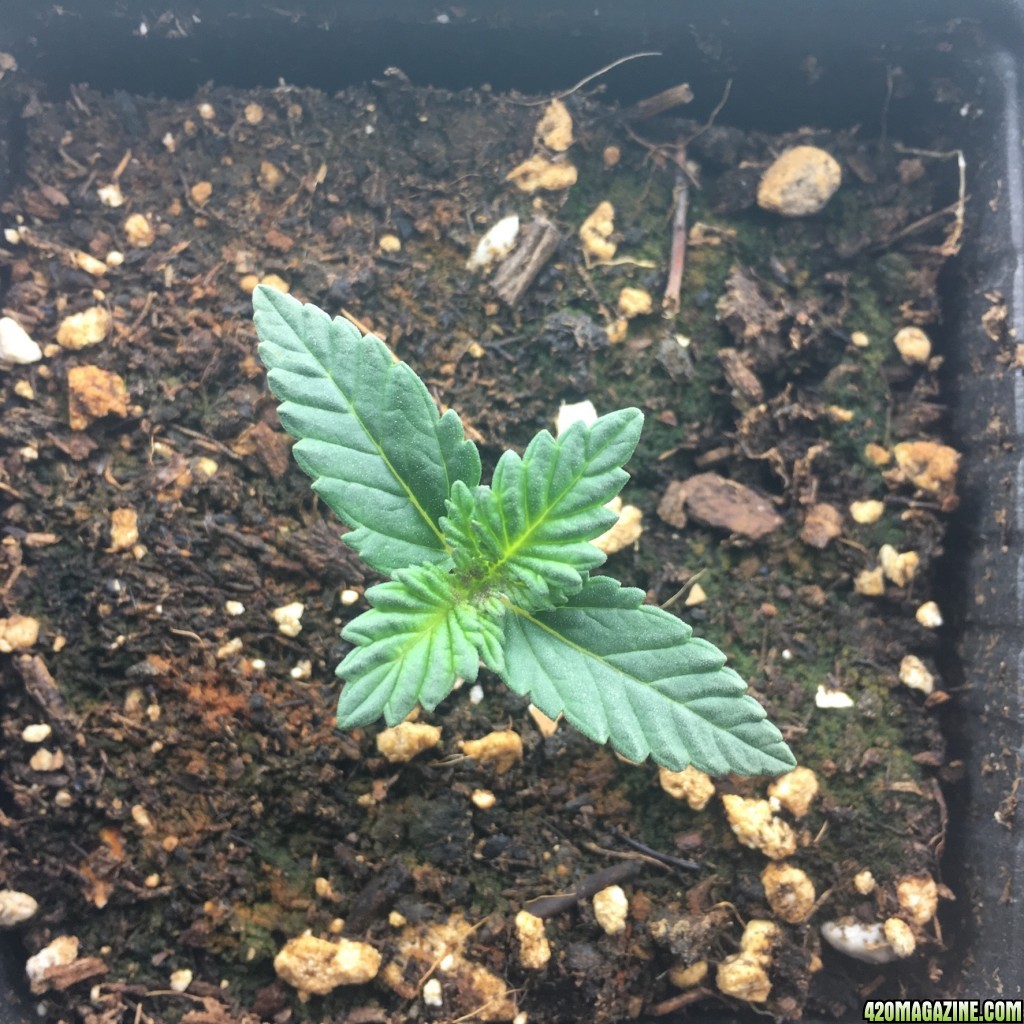
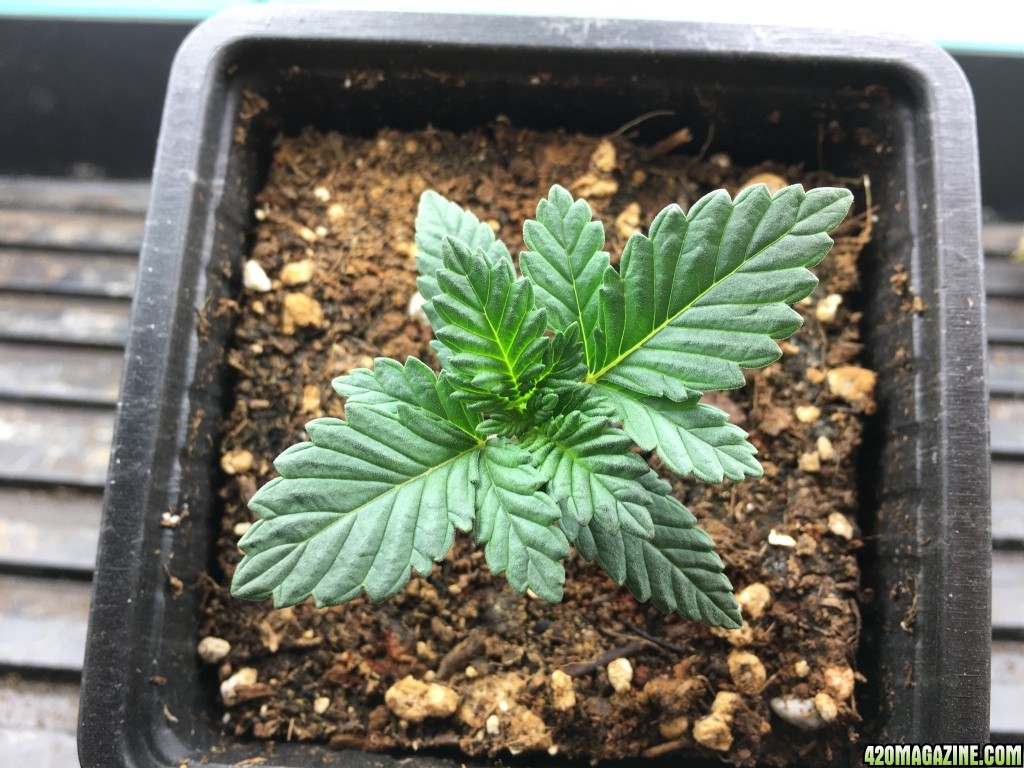
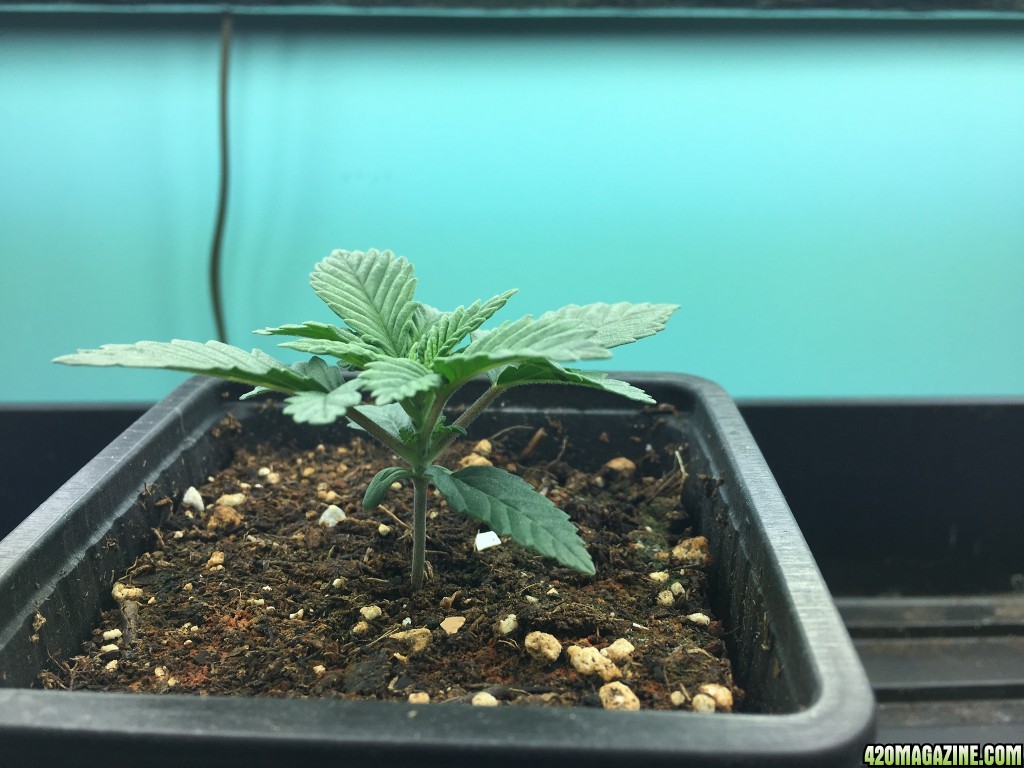
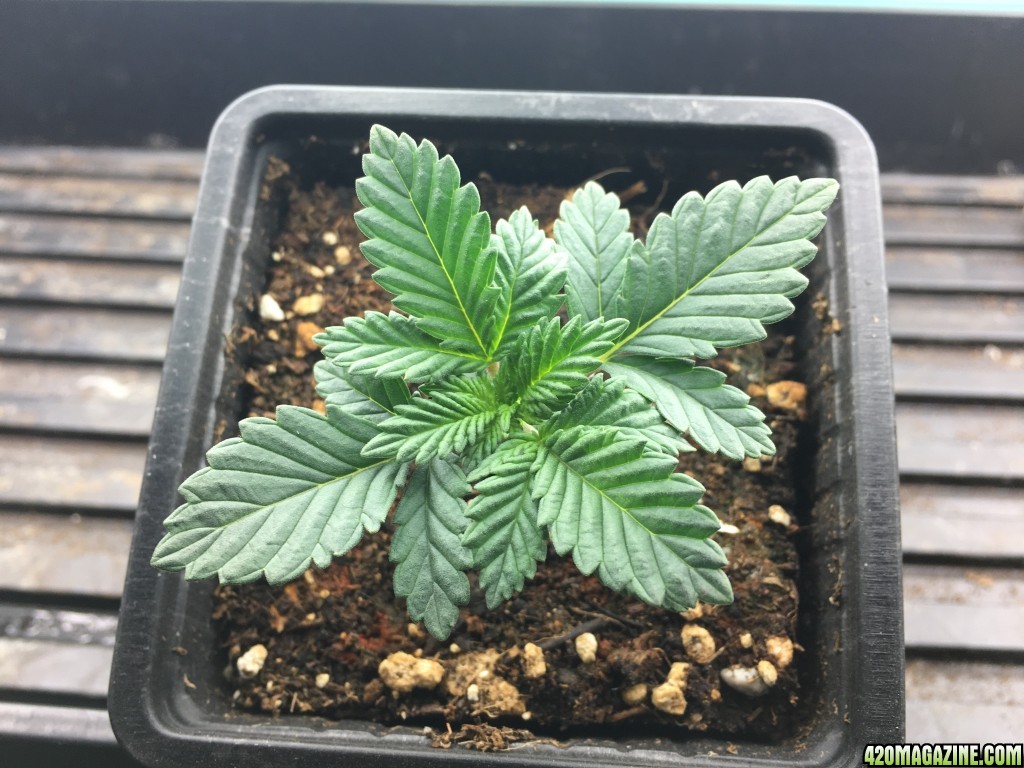
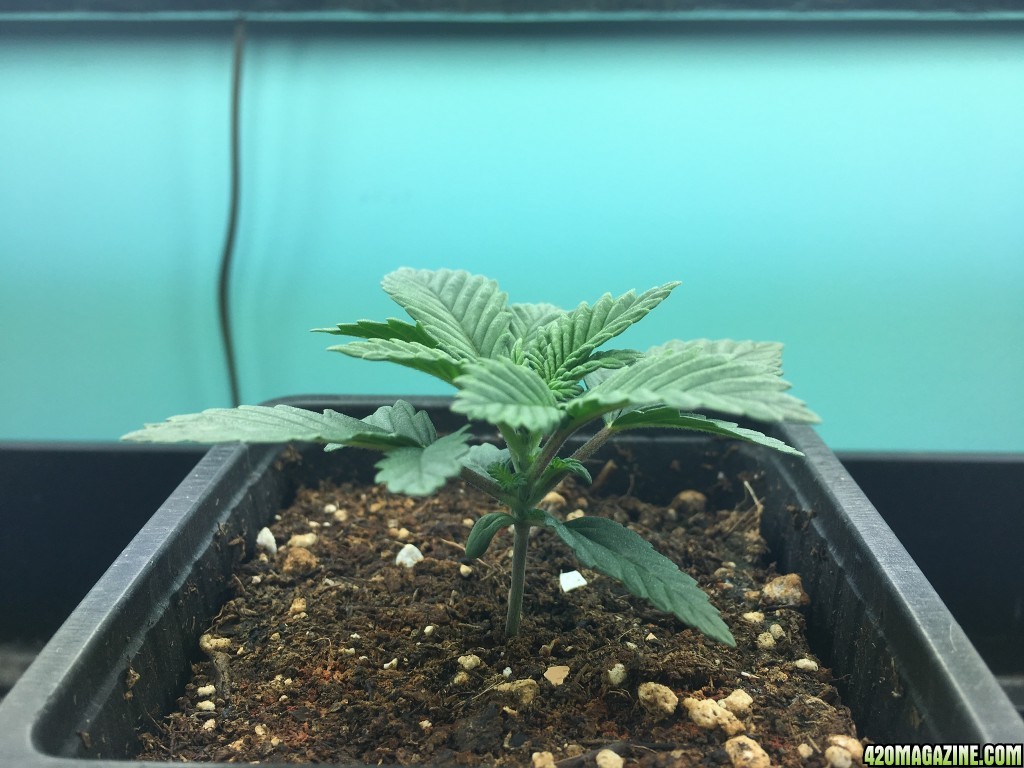
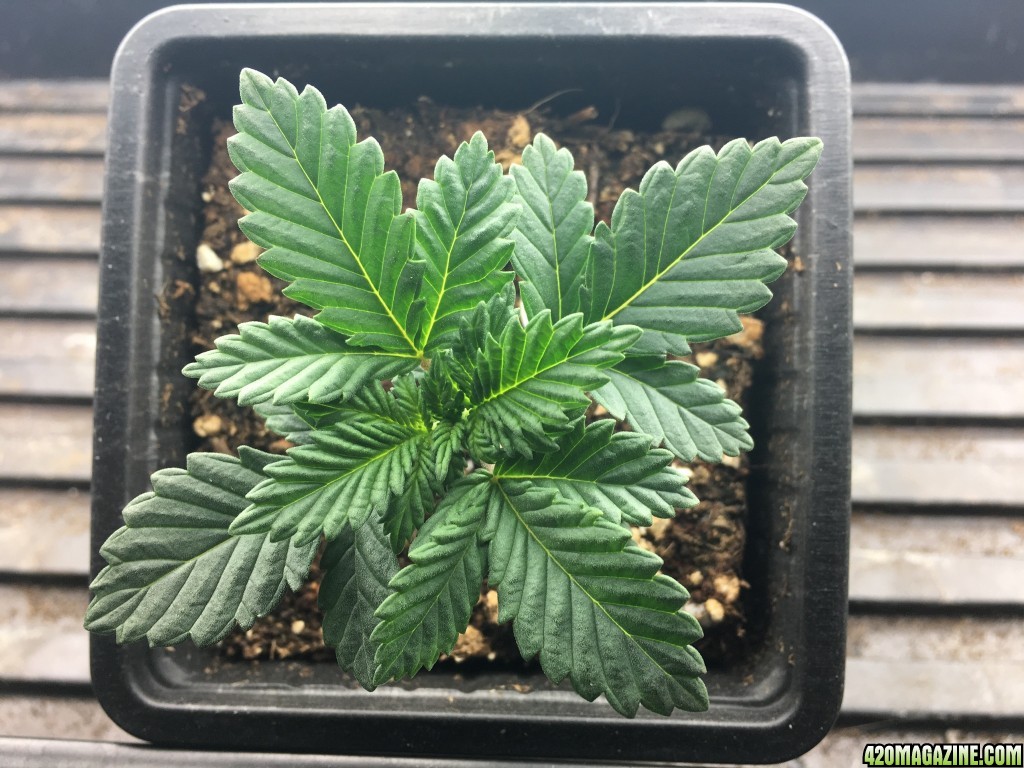
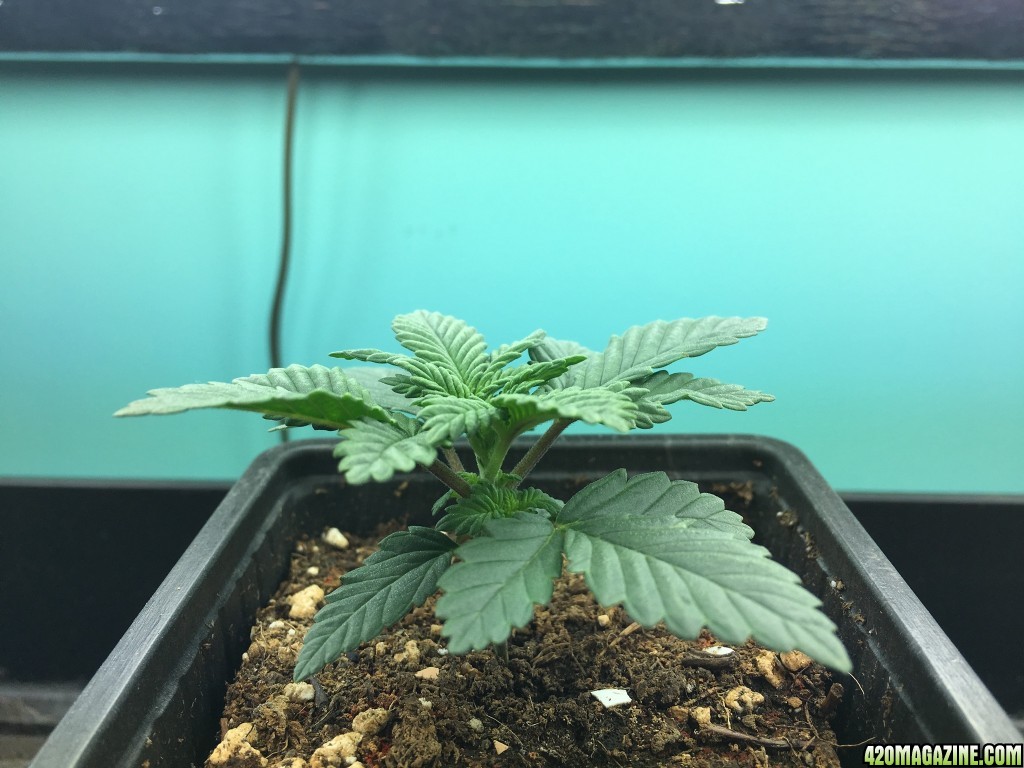
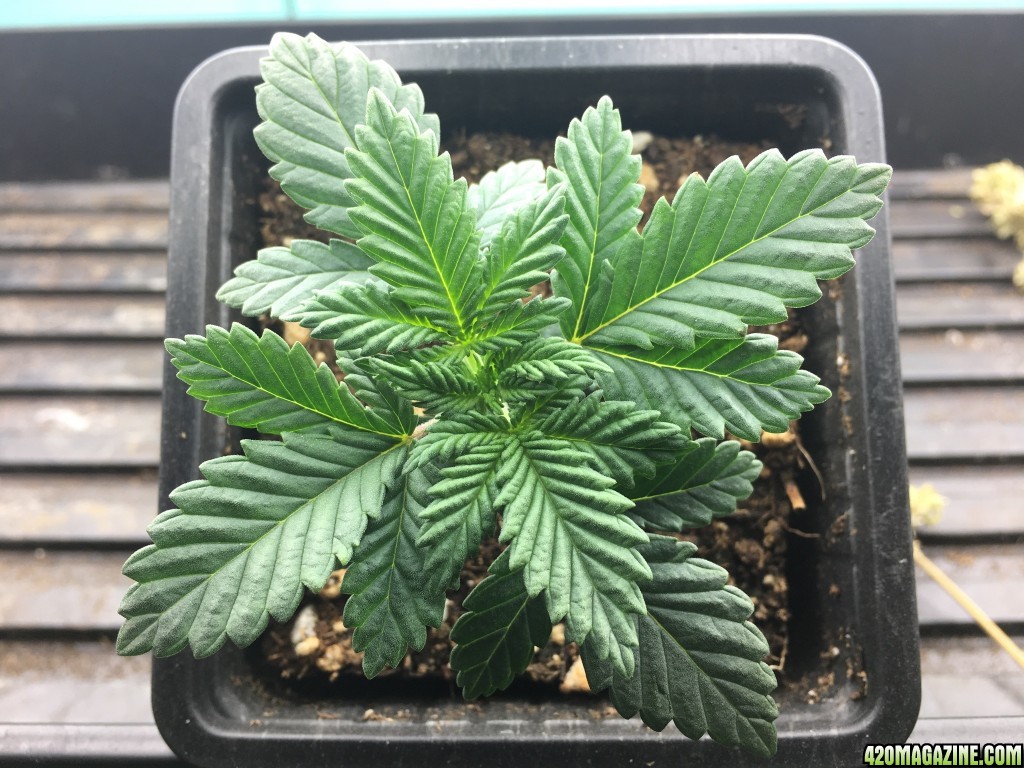
Hears the deal. I like to garden and grow lots of different things. I have two outdoor MJ plants that are fishing up, this is middle of Sept. 2017 of course. They are my first grow. I think they still need a few weeks...let's not worry about them except to say that one is a White Widow from the same batch of seeds as the one I will try to document here.

Details

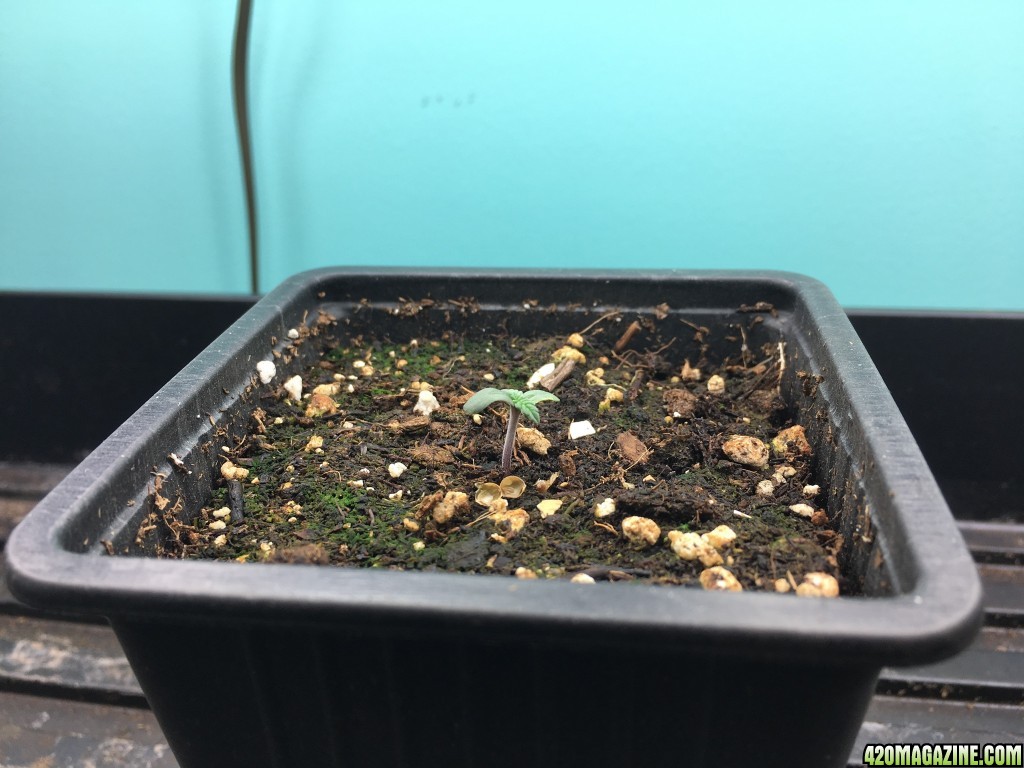
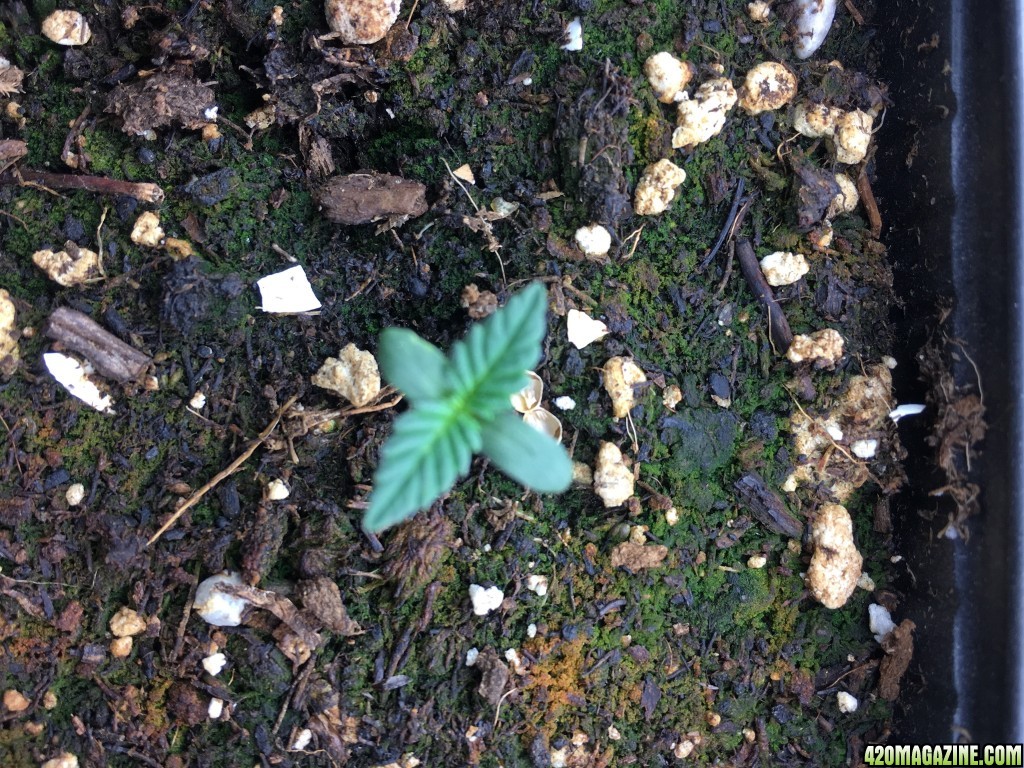
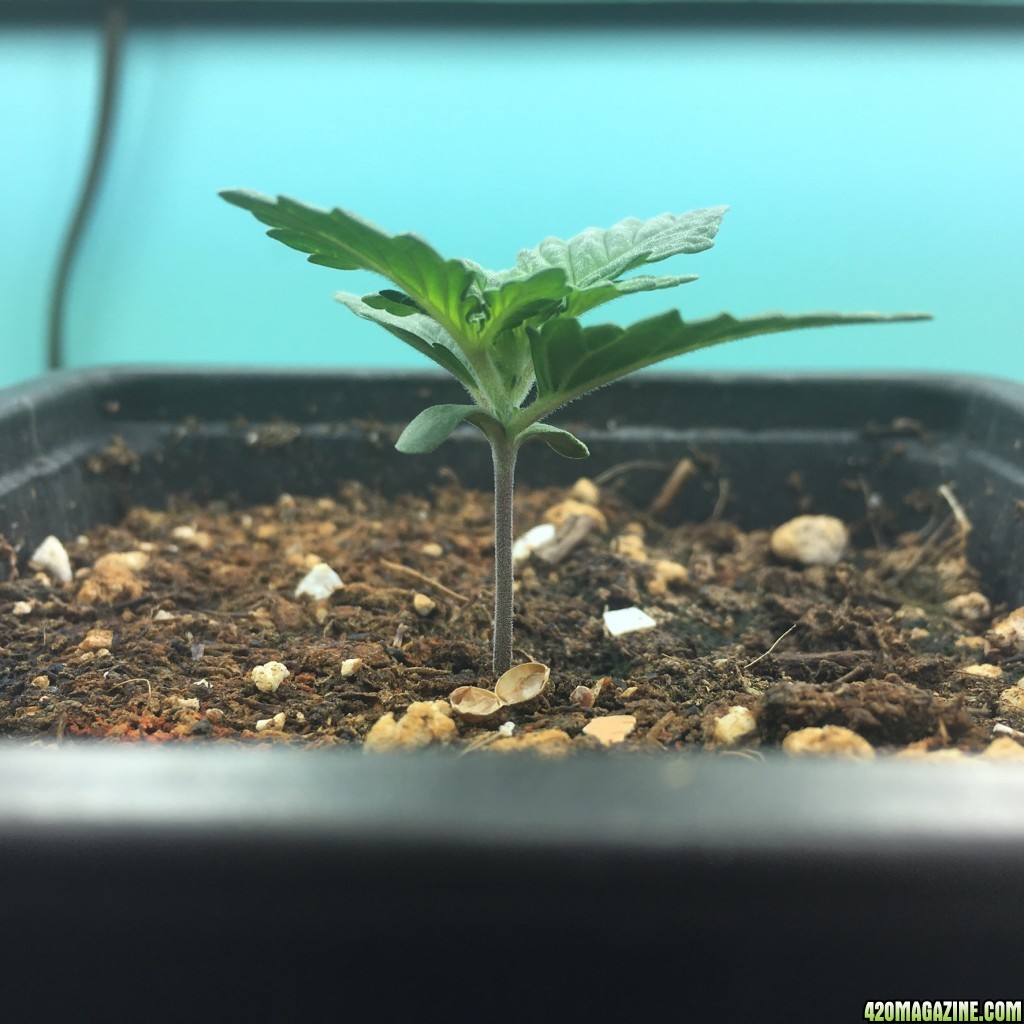
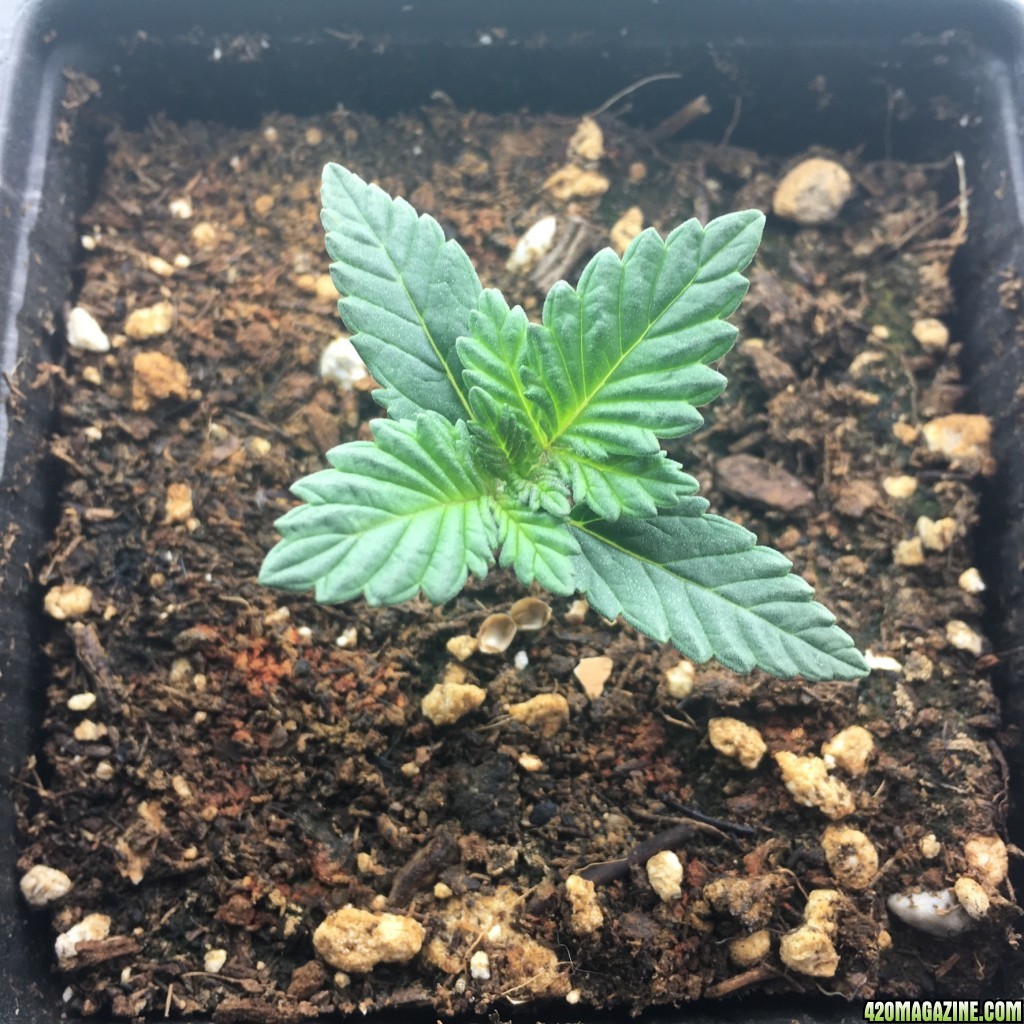
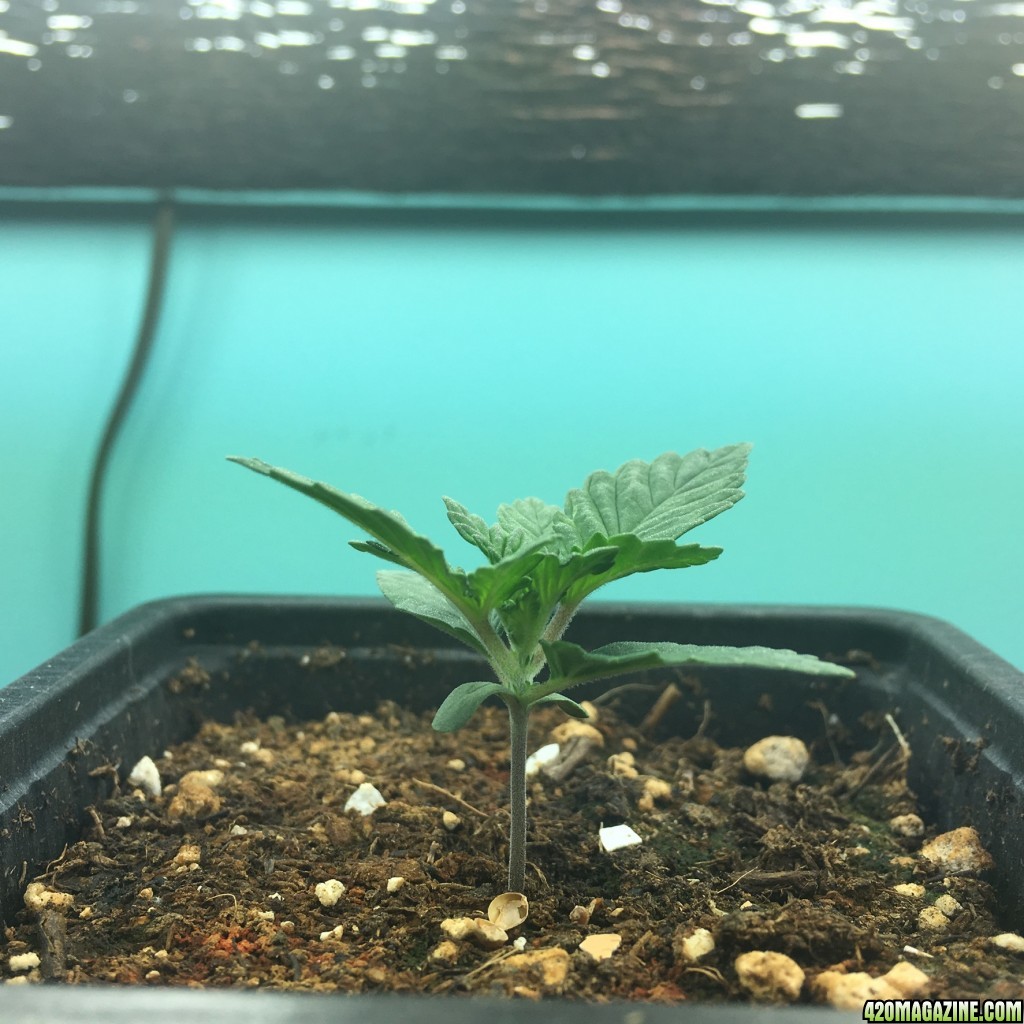
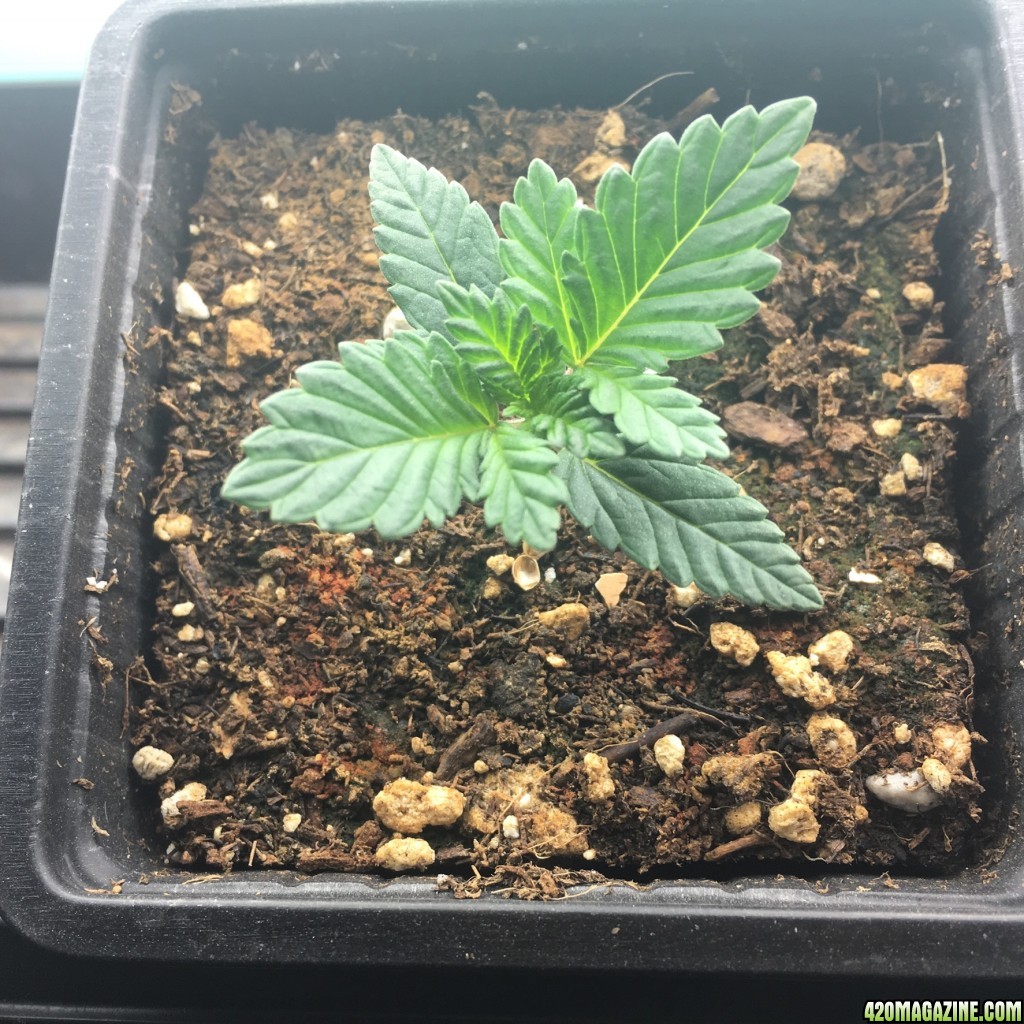
Strain : White Widow-Indica heavy hybrid 60/40
Soil : Pro-Mix Organic Veg & Herb
Nutrients: General Hydroponic's Flora Trio & General Organic's CalMag+ (For the total new grower, GH & GO are the same company, just different lines of product)
Temp & Humidy : not gona worry about it, it's an open spair bed room - I'm sure this will be discussed
Tent/enclosure : nope, see above
Ventilation : One upright oscillating fan
Filtration : this we will discuss once we get there
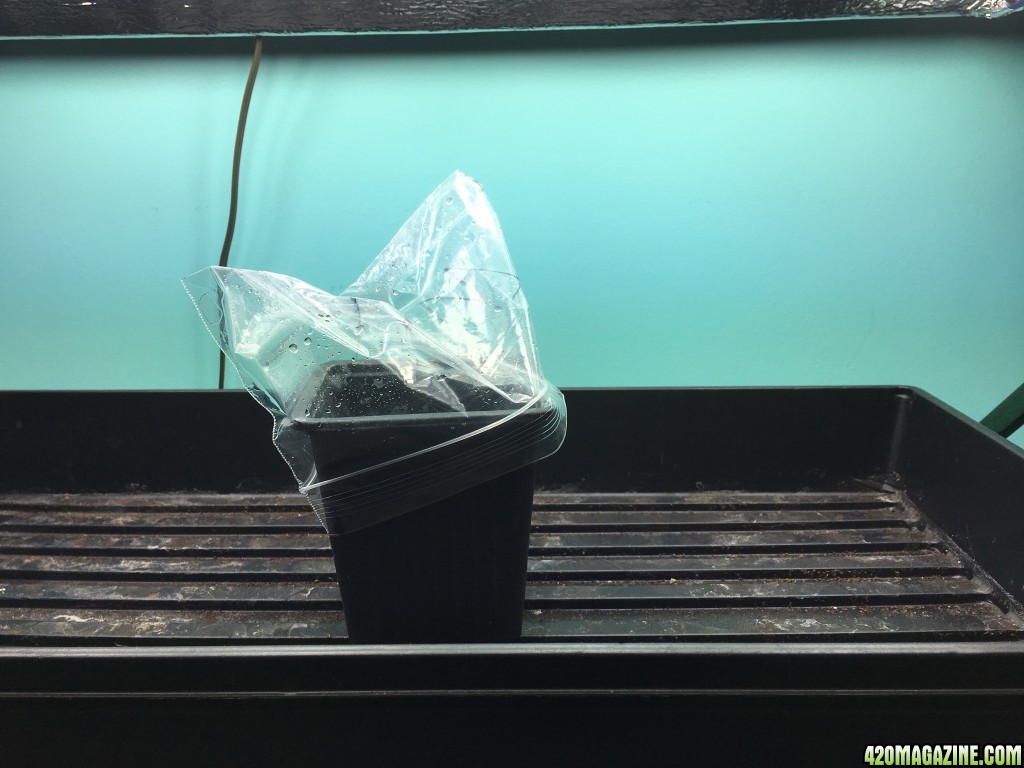
Container : recycled # 2 nursery pot
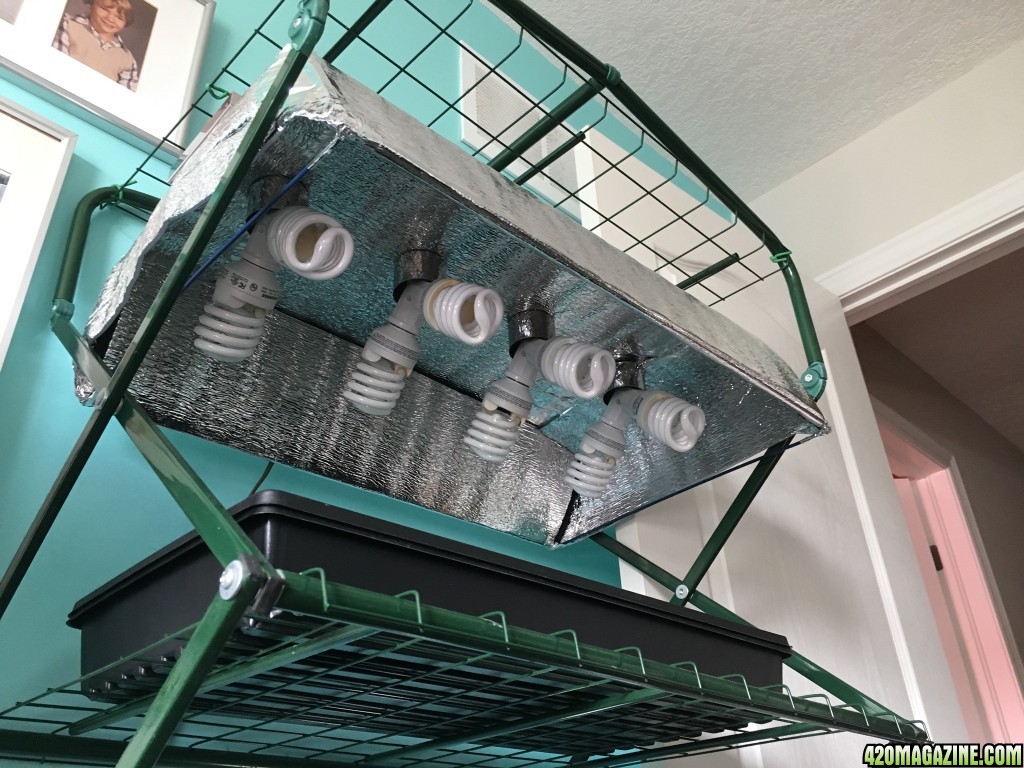
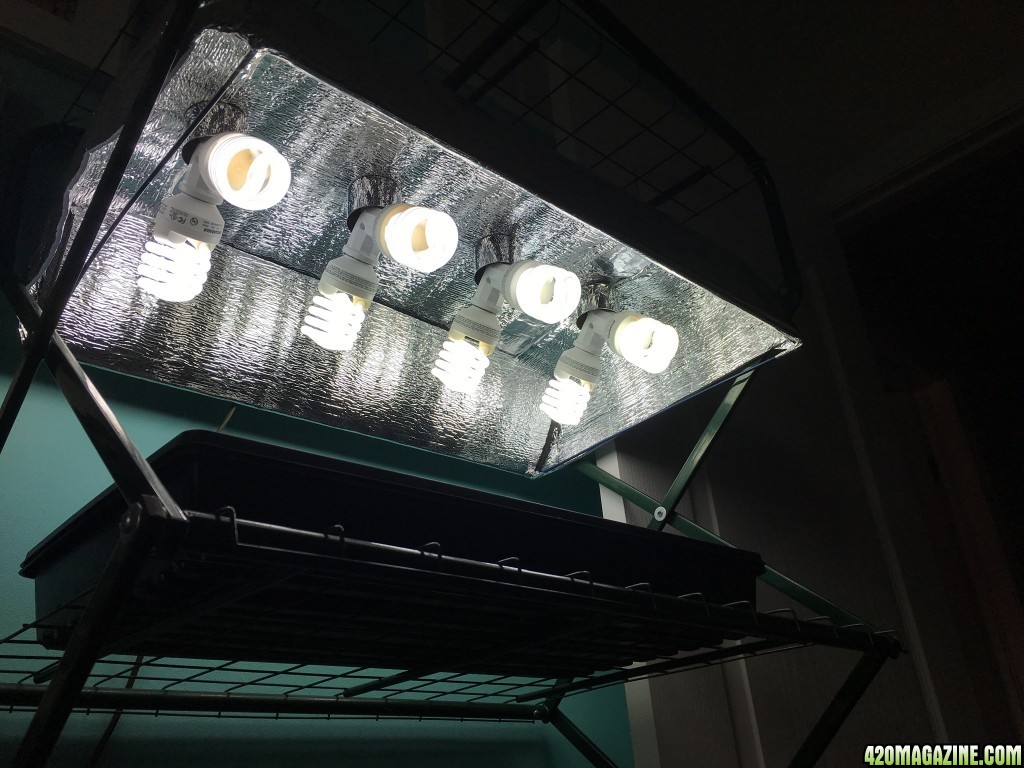
Lighting : DIY CFL Reflector - 8 23w CFL's @6500k
# of plants : just one
Training : we will try someing that we will loosely call mainlining

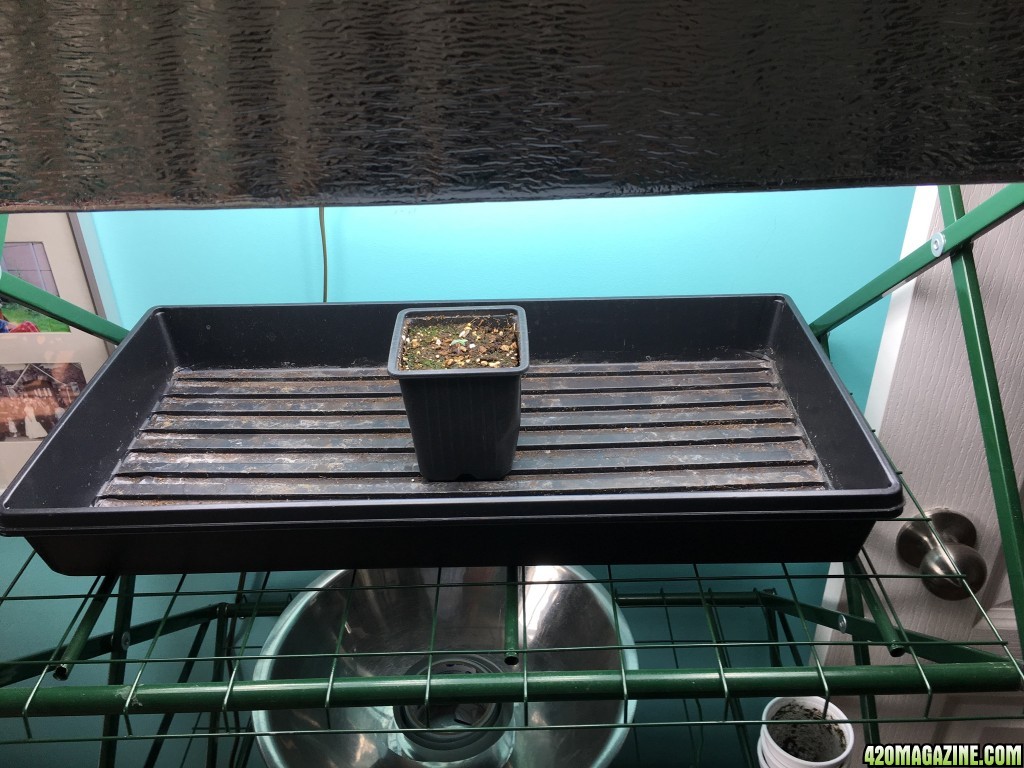
Here's the huge set up.

IMG_211228.JPG


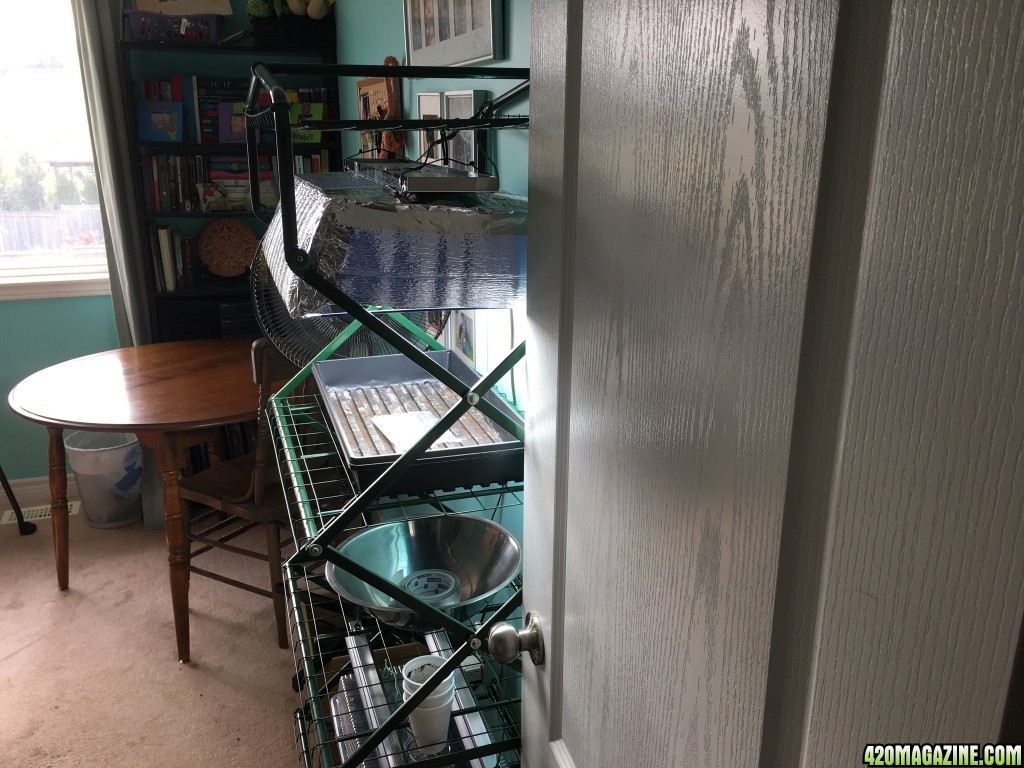
So yes, it's a shelf and a taped together light. It is in fact a simple "green house" with the plastic covers, one side zips up and there is a zipper vent on the back side. Mine came from Home Depot but all the usual places have the same thing. I'm sure it was under $100 Canadian but I've had it a while.

Something I want to do in this journal is give a little tip in each post to the person that is trying to plan and make decisions. Simple questions that seem to simple to ask, basically things that I got hung up on when I want to grow my first plant. Like I did with Nutrients above, seams dumb to me now but GH & GO confused me once...and this is how I'm going to do it...

Newbie Tip!:high-five:
BUYING SEEDS ONLINE - Your going to hear this from me a lot. RELAX! This from my perspective in Canada of course. I know I have seen a number of people all freaked out trying to have them sent to a secrete address that isn't connected to them. Do not waste your time stressing over this...there is no helicopter hovering over your house once you click Buy Now...the police are not going to be delivering your seeds. Best advice, choose one of the forum sponsors! They support us, we should do the same in return. They are all pro's at getting seeds in your hands discreetly and efficiently. Which sponsor you buy your seeds from is up to you, read reviews and journals, you know the drill...I will tell you this, if you have never grown MJ or any plant for that matter, just buy some freaking seeds...yes genetics play a role and all that, but at this point before your first grow, it's the least of your worries..your going to slow the plant down more than the genetics will. Just buy some seeds, ship them to your door, easy as that.

Next post I'll show you the taped together light.
 
As promised, My DIY CFL growlight in all its shimmering glory. I didn't document the construction of this epic piece of awesomeness but I wish I did...it was a fun afternoons project. Easy to explain though. if I can do this anyone can.

Believe it or not I found just about everything in the same thrift style store. This particular place is literally 5 minutes from my front door, it's like a reuse store and they carry only construction type stuff. It's a Christian not for profit charity outfit. Everything is donated to them and they help out people in my little town so that's cool with me. I'm not a religious person but helping is helping, sharing is caring! Sorry couldn't resist. LOL

So I kind of new what I was looking for before I went to the store but I figured they would have what I was looking for and they had exactly what I wanted...here's my list and what I paid.

1 four bulb bathroom fixture $5
4 socket splitters $4 - $1 each
8 CFL bulbs $8 - $1 each
1 vehicle windshield shade $0.50

I had to go to the Doller Store for a $2 role of foil tape and I had a couple of metal coat hangers kicking around.

IMG_211434.JPG
IMG_211532.JPG
IMG_211631.JPG


Simple stuff to put it together...first the windshield shade has the cut out for your review mirror, I filled that in with the foil tape. I took the crome front off the fixture and used the holes to trace on the shade. I cut the holes out. I trimmed off each side of the shade for the ends of the reflector...I just cut at the factory folds. Originally I figure that I would make the reflector 18"x18" that's the size of a regular HPS wing reflector but just the bottom part of a coat hanger is 16" so that's the width of the reflector. That's twice that I didn't measure anything. I just taped the reflector together, put the face back on the fixture, then the reflector. I simply used the fixtures trim rings that go on the bulb holders to secure the reflector...put splitters and bulbs in. I used an old lamp cord that I soldered on to the fixture wires...little bit of heat shink tube over that and then wrapped it up with electrical tape. Used a few zip ties for something to hang it with.

Newbie Tip:high-five:
LIGHTING : Be forewarned I'm not going to tell you what to get. if you don't already know, there is more info on lighting on the 420mag forums than you'll ever need but you do have to do your own research. This step and all the work is mandatory, sorry it just is.

You can just ask in the Grow Lights forum, but this is what is going to happen...you ask "I have an X x X tent/box/closet, what light(s) should I get" ask that question and you will get responses for days and days...the posters responding will be some of the most knowledgeable and experienced MJ growers on the planet. Your going to then learn about all the different light styles, HPS, Blurple LEDs, White COB LEDs etc, etc. Then you learn about penatration and PAR and talk about efficiency and grams per watt. Your going to get very direct answers like this "the minimum you need for your 2x2 tent is a DIY COB fixture consisting of 30 COB's, heat sinks, frame work and a driver that can power a small city, any less and you will only get larffy bud" all the parts are easy to source. Assembly is just as easy...and your gona spend $3000...do you want a light like this for your grow space?, do I? Hell yes!!! Do you or I need a light like this? F$@$ no!

Now don't get me wrong, there is all kinds of scientific information about lighting all over these forums. There is just as much real world evidence in all the grow journals and I believe not all grow lights are created equal. I also think you get what you pay for. Here's the question, do I think I can grow a pound of weed with my glowing wonder of lighting excellence above? No I don't. Do I expect that any yield from beneath it will be top shelf stuff? Of course not. Do I think my adult children are going to smoke anything I grow? Absolutely, not a fair question.

What I'm trying to say is this. If you look out at your lawn in the morning and you see weeds everywhere except the brown patches where the dog has pee'd and the last time you watered was the same week you bought the new hose and sprinkler... then you don't need to invest hundreds and hundreds of $ in grow lights.

Don't be foolish, just because you spent the most and have the latest and greatest light won't stop you from forgeting to water one week, over water for the next month to compensate, then forget about them and let them grow into your fancy azz light and die a lonely firey death.

I see no reason not to look for used stuff...I'd bet that if you found a used LED panel on eBay or kijiji, and the price was rite, that the guy selling it spent way to much for it new, ran it for half a veg cycle killed his plants and gave up...ill take two please! I happen to live in an area surrounded by commercial green houses. They do upgrade lights from time to time too. I have found crazy deals, like two weeks ago I found a Kijiji add...guy was selling 400w HID fixtures, reflectors and ballast, all were 110v. Clearly they just came out of a local green house - $30 each. You had to buy ten for $300...clearly 10 400w HID lamps could out perform my DIY effort.

So RELAX, your first grow light is not that big of a deal so stop chasing your own tail. Again look at the forum sponsors. There's a huge range of price and quality. Maybe you buy a small economical blurple LED, maybe you spend a bit more for a couple COBs and parts. Look at it this way, regardless of the light you put in your grow space, your first grow will still be the best weed you have ever grown!

In the next post we should germinate a seed eh?
 
Ok, so let's get a seed wet and see what we get.

I'll ASSuME that if you have even one bag seed and some type of suitable light for growing that you have looked up how to germinate seeds. As you know there are a number of ways to accomplish the task. Some are simple, some with multiple steps etc. I have tried a bunch of different techniques with different seeds not just MJ.

For most fruits and Veg and for MJ I like the paper towel/ziplock bag method. For me, seeing that tap root, knowing that germination has happened is huge. If I'm going to mess up a seedling start it will because I pop a seed in some dirt, see nothing happen over a day or two, figure it needs more water to get going....aaaaaand then proceed to water the crap our of it for days. Dont do that! You might grow some moss on the top of your dirt but your seed has about as much of a chance for success as a submarine with an open port hole.

I take a few pieces of paper towel, fold them up and trim them off to fit inside a snack size ziplock bag. I just soak the towel under the tap, ring it out, straighten it out a bit and put it in the ziplock and open the middle of the fold. Place a seed(or however many) on the centre of the wet paper, fold it back up and zip it up. Put it somewhere warm.

Mine look like this.

IMG_211331.JPG


In this case as I have in the past, I just through the baggie under a light to keep warm. This was two fold though. I had just assembled the Mona Lisa of lighting goodness and wanted to make sure it wasn't going to burst in to flames.

I did this earlier in the week, this was the timing.

Sept. 12, 5'ish pm - baggie and seed under light.
Sept. 13, 5'ish pm - checked - nothing to see here.
Sept. 14, 9'ish am - checked - 1/8" tap root.

This is only the 4th Cannabis seed that I have germinated but I have had the same result each time.

Tips from a Newbie:high-five:

GERMINATION : This has got to be the easiest part of the hole start to finish process of growing MJ. Like most topics here at 420mag there is a ton of information and discussion. I hope you have read a bunch of the discussions about how to start a seed. Some like to PH there water for germination, some like RO water, spring water or rain water. Many would suggest you make a solution of water and hydrogen peroxide and soak your seeds in it first to ward off disease. There was a time when I figured the only way to get a MJ seed to germinate was that it had to be in the dark on top of a warm hot water heater...couldn't be any where else...if it wasn't the water heater you were bound to fail.

If your about to start your first seed...here it is...RELAX. All this information about sterilization and water quality etc, etc, is all good info and probably best practices...even the water heater thing is good advice, it's a nice warm place. But you don't need it.

Your little seed has one job. Grow. That's all, nothing more. With or with out you, if that seed stays warm and wet, it's going to push a root out one end and start looking for light at the other. You could have the Pope bless your seed, soak it in holy water and carefully place it between the breasts of the Vergin Mary to keep warm. Your seed doesn't care...it's warm, it's wet...it's going to do its thing.

I think the same is true for the next step and my next post where you move that little seed with its little tail to some dirt or what ever growing medium you choose. Don't get me wrong here, you need to be gentle with that little white bit sticking out of it but all you need to do is pick it up and put it in a hole about 1/2" deep and cover with some loose dirt...maybe a little sprinkle of water. What you don't need to do is contact the Intel Corporation and request the use of their clean room! Have you been outside today? It's not sterile out there.

Again, most of the tips you will see about germination are 100% correct. If you want to take the time and soak your seeds in a peroxide solution with water from a secret mountain spring you found, I bet you will be giving your seed the best chance of survival.

But I see it this way...Plants, MJ included, all over the planet self seed every year to insure their survival. I have flowers that do this every year. However, I still haven't seen the hydrogen peroxide fairy that comes and sterilizes the seeds before they fall from the plant to the ground. When I catch one I'll let you know.

Upcoming post...seed to dirt and a seedling.
 
Clearly I'm Bat Guano crazy and talking to myself! Can't even get a "that's not going to work" eh?

Let's do this, see if I can get one post.

Simple personal experience riddle. With only a bit of growing experience someone here should get this...it's dumb I know.

Riddle:
I have germinated 4 seeds.
All produced a seedling.
My germination rate is 125%.
How?

I suck, I know.
 
First thing in the morning on Sept. 14th I found that I had a seed with a tail coming out of it. I find it pretty exciting every time I'm able to get any type of seed to germinate, but on this day, there was more coffee to drink and the sun was shining so I elected to sit in my garden, turn up the country music on the radio and watch the grass grow...literally.

IMG_013964.JPG


Sometime after dinner I moved the seed to a seedling pot with soil. The little pots I use came from the Dollar Store, they measure 3.5"x3.5" and are 4" tall.

This year for soil, as I posted above, I used ProMix Organic Vegetable & Herb. It went in all my containers. It happened to be what was on sale at Costco when my wife and I made our monthly trip to the $500 dollar store in the spring...is it even possible to NOT spend $500 at Costco? Hmmm, doubt it!

Truth be told, the soil this seedling is in is actually recycled from a failed attempt to grow carrots in an old champagne bucket. I think I picked a bad location in the garden and the carrots needed more sun...hey, if you don't fail from time to time your not trying hard enough!

Anyway, the dirt goes in the pot, I poke a hole in the centre about 1/2" deep with what ever implement happens to be within reach. I carefully move the seed from the wet paper towel baggie to the hole and lightly cover it up.

Unless your Donald Trump, you may find that your hands are to big to handle the wee seed. Use tweezers if you like, or wet the tip of you finger, you have wet paper towel in front of you after all, touch the seed, it should stick, and move it that way.

I take the paper towel out of my baggie and reuse it as a humidity dome of sorts. It doesn't actually fit but it's all good.

IMG_212028.JPG


Tips from a Newbie:high-five:

I promis their will be something of value today and not just a rambling rant!

SOIL : Once upon a time, when I first started planning to grow MJ, I thought that you had to use a Fox Farms product...I figured it was the funky fishy and frogy graphics on the bag that made the difference. Turns out you don't even need dirt! If your planning your first grow you have no doubt found, once again, loads of info and discussions on what soil or medium to use on these forums. From home composting to Doc's High Brix kits and all the other soilless mediums out there, it's a lot to take in. You should atlest try to take some of it in though, it's all awesome information.

But for me, I'm just to lazy. Plus, where I live, garden centres and greenhouses out number Tim Hortons 2 to 1. If your not Canadian, Tim Hortons is our patriarch coffee chain...we feel the need to put two stores at every intersection across our country...you can never have to many maple glazed bacon donuts! Also, there is an active fine wine vineyard 100 yards from my back door so it seamed a little silly to order dirt from the USA.

If you feel like you have to have a Gucci branded soil that comes with a diamond encrusted solid gold scoop, knock your self out. But any half ass soil that drains well will also work just fine. Simply, the #1 thing you need is a good draining soil. Go to your local garden centre, hardware store or even the Dollar Store and get some potting soil. Buy what's on sale. Well your first cannabis plant grows you can plan out a fancy medium for your next grow.

POTS : Ultimately I like fabric pots only because they assist in keeping you from over watering. But it's not required, particularly for seedlings. Just like your dirt, drainage is the key. You can use a small seedling pot like I do, a styrofoam cup with a bunch of holes poked in the bottom. "Red Solo cup...I fill you up...proceed to party, proceed to party" that songs always fun to play around a campfire! Red Solo cups are popular for seedlings, just put a bunch of holes in it...Finish your beer first though...drainage, drainage, drainage.

You should already know this but, the more room you give a plant to build a root mass, the more potential you give the plant to grow big. Small pot, small plant, big pot, big plant. Simple eh? So you might be tempted to start your little seedling in your huge pot so you can avoid transplanting. I'd strongly advise against this! Honestly, potting up a plant is not that hard...your not going to kill your plant. Once you do it once it's no big deal. I love repotting, it's part of the fun of the hole thing. Trying to water and care for a tiny seedling in a huge pot has way more potential for problems or outright disaster than moving from one pot to the next. Start small go big it's fine.

When I fill my seedling containers, I like to get the dirt in and then run a bunch of water through it. A lot of water. Just let it run from the hose, the kitchen sink or a watering can, whatever. Just let it piss out of all the holes you made. I'm doing two things here...1st the watering is doing all the soil compaction you need...I find if I don't do this, the first time I really water the soil settles creating big holes that were air pockets and it's just a pain in the ass to fix, plus more than likely the poor little seedlings roots are all exposed. 2nd, you may have noticed above, when I moved the seed to the pot I gave it no water...the soil was already damp enough for my seed to do its thing.

I do have a seedling...I'll show you, promise.
 
This loanly little seed went to its new dirt home in the evening of Sept 14th. I was surprised that it was above soil on the morning of the 15th. The seed husk was still fully attached as the leaves had not yet started to unfold...I just left in alone in the morning.

When I started seeds for the first time in March of this year I had a seed husk stick and not fall off. I waited to long I guess before trying to help it off and eventually the seedling fell and died. After thinking about it all day, considering I'm only doing one, I went back and removed the husk with a pair of tweezers. I neglected to document this but took a picture on the 16th.

I'm not hugely concerned since I'm not using an enclosure of any kind but under the lights with the fan running on it's lowest speed, temperature stays around 78* and the RH sits on 75%.

IMG_211831.JPG
IMG_211729.JPG
 
Clearly I'm Bat Guano crazy and talking to myself! Can't even get a "that's not going to work" eh?

Let's do this, see if I can get one post.

Simple personal experience riddle. With only a bit of growing experience someone here should get this...it's dumb I know.

Riddle:
I have germinated 4 seeds.
All produced a seedling.
My germination rate is 125%.
How?

I suck, I know.

I'm starting to think I stumped the entire 420 community with my dumb ass riddle...then again, it's probably because I'm a blithering idiot.
 
Back
Top Bottom