el cheapo

Well-Known Member
Hello everyone! el Cheapo here. Today I am very excited about sharing my first grow with you all. I'll explain how I went from nothing to something, how I went from something to something more, and I'll continue to explain EVERYTHING as I go along. This current project focuses on getting a first grow completed on a low budget. From using old items found around the house to buying cheap items from the dollar store. Of course there are some things that may cost more than a dollar but still, cheap, cheap, cheap. So stay tuned. I'm about to go take some pics. And in my next post we'll really get the ball rollin'.

Thanks for stopping by!

EDIT: Link to first long post El Cheapo Grow #1 - From Nothing To Something
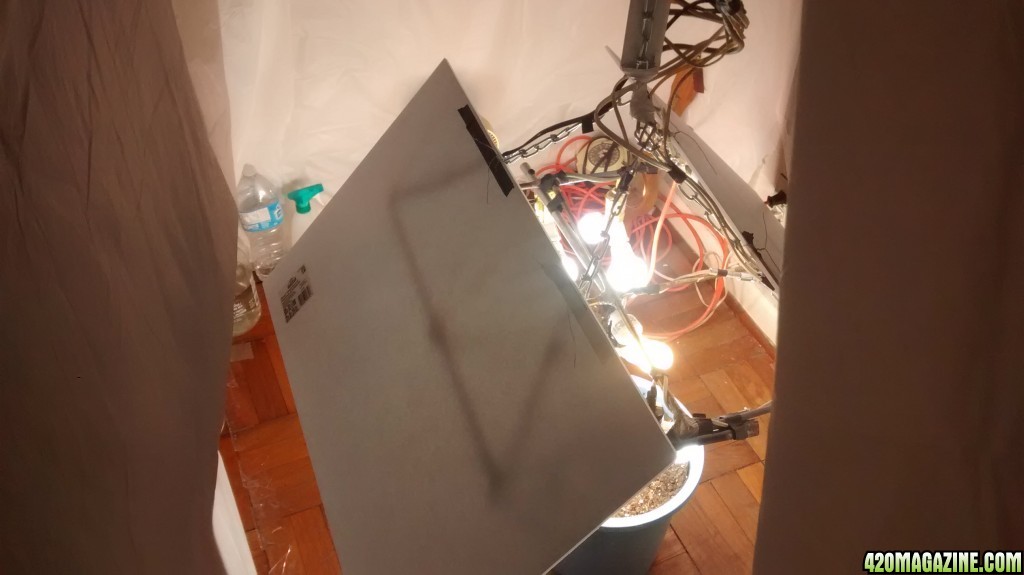
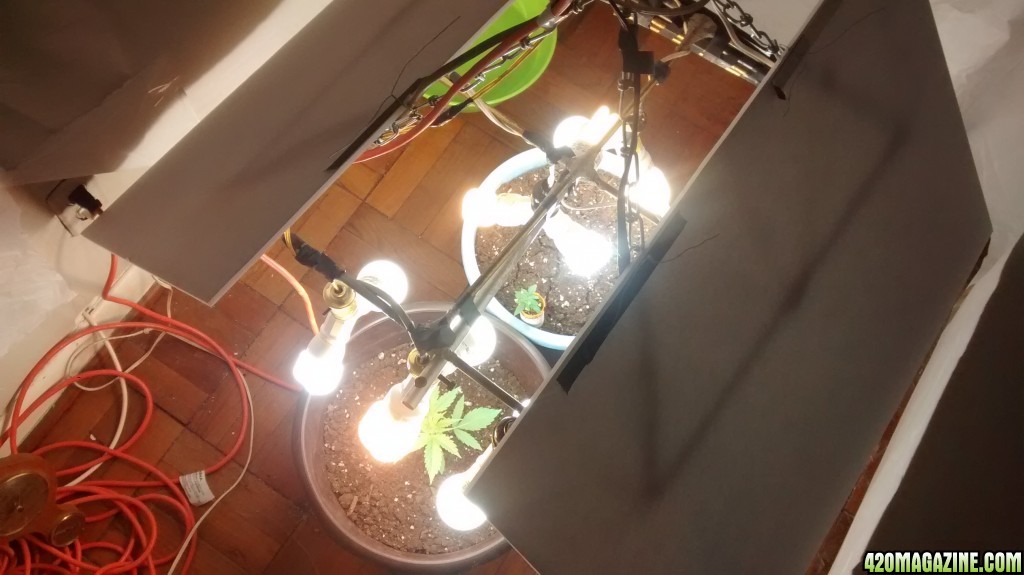
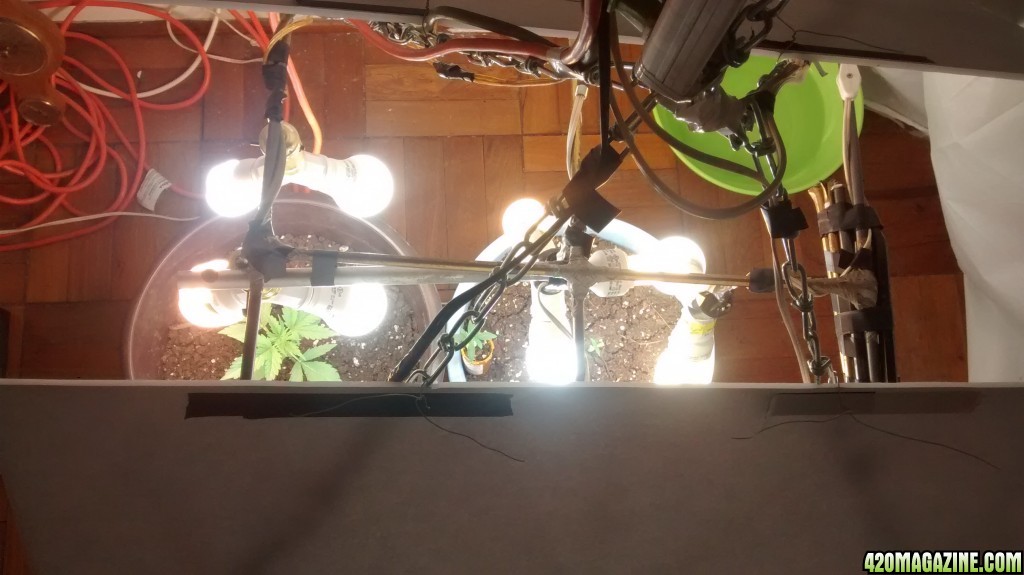
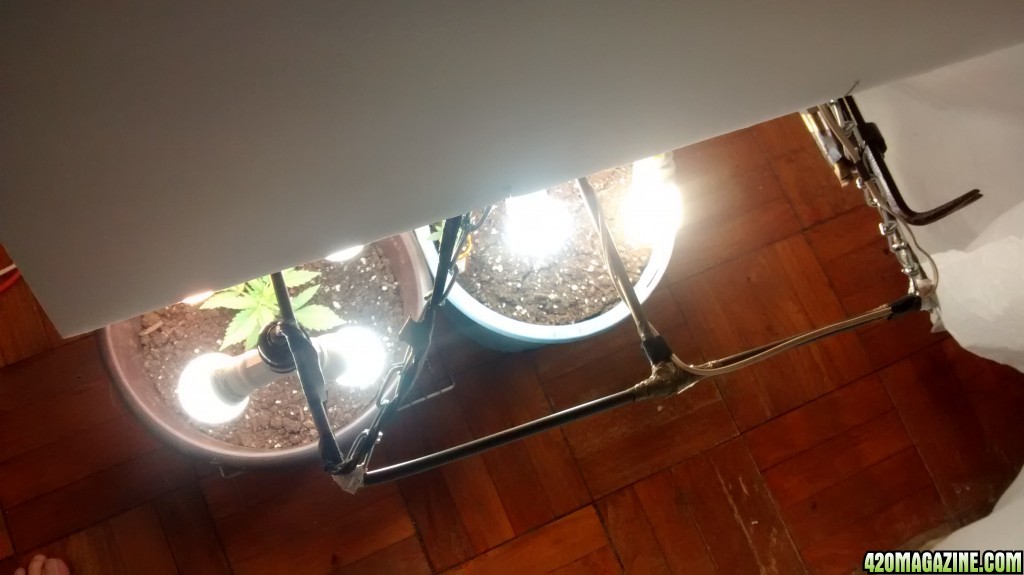
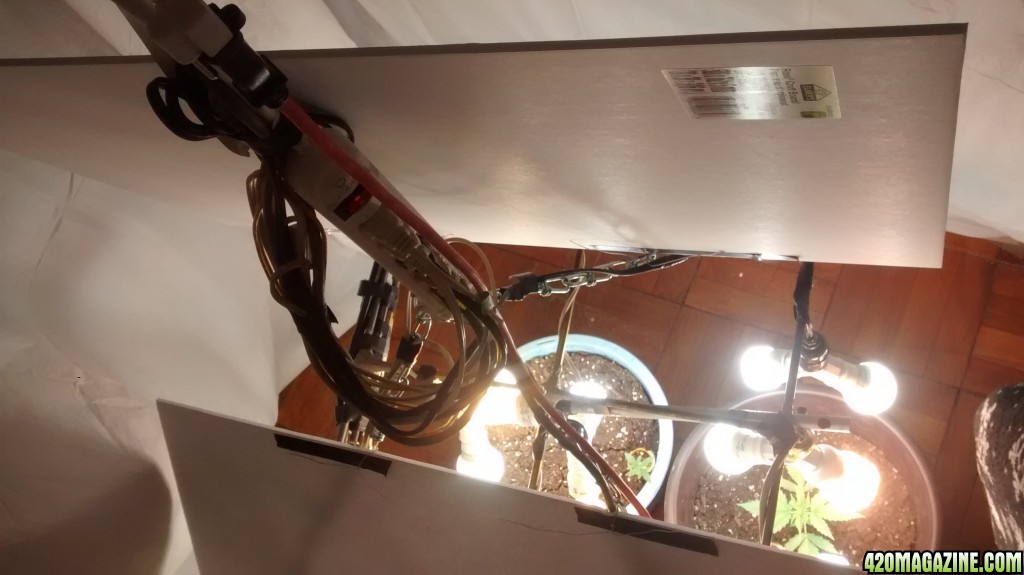
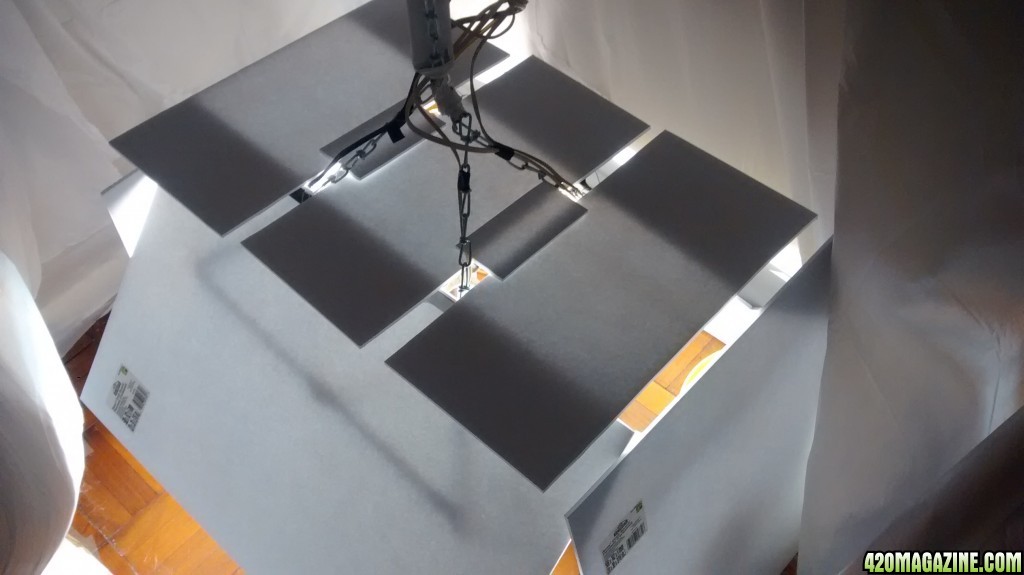
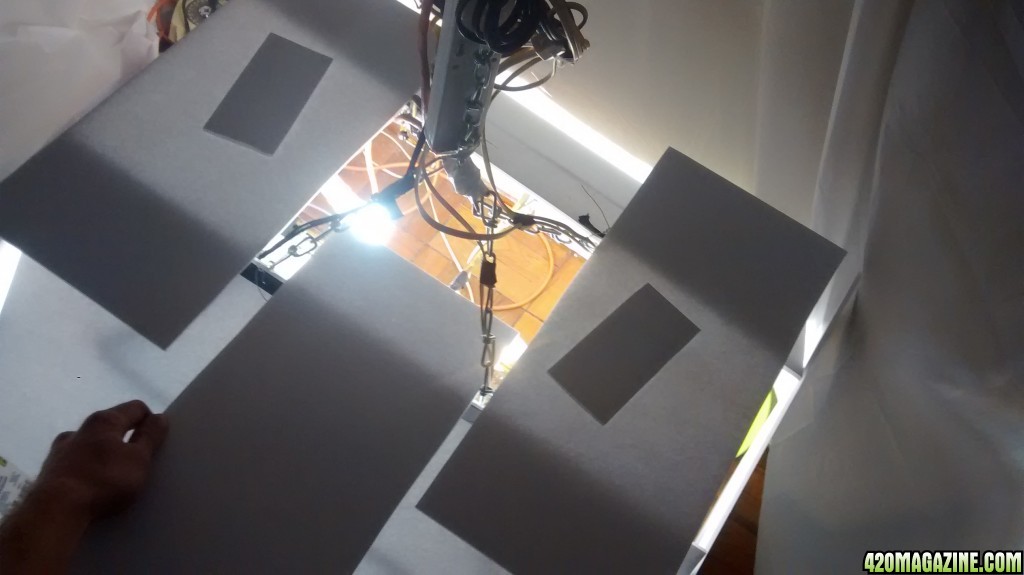
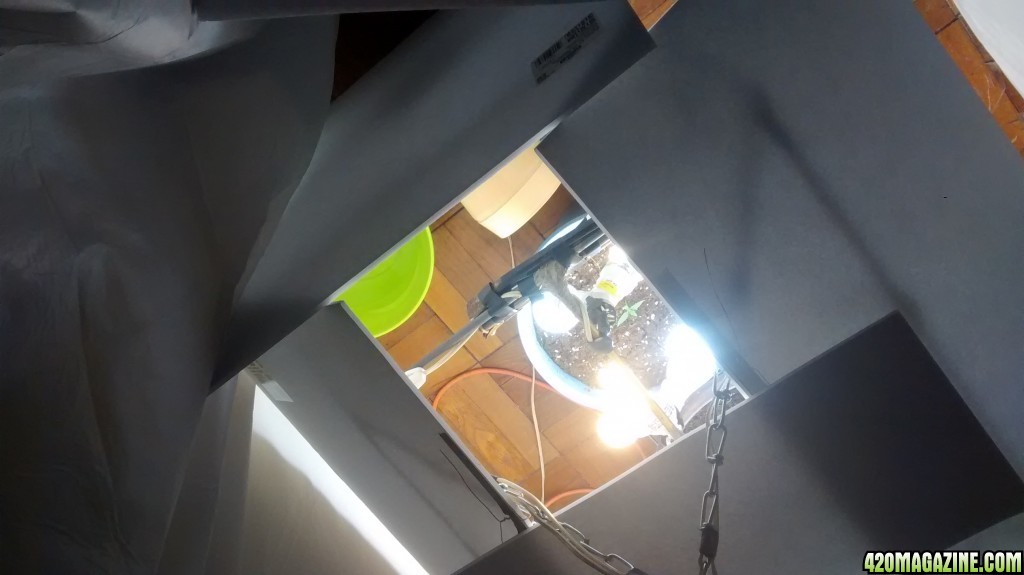
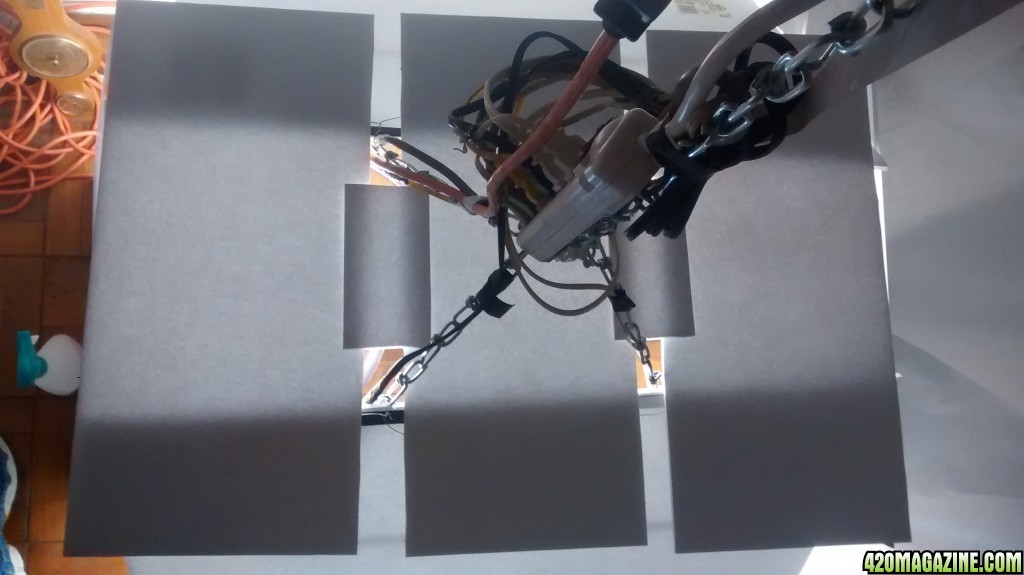
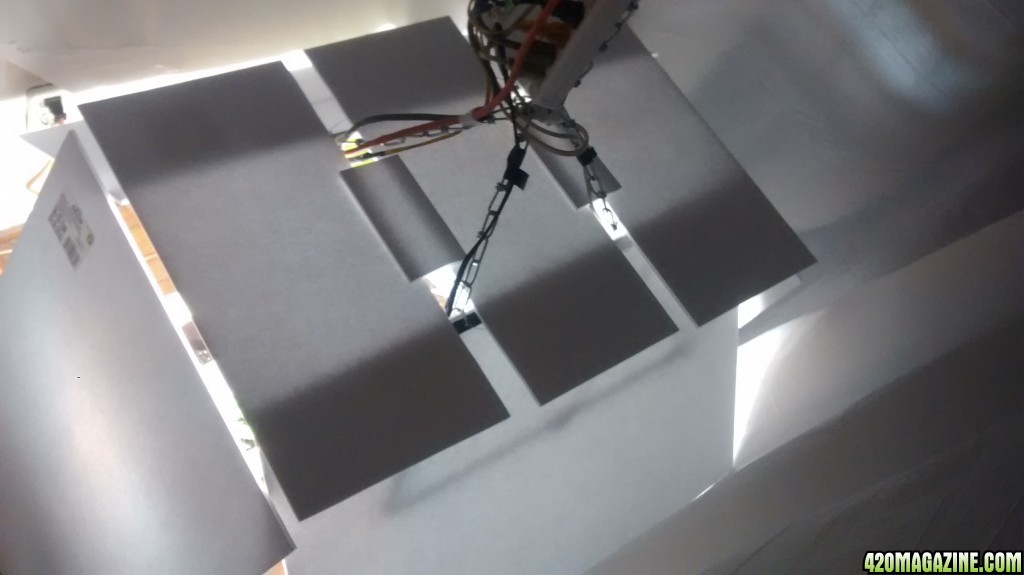
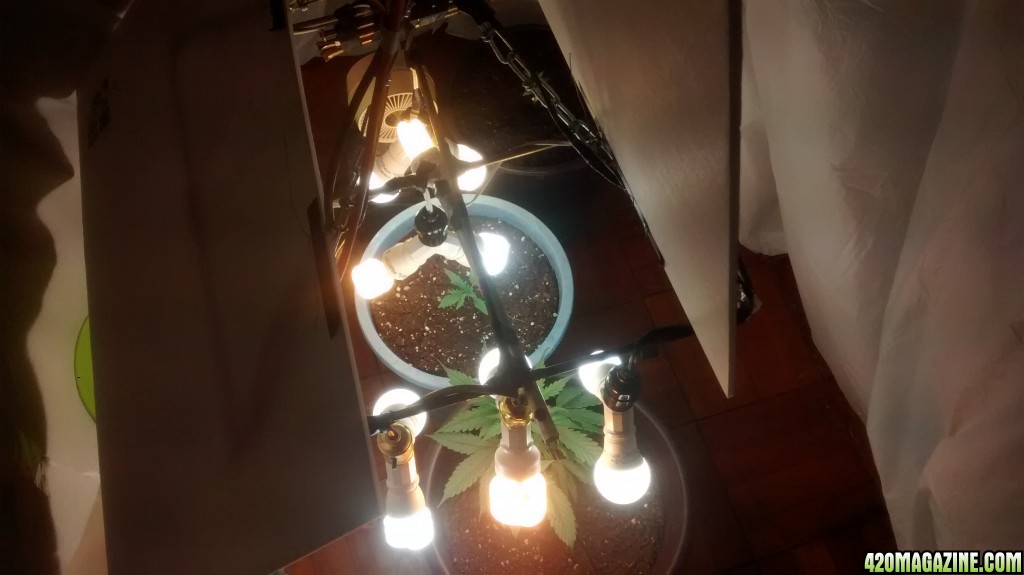
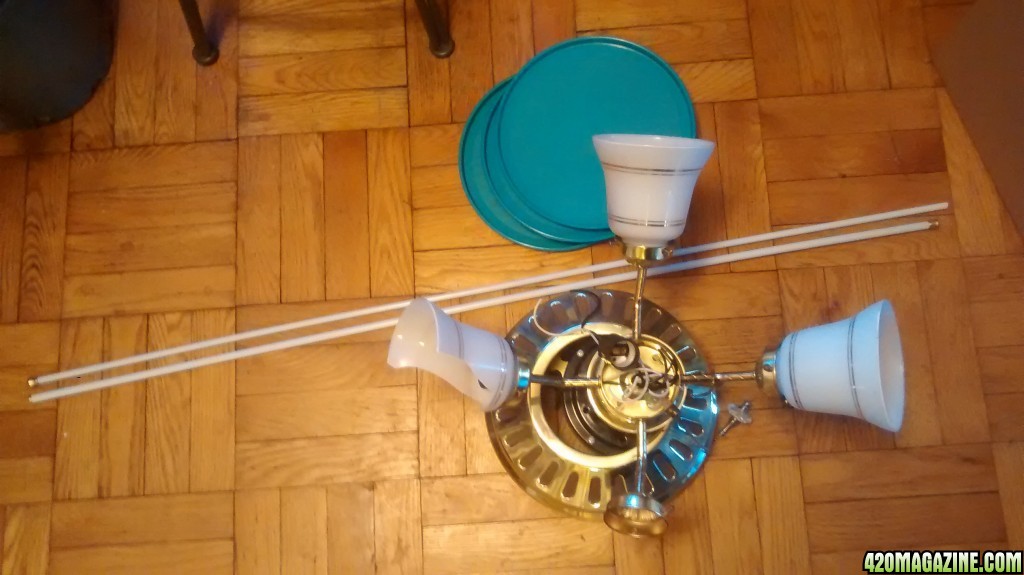
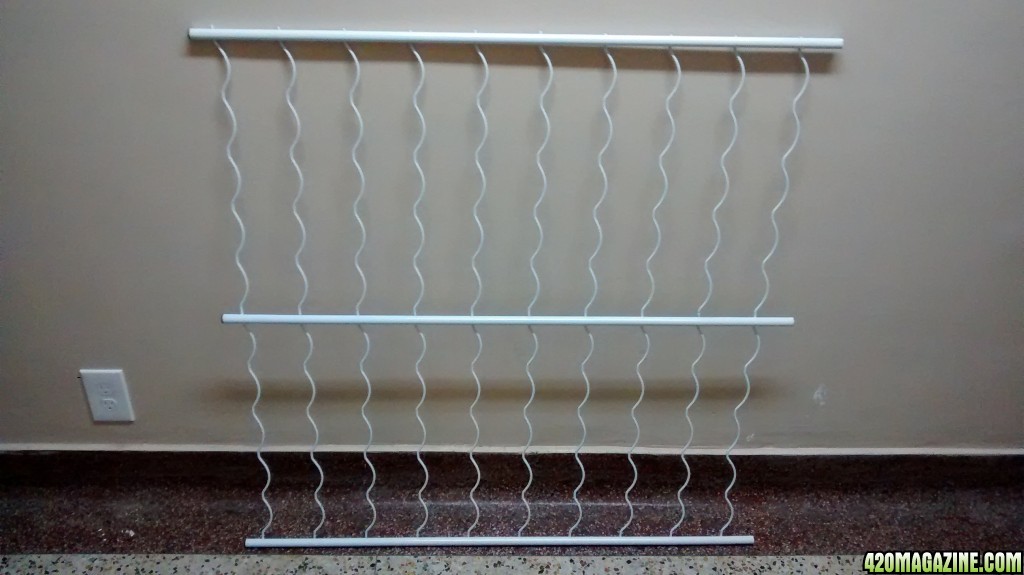
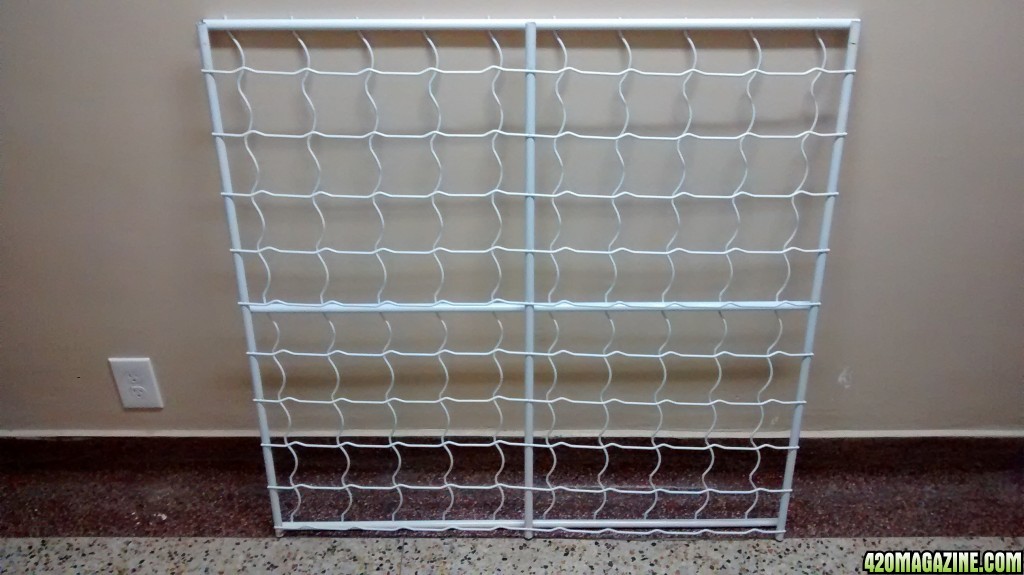
 
High cheapo,

It's amazing how much we can scrounge when we have to. I managed to get a great harvest for no cost this year, because I had the seeds and some nutes, but mostly because I planted outdoors in the soil. Went great. But it's amazing.

So, what you growing? Soil? etc.?

Oh, yeah, subbed.:thumb:
 
Okay here we go... In today's entry, I'll explain all I've done up to this point. ie. How I built my setup. The pots/soil I use. The lights I use etc etc. Everything I have learned about growing I learned over the last 3-4 weeks via crash course on the interwebs, mainly here at 420 Mag. I am by no means a pro. In fact I have no experience at all. I have MUCH to learn. Anyways, what I do have is ambition. Through life experience, common sense and the desire to succeed in everything I do, I promise to give it my all during this adventure. So, feel free to comment, give advice or just observe. The goal is to see what can be achieved with a small budget. How to grow acceptable plants from scratch by spending a couple bucks here and there, when available (all prices I mention are in Canadian dollars). And by using any old items laying around the house. With that being said folks, let's get at 'er... I'll try to explain in as few words as possible. Maybe some point form style. View images for visual understanding of explanations. Take care and thanks for stopping by!


So, I had a thought. "What if I grow my own plants? What will I need? How can I do it with very little money?" Then I explored. Then I built. Bit by tiny bit. First thing though, let's get the price of the seeds out of the way. They were stupid expensive imo. I paid $60 shipping/taxes included for 3 Critical Purple seeds online. And I bought 5 Northern Lights seeds downtown for $60 taxes included. Both autos. Big investment there. Cheaper prices may be available but this is what I bought for now. Nice bag seeds for "free" would be great if you get them but I haven't been so lucky. Then there's clones... Next, I'll explain my setup...

Setup

* Spare bedroom in apartment

* 3' x 4' area portioned off. See white "sheets" in image. The sheets are actually queen size mattress covers. $1.25 ea at Dollar Tree. I cut the elastic out of the corners then taped them to the ceiling. They easily reach 8 feet with plenty of room to spare. I bought/used 3 pieces, total $3.75 +tx.

* The light fixture/frame is made from old curtain rods I had laying around. I broke up 2 long pieces of equal length and folded them in the middle to a 90 degree angle. I then put the pieces together to form a square and taped the loose ends together, making sure the joint is nice and strong (see what I did there?) I said joint hehe hehe, Ya, nice and strong hehe hehe (enter Beavis and Butthead meme) :) I then broke up 2 pieces that fit the length of the square. I placed the first piece across the middle of the square and taped down the ends. I then flipped the square and attached the second piece to form a "+" sign. It essentially creates four equal squares within a square and provides strength for the frame. I then added the chain. (2 3' pieces and 1 6' piece - $15 total @ Home Hardware * a bit expensive but needed. Easier to lower and raise lights with chain and HOOK WITH "TOGGLE BOLT" (2 for $5 @ HH) in ceiling). The 2 3' foot pieces attach to the square from one corner to the other **NOT DIAGONALLY**. Attach the chain using wire, then tape. The bond will be very strong. Once both 3' pieces are attached on either side pull them both upward to form a pyramid shape. Wire and tape where the the 2 chains meet (top of the pyramid). Next, connect the 6' chain to the top of the pyramid via wire and tape. Voila! Fixture/frame is complete.

* The lights I am currently using are CFL's and LED's. They may not be the strongest but they work for now. The very first bulbs I bought were 13 watt CFL's 6700K. Package of four $4.00 +tx at Dollarama. Great deal. These four bulbs got my seedling growing good. No reflectors whatsoever at the time. I then bought some 9 watt 5000k LED bulbs at Home Depot (package of 4 $8.00 +tx). Not too bad a deal again. I also bought one LED 9 watt 3000K bulb at Dollar Tree. ($1.25 +tx). I am using one 2700K/3000K bulb per plant atm. I'll use many more during flower. Aside from the light bulbs I have bought, I have at the ready a few that were laying around the house, including flood bulbs, 2 T8's that I'll soon set up and a T8 black light for late in the game. More veg lights will be added as the plant grows.

* The pots I use are, one I already had and one I found that someone was trashing (nice pots can be bought at Dollarama for 3-4 dollars). Each pot contains 20 litres of potting soil. The pot with the Northern Lights (biggest plant in images) has one 9L bag of Pro Mix potting soil (5.49 +tx @ Walmart *a bit expensive but I couldn't find ANY soil at the time), one 9L bag of Schultz potting soil ($4.49 +tx @ Walmart *again, a little pricey but...) and one 2.7L bag of soil from Dollarama (2 2.7L bags for $1.25). The pot containing the Critical Purple (the new sprout in images) contains 9L Pro Mix PS and 11L dollar store soil (next grow I'll experiment using dollar store soil only). As for nutes (IF I use them) I'm not sure what I'll use yet. Will be an entry for the future.

* Other items I use in the grow room - an ancient thermometer/barometer handed down from grandma, a small fan I had (I also have a larger fan for later), a glass jar with water placed against the heat rad in the room as well as another tub of water to help create humidity, an old never used timer I had laying around (not sure where I got it) that works great, six socket power bar (connected to vertical fixture chain), light sockets from old lamps (one socket I bought at Walmart $3 +tx CLEARANCE ITEM. Can get them at @ Home Depot for $6 regular price), light bulb splitters (I bought five $4.49 +tx ea @ Home Depot), power extension cable (already owned), water spray bottle $1.25

* My current light schedule - 42hrs on 6hrs off

* Water schedule - no water for first 10 - 14 days as soil is initially quite wet. Maybe a few drops around where the plant stem meets the soil, that's it. With the bigger plant, Northern Lights, I focus more on a 4" x 4" area around the stem. One larger watering was given at 2 weeks.

* The Northern lights sprouted on November 8, 2017. The Critical Purple sprouted on November 21, 2017.

* Carbon dioxide provided free of charge by my wife, myself and 2 cats. Spend time breathing in grow room :)

* In case you were wondering about the plant in the pill bottle... That was actually my first plant ever. A mystery seed I had. It sprouted and was looking good (in 20L of soil). One day when the plant was like 3-4 days old I was doing some work in the room when CRASH! The light fixture fell and snapped the little lady clean in half. I quickly grabbed what was left (one inch of stem), stuck it in the soil, gave it a little water and prayed it would miraculously survive. It sat there for 2 weeks. Not growing but also not dying. When my Northern Lights germinated I needed the pot/soil that the injured plant was in so, I dug her out and saw tiny roots growing from the bottom of the stem. Just for fun I put her in the pill bottle. From there the roots have really taken hold. She's (actually don't know if it's female) now growing like a champ. Not sure if I will experiment and leave her in the pill bottle or transplant. Time will tell ;)

Well that's all for today. There may be some things I forgot to include. If I think of anything I'll talk about it in my next journal entry. Wait, I just remembered... I originally used tin foil as a light reflector until I learned that that was bad. I then used blank white paper I had. Yesterday I bought 2 nice white school project type boards (Dollarama, $1.50 +tx ea). Not bristol boards. The boards I bought are a sheet of foam cover on both sides with white paper. No flex to them. They connect nicely to the light fixture using wire. They can be propped straight up and down, unaided, when working in the grow room. I tried to find emergency blankets to use as reflectors for light fixture and walls but have not been able to any for cheap yet. The only place I've seen them so far is Walmart (Coleman, $6).... So ya, like I mentioned I'll talk about whatever I missed, if I missed anything, next time. If you have any questions or comments please feel free to post a reply. I'm going to continue to update my journal frequently and more of what I'm doing or have done. I'll show lots of pictures and hopefully in the end I, you, we, are all successful. Have a great day!

IMG_20171123_173425966_HDR.jpg


IMG_20171123_173551969.jpg


IMG_20171123_173710552.jpg


IMG_20171123_173747043.jpg


IMG_20171123_173809028.jpg


IMG_20171123_173824352.jpg


IMG_20171123_173948829_HDR.jpg


IMG_20171123_174020029_HDR.jpg


IMG_20171123_174046847.jpg


IMG_20171123_174253947.jpg
 
High el cheapo,

One of the ladies looks really nice. Nice setup! I do love using ingenuity to solve problems rather than throwing money at it. Nice going!
 
Well done El Cheapo,

My set up isn't a ton different that yours, but I'm right at day 3.

I also used leds, which I learned you can take off that opaque lens. I removed my lens, and went on amazon and found a 7:1 light socket adapter.

I'm stoked to come along for the ride and learn more.:Namaste:
 
Re: El Cheapo Grow #1 - From Nothing To Something - Journal Entry #2

Hello everyone! el Cheapo here once again. Before I get into today's journal I want to thank everyone who has stopped by for a visit. I appreciate your time and comments. Such an amazing community here at 420 Mag. Again TYVM for everything!

Journal Entry #2

Today I'd like to talk about the hood I made for the light fixture, the water I use and how the plants are coming along so far.

In my first journal entry I showed my setup and the hood/reflectors I was using at the time. Well, everything is the same except I ended up cutting 3 pieces from an extra sheet I had and placed them over the top of the fixture. In the images you'll also notice 2 smaller pieces covering even more area. I really like these white boards. When I look up into the fixture it's nice and bright white. Realizing I was still losing a ton of light from the sides I decided to go buy 2 more white boards. They're currently standing on the ground leaned into the fixture. In total I bought 5 of them (cost $7.50 +tx) at Dollarama. I later noticed that Dollar Tree has them for less (1.25 +tx ea). Well worth it in my opinion. In the future I'll probably modify the hood to gain maximum efficiency but, for the next few days I think I'm good. I'm also thinking of covering the inside of the hood with reflective tape.

At first I was using tap water to water my plants. I'd fill a jug, let it sit for a couple hours, then giv'er. Then at about 10 days into the Northern Lights' life I remembered I had a brand new Brita filter jug that hooks up to the tap. I did some research and found out that my tap water is delivered at PH 7.5. Then I found that the Brita filter will bring the PH to 6.5. From what I understand PH 6.5 is ideal for soil grows. I think it's great that I remembered it and am using it. If anyone has more info about the filter, for example, it's bad for the plant, please share it with me. I recently discovered lemon juice / vinegar can be used as PH down. I still need to research this topic but I know that Dollarama sells those little plastic lemon things for $0.63. If those are acceptable then that's a cheap way to start PH downing. Also, vinegar isn't much more expensive so ya, it's worth researching.

Current water schedule - I water right before I turn off the lights. Current light schedule 42 on 6 off. Reminder, these are autos. I picture the diameter and height of the plant being below the soil and lightly water that area only. Larger watering given less frequently.

The plants are coming along quite nicely if I may say so myself. They may be small or not growing so great at all but for a crash courser and first grow, I'm liking the progress. The Northern Lights is now 18 days old and since my previous journal entry she has really started to rise and fill in. The image in journal #1 and the image I posted below were taken 70 hours apart. The Critical Purple is still young, 5.5 days old, and is looking good. I believe she is going to be a beauty. Noob dreams maybe but it's all about the love. The more love thou givith, the more love thou getith. :) The Trauma Patient (that's what I call her/him now), the small plant in the pill bottle, is still hanging in there. See journal entry one for the story about this super survivor. At first I thought I would leave it in the pill bottle and see how she grows. Just for fun or to experiment. But now I'm thinking he/she deserves better than that. I think I'm going to transplant. I figure the plant deserves to grow big and strong and enjoy life. Keep an eye out for my next update to see how it goes.

Well that's it for today folks. Once again thanks for stopping by and I'll see you again soon. Peace!

HOOD

IMG_20171126_135803219.jpg


IMG_20171126_135911358.jpg


IMG_20171126_135929995.jpg


IMG_20171126_135955446.jpg


IMG_20171126_141108848.jpg


IMG_20171126_141125679.jpg


PLANTS
NORTHERN LIGHTS
IMG_20171126_140324035_HDR.jpg


IMG_20171126_140404646.jpg


IMG_20171126_140635127.jpg


CRITICAL PURPLE
IMG_20171126_140900309.jpg


TRAUMA PATIENT
IMG_20171126_140831091.jpg
 
Good day everyone! el Cheapo here once again. I can't believe how much fun it has become growing my own plants. Cost aside, which is not much at all, there's just so much more to be gained other than yield. I feel like a father constantly nurturing his kids. The satisfaction of watching my babies grow into strong ladies provides great positive vibes. At 22 days into my first ever grow I'm still far from finished, I know, but with confidence and parent like attention, there could only be success.

Today I would like to talk about LST, my current lighting setup and how the plants are doing.

LST / LOW STRESS TRAINING
24 hours after my last journal I performed LST on the Northern Lights (she was 19 days old). What I'm using to train her are pipe cleaners ($1.25 - 40 pieces - Dollarama). To begin the training I used one pipe cleaner as an anchor. This is done by placing a hook or noose at the base of the plants stem then securing the pipe cleaner to the rim of the plants pot (see image). Next, I used another pipe cleaner to pull the top of the plant down and outwards (opposite direction of anchor) and secured it to the pots rim (see image). I pulled it down about half way at first then fully 3-4 hours later. Once the main stem grows higher I'll pull her out even more. Once the pipe cleaners were set I began tucking leaves and must have done so a dozen times or more so far. The lower hidden branches are really starting to pop up. I'm hoping within 7-10 days I'll be able to train a few more limbs.
*Note - I currently have the anchor set to 100% slack

ANCHOR
IMG_20171127_192516627.jpg


TOP PIPE CLEANER
IMG_20171127_192531548.jpg


OVERHEAD VIEW
IMG_20171127_192614409.jpg


LIGHTING SETUP
I'm currently using the same light setup as my last journal but I'd like to show a quick drawing I made up of some specifics (see image). IMO I could and should be providing a little more light for the plants but this is where I'm at so far.

LIGHT MAP & PICTURE
fjffhsj.png


IMG_20171130_184423192.jpg


THE PLANTS
NORTHERN LIGHTS - What can I say other than I'm very happy with how the plants are growing. I have a feeling they may be a little small for their age (Northern Lights 22 days, Critical Purple 12 days) but tbh as a noob I don't really know. Either way, I'm quite pleased. As mentioned above the Northern Lights has begun training and is looking great. I'm not noticing any damage or other concerns. I gave her a large watering before her last nap, no water since nor will there be water given before tonight's six hours of sleep. I probably won't give water until her next nap (Saturday night).

IMG_20171130_184523829_HDR.jpg


IMG_20171130_184815407.jpg


IMG_20171130_184926771.jpg


CRITICAL PURPLE - The Critical Purple looks to be coming along just fine as well. She's still a little baby at 12 days but expect an explosion in growth real soon. She's receiving a little less light than her sister atm but over the next couple of days more will be added. I'm SUPER excited about this plant. I mean c'mon, look at the name, "Critical Purple". Doesn't it sound awesome?! I think she holds one of the highest THC levels on the market at 27%. Cheers to that!

IMG_20171130_184320564.jpg


TRAUMA PATIENT - The Trauma Patient has been transplanted and is once again in recovery. A few roots were ripped off in the process but that's nothing for this beast. The surgery seems to be a success and he/she is showing signs of strength. The plants roots have 5 gallons of soil to grow into now and the pill bottle experiment is no more. Cheers to this little trooper as well. The ultimate fighter!

IMG_20171130_184212605.jpg


IMG_20171130_184019872.jpg


Well that's it for today's journal entry. If you have have any questions or comments please fell free to post them. I hope you're having a wonderful day and until next time, take care!
 
High E.C.,

Just goes to show what ingenuity can do! The northern lights is very bushy for 22 days. A tad of stress signs. I cringe thinking of my seedlings in my cellar last year at 62 degrees and 2 4' flourescents. Quite stressed. Put them outdoors, they took off. The critical purple looks like she'll kick in after getting used to her new surroundings. Looking Good. :goodjob:

I'm growing the same strain right now, curious about why you think his NL is stressed? I'm a new grower my self so I'd love to hear.
 
Good day everyone! How's everything going? I hope you are all having a wonderful evening. It's been 4 days since my last journal entry and so far everything seems to be going quite well here. Iv'e made a couple changes and additions to the setup and the plants look to be responding. Without further ado, let's get into it...

Today I would like to talk about free treasure, changes to the setup and of course, about how the ladies are coming along.

FREE TREASURE
It's funny how things work out. In my first attempt at growing my own plants the plan is to be successful while keeping costs at a minimum. Parts of my plan includes buying and using Dollar store items, using unwanted items that are laying around the house AND seeing what I can come across on garbage night. Over the past couple of weeks I've gone for walks through the neibourhood and have found numerous items I can use for the grow/setup. I've found brand new bulbs, pots, pot trays, a water sprayer/mister, curtain rods, scrog items, lamps/sockets, chicken wire... All for free! I know a lot of people won't grab something from the curb but hey it's worth it. Go at night when it's quiet if you don't want be seen. :)

CEILING FAN = 4 SOCKETS, + PLANT TRAYS AND CURTAIN RODS
IMG_20171201_120113909.jpg


IMG_20171201_120325134.jpg


IMG_20171202_130316.jpg


2 PIECES MAKE A NICE SCROG SETUP
IMG_20171204_182550306.jpg


IMG_20171204_182612178.jpg


SPRAYER
IMG_20171204_183829919.jpg


CHANGES TO THE SETUP
Since I got 4 sockets from a trashed chandelier a couple of days ago I have made a couple changes to the setup. I've added a 2700k floodlight (free) and 3 5000k 1500 lumen leds ($4 ea at Dollarama). I repositioned all lights in order to cover a larger area. You'll notice in the image below that i have placed 2 bulbs lower than the others. They're placed there to shine their light in under the plant where new branches are forming. I released the top pipe cleaner last night in order to hook the plant higher and pull it down but I noticed 2 nice little branches that were fighting to break through so I left it off until this morning. I only pulled her down a bit making sure the 2 branches were getting adequate light. I'll probably pull her all the way down tomorrow morning.

IMG_20171204_090624863.jpg


IMG_20171204_090654205_HDR.jpg


THE PLANTS
NORTHERN LIGHTS (DAY 27) - She's looking good. Some slight damage from constant leaf tucking but nothing to worry about a far as I'm concerned. The LST I performed 5 days ago looks to be working. The new "hidden" branches are starting to grow out towards the light. The main stem or kola is growing like crazy. I'm very happy about being able to set lights at various levels with this setup otherwise the main stem would far outgrow everything else. I think that within the next day or two I'll be able to pin down more branches. I gave her a medium watering last night btw. Not Saturday as I said I would in my last journal.

IMG_20171204_183457943.jpg


IMG_20171204_183038207_HDR.jpg


IMG_20171204_183218379_HDR.jpg


IMG_20171204_183135801.jpg


CRITICAL PURPLE (DAY 13) - Looking good? I like how she is filling in at such a young age. I'm currently trying to stretch her a tiny bit so that I can begin LST ASAP. *Normal watering given last night.

IMG_20171204_182945457_HDR.jpg


TRAUMA PATIENT - It's not looking good atm :( 
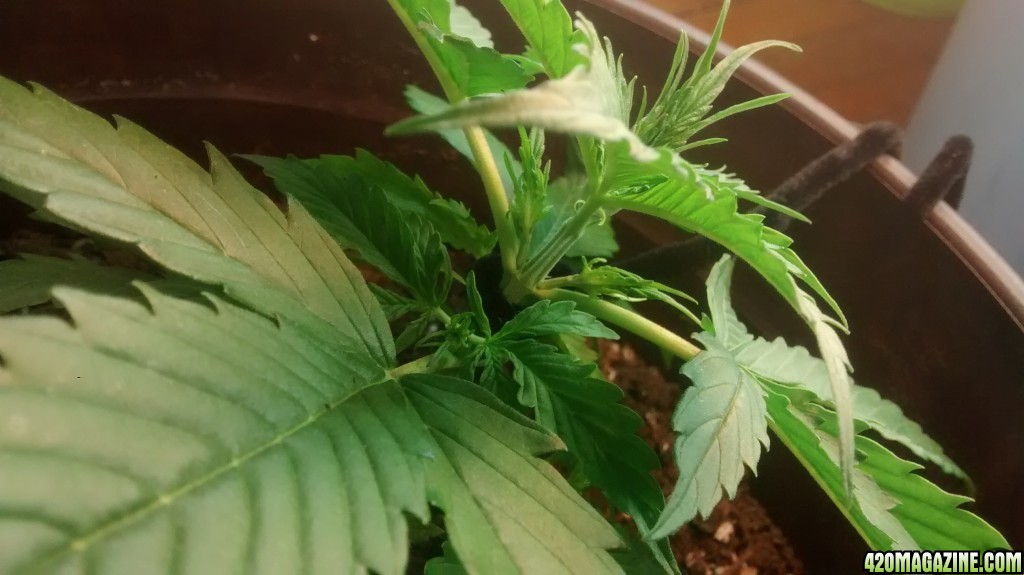
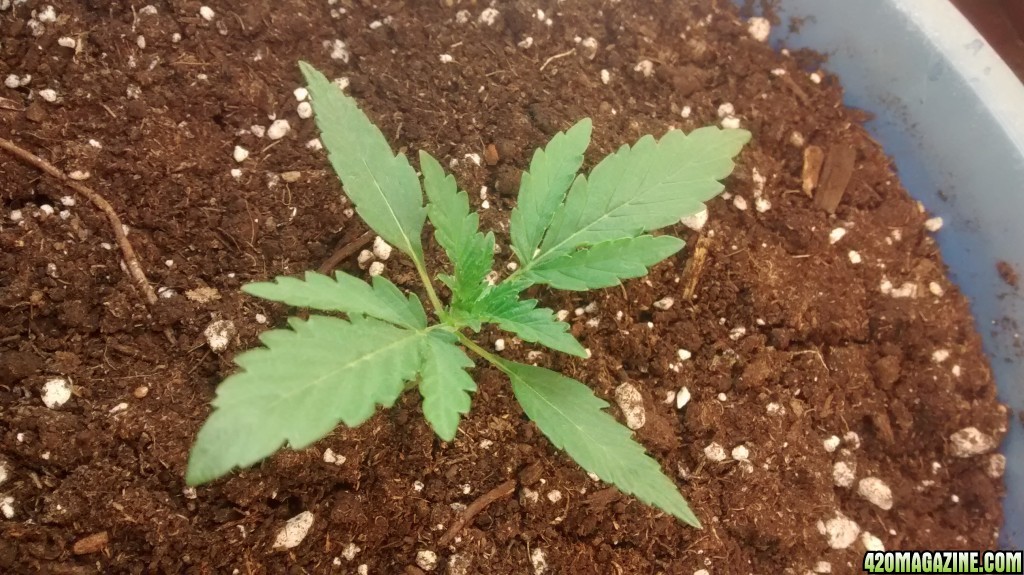
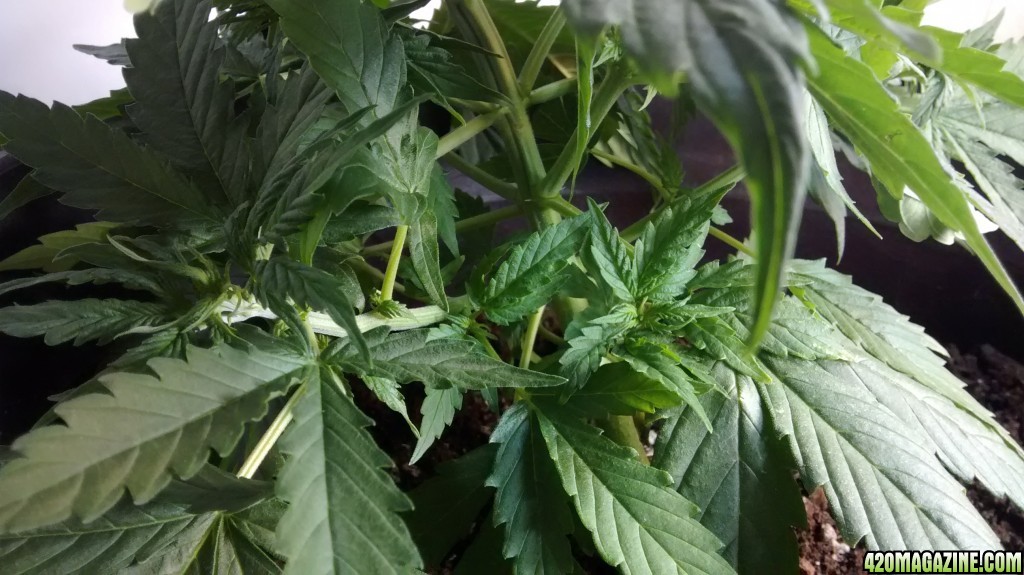
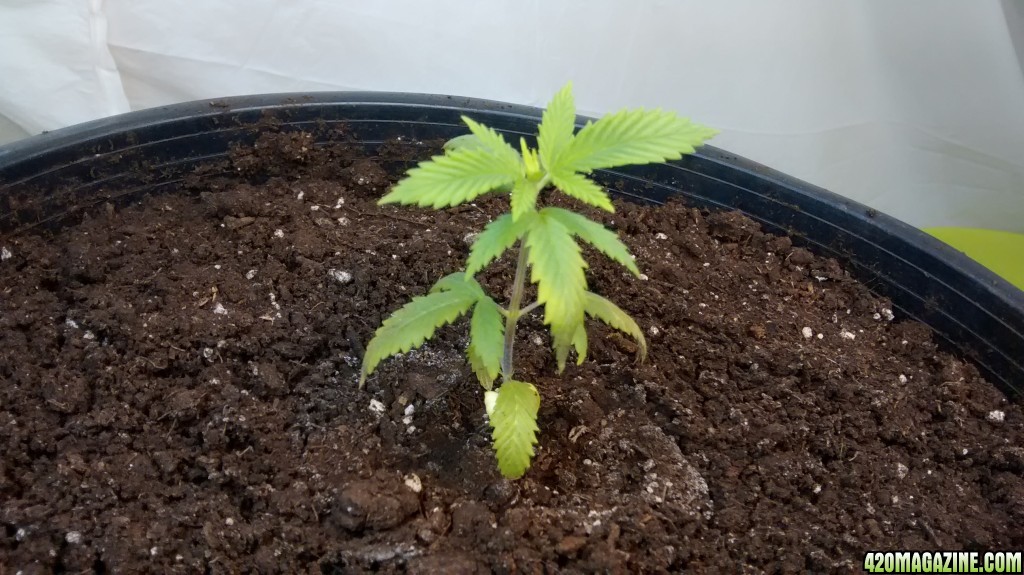
She might be heading back to the ER.

IMG_20171204_183321986.jpg


Well that's it for today guys. I saw a journal where a guy had defoled his auto(s). I heard that it's not a good idea to remove leaves from autos but he said he didn't have any issues. His plant(s) look amazing! He said he started cutting on day 33. Anyone have experience with defoling autos? What's your opinion?
 
Back
Top Bottom