Indoor 4 x Black Russian - 400W MH/HPS - 1st Indoor Grow

speedyp

New Member
Hey Guys I would just like some input from people that are a bit more experienced than I am. I am happy to be part of this community and looking forward to your feedback !!!

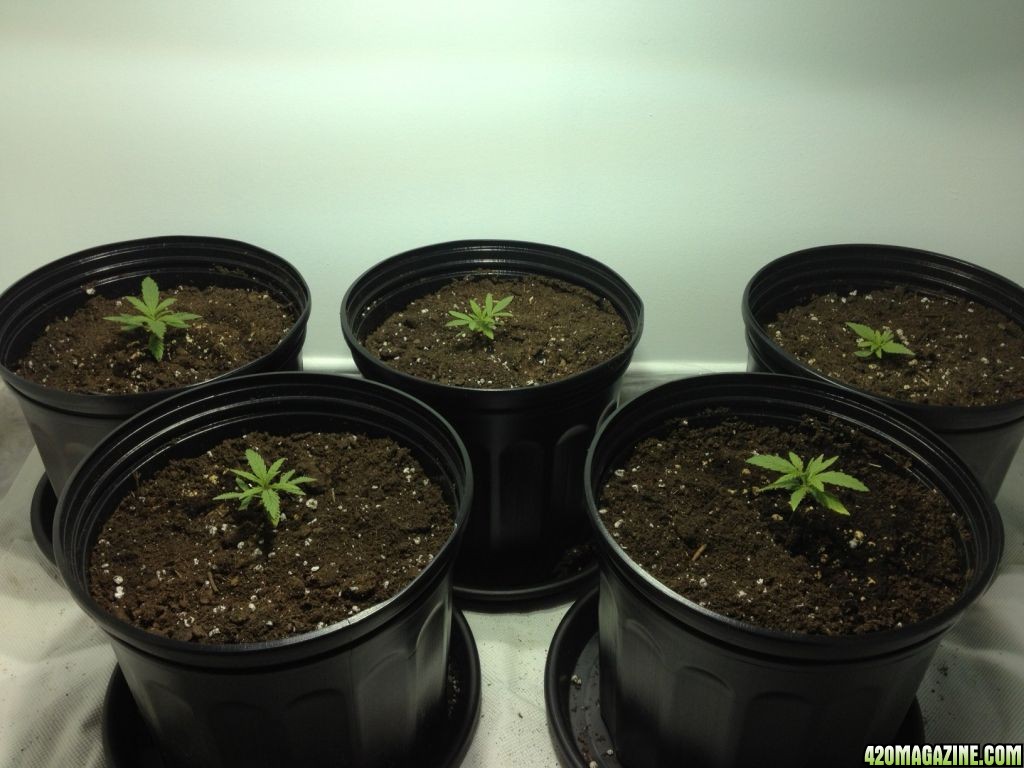
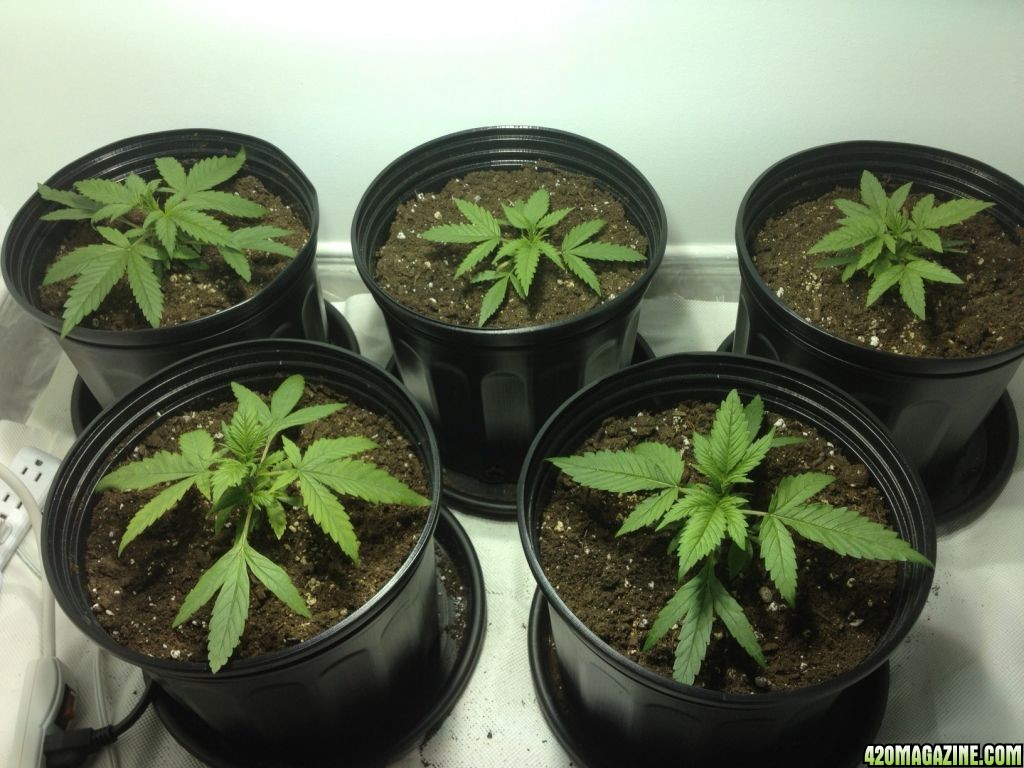
It is my first time growing indoor and I am growing 4 plants of black russian (AK x blackberry)

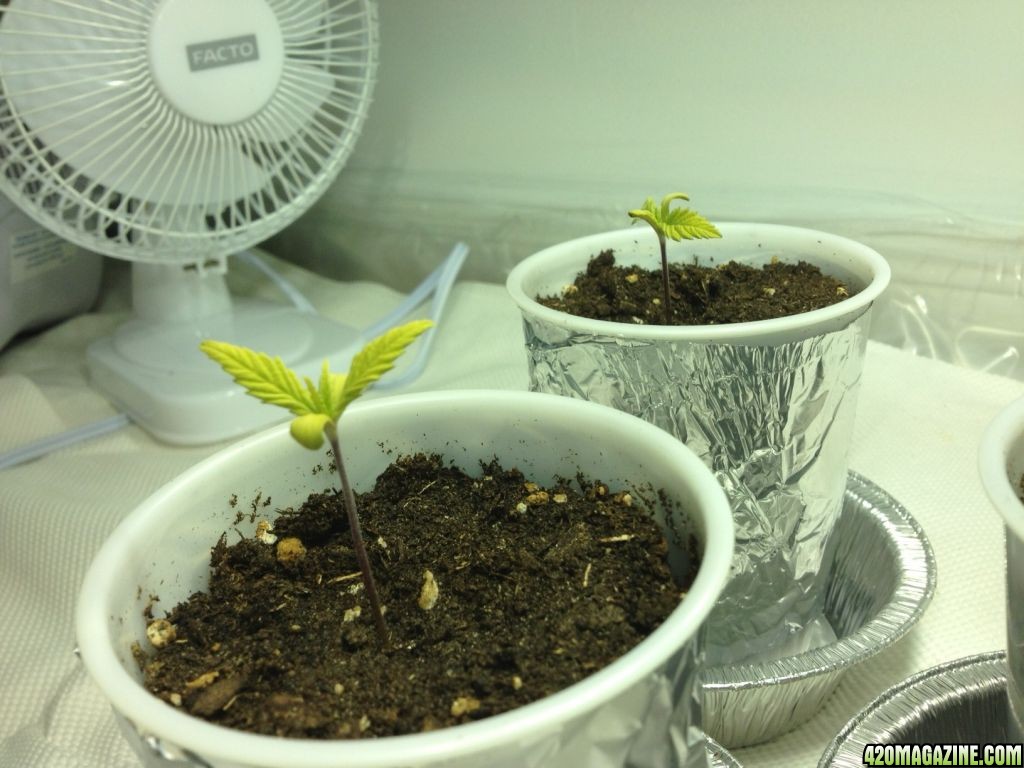
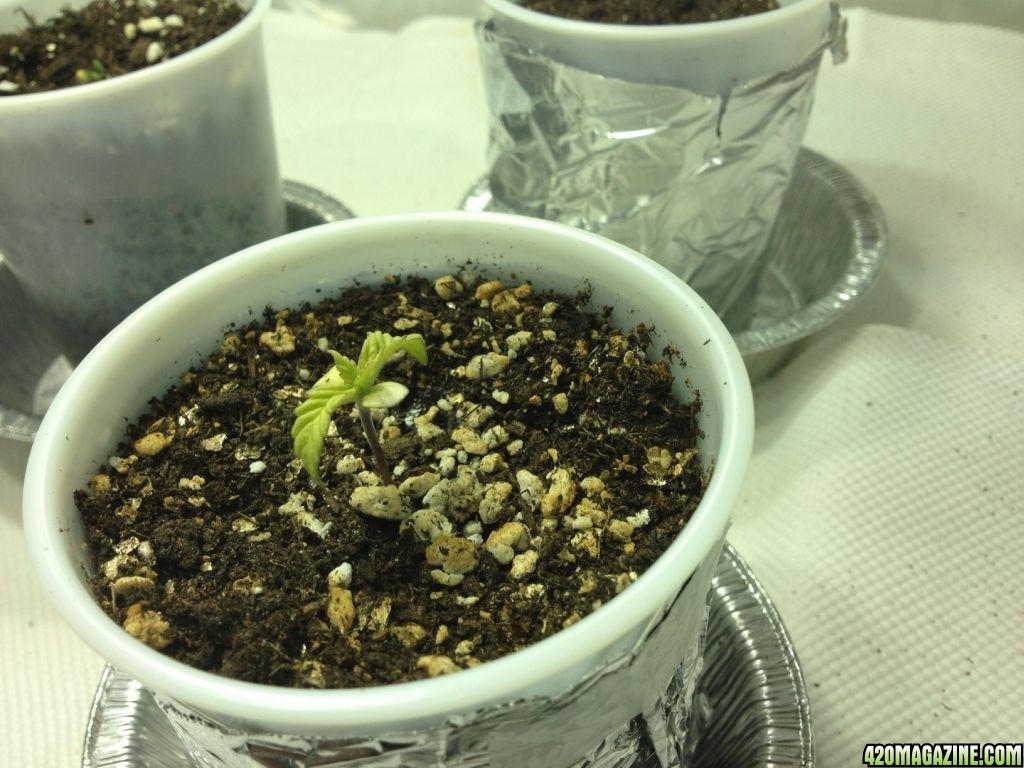
seeds started to germinate Nov 29th in wet paper towel. I planted the germinated seeds on dec 01 and my seedlings popped out Dec 03 so they are now 9 days old.

I chose this strain because it seemed out of the ordinary with the possible purple colour and also because of the reliability of the AK strain.

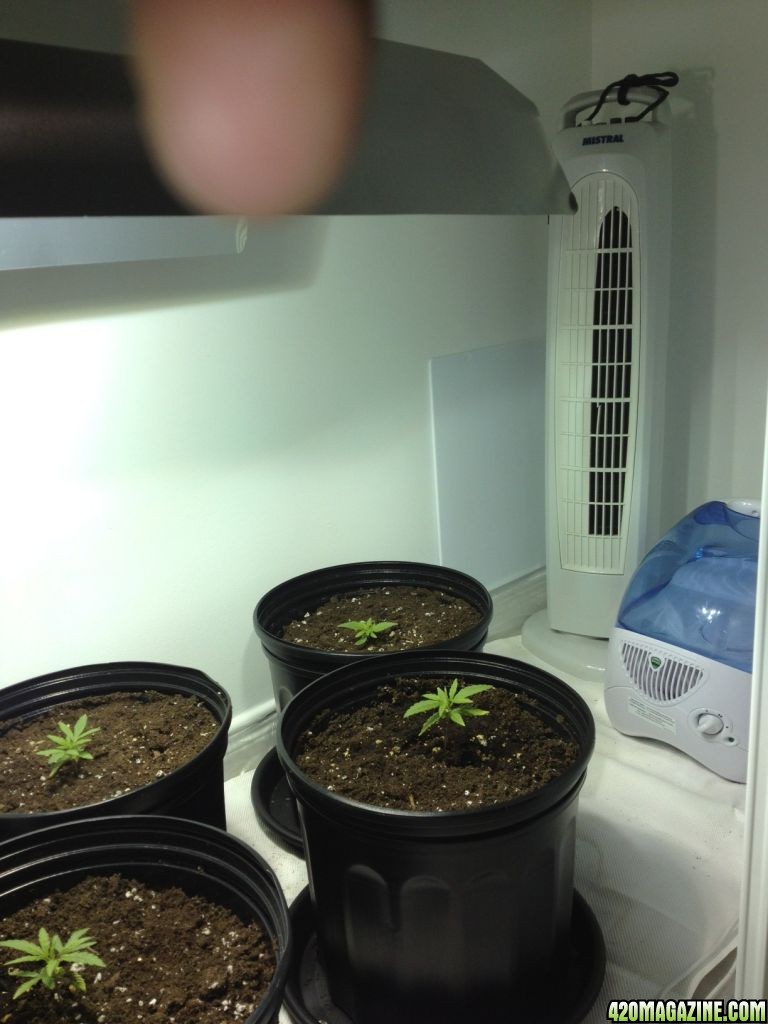
here are a few stats about my grow environment

- 18/6 under 400W MH 12'' away
- closet grow ( 2x5x8)
- all surface painted flat white
- using a cool mist humidifier
- 6" fan on plants and light (low setting)
- tower fan for air exchange
- daily min is 64f , daily max is 80-81
- humidity between 50-60%
- planted in MG soil for seedlings (no nutes)

photo_354.JPG

photo_264.JPG

photo_1123.JPG


So I have a few questions ...

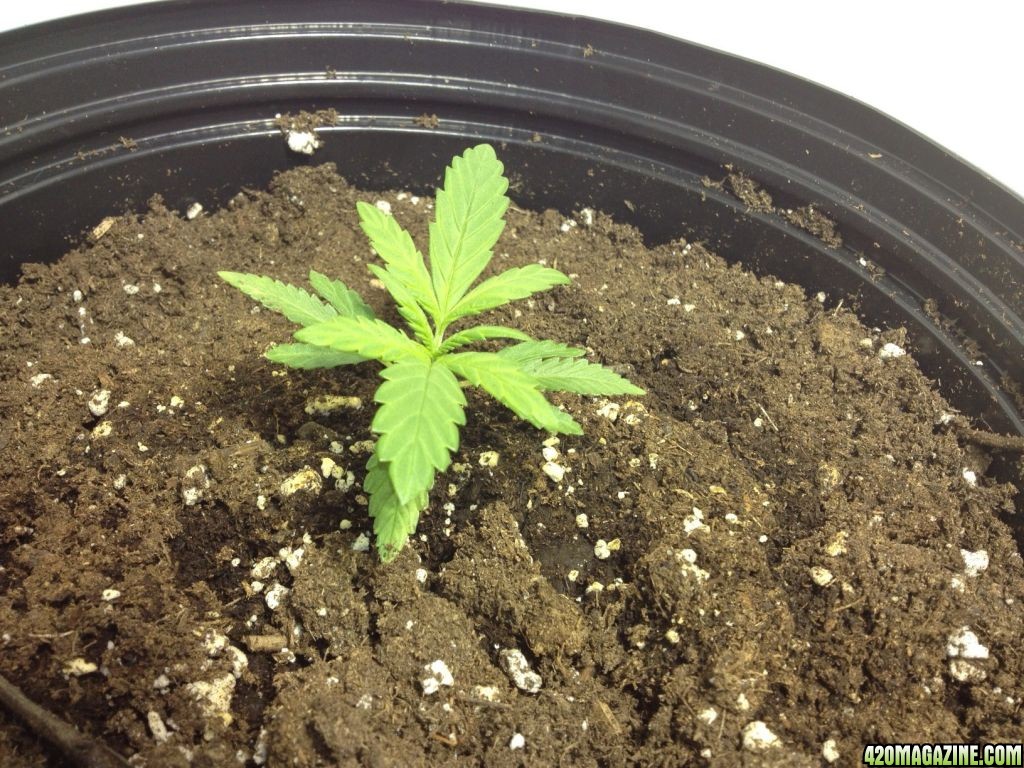
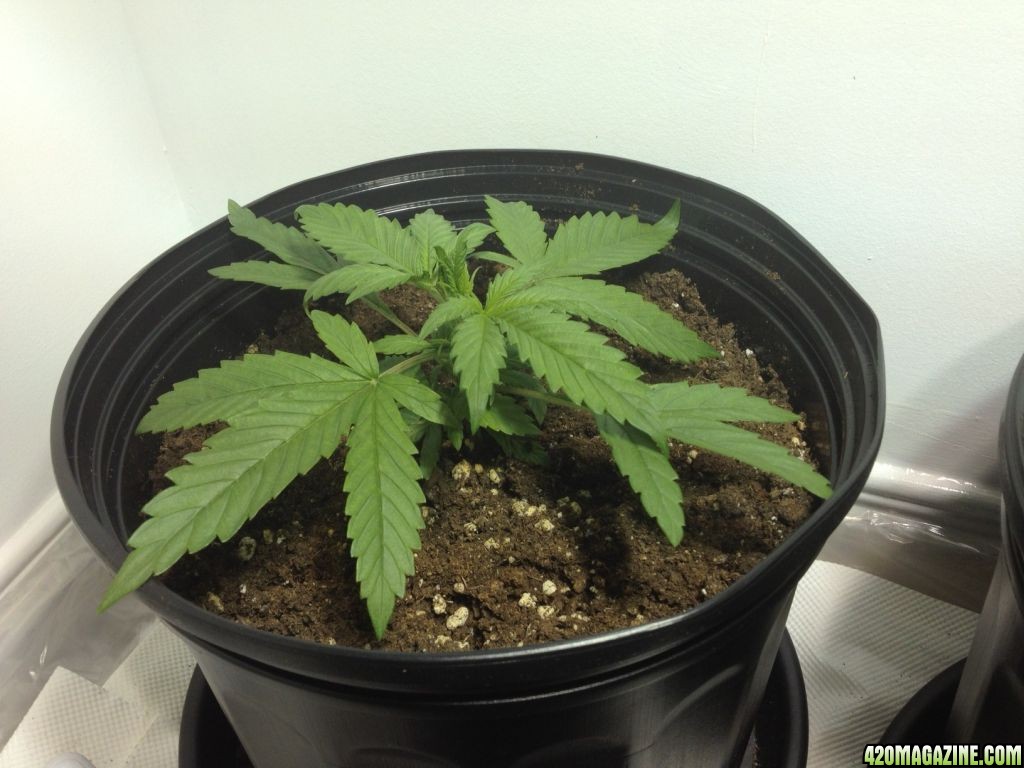
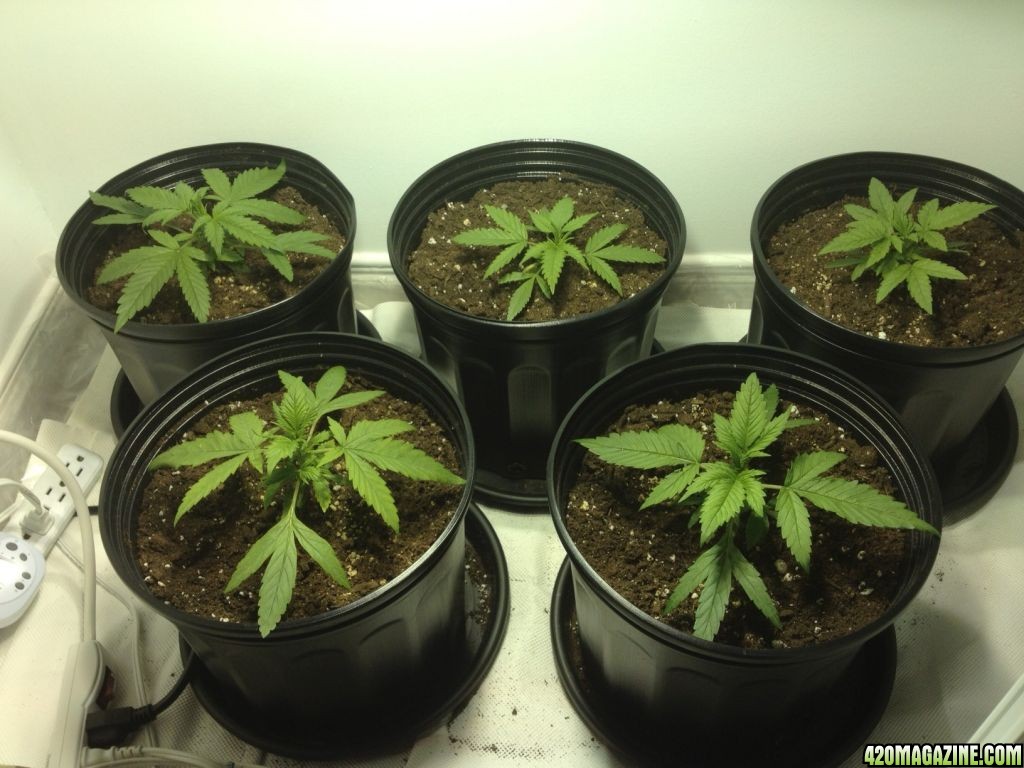
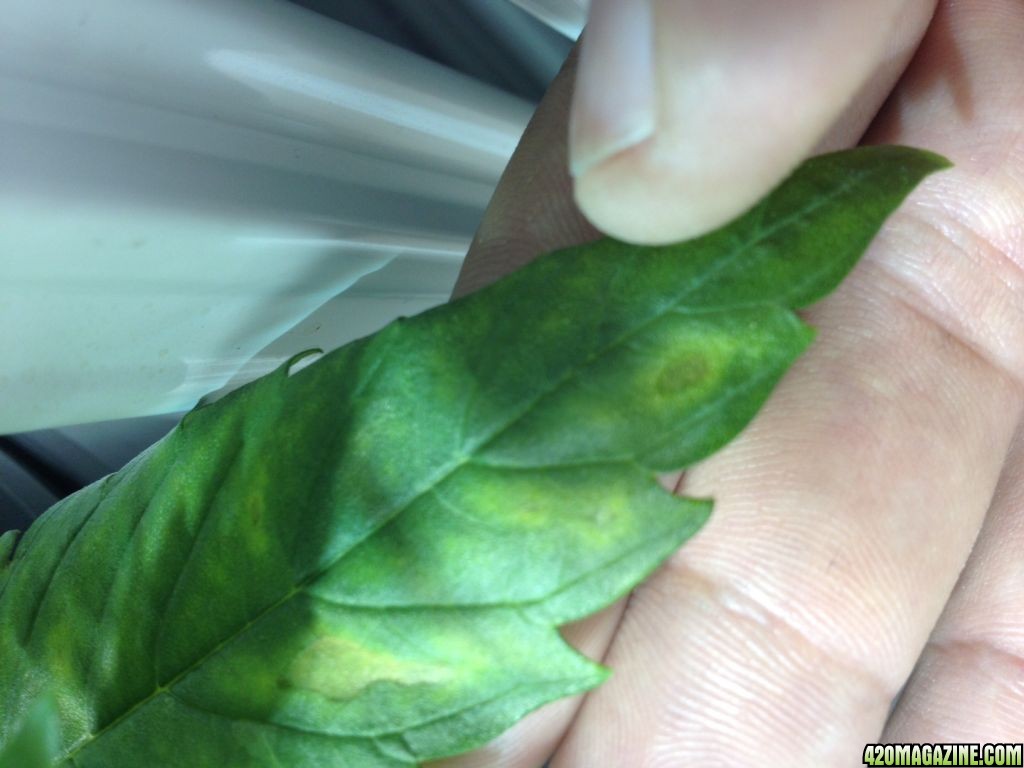
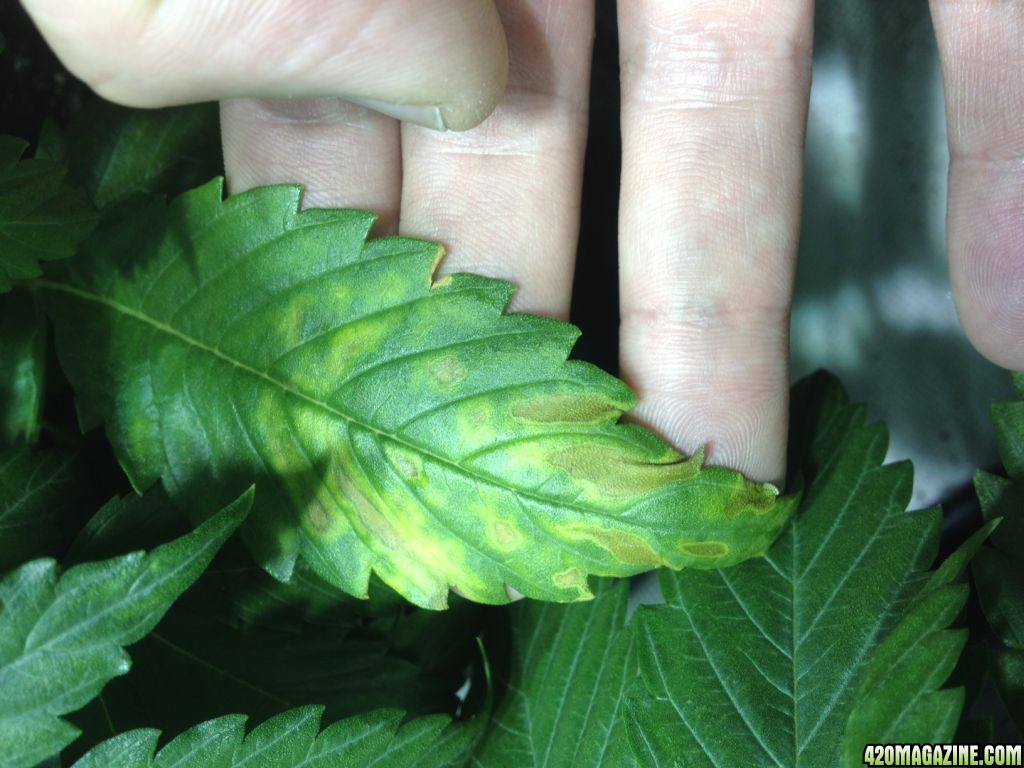
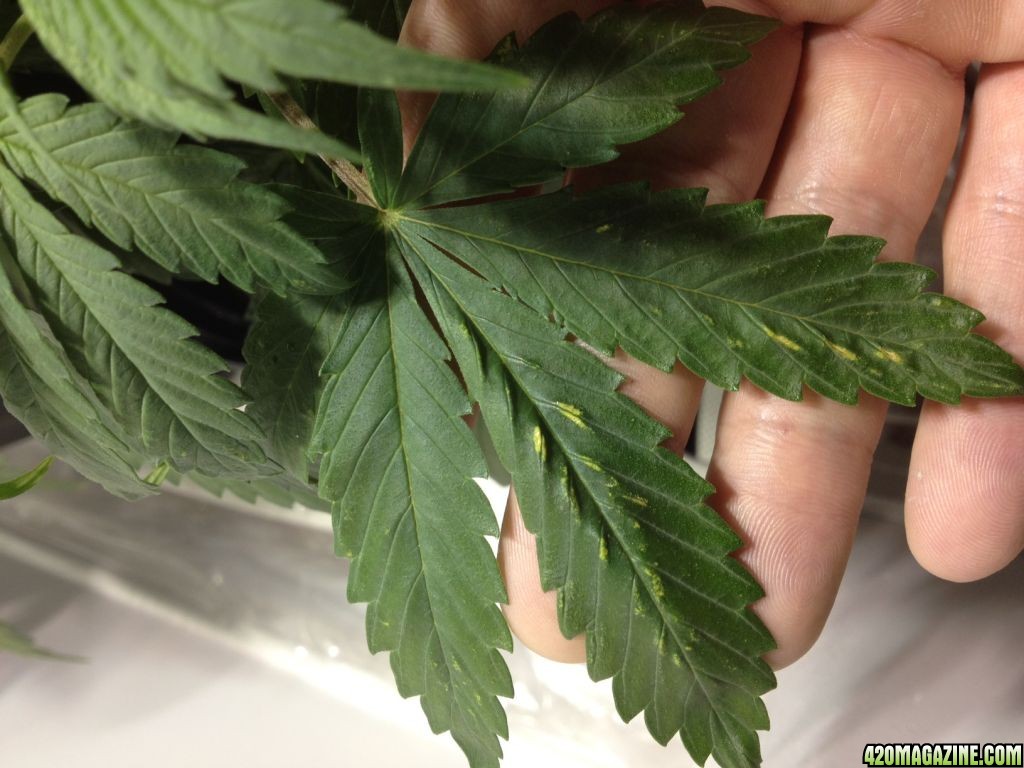
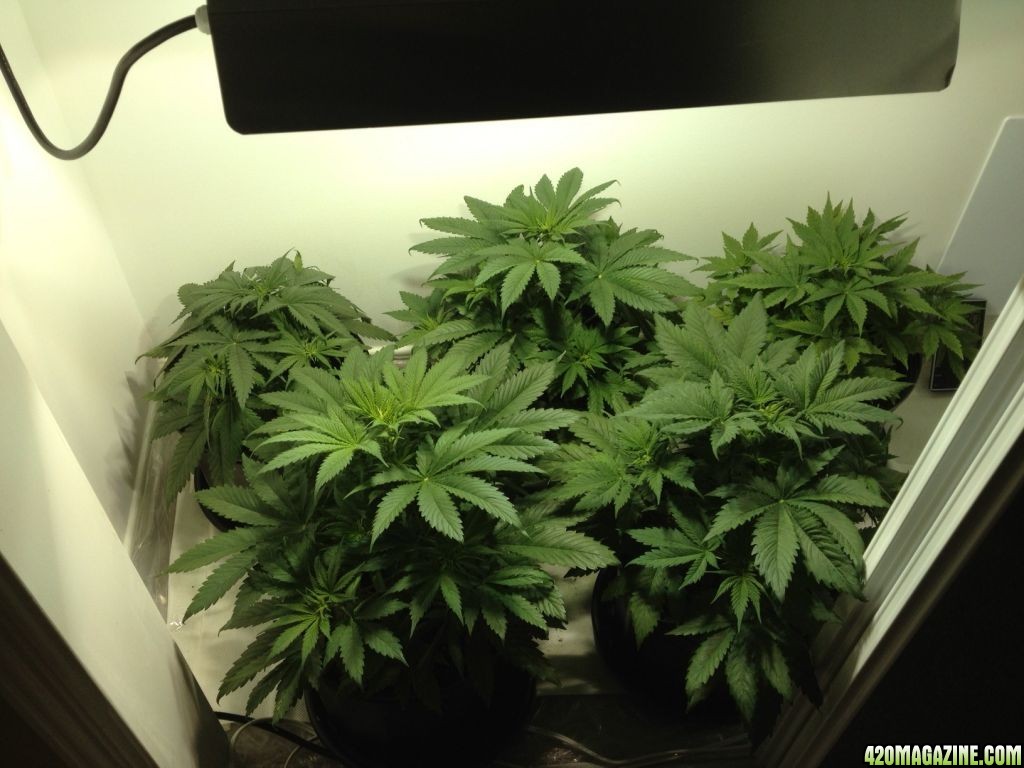
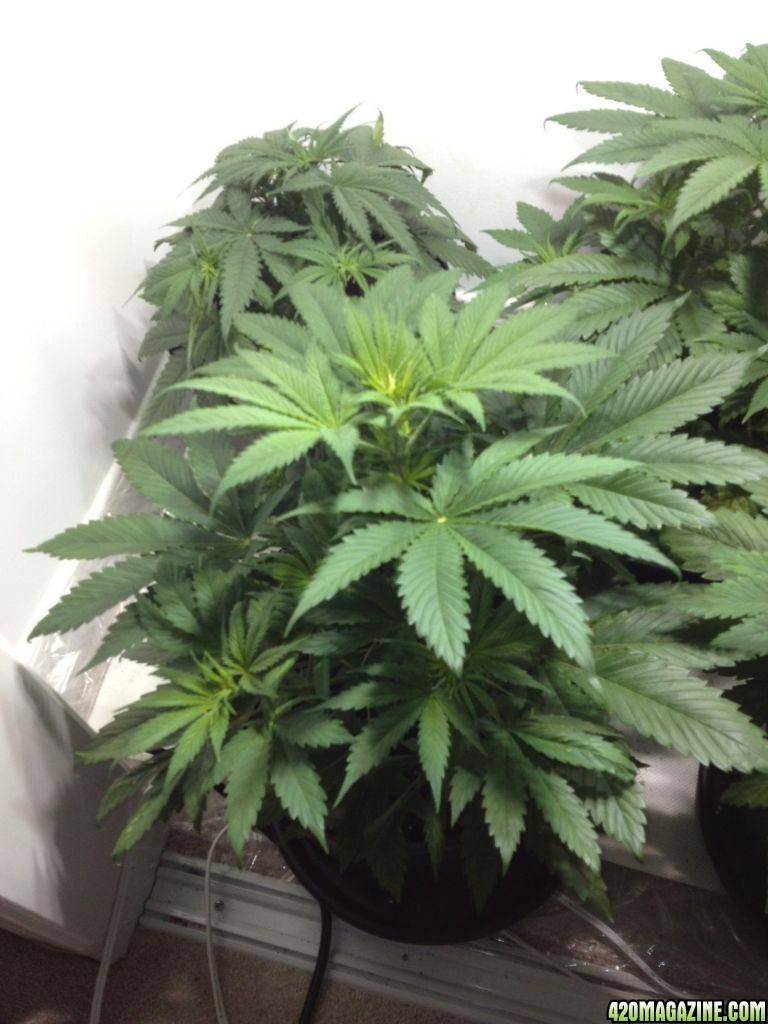
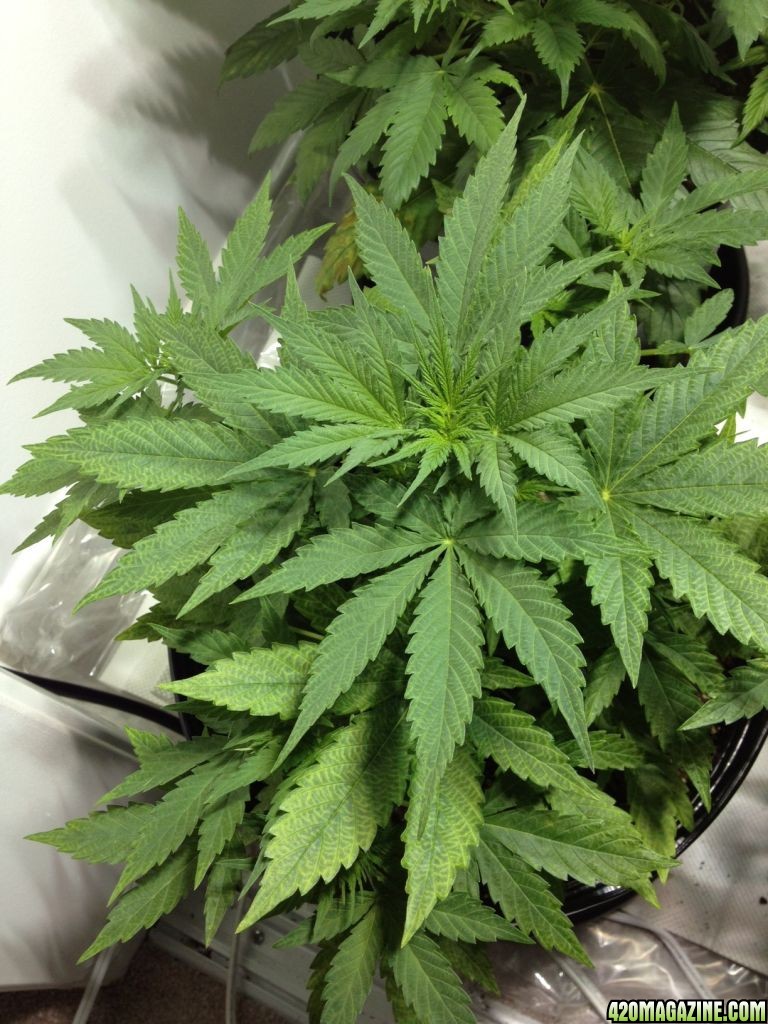
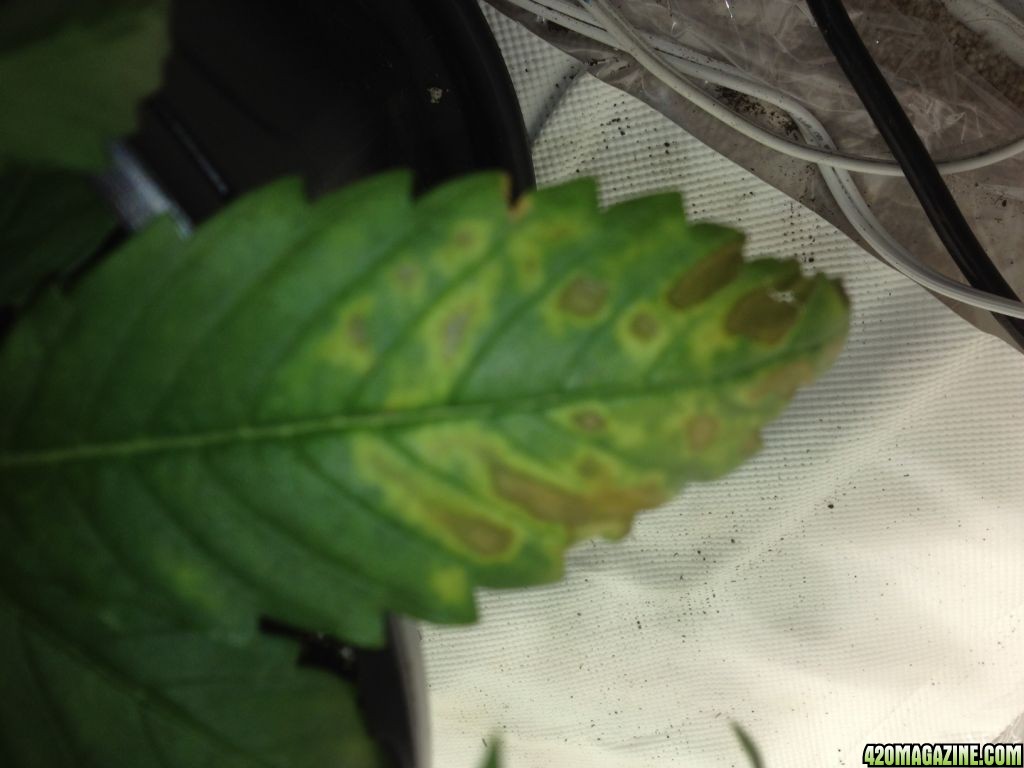
1) do they look healthy ?
2) do they seem to be at the stage/size they should be ?
3) in the first pic does the leafs seem to be drooping a little or is it just me ?

Any comment or input appreciated , thanks !
I look forward to keeping this thread updated
 
speedyp said:
The entire leaf is pale ... Can it be because my soil is lacking in N ?

The soil is for seedlings and is 0-0-0

It's definitely lack of N if it is a nutrient issue. Seedlings don't need much, but they do NEED some. It could also be from the temps dropping too low, but I'd say it's lack of N. The soil you're growing in has no nutrients at all? You should just grow in coco then lol.. Much easier.
 
Re: Indoor 4 x black russian, 400W MH/HPS ( 1st indoor grow)

Some, but not much. Here, read this:

Guide to Growing in Coco

Coco coir is the outside layer of husk that surrounds the shell of the coconut. After coconuts are harvested, the fibrous husk is removed from the coconut seed. From this husk, three main horticultural coir products can be produced: coir chips, coir fiber or coir pith/dust. Coir dust retains water well while the fibers and chips help with air space and drainage.

There are many brands and types of coco coir available on the market. We recommend that you use only buffered coir products, as coco coir naturally contains a lot of sodium ions that cling to the coco coir like a magnet. The buffering process involves pre-soaking with a buffering solution high in calcium, which displaces the sodium and balances the naturally occurring potassium. After the soaking period the media is washed with water, which removes the displaced sodium, leaving the calcium in the coir. This buffering process prevents unwanted draw down or 'lockout' of calcium and magnesium, and avoids sodium toxicity issues. These selections of coir products are made from high quality coconuts and use unique buffering processes to ensure the health of your crop.

10 Benefits of Coco:

  • Promotes strong root growth and plant vigor.
  • Coco coir is completely environmentally friendly.
  • Encourages beneficial bacteria and discourages harmful bacteria.
  • It is a 100% renewable resource
  • Coco has an ideal pH range of 6.0-6.8.
  • Coco coir never shrinks, cracks or produces crust
  • High lingin and cellulose content
  • Coco coir is odorless, pleasant to handle, and uniform in composition.
  • Coir has a high cation exchange, meaning it can store unused minerals to be released to the plant as and when it requires it.
  • Contains significant amounts of phosphorous (10-50ppm) and potassium (150-450 ppm).

Coco coir has many unique physical and chemical properties that actually make typical hydroponic nutrients less than ideal. This is because coco coir growing media interacts with nutrients and holds onto calcium and magnesium while slowly releasing potassium and nitrogen instead. For this reason there are several nutrients that are specifically formulated with the coco coir's unique characteristics in mind. These formulas contain far less potassium, less sulfate, more calcium, and more magnesium than their standard grow and bloom counterparts. By using a nutrient specifically formulated for the coir-based system, such as House & Garden's Cocos A+B, you are ensuring that your plants are receiving the best possible nutrition package. Only high quality coco coir nutrients will ensure that your plants receive the nutrients and elements they require for strong and healthy growth.

Furthermore, coconuts are naturally high in compounds called lignins. This compound is able to help encourage the development of beneficial bacteria, which makes it less likely for harmful bacteria to invade your system. This also means that if you choose to use a hydroponic supplement that contains beneficial microbes, they are more likely to grow, thrive, and benefit your system. These organisms, such as bacillus, mycorrhizae and trichoderma all form symbiotic relationships with the plant that can increase overall performance and yield. Bacillus is used world wide for the control of insect pests and opportunistic fungi pathogens. Mycorrhizae are beneficial fungi that colonize the root surface, helping the plant take up nutrients.

Many forms of coco coir also contain trichoderma and if a healthy root environment is maintained, the bacteria will continue to colonize the roots and multiply in the growing media. Trichoderma works in symbiosis with plant roots to protect them from pathogenic fungi such as pythium or fusarium. These characteristics can boost yields by decreasing disease organisms. Since Trichoderma grow and proliferate best when there are abundant healthy roots, they have evolved numerous mechanisms for both attack of other fungi and for enhancing plant and root growth. As coco coir is a natural habitat for trichoderma, it provides an ideal environment for trichoderma to thrive.

When using beneficial microbes, always use reverse osmosis (RO) water, which removes harmful chemicals that can kill the beneficial microorganisms. Tap water often contains chlorine and chloramine to kill harmful biologicals. Unfortunately this indiscriminately kills beneficial bacteria. Reverse osmosis units can remove up to 99.9% of tap water impurities including phosphate, nitrate, minerals, and heavy metals for contaminant-free water. Your beneficial microorganisms will thrive and be at their healthiest population by removing these harmful substances.

However, reverse osmosis water is so pure that it is depleted of essential trace elements and minerals, which must be added back to the nutrient solution. Furthermore, calcium and magnesium are both naturally attracted to bind to coco coir, causing them to become unavailable to plants. To compensate for this, it is important that you add some form of a calcium/magnesium supplement to your nutrient solution, especially if you are using reverse osmosis water.

Coco coir is an ideal medium for encouraging roots to develop to their full potential due to its high levels of aeration, naturally occurring trichoderma and remarkable drainage properties. Its high buffer capacity also assures that coco coir will hold and release nutrients over extended periods of time, optimizing plant growth.

Source: Guide to Growing in Coco

im doing my first grow in Coco. ITS SO EASY! Impossible to overwater. Allows air to the roots easily. Dries quicker than soiler, speeding up the plants metabolism..
 
Here is an update. My plants were struggling. They were not growing one bit. The only thing they were doing is becoming more yellow. during 2 weeks nothing happened. No growth was seen.

7 days ago. I did the following

- transplated in bigger pot
- potting medium is soiless mix of peatmoss, perlite, etc...
- lifted the light a few inches it's now sitting at 15" above the plants
- added B1 formula
- added a small amount of grow solution from Ionic

From that day forward they started growing. In 1 week they at least tripled. After 3 days they were becoming green again. They are now fully green and look healthy.

I beleive the soil I was using ( miracle grow for seedlings) was causing the problem. The plants were lacking nutrients.

Here are a few pics of the nutes and the plants/setup.

temperature is around L 65 / H 78
RH is between 45-60 ( adding humidity using a cool mist humidifier)

I'm happy things are looking up. I now even have 5 plants. One seed that was germinated but not growing ( I thought it was dead) started growing and now looks healthy !

photo_524.JPG


photo_4_1_.JPG


photo_3_1_.JPG


photo_2_2_2.JPG


photo_1_2_2.JPG
 
Update First day of 2012.

Since the transplant and feed schedule they are getting bigger and bigger. Huge gain in 1 week.

They are starting to smell a little which surprised me !

They seem to need water every 4 days. After 4 days leafs start to curl down just a little.

So far I'm using 3/4 strength grow formula from Ionic and regular strength of B1.

photo_356.JPG


photo_277.JPG


photo_1126.JPG


Any feedback or comments appreciated !
 
Update, been having some issues with the leaves in the past week, i am wondering if anyone could pitch in and help.


my plants have been vedging for 4 weeks and are starting to show some issues with the bottom leaves mostly.

I am feeding weekly with

-ionic grow
- h2o2
- b1

I am watering with tap water. sometime the water does not stand for 24 hour to let the chlorine evaporate Could that be causing the problem ?

I have been looking through dif threads but can't seem tu pinpoint one culprit.

here is 2 image of 2 bottoms leaves. there are brown spots on the leaves. and complete leaf seem to be turning more yellow.

photo_2100.JPG


photo_1129.JPG


Here is one of a top leaf, this issue seems totally different than the other one.

photo_359.JPG
 
Well i doubt its the chlorine personally i use straight tap water and the only sitting out it does is sitting untill i measure my nutes and ph down. I never left mine out 1 time to clear the chlorine. But it could be 1 of 100's of tiny problem. Waters too cold waters too warm, ph is too low too high, not enough nutes or too many.

Id just let things run the way you normally would. These kinds of problems happen alot and sometimes the only medicine is time. Ive never worked with your nutes but i would like to learn more. What do you have for nutes after they start growing more, what additives are you hoping to use?

I will let the week pass by and see if it gets worse or not. I will start flowering next week probably and then I will use the bloom additive form Ionic. and some h2o2. That will be all for supplements unless i see deficiencies i need to remedy.

My vote is for a cal/mag deficiency or a ph problem. As 253Chiefin said only time will tell...
Do you know your ph?

I am having a hard time testing the ph from the runoff water because I am using a cheap PH tester. Just a tube with liquid drops. My runoff is not clear so when I add the water is screws up the colors..

Any ways I can be sure it's a cal/mag def ?
 
Back
Top Bottom