

WHAT YOU'LL NEED
RUBBING ALCOHOL
SURGICAL, OR EXAMINATION GLOVES (unless you're a hand washer)
SMALL SNIPS OR SCISSORS - Must be sharp!!
A SINGLE EDGE RAZOR BLADE - Must be sharp!! A new blade is best.
BACK-UP BLOCK - A piece of wood or plastic or cutting board
SHOT GLASS -Or similar small glass or plastic container.
SPRAY BOTTLE WITH WATER
SEED TRAY WITH CLEAR HUMIDITY DOME
GROWING MEDIUM - One of any of several growing media available at your local hydroponics stores (NOT SOIL).
ROOTING HORMONE - You will need a good quality rooting hormone. You can use a powdered rooting hormone but in My opinion they are much harder to work with resulting in a reduced success rate. Alternatively, you can make a "tea" of willow branches.
BEFORE YOU START
This is not recommended for the amateur at cloning, and therefore is not a step-by-step of the cloning process.
For that tutorial, go here: Cloning: Mad Simple
That is the introduction to cloning/propagation
Also, before we get going, fear is okay, failure is not.
Any questions are welcome, and expected if it is not fully understood how a one-cut cloning is performed.
In this tutorial it is assumed that the reader already knows the basics of cloning and is looking for a way to quickly take clones from one plant that is still relatively small and therefore should make as few cuts as possible.
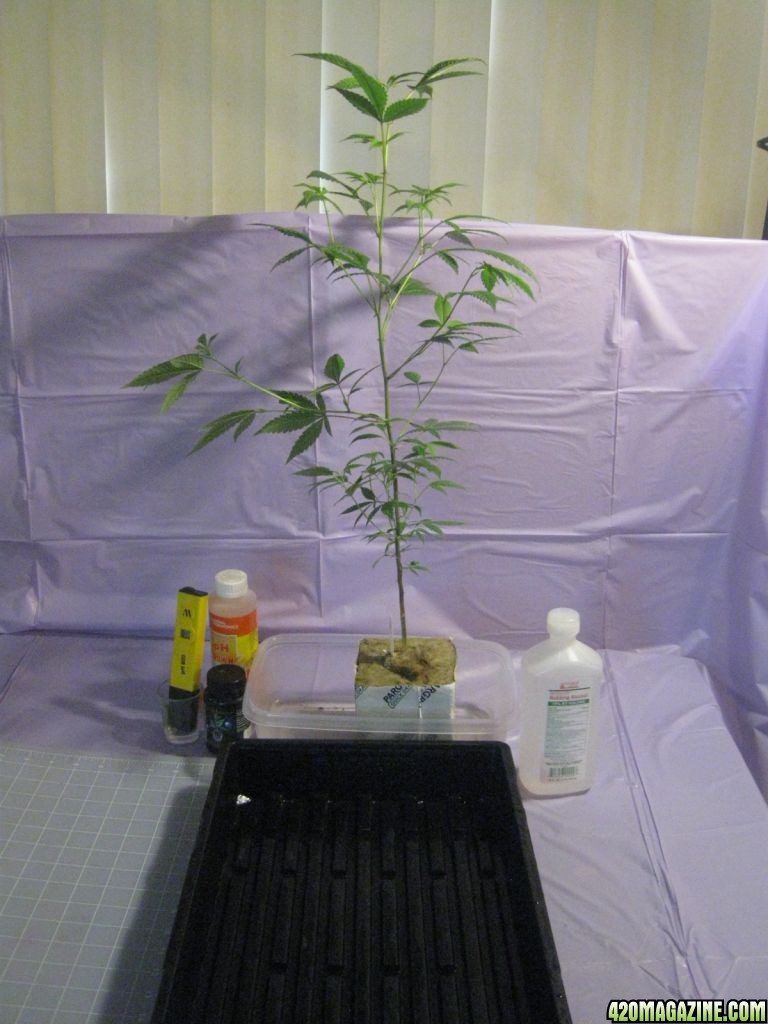
For demonstration ease and clarity, I removed the plant from the Maternity Ward where all my mothers reside to show the before and after. I placed her in a B12 bath to prevent shock as well.
This is the plant we will be performing a TOP and SEVERAL Clones from just the main stem.
TAKE THE CUTTINGS
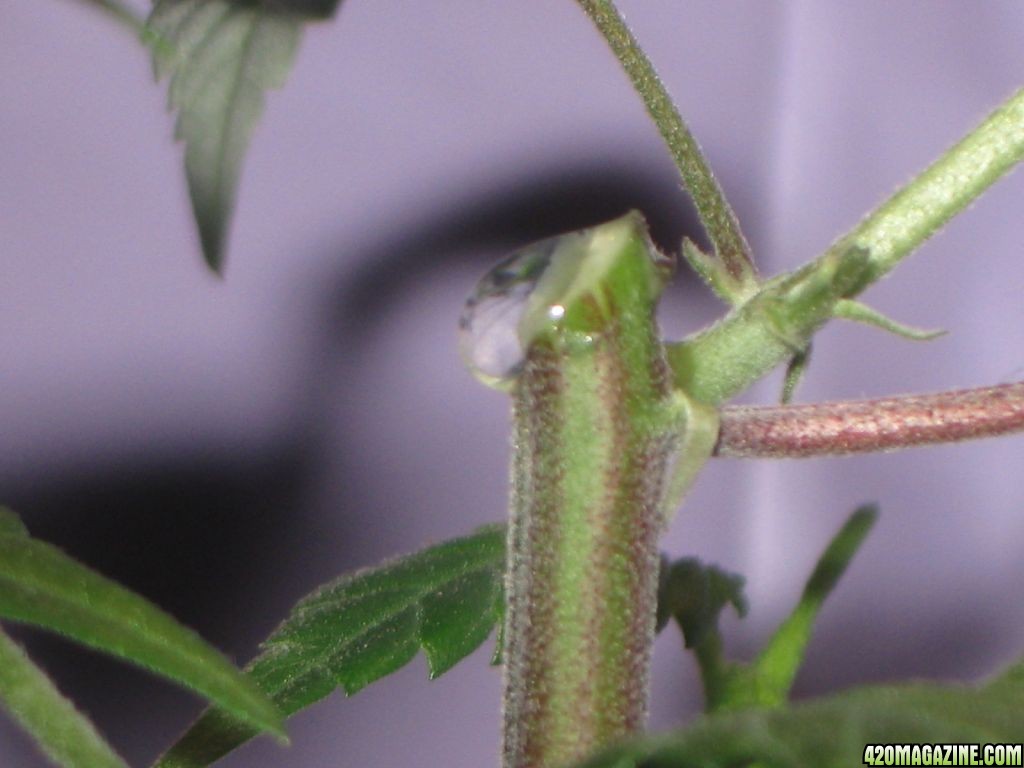
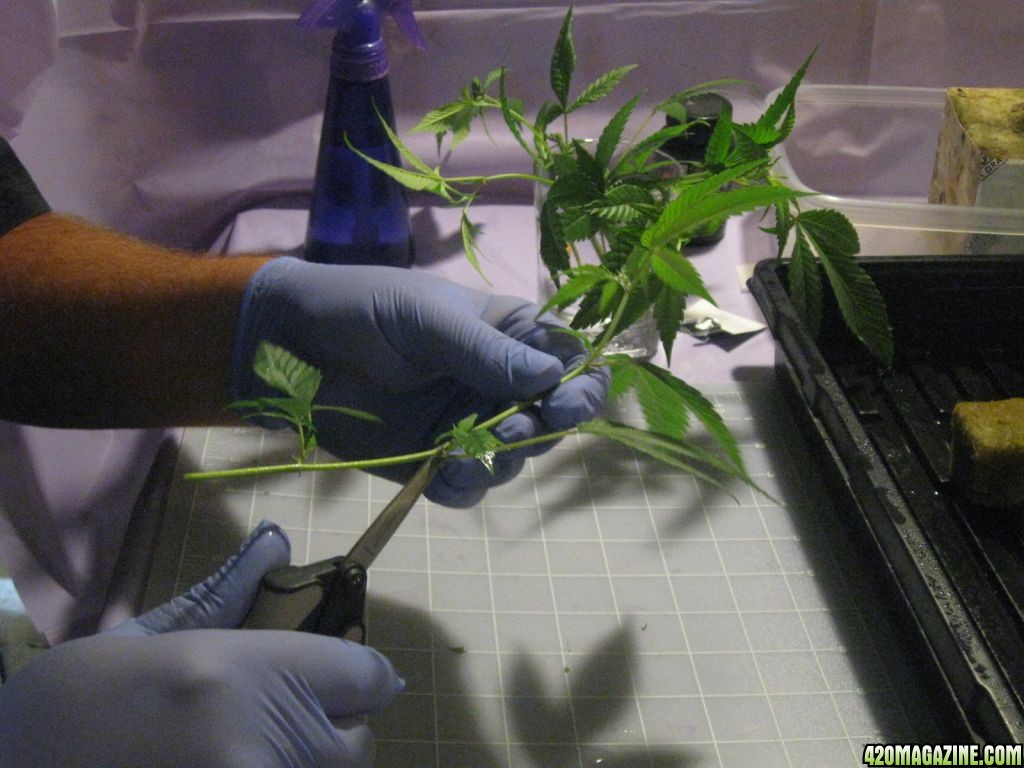
I made ONE CUT and placed this very large cut into the water glass immediately.
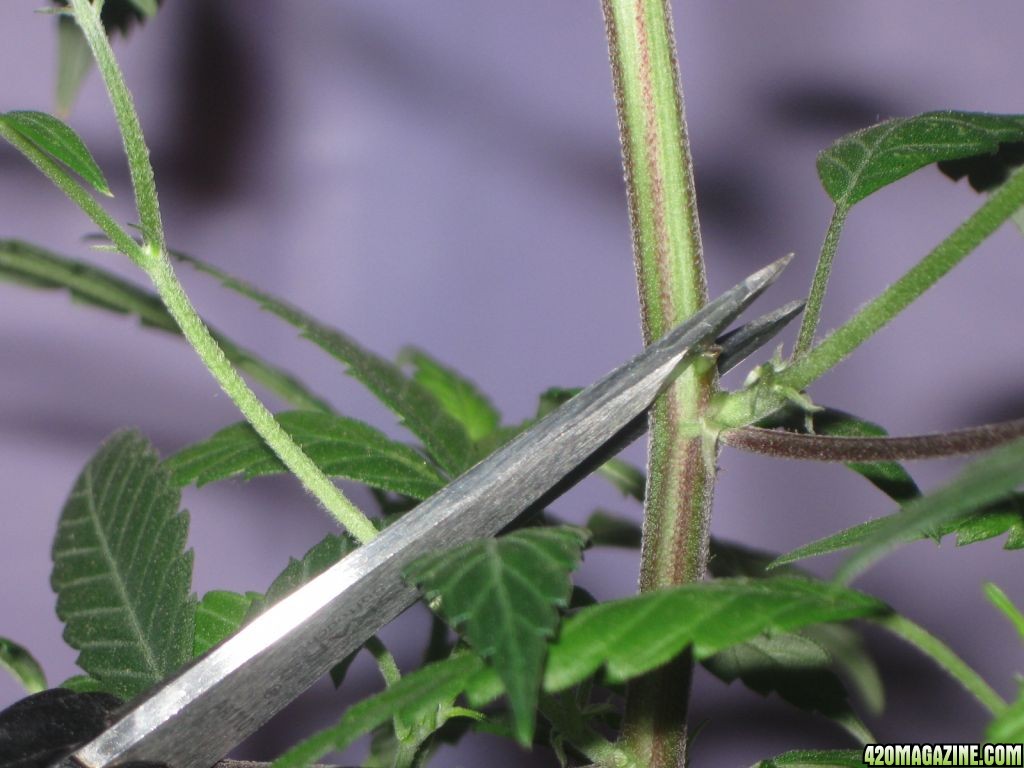
Some fluid leakage will occur when taking a cutting this far down, but it will dry and "scab over" quickly. If done correctly, the plant should recover from the trauma within three days.
I took many cuts at once from only that one stem that was overgrown and leggy and proved to be very a good candidate for this technique. After each snip, I placed the cut into the water. Keep in mind that there were three more cuts made than clones placed in cubes, but I was looking for the strongest out of the bunch. Otherwise I would have been hacking away at the plant to take several clones, and would have had MANY bleed sites for the plant to concentrate on healing.
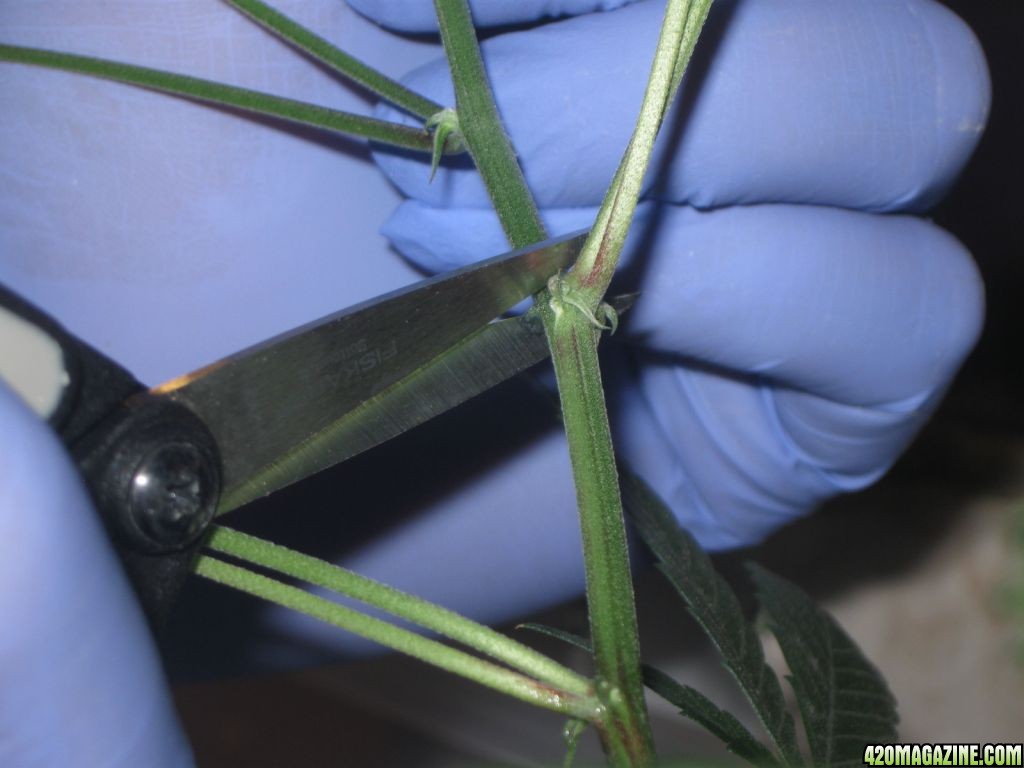
I cut the Main Stem at EVERY OTHER NODE, which gave 3 clones.
The lower part of the main stem, when I got to it, had lateral growth large enough to be clones themselves.
 so I made the cut ABOVE AND BELOW that node and dipped the main stem part into the cloning gel after removing the fan leaf still attached to the bottom.
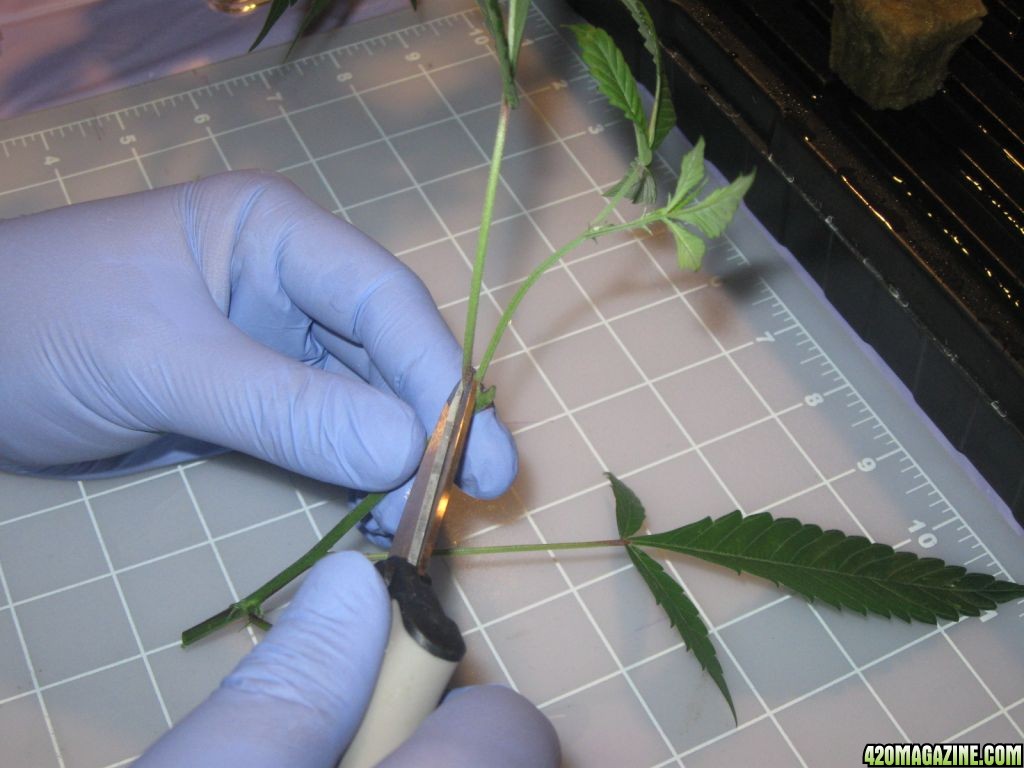
In the sections that had had small growth, I snipped all but one fan or two fans, going on "feeling" and cut below the next node down.
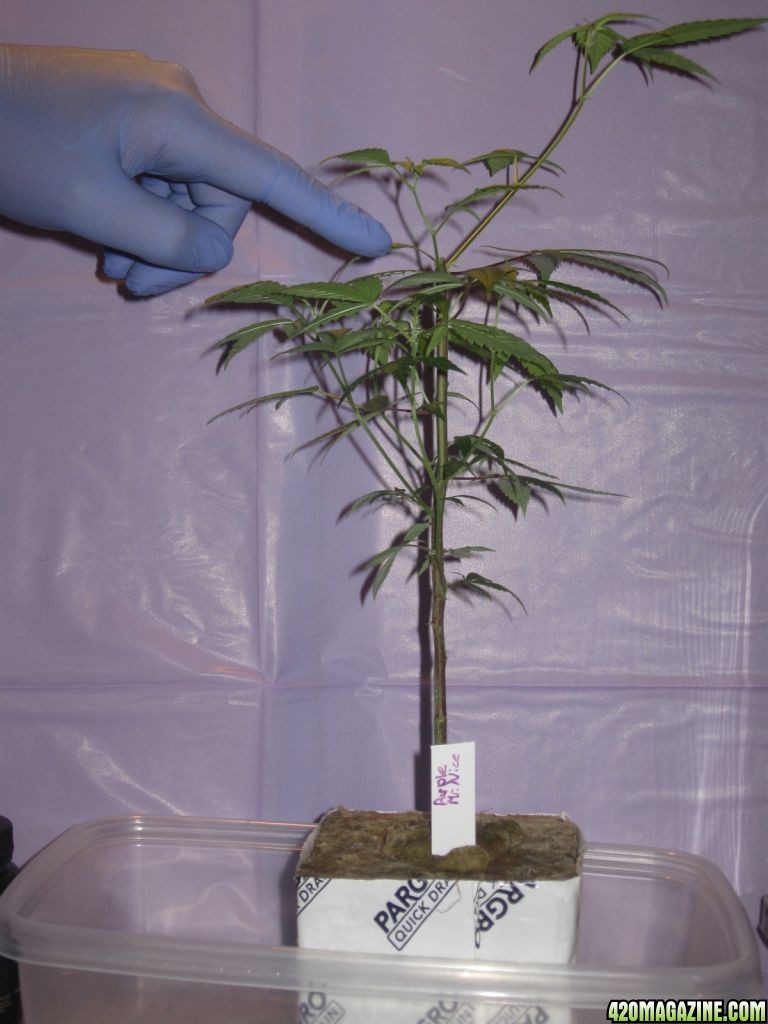
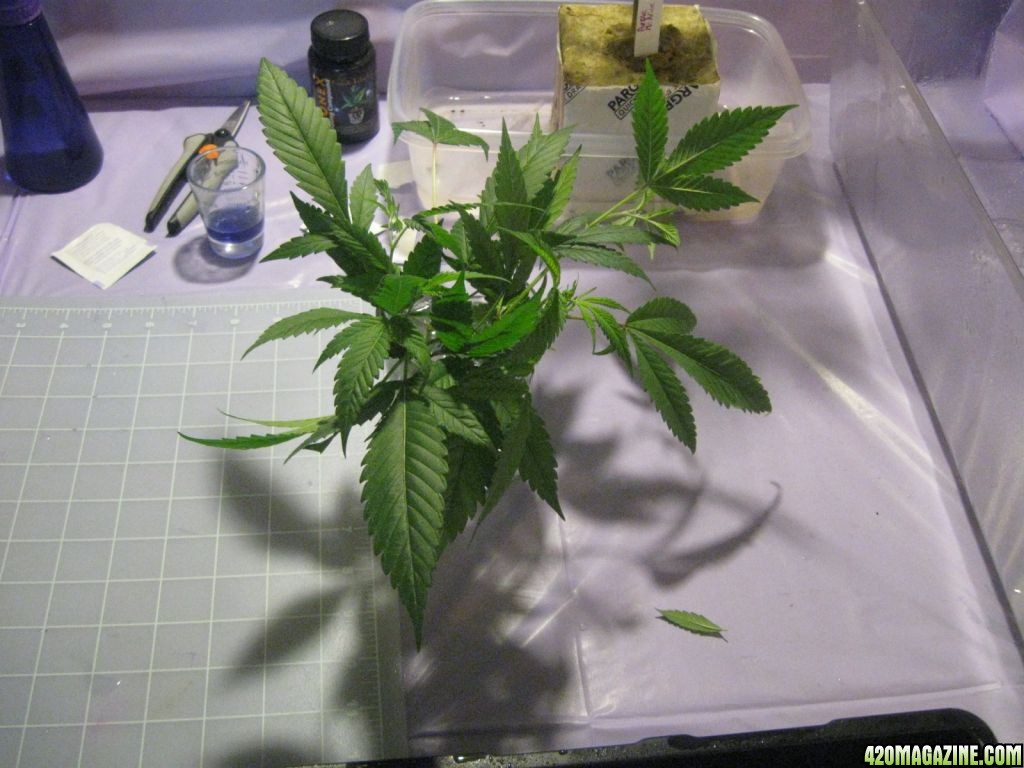
This was the main stem before the trimming, and clipping.
And these are the clippings in the water glass, ready to dip into the gel, and go into rockwool.
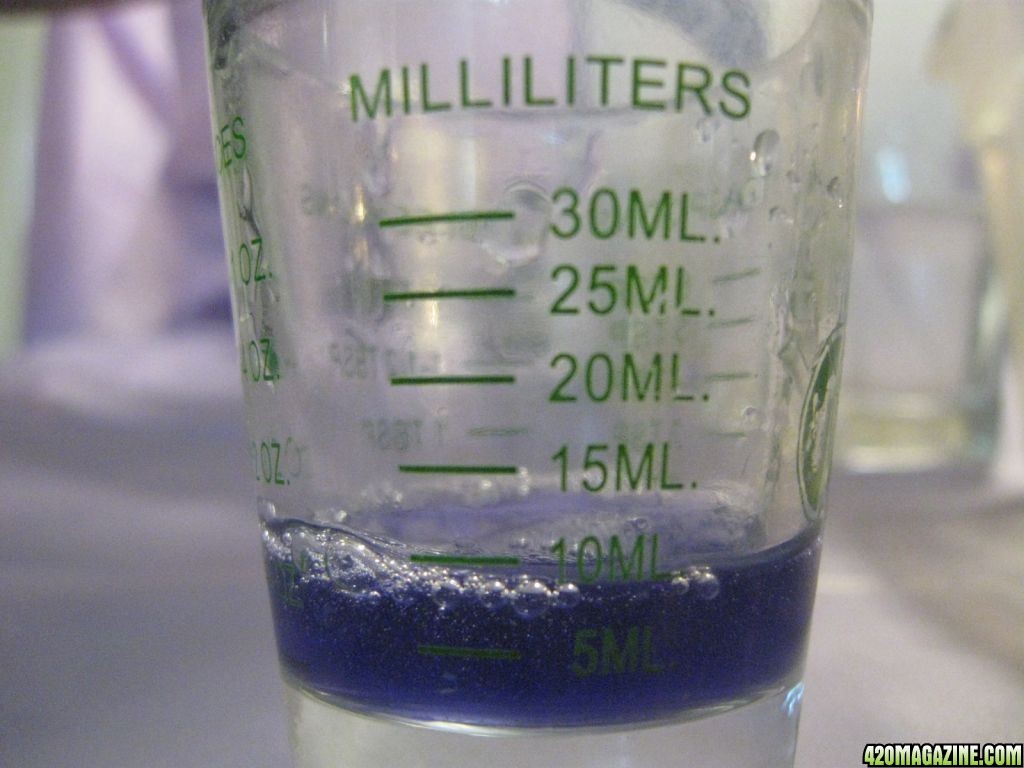
and this is the amount of gel used for all of the clippings
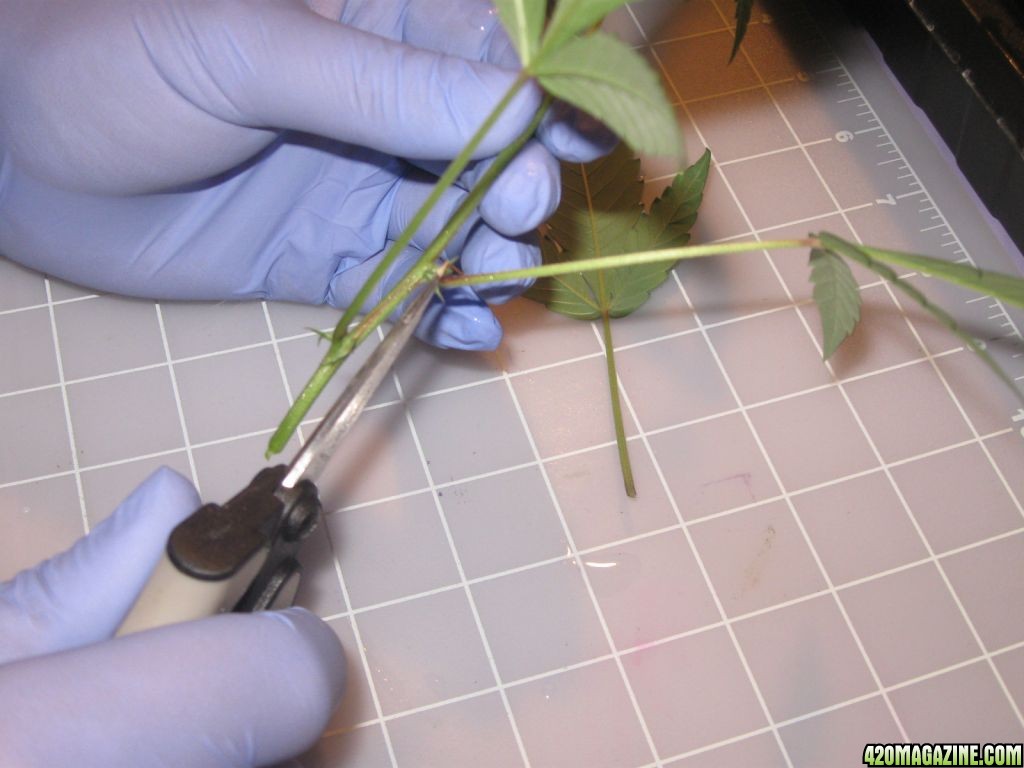
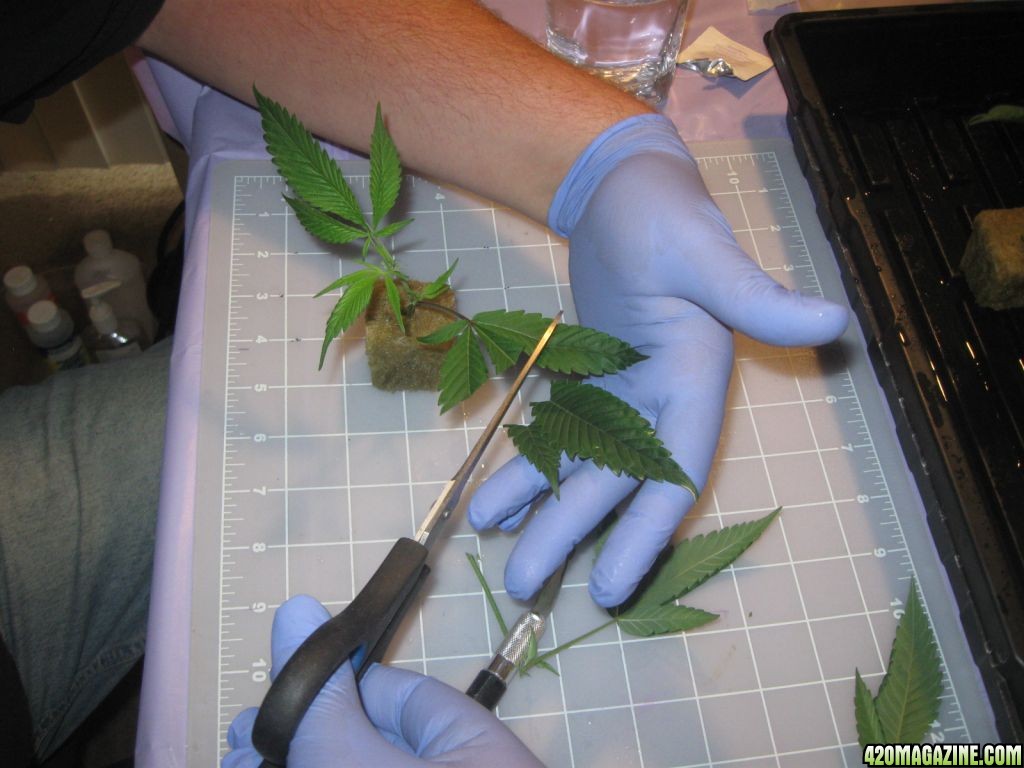
Another technique I employ is that of snipping the fans to reduce photosynthesis of available N and to encourage root growth beyond that of the rooting hormone.
I also find that when taking a large number of clones, it helps to get them all under the dome, if 50%-60% of the fans are clipped square.
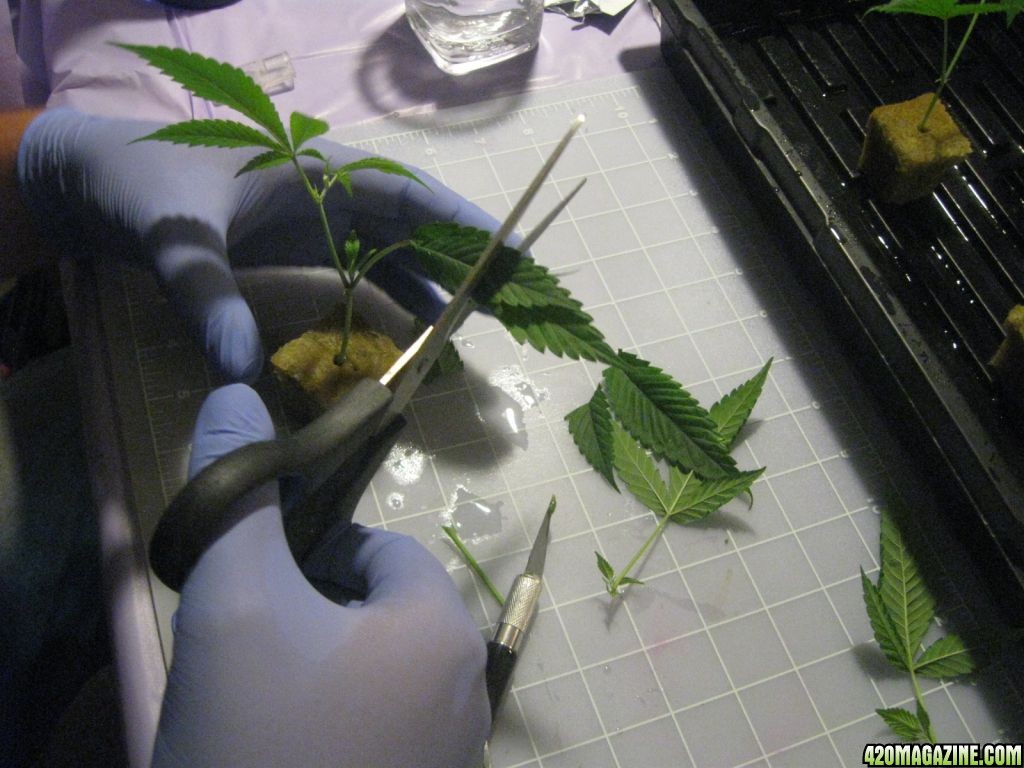
Don't forget to spray the dome!
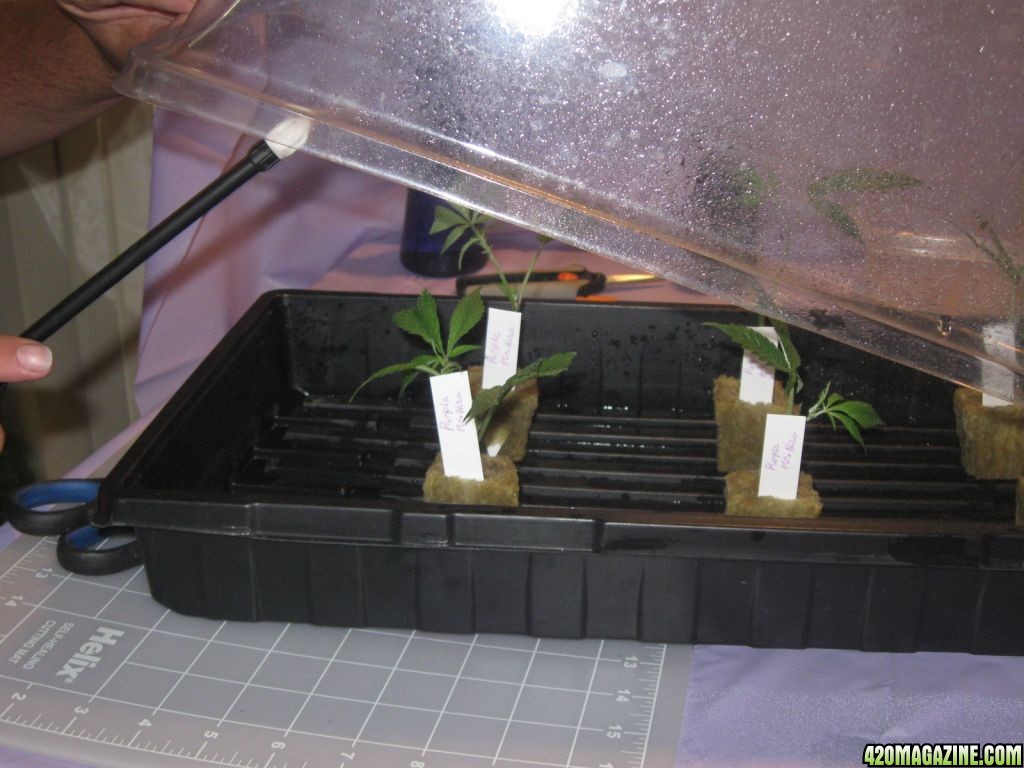 And don't forget to tag. I hate losing the strains in the veg bin.
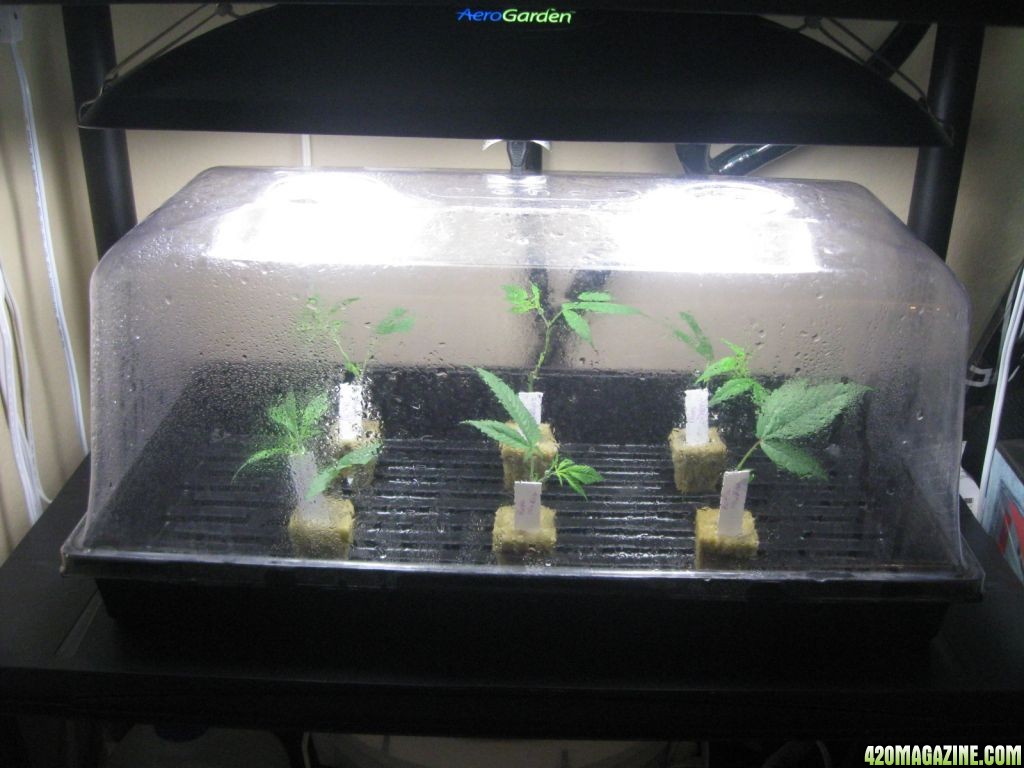
Now place under lights and don't forget them!!
RUBBING ALCOHOL
SURGICAL, OR EXAMINATION GLOVES (unless you're a hand washer)
SMALL SNIPS OR SCISSORS - Must be sharp!!
A SINGLE EDGE RAZOR BLADE - Must be sharp!! A new blade is best.
BACK-UP BLOCK - A piece of wood or plastic or cutting board
SHOT GLASS -Or similar small glass or plastic container.
SPRAY BOTTLE WITH WATER
SEED TRAY WITH CLEAR HUMIDITY DOME
GROWING MEDIUM - One of any of several growing media available at your local hydroponics stores (NOT SOIL).
ROOTING HORMONE - You will need a good quality rooting hormone. You can use a powdered rooting hormone but in My opinion they are much harder to work with resulting in a reduced success rate. Alternatively, you can make a "tea" of willow branches.
BEFORE YOU START
This is not recommended for the amateur at cloning, and therefore is not a step-by-step of the cloning process.
For that tutorial, go here: Cloning: Mad Simple
That is the introduction to cloning/propagation
Also, before we get going, fear is okay, failure is not.
Any questions are welcome, and expected if it is not fully understood how a one-cut cloning is performed.
In this tutorial it is assumed that the reader already knows the basics of cloning and is looking for a way to quickly take clones from one plant that is still relatively small and therefore should make as few cuts as possible.
For demonstration ease and clarity, I removed the plant from the Maternity Ward where all my mothers reside to show the before and after. I placed her in a B12 bath to prevent shock as well.
This is the plant we will be performing a TOP and SEVERAL Clones from just the main stem.
TAKE THE CUTTINGS
I made ONE CUT and placed this very large cut into the water glass immediately.
Some fluid leakage will occur when taking a cutting this far down, but it will dry and "scab over" quickly. If done correctly, the plant should recover from the trauma within three days.
I took many cuts at once from only that one stem that was overgrown and leggy and proved to be very a good candidate for this technique. After each snip, I placed the cut into the water. Keep in mind that there were three more cuts made than clones placed in cubes, but I was looking for the strongest out of the bunch. Otherwise I would have been hacking away at the plant to take several clones, and would have had MANY bleed sites for the plant to concentrate on healing.
I cut the Main Stem at EVERY OTHER NODE, which gave 3 clones.
The lower part of the main stem, when I got to it, had lateral growth large enough to be clones themselves.
In the sections that had had small growth, I snipped all but one fan or two fans, going on "feeling" and cut below the next node down.
This was the main stem before the trimming, and clipping.
And these are the clippings in the water glass, ready to dip into the gel, and go into rockwool.
and this is the amount of gel used for all of the clippings
Another technique I employ is that of snipping the fans to reduce photosynthesis of available N and to encourage root growth beyond that of the rooting hormone.
I also find that when taking a large number of clones, it helps to get them all under the dome, if 50%-60% of the fans are clipped square.
Don't forget to spray the dome!
Now place under lights and don't forget them!!