

Mad Cow Steakho
New Member
Damn, I had to type this son of a bitch out, but I hope you guys can get some use out of it.
Many people are reluctant to purchase indoor growing equipment online or from grow stores, particularly for their first small garden. Security measures and financial considerations often prevent would-be indoor growers from starting gardens.
Other first-time growers forge ahead with window gardens or inadequately lit closet set-ups with poor ventilations and wind up with a few handfuls of schwag after three months of waiting. There are no shortcuts to cultivating a healthy, abundant indoor garden. The grower must provide everything essential to healthy plant growth and development.
LIGHTING
When growing indoors, there's no substitute for high-intensity discharge lighting. It's by far the brightest, most efficient artifical light source. There are three types of HID lamps: metal handle, high-pressure sodium and mercury vapor. Mercury-vapor lamps are the cheapest and easiest to find, but their spectrum isn't sufficient to promote and mantain healthy plant growth. Metal halides (MH) emit a more complete spectrum and are excellent for vegitative growth. High-pressure sodium (HPS) fixtures produce the most light per watt and have an ideal spectrum for flowering. Both MH and HPS lamps can be used exclusively throughout the life cycle of the plant; however, a mix of the two spectrums is best.
It's difficult to find these fixtures without shopping at an indoor-garden
supply store, and they can be quite expensive. One exception is Regent, which manufactures 70-watt HPS security lamps that emit 6,300 lumens. These fixtures can be purchased at most large home centers or hardware stores; Home Depot sells them for around $45 each. You'll need at least two.
For those who wish to spend a little more, FarmTek sells several different types of HID lamps. They're mostly for use in farming applications, but can also be employed by indoor growers who want to maximize the amount of light in their gardens. FarmTek offers both ML and HPS fixtures from 70 to 400 watts in many different shapes and size and also carries replacement bulbs. FarmTek (farmtek.com) is primarily a mail-order operation, but you shouldn't have to worry about security (they sell a variety of farm supplies and equipment).
Fluorescent lighting isn't as efficient as HID, but it has a very evenly distributed spectrum, which is ideal for all phases of plant growth. It's not recommended for use as the sole light source for an indoor garden, but it makes excellent supplemental lighting when added to HPS fixtures. Fluorescent fixtures operate at much cooler temperatures and can be positioned very close to plant foliage. This makes it possible to mount them on walls and distribute light evenly throughout the garden. They can be found in most hardware stores and home centers and come in all shapes and sizes, with different bulb types and light outputs. The 24-inch strip fixtures are the easiest to work with in micro-gardens (3-5 plants or about 1 plant per 2.5 to 3 square feet). The dual-tube fixtures are made to operate two 40-watt bulbs. Home Depot sells them for about $20 each. They also carry daylight tubes that closely match the sun's spectrum, and aquarium and plant bulbs designed for gardening use. Compact fluorescents are recommended as well.
To maximize the effectiveness of the lighting, the walls and celing of the growroom should be as reflective as possible. Mylar is easy to hand and highly reflective, but it's expensive and hard to come by outside of grow shops. Aluminum foils are just plain hard to work with and aren't the best reflectors. Flat white paint is an inexpensive alternative, but it requires painting the walls and ceiling, which may not be an option. A convenient, inexpensive alternative is to use emergency camping blankets made of aluminum-laminated polyethylene. They're 52 by 84 inches, which makes them very easy to work with and highly reflective; they can be found at most department stores or wherever camping supplies are sold.
CLIMATE CONTROL
Ventilation is required to prevent C02 levels from being depleted, as well as to remove the excess heat of HID lights and keep temperatures down. Grow shops sell a wide variety of exhaust blowers made to ventilate an indoor garden. They range in price from $50 to $200, depending on the size, and work well in large gardens.
For smaller gardens, bathroom vent fans are an inexpensive alternative. They have exhaust ports where dryer hoses can be connected to direct the flow of air out of the garden. Home Depot carriers 70-cfm vent fans made by NuTone for about $20. They also have 3' X 50" vinyl vent hose for about the same price. You probably won't need that much, so check around---most hardware stores charge by the foot.
Circulation is also important: it keeps fresh air and CO2 moving across the foliage and prevents stagnant pockets of hot, humid air from forming in the garden. A simple 6-inch personal fan works great in a micro-garden and can be purchased at any department store for about $10 to $15.
You'll need some way to monitor the climate in the garden. A simple thermometer/hygrometer combo to measure temperature and humidity can also be bought for about $4 almost anywhere. It will give you a general idea of the conditions in the garden and must be read often to get a precise picture of the daily fluctuations that occur. This is where spending the extra few dollars is recommended. For $15, you can pick up an indoor/outdoor digital thermometer/hygrometer, which not only displays the current temperature and humidity in two seperate places, but also shows the minimums and maximums in each area since the last time it was reset. This gives you a more complete picture of the overall climatic conditions in your growroom.
ODOR CONTROL
Though it's not necessary to the health and well-being of your garden, odor control can have a great effect on your piece of mind. Venting, particularly to the outdoors, will help control most of the odor emanating from the garden, but you'll probably want something extra.
Ionizers and ozonators are the equipment of choice among large indoor growers, but they can cost as much as the lights or more. For a micro-garden, a HEPA air purifier ($45) will keep the odor down. Since it's too big to place directly in the garden, the purifier should be located just outside of it, wherever the odor is the strongest. Another option is th Pollenex Personal Space air purifier ($20). This unit is intended to work in small areas, so it can be placed right in the garden. Air purifiers aren't as effective as ionizers and ozonators, but it shouldn't be too hard to mask what little odor is produced by a micro-garden.
ELECTRICAL
You'll need to put the lights on a timer to allow you to manipulate the light cycle and artificially force flowering. You'll also need some extension cords and an outlet strip. All of these items can be bought at any department store. Make sure you buy a heavy-duty, grounded appliance timer. The timer and power strip should be able to handle a 15-amp load, and the extension cords should be 14-gauge or heavier. Heavy-duty appliance timers cost $5 at hardware outlets. Home Depot has 15-amp, 8-outlet power strips for about $7 and 14 gauge, 6-foot extension cords for $5 each.
GARDENING SUPPLIES/EQUIPMENT
Organic gardening is the simplest way to start. All you need is a good soil mix and some fertilizer. There are about as many soil mixes as there are gardeners. The key is to start with a high-quality potting soil. Avoid clumpy, muddy soilsl it should be easy to crumble and rich with organic matter. Adding perlite, vermiculite or sand to the mix will help loosen the soil and build it up a bit. You can mix in some organic fertilizer as well. The following are three simple organic soil mixes.
5 parts potting soil
2 parts perlite or vermiculite
5 parts wood ash
5 parts potting soil
2 parts perlite or vermiculite
1 part manure
1 part wood ash
5 parts potting soil
2 parts perlite or vermiculite
Organic mixes tend to be a little acidic. To sweeten the soil and stabilize the PH, add one cup of lime for eery 5 lbs. of manure.
Potting soil, fertilizer and osil amendments can all be found at garden-supply shops. This is another area where you don't want to skimp. They're all relatively inexpensive, but they can make a big difference in quality, so buy the best products. For containers, you'll want 6-inch pots to start your plants, and 2-gallon or larger pots to finish them. Make sure the ones you buy allow for drainage or cut holes in the bottom yourself. Make sure to add a 2-gallon watering can ($2.500 and a 1-quart misting bottle ($1) to your shopping cart.
EXTRAS
A few simple garden tools will make mixing and cultivating the soil much easier. Hand trowels, cultivators and pruners are all about $3 each at most department stores and garden centers. They usually have soil-test kits and pH meters as well. Look for a 3-in-1 moisture, pH and light meter ($10). Pick up a roll of plastic to protect against spills and runoff and a roll of duct tape.
ASSEMBLING THE GROWROOM
Assuming you've found a location for the growroom and have worked out a ventilation strategy, follow these step by step instructions to build your micro- garden.
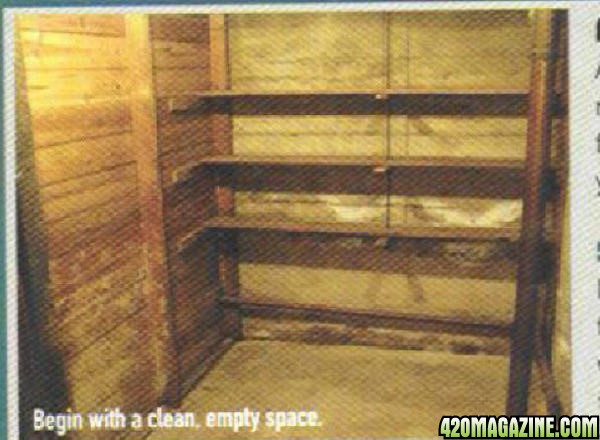
Step 1: Prepare the Location
Begin by making any necessary modifications to the location. For example, if you must build walls or cut out a hold for ventilation, now's the time to do it. Next, using tacks or tape, cover the walls or celing (if possible) with the emergency camping blankets. The cut or fold the plastic and cover the floor of the growroom.
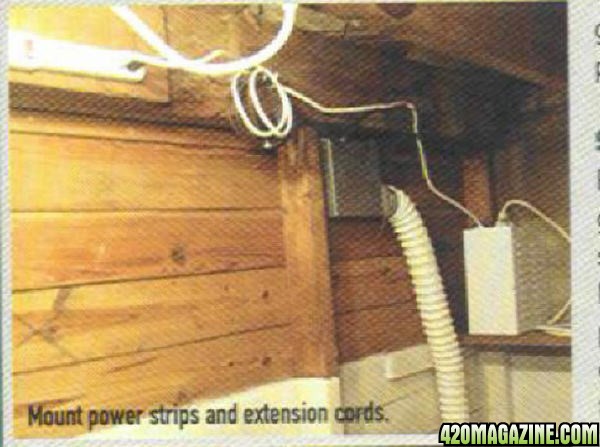
Step 2: Power Strip and Extension Cords
Plug the appliance timer into the nearest grounded outlet. Then plug the 8-outler power strip into the timer and run it into the growroom. If the nearest outlet is too far away to allow the power strip to be placed in the garden, run an extension cord between the two. You can mount the power strip to the wall and place it somewhere out of the way, preferably off the floor.
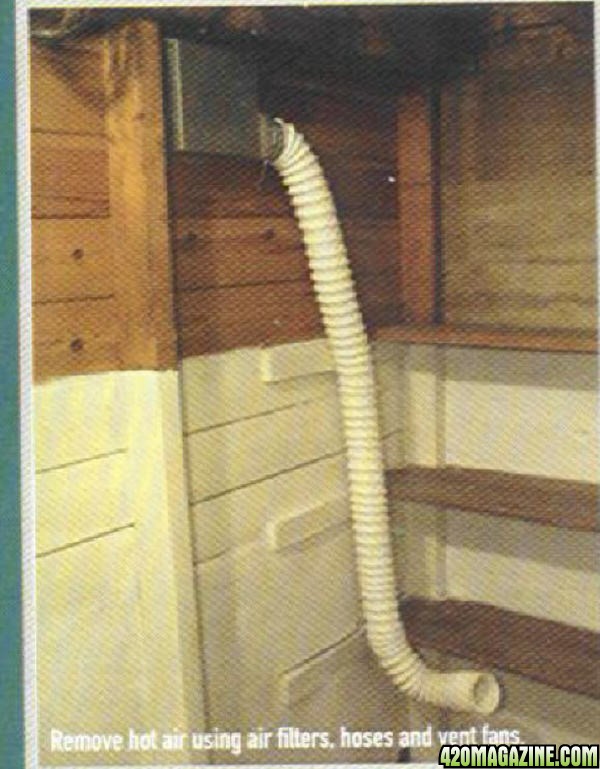
Step 3: Mount the Equipment
Install the exhaust fan on the wall at the top of the growroom, near the opening you've created or left for ventilation. Attach the dryer vent hose to the exhaust port with duct tape and run it out through the ventilation hole. Attach the two 70-watt HPS fixtures to the center of the walls, 4 feet up on opposite sides from one another, as recommended by the manufacturer. You can also hang them from eye hooks off the ceiling using a chain. This would allow you to move them up and down and keep them as close to the plants as possible.
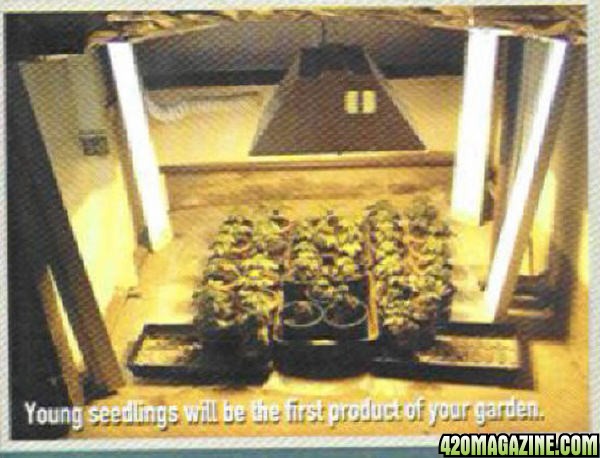
Mount the four 2-foot fluorescent fixtures standing on end, one in each corner, 18 inches off the ground with the plugs facing up. Place the personal fan in the garden---either mount it in the middle of a wall a few feet up or put it on the floor somewhere out of the way. Make sure you leave room behind it for air intake. Lastly mount the digital thermometer/hygrometer (T/H) on the wall where it will be easy to read and reset.
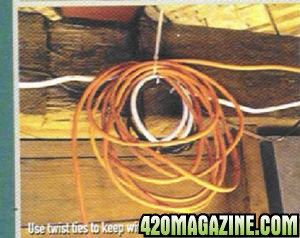
Step 4: Make the Power Connections
Run the extension cords from each powered device into the 8-outlet power strip. Try to keep them off the floor and out of the way. Use twist ties to bind them together and electrical staples to secure them to the walls or celing.
Step 5: Power Up and Test the Growroom
Set the timer to an 18/6-hour on/off schedule, reset the minimums and maximums on the digital thermometer, and power up the equipment. Checks to make sure that all the bulbs ignite and burn properly, the fan is circulating air and the ventilation is functioning. Run the growroom for 24 hours, checking the climatic conditions periodically. This is where the digital T/H will come in handy: You can monitor the minimum and maximum temperature and humidity at the touch of a buttom. If all goes well, your growroom should remain within acceptable climatic limits.
Author: Max Yields
Many people are reluctant to purchase indoor growing equipment online or from grow stores, particularly for their first small garden. Security measures and financial considerations often prevent would-be indoor growers from starting gardens.
Other first-time growers forge ahead with window gardens or inadequately lit closet set-ups with poor ventilations and wind up with a few handfuls of schwag after three months of waiting. There are no shortcuts to cultivating a healthy, abundant indoor garden. The grower must provide everything essential to healthy plant growth and development.
LIGHTING
When growing indoors, there's no substitute for high-intensity discharge lighting. It's by far the brightest, most efficient artifical light source. There are three types of HID lamps: metal handle, high-pressure sodium and mercury vapor. Mercury-vapor lamps are the cheapest and easiest to find, but their spectrum isn't sufficient to promote and mantain healthy plant growth. Metal halides (MH) emit a more complete spectrum and are excellent for vegitative growth. High-pressure sodium (HPS) fixtures produce the most light per watt and have an ideal spectrum for flowering. Both MH and HPS lamps can be used exclusively throughout the life cycle of the plant; however, a mix of the two spectrums is best.
It's difficult to find these fixtures without shopping at an indoor-garden
supply store, and they can be quite expensive. One exception is Regent, which manufactures 70-watt HPS security lamps that emit 6,300 lumens. These fixtures can be purchased at most large home centers or hardware stores; Home Depot sells them for around $45 each. You'll need at least two.
For those who wish to spend a little more, FarmTek sells several different types of HID lamps. They're mostly for use in farming applications, but can also be employed by indoor growers who want to maximize the amount of light in their gardens. FarmTek offers both ML and HPS fixtures from 70 to 400 watts in many different shapes and size and also carries replacement bulbs. FarmTek (farmtek.com) is primarily a mail-order operation, but you shouldn't have to worry about security (they sell a variety of farm supplies and equipment).
Fluorescent lighting isn't as efficient as HID, but it has a very evenly distributed spectrum, which is ideal for all phases of plant growth. It's not recommended for use as the sole light source for an indoor garden, but it makes excellent supplemental lighting when added to HPS fixtures. Fluorescent fixtures operate at much cooler temperatures and can be positioned very close to plant foliage. This makes it possible to mount them on walls and distribute light evenly throughout the garden. They can be found in most hardware stores and home centers and come in all shapes and sizes, with different bulb types and light outputs. The 24-inch strip fixtures are the easiest to work with in micro-gardens (3-5 plants or about 1 plant per 2.5 to 3 square feet). The dual-tube fixtures are made to operate two 40-watt bulbs. Home Depot sells them for about $20 each. They also carry daylight tubes that closely match the sun's spectrum, and aquarium and plant bulbs designed for gardening use. Compact fluorescents are recommended as well.
To maximize the effectiveness of the lighting, the walls and celing of the growroom should be as reflective as possible. Mylar is easy to hand and highly reflective, but it's expensive and hard to come by outside of grow shops. Aluminum foils are just plain hard to work with and aren't the best reflectors. Flat white paint is an inexpensive alternative, but it requires painting the walls and ceiling, which may not be an option. A convenient, inexpensive alternative is to use emergency camping blankets made of aluminum-laminated polyethylene. They're 52 by 84 inches, which makes them very easy to work with and highly reflective; they can be found at most department stores or wherever camping supplies are sold.
CLIMATE CONTROL
Ventilation is required to prevent C02 levels from being depleted, as well as to remove the excess heat of HID lights and keep temperatures down. Grow shops sell a wide variety of exhaust blowers made to ventilate an indoor garden. They range in price from $50 to $200, depending on the size, and work well in large gardens.
For smaller gardens, bathroom vent fans are an inexpensive alternative. They have exhaust ports where dryer hoses can be connected to direct the flow of air out of the garden. Home Depot carriers 70-cfm vent fans made by NuTone for about $20. They also have 3' X 50" vinyl vent hose for about the same price. You probably won't need that much, so check around---most hardware stores charge by the foot.
Circulation is also important: it keeps fresh air and CO2 moving across the foliage and prevents stagnant pockets of hot, humid air from forming in the garden. A simple 6-inch personal fan works great in a micro-garden and can be purchased at any department store for about $10 to $15.
You'll need some way to monitor the climate in the garden. A simple thermometer/hygrometer combo to measure temperature and humidity can also be bought for about $4 almost anywhere. It will give you a general idea of the conditions in the garden and must be read often to get a precise picture of the daily fluctuations that occur. This is where spending the extra few dollars is recommended. For $15, you can pick up an indoor/outdoor digital thermometer/hygrometer, which not only displays the current temperature and humidity in two seperate places, but also shows the minimums and maximums in each area since the last time it was reset. This gives you a more complete picture of the overall climatic conditions in your growroom.
ODOR CONTROL
Though it's not necessary to the health and well-being of your garden, odor control can have a great effect on your piece of mind. Venting, particularly to the outdoors, will help control most of the odor emanating from the garden, but you'll probably want something extra.
Ionizers and ozonators are the equipment of choice among large indoor growers, but they can cost as much as the lights or more. For a micro-garden, a HEPA air purifier ($45) will keep the odor down. Since it's too big to place directly in the garden, the purifier should be located just outside of it, wherever the odor is the strongest. Another option is th Pollenex Personal Space air purifier ($20). This unit is intended to work in small areas, so it can be placed right in the garden. Air purifiers aren't as effective as ionizers and ozonators, but it shouldn't be too hard to mask what little odor is produced by a micro-garden.
ELECTRICAL
You'll need to put the lights on a timer to allow you to manipulate the light cycle and artificially force flowering. You'll also need some extension cords and an outlet strip. All of these items can be bought at any department store. Make sure you buy a heavy-duty, grounded appliance timer. The timer and power strip should be able to handle a 15-amp load, and the extension cords should be 14-gauge or heavier. Heavy-duty appliance timers cost $5 at hardware outlets. Home Depot has 15-amp, 8-outlet power strips for about $7 and 14 gauge, 6-foot extension cords for $5 each.
GARDENING SUPPLIES/EQUIPMENT
Organic gardening is the simplest way to start. All you need is a good soil mix and some fertilizer. There are about as many soil mixes as there are gardeners. The key is to start with a high-quality potting soil. Avoid clumpy, muddy soilsl it should be easy to crumble and rich with organic matter. Adding perlite, vermiculite or sand to the mix will help loosen the soil and build it up a bit. You can mix in some organic fertilizer as well. The following are three simple organic soil mixes.
5 parts potting soil
2 parts perlite or vermiculite
5 parts wood ash
5 parts potting soil
2 parts perlite or vermiculite
1 part manure
1 part wood ash
5 parts potting soil
2 parts perlite or vermiculite
Organic mixes tend to be a little acidic. To sweeten the soil and stabilize the PH, add one cup of lime for eery 5 lbs. of manure.
Potting soil, fertilizer and osil amendments can all be found at garden-supply shops. This is another area where you don't want to skimp. They're all relatively inexpensive, but they can make a big difference in quality, so buy the best products. For containers, you'll want 6-inch pots to start your plants, and 2-gallon or larger pots to finish them. Make sure the ones you buy allow for drainage or cut holes in the bottom yourself. Make sure to add a 2-gallon watering can ($2.500 and a 1-quart misting bottle ($1) to your shopping cart.
EXTRAS
A few simple garden tools will make mixing and cultivating the soil much easier. Hand trowels, cultivators and pruners are all about $3 each at most department stores and garden centers. They usually have soil-test kits and pH meters as well. Look for a 3-in-1 moisture, pH and light meter ($10). Pick up a roll of plastic to protect against spills and runoff and a roll of duct tape.
ASSEMBLING THE GROWROOM
Assuming you've found a location for the growroom and have worked out a ventilation strategy, follow these step by step instructions to build your micro- garden.
Step 1: Prepare the Location
Begin by making any necessary modifications to the location. For example, if you must build walls or cut out a hold for ventilation, now's the time to do it. Next, using tacks or tape, cover the walls or celing (if possible) with the emergency camping blankets. The cut or fold the plastic and cover the floor of the growroom.
Step 2: Power Strip and Extension Cords
Plug the appliance timer into the nearest grounded outlet. Then plug the 8-outler power strip into the timer and run it into the growroom. If the nearest outlet is too far away to allow the power strip to be placed in the garden, run an extension cord between the two. You can mount the power strip to the wall and place it somewhere out of the way, preferably off the floor.
Step 3: Mount the Equipment
Install the exhaust fan on the wall at the top of the growroom, near the opening you've created or left for ventilation. Attach the dryer vent hose to the exhaust port with duct tape and run it out through the ventilation hole. Attach the two 70-watt HPS fixtures to the center of the walls, 4 feet up on opposite sides from one another, as recommended by the manufacturer. You can also hang them from eye hooks off the ceiling using a chain. This would allow you to move them up and down and keep them as close to the plants as possible.
Mount the four 2-foot fluorescent fixtures standing on end, one in each corner, 18 inches off the ground with the plugs facing up. Place the personal fan in the garden---either mount it in the middle of a wall a few feet up or put it on the floor somewhere out of the way. Make sure you leave room behind it for air intake. Lastly mount the digital thermometer/hygrometer (T/H) on the wall where it will be easy to read and reset.
Step 4: Make the Power Connections
Run the extension cords from each powered device into the 8-outlet power strip. Try to keep them off the floor and out of the way. Use twist ties to bind them together and electrical staples to secure them to the walls or celing.
Step 5: Power Up and Test the Growroom
Set the timer to an 18/6-hour on/off schedule, reset the minimums and maximums on the digital thermometer, and power up the equipment. Checks to make sure that all the bulbs ignite and burn properly, the fan is circulating air and the ventilation is functioning. Run the growroom for 24 hours, checking the climatic conditions periodically. This is where the digital T/H will come in handy: You can monitor the minimum and maximum temperature and humidity at the touch of a buttom. If all goes well, your growroom should remain within acceptable climatic limits.
Author: Max Yields


 dude u rule now i can growing twice as much bud