KJ's T5/CFL 1st Time Grow

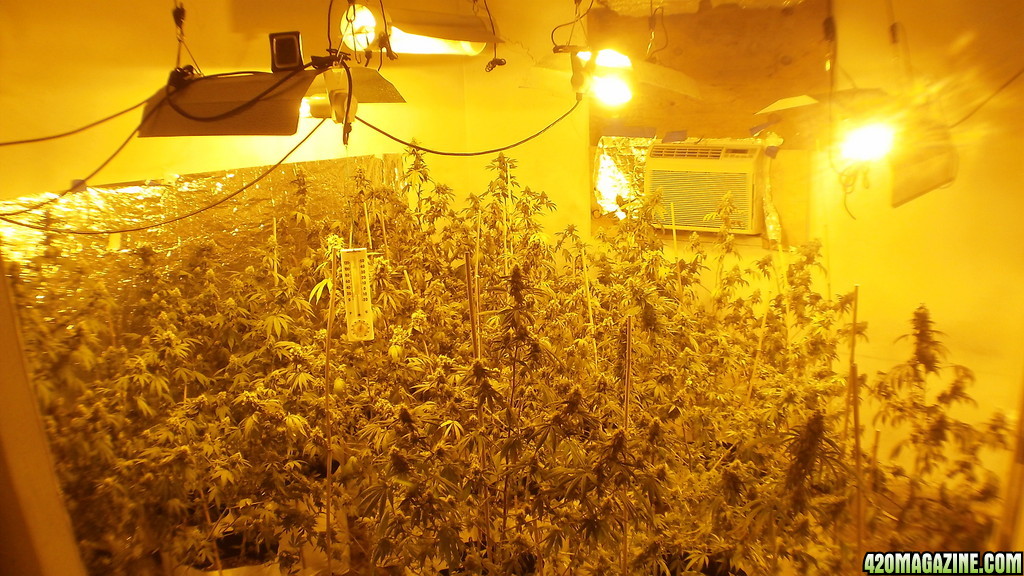
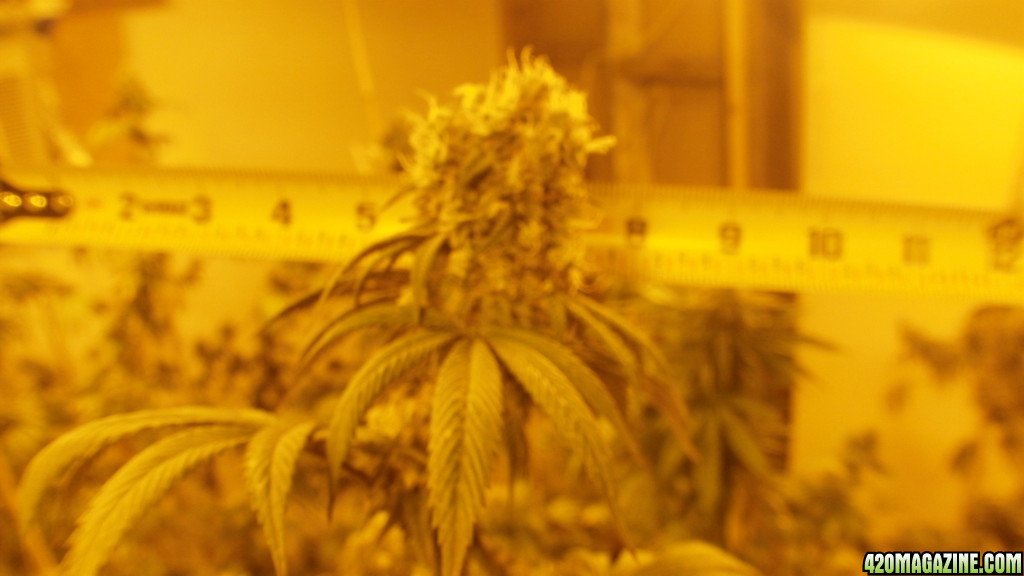
HEY! I haven't updated in a while. The 2nd grow is mostly in flush with a harvest any day now. I'm seeing enough amber in some to start now, but I wanted a bit more flush time.

I expect 16 of the 26 in grow 2 to be harvested later this week and the other 10 in about 3 or 4 weeks later.

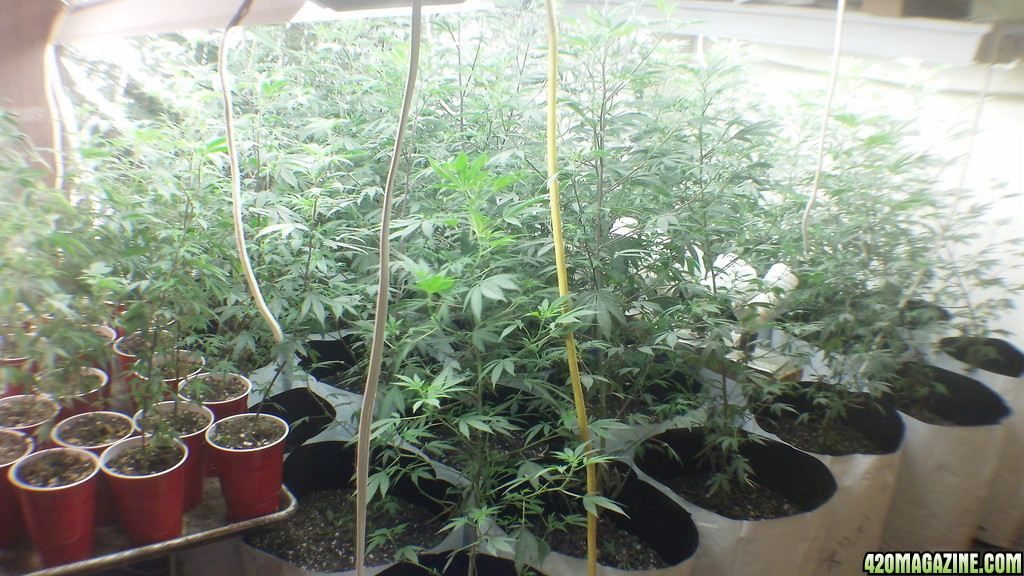
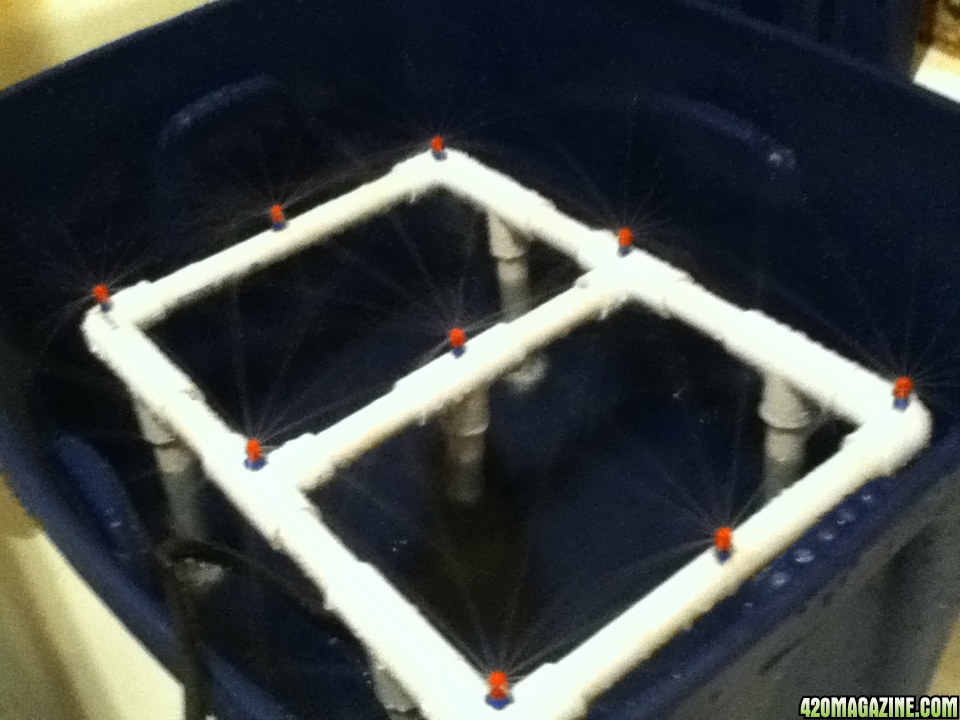
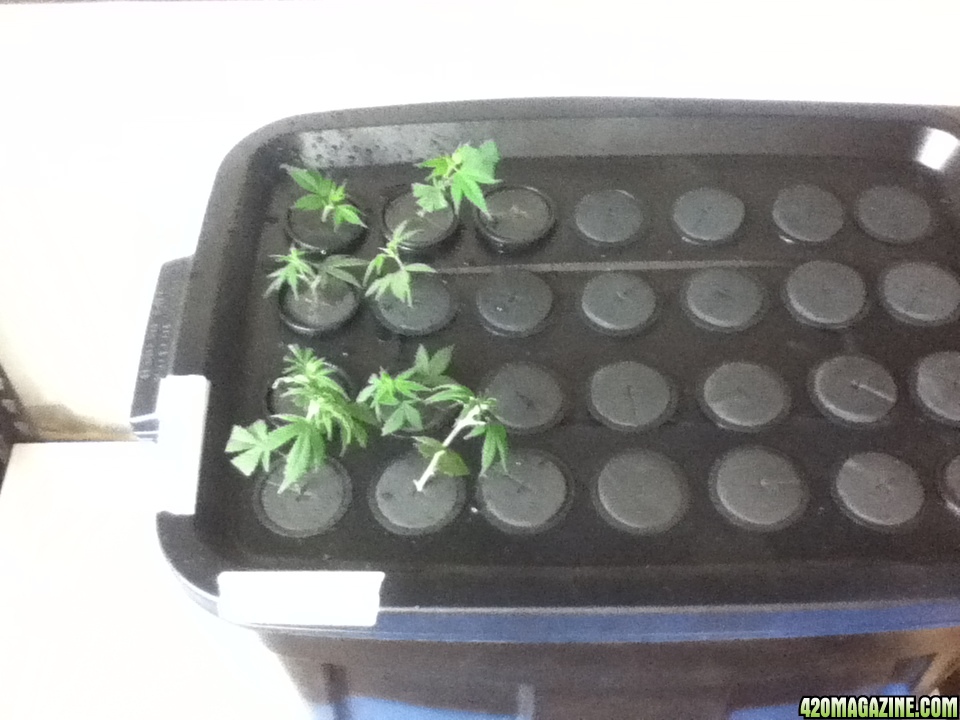
Grow 3 is 26 plants in veg and they are very ready for flower, but I don't have enough space in the flower room.

Grow 4 is overdue to get into 5 gallon grow bags and I can't do anything about that until my veg room is cleared out.

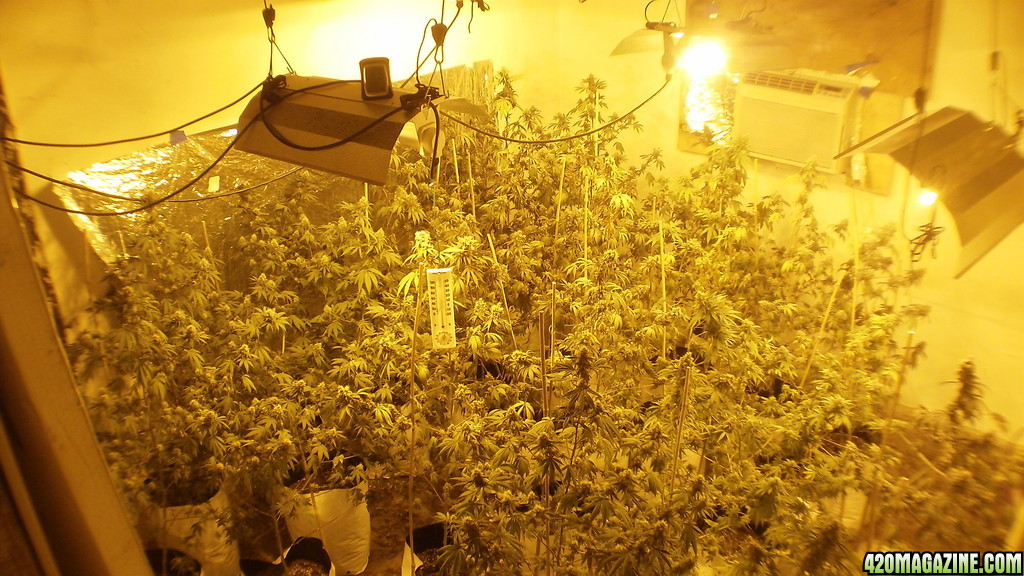
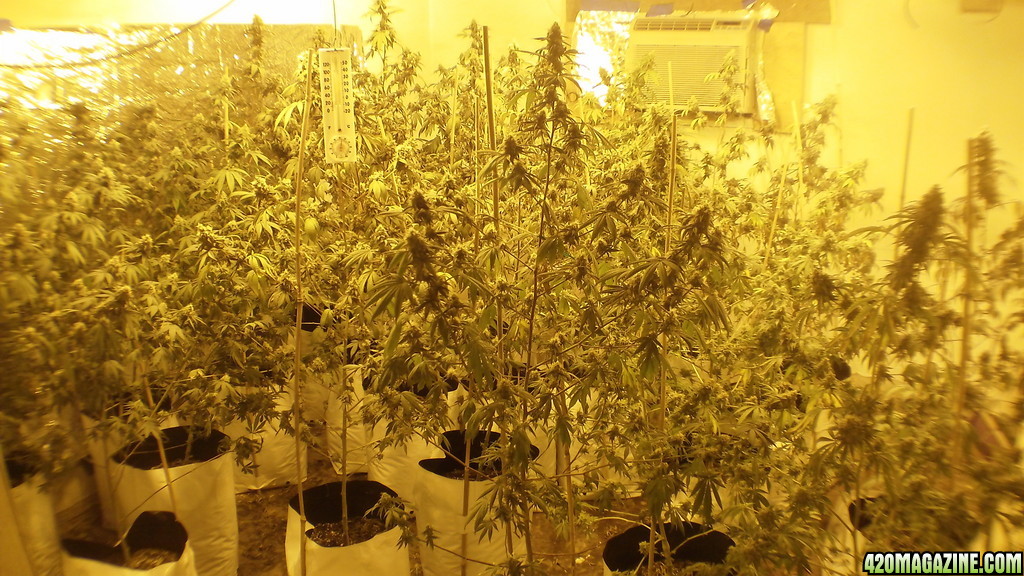
So... Space is once again an issue. I currently have 26 in flower, 48 in veg. I think one problem is the amount of time they stay in flower.

I think the ideal is to have 2 flowering rooms or a flower room that's 2X the size of the veg room.

This whole timing thing is going to take a while to get sorted out, but I'll get there.

Even as it is now, I'm going to have 37 in flower in about a week and that's really going to get crowded in there.

One other option is to convert the veg room into a veg/flower room by changing from current T8/CFLs over to HPS. I don't think I have the power to run much more than I'm running now.

We're having a heatwave and I've got 3 AC units running and it's barely keeping things under control.

I'll take some pic and have a full update soon.
 
Ok, got around to some new pics. The buds are clearly larger than last time, but there is "less" of a plant to harvest because although the are as tall and many taller than the tallest of the 1st grow, they don't have anything on the bottom.

I don't know if the larger buds will cover the loss of the lower branches, they did add up to quite a bit last time. They will be easier to harvest, less medium size branches to trim.

They've been flushed and ready to harvest whenever I want, amber is right about where it was last time.

16 of the 26 will be harvested, the other 10 were held back for cloning the 4th grow, so they'll be ready in something like 4 weeks.

This may actually be the solution to the space problem, move grows into flow 1/2 at a time... don't know, that sounds like a kludge. I'll get it figured out sooner or later :D

The ones in the red cups are WAY overdue for going into 5 gallon bags and there's NO CHANCE of waiting 4 more weeks to transplant them, so I'll have to figure out something.
116_3034.JPG
116_3035.JPG
116_3042.JPG
116_3049.JPG
116_3050.JPG


116_3046.JPG
116_3047.JPG


Busy guarding the goods :D

116_3048.JPG
 
The harvest of grow 2 has started! I'm hoping to get a few plants done tonight, it might be a LONG night.

I can tell from just one plant being trimmed out, that the per plant is NOT likely to be as much as the 1st. I'm (right at this second) convinced that cutting the lower branches off did not make the upper buds big enough to make it worthwhile.

Haven't weighed anything, but that's just the way it looks and it actually looks pretty clear to me.

On the upside, the upper bud sites do look impressive compared to the 1st grow, they really kicked in during the final week.
 
KarlJay,

With my small tent and lacl of courage, I won’t have more than two plants growing at one time. What you accomplished was phenomenal. I have a distinct feeling though that I will seriously need to consider cloning. It's finding a separate room to do it in and the equipment I'll need that has me overwhelmed!

:Namaste:

Jeff
 
Thanks Jeff, it's been a bit of work to say the least :D ...My homemade DIY clone machine has done pretty well. Total cost is about $40 and it could fit in some cheap oversized moving box or one of those portable closet things.

It really isn't that hard, but I have had issues with the last two rounds. The last round about 5 didn't live, a few didn't root. I think the 1st clones, I changed the water after 1 week and that could be the issue.

I don't know where you get your source, but I see clones as basically free. Locally they charge $10 for little ones, but they are rooted. If I paid for all my clones, that would have been about $800. That's about what I have invested in the 4 HPS grow lights.

... Not to mention, you can select which plants you want to clone, I try to take mostly from the "branchy" ones.

Overall, it's a great investment if you intend to continue.

One down side is that if you want to switch strains, you have to buy at least one of that strain, then getting a big grow going would take a while.

Update: got 6 plants harvested and into drying, now the hanging drying bin is full. Found 1 branch with powder on it, probably should have cleaned the room better between grows, I though the spray down was enough.

All the upper buds are much stockier than the ones from grow1. Easier to trim without all the baby popcorn at the center of the plant.

The whole timing thing is clearly wrong. I have 16 of the 26 in flower ready for harvest, which means that grow 3 going into flower would give me 37 in flower (in a room that is 9x11) Don't think it'll work well. I can't move the plants from the cups until that area is cleared out.

I'm going have to do some math and get this figured out. I'd also have to go back and check, but it looks like the last harvest was probably 2 months ago.

maybe I need to forget 1 harvest /month and shoot for every other month.

KarlJay,

I was thinking about just using clones from my own plants. I know I would need to find another spot for them, because they will be in need of a different light schedule than I am on with the mothers, that's where my problem lies. How much space do I need? Do I need 100% light integrity, can I get away under some sink or something? What extra equipment would I need to process these successfully until they are ready for the main veg light again?

Thanks

:Namaste:

Jeff
 
The space depends on how many you are doing. My setup is a Walmart bought rubbermaid 18 gallon tub w/lid. I cut 28 2" holes and use one of the holes for the pump cord.

I think it's about 2'x3' or so.

The height is about 18" then the plants would want about 1' and the lights would probably be another 1'. Under a sink, you'd need a shorter tub.

You can go with rockwool, it would be shorter. I've even heard some clone straight to soil, but I've never done these.

Rockwool is common and cheap, I think it comes in a tray and you just add water. This would fit under a standard kitchen sink.

The light cycles really need to be held to. More so if you are in flower. The 18/6 veg is what I use for clone, so you CAN clone in a veg room.

You can buy some panda plastic to control light. I use that for my drying and veg room because I don't have doors (doing a remodel).

Be creative, people grow in speaker, computer boxes, attics, sheds, ... all over the place.

As far as the equipment, a few CFL lights and a rockwool tray would do.
 
One more plant to go for the one's that are ready to harvest from grow 2. Grow 2 has 26 plants and 16 are harvest ready, 10 were held back for cloning. 15 of the 16 harvest ready are in drying now!

The rack is full, the closet is near full and the last plant will completely fill the closet.

Given the 1st grow was 10 full plants and this partial harvest is 16, I'd say the space used is close to the same. Although the buds are bigger and heavier, the drying space used is about the same.

If the 1st harvest was 10 pllants making 3lbs, the 2nd round should be 16 plants making maybe 4+lbs ... at this point, I don't see that happening.

I still have no clue if removing the lower branches made the bud bigger or if the feeding, better lighting, etc... made the buds bigger. I can say the trimming process was easier than before, those dam finger tip popcorns took a while to trim because of how many there was.

So I'll have to get a 'real' scale to find out for sure.

One other note: I talked and asked about those auto-trimmers. This being my second round of hand trimming for a total of something near 6 lbs, I'm going to pass on the auto-trimmers for this reason:
When I trim, I reach in and snip the larger leaves 1st and then work my way around the buds. A fixed blade will only cut what sticks out and because I have never seen a well trimmed bud from an auto-trimmer, I'll have to assume they CAN'T do a well trimmed bud.

Consider: If they could do a well trimmed bud, wouldn't they show up close just how good the trimming is? What they do show is bud that doesn't seem to be very 'chunky' with fingers, those fingers would likely be cut off in an auto trimmer. Also, the stem of the leaves would still be there.

Many of the 2nd batch of lady bugs are still alive! Those ladybugs sure do know how to hang on :D, had to flick them off to the other plants.

When checking for amber trichs, I found ZERO bugs, so that good news.

I'm going to clean out the 1/2 ton of dead leaves from the flower room and get the 3rd grow in there, for a total of 37 plants in flower! Then the 4th grow goes from cups to bags (fun fun fun)

I should probably take clone before grow 3 goes into flower, but I've still off on the timing. Might end up hold some back for clone again.

The timing answer might be partial harvesting like I'm doing now, where I harvest 16 of the 26... Gotta think about that one for a while.

I'll get working on the scale and post up some pics soon.
 
The space depends on how many you are doing. My setup is a Walmart bought rubbermaid 18 gallon tub w/lid. I cut 28 2" holes and use one of the holes for the pump cord.

I think it's about 2'x3' or so.

The height is about 18" then the plants would want about 1' and the lights would probably be another 1'. Under a sink, you'd need a shorter tub.

You can go with rockwool, it would be shorter. I've even heard some clone straight to soil, but I've never done these.

Rockwool is common and cheap, I think it comes in a tray and you just add water. This would fit under a standard kitchen sink.

The light cycles really need to be held to. More so if you are in flower. The 18/6 veg is what I use for clone, so you CAN clone in a veg room.

You can buy some panda plastic to control light. I use that for my drying and veg room because I don't have doors (doing a remodel).

Be creative, people grow in speaker, computer boxes, attics, sheds, ... all over the place.

As far as the equipment, a few CFL lights and a rockwool tray would do.

Sorry for taking up your time, I get the rubbermaid tub, but the 28 2" holes? on the cover or bottom of tub? I'm trying to visualize this. You mentioned a pump tube? What is that for?

:Namaste:

Jeff
 
Sorry for taking up your time, I get the rubbermaid tub, but the 28 2" holes? on the cover or bottom of tub? I'm trying to visualize this. You mentioned a pump tube? What is that for?

:Namaste:

Jeff
NP Jeff, we're all here to learn, and I'm happy to help!

Ok, I used the Rubbermaid because it was more squared off and stronger. The lid on the Rubbermaid was mostly flat and was thicker. The other brands/styles had ridges on the lid, my lid is mostly flat.

Parts List:
1 tub (black or DARK blue, you can paint the outside like I did too)
28 2" poly foam pucks / disks / stem holders
28 2" baskets that the poly foam pucks fit in
12 or more spray jets (the spray jets need to spray, not STREAM the water, stream jets don't work, SPRAY jets do).
10' section of 1/2" PVC tube
4 PVC elbows
7 PVC 'T's
4 PVC caps
1 water pump, about 200 gallon/min or more

Tools:
Saw, drill, hole saw

Directions:
Take a 2" or 1 7/8" hole saw and make 28 holes in the lid of the tub. Check to make sure the baskets fit in the hole without falling thru.

Take the baskets and cut the bottoms off so that they are about the same height of the foam pucks. Place the pucks in the basket tops and place that into each of the holes.

Now you have a clone holder. You cut your clone, place it in the foam puck and place the foam puck in the basket then into the hole you drilled. The rooting area of the clone should stick down about 1 to 2 inches to get the water spray.


Water sprayer:
Make a figure 8 from the PVC parts.

You won't need much of the 10' 1/2 PVC pipe, but that's usually how they sell it.

Start with elbow at the corner, then 'T' pointing down for a leg, then 'T' for the middle of the figure 8, then 'T' for the next leg, elbow for the corner...
Now you have 1/2 the sprayer, Elbow,T,T,T,Elbow

Make one more of the same, now you have the 2 sides.

Make the 3 middle sections to connect the 2 halves. Elbow to elbow, T to T, Elbow to elbow.

Now you have a figure 8 with 4 openings for legs.

You need the extra T for the pump, cut the center of the figure 8, add a T and attach the pump.

Now you need legs. cut 4 legs from the PVC, put them into the 4 T's and add the caps at the bottom.

Now you have a figure 8 with a pump in the center and 4 legs.

Drill about 9 to 12 holes for the SPRAY jets. The hole you drill is SMALL and the jets have threads. Make the hole big enough to catch the threads, but small enough to seal. Screw in the spray jets. This part sucks because those jets are small and you have to push hard without breaking it.

Place the sprayer inside the tube and recut the legs so that the spray is all over the lid and will come out of the tub if the lid is not on. The sprayer is probably near 10" tall or so.

Run the power cord for the pump thru one of the pucks and out to a plug, you run the cord thru the puck to keep it water tight and allows the lid to seal.

Notes:


The pump MUST RUN 24/7 - non stop! It always runs!

You should spray the plants as needed, they are stressed and could use it and maybe some Vit B1?


when you cut the legs, make them a bit long so you can adjust them later by cutting a bit off.
The pump is light and doesn't need to rest on the bottom of the tub, close to the bottom is best so that the spray won't wobble so much.
I didn't use any PVC glue/sealer, just pushed them together.
You might get PVC parts in the tube when you drill the holes, this parts will clog up the spray jets. Wash the sprayer before you add the jets to get rid of the junk. You can blow out the jets if they get clogged.

I use clear PH'd water for my clones, I don't use honey or root helpers. You probably need to change the water every week or so of the cloning process, you should see roots in about 10 days or so.

I do 28 just in case some fail.

I see clones as free, I threw away about 15 nice clones when I did my last run because I didn't have enough room for them and I was removing the lower branches to see if that would help with bud growth.

I usually pull clones from "Known good producers" Kinda like selective breeding, it seem to be working.

After clones, I go to large plastic cups, you can and should go to something larger, but again, I don't have enough space. I'm running about 73 plants right now and I've had about 94 at one time before... they take space, more than I have right now.

If you have great luck, you can always give/trade your clones to some locals. You give away some good clones and you may have bought yourself a favor from another grower, they may have clones for you next time (just be careful of bugs and stuff).
 
Here's a few pics:
IMG_014828.JPG
IMG_014723.JPG
IMG_011826.JPG


the red jets in the last pic are STREAM jets not SPRAY jets... Notice how they have streams of water instead of a sheet of water. These came from Home Depot, the SPRAY jets came from replacement jets from a brand name clone machine.

also, notice how flat the lid is. Easier to work with.

I use black fusion plastic paint on this after I got it working to help keep light out. Roots don't like air and light.


IMG_018617.JPG
IMG_017825.JPG
IMG_018425.JPG
 
KarlJay, you are a friggin' genius!!! Is that white strip above the rubbermaid your CFL's attached to a bucket or a 4ft fluorescent? are those 6400k bulbs, 4 of them or less??? Do you need to keep it dark at all or can it be in the open light? Freakin' Amazing! I am impressed!!!!

:Namaste:

Jeff
 
KarlJay, you are a friggin' genius!!! Is that white strip above the rubbermaid your CFL's attached to a bucket or a 4ft fluorescent? are those 6400k bulbs, 4 of them or less??? Do you need to keep it dark at all or can it be in the open light? Freakin' Amazing! I am impressed!!!!
:Namaste:
Jeff
Thanks! Always glad to help. I was going to use a 4' HO T8 that I made from a putting 2 Walmart light ballest together into one unit, but that wouldn't fit into the clone closet. So I use 4 or 5 CFLs. I don't remember the K value, but they are veg probably near 6500K. As far as light/dark I use 18hours on 6 hours off and yes you do need true dark.

Panda plastic is $1/foot here and I think it's 12' wide. So a 10'x12' is $10 It's thick and works excellent for controlling light. Black on one side, white on the other... can eat light or reflect light, great stuff.

BTW, those 4' shop lights are still in use today. You take 2 Walmart shop lights, take the ballests out and wire them into one unit and they provide a great light because it's nicely spread out. The CFLs don't spread as wide, but work well for the sides and spot areas.
 
Just had a look at the harvest and the humidity was too low, they are drying too fast. I put a humidifier and some wet t shirts in there to slow down the drying.

When I was in there, I looked again at the volume of the harvest.

I looks pretty clear that these 16 plants will NOT produce as much as the 10 did last time.

I remember when I did the 1st harvest, I held the lower 1/3 of most of the plants for later harvest (1 week later). Just those lower 1/3's alone completely filled the drying rack.

The amount in the drying rack right now is less volume that what it was last time... Even with the drying closet being pretty full, I still can't see this harvest being as much as the last one.

I think the next batch going it flower will have the lower branches left in place. That should pretty much answer the question about if you get more by removing the lower branches. I really don't think you do.
 
Thanks! Always glad to help. I was going to use a 4' HO T8 that I made from a putting 2 Walmart light ballest together into one unit, but that wouldn't fit into the clone closet. So I use 4 or 5 CFLs. I don't remember the K value, but they are veg probably near 6500K. As far as light/dark I use 18hours on 6 hours off and yes you do need true dark.

Panda plastic is $1/foot here and I think it's 12' wide. So a 10'x12' is $10 It's thick and works excellent for controlling light. Black on one side, white on the other... can eat light or reflect light, great stuff.

BTW, those 4' shop lights are still in use today. You take 2 Walmart shop lights, take the ballests out and wire them into one unit and they provide a great light because it's nicely spread out. The CFLs don't spread as wide, but work well for the sides and spot areas.

I'm wondering if there is a way to do what you did on a smaller scale. I won't have the number of clones you do, I was thinking more of a maximum of 2 each time.

Thanks and +reps
 
Back
Top Bottom