

Icemud;3059322 said:Ok Here is the process that I have used successfully to make seeds:
Making seeds:
What you will need:
colloidal silver around 50ppm (you can make it or buy it) (I chose to buy mine) (Also referred to as CS)
a female cannabis plant that will be used to make pollen and will grow male parts (Called REVERSING)
a female cannabis plant/plants that you will be pollenating with the female pollen (plants that will grow seeds)
A grow area, away from other flowering plants as pollen spreads very easily.
A small dark blue/brown glass fine misting bottle. (you want to use dark because light degrades colloidal silver)


The steps:
1
First and foremost, you want to veg all of your cannabis plants to the size of choice. I usually tend to veg mine until they reach about 18"-24", and usually I prefer to top them 1-2x to get more main tops that will generate seeds. This includes the plant you will be using to create male pollen, as well as all the female plants.
2
Once your plants are at a desired height and you are ready to start flowering set your light timers to 12/12.
3
On the very first day of flowering, you are going fill up your small sprayer bottle with colloidal silver 50ppm. Take the plant that you will be converting to make pollen (this is called reversing) and remove the plant away from your other plants. Spray the entire plant, both top sides and bottoms of leaves, stems and all with colloidal silver.
****ONLY spray the plant that you want to "reverse" and take extreme care NOT to spray the plants that will be receiving pollen (the females)
******* especially take care to MAKE SURE NOT TO SPRAY ANY PLANTS YOU PLAN ON SMOKING WITH COLLOIDAL SILVER. (I have not found the exact reason why, however, every source I researched said to make sure you don't smoke any plants sprayed with CS).
4
Place the plant you sprayed with colloidal silver, back into your grow area with the other plants you will be pollenating. (Make sure to do this ONLY if you want all the other plants in your grow area to get pollenated. Some people even keep the plant they will be "reversing" in another area, far away from any female plants. Pollen travels and last thing you want to do is get it on plants not intended for getting seeds.
5
For the entire first week of flowering (12/12) you want to spray your "reversed" plant 2x, generally I do this 1 time in the mornings and 1x before lights out. Again, make sure to ONLY spray the plant with CS that you plan to reverse, and do this away from your other plants.
6
For the 2nd week you will continue to spray the plant you are "reversing" with CS, but you only need to now apply the CS 1x per day. Make sure to coat the entire plant, both sides of leaves, nodes, and all green plant material including stems. ***ONLY spray the plant you are "reversing" and be very very careful not to get any on your other plants, especially if you plan on smoking them. YOU DO NOT WANT to smoke any plants sprayed with CS.
7
Around the 2nd to 3rd week you will see all of your other NON sprayed plants start to flower as they normally do. The plant that you have been spraying with CS, may start to develop female flowers, but this is ok, as they will quickly start to convert to male pollen sacks. The pollen sacks look like clusters of oval football shaped pods and you will slowly start to see many many pods form, usually where the flowers would form. AT this point its a good idea to turn off any circulation fans in your grow area as even a slight breeze will knock loose pollen all over. Its much easier to control it before it forms, then to worry about cleanup later.
8
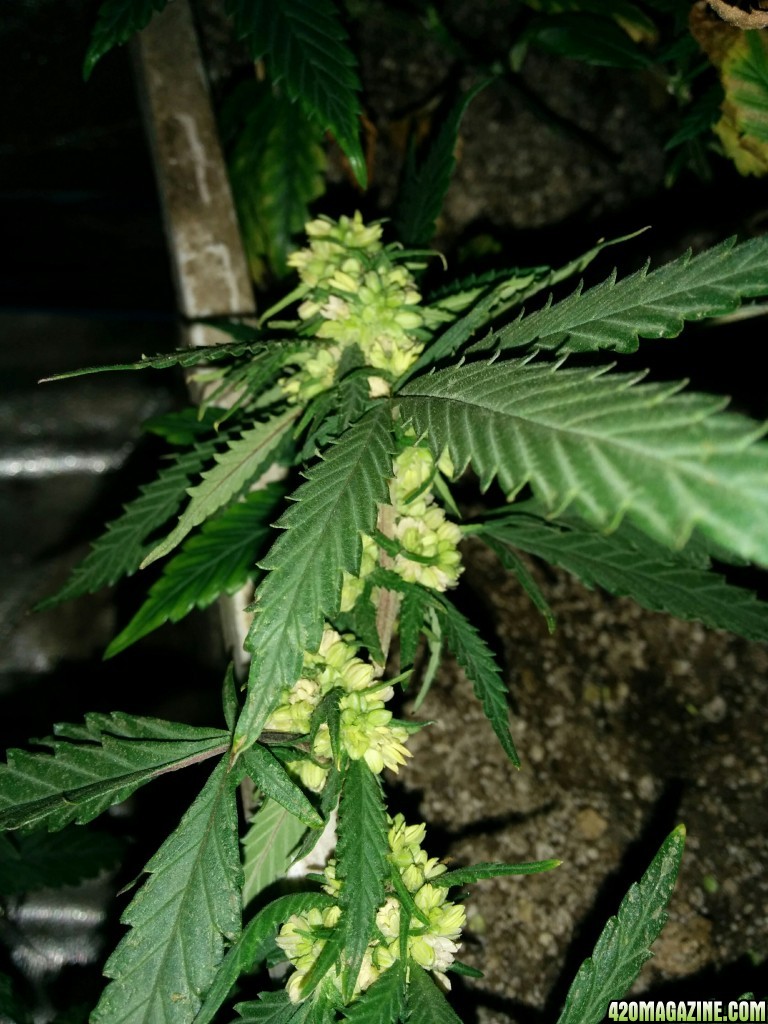
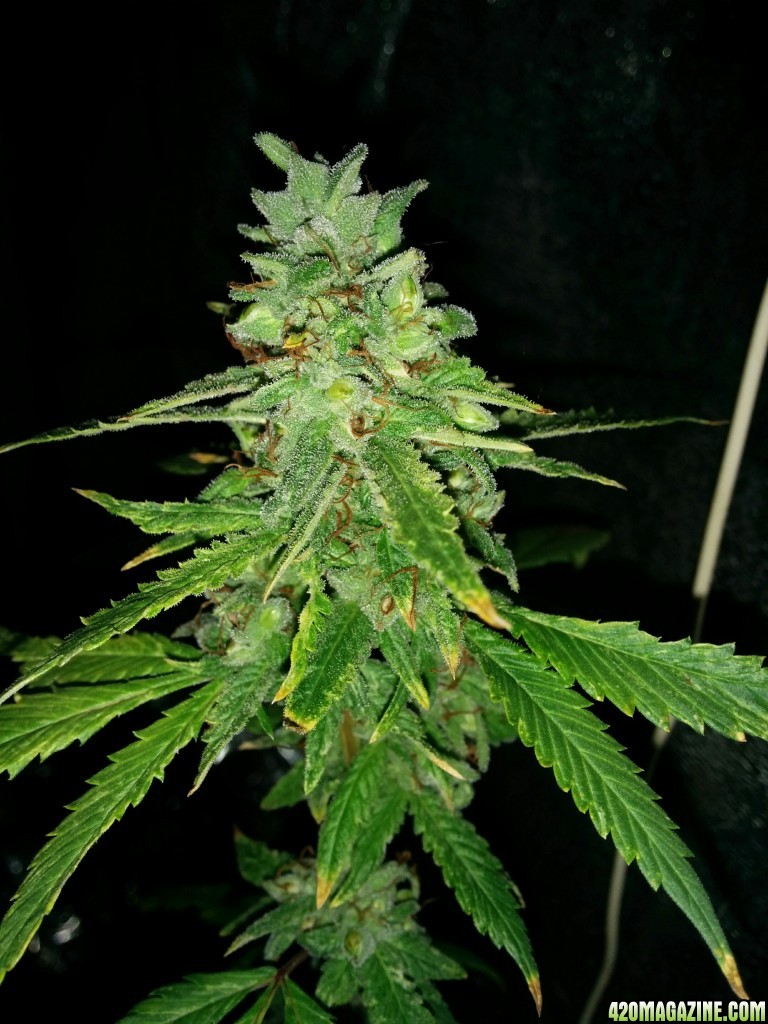
Once you see no more female flowers (white pistils) and see large clusters of pollen sacks on the plant you are reversing, you can stop spraying colloidal silver (CS).
It should look like this:
9 Around week 3-4 of flowering, you will notice the pollen sacs beginning to open up and this is when you will start to see a fine yellow powder starting to fall out of the pollen sacks, this is generally noticeable on the leaves below the pollen sacks as sometimes it will fall on the leaf and collect. This is Active pollen, and will pollinate any female plants in the area so if you have other plants around in flowering, that you DO NOT want to make seeds, be very very careful with the pollen.
**again a word of caution... do not have your "reversed" plant that is producing pollen anywhere near plants that you DO NOT want to create seeds... IT WILL GET ON THEM.
10
Spreading the pollen:
Now this step there are many ways to spread the pollen to the flowering female plants that you want to produce seeds. Since I do all of the above inside of 1 grow tent, I don't mind if pollen spreads however I still make sure to have all of my circulation fans off, and handle the "reversed" pollen plant very carefully, as even a slight shake or bump will create a cloud of pollen.
Now my personal process is to cut off one of the clusters of pollen sacks from the "reversed plant". Very carefully making sure not to bang it around while cutting it off, I remove it. Then I take this cluster of pollen sacks and slowly move plant to plant (Females flowering) and rub the pollen sacks on each flower of the female plants that I want to seed. Sometimes i will give the pollen sacks a little flick in order to help knock pollen from the sacks, onto the female flowers.
Now many people also at this point will collect the pollen in a sandwhich bag, or some even will wrap the entire "reversed" plant into a black garbage bag to prevent pollen from spreading where they don't want it. Some people will just collect the pollen inside a sandwich bag and use a paintbrush to spread the pollen onto the female flowers. All of these ways will work, as long as somehow the pollen gets onto the female flowers.
11
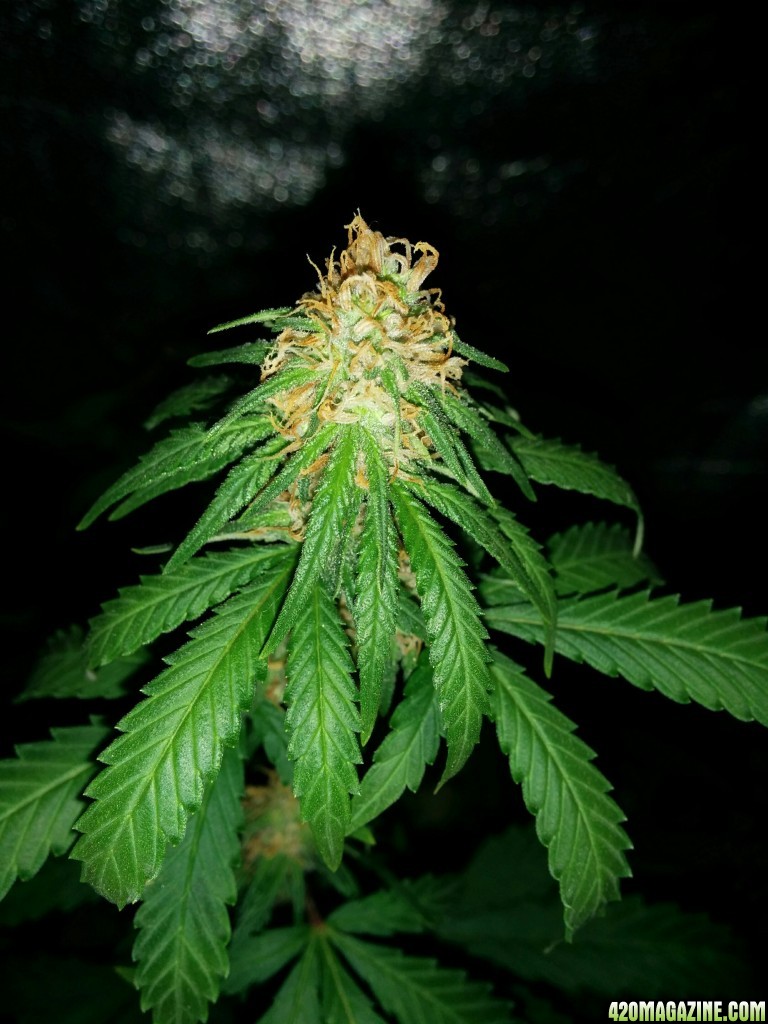
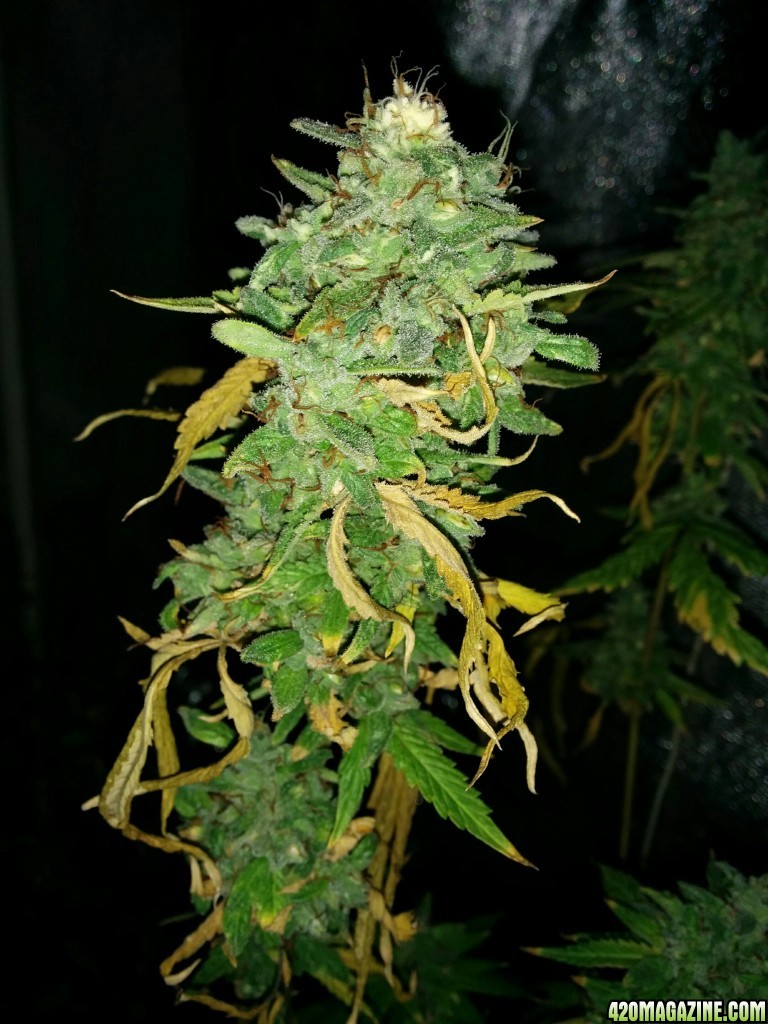
Within the next day or 2 after you have spread the pollen from the "reversed" plant onto the female plants/flowers, you will know if they received the pollen because all the white hairs (pistils) will turn orange/brown. Make sure to look at each flower set on each plant to see if they have orange hairs/pistils, or if they are still all white. If the flower pistils/hairs have not changed orange, and are still white you will want to go back to step 10 and repeat this. At this point you should not be spraying any colloidal silver.
Your Female plant buds should look like this, once they have received pollen, notice the amber hairs early in flowering.
12
Once you have finished pollenating all the female plants, and have seen the pistils change from white to orange, you are done with the "reversed" plant and you can carefully discard of it. Again, this pollen will spread very very easily so its best to move very slowly avoiding any bumps, wind or shaking as this will make clouds of pollen very easily, and you may want to wrap the whole plant in a garbage back, tighten the opening around the stem and cut the stalk at the soil level, which should contain any loose pollen. You can decide whether to keep some pollen for future use by collecting it in a small baggie, or you can just get rid of it all together if you don't want to keep it. I haven't tested the methods of storage yet, but a cool dry and dark place from what I read is the best to store pollen.
13
If you happen to make a mistake with your "reversed" plant, and get pollen all over, you can use water to deactivate the pollen. I usually will wait a few days after I have pollenated my plants, the pistils have turned orange and then I will spray the entire tent down, including the walls, floor, plants and soil with just plain water to make sure any loose pollen is deactivated.
14
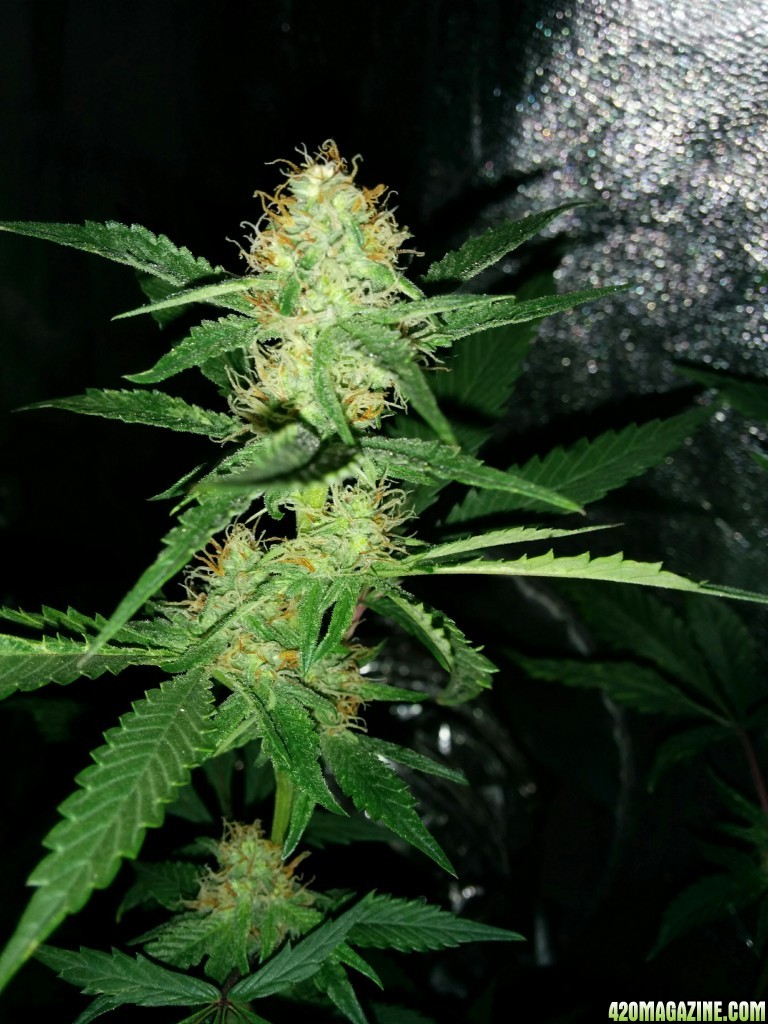
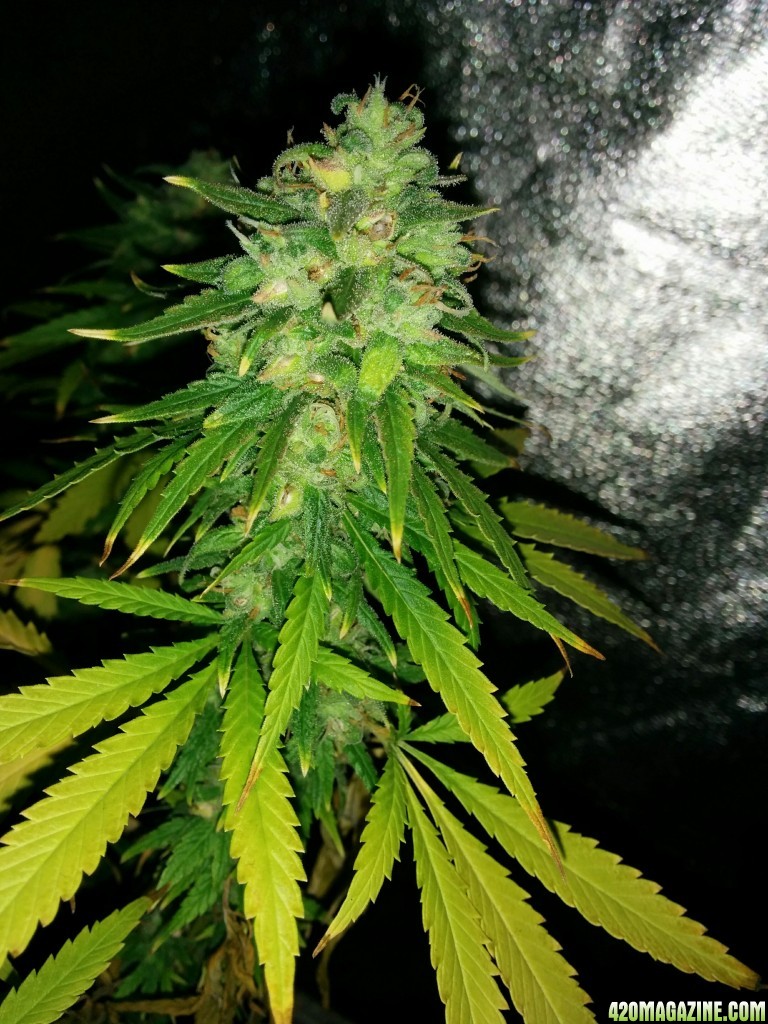
Now the last part of the process is the waiting period. After all the female plants are pollenated, the "reversed" plant has been removed, all you have to do now is treat your plants with love, just as you would if you were flowering them normally and make sure they stay healthy. As the buds form, you will start to notice that within the buds, the calyx's (place where the hairs attach to the buds, looks like a teardrop shape) will start to swell. This is your seeds forming.
Notice on these photos, you can see the swollen calyx's with the seeds forming inside.
15
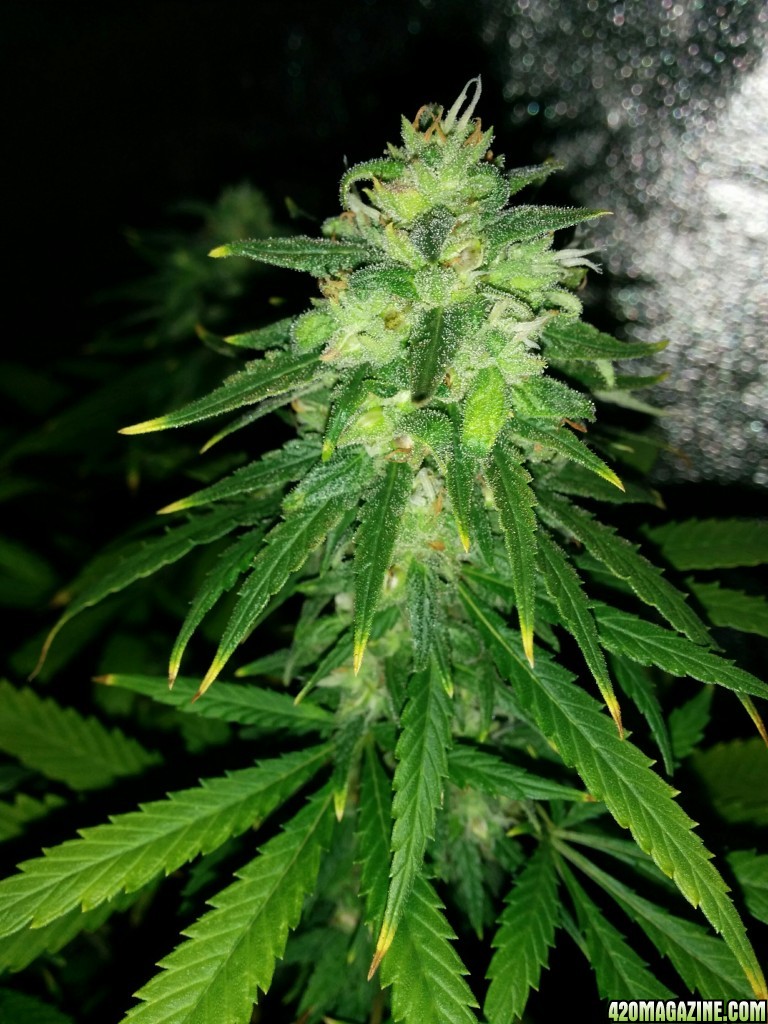
When to harvest... If you have so far followed this process to a T, then everything should work as planned, buds will form, thicken up, mature and you will notice seeds forming in the buds, as the calyx's swell. By now you should be nearing the end of flowering, but you want to make sure that you get those nice brown, tiger stripe seeds. Wait until you start to see the swelling calyx's which contain the seeds actually start to split showing the hard seed coat, which at this point usally will be an offwhite color. Within the next week to 2 weeks at this point you will seed the seeds go from a green/offwhite color to a light brown and then they will turn to a darker brown with black lines.. These are the tiger stripes! When you start to see most of your seeds turn this darker brown color, your plant is ready to harvest. You may even want to pull a few of these seeds/calyx's off, to check them to make sure the seeds are done, which will be all dark brown with black stripes (usually) some strains produce seeds that might not be dark brown but more of a tan, and I've even had some seeds not produce stripes, but its uncommon.
Notice on these photos how the calyx's have split and the seeds are showing through the splits, and most are a darker brown. This is when they are about ready.
16
How to harvest and gather seeds:
You treat your seeded plants/buds the same as you would harvesting a normal crop. Cut each plant from the soil, hang it for your preferred dry time.. Usually I go for 7-10 days until the buds are fully dry. I generally don't plan on smoking any of the plant material afterwords so personally I don't cure it or anything as I pretty much grind up everything with my fingers to remove the seeds.
How I personally remove the seeds:
Once your plants are dry, buds are dry I usually will take a flat surface with a lip on it, like a mirror or a picture frame and I will lay it flat, but on a slight 10-15 degree tilt. I use this as my work surface. I remove all the dead fan leaves, and most of the leaves I can just pull off, and put this in my compost pile. Then once I have just buds left, I remove 1 bud at a time, roll it between my fingers pulverizing the bud. The seeds at this point will drop out, and most of them will roll down the angled flat surface/mirror and get caught in the "lip" of the surface you are using, where the grinded/pulverized plant material will just fall down directly below my fingers. After a full bud is ground up and in a pile of grinded green, I sift through it with my fingers removing any other seeds that I find that are nice and mature. These get bagged up, labeled and stored for future use. All the immatture seeds, and ground up buds get placed in separate ziplocks and put in my freezer until I am ready to use them for edibles.
17
Seed storage: Now this is something that I have only researched but not tried yet, so take this part with a grain of salt and you may want to do your own research on this part (storing seeds). The rest of the instructions if followed should work perfectly as they worked for me with 100% success.
If you plan on using your newly created seeds right away or in a short amount of time, then you don't need to really store your seeds in any specific way, but its best to keep them cool, dry and out of direct light. If you do plan on storing your seeds for long term, then I have read the best way to do this is to store them with less than 10% oxygen. So for this, if you have a food sealer, or canning jars with vaccum pump then you want to suck out all the air out of the food sealer bag/jar which will remove most of the oxygen. This helps the seeds stay fresh and active because water and oxygen are what allow the seeds to want to sprout, so if you remove both water and oxygen, then they will stay fresh for long storage. You also will want to keep them cool, and in a dark place, like a refrigerator, basement or cool closet.
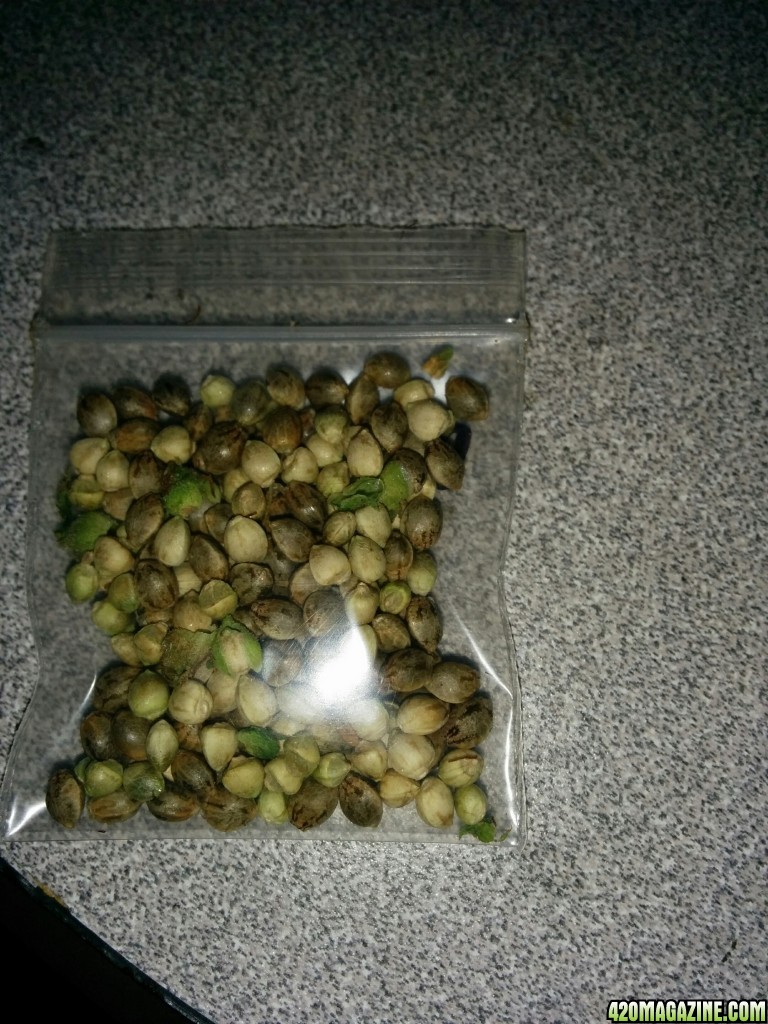
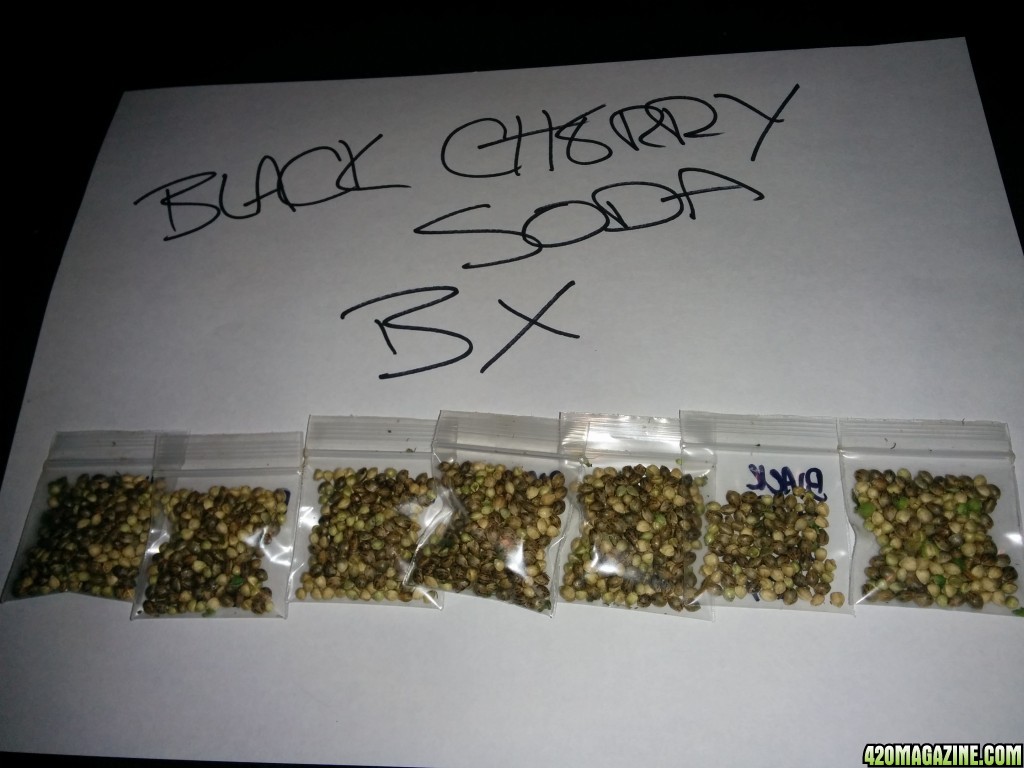
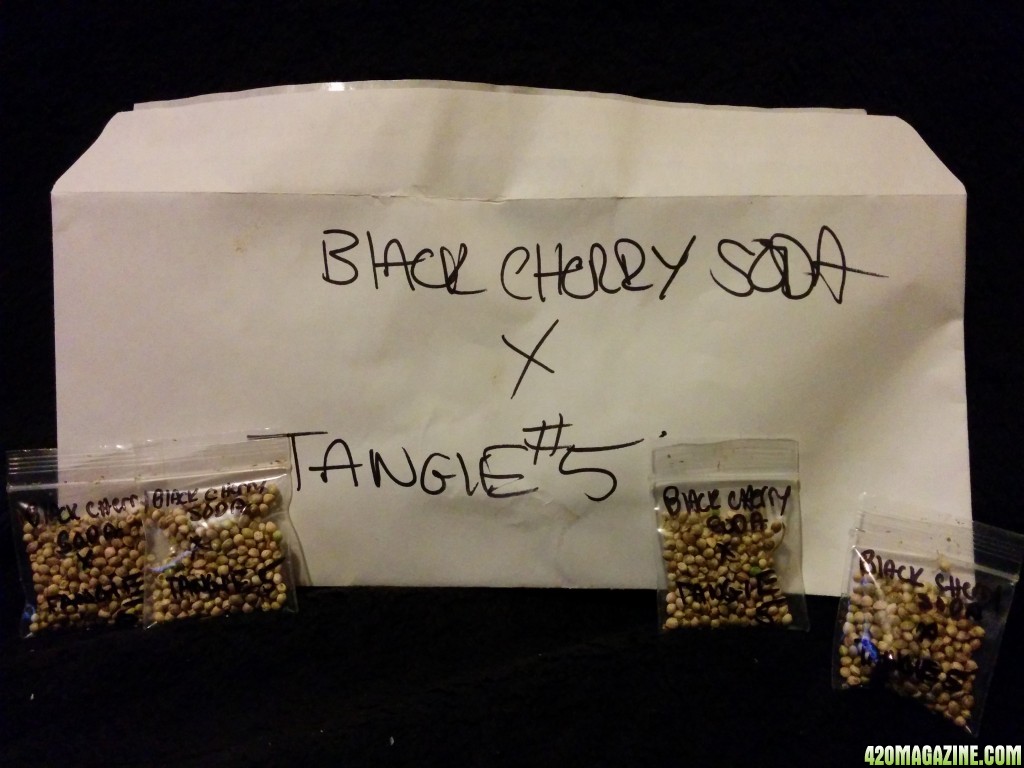
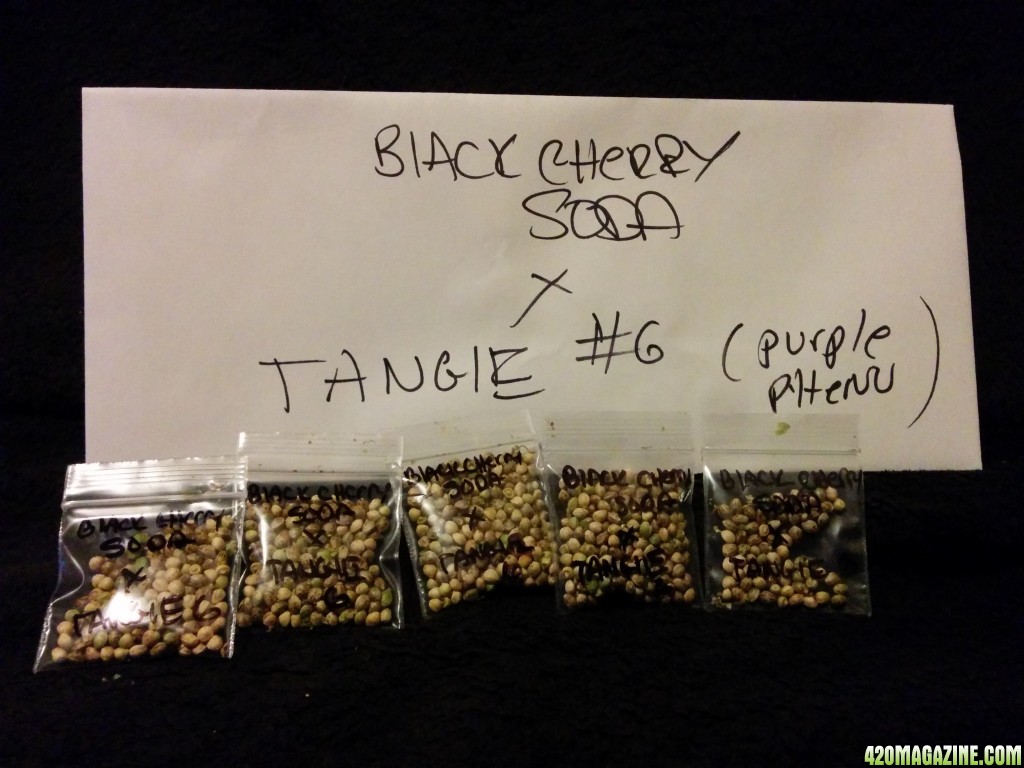
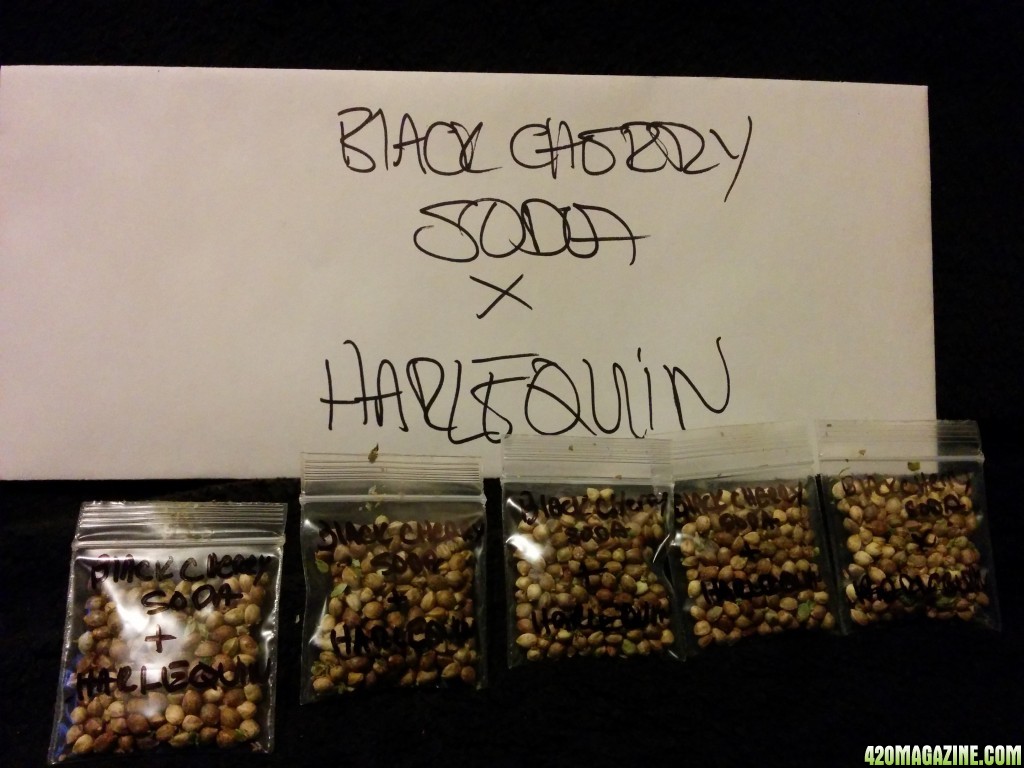
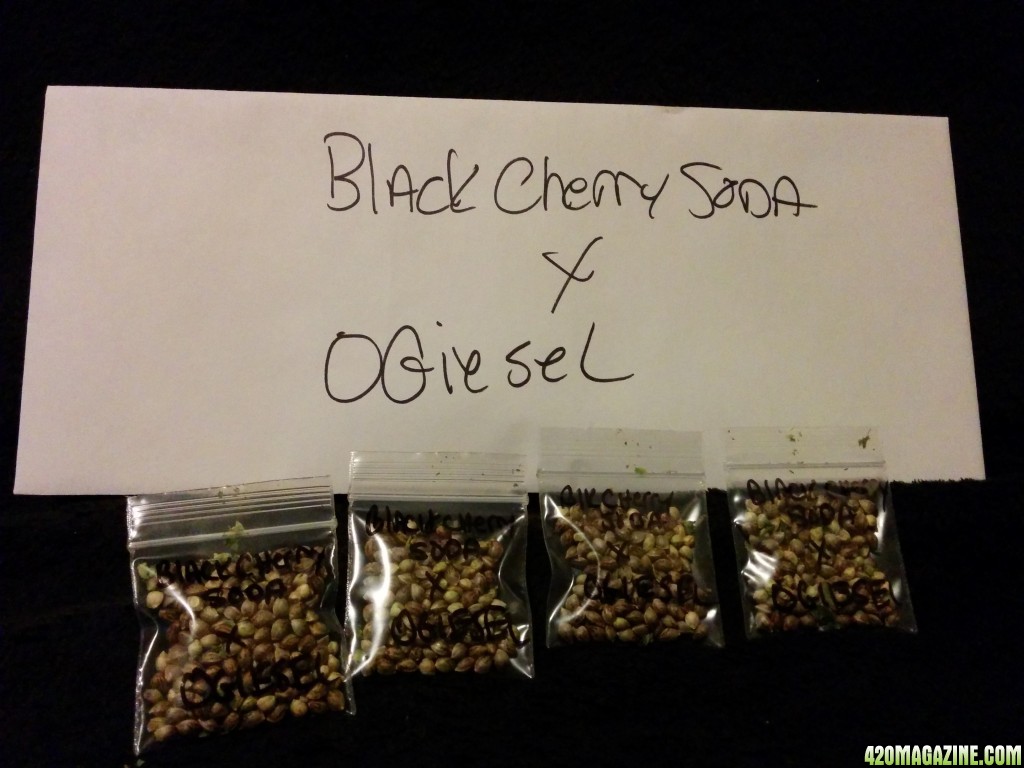
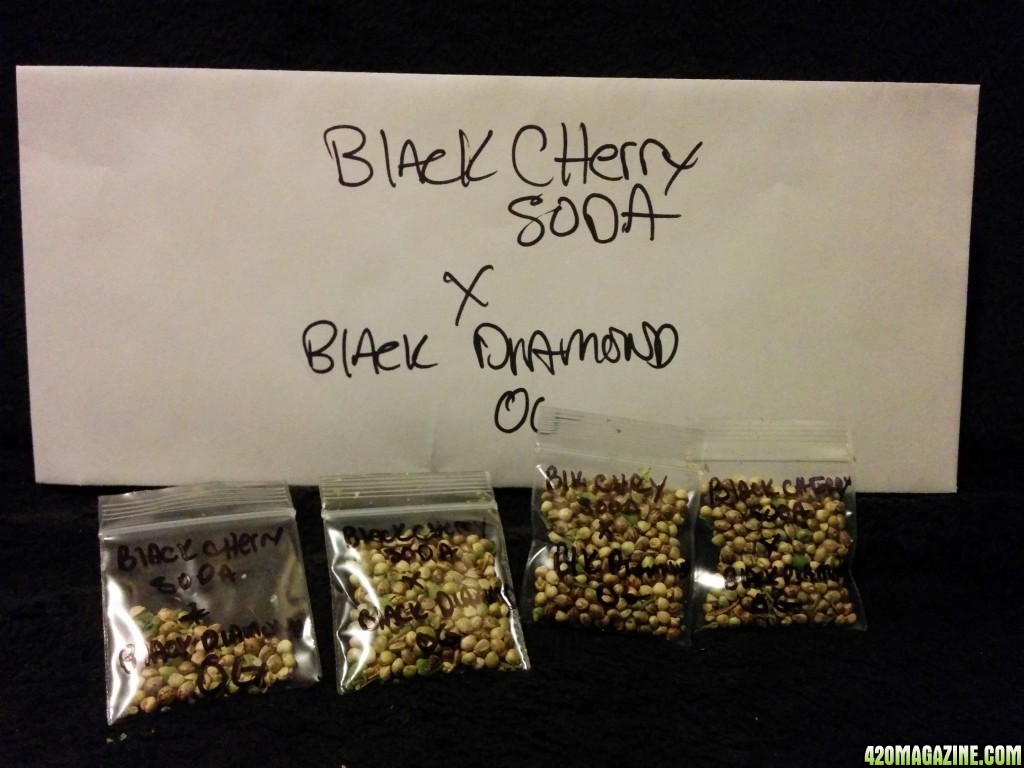
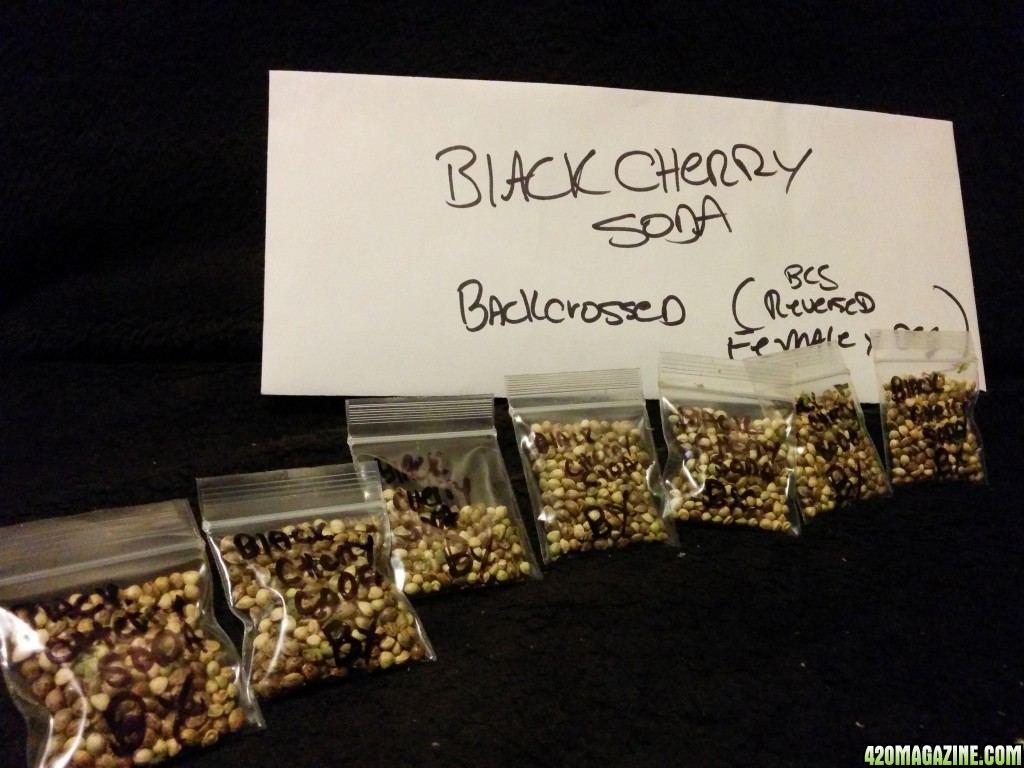
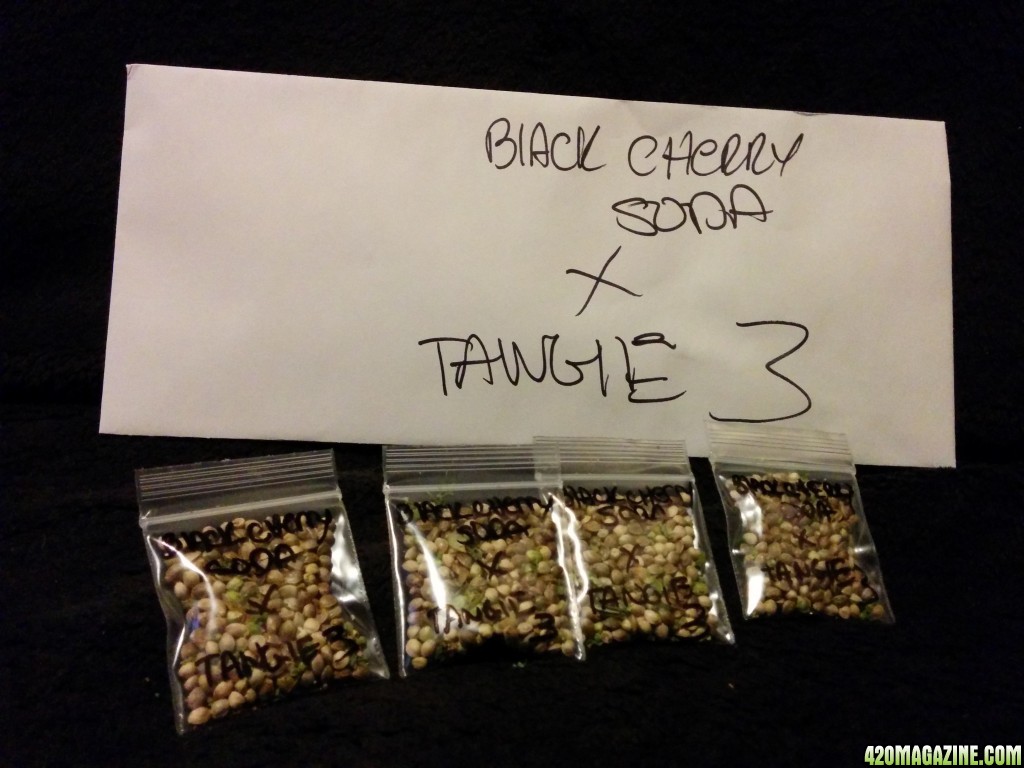
Well that is the process, and if done right.. you will end up with this::: (seeds from my last project)


Icemud's How To Make Feminized Seeds Using Colloidal Silver
- Author Skullman420
- Create date
Blog entry information
More entries in Member Blogs
-
 From Dab to Vape: The Evolution of Rosin Consumption HabitsIn recent years, Live Rosin, as a typical product type of solventless cannabis concentrate, has...
 -
Micro Bar: Box-Shaped Cannabis Vape and Their Market AppealMicro Bar, a brand that has quickly risen to the top of the disposable cannabis vape market...
-
How Box-Shaped Disposable Vape Empower Cannabis Vape Brand?The emergence of box-shaped disposable cannabis vape hardware as a preferred choice marks a...
-
 HashGirl's Completed Grow Journals - 2017 to 2024HashGirl's Completed Grow Journals My and Felonious Punk's (my husband) Completed Grow...
 -
DEMO: The Petite Powerhouse in Cannabis VapingIn the ever-evolving world of cannabis consumption, variety and personalization are key, and...