

Dislaimer: Sorry 4 crappy pix all taken on a camera phone


Welcome to my tutorial on building a Recirculating Deep Water Culture set up that includes a professional grade water chiller. Honestly the title should say "how to convert dwc to rdwc" because im not going to go into a tutorial on how to make a deep water culture set up with hydroton, because there are already so many great ones out there! So we are going to start from where I am at with a plant half way through its Veg cycle already rooted in the bucket. Now I dont recommend this but when your like me and can't wait to use new stuff....just follow what I do and be careful. Again Thank you and enjoy, this is my first tutorial and I hope to create more in the future so any and all feed back would be great!
Step 1. I feel a successful grower is an organized grower. I make sure I have a large open space that is clutter free. So that when and if things get stressful I dont go crazy because everything's in disarray and I can't find anything. So since my space is open and clean I lay out all my tools and material as listed below the picture:
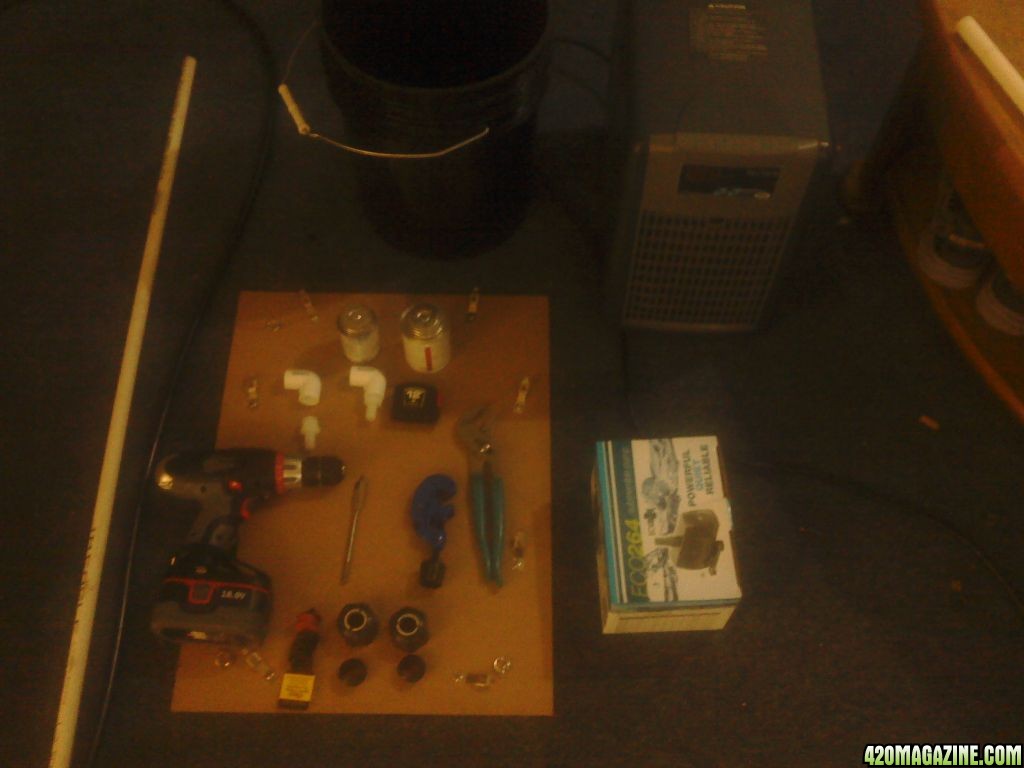
ammout material
1 stick of 1/2" PVC atleast 16" long-thats if you dont think ull screww up
2 1/2" PVC elbows one end threaded inside, one end smooth inside
2 1/2 " 1/2" plastic garden hose to threaded PVC connectors
1 Bottle of PVC purple primer
1 Bottle of PVC glue
1 12' long 1/2 black plastic garden hose
1 submersible water pump (Gallon per hour varies on chiller used, my chiller requires a minimal of 240 GPH, my pump is 264 GPH)
2 1/2" rubber grommets
1 Chiller (for this example I used an Aquarium grade chiller from jbjlighting.com
1 5 gal Bucket
1 5 gal+ Resivor
Tools
Drill
5/8 spade drill bit
PVC cutter
channel locks
tape-measure
Sharpie

Step 2. So now that everythings organized and excessable to me im going to grab the things I need to start building the PVC pipes that are required to hook my hoses up to the chillers in and out ports. I grab the two 1/2" hose2PVC connectors, channel locks, my stick of pvc, my pvc cutters, blue glue and primer as well as a rag because that PVC chemical goo crap is toxic and gets everywhere. Also I grab my 1/2" PVC elbows.

(an example of what we are making is on the right side of the shot)
Step 3.
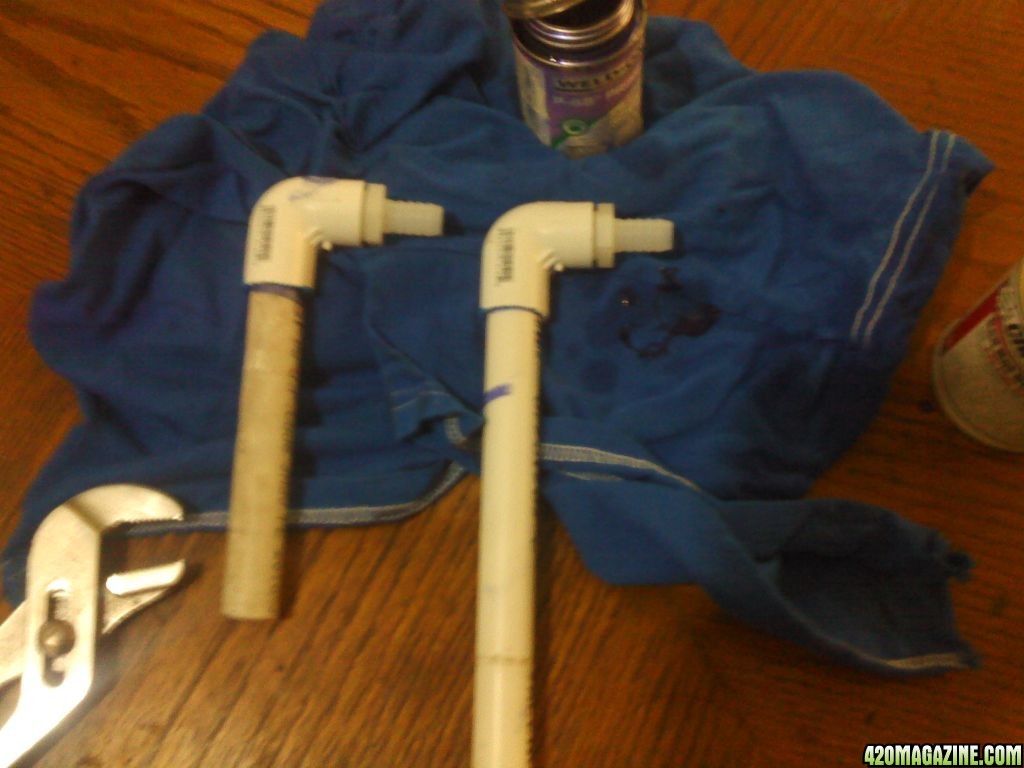
First I gatta cute my PVC sticks down to the correct size. In order to help with the flow of the pump through gravity, I made the piece of PVC that will be connected to the "IN" part of the chiller longer than the piece that will be connect to the "OUT" port of the chiller. The Long one is 9 1/2" the short one is 5 1/2".
Now that I have a cut piece I smooth the corners off where any jagged edges might have formed from the cutting. I dont get crazy with it, usually I'll use the blade of myknife to shave it clean make sure there isnt any loose pvc that will end up in your water then your pump.
Next I prime the outside of the PVC stick lay it down on a rag that i have layed out so i dont drip a bunch of gross crap on my table. Quickly I drab the inside of the PVC elbow with glue and QUICKLY I shove the PVC pieces together and twist and give it a good knock or two against the table kinda hard to nock it in tight. Then I let it sit for the next 10 minutes while I smoke cannabis
Next I pick up my whitish clear 1/2",1/2" PVC 2 garden hose connector
and first hand screw it into the open side of the PVC elbow now glued into my 9 1/2" PVC stick. I make it secure by using my channel locks to tighten it. though I worry it will break so I didn't do it all the way in. Thats what she said .
.
Last I have to connect them to my chiller. each chiller is different for this one I slid the PVC pipe through a twist cap that tightened on the pipe when twisted down. Very user friendly.
Boom one down one more to do Repeat except cut a 5 1/2" piece this time.
(I an't stress enough how important it is to have be near an open window while handling the PVC glue)
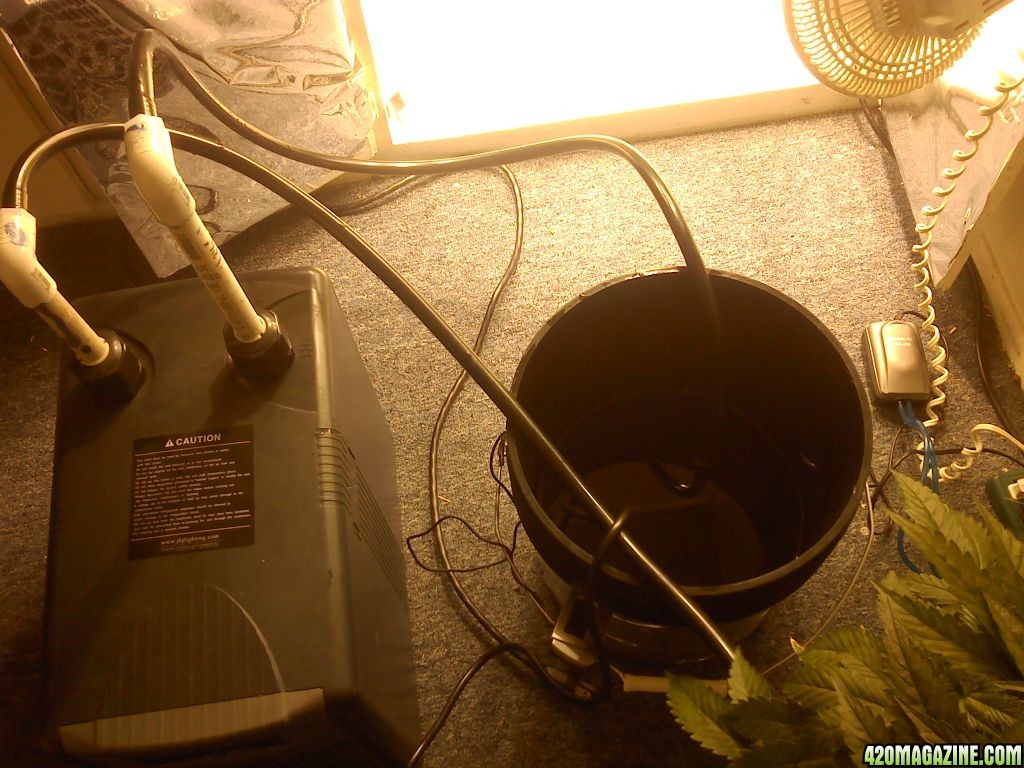
STEP 4. and we get to assemble our pump if it was just purchased. Make sure your pump has a 1/2" hose connector like mine
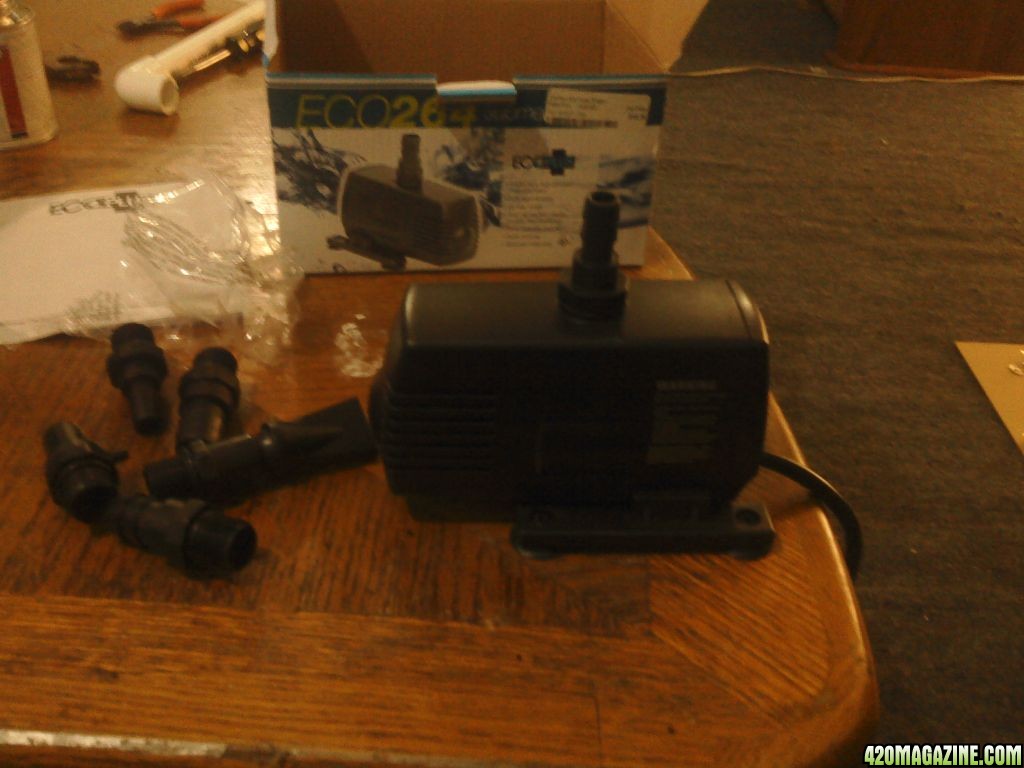
Now If you got your chiller used like I did your ganna wanna run water through it to lear it out and its always good to test and make sure your pump and everything is working correctly before you apply it to a living plant. So here I have my a 5 gal bucket with 4 gal of water. I submerge my pump in it and connect 6' of my 1/2" black garden hose to it(I cut my 12' piece of hose in half). I then connected the other side to the PVC raised elbow we created and installed into the unit earlier. I connect it to the elbow connected to the chillers "IN" port. I then Connect the other piece of hose left to the "OUT" port and put that end in a resivoure a friend gave to me and let it run!
Perfect! Everything looks ready to get locked and loaded. Here comes the hard part  .
.
STEP 5 Now we have to take our 5/8 drill bit and drill two holes on the outer rim of our bucket without breaking any leaves branches or mess up any roots either! It wasn't that bad though. Also make sure you make the two holes on the opposite side of the bucket from the holes where the air stones also enter. As shown below:
(sorry picture is sideways if you can't tell what your looking at)
I made sure when I drilled the holes that I had already transferred her to an empty bucket so I wasn't dropping a bunch of plastic scrap into her nutrient water that would soon have a pump in it.
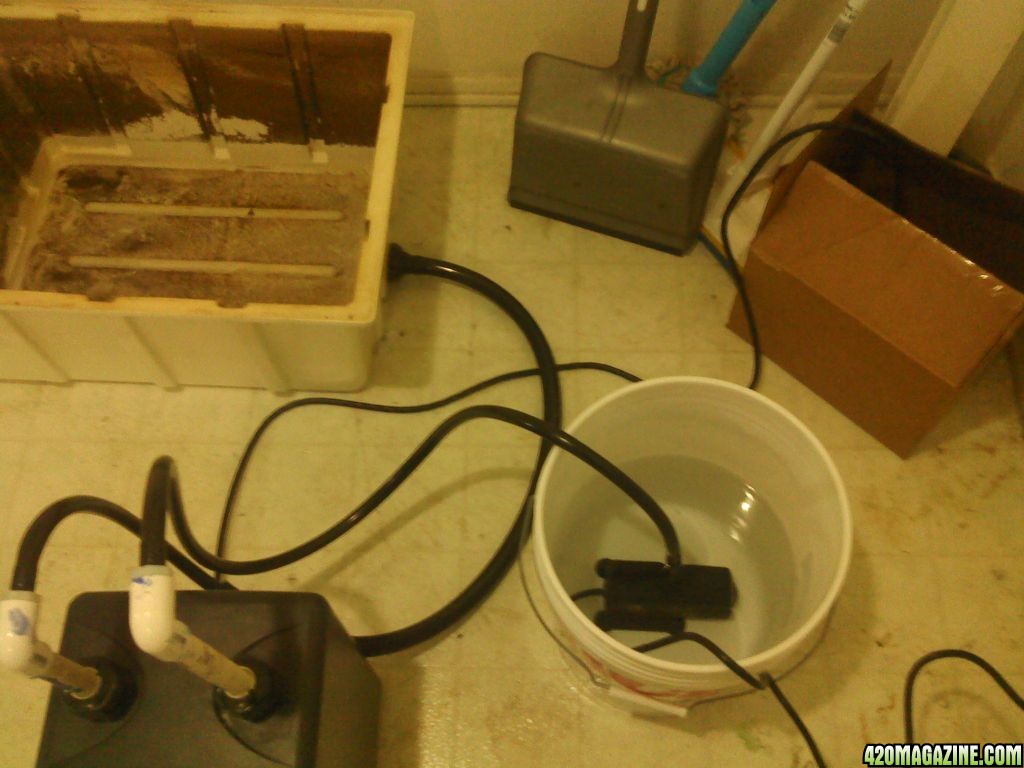
Before transferring her back I Submerge my pump and fasten it to the bottom with its cool little suction cup feet. I connect my 6' hose to the out port on the Pump and prepare it to be coaxed through the hole I drilled in the buckets lid.
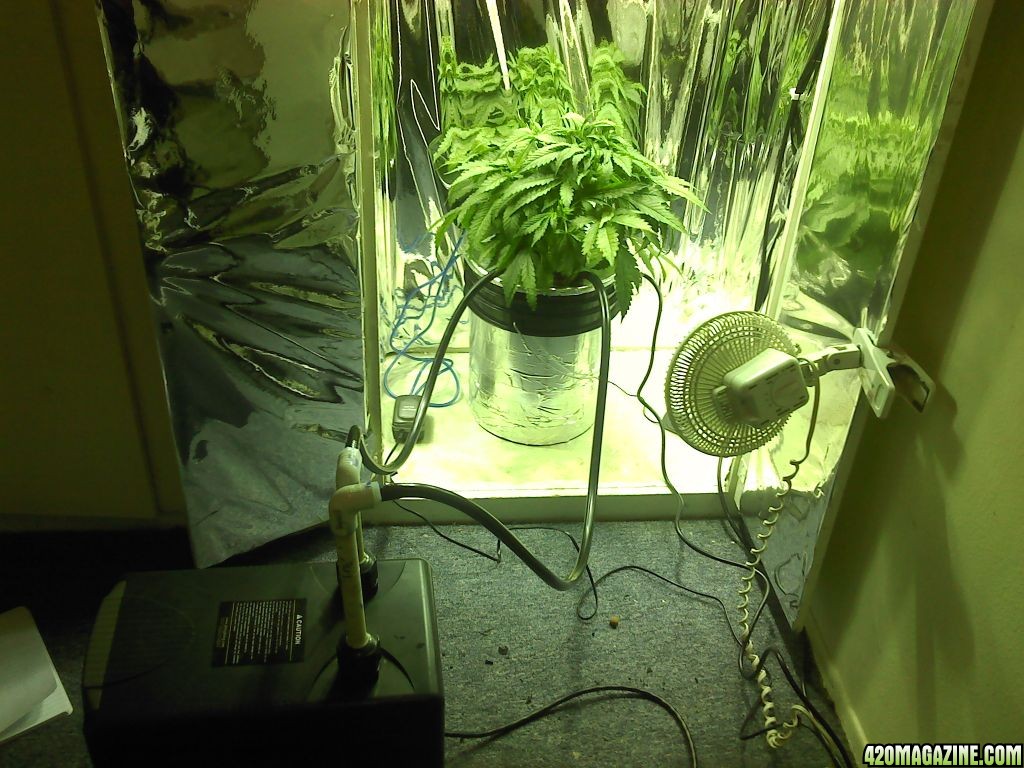
Last before I move her back I feed the hose connected to the chillers "OUT" port into the top of my DWC's bucket through one of the 5/8" holes. I only push the end of it down about 3 to 4 inches into the bucket because I want the water to "water fall" into the bucket and help oxygenate the water. then I picked her up and set her into her soup. While simultaneously feeding the submerged pumps black hose through the other open 5/8" hole-though from inside out, instead of from outside in like the first one.

(her roots are only going to get huger!! I love DWC and im sure i'll love RDWC more!)
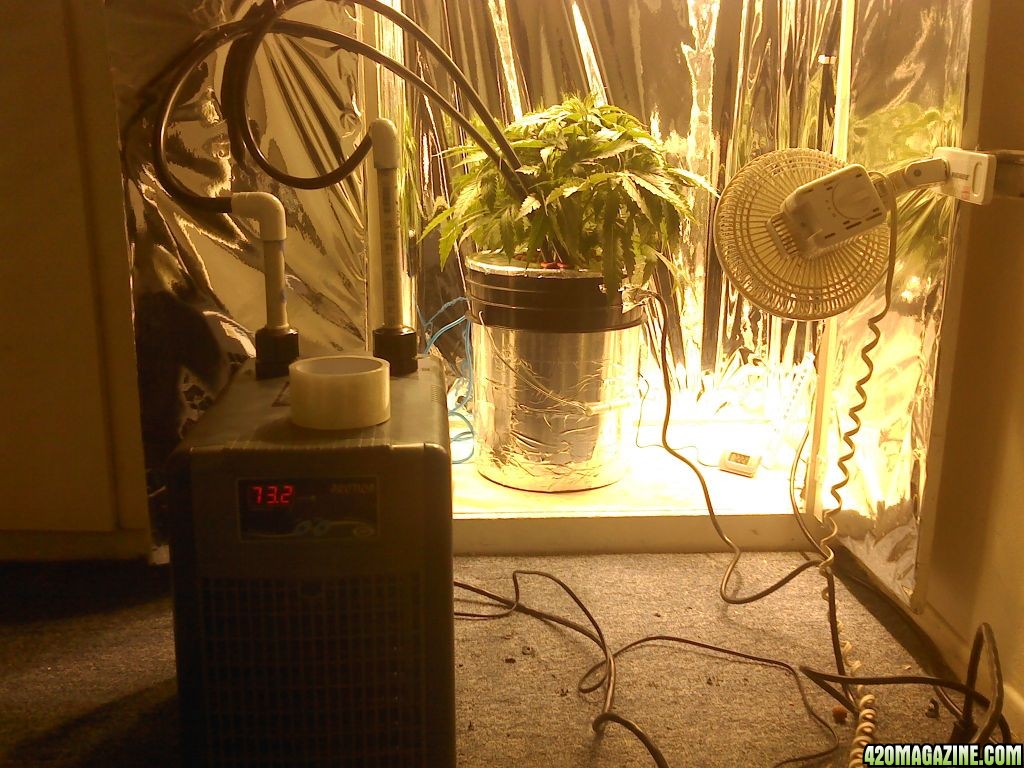
Last thing I to do is sit and just go over everything make sure everything looks good if the hose looks like its bending and getting pinch do what I did tape it up against a wall or something. Worked great for me. Now time to kick back relax and monitor the unit for the rest of the night. I dont mean sit in a char and stare at it but u know smoke some weed with your plant stare check up on her make sure the system is okay touch the water with your hands and feel how bad ass and COLD it is! I got my baby set down to 60 Deg/F and I know she's lovinnnn it!!!


And thats it folks your on your way. I suggest you dont follow everything I do, I can also tell your while doing this I spilled alot of glue hot a grommet shoot me in the eye I spilled water on my floor. But because I was organized and made sure I had a towel on hand at all times and made sure I laid rags down when working with hazardous materials. Alittle bit of foresight goes along way when working with something that can be as challenging as hydroponics but. And please any feed back is good feed back to me and is greatly apreciated! Thanks for checkin this out and if you'd like to see how this system turns out for me in the long run just click on the "current grow" link in my signature! 
Best,
p.g.
Welcome to my tutorial on building a Recirculating Deep Water Culture set up that includes a professional grade water chiller. Honestly the title should say "how to convert dwc to rdwc" because im not going to go into a tutorial on how to make a deep water culture set up with hydroton, because there are already so many great ones out there! So we are going to start from where I am at with a plant half way through its Veg cycle already rooted in the bucket. Now I dont recommend this but when your like me and can't wait to use new stuff....just follow what I do and be careful. Again Thank you and enjoy, this is my first tutorial and I hope to create more in the future so any and all feed back would be great!
Step 1. I feel a successful grower is an organized grower. I make sure I have a large open space that is clutter free. So that when and if things get stressful I dont go crazy because everything's in disarray and I can't find anything. So since my space is open and clean I lay out all my tools and material as listed below the picture:
ammout material
1 stick of 1/2" PVC atleast 16" long-thats if you dont think ull screww up
2 1/2" PVC elbows one end threaded inside, one end smooth inside
2 1/2 " 1/2" plastic garden hose to threaded PVC connectors
1 Bottle of PVC purple primer
1 Bottle of PVC glue
1 12' long 1/2 black plastic garden hose
1 submersible water pump (Gallon per hour varies on chiller used, my chiller requires a minimal of 240 GPH, my pump is 264 GPH)
2 1/2" rubber grommets
1 Chiller (for this example I used an Aquarium grade chiller from jbjlighting.com
1 5 gal Bucket
1 5 gal+ Resivor
Tools
Drill
5/8 spade drill bit
PVC cutter
channel locks
tape-measure
Sharpie
Step 2. So now that everythings organized and excessable to me im going to grab the things I need to start building the PVC pipes that are required to hook my hoses up to the chillers in and out ports. I grab the two 1/2" hose2PVC connectors, channel locks, my stick of pvc, my pvc cutters, blue glue and primer as well as a rag because that PVC chemical goo crap is toxic and gets everywhere. Also I grab my 1/2" PVC elbows.
(an example of what we are making is on the right side of the shot)
Step 3.
First I gatta cute my PVC sticks down to the correct size. In order to help with the flow of the pump through gravity, I made the piece of PVC that will be connected to the "IN" part of the chiller longer than the piece that will be connect to the "OUT" port of the chiller. The Long one is 9 1/2" the short one is 5 1/2".
Now that I have a cut piece I smooth the corners off where any jagged edges might have formed from the cutting. I dont get crazy with it, usually I'll use the blade of myknife to shave it clean make sure there isnt any loose pvc that will end up in your water then your pump.
Next I prime the outside of the PVC stick lay it down on a rag that i have layed out so i dont drip a bunch of gross crap on my table. Quickly I drab the inside of the PVC elbow with glue and QUICKLY I shove the PVC pieces together and twist and give it a good knock or two against the table kinda hard to nock it in tight. Then I let it sit for the next 10 minutes while I smoke cannabis
Next I pick up my whitish clear 1/2",1/2" PVC 2 garden hose connector
and first hand screw it into the open side of the PVC elbow now glued into my 9 1/2" PVC stick. I make it secure by using my channel locks to tighten it. though I worry it will break so I didn't do it all the way in. Thats what she said
. Last I have to connect them to my chiller. each chiller is different for this one I slid the PVC pipe through a twist cap that tightened on the pipe when twisted down. Very user friendly.
Boom one down one more to do Repeat except cut a 5 1/2" piece this time.
(I an't stress enough how important it is to have be near an open window while handling the PVC glue)
STEP 4. and we get to assemble our pump if it was just purchased. Make sure your pump has a 1/2" hose connector like mine
Now If you got your chiller used like I did your ganna wanna run water through it to lear it out and its always good to test and make sure your pump and everything is working correctly before you apply it to a living plant. So here I have my a 5 gal bucket with 4 gal of water. I submerge my pump in it and connect 6' of my 1/2" black garden hose to it(I cut my 12' piece of hose in half). I then connected the other side to the PVC raised elbow we created and installed into the unit earlier. I connect it to the elbow connected to the chillers "IN" port. I then Connect the other piece of hose left to the "OUT" port and put that end in a resivoure a friend gave to me and let it run!
Perfect! Everything looks ready to get locked and loaded. Here comes the hard part .STEP 5 Now we have to take our 5/8 drill bit and drill two holes on the outer rim of our bucket without breaking any leaves branches or mess up any roots either! It wasn't that bad though. Also make sure you make the two holes on the opposite side of the bucket from the holes where the air stones also enter. As shown below:
(sorry picture is sideways if you can't tell what your looking at)
I made sure when I drilled the holes that I had already transferred her to an empty bucket so I wasn't dropping a bunch of plastic scrap into her nutrient water that would soon have a pump in it.
Before transferring her back I Submerge my pump and fasten it to the bottom with its cool little suction cup feet. I connect my 6' hose to the out port on the Pump and prepare it to be coaxed through the hole I drilled in the buckets lid.
Last before I move her back I feed the hose connected to the chillers "OUT" port into the top of my DWC's bucket through one of the 5/8" holes. I only push the end of it down about 3 to 4 inches into the bucket because I want the water to "water fall" into the bucket and help oxygenate the water. then I picked her up and set her into her soup. While simultaneously feeding the submerged pumps black hose through the other open 5/8" hole-though from inside out, instead of from outside in like the first one.
(her roots are only going to get huger!! I love DWC and im sure i'll love RDWC more!)
Last thing I to do is sit and just go over everything make sure everything looks good if the hose looks like its bending and getting pinch do what I did tape it up against a wall or something. Worked great for me. Now time to kick back relax and monitor the unit for the rest of the night. I dont mean sit in a char and stare at it but u know smoke some weed with your plant stare check up on her make sure the system is okay touch the water with your hands and feel how bad ass and COLD it is! I got my baby set down to 60 Deg/F and I know she's lovinnnn it!!!
And thats it folks your on your way. I suggest you dont follow everything I do, I can also tell your while doing this I spilled alot of glue hot a grommet shoot me in the eye I spilled water on my floor. But because I was organized and made sure I had a towel on hand at all times and made sure I laid rags down when working with hazardous materials. Alittle bit of foresight goes along way when working with something that can be as challenging as hydroponics but
. And please any feed back is good feed back to me and is greatly apreciated! Thanks for checkin this out and if you'd like to see how this system turns out for me in the long run just click on the "current grow" link in my signature! Best,
p.g.