

KiwiKing
New Member
I just finished this window AC chiller, I got this idea from BudleyDoRight. This is a basic How-To, it is a relatively easy process and shouldn't take someone more than an hour.
Supplies
Window Air Conditioner new or used
Ratchet and Socket set
*If you are going to use this chiller in a nutrient reservoir, I suggest you use a new AC unit or thoroughly clean and disinfect the unit.
***********************************
The first thing you need to do is remove the metal housing from the air conditioner.
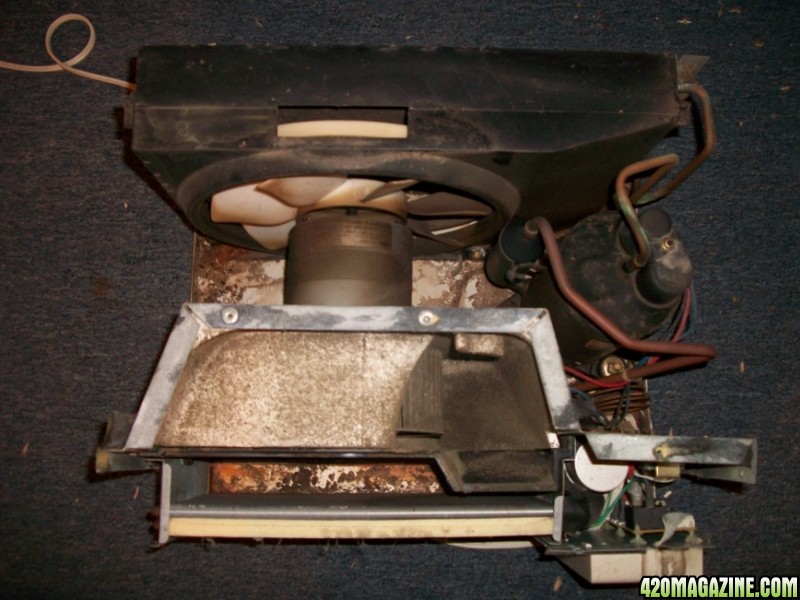
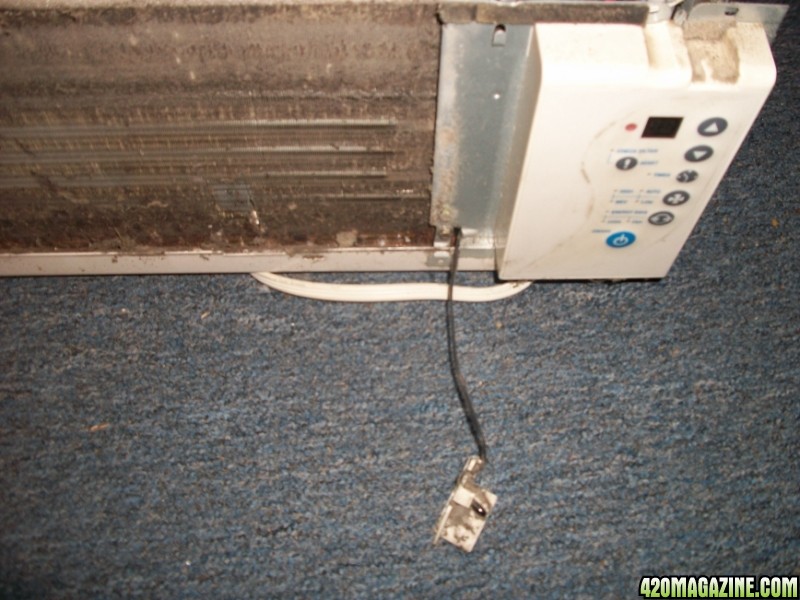
Now you are ready to remove the plastic face. Be careful not to remove or damage the temperature probe. This is how you will control the temperature of your rez.
The next step is to remove the fan and fan housing. This step requires some attention to detail, as the fan is connected to the controller and you need to remove both the controller connections and the connections to the motor. You will also need to unhook any wires that are attached to the fan housing.
All these attachments must be removed from the housing ONLY. There is also a wire that is simply connected to the base of the unit. This is the ground wire, you may need to remove this to get the housing off, but will need to reconnect it before you power on the unit.
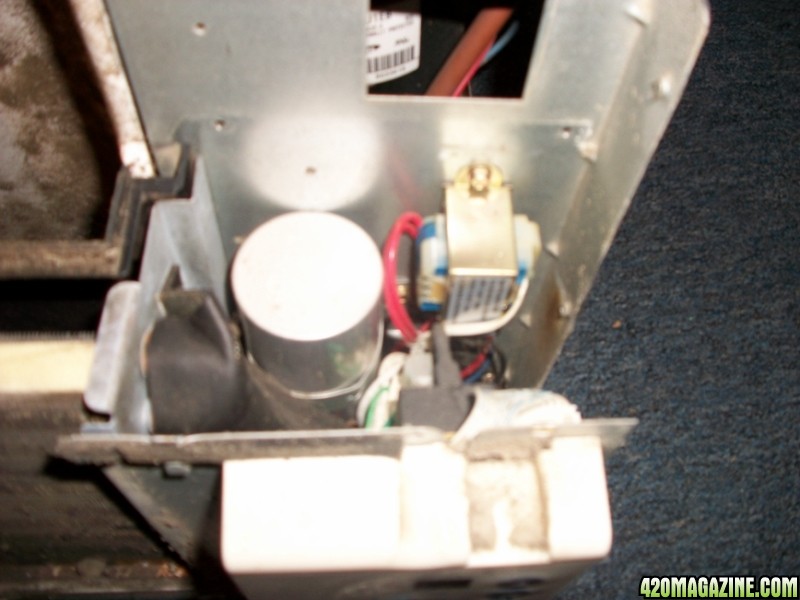
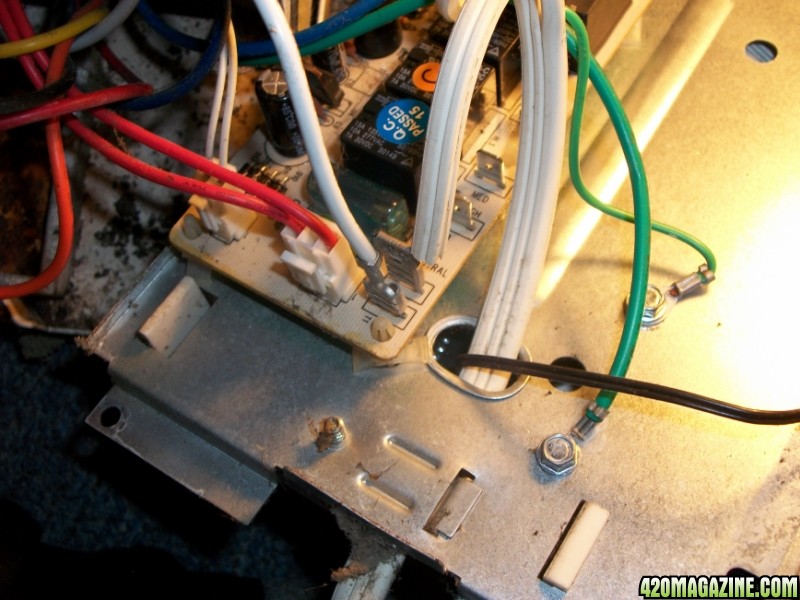
These attachments label high, medium and low control the fan speed and need to be unhooked, be careful not to damage the controller. These also connect to the motor, the small metal tube, and will again need to be unhooked from the motor, and again from the motor to the fan. Be careful not to remove the wrong wires, neutral and the wire to the power cord need to stay connected, there are also 2-3 wires connected to the motor that are also connected to the coolant tank ( the big one) these stay connected. Basically you only want to remove the connections to the fan so that you can remove it. It would be wise to place plastic covers over any metal wire connectors you may have exposed.....
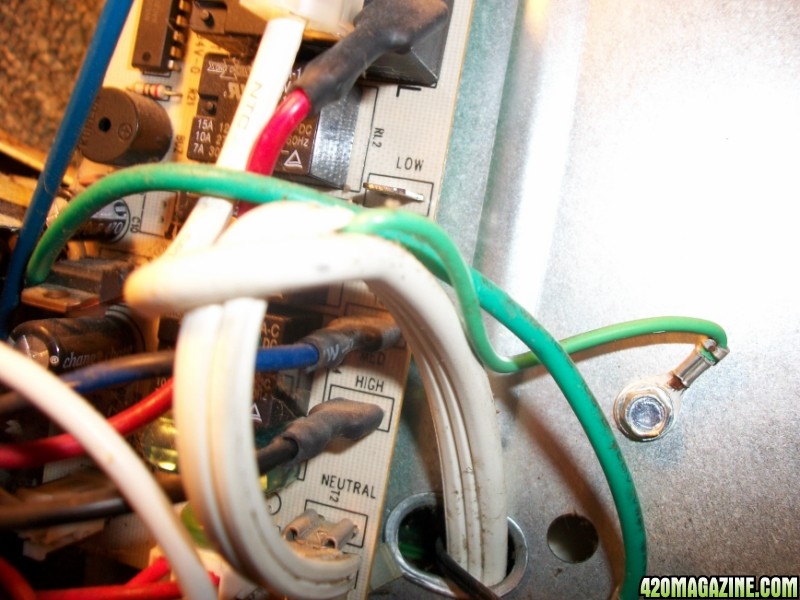
neutral and power (white)
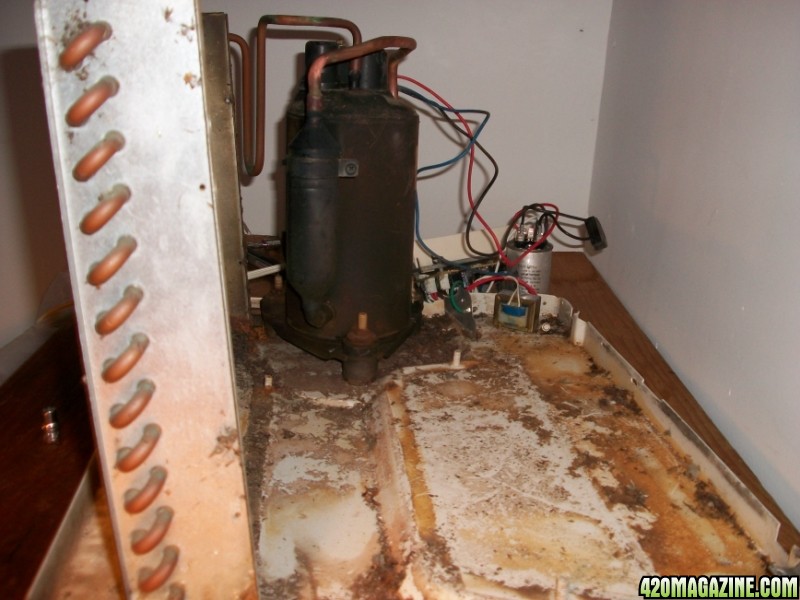
Now that you have removed and unhooked the appropriate wires, the fan and fan housing can be lifted out. Remove an remaining bolts that are connecting the fan housing to the metal base. All that will remain are the 2 radiator, a small one in the front, a larger one in the in the back, the control unit and the coolant tank.
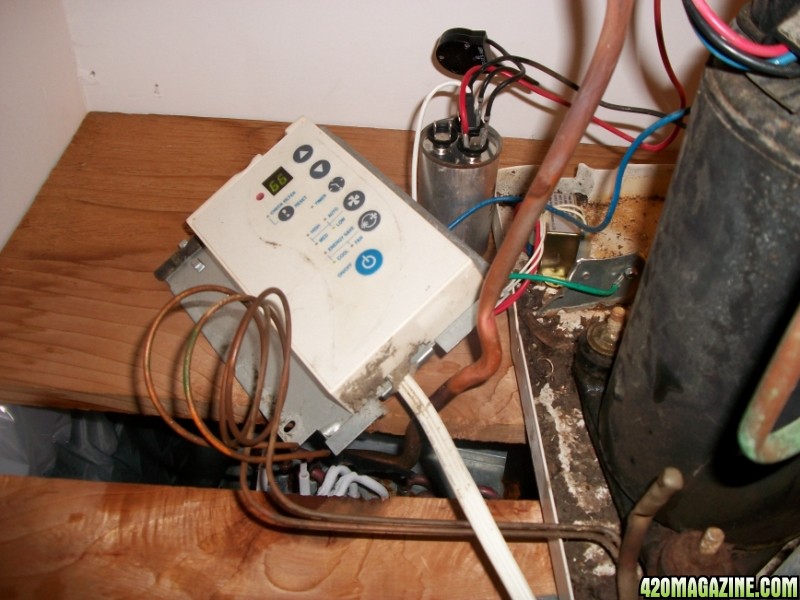
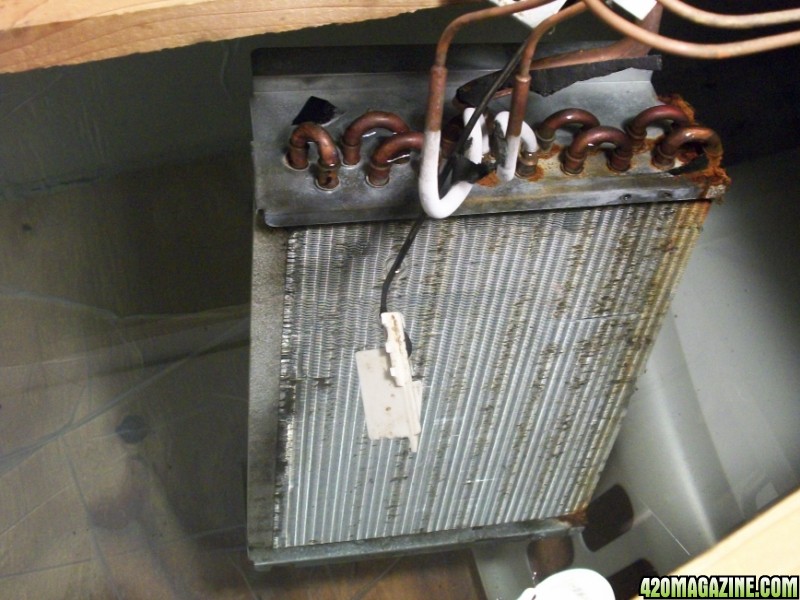
With the fan removed,carefully lift the small radiator (this will go in your rez) and carefully bend the copper wires attached to the coolant tank to achieve the desired position of the *now* water cooler. MAKE SURE YOU DO NOT KINK THE COPPER WIRES My *water cooler* is positioned completely below the the metal housing and off to the side.
Completely submerge the aluminum fins in the rez, put the temperature probe in the water and position the controller for your needs. MAKE SURE THE POWER IS OFF WHEN YOU DO THIS!!! ( I tried to reposition the motor when the power was on, forgetting that I had not covered the metal lead ins from the removed fan wires and got ONE HELL OF A SHOCK). The motor is the round cylinder.
It is advisable that you place plastic end caps over any exposed metal lead ins as well as seal the top pf the cylinder with silicone caulk. A GFCI circuit can also be purchased inexpensively ($15) to plug the power cord into to prevent any accidents.
You are now the proud owner of a new water chiller. Pretty simple huh? Enjoy!!!

Supplies
Window Air Conditioner new or used
Ratchet and Socket set
*If you are going to use this chiller in a nutrient reservoir, I suggest you use a new AC unit or thoroughly clean and disinfect the unit.
***********************************
The first thing you need to do is remove the metal housing from the air conditioner.
Now you are ready to remove the plastic face. Be careful not to remove or damage the temperature probe. This is how you will control the temperature of your rez.
The next step is to remove the fan and fan housing. This step requires some attention to detail, as the fan is connected to the controller and you need to remove both the controller connections and the connections to the motor. You will also need to unhook any wires that are attached to the fan housing.
All these attachments must be removed from the housing ONLY. There is also a wire that is simply connected to the base of the unit. This is the ground wire, you may need to remove this to get the housing off, but will need to reconnect it before you power on the unit.
These attachments label high, medium and low control the fan speed and need to be unhooked, be careful not to damage the controller. These also connect to the motor, the small metal tube, and will again need to be unhooked from the motor, and again from the motor to the fan. Be careful not to remove the wrong wires, neutral and the wire to the power cord need to stay connected, there are also 2-3 wires connected to the motor that are also connected to the coolant tank ( the big one) these stay connected. Basically you only want to remove the connections to the fan so that you can remove it. It would be wise to place plastic covers over any metal wire connectors you may have exposed.....
neutral and power (white)
Now that you have removed and unhooked the appropriate wires, the fan and fan housing can be lifted out. Remove an remaining bolts that are connecting the fan housing to the metal base. All that will remain are the 2 radiator, a small one in the front, a larger one in the in the back, the control unit and the coolant tank.
With the fan removed,carefully lift the small radiator (this will go in your rez) and carefully bend the copper wires attached to the coolant tank to achieve the desired position of the *now* water cooler. MAKE SURE YOU DO NOT KINK THE COPPER WIRES My *water cooler* is positioned completely below the the metal housing and off to the side.
Completely submerge the aluminum fins in the rez, put the temperature probe in the water and position the controller for your needs. MAKE SURE THE POWER IS OFF WHEN YOU DO THIS!!! ( I tried to reposition the motor when the power was on, forgetting that I had not covered the metal lead ins from the removed fan wires and got ONE HELL OF A SHOCK). The motor is the round cylinder.
It is advisable that you place plastic end caps over any exposed metal lead ins as well as seal the top pf the cylinder with silicone caulk. A GFCI circuit can also be purchased inexpensively ($15) to plug the power cord into to prevent any accidents.
You are now the proud owner of a new water chiller. Pretty simple huh? Enjoy!!!