First Closet Grow :)

So, I've been gone for a minute. I was gone out of town, then this and that happened, blah blah blah. Here's the status on the plants:

The Purple Power had some balls. The Mother's Finest, we gave to a friend in need. That was a girl though :)


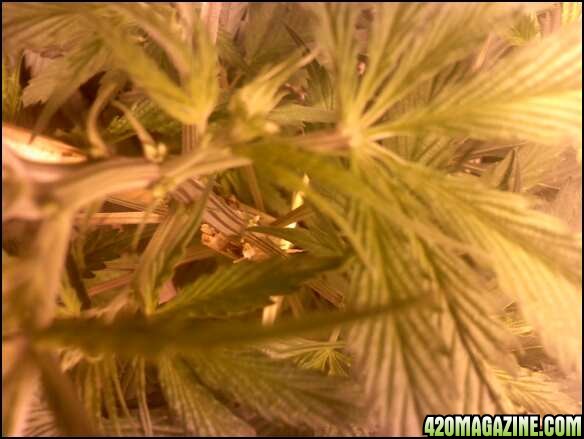
Now we have 3 of our other plants, 2 Ice and Hash Spice in flowering. We just started flowering today and I think I see signs of sex already. Which makes me wonder if it this occured sometime before I just didn't notice... Is that even possible??? The Hash Spice plants looks like it has balls..here's a pic. I know it kinda sucks but all I have is my phone camera. Tell me what you think?? look near the stem..
balls6.jpg


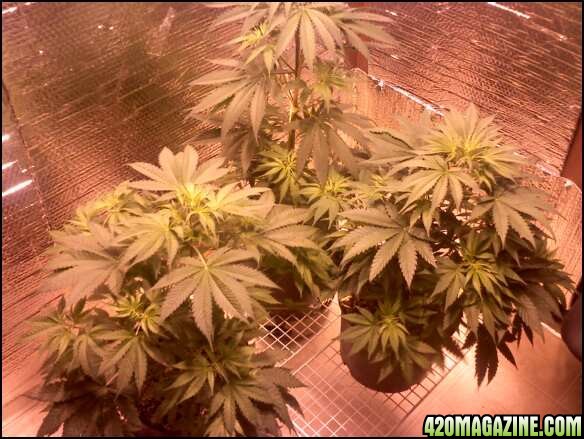
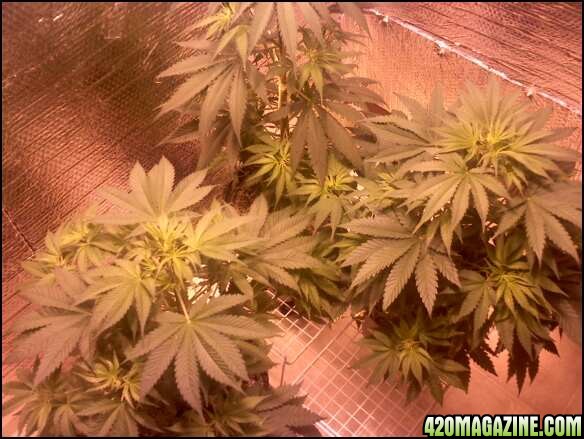
And for the other Ice's. Ice # 1 has white little pistels ( I think, but I am like 100% positive.) Ice # 2 isn't showing yet which is normal. Like I said, It's only Day 1 of flowering so I am wondering what could cause this early sexing, it seems like? Is this possible? Needless to say, i know i won't know for sure for sure for a week or 2.

545990497_1932224590_0.jpg

545990495_1932224585_0.jpg

545990308_1932223907_0.jpg
 
I think I see signs of sex already. Which makes me wonder if it this occured sometime before I just didn't notice... Is that even possible?

Yes. Plants generally show sex (aka "pre-flowers") if they are allowed to reach maturity before the light is cut back.

The Hash Spice plants looks like it has balls..here's a pic. I know it kinda sucks but all I have is my phone camera. Tell me what you think?? look near the stem..

My eyes are worse than your phone's camera, lol. But it does look like you are correct. When you look at them under magnification (a cheap 17x-20x jeweler's loupe such as coin collectors or other hobbyists use is helpful, or one of those cheap 30x-50x scopes that you see at RatShack for around $15 usually has a dinky little pull-out 8x magnifier on it) do they have the "lobster-claw" shape? There's an excellent sticky in one of the forums that should help with identification of sex.

And for the other Ice's. Ice # 1 has white little pistels ( I think, but I am like 100% positive.)

Again, a strong magnifier of some sort is helpful. The pistils will look like tiny pieces of yarn - kind of "frizzy" as they are made with a lot of surface area - for their size - for the male pollen to land on.
 
Thanks guys :) :battingeyelashes: :) I appreciate all your help. Thanks for the links as well. Hash Spice-out. Ice #1 is definately a GIRL!! So I'm very excited. So we are going to start a couple clones today. We picked up some Clonex for that. And also we picked up growth hormones called Hormex. Is is okay to use this during flowering?

I love the whole process of all of this. And now that we have a girl, cloning is definately going to help save money and time.

Thinking about taking Juicy's advice and making a video so you can follow me during this flowering stage. So stay tuned :)

:tokin:
 
:yahoo: on the girl :hookah: that is excellent. cloning will definately speed things up for you. great news. cant's wit for the vid,, getting the popcorn and pulling up a seat :popcorn::popcorn:
 
One of my other Ice plants in veg is showing sex of a female. She's about 5 weeks old. My question is, can I keep her in veg so she can get a bit taller or do I move her into flowering now?? :scratchinghead:
 
if she is showing sex she is ready,, IDK about keeping her in veg longer,, I have never done it, and got scared last time I had that happen and threw her into flower. I don't think it will be bad,, but I really do not know. It will strech however, and can double or triple in size when you first flip the switch,
 
if she is showing sex she is ready,, IDK about keeping her in veg longer,, I have never done it, and got scared last time I had that happen and threw her into flower. I don't think it will be bad,, but I really do not know. It will strech however, and can double or triple in size when you first flip the switch,

Thanks Herb :) I'll switch her over then, I don't want to risk it.
 
One of my other Ice plants in veg is showing sex of a female. She's about 5 weeks old. My question is, can I keep her in veg so she can get a bit taller or do I move her into flowering now?? :scratchinghead:

If it's not an autoflowering strain and you're just seeing "preflowers," then there is no reason that you cannot keep it in veg for many moons.
 
Alright I think I'll leave it in veg then. Thanks guys! I checked my other Ice plant and it also is showing preflowers of a female. If I'm right, then I have 3 girls :) So I think in maybe 2 weeks I'll switch them over, maybe a week...we'll see.

I absolutely love this strain. I smoked it for the first time tonight at a friends. It's probably THE best high I've ever experienced. :tokin: It's great to grow too. I've had no problems at all.

Hey Langa!!! Glad you came :) LST them???
 
Well here we go, LST (Low Stress Training) the ultimate way to maximize your yield. It is important to start your grow with high potency marijuana seeds genetics, with LST you can even go for tall sativa cannabis seeds strains.
Before we begin lets get some knowledge on what you will be looking at:
Light Brown: Pot Outline
Green thick Lines: Main Stem
Small Thin Lines with Green Balls on top: Fan leafs
Yellow Lines: Side Branches
Red: Tiedown Metal Hooks (or thread whichever item you use, i use Hooks - it's easier)
The Text in the box: First digit is Step No. and Second Digit is Pot Size, below the numbers is the type of view your looking at (either from the SIDE or from the TOP)

STEP 1: Grow your plant from a potent marijuana seeds strain of choice to 3 or 4 leaf sets, some use 5 but i always use 3 because after 3rd leaf set the main stem starts to harden and it will be harder to bend over your plant properly without breaking the main stem.
STEP 2: Using a metal hook (i cut small sections of cloths hanger and bend a U shape at the end as a hook) bend over your plant with metal hook at the last internode (space between the last set of fanleafs and the next to last) and stick the metal hook into your dirt to hold down the stem.
STEP 3: This is really not a step, just waiting time... Take note of how the top of the plant that was bent down will bend back upwards towards the light, this could take anywhere from 3 hours to 1 day. Under my 1000 Watt Metal Halide light it does it in under 3 hours.
STEP 4: Veg and dont tie down until you have a new leaf set. You will notice Side branching has started already because good light is getting to the main stem areas next to each fanleaf stem intersection with the main stem.
STEP 5: Depending on your starting pot size you may have to transplant. If you started out with a large pot, repeat step 2 over and over again holding the main stem down with hooks until you reach the end of the pot. In this illustration to save time and drawings, i started out with a small pot and it reached the end of the pot after the first tiedown. I repotted it into a 10 inch pot which will be my final pot size for this plant in order for me to continue the LST Bends around the inside edge of the pot.
STEP 6: Now that your new leaf set has formed you have enough length in growth since the first bend(s) to allow you to start bending the stem horizontally around the inside edge of the pot. Use metal hooks again to keep this bend in place. Side branches should be coming along very nicely. Sativa cannabis seeds strains grow faster and produce more stems, indica marijuana seeds varieties will grow half as much.
STEP 7: Continue repeating steps 4 and 6, allowing the plant to grow and then keep tieing it down along the inside edge of pot using metal hooks (or whatever your using) Side branches should be forming and growing up towards the light.
STEP 8: Continue to repeat step 7 until you are all the way around the pot... when you reach the point where your plant first met the edge of the plant Top the plant (cut off the very top of the plant) and hold it down horizontally with a metal hook... During all this time of repeating step 7 you should also be tieing down horizontally the new branches that have formed from the main stem as much as possible until you use up as much space as possible inside the pot as well , the outter branches growing over the outside edge of the pot you can hold down as well with string to keep those tops even with the inner branches.
STEP 9: After you have used up all possible space inside the pot (or your eggcrate) its time to just let it flower.. This is a side view of how it will and should look by that time with all the side branches growing upwards towards the light... these will all become Collas unlike a non LST plant will only have one colla.
During flowering and even before due to lack of light on the main stem fan leafs which is all the way to the bottom almost against the soil those fanleafs will die off anyways, i usually cut these off the main stem right after the branch has grown out in that area, keeps things neat down below where you will need good airflow during flowering.. so go ahead and take off any fanleafs coming off the main stem that is going around the inside edge of the pot.
Set your timer to 12/12 and watch it bloom. There is no Step 10 in the picture but we all know what that is HARVEST!!!
Sativa indica hybrids or sativa marijuana seeds strains are suitable for LST as they grow fast and low stress training helps to control their height. Choose a potent, high yielding cannabis seeds variety for LST!
 
If it's not an autoflowering strain and you're just seeing "preflowers," then there is no reason that you cannot keep it in veg for many moons.

Thanks TS, I was curious about that myself, I always panic when I see somehting and I don't know 100% what it is or what to do with it.. :hookah:

I didn't know if it would hurt the plant or confuse it by leaving in veg.:blunt:
 
Man thank you so much Langa! So much info, thank you for going in depth and taking the time. I had no idea you could do something like this, so awesome :) I think I'm definately going to try this out my babies tonight or tomorrow. Seems like the I could get alot of bud this way. :)

Looking forward to seeing your girls flower :) YAY!

And thank you for the links Herb Zen, you always come equipped :thanks:


Has anybody ever heard of this...my buddy says that you can take clones from your plants and put them right into flowering to determine sex quicker, Any truth to this??
 
Yes. You can actually sex a plant by covering a branch (blocking 100% of the light) for 12 hours a day. I imagine it's pretty stressful for the plant, but it has been done.

If someone likes to grow for longer periods in the vegetative phase in order to produce larger plants, they can continue to flower the clones and have a small(er) "first harvest" which might help tide them over while their main grow progresses.
 
Thanks TS,,, I knew you could put a clone into flower to check, but never heard of covering a branch,, (does seem like it would be stressful to the plant though)

would rep ya,, but I can't.. ever find youself just handing out the reps, so you can rep a specific person again..lol :hookah:
 
So I am starting to see some damage from spider mites on my flowering Ice. It's nothing extremely serious but I want to stop the problem before it gets worse. So, I looked and found a post by Roseman and I found this concoction :

"" Spider Mites and Pests

Last night my wife comes running in the den and says

Dear, Dear, my violets are covered in aphids. Do you have anything from your hydro supplies I can borrow to kill them?

Well, I didn't. So I spent an hour goggling natural pesticides.

I found that I need to mix in water to make a spray, one or two of the following:

Ivory Soap

Canola Oil

Tobacco

Garlic

Blended up chrysanthemums (makes pyrethrum )

so we got some ivory soap, a clove of garlic, some chrysanthemum leaves and blended the heck out of them, and sprayed her violets.

This morning, we had dead aphids and not one live one.

Try it, you can make a preventative or a cure. ""


Has anyone tried this?
 
oh dreaded mites, you need to nail those quickly as i hear they can ruin a whole plants and grow easily, ive not had any myself thank god and but heres a couple of cheap ways that might help to get rid though........How to Get Rid of Spider Mites
First of all, you need to make sure that you have spider mites in your garden. Scorched looking leaves and leaf discoloration are amongst the most obvious signs. After you have seen these signs, take a white sheet of paper and hold it under a branch. Gently shake or tap the branch. Look at the paper. If it has slow-moving specks on it, your problem is surely that of spider mites.
In case you feel that the problem of spider mites is not too great, you can wait for sometime, to see whether it gets solved on its own. Insects like lady beetles, predatory mites and big-eyed bugs are natural predators of spider mites and can easily get rid of the problem for you. Since these predators can be killed by insecticides, make sure to spray them carefully and save the beneficial insect species.
One of the major conditions supporting the outbreak of spider mites on plants is dryness. So, make sure to give your plants adequate water, especially during the dry periods. In case of sturdy plants, you can even hose them down periodically. This will help in removing the dust on their leaves and thus, restrain the spider mite webbing that holds the eggs and leads to the break.
In order to retain moisture in plants, try to keep them away from late afternoon sun and arid weather. This solution can work mainly in the case of potted plants, which you can remove from direct sunlight and put under shade. In case of plants that are attached to the ground, try to provide them shade in any other way. For indoor plants, you can draw the shades or move them out of direct sunlight. Using a humidifier next to the plants is another option.
In case you feel that the problem is not going away by natural means, make your own insecticide and get rid of the spider mites. For the purpose, add 5 tbsp liquid dish detergent to 1 gallon water. Repeated sprayings will be required to kill the mites. While spraying, ensure that you do use it on the undersides of the leaves. This is because spray will only kill those spider mites that it comes in contact with.
Another homemade insecticide comprises of alcohol and water. For making the same, add 1 part alcohol to 1 part water i.e. use both in equal quantities. Since rubbing alcohol is poisonous, it will kill the mites on contact. At the same time, it evaporates quickly and thus, will do little damage to your plant. Make sure to use the spray on the entire plant, paying emphasis on the bottoms of the leaves.
If you feel that even homemade insecticide is not helping you kill spider mites, you have the option of using a miticide or other pesticide on your plants. They should be applied once every five days, till all signs of spider mite infestation go away. Remember that it is quite difficult to get rid of spider mites, even when you use pesticides. So, before using such harmful substances, weigh the pros and cons first.if not neem oil is very good i hear to...good luck
 
Back
Top Bottom