Hey Dr Fish I love your original modifications, so I really hope this thread is still alive. I was wondering have you come up with anything to do regular maintenance flushes on the 8 bucket system? Because it is a real pain, especially when you like to do them as frequently as I do. I was also looking at how you increased the circulation in the system and I was wondering if there is a way to increase the circulation without modifying each individual bucket. Hope to hear from you soon!!! many thanks
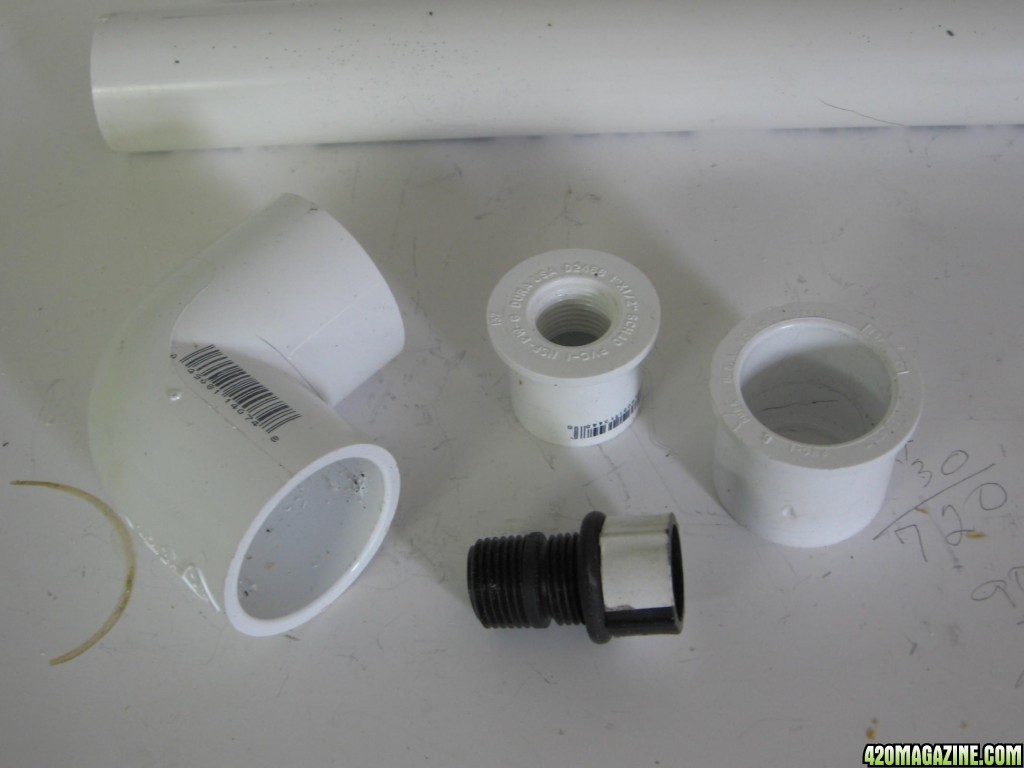
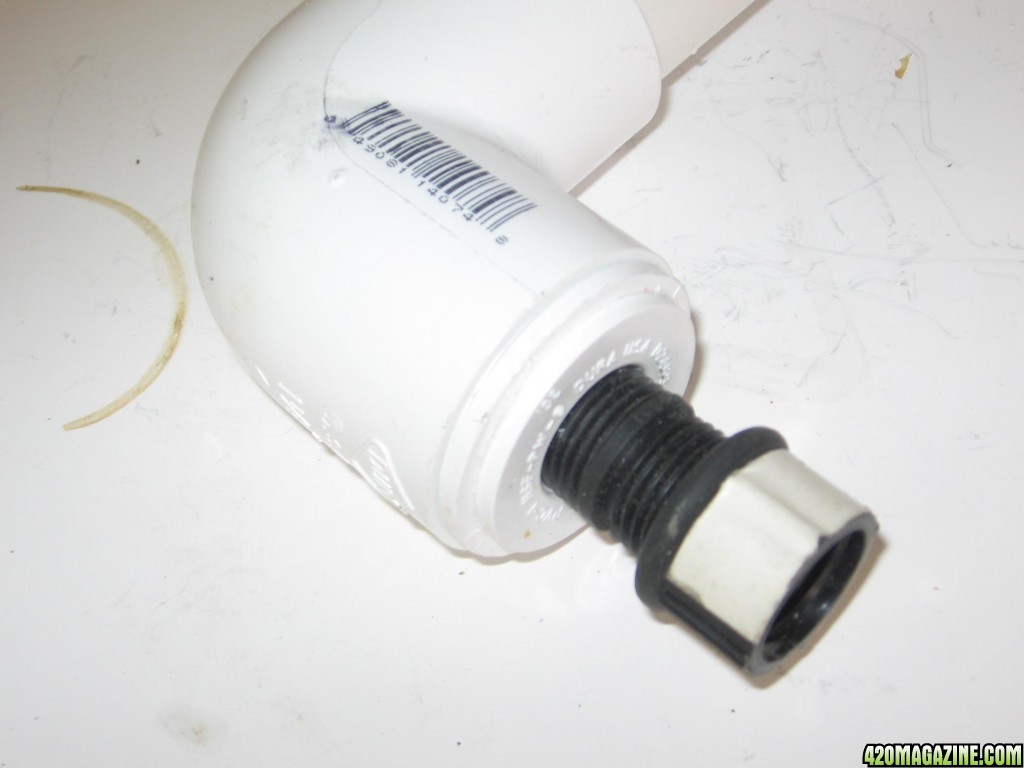
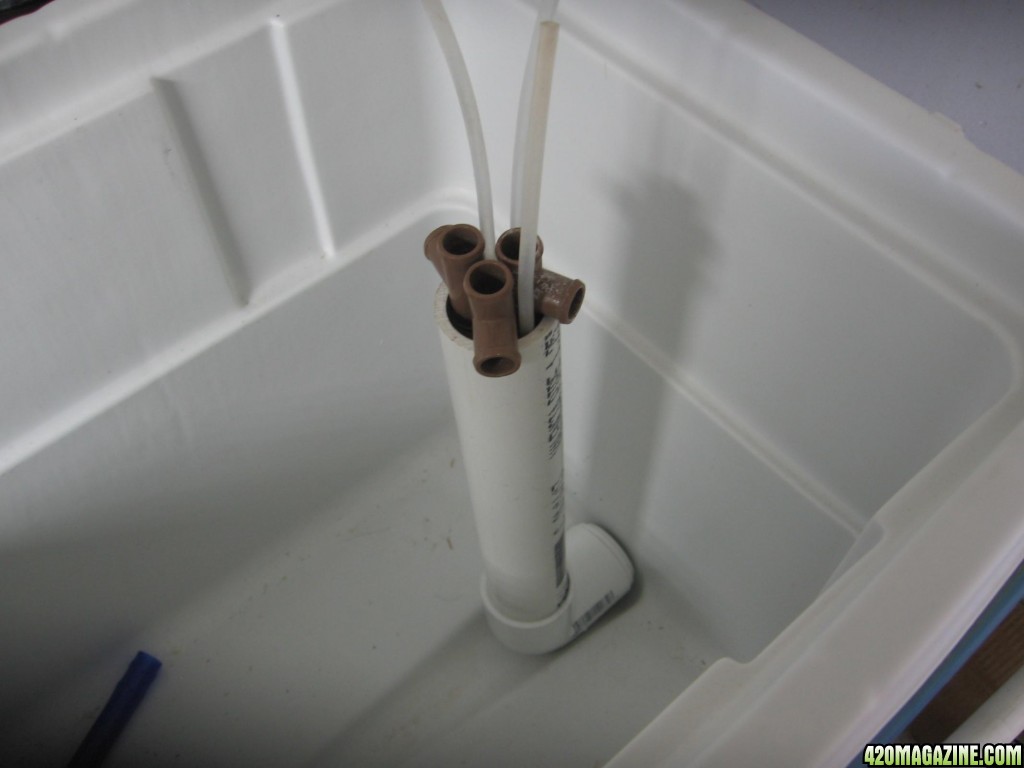
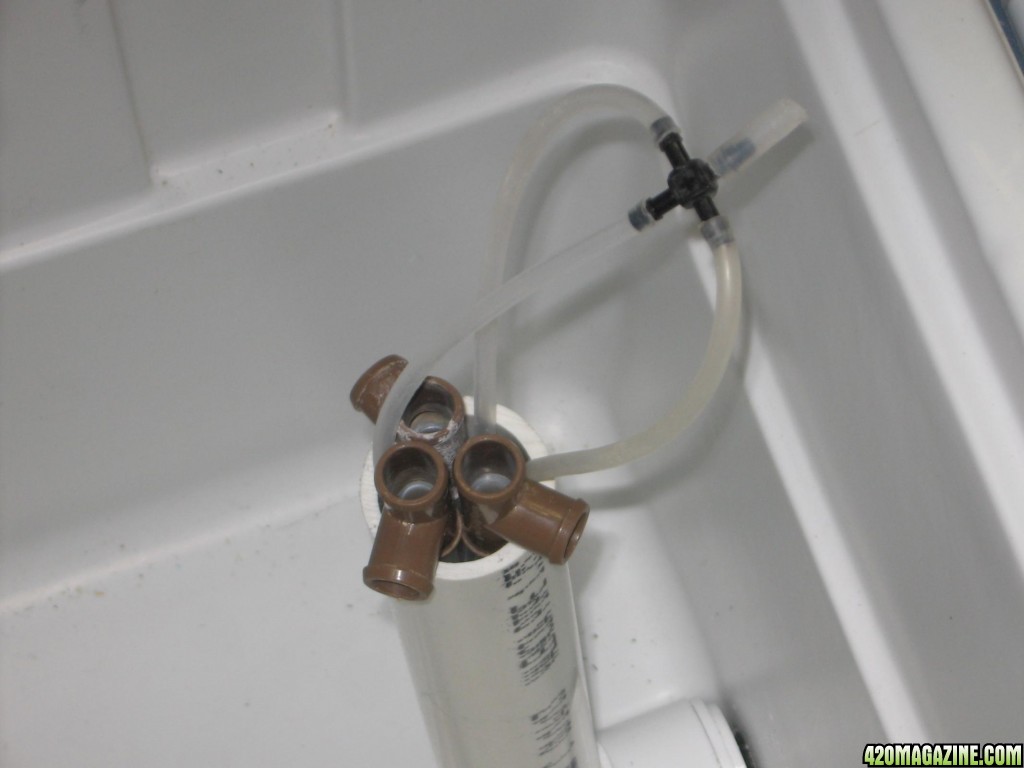
You can add multiple pumping columns to the reservoir by adding a large standing water column to the reservoir, then drop three pumping columns in it.. Where you cut the threads depends on the wall thickness of the reservoir.. I was using an ice chest in the picture so they needed to be longer, also i used the old style pumping columns. .... That mod should move about 15-18 gal an hour..
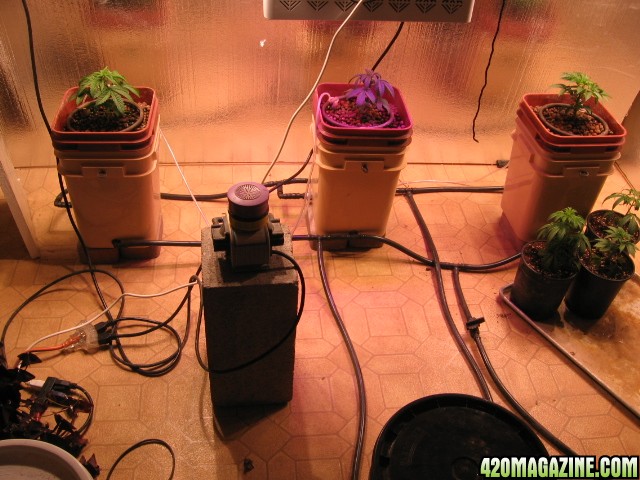
This is what i did to make flushing easier.. With these three WFs in my mixed hydro thread, i put an inline valve to drain outside my house... Your WFs should be off the floor a bit to make draining easier.. The black bucket in the foreground was my reservoir..
Thank you so much for getting back to me. So yeah i saw your early pictures you posted, I'm just having some difficulty imagining how that would be done with the standard 8 gallon controller that comes with the kit. I also have the recirculating kit (cant believe the system didn't come with it but that's another story) hooked up to a four outlet air pump with all four outlets dedicated to just circulating the water, yet upon looking and feeling in one of the grow buckets, it didn't seem like there was any circulation going on at all. I'm digging the flush/maintenance setup, I'm coming to terms with the fact that I don't think there is any way around modifying each bucket.
Any tips/examples of modifying the included res w/ circulation kit to achieve better circulation?
Just pumping more air won't increase the flow of water in a single GH pumping column... You do understand that the top of the standing larger pvc water column tube, in the reservoir, is higher than the water level in the reservoir, and buckets, by a couple inches..... Gravity will keep the water level in the standing pvc water column he same height as the buckets and reservoir .. Since that water column is only connected to the last bucket, three pumping columns dropped into that larger column of water will remove the water from the last bucket, 3 times as last as a single pumping column in the reservoir..... Thats all you get with the GH recirculating kit... The larger standing water column will replace the GH recirculating pumping column in the reservoir.
Don't expect to feel water movement... It's still a slow exchange of water.. The up side is it's not fast enough, even with 3 pumping columns, to suck roots into the tubing....
Thanks for the reply, so the "recirculating" pumping column is the same pumping column using in their drip ring set up? Just retrofitted to pull water from the last bucket? If that is the case, not only is it extremely disappointing but I need to find a way for it to circulate through 5 buckets...
I was assuming all buckets are connected with in/out lines... an inline conection from the reservoir to the first WF, 1st WF connected to WF #2, #2 WF to #3WF . till we get to the last WF... When the water in that Wf is pumped out into the reservoir it draws water through the first 4 Water farms....... What part of that don't you understand..... That's how a regular GH Waterfarm recirculating kit works...
Sorry for being confusing, it is how you imagine. I see how you created a better circulation system with the cooler, I'm wondering what I can do for better circulation with the res that comes with the kit, even if it is just a slight increase in flow between buckets and reservoir. The reservoir it comes with has the 8 gallon "controller" on bottom, and a 13 gallon tank on top ( I'm sure you already knew that).
You toss the pumping column in the controller that's used to circulate the water..[that's what i'm calling your reservoir] the container on top is just there to maintain the water level in the controler/reservoir.. now you replace that pumping column with the standing water column and 3 pumping columns... Forget about the damned ice chest with the larger pvc water column... i never meant for you to use the ice chest.... Those were the only pics i had of that column... I'm done now..
Will be running 2 Waterloos with an Ice probe to cool the igloos.. The blue tape on the probe was to keep the threads clean because it was set in urethane spray foam to bed the unit firmly in place… Waiting for the mothers to grow bigger... It'll be like my Waterloo grow.. In the summer I have another trick to improve the temp drop of the probe. There's an uninsulated wall between the ice chest and a swamp cooler I use in the summer... Come summer, I plan on piping the colder air, through the wall, directly to the heat sink of the probe.. I bought an Ink Bird temp controller instead of the one sold by Ice Probe... It can control heating or cooling.. I plan on cloning directly in the igloos using big cuttings,, There will also be the close in reflectors like in the igloo grow The scrog screens will be 32"x32" to take advantage of the advertised best footprint of my 315 watt cmh lights. I'll be trying for a pound from each light.. Here's a Ice Probe grow thread.. First Grow - Casey Jones - DWC - SCROG - Ice Probe Thermoelectric Chiller
`The black abs 1-3/4" washers you see on the outside of the reservoir serve two purposes.. First to spread the force on the rather thin skin found on most ice chests... Second is as spacers to compensate for the not perfect fit of the 6" cut off sprinkler risers I use.. This works because there are no gaskets on the outside of the ice chest.. I use Teflon tape where it's needed.
Should have this up and running first or second week of nextyear..
I'll post the allowed 5 pics and try and cover as many of the details as I can.. I bought the 13/16" deep hole drill off Amazon, 6-7$, It was needed to get a clean, straight hole through the ice chest insulation... It also works for the center hole in the washer/spacer.. A 13/16 spade drill will work for buckets when drilling holes for 1/2" grommets. The old 1-3/4" hole drill I had on hand.. The plastic washers used on the outside of the igloos are cut from 5 gal buckets... I also had 1/4" and 1/8" abs sheet on hand from other projects. Plastic washers for the outside of an igloos, I cut from the sides of 5 gal buckets.. Almost all the parts I use, or adapt, are bought off the shelf from HD..
Please bear with me as I go through this again, The pvc standing water column connected to the reservoir is what makes this setup work.. The water in the grow igloo, and the reservoir, and the water column are all the same level.. The top of 3/4" pvc water column is 6-7" higher than the water level.. As the drip ring removes 5-6 gal an hour from the water column, it is replaced from the reservoir... With the dripring adding 5-6 gal an hour to the grow Igloo, gravity will return the water, at the same rate, to the reservoir near the Ice Probe..
No matter how slow you think the circulation is, It's more than enough... The o2 added by the hydroton means no air stones needed.. For myself this has always been about removing all sources of heat.. I have a 1/10 hp chiller sitting in the wings..
This project isn't allowed in my Projects from my shop thread... No pot references allowed there..
When drilling the plastic washers/spacers, I drill the pilot hole with 13/16" drill, but not the hole itself.. That holes serves as the start hole for the 1-3/4" hole drill.. I drill out the 13/16 hole while holding the 1-1/2" plastic in a $2.99 clamp from HF.....
The short cutoff sprinkler risers I've referred to before as 3" risers, are actually 2-1/2" risers..
I'll also cover how to install the water column for use with a 8" lid basket.. I do prefer that size.. It's what I used in the led grow thread.. I didn't use the igloo lid this time.. The basket lids are much simpler..
I don't know if I've made the point of saying, the water column is always attached at the spigot hole on the igloo..
These igloo scrog screens are 24"x36" .. The screen supports are 16" long.. That puts the screen about 12" from the dripring.. The light will effectively cover a 36"x36" screen, but I didn't have a screen that large.. I just make do with I have, or can change to work..... I gave up on the hole punch for cutting the hole for the water column pass through in the basket...... Didn't have the rotary files I needed, and didn't want to spend the $70 for a set.. I used a 1/2" wood chisel to cut the hole.. I drew the right size hole on piece of peel and stick shipping label.. It was simple enough to cut, where needed around the label.. The cone was shortened 1-1/4" I used a small saw to remove all but the bottom grove.
The last pic is the 1/2" fittings needed for the screen.. All slip fittings, no glue needed.. The reflector panels hangers are cut from the same 2"x4" wire used for the screen.. The 4 uprights are 24" long..
Just filled the system.. The insulation for the tubing will be added.. Wanted to check for leaks first.. The line from the center of the ice chest is the drain... I drilled a hole through the floor so it drains outside.. Will drop sprouted seeds into the hydroton in the morning.
The sprouted seeds went into the hydroton yesterday.. Plan on flowering in 5 weeks.. They really don't need to be started in anything else.. When I start the waterfarms, I'll be cloning in the WFs.. Can't see using a cloner, when the WF can be used as one..