

DIY Cooler Reservoir
This is so simple to make and works incredibly keeping reservoir temperatures down. Depending on the size and quality of cooler that you use, this build could cost you as little as $15 or just pennies if you already have a cooler.
Step 1: Pick up a cooler preferably with a removable lid (as opposed to the hinged only type).
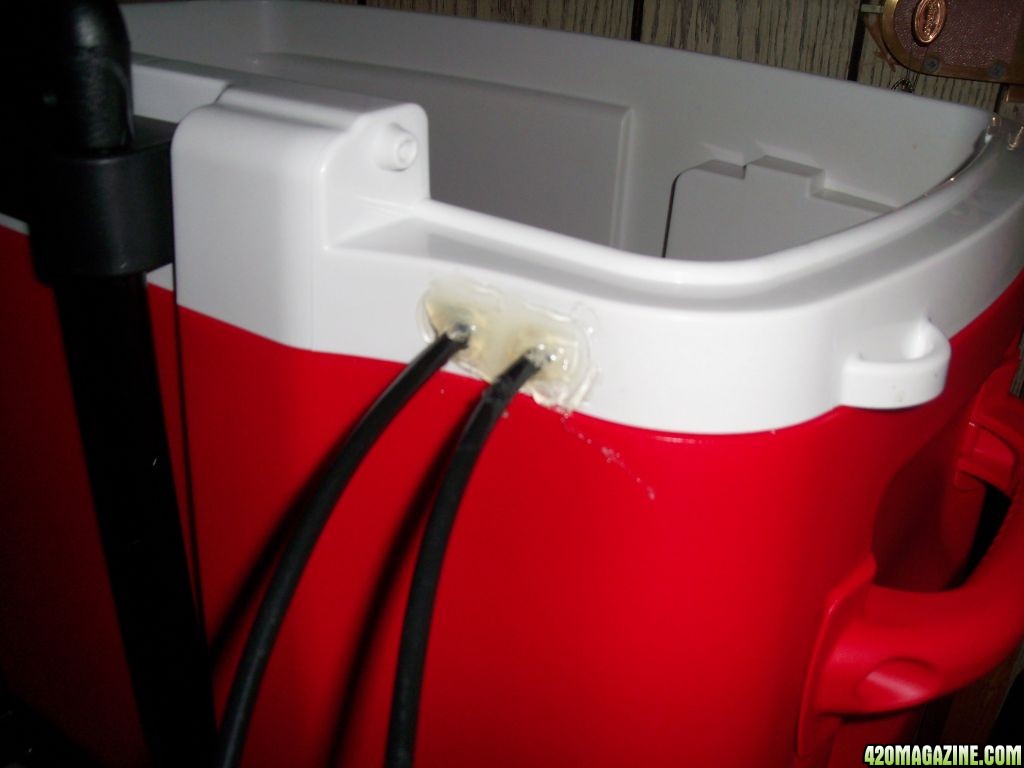
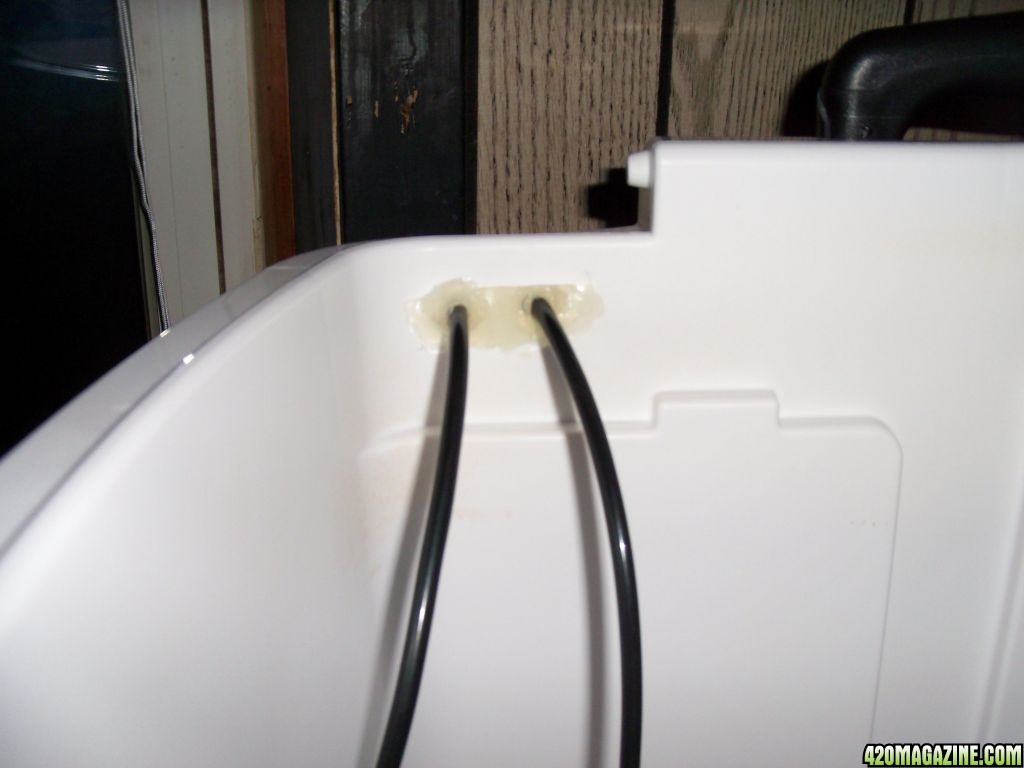
Step 2: Drill 1/4" holes in the base of your cooler near the very top to feed your air lines. As you can see I have drilled a total of 4 holes, 2 on each side to fit my needs.
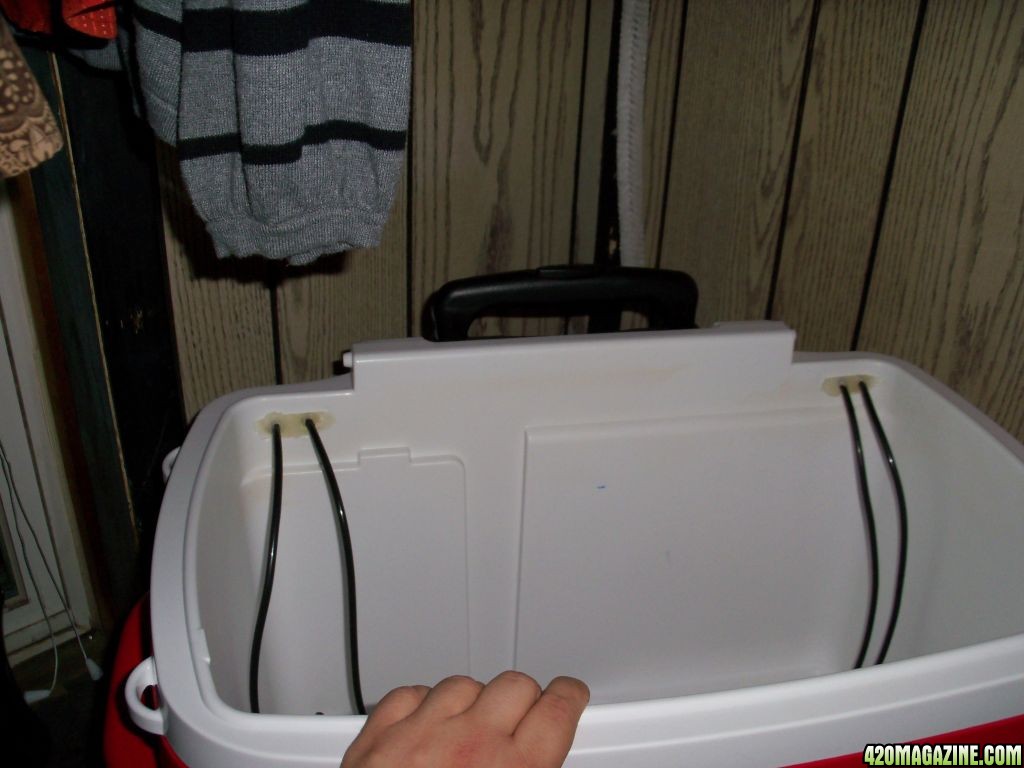
After the 1/4" tubing is fed through the holes, you can use silicone caulking or hot glue to seal the holes and hold the hoses in place. I would have loved to use rubber grommets here, but unfortunately the cooler walls are just too thick to allow it.
Note: Drilling the holes in the base of the cooler will allow you to totally remove the top (where your plants will be) when you need to change the solution.
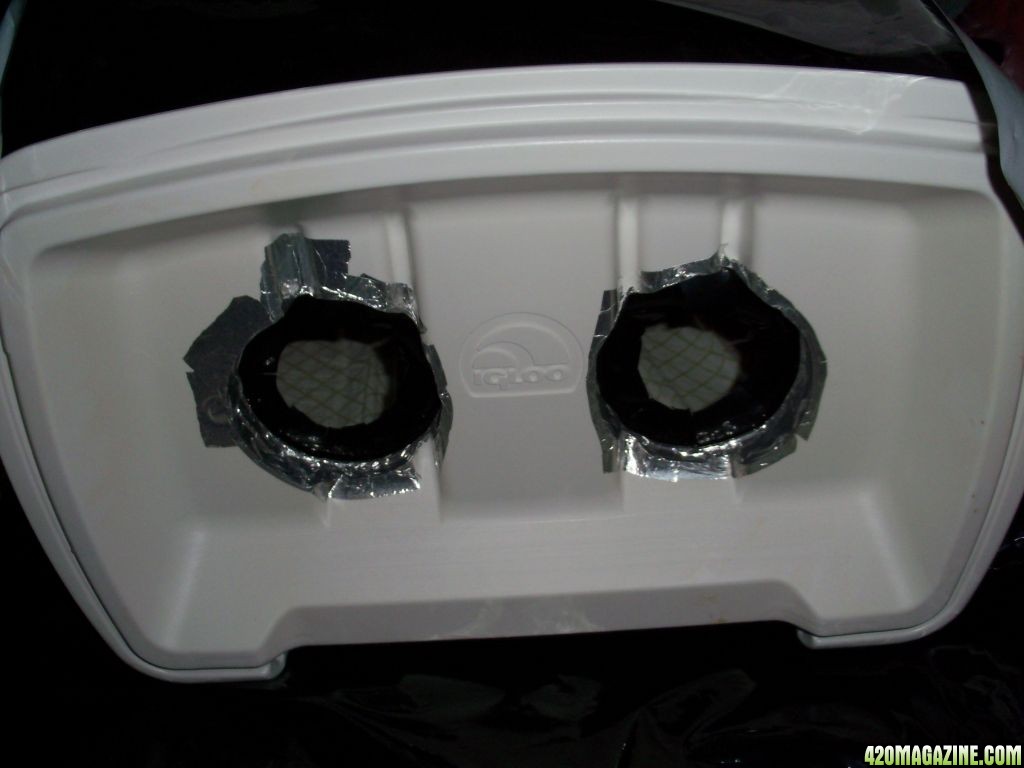
Step 3: Take the lid of the cooler and cut holes that will allow you to drop your net pots in. You want to make them slightly smaller than the size of your net pot so they don't fall all the way through. You just want the lip of the pot to sit on top.
For example: I am using 5" net pots, so I cut my holes about 4 7/8" in diameter so they don't fall through. Your pots could be different though, so it's best to measure just to make sure.
You will notice when you cut through the lid of the cooler that there is two layers. My cooler had about a 2" gap between layers that was just filled with air to help insulate the cooler. Make sure you cut though both layers and all the way through!
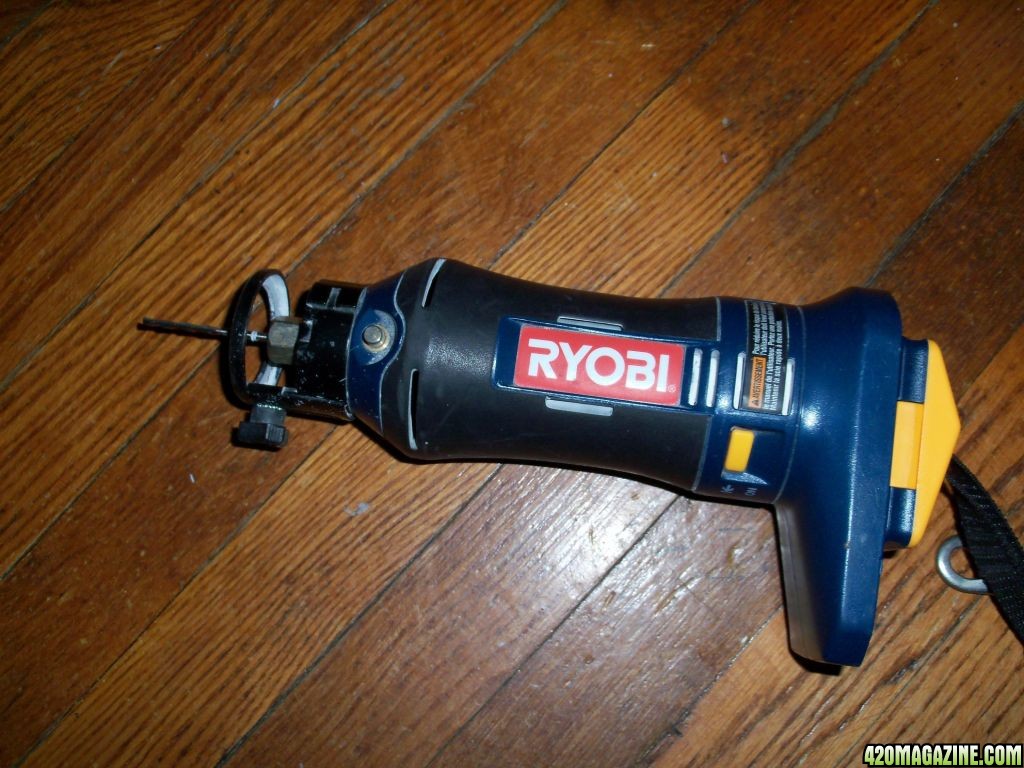
An orbital saw such as this will make cutting the holes a breeze.
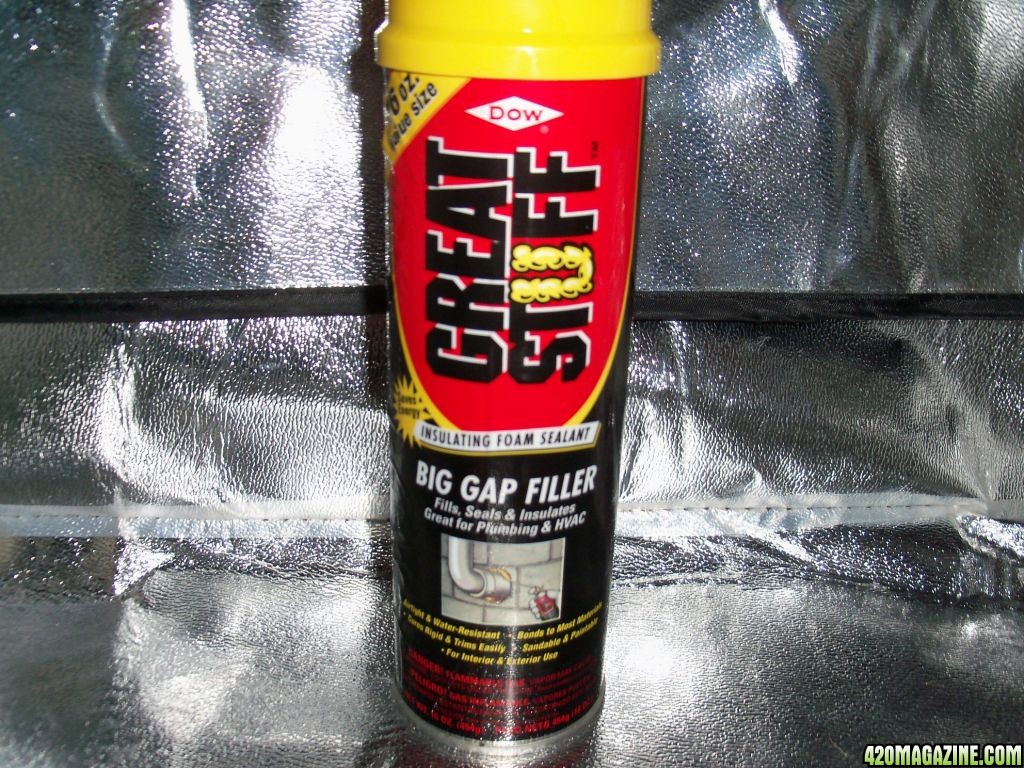
Now we have to fill that gap between the two layers of the lid. For that I used this stuff (Better to use the can that is marked "Big Gap Filler").
When it dries you can just shave the excess that has oozed out so the hole is back to original size. Next I used foil tape just to cover and somewhat waterproof the gap I just filled.
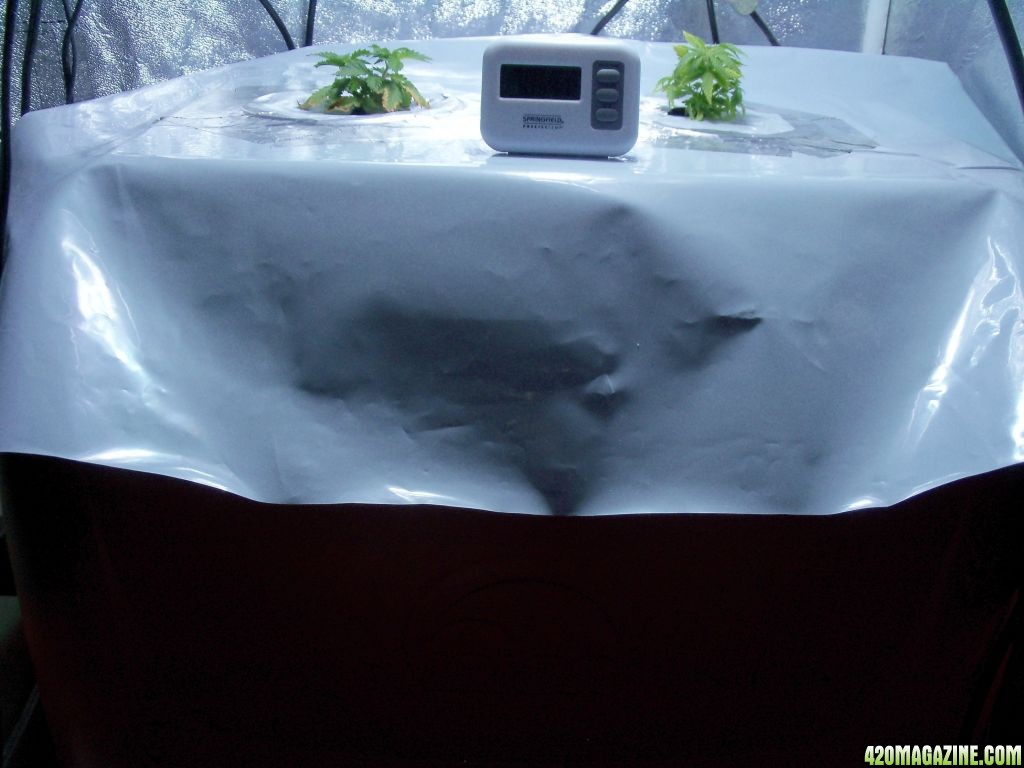
Step 4: Although I doubt the lid of my cooler will allow light through (considering the two plastic layers and now the added foam), I decided to layer the top with a sheet of lightproof black and white poly film just to make sure.
I cut the film a bit larger that the lid so it would hang over every side by about 6" or so. This will ensure that the film covers the joint between the lid and the bottom of the cooler when it is whole again. I used a spray adhesive to glue the poly film to the lid, but just about anything could be used here.
Now just cut out the poly film that is covering your holes. and drop your net pots in. They should fit snug. A little foil tape to seal the lip of the net pots to the lid and voila, you should be done........man I love that foil tape!!!
Placing exactly 10 gallons of water in my cooler will bring the water level to about 2" below the bottom of my 5" net pots. Perfect! The higher volume of water along with the cooler insulation proved to be the key for me. This build helped me keep my solution temps at around 65 degrees. They were at around 75 degrees before. Big difference!
I hope I can help some of you out with this.........I've gotten so much help here, I would love to give some back. Thanks all and.....Good Luck!
This is so simple to make and works incredibly keeping reservoir temperatures down. Depending on the size and quality of cooler that you use, this build could cost you as little as $15 or just pennies if you already have a cooler.
Step 1: Pick up a cooler preferably with a removable lid (as opposed to the hinged only type).
Step 2: Drill 1/4" holes in the base of your cooler near the very top to feed your air lines. As you can see I have drilled a total of 4 holes, 2 on each side to fit my needs.
After the 1/4" tubing is fed through the holes, you can use silicone caulking or hot glue to seal the holes and hold the hoses in place. I would have loved to use rubber grommets here, but unfortunately the cooler walls are just too thick to allow it.
Note: Drilling the holes in the base of the cooler will allow you to totally remove the top (where your plants will be) when you need to change the solution.
Step 3: Take the lid of the cooler and cut holes that will allow you to drop your net pots in. You want to make them slightly smaller than the size of your net pot so they don't fall all the way through. You just want the lip of the pot to sit on top.
For example: I am using 5" net pots, so I cut my holes about 4 7/8" in diameter so they don't fall through. Your pots could be different though, so it's best to measure just to make sure.
You will notice when you cut through the lid of the cooler that there is two layers. My cooler had about a 2" gap between layers that was just filled with air to help insulate the cooler. Make sure you cut though both layers and all the way through!
An orbital saw such as this will make cutting the holes a breeze.
Now we have to fill that gap between the two layers of the lid. For that I used this stuff (Better to use the can that is marked "Big Gap Filler").
When it dries you can just shave the excess that has oozed out so the hole is back to original size. Next I used foil tape just to cover and somewhat waterproof the gap I just filled.
Step 4: Although I doubt the lid of my cooler will allow light through (considering the two plastic layers and now the added foam), I decided to layer the top with a sheet of lightproof black and white poly film just to make sure.
I cut the film a bit larger that the lid so it would hang over every side by about 6" or so. This will ensure that the film covers the joint between the lid and the bottom of the cooler when it is whole again. I used a spray adhesive to glue the poly film to the lid, but just about anything could be used here.
Now just cut out the poly film that is covering your holes. and drop your net pots in. They should fit snug. A little foil tape to seal the lip of the net pots to the lid and voila, you should be done........man I love that foil tape!!!
Placing exactly 10 gallons of water in my cooler will bring the water level to about 2" below the bottom of my 5" net pots. Perfect! The higher volume of water along with the cooler insulation proved to be the key for me. This build helped me keep my solution temps at around 65 degrees. They were at around 75 degrees before. Big difference!
I hope I can help some of you out with this.........I've gotten so much help here, I would love to give some back. Thanks all and.....Good Luck!

") .
.
")