Hi everyone! So this is a journal I started to show everyone how you can make a 5 gallon hydroponic drip system.
The 5 gallon ebb and gro "2 gallon C.A.P. upgrade" journal was pretty popular so I thought I would make this journal on how to convert that system into a drip...or just make a drip from the get go.
This is a very easy build so dont worry about that, its very simple.
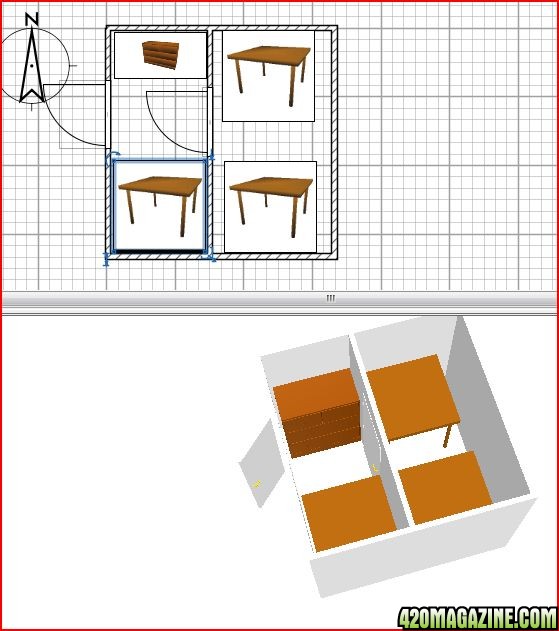
In case you didnt see the 5 gallon ebb and gro journal heres a quick pic of what it looked like, and how it did....

You can quickly and easily turn that 5 gallon ebb and gro system into a drip system by simply not having any of the pins pushed in so that the return bucket is always evacuating when the water line gets high enough.
The second thing you will need to do is take the pump thats in the res and attach a 1/2" "T" and make a big loop out to your plant sites. From there you can use spaghetti tubing and stakes to each plant,...two is preferred just in case one gets clogged.
Last thing you will need to do is plug the pump in the res into a 15 minute timer and have it irrigate for 15 minutes, 4 times a day.
This system will take water from the reservoir and pump it out to your plants through half inch tubing and then 1/8" spaghetti tubing from there. Once it drips onto your rockwool cube it will travel down and out towards the edges of the "top" 5 gallon bucket eventually draining out the bottom filling the buckets as well as the "control bucket". When the control bucket gets full enough it will turn on the pump to evacuate the water putting it back in the reservoir and completing the cycle.
The next part of the journal will be for those of you interested in solely building a 5 gallon hydroponic drip system from the get go and are NOT converting your E&F.
The difference between this next version and the last version described is we will no longer be using a control bucket but a "return" bucket, ones a retrofit, one isnt. Unlike a "control" bucket this bucket will not be able to be used as a ebb and gro but also offers some advantages...namely simplicity, and no little electronic float switches to go bad and flood your house.
We will start by building the buckets...these are 5 gallon buckets from anywhere, so long as they nest in one another and leave atleast 1.25" between the two buckets on the bottom.
For this journal we will be building a 16 site system so we will need 16 "bottom" buckets, 16 "top" buckets, and one "return" bucket.
We will start by drilling 2 holes in the side of 16 of the buckets opposite from each other about 1.5 inches from the bottom making sure to leave enough room for the 3/4" grommet that you will be putting in there. You will need a conical drill bit for this...and make sure it makes holes up to atleast 1.25 inches in diameter because that is around the size you will need for the grommets to fit properly. (Word of advice on grommets...dont get them from home depot, the ones from the hydro stores are much better so long as they arent the old school ones with only one side (shaped like a tophat)).
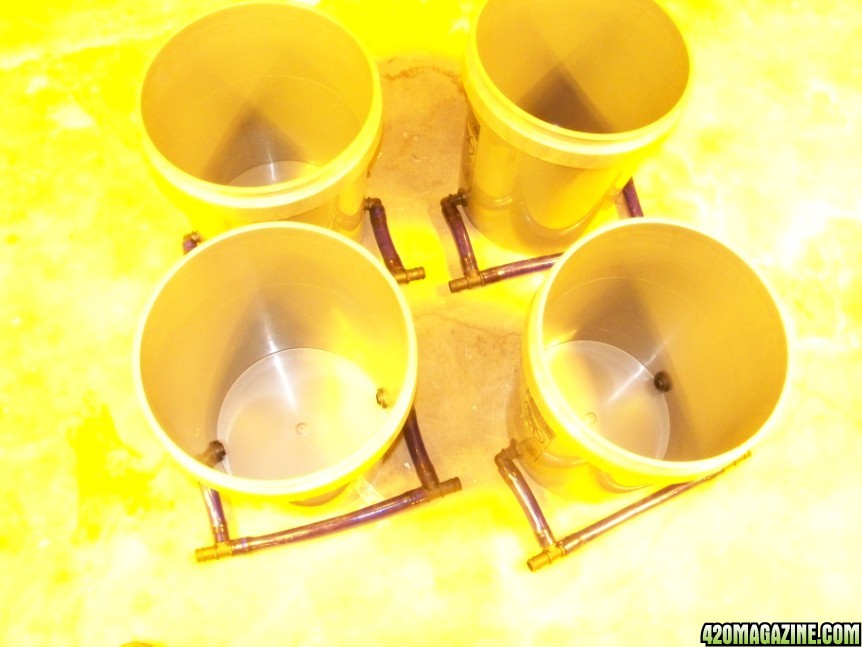
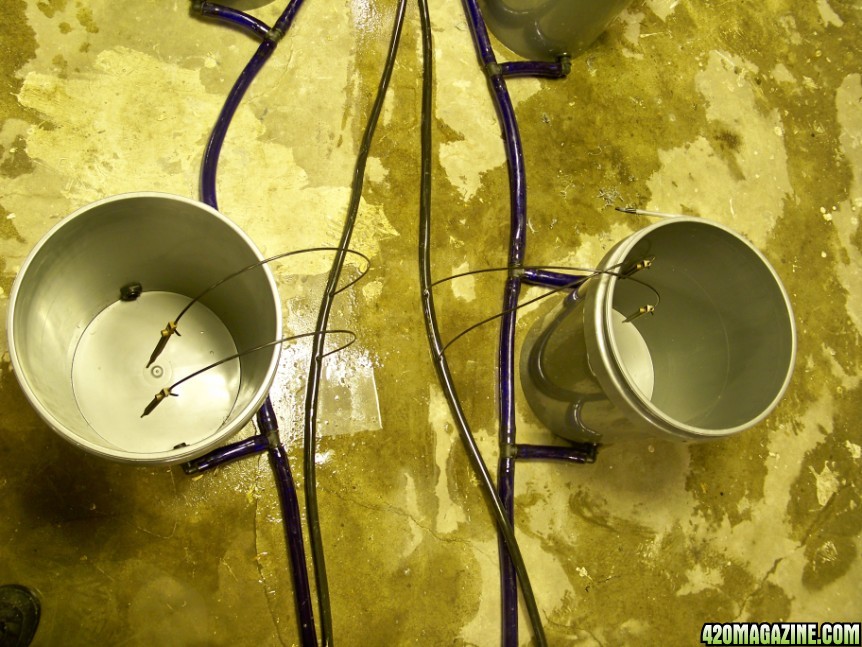
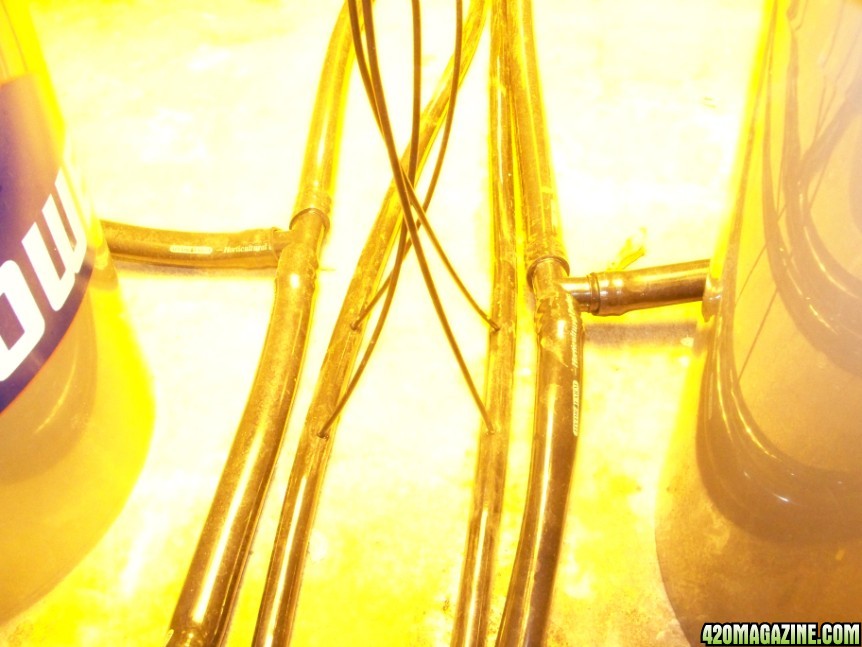
Heres a pic of the grommets in there holes...ignore the drip lines for now, well get to that in a sec. Putting together the tubing can be kind of a pain in the butt however there is a trick when dealing with the curvature and stiffness. If you always curve the tubing away from the bucket they will correct themselves and be square ultimately,...or relatively so atleast. I took these pics to demonstrate this....
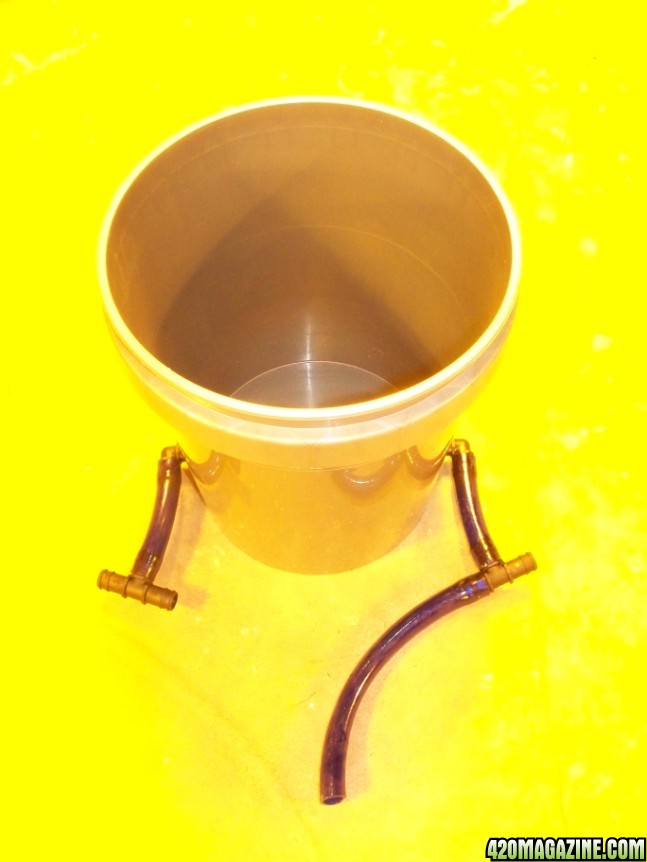
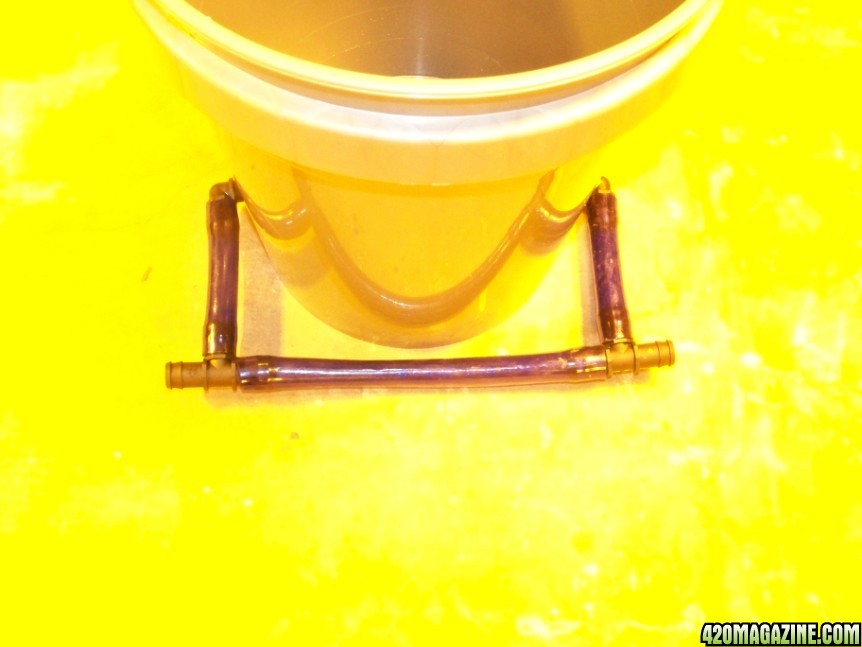
So before its asked I will address the question of "why two drains in the bucket"...the answer is redundancy...if one fails to work the other hopefully will take its place. A hydroton ball could easily run amuck and get lodged into one of the drain holes and cause the bucket to overflow and not work properly, two drains makes it so the system will still work.
Next you will want to drill out the bottom of the "top" buckets (16 buckets). I make about 20-30, 1/4" holes in the bottom of these buckets for water to drain out of.
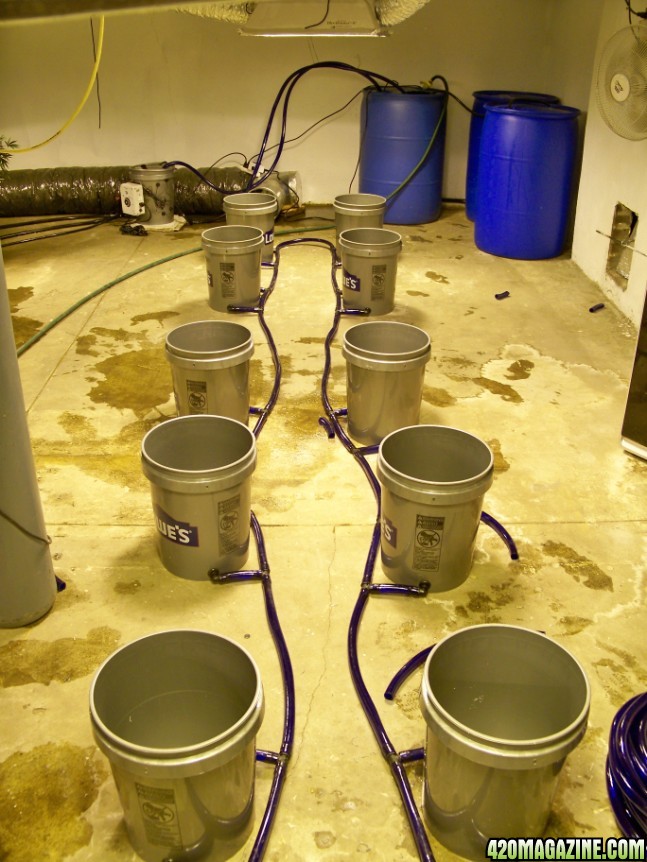
Now you can place all of your buckets around the garden as you please but make sure to choose carefully because this will be the final place for you plants. Next you will need to connect all the buckets together as well as connect them with the "return bucket". When your done when one bucket fills with water they should all fill with water, including the return bucket.
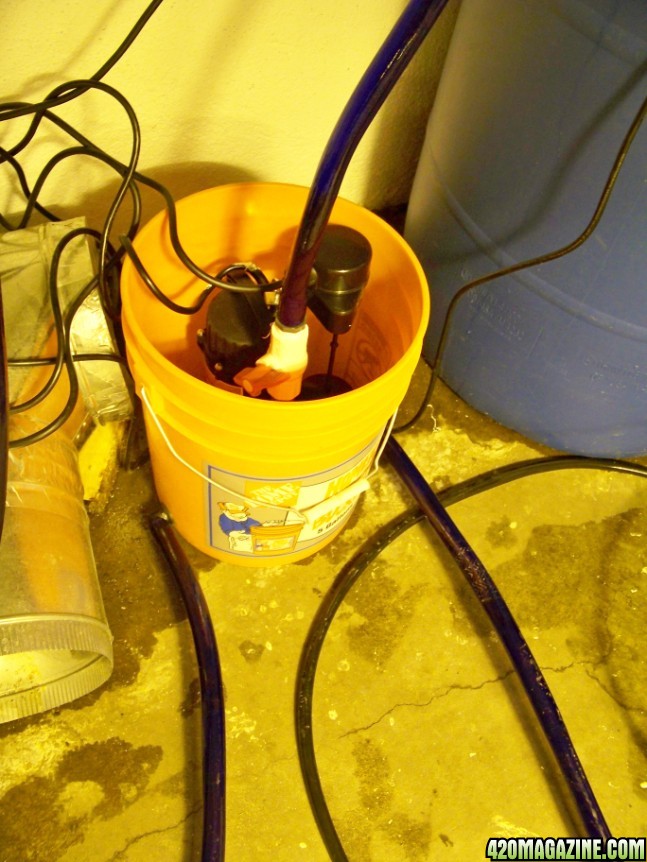
The next thing you will need to construct is the "return" bucket. You will want atleast 2 holes in the bucket for a 16 site, more for larger. These are grommet-ed just like the other buckets and fitted with elbows or bulkhead fittings (if you want the barb to stick straight out).
The return bucket will house a "special" sump pump. When I say "special" I just mean one thats small enough to fit in the bucket, powerfull enough to evacuate a decent amount of water and most importantly features a "vertical float switch"
You can buy this pump at Harbor Freight at its what I commonly use for this kind of system.
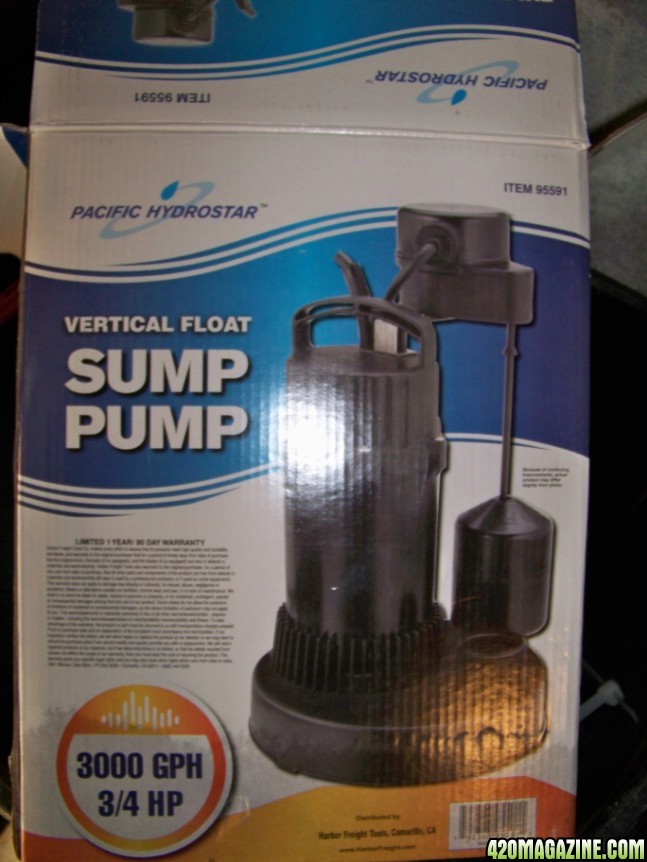
They tend to not make sump pumps any smaller than 3/10 of a HP with vertical float switches which sucks but you must get a vertical float switch with the pump, its necessary so typically you have to get a larger pump than you really needed.
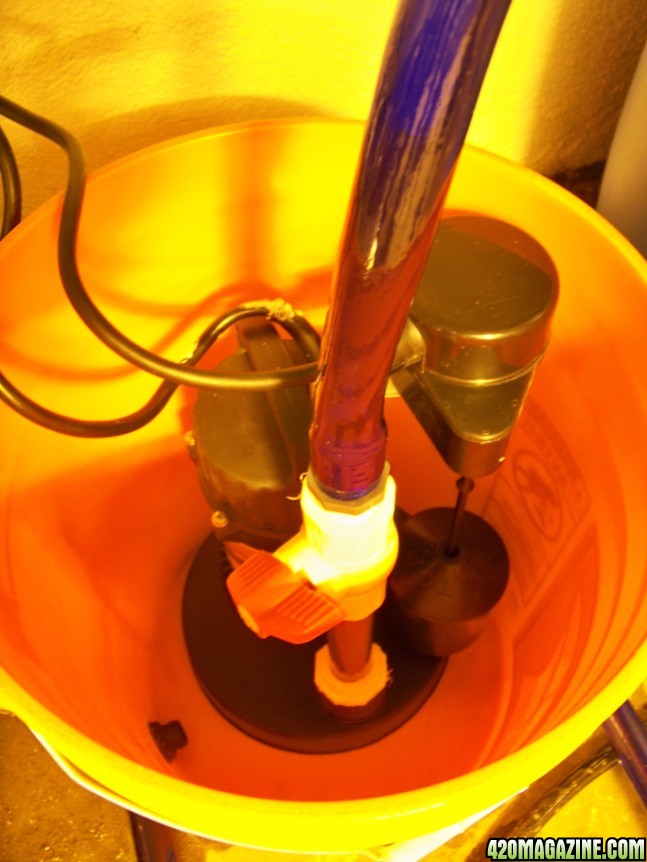
Since this pump does 3000gph and we need to dial that down to about 1000gph you will need to install a "ball valve" to dial down the flow of water. If the GPH was left at 3000 GPH the pump would cycle much more often and cause extra wear and tear as well as increasing its likely hood to fail from excessive switching.
It should look something like this.....
Now your going to have to change the float switch a bit for our purposes. The way the float is set up the bucket has to fill up about 2/3 of the way which is too full for a drip system. What we will do is put some ties traps on the float so it turns on at a much lower level and doesnt allow the system to get too full.
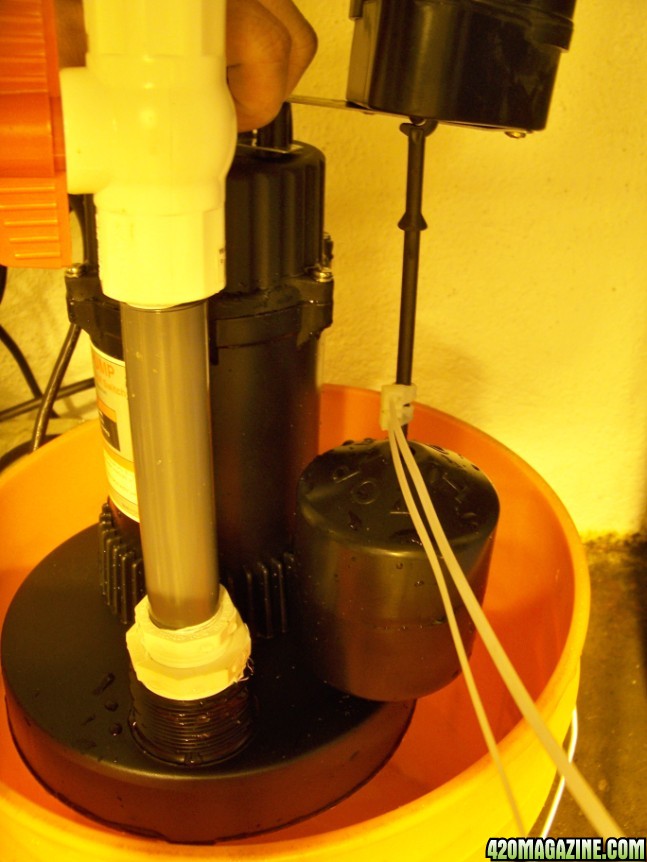
Now,... the float just moves up a couple of inches and it turns it on so the water level stays low all the time. Even better you can raise all the plant sites about 2 inches above the return bucket and it will drain them even lower allowing for even more oxygen to reach the roots. PS: vut off the extra tie strap, I hadnt yet in the pic.
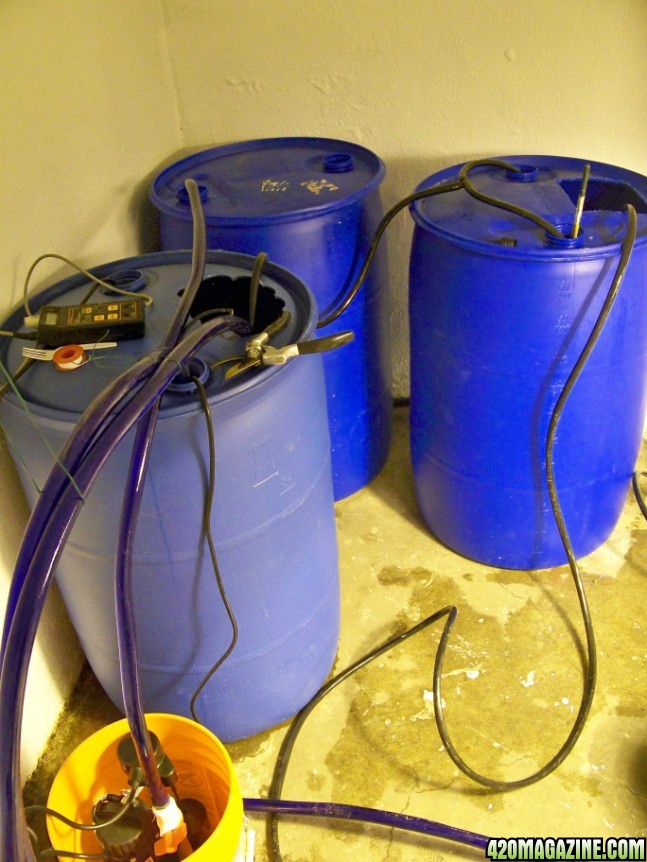
Now that you have built the return bucket and the drainage system you just need to get a reservoir...about 75 gallons for a 16 site unit is good. Put a pump in there, for a 16 site a 1000gph ecoplus is good. You will need to take the pump thats in the res and attach a 1/2" "T" and make a big loop out to your plant sites.
From there you can use spaghetti tubing and stakes to each plant,...two lines per plant is preferred just in case one gets clogged. Spaghetti tubing is 1/8" in diameter and is just excellent stuff. With spaghetti tubing you dont need drippers or any fittings. All you do is take a pen, poke a hole in the 1/2" tube coming from the rez pump and stick the spaghetti tubing in, no grommet needed as demonstrated in this pic...
You will need a 15 minute timer so you can have the pump in the res turn on for 15 minutes every 4-6 hours to irrigate.
At this point you should be able to put the spaghetti lines in the empty buckets and make sure that everything is working properly by turning on the timer and letting the buckets fill until the pump turns on and evacuates the water. You have NOT put the top bucket with the hydroton in yet this way you can see how high it floods the buckets, the lower the water level stays the better.
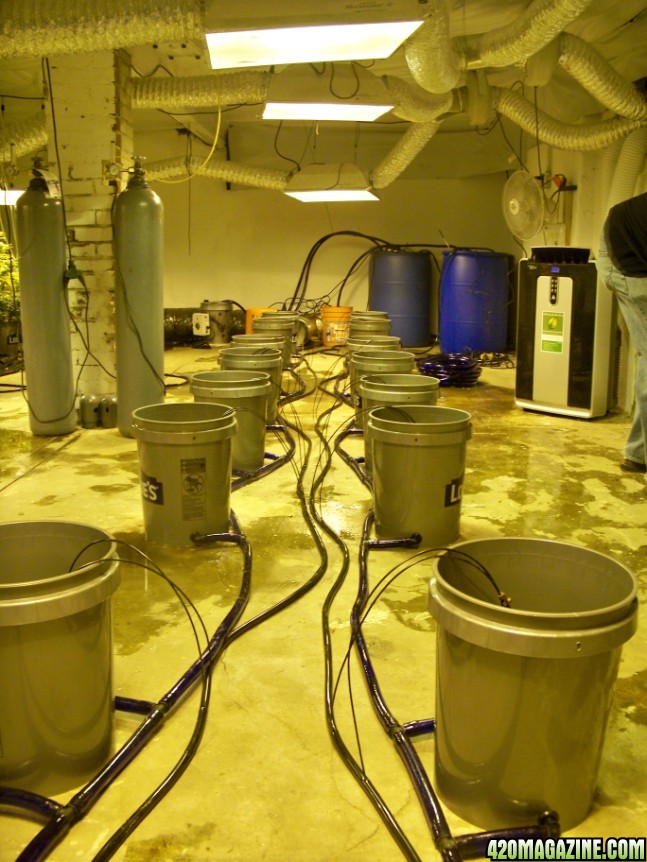
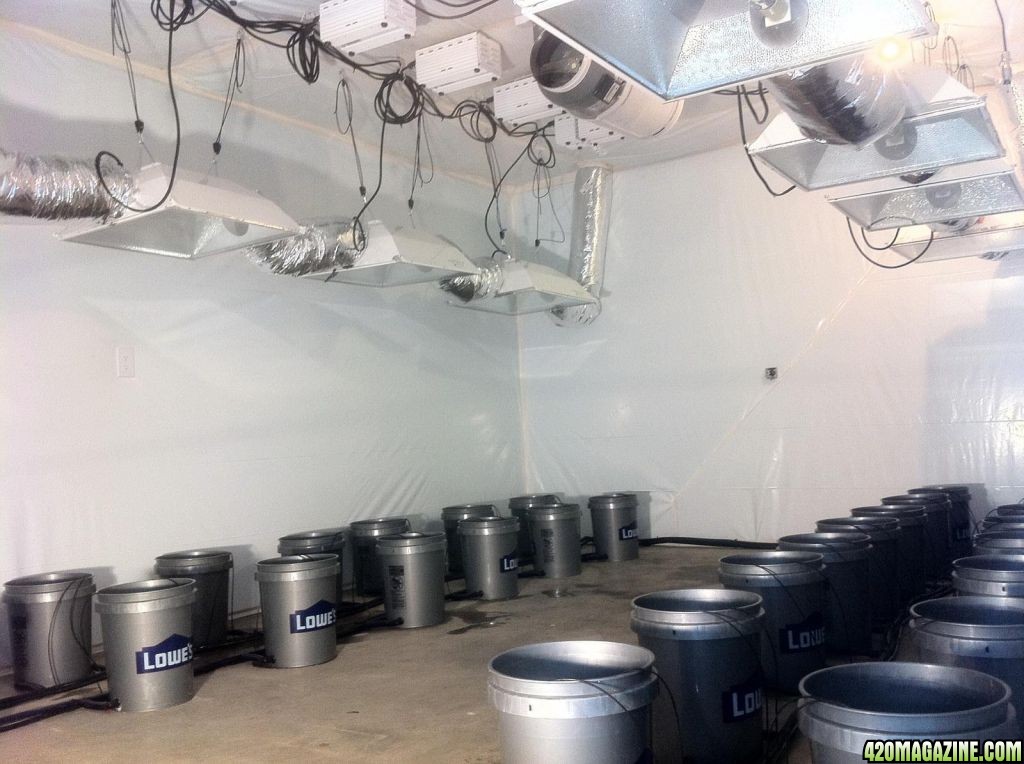
As a note you can see that in this garden we are actually utilizing 3 flower res's in conjunction with one-another for a total of TWO 16 site drip units running off these res's, each with their own return bucket for flexibility.
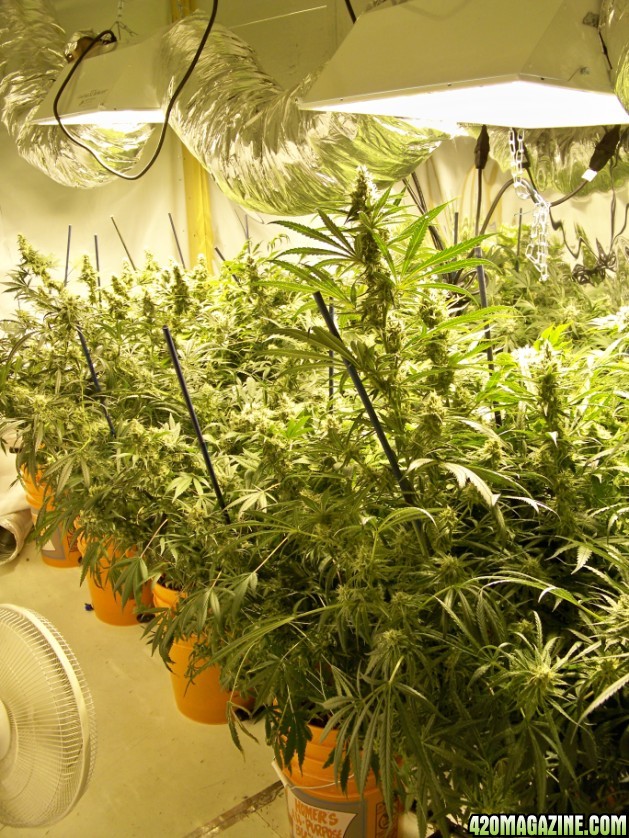
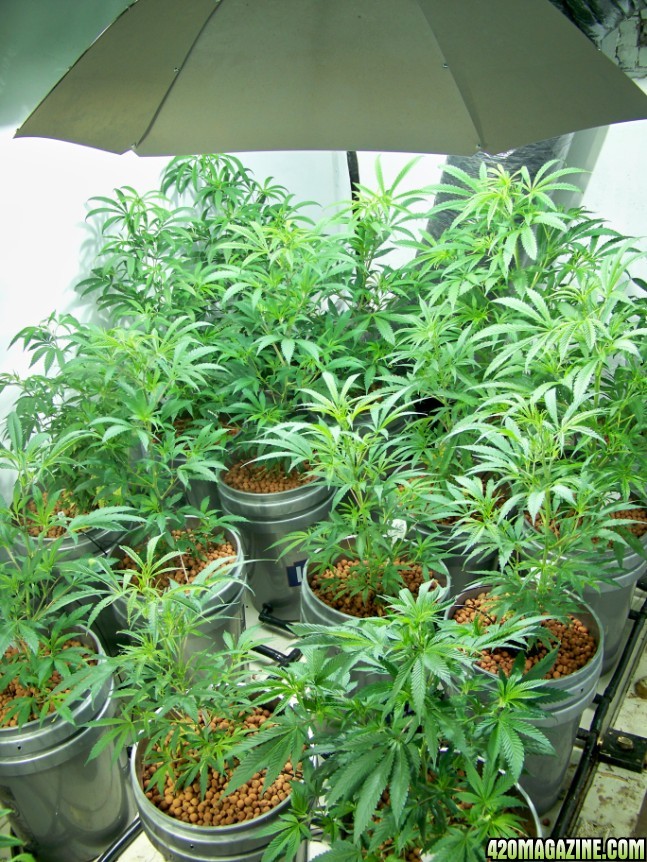
Heres the system all put together with the top buckets full of hydroton (and plants!) and dropped into the bottom buckets, lets get growing!
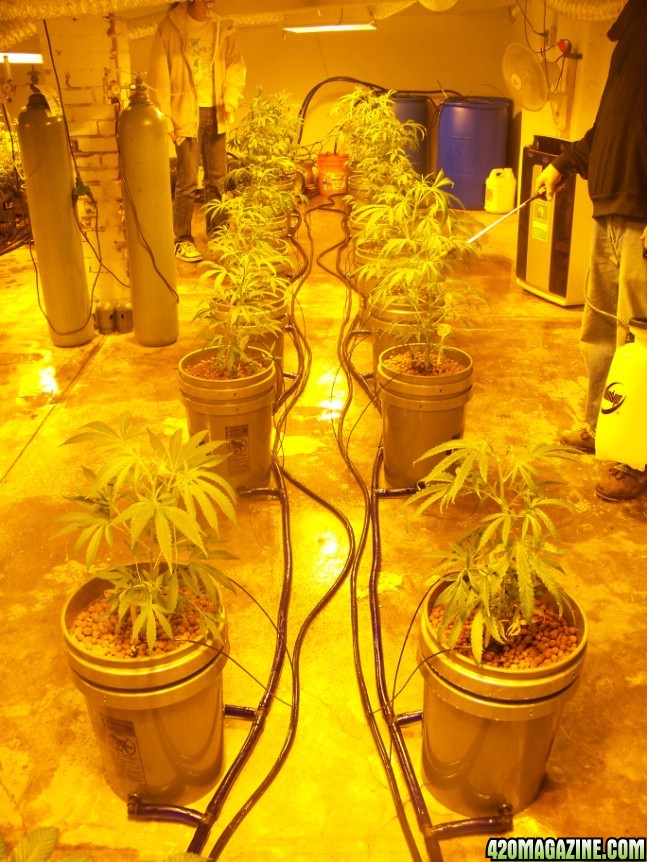
So you ask "how well does it work?"...well heres your answer. These plants in the backround just got put into the 5 gallon drip system.
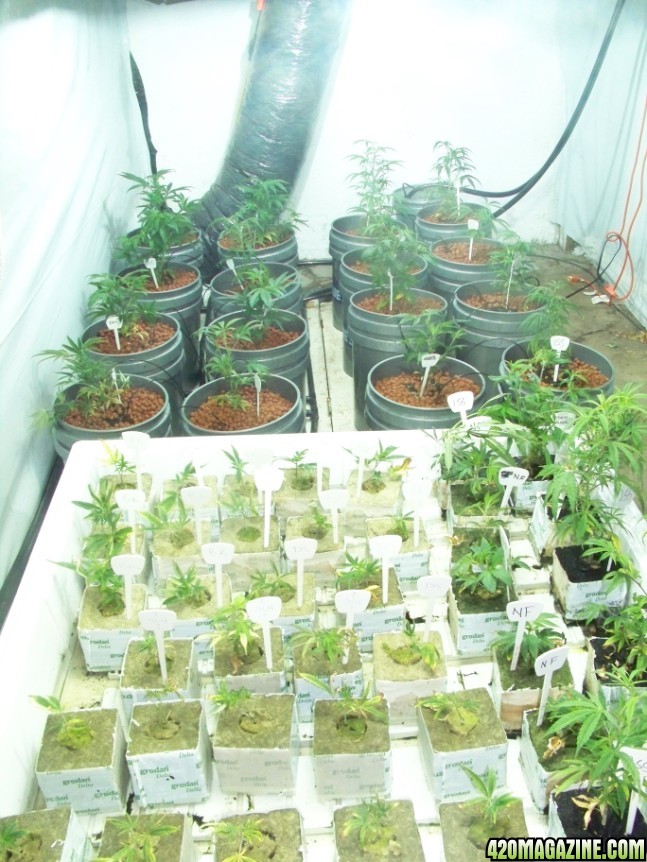
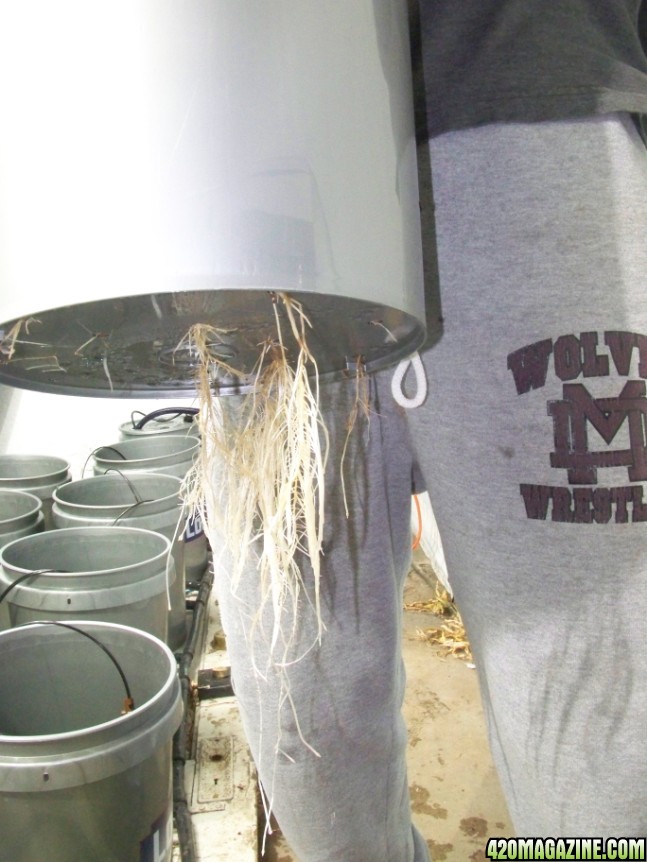
14 days later we have this!!
This wasnt even as many roots as some of the others had either....just 2 weeks!
Ebb and flow VS Drip.
Many people are turning from ebb and flow bucket systems like "C.A.P.'s Ebb and Gro" to bucket drip systems instead, this offers several key benefits.
One major benefit is reliability, while ebb and flow systems can be very reliable and produce incredible results,... for bucket E&F systems its a little more complicated. The problems with these are commonly associated with returning the water back to the res or the "control" bucket. Where as a regular E&F flood table only relies on one pump to work and then gravity to return it to the res, a ebb and flow "bucket system" relies on 2 pumps and atleast 3, sometimes even 5 floats to all operate correctly. With a drip system its just one float and a much more direct way of watering in general.
Another benefit people find is the ability to see the water come out and see the plants getting watered,...with a E&F you cant really see if they are all getting water and flooding evenly unless you lift out the top bucket, which can be a b*#*#!.
Another benefit is more root zone,...in a E&F you can only put the rockwool cube so high because when it floods it has to atleast somewhat touch that cube (at first atleast), In a drip you can fill it to the top with hydroton and then put the cube on top of that if you like,...lol, not suggested but you could and it would grow just fine because the water is moving from the very top all the way down.
Another reason is drip systems are less likely to be attacked by root rot, and this is a major issue in some places of the world where its humid and cool and the substrate doesnt dry out regularly.
Its not all benefits though either...
The downside to a drip system is that you have more lines, and tubing to mess with,, as well as the possibility of getting a clogged line. Clogged lines are easily avoided by using a pump that has a filter on it though, and when you have two lines to each plant they should still be fine with just one so the concern negated considerably.
.
Hope this journal will someday encourage others to build this system themselves (or hire me to come build you a custom one, lol).
So there you have it... a 5 gallon drip system by Greenisland.
Enjoy!!
The 5 gallon ebb and gro "2 gallon C.A.P. upgrade" journal was pretty popular so I thought I would make this journal on how to convert that system into a drip...or just make a drip from the get go.
This is a very easy build so dont worry about that, its very simple.
In case you didnt see the 5 gallon ebb and gro journal heres a quick pic of what it looked like, and how it did....
You can quickly and easily turn that 5 gallon ebb and gro system into a drip system by simply not having any of the pins pushed in so that the return bucket is always evacuating when the water line gets high enough.
The second thing you will need to do is take the pump thats in the res and attach a 1/2" "T" and make a big loop out to your plant sites. From there you can use spaghetti tubing and stakes to each plant,...two is preferred just in case one gets clogged.
Last thing you will need to do is plug the pump in the res into a 15 minute timer and have it irrigate for 15 minutes, 4 times a day.
This system will take water from the reservoir and pump it out to your plants through half inch tubing and then 1/8" spaghetti tubing from there. Once it drips onto your rockwool cube it will travel down and out towards the edges of the "top" 5 gallon bucket eventually draining out the bottom filling the buckets as well as the "control bucket". When the control bucket gets full enough it will turn on the pump to evacuate the water putting it back in the reservoir and completing the cycle.
The next part of the journal will be for those of you interested in solely building a 5 gallon hydroponic drip system from the get go and are NOT converting your E&F.
The difference between this next version and the last version described is we will no longer be using a control bucket but a "return" bucket, ones a retrofit, one isnt. Unlike a "control" bucket this bucket will not be able to be used as a ebb and gro but also offers some advantages...namely simplicity, and no little electronic float switches to go bad and flood your house.
We will start by building the buckets...these are 5 gallon buckets from anywhere, so long as they nest in one another and leave atleast 1.25" between the two buckets on the bottom.
For this journal we will be building a 16 site system so we will need 16 "bottom" buckets, 16 "top" buckets, and one "return" bucket.
We will start by drilling 2 holes in the side of 16 of the buckets opposite from each other about 1.5 inches from the bottom making sure to leave enough room for the 3/4" grommet that you will be putting in there. You will need a conical drill bit for this...and make sure it makes holes up to atleast 1.25 inches in diameter because that is around the size you will need for the grommets to fit properly. (Word of advice on grommets...dont get them from home depot, the ones from the hydro stores are much better so long as they arent the old school ones with only one side (shaped like a tophat)).
Heres a pic of the grommets in there holes...ignore the drip lines for now, well get to that in a sec. Putting together the tubing can be kind of a pain in the butt however there is a trick when dealing with the curvature and stiffness. If you always curve the tubing away from the bucket they will correct themselves and be square ultimately,...or relatively so atleast. I took these pics to demonstrate this....
So before its asked I will address the question of "why two drains in the bucket"...the answer is redundancy...if one fails to work the other hopefully will take its place. A hydroton ball could easily run amuck and get lodged into one of the drain holes and cause the bucket to overflow and not work properly, two drains makes it so the system will still work.
Next you will want to drill out the bottom of the "top" buckets (16 buckets). I make about 20-30, 1/4" holes in the bottom of these buckets for water to drain out of.
Now you can place all of your buckets around the garden as you please but make sure to choose carefully because this will be the final place for you plants. Next you will need to connect all the buckets together as well as connect them with the "return bucket". When your done when one bucket fills with water they should all fill with water, including the return bucket.
The next thing you will need to construct is the "return" bucket. You will want atleast 2 holes in the bucket for a 16 site, more for larger. These are grommet-ed just like the other buckets and fitted with elbows or bulkhead fittings (if you want the barb to stick straight out).
The return bucket will house a "special" sump pump. When I say "special" I just mean one thats small enough to fit in the bucket, powerfull enough to evacuate a decent amount of water and most importantly features a "vertical float switch"
You can buy this pump at Harbor Freight at its what I commonly use for this kind of system.
They tend to not make sump pumps any smaller than 3/10 of a HP with vertical float switches which sucks but you must get a vertical float switch with the pump, its necessary so typically you have to get a larger pump than you really needed.
Since this pump does 3000gph and we need to dial that down to about 1000gph you will need to install a "ball valve" to dial down the flow of water. If the GPH was left at 3000 GPH the pump would cycle much more often and cause extra wear and tear as well as increasing its likely hood to fail from excessive switching.
It should look something like this.....
Now your going to have to change the float switch a bit for our purposes. The way the float is set up the bucket has to fill up about 2/3 of the way which is too full for a drip system. What we will do is put some ties traps on the float so it turns on at a much lower level and doesnt allow the system to get too full.
Now,... the float just moves up a couple of inches and it turns it on so the water level stays low all the time. Even better you can raise all the plant sites about 2 inches above the return bucket and it will drain them even lower allowing for even more oxygen to reach the roots. PS: vut off the extra tie strap, I hadnt yet in the pic.
Now that you have built the return bucket and the drainage system you just need to get a reservoir...about 75 gallons for a 16 site unit is good. Put a pump in there, for a 16 site a 1000gph ecoplus is good. You will need to take the pump thats in the res and attach a 1/2" "T" and make a big loop out to your plant sites.
From there you can use spaghetti tubing and stakes to each plant,...two lines per plant is preferred just in case one gets clogged. Spaghetti tubing is 1/8" in diameter and is just excellent stuff. With spaghetti tubing you dont need drippers or any fittings. All you do is take a pen, poke a hole in the 1/2" tube coming from the rez pump and stick the spaghetti tubing in, no grommet needed as demonstrated in this pic...
You will need a 15 minute timer so you can have the pump in the res turn on for 15 minutes every 4-6 hours to irrigate.
At this point you should be able to put the spaghetti lines in the empty buckets and make sure that everything is working properly by turning on the timer and letting the buckets fill until the pump turns on and evacuates the water. You have NOT put the top bucket with the hydroton in yet this way you can see how high it floods the buckets, the lower the water level stays the better.
As a note you can see that in this garden we are actually utilizing 3 flower res's in conjunction with one-another for a total of TWO 16 site drip units running off these res's, each with their own return bucket for flexibility.
Heres the system all put together with the top buckets full of hydroton (and plants!) and dropped into the bottom buckets, lets get growing!
So you ask "how well does it work?"...well heres your answer. These plants in the backround just got put into the 5 gallon drip system.
14 days later we have this!!
This wasnt even as many roots as some of the others had either....just 2 weeks!
Ebb and flow VS Drip.
Many people are turning from ebb and flow bucket systems like "C.A.P.'s Ebb and Gro" to bucket drip systems instead, this offers several key benefits.
One major benefit is reliability, while ebb and flow systems can be very reliable and produce incredible results,... for bucket E&F systems its a little more complicated. The problems with these are commonly associated with returning the water back to the res or the "control" bucket. Where as a regular E&F flood table only relies on one pump to work and then gravity to return it to the res, a ebb and flow "bucket system" relies on 2 pumps and atleast 3, sometimes even 5 floats to all operate correctly. With a drip system its just one float and a much more direct way of watering in general.
Another benefit people find is the ability to see the water come out and see the plants getting watered,...with a E&F you cant really see if they are all getting water and flooding evenly unless you lift out the top bucket, which can be a b*#*#!.
Another benefit is more root zone,...in a E&F you can only put the rockwool cube so high because when it floods it has to atleast somewhat touch that cube (at first atleast), In a drip you can fill it to the top with hydroton and then put the cube on top of that if you like,...lol, not suggested but you could and it would grow just fine because the water is moving from the very top all the way down.
Another reason is drip systems are less likely to be attacked by root rot, and this is a major issue in some places of the world where its humid and cool and the substrate doesnt dry out regularly.
Its not all benefits though either...
The downside to a drip system is that you have more lines, and tubing to mess with,, as well as the possibility of getting a clogged line. Clogged lines are easily avoided by using a pump that has a filter on it though, and when you have two lines to each plant they should still be fine with just one so the concern negated considerably.
.
Hope this journal will someday encourage others to build this system themselves (or hire me to come build you a custom one, lol).
So there you have it... a 5 gallon drip system by Greenisland.
Enjoy!!


")