SoCalPianoMan's- Indoor - LED - Pineapple Chunk AF - Grow Journal - 2015

SoCalPianoMan

New Member
This is the beginning of what I hope will be a great medicinal grow and yield.

Okay, I'll start off saying I've been an outdoor grower for decades, with the exception of a short time during the Phototron days many years ago (if you're old enough to remember those! :high-five:).

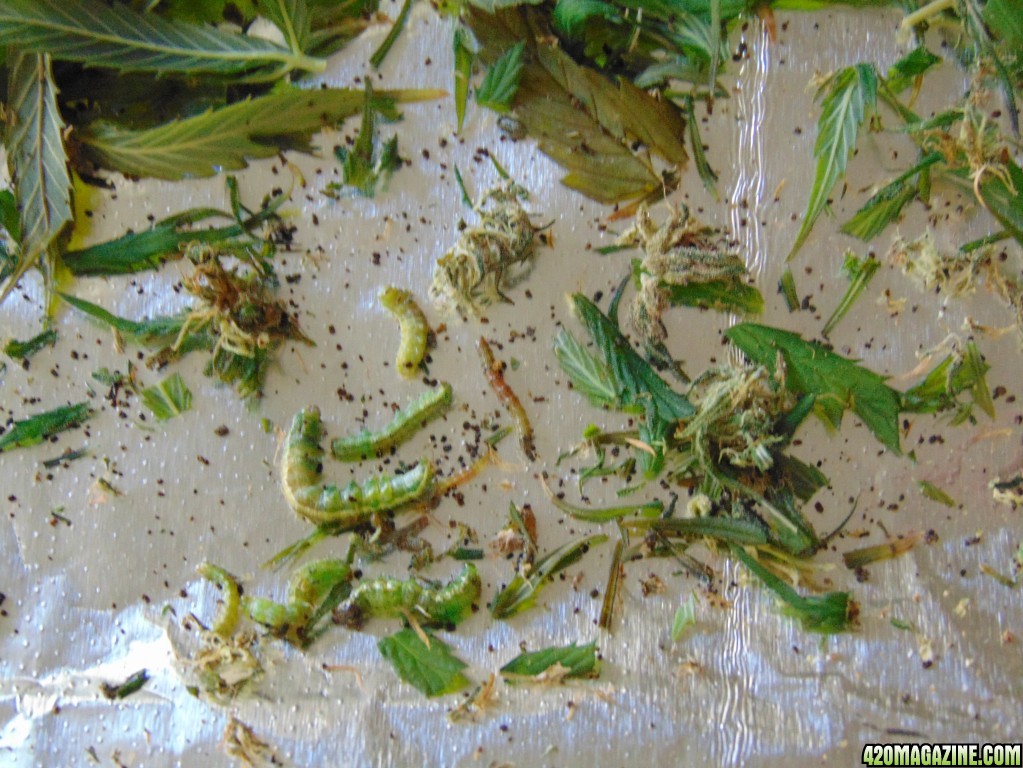
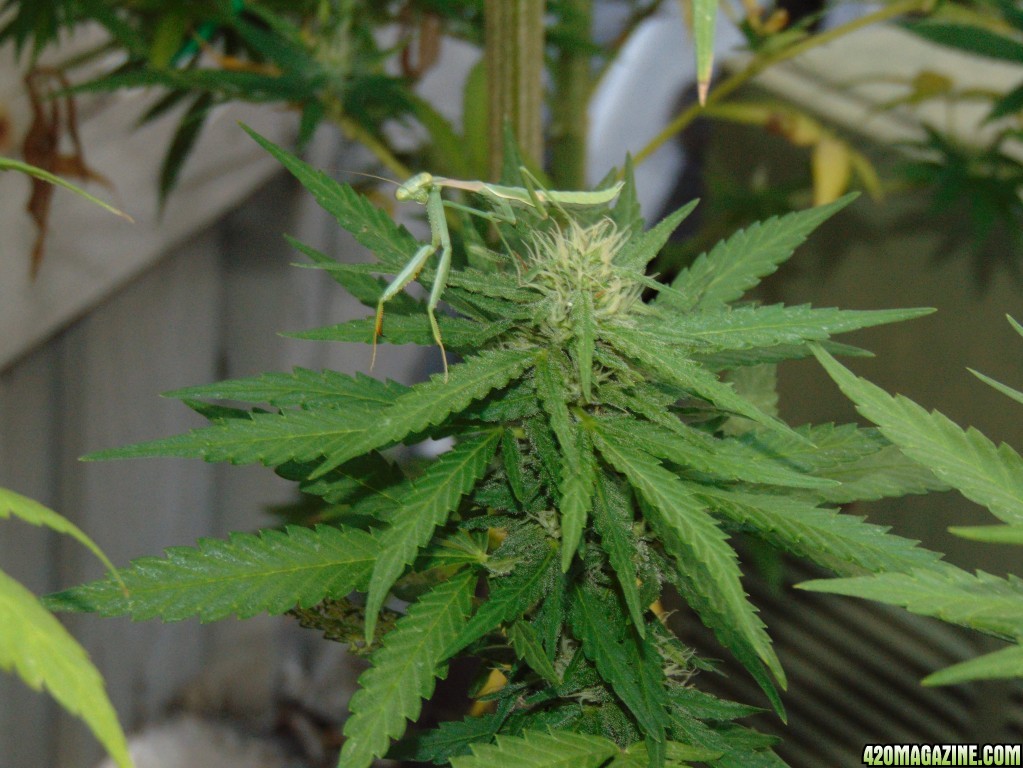
So, this is my first indoor grow in recent years, mainly because my most recent outdoor grows ended up being consumed more by a nasty curse of the caterpillars that bored into many of the buds, and quite frankly really pissed me off!

I did some research on some of the more reliable methods, really didn't want to go with HID lighting due to some of the temp and energy issues, and LED technology appears to have finally caught up.

I chose the Mars Hydro set-up because it appears they really seem to be on the cutting edge of LED growing technology, especially with their Mars II and Mars Pro lights.

DSC0206810.JPG


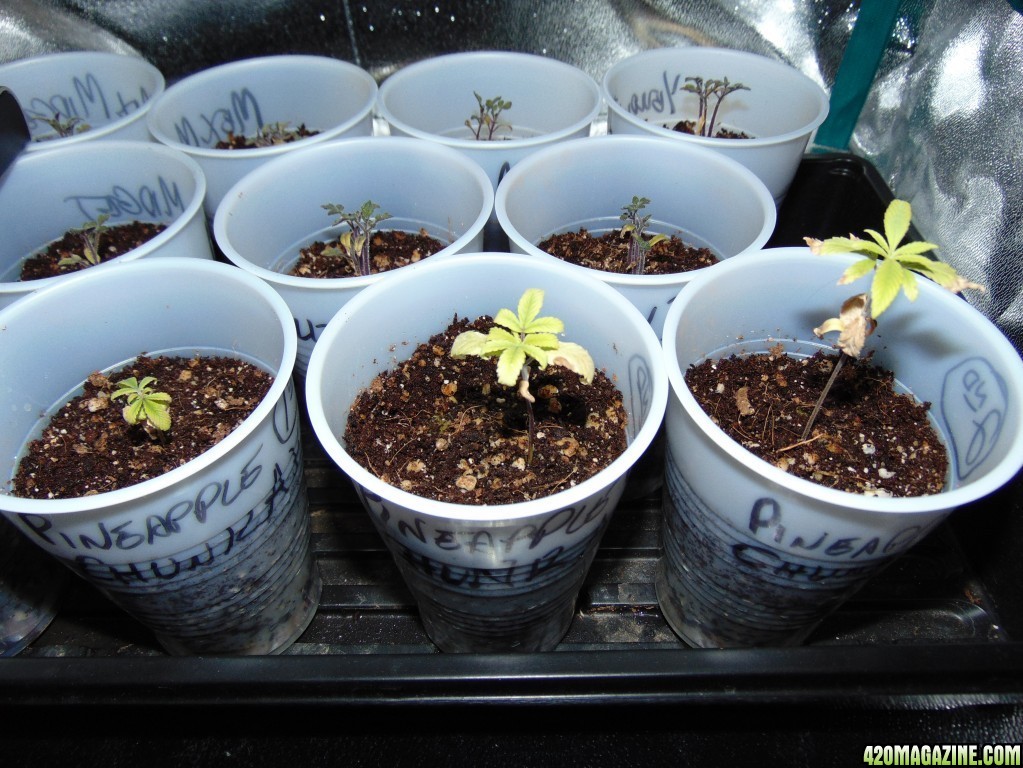
STRAIN: Pineapple Chunk Auto-Flower seeds
THC: 24%
CBD: 1.4%
Blend: 80% Indica / 20% Sativa, cross between Pineapple, Skunk #1 and Big Cheese strains from freecannibisseeds.nl

EQUIPMENT:
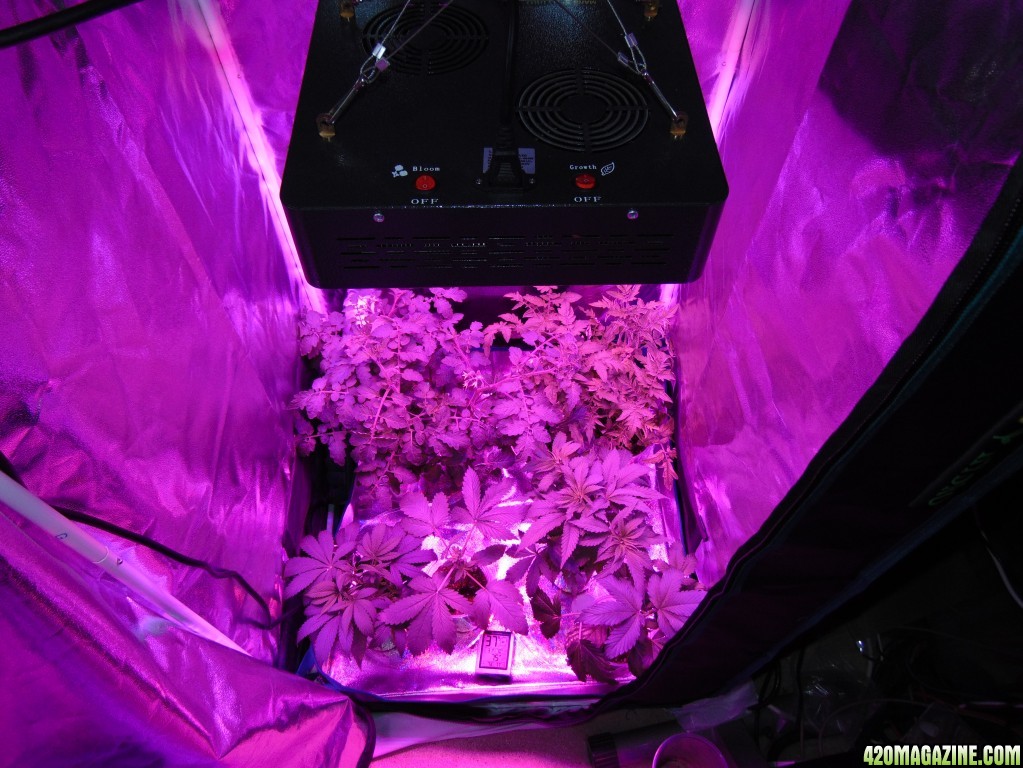
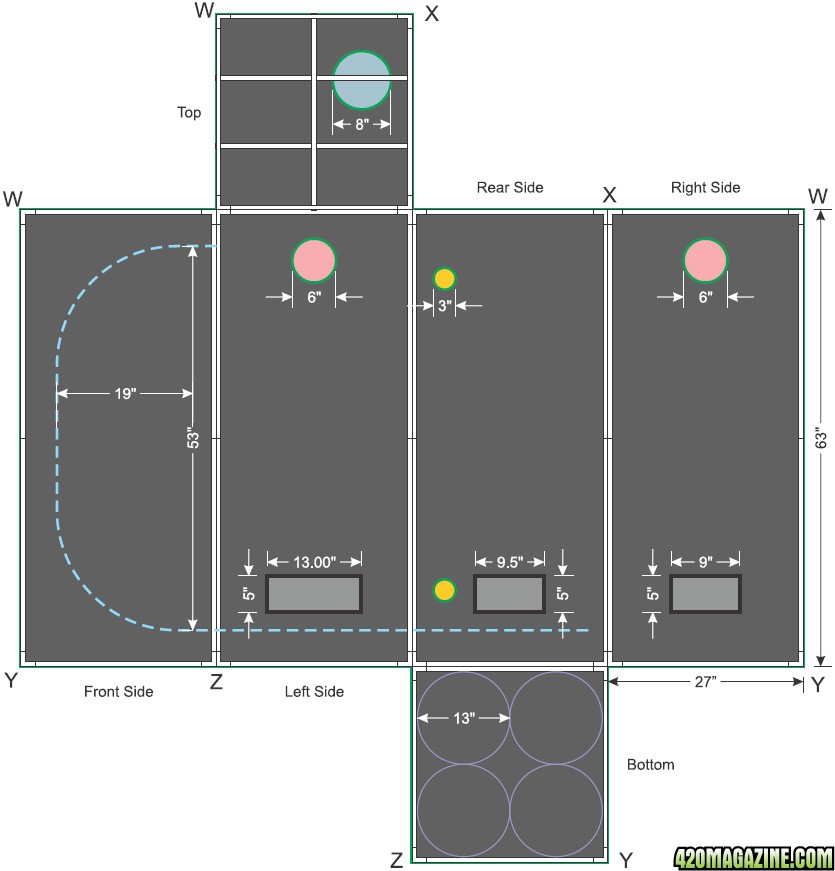
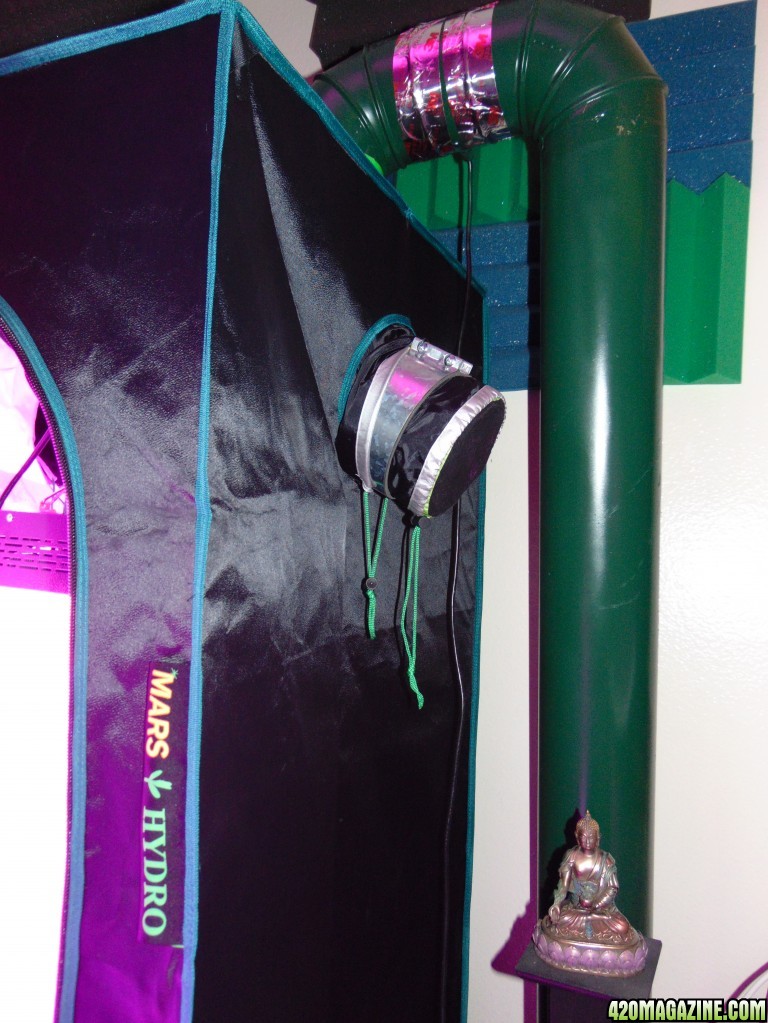
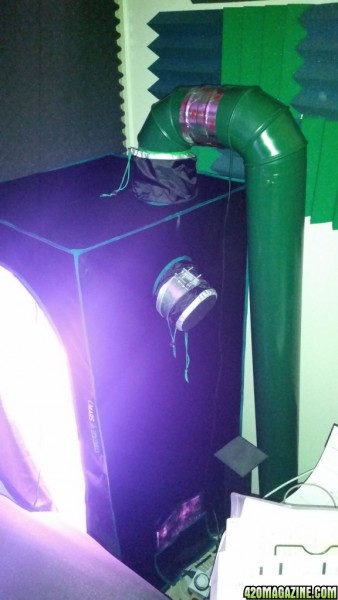
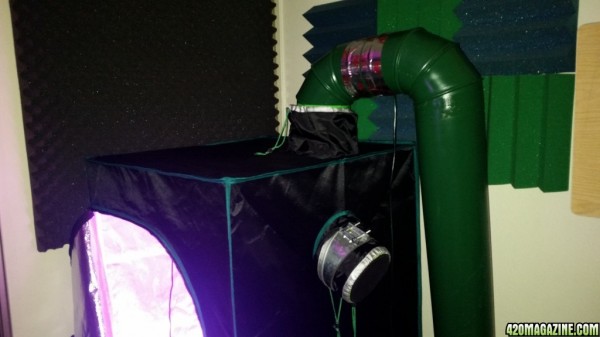
Grow Tent: Mars Hydro 27"x 27"x 63"
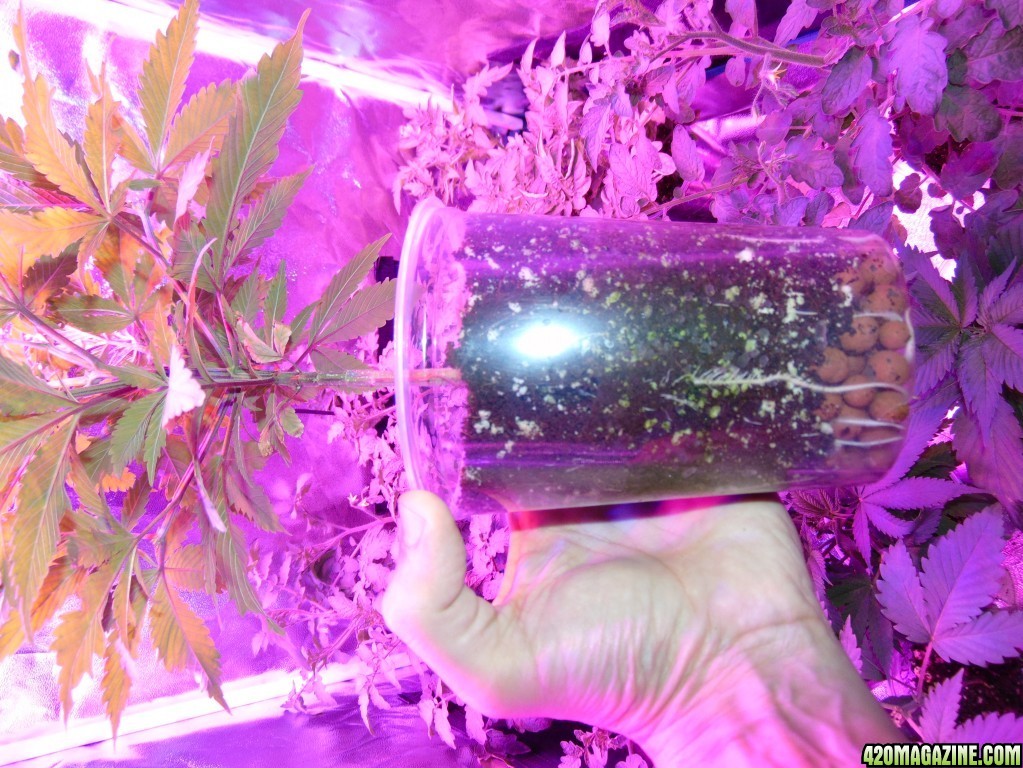
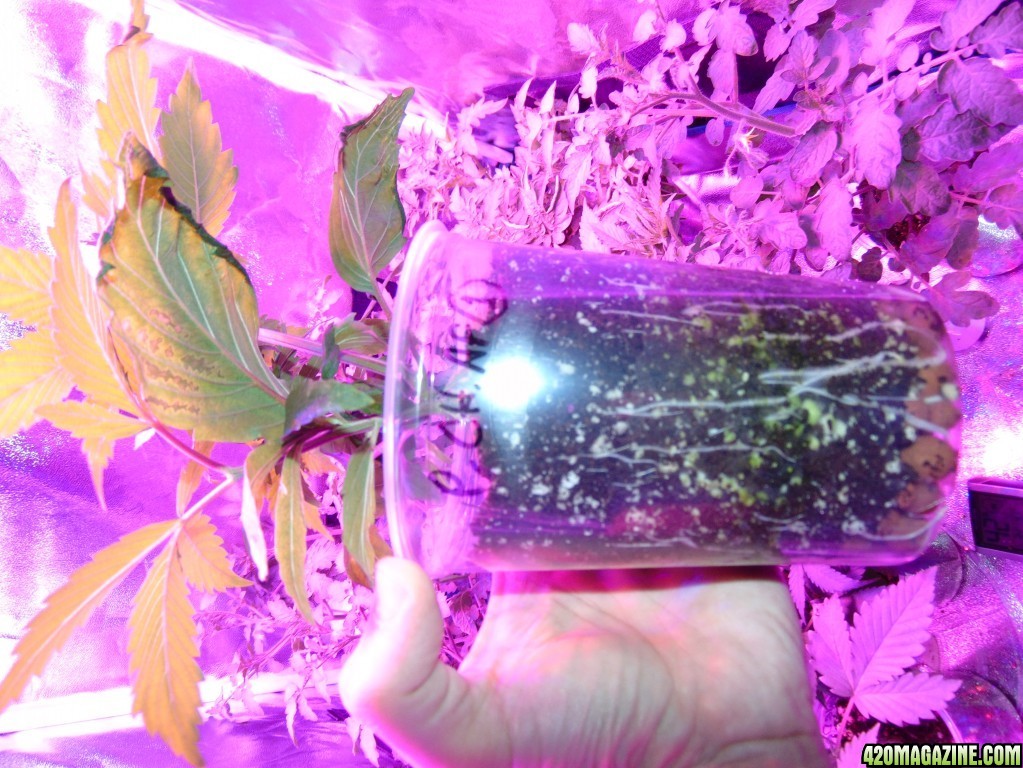
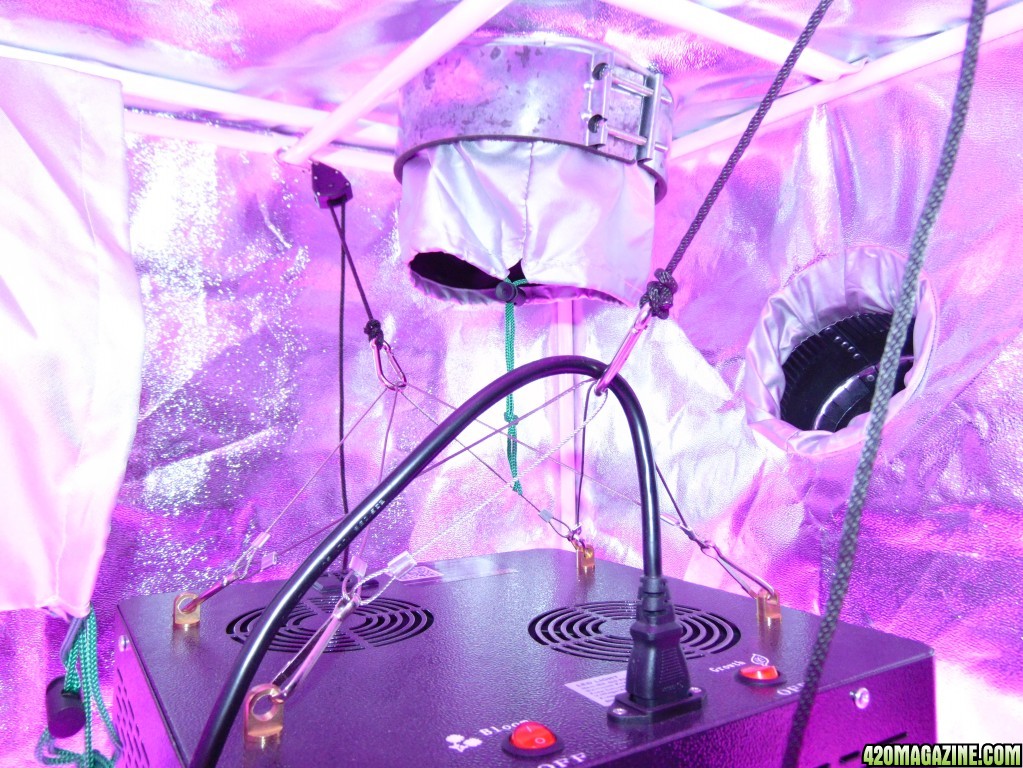
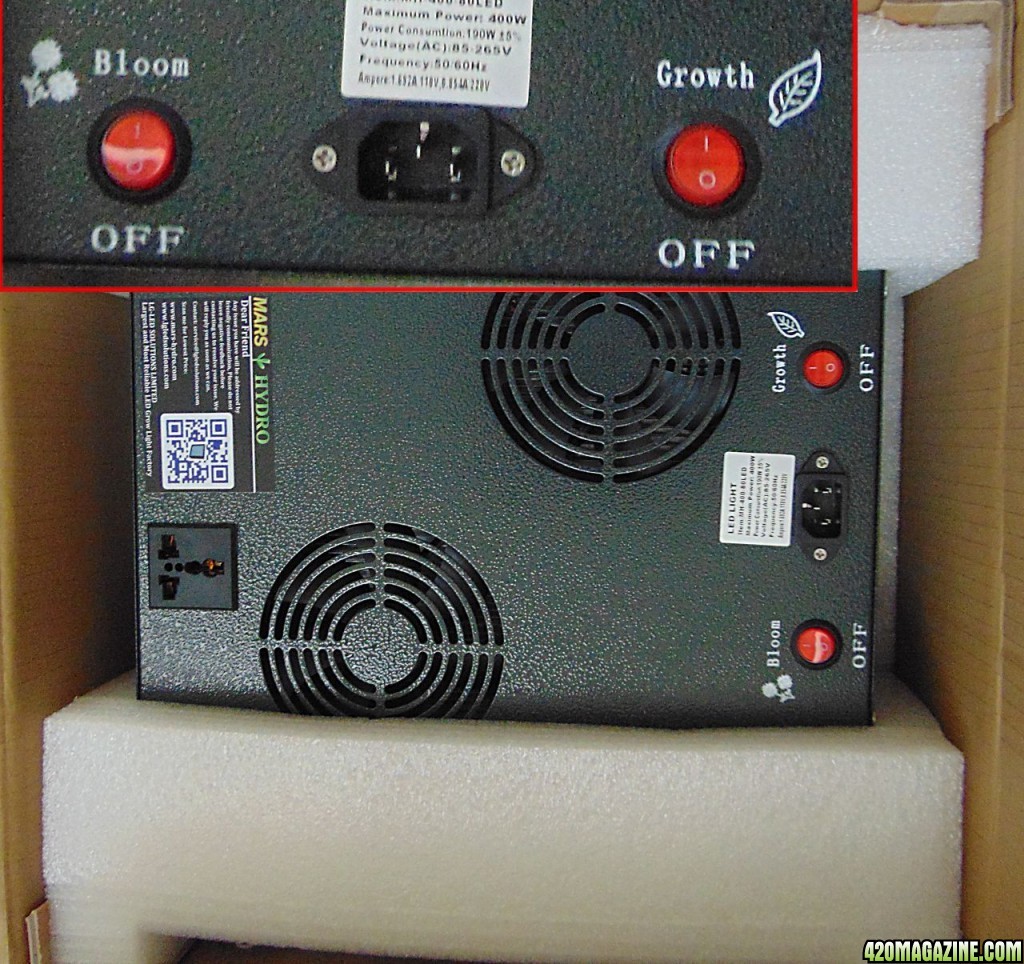
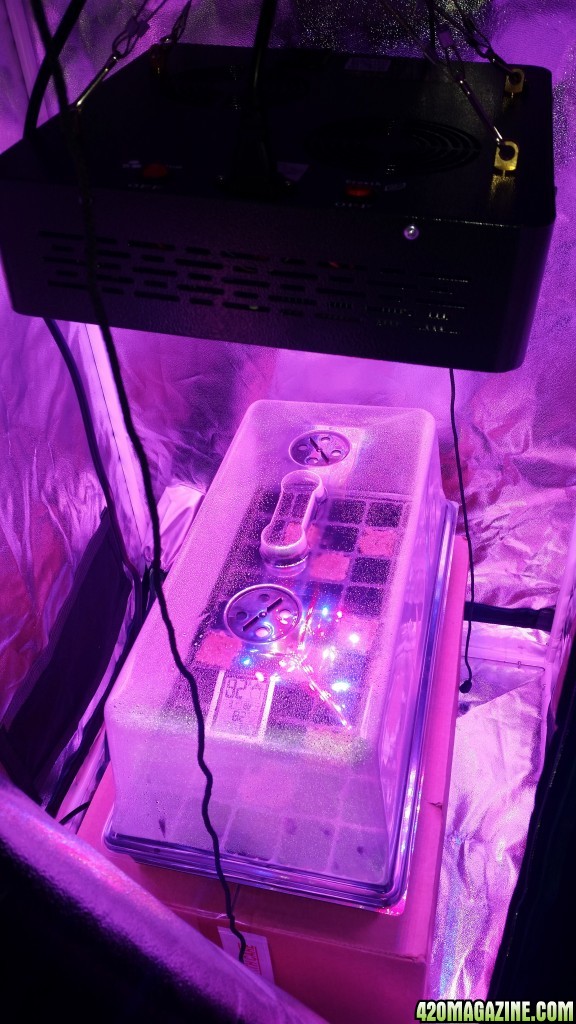
Lighting: Mars Hydro, Mars II 400w, 80 x 5w LEDs
Venting: 8" to 6" at Top with 6" Duct Fan and 6" Ducting to external window for venting, activated carbon pre filter fabric used on all bottom screen vent intakes and on both 6" upper round intakes

20151112_000806.jpg


20151112_000736.jpg


GROWING MEDIUMS, NUTRIENTS & CONDITIONS:
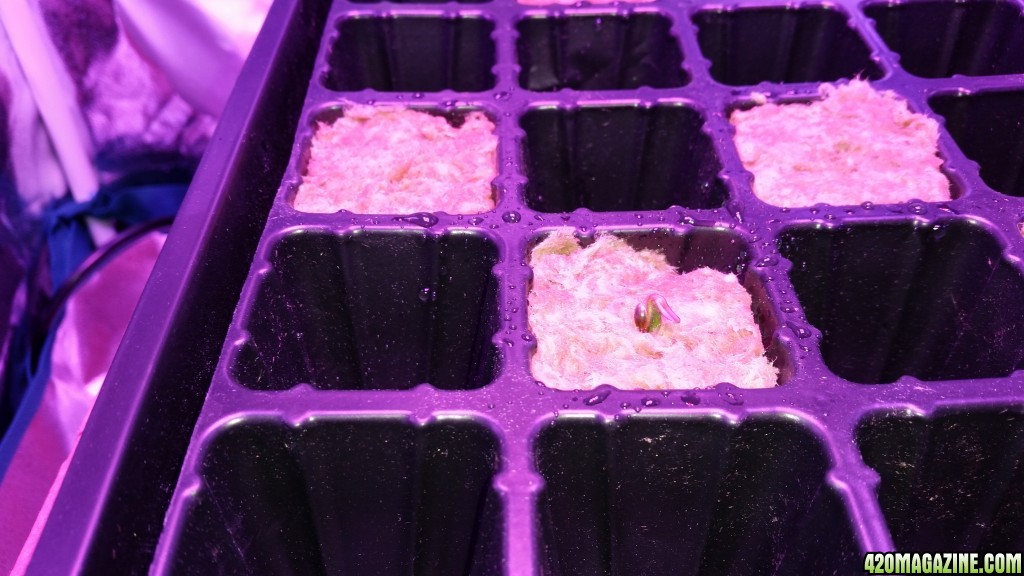
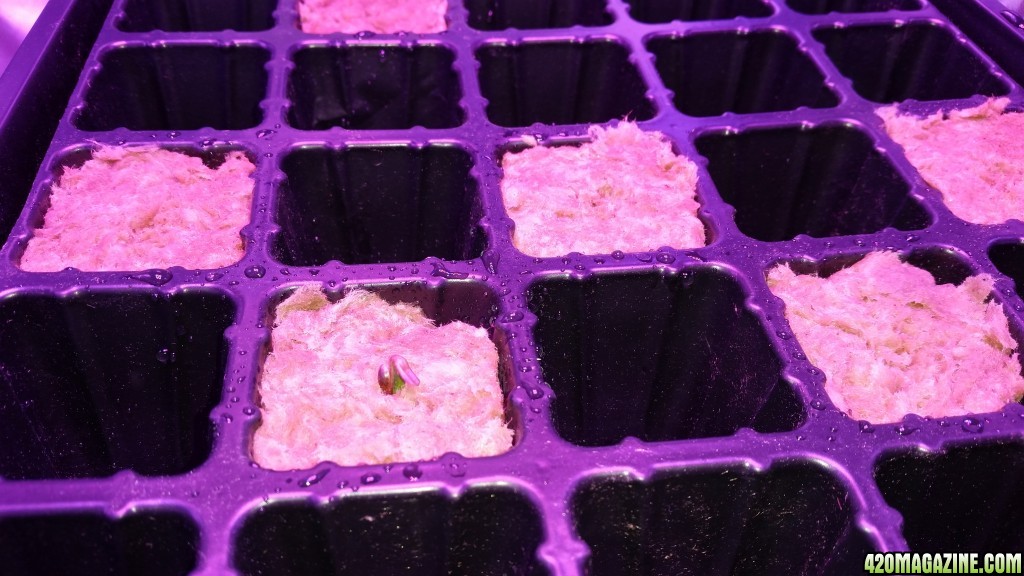
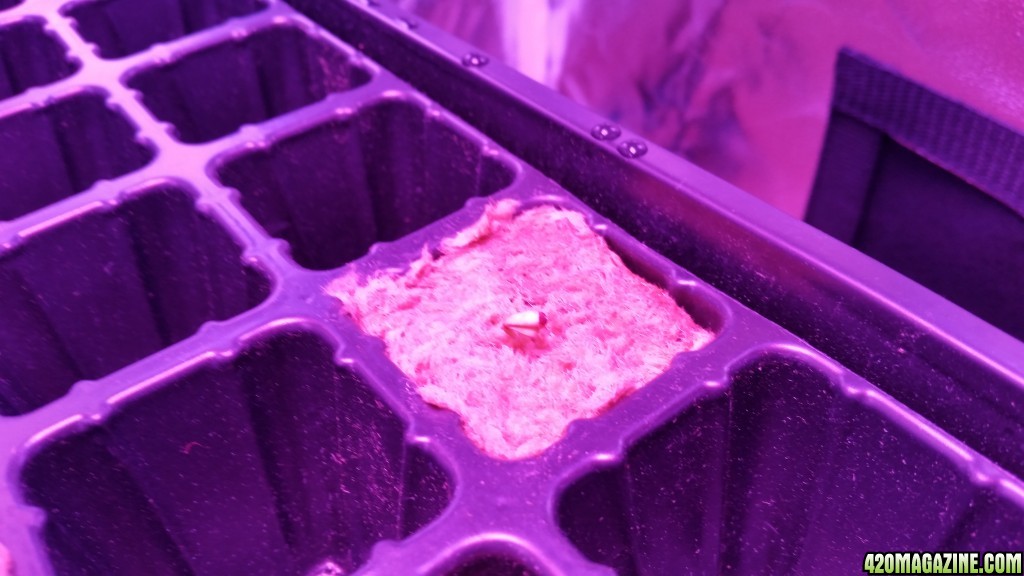
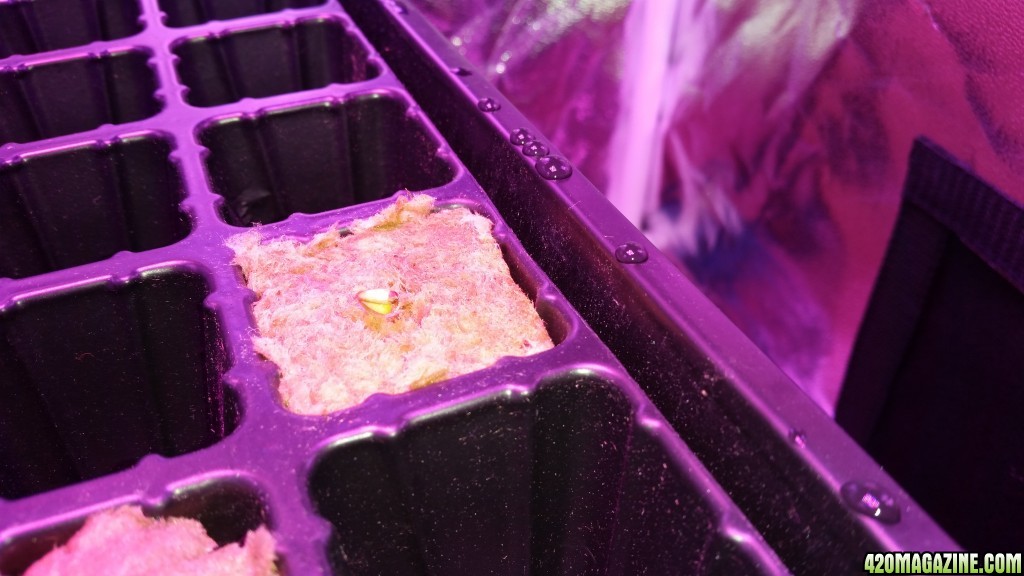
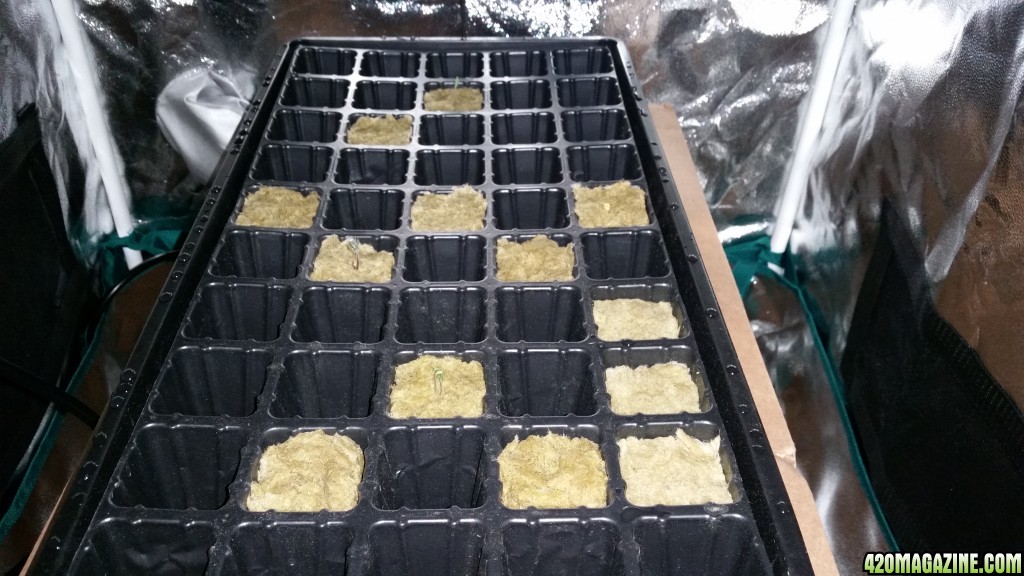
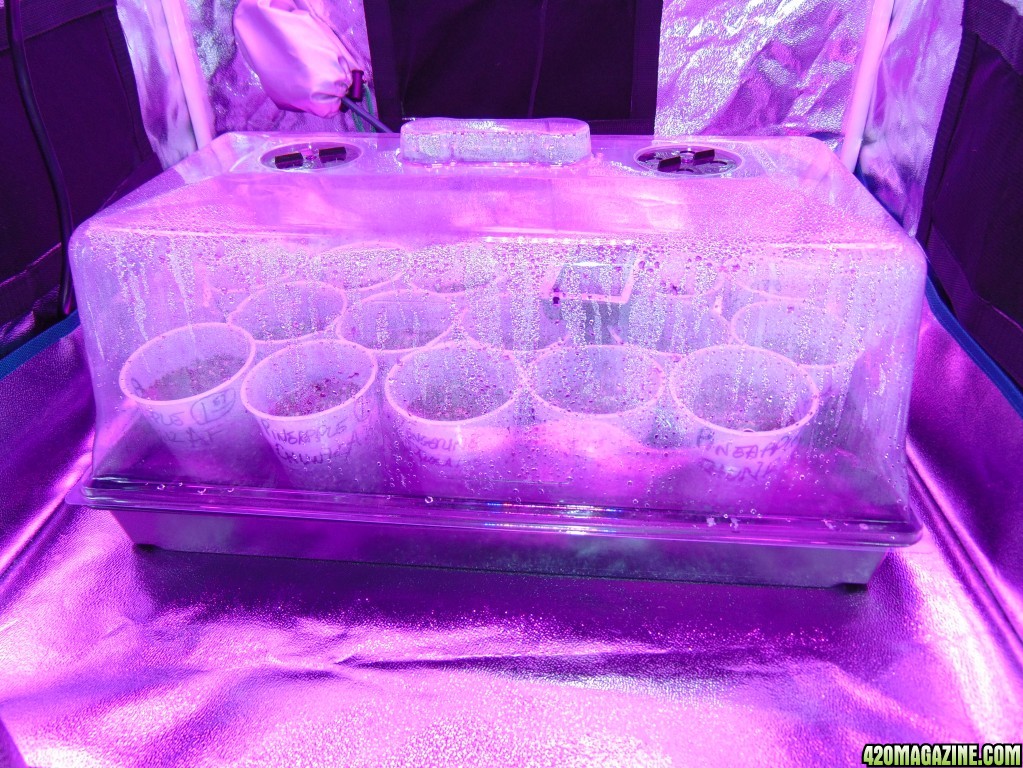
Germination Medium: Rockwool 2" cubes inside covered seed starter with clear dome
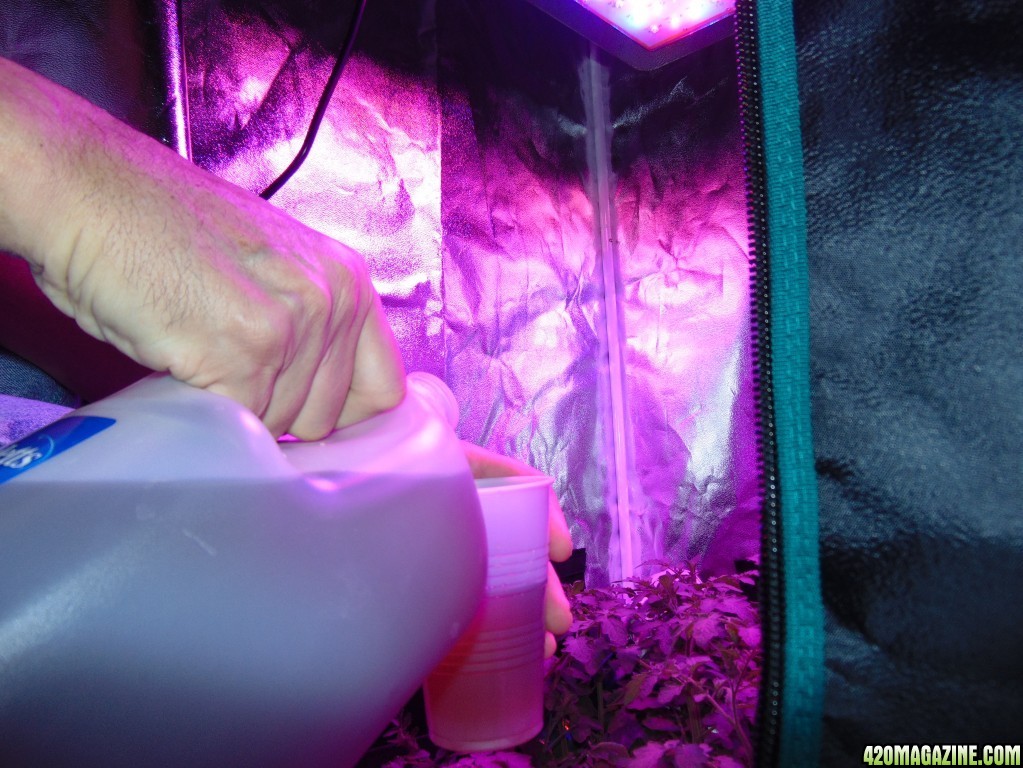
Germination Water: Distilled water (1 gallon bottle) with two drops of B1 in the form of SuperThrive, balanced to approx. 6.2pH, no nutrients yet
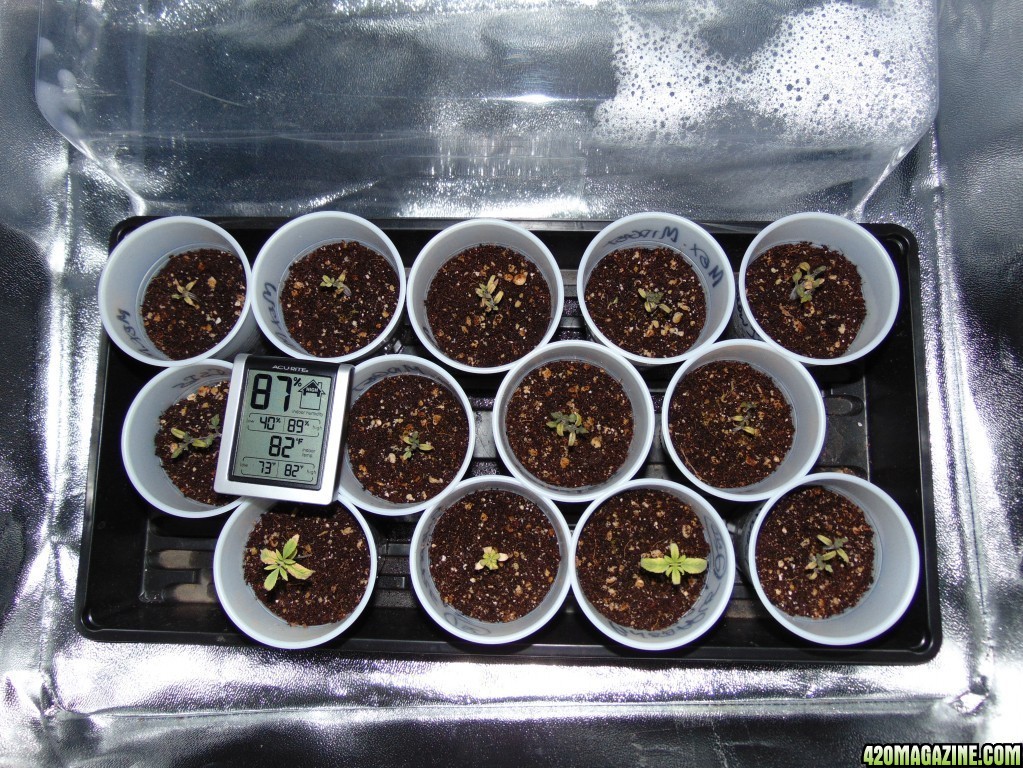
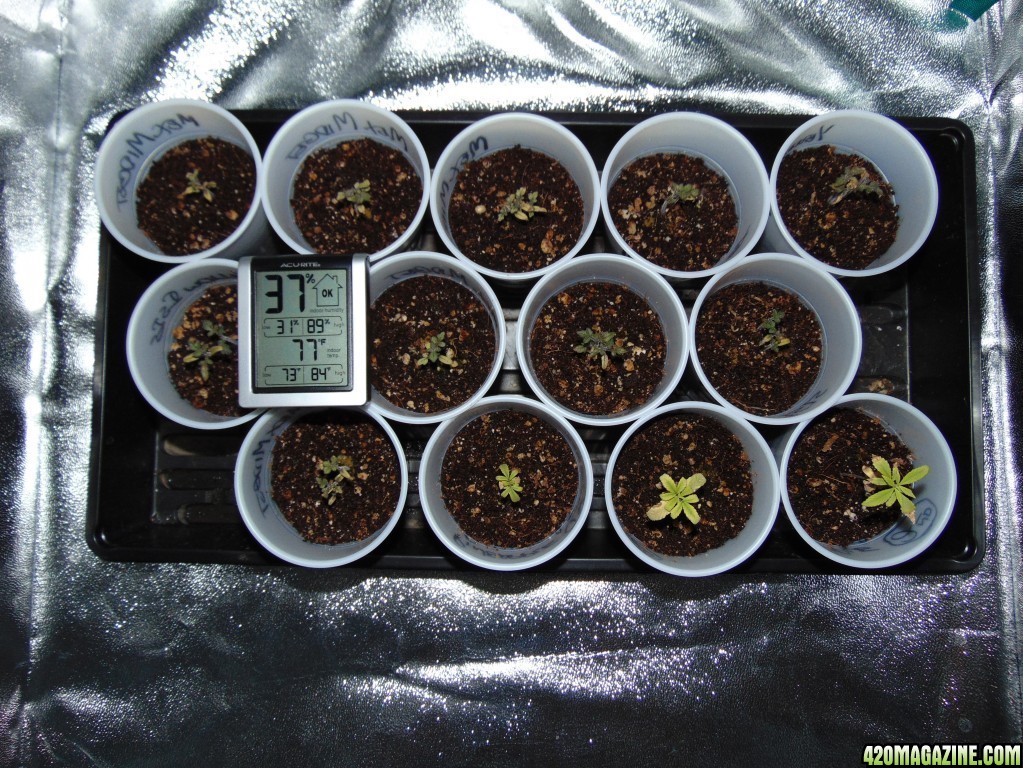
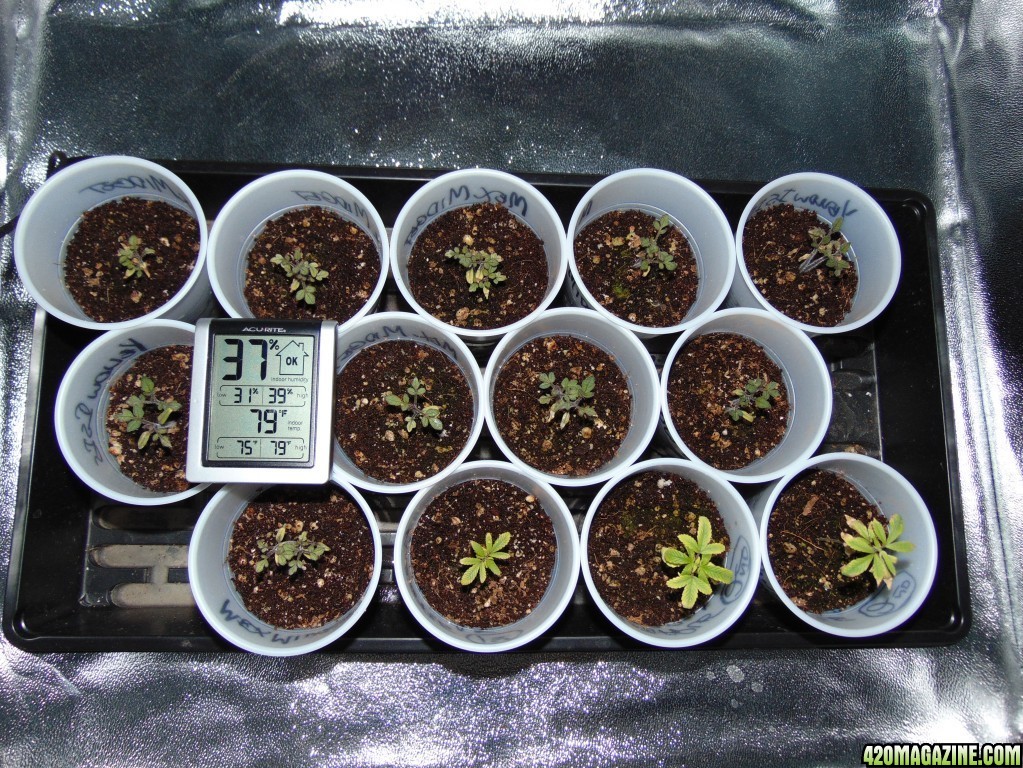
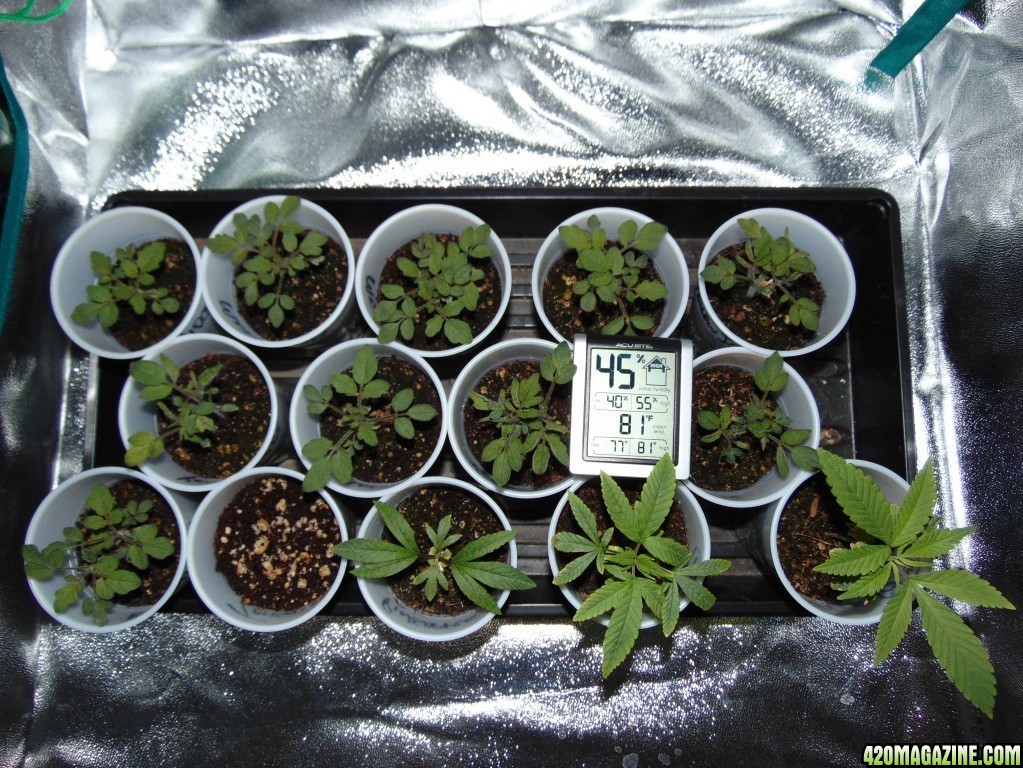
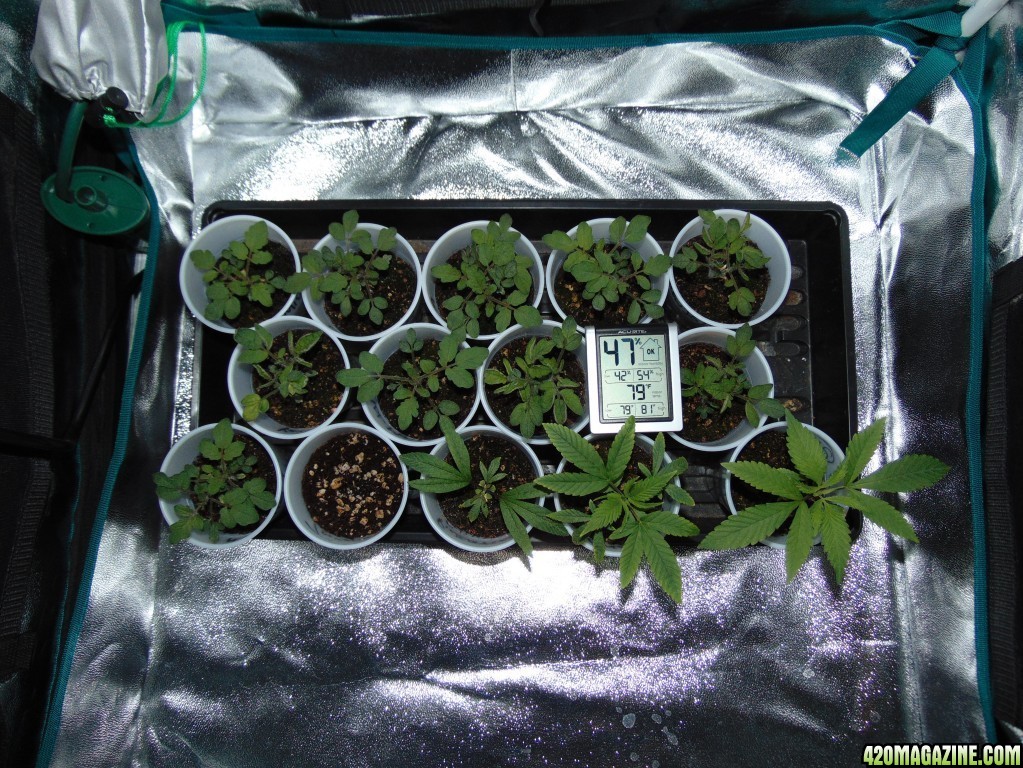
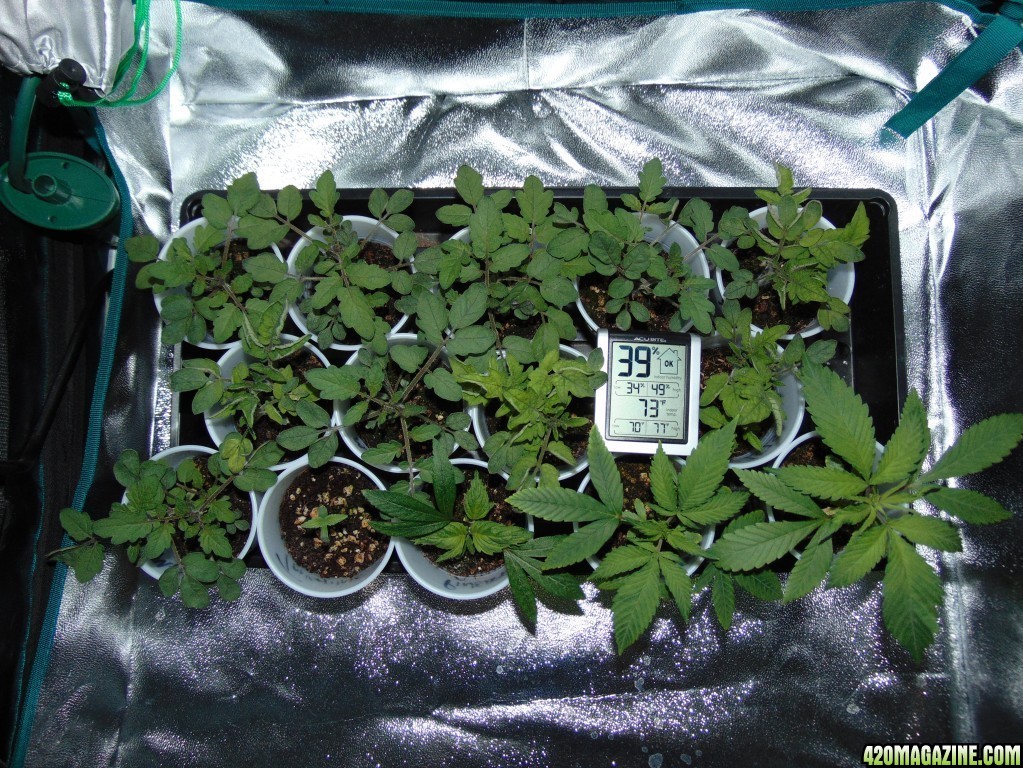
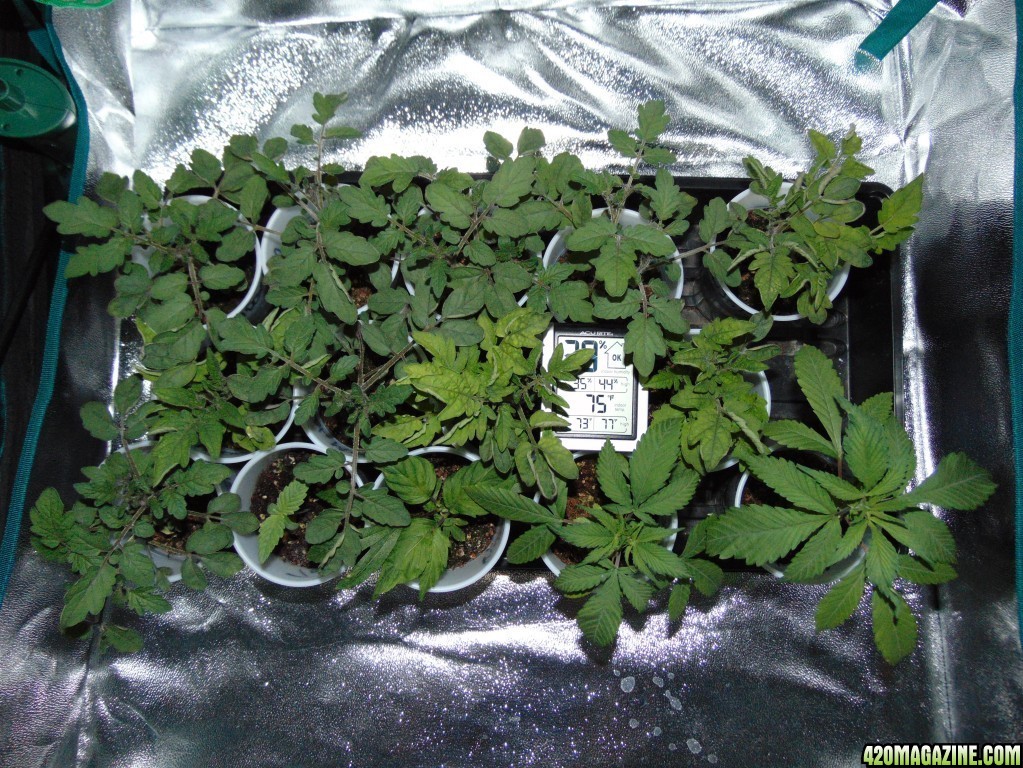
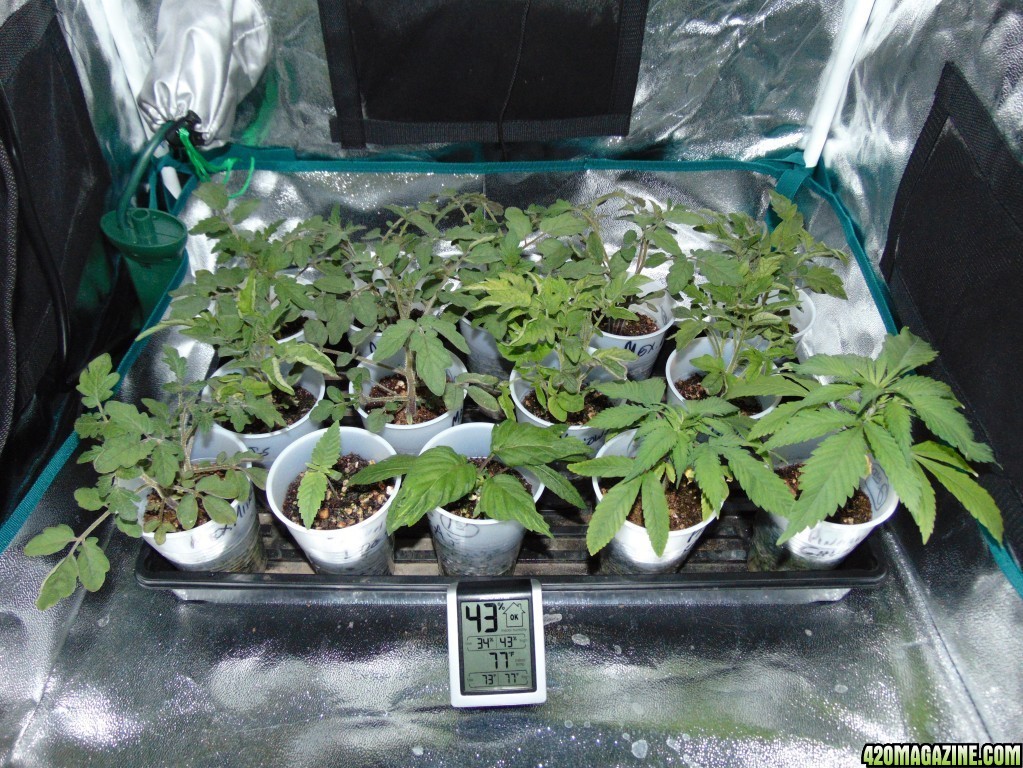
Germination Temp & Humidity: Maintaining approx. 75-82 degrees F, between 70%-90% relative humidity by using lamp during night time & when necessary

20151112_000854.jpg


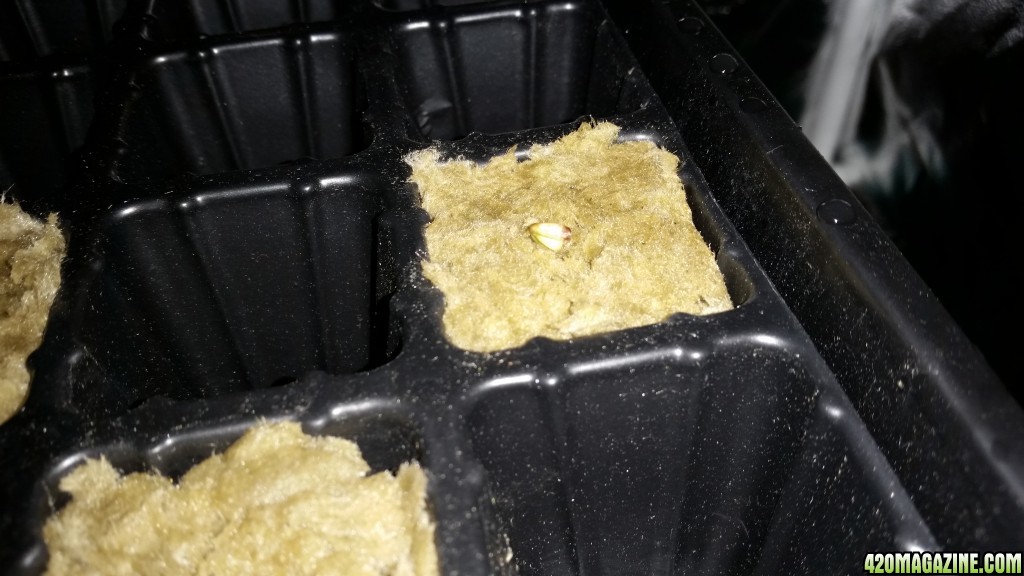
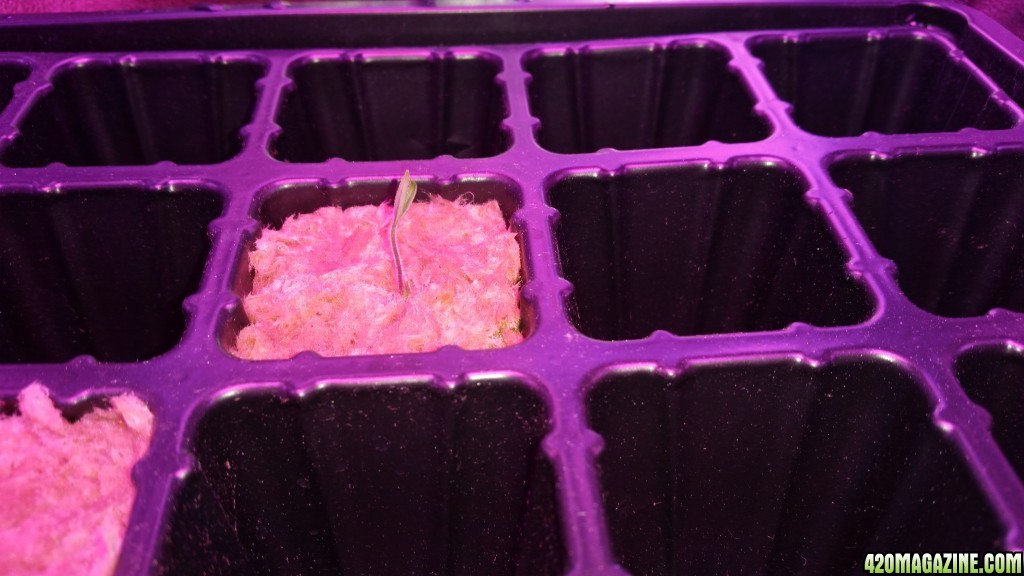
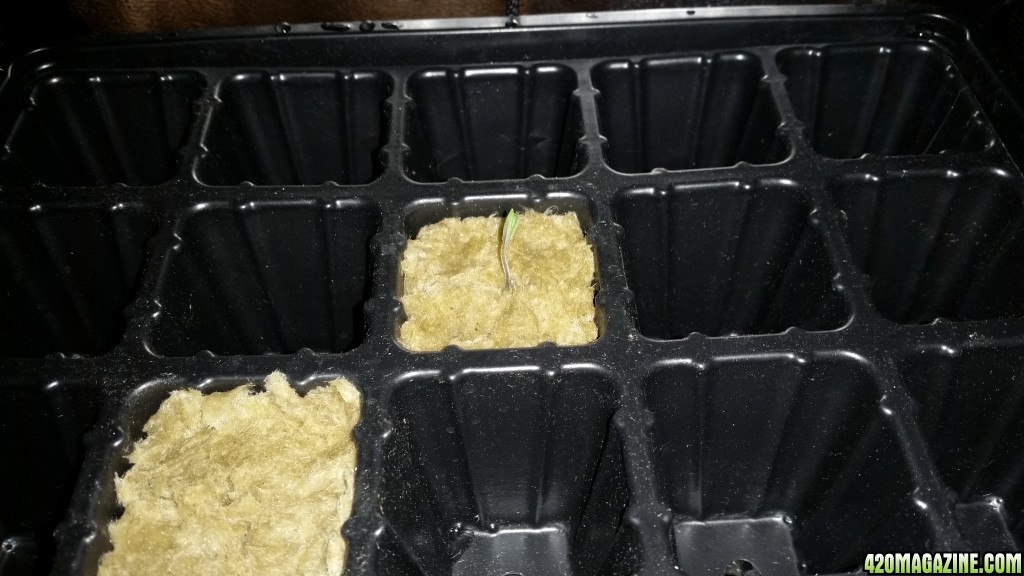
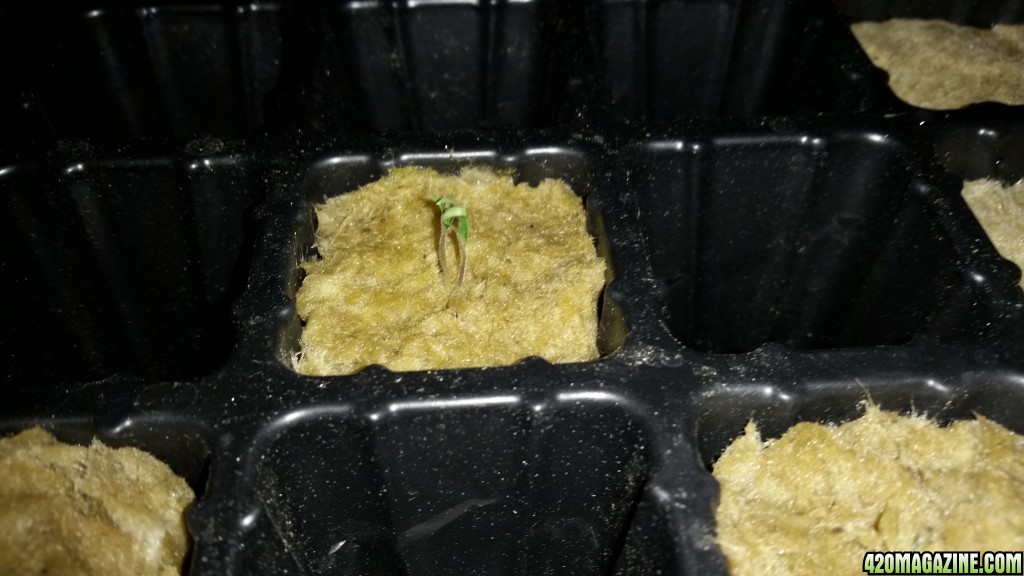
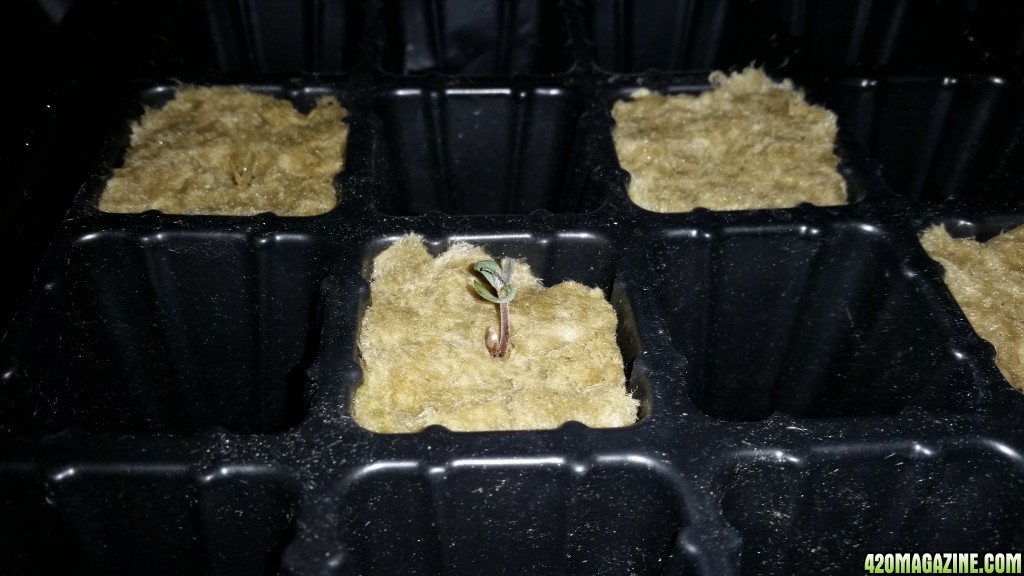
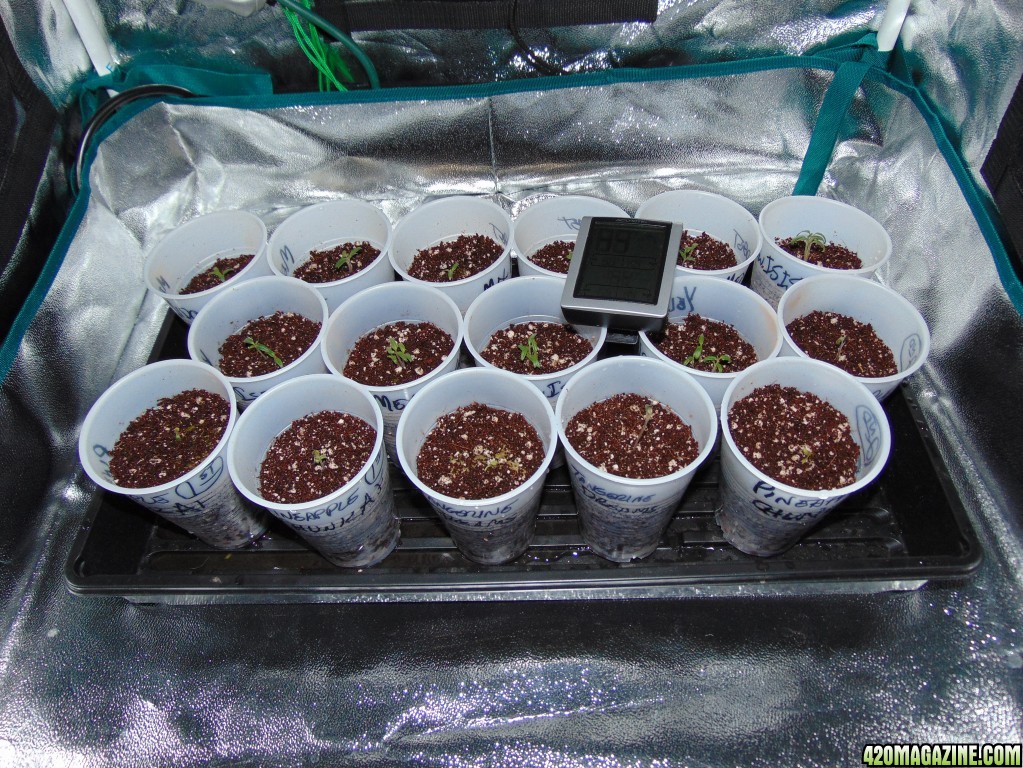
I soaked the rockwool cubes within the pH balanced water, squeezed out excess, placed a single seed inside the hole in the center of each at a depth of about 1/4" to 3/8", closing up the opening above the seeds. I chose to start on 11/11 during the New Moon cycle.

Right now, I'm on day three, seed roots are starting to sprout, and I've been using a spray bottle with the water I prepared and pH balanced to moisten the rock wool cubes, as well as spraying a fine mist on the inside of the clear dome to maintain humidity.

20151112_000516.jpg


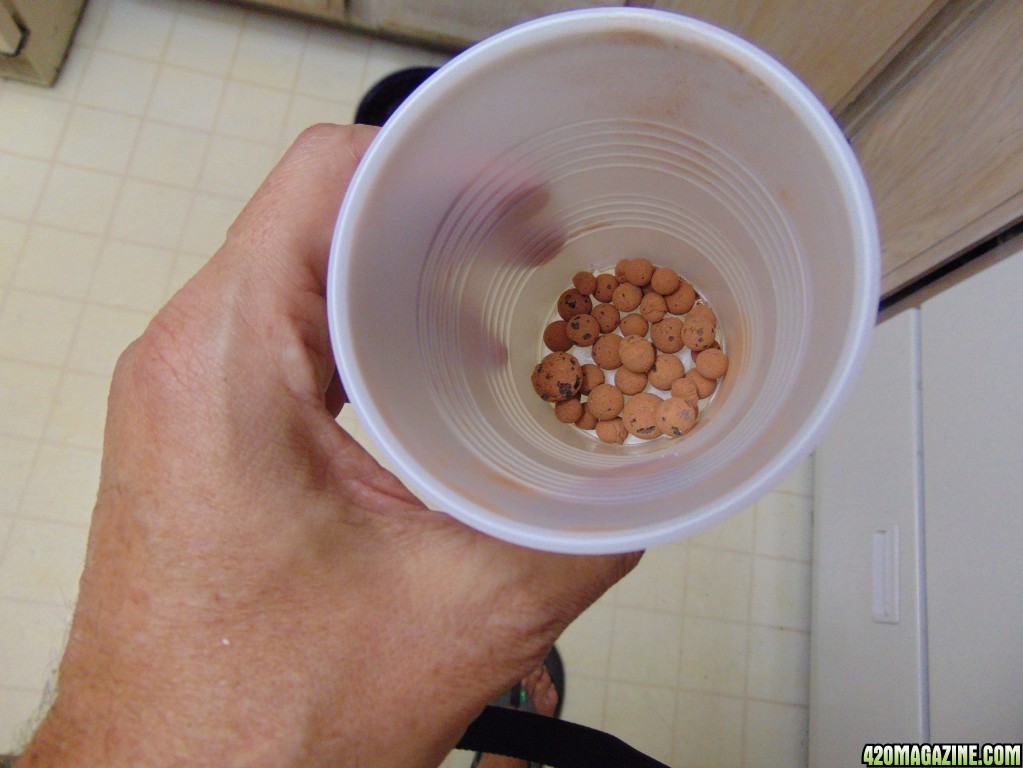
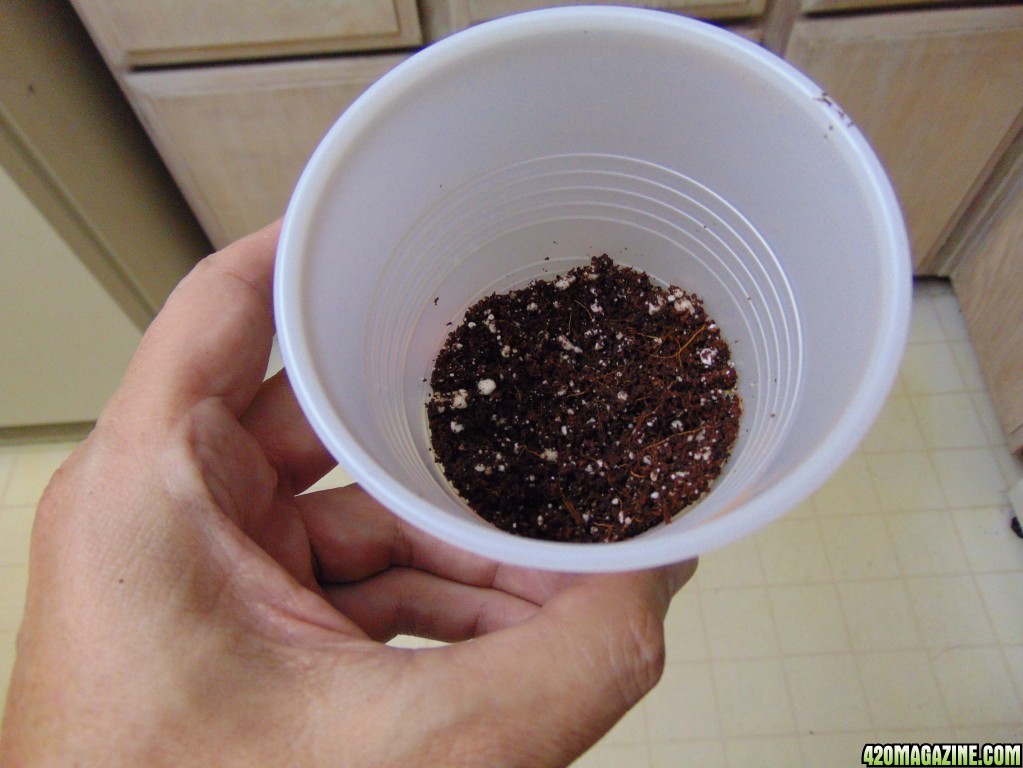
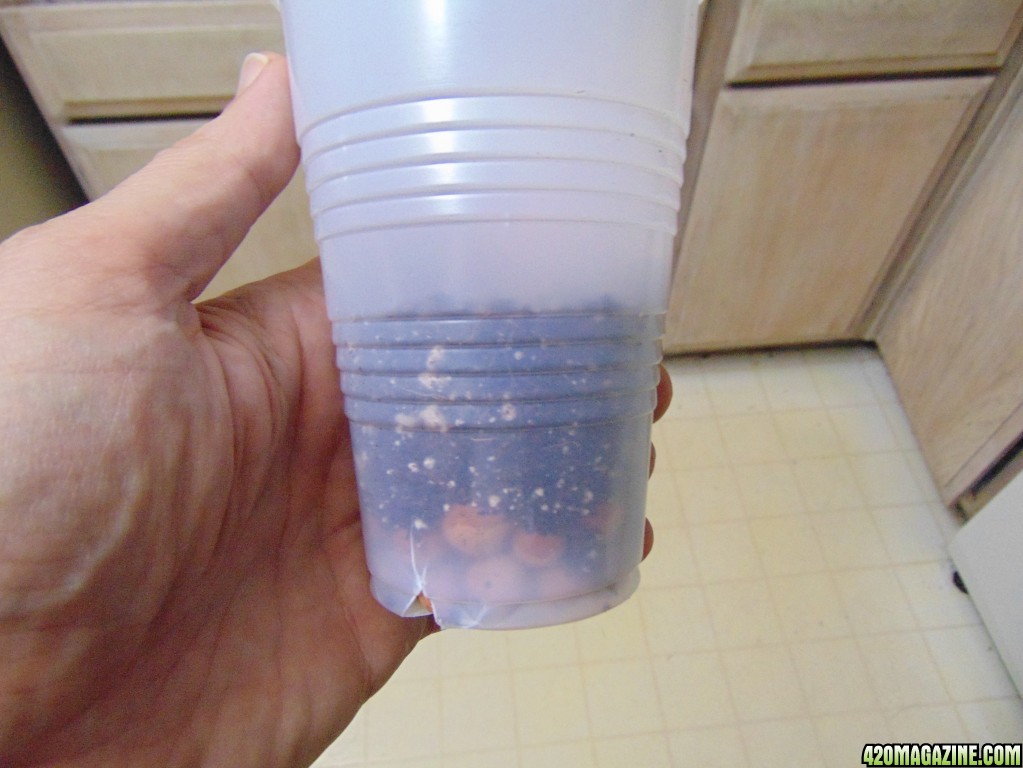
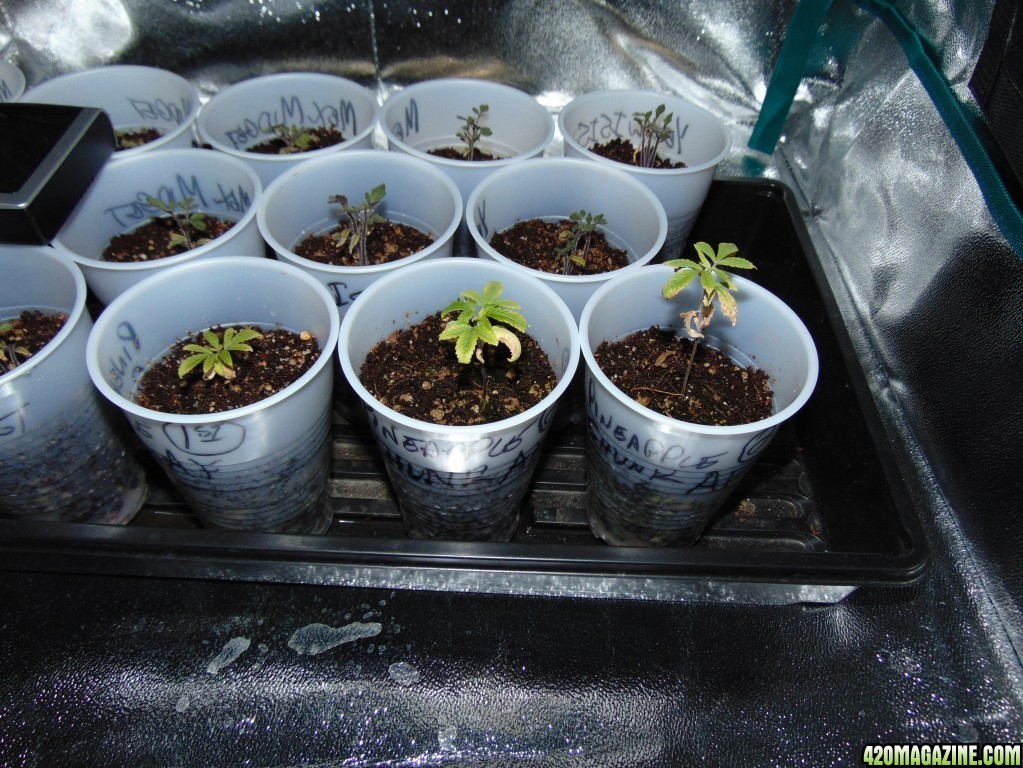
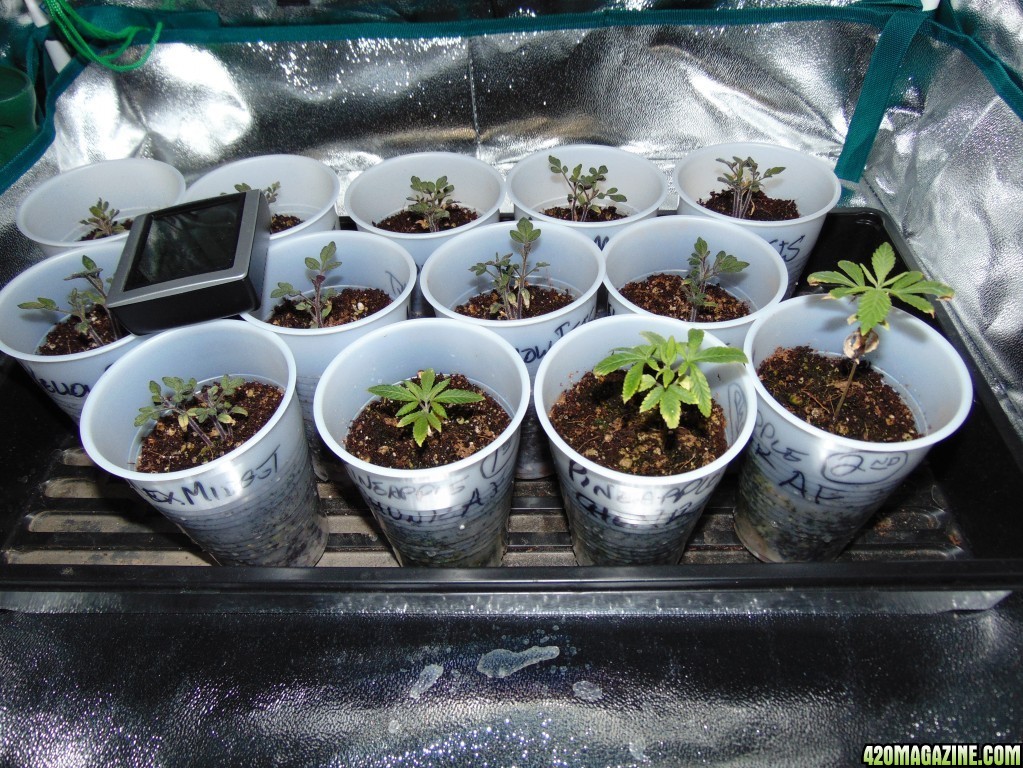
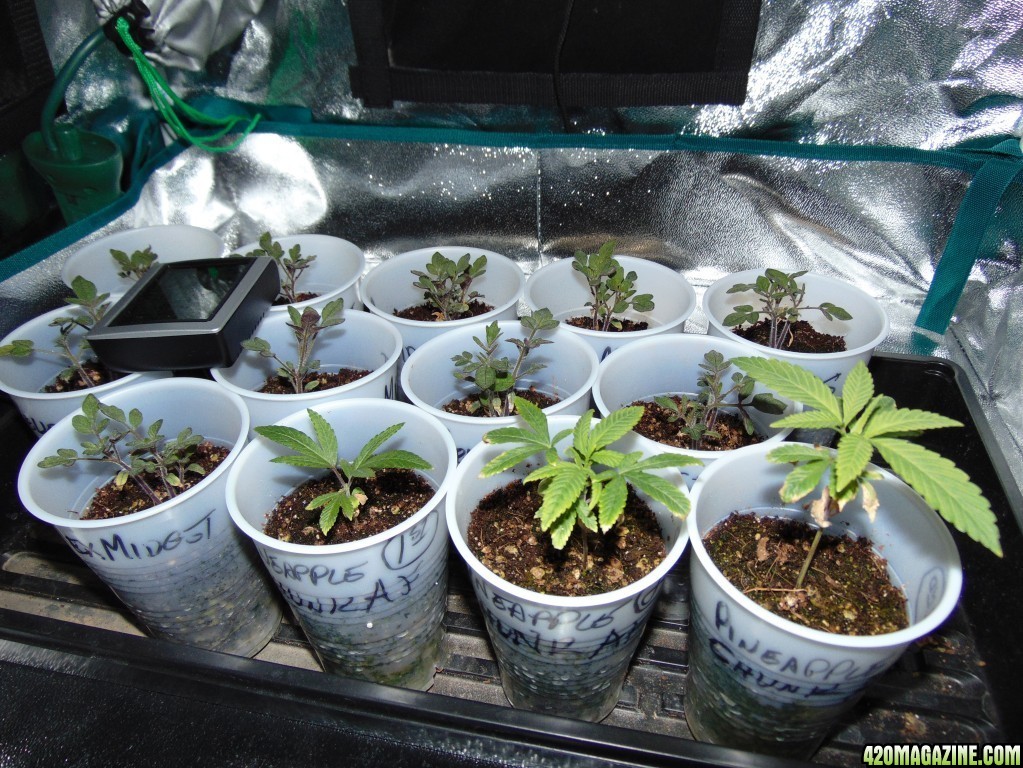
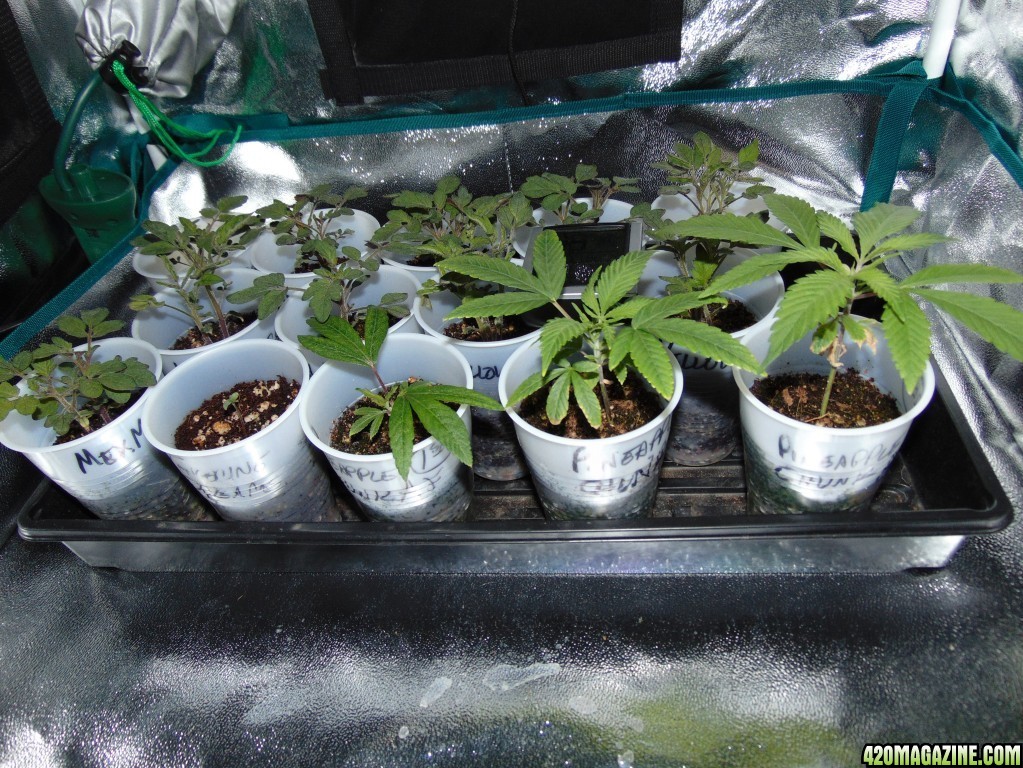
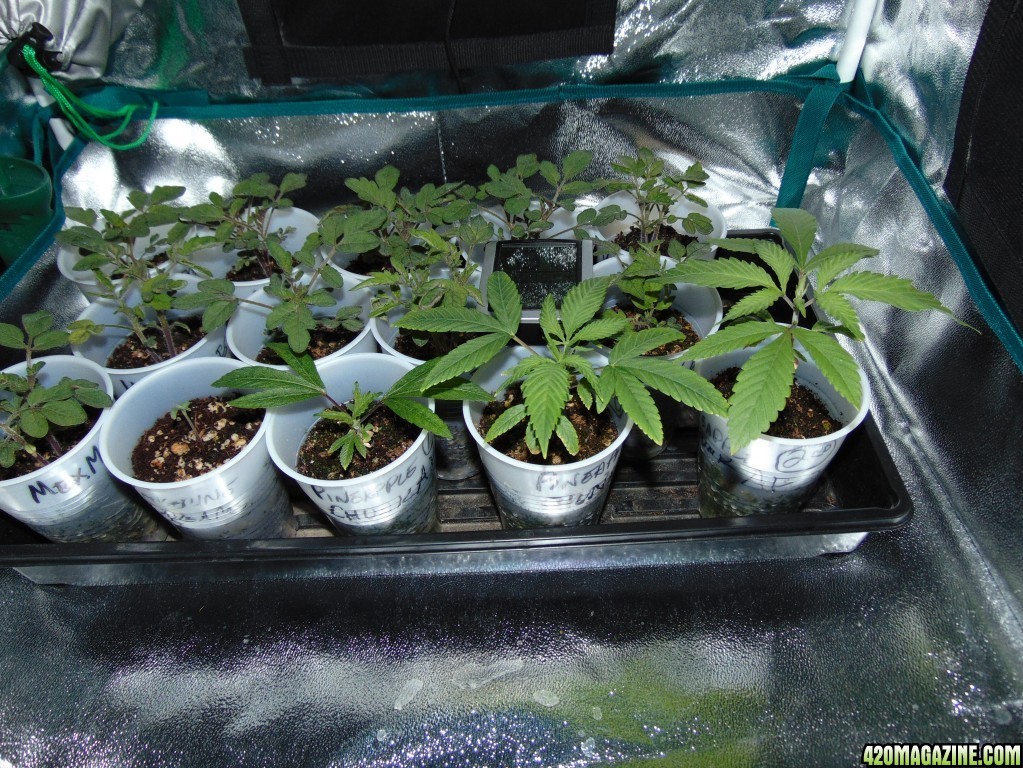
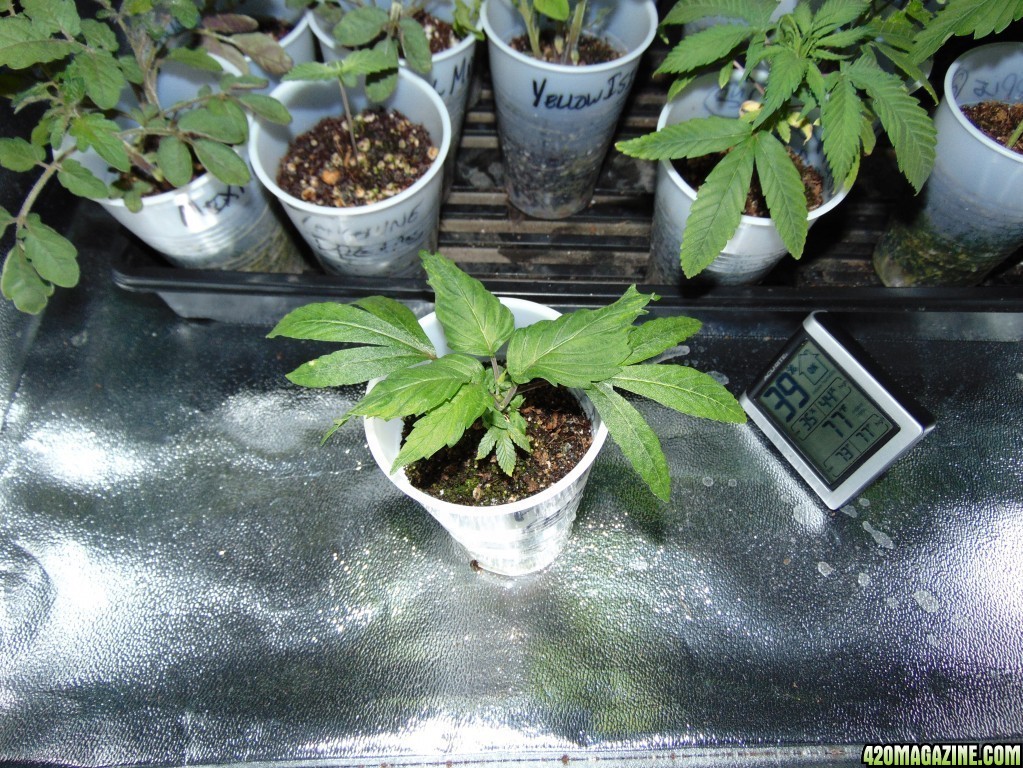
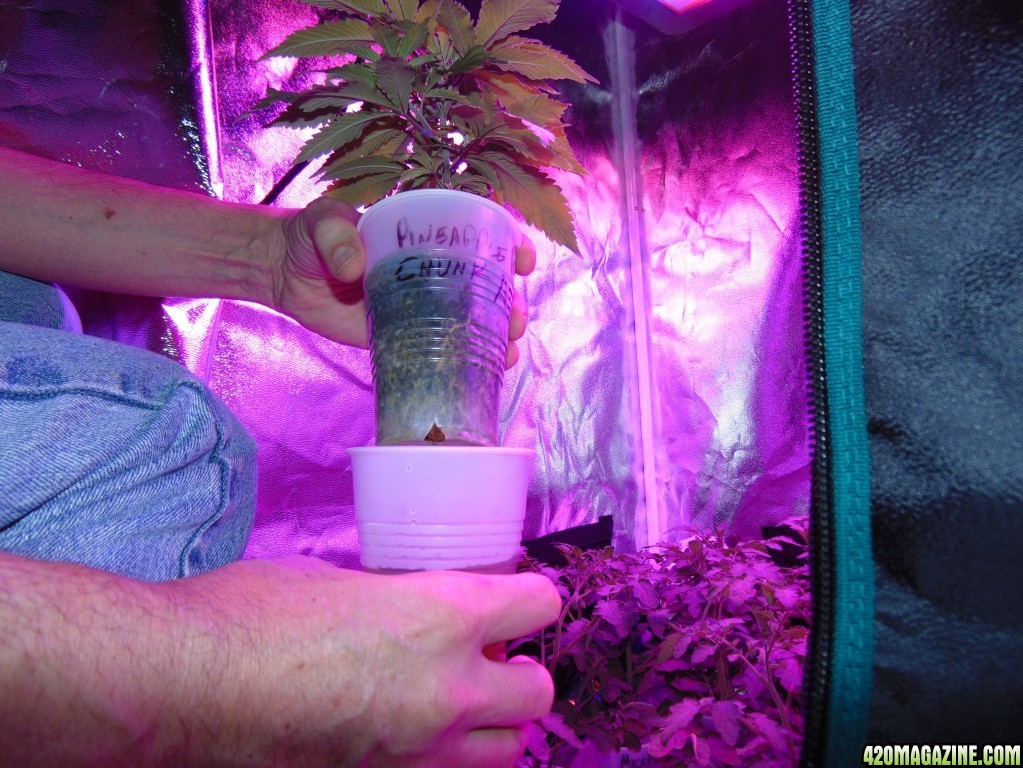
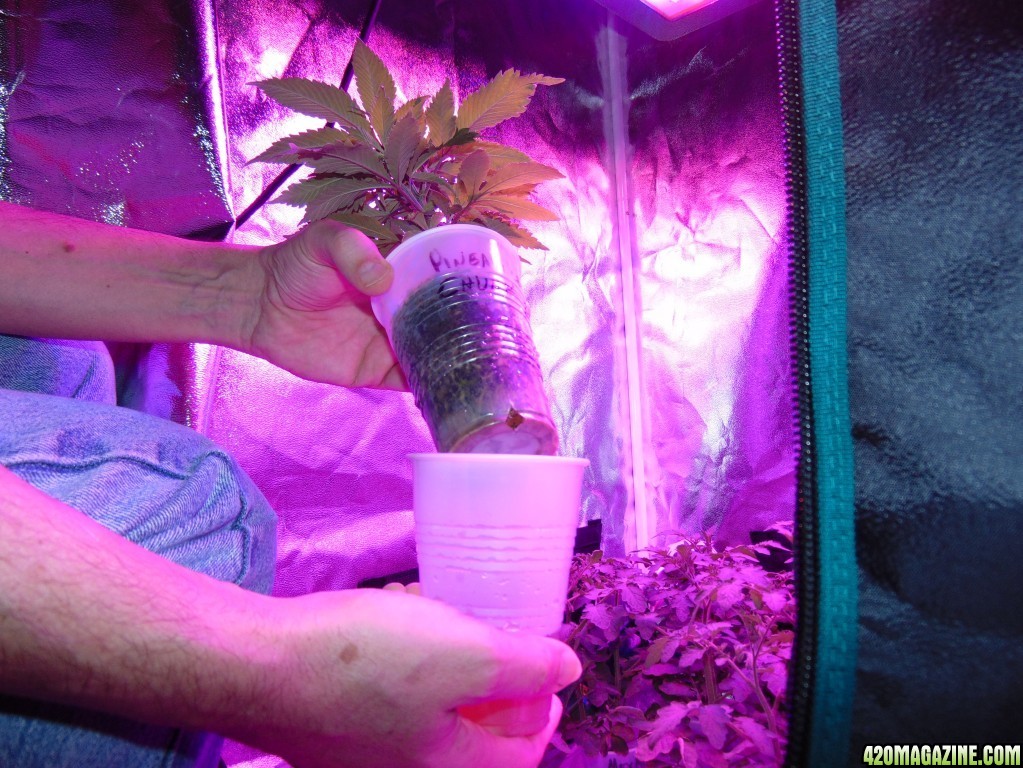
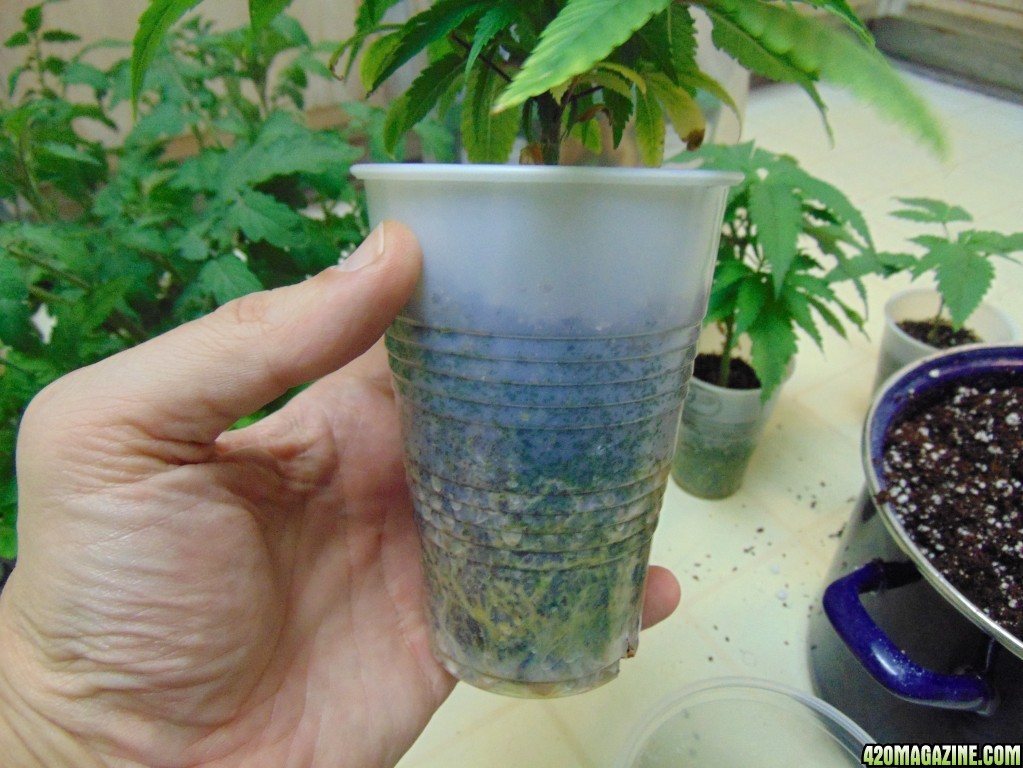
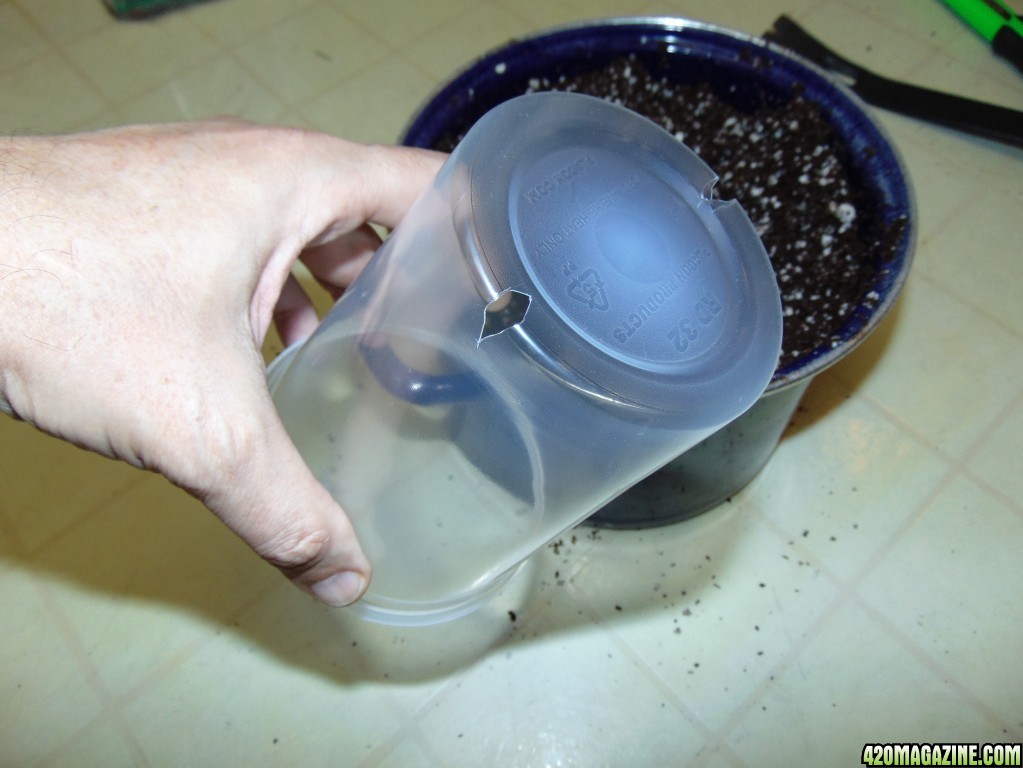
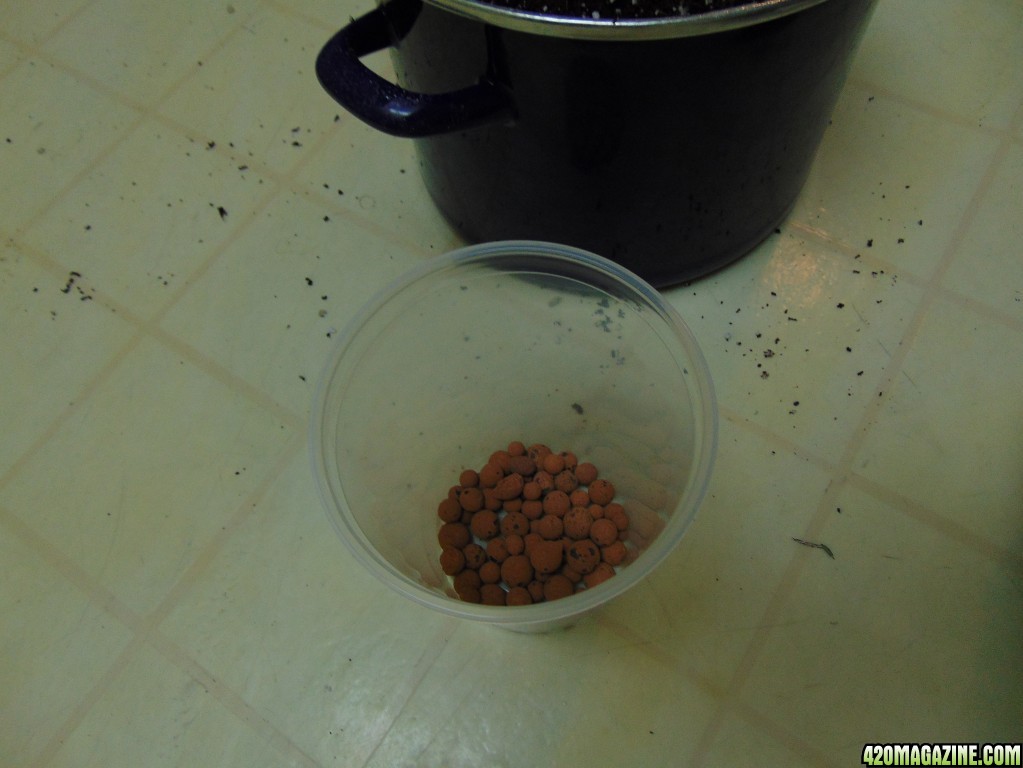
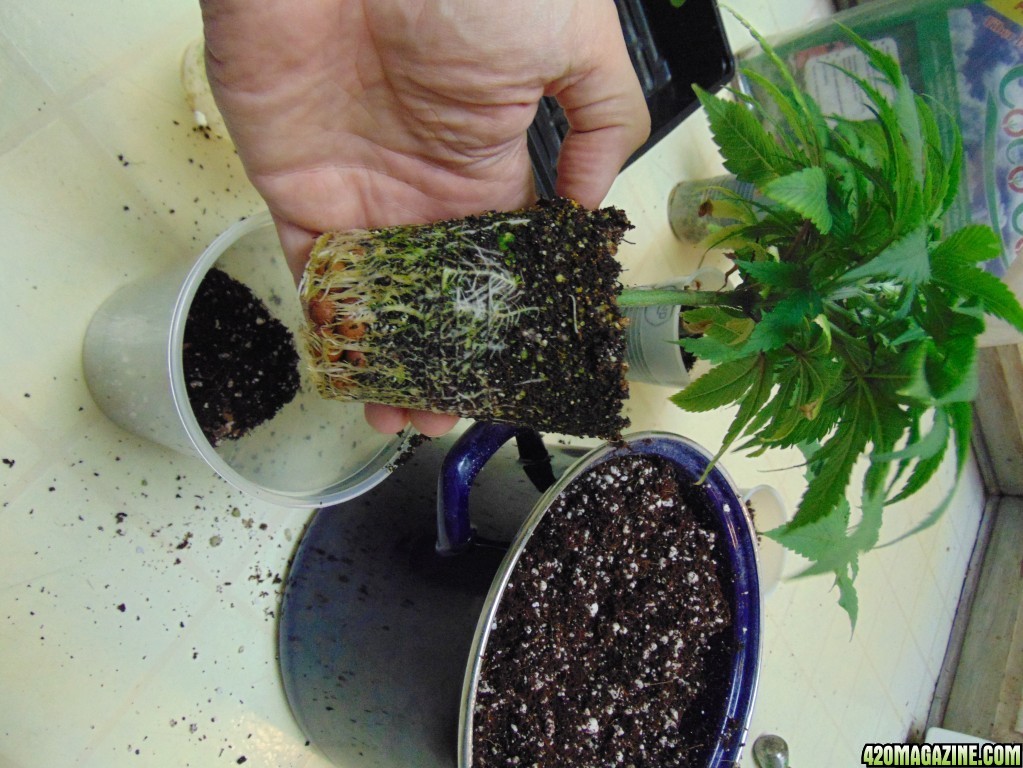
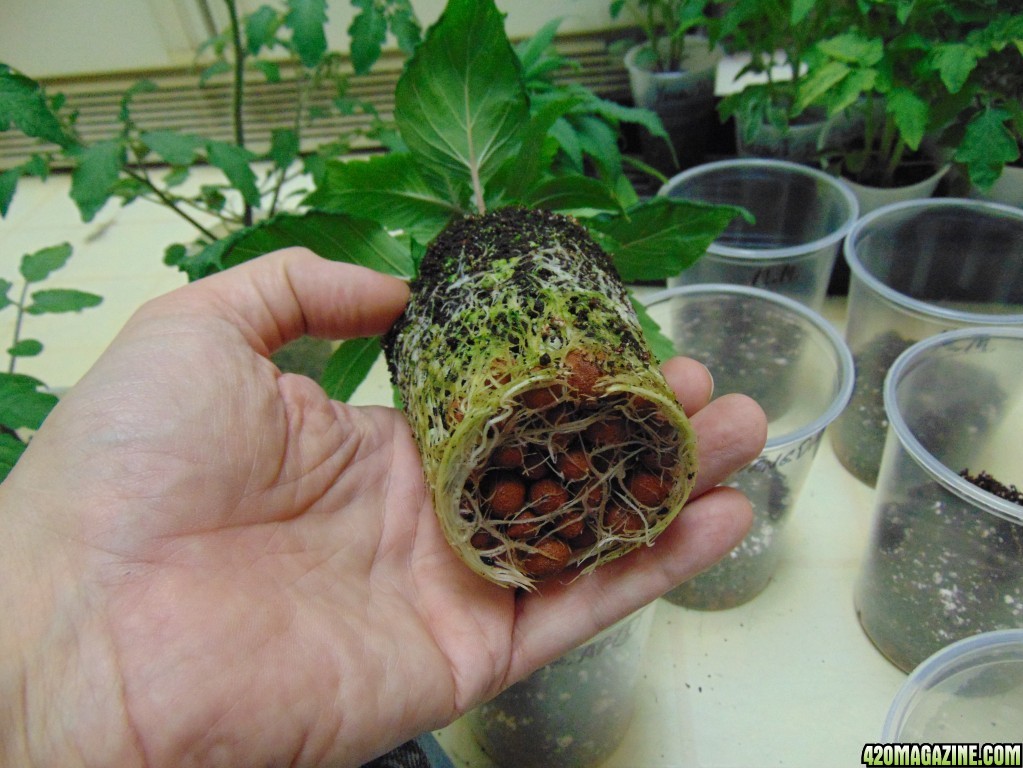
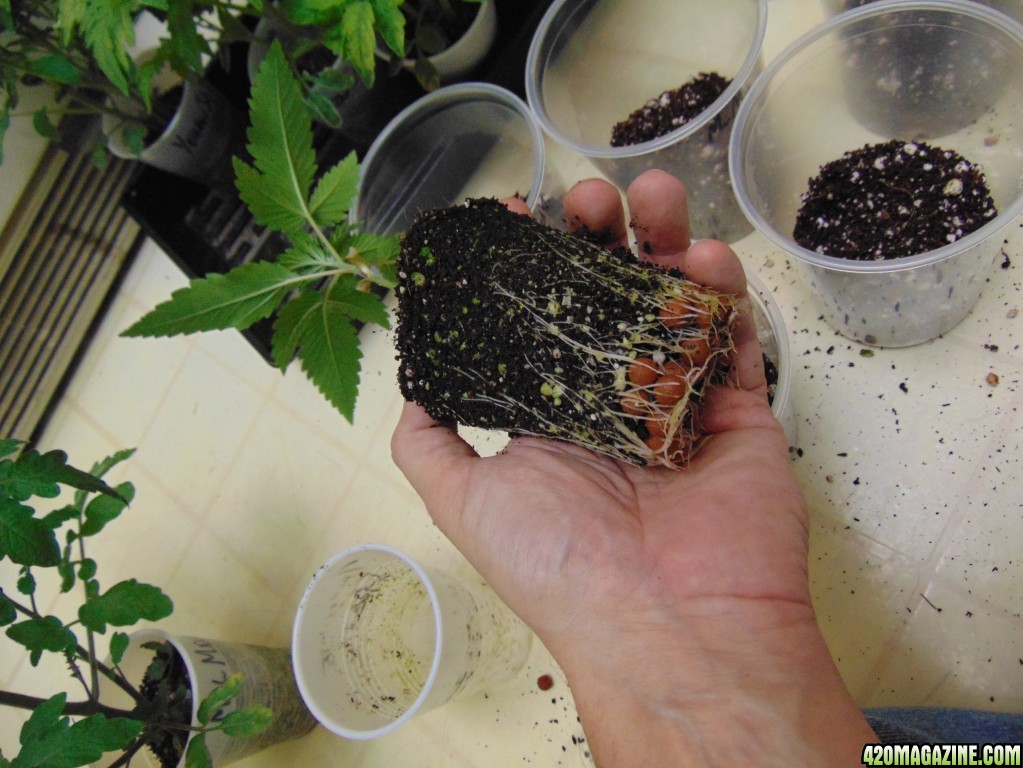
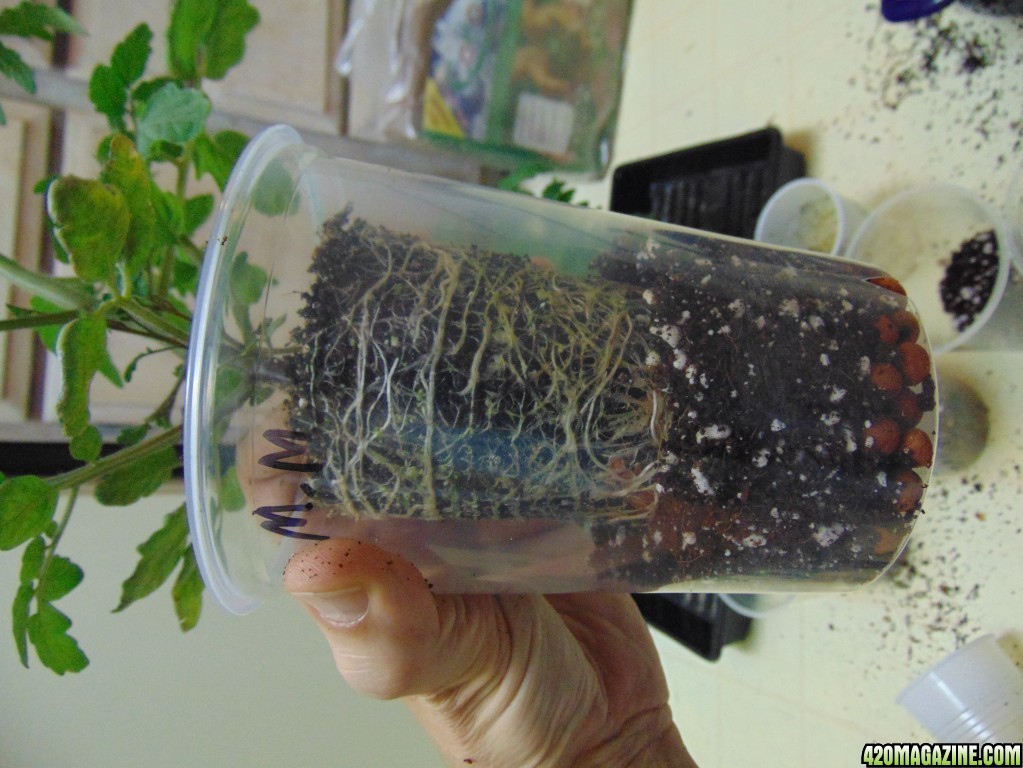
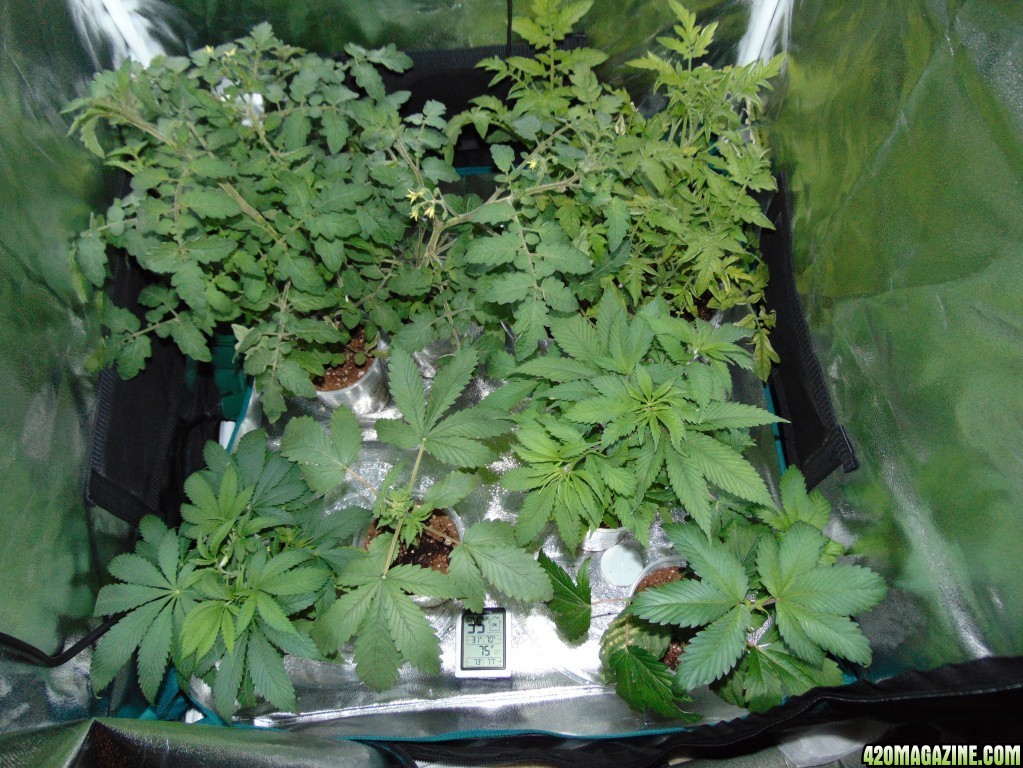
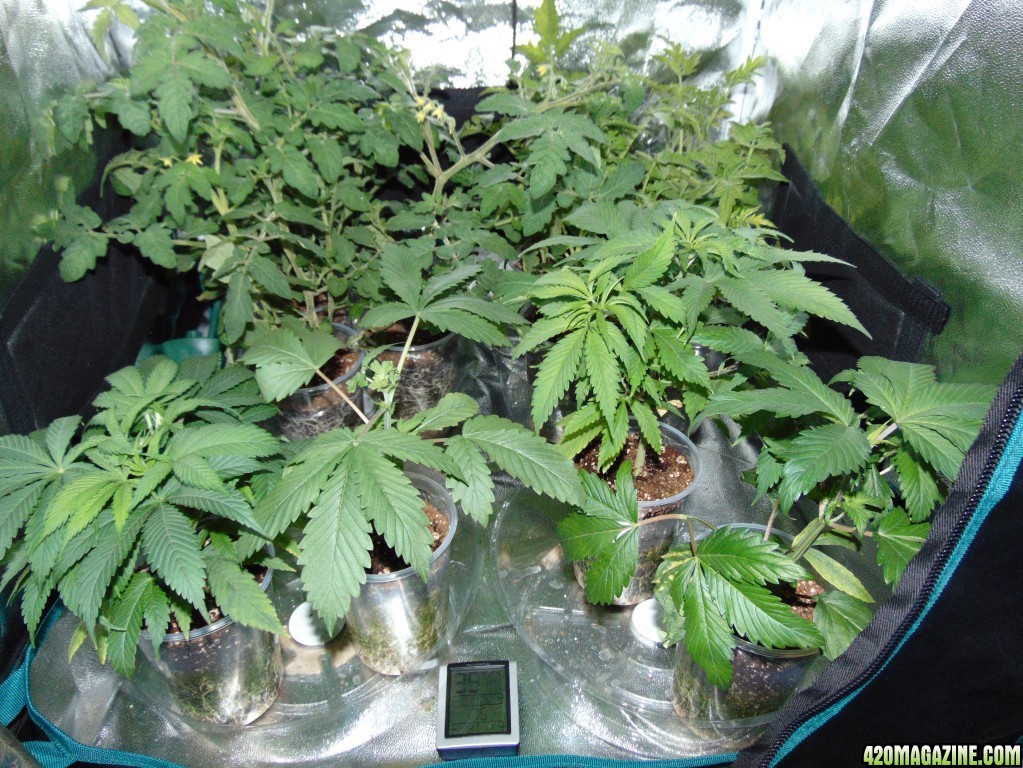
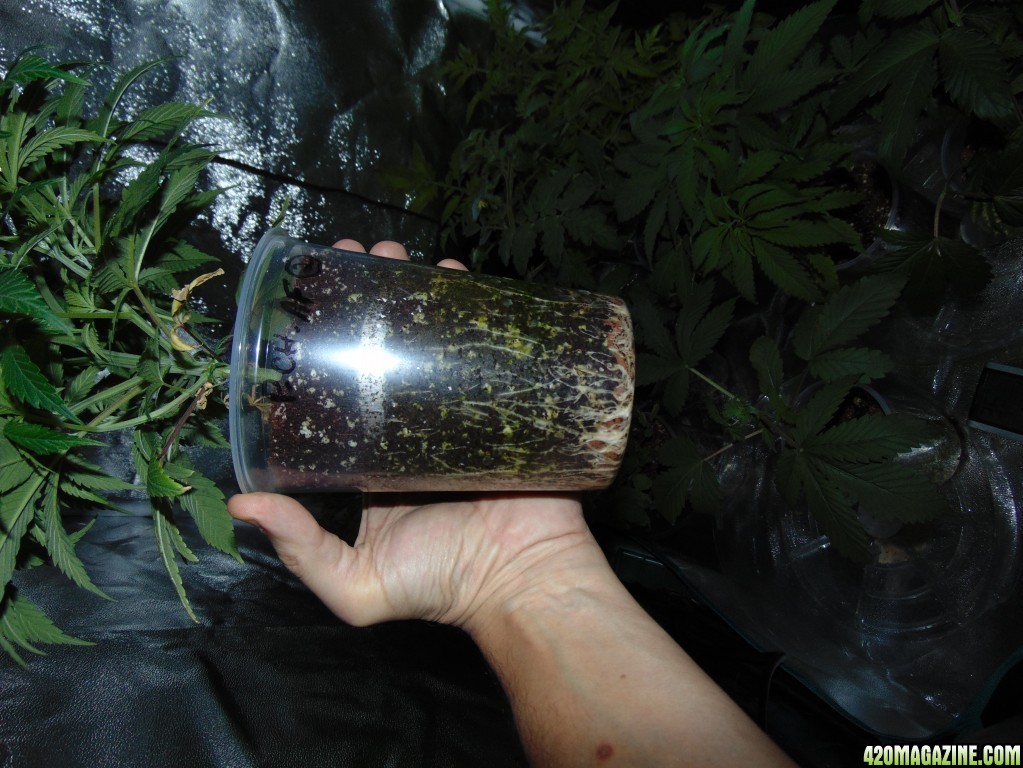
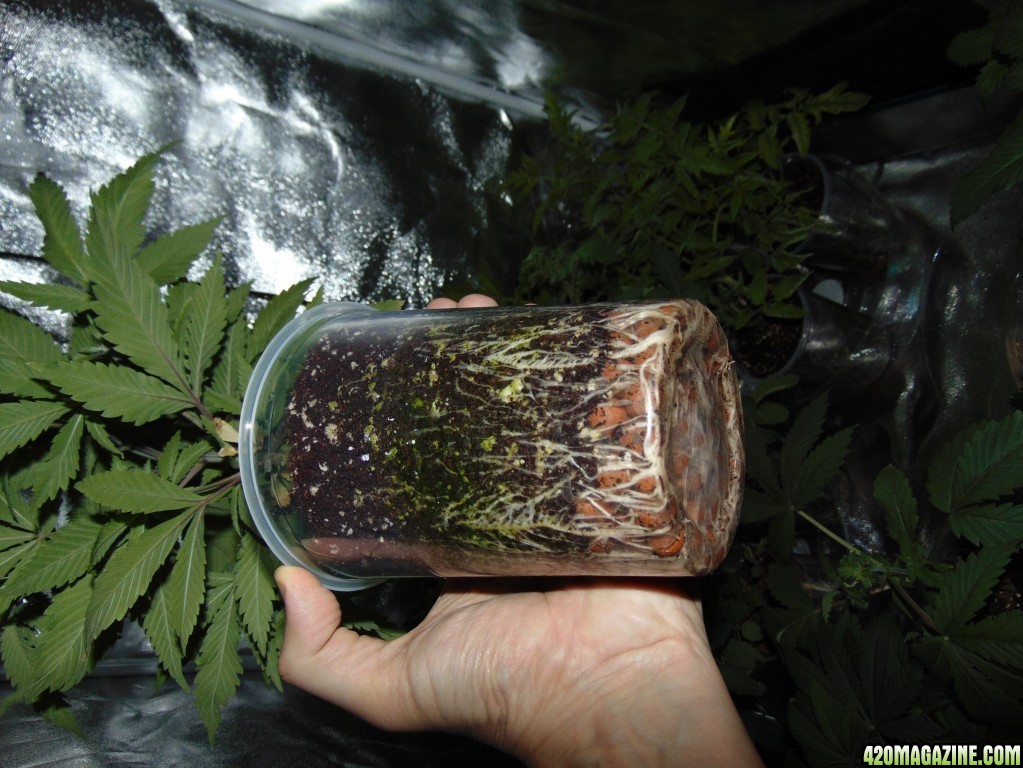
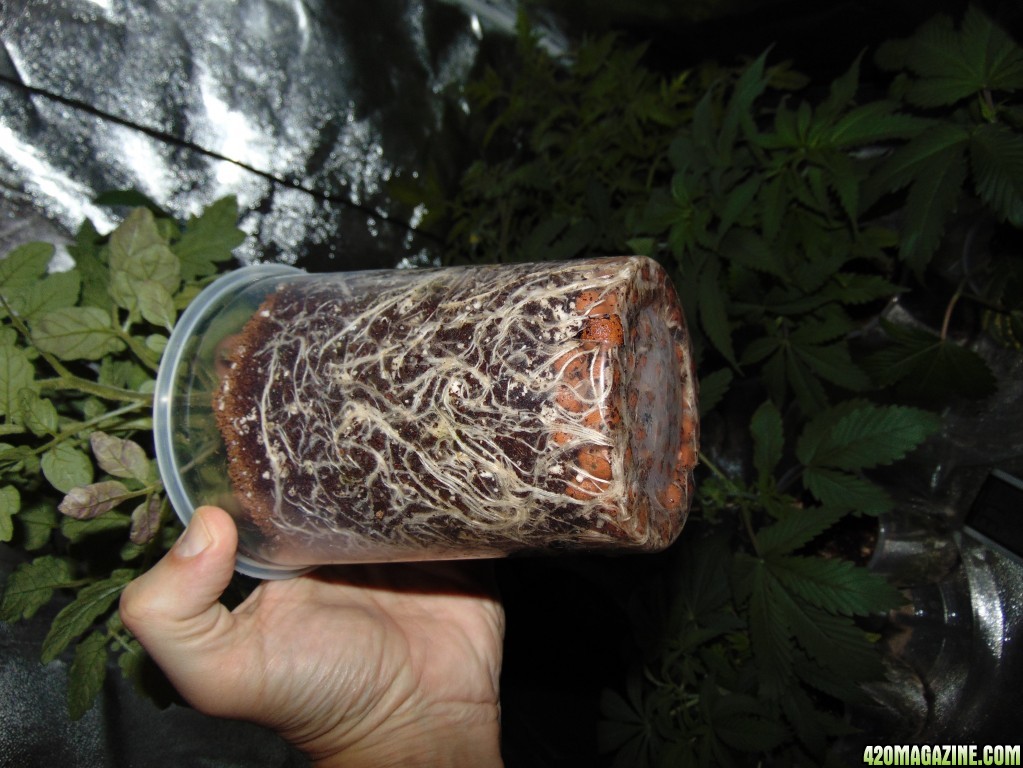
I plan on using a combination of Coco Coir, Perlite and Clay Balls within 5 gallon Phat Sacks for final growing, after transplanting the rockwool cubes into the same mediums in consecutively larger growing containers, which should allow the roots to explore the outer edge without getting root bound.
 
As a side note: at present I'm also germinating a couple of strains of tomatoes from seeds I harvested about 1-1/2 years ago. In addition, I'm awaiting the arrival of some Tangerine Dreams seeds (non A/F, so I may clone, too), so I will likely also start some and conduct a grow journal on those with any adaptations based on what happens here.
 
Okay, we got our first little lady poking her pair seed leaves on day 3,

20151115_155342.jpg


20151115_155350.jpg


She stretched out a bit and looked better on day 4,

20151116_193248.jpg


...and on day 5 another girl poked through, with at least 2 of the 3 remaining looking like they're close.

20151116_193241.jpg


20151116_215037.jpg


20151116_222159.jpg

(w/o LEDs on)
This one's a little brown on the seed leaves, which I believe was from being slightly too wet, and I'd gently squeezed out a bit of the water from all of the rockwool cubes.

Here's Yellow Isis Candy tomato starting off,

20151116_215043.jpg


20151116_222222.jpg


...and some Mexican Midget tomatoes, as well,

20151116_222213.jpg


As a reference shot for the starter cubes, I turned off the LEDs and used phone flash, which shows more realistic colors, too.

20151116_222234.jpg


The center 5 cubes are the Pineapple Chunk AF, counting from the left, #2 was the first to sprout, and #5 on the right is the one that's second to sprout (with a little brown).

The 3 staggered cubes in the foreground are the Mexican Midget tomatoes, the two staggered cubes in the background are the Yellow Candy Isis tomatoes.

On day 5 the Tangerine Dreams feminized seeds arrived, from the same place I'd gotten the previous ones. So I've decided to try just three seeds in 3 cubes along the right side.

Here's another shot with flash and no LEDs of that beautiful purple stalk and first leaf set,

20151116_222146.jpg


YUM, I can't wait!

Well, it looks like we're off to the races! I can't wait to see the Tangerine Dreams start off.

Here's info on that variety, leaning more on the sativa side, but still great CBD and good THC content.

STRAIN: Tangerine Dreams seeds (feminized)
THC: 22%
CBD: 1.5%
Blend: 80% Sativa / 20% Indica, cross between California Orange and G13 Haze strains from freecannibisseeds.nl
 
Quick Update:

After noticing the primary pair of leaves (after the seed leaves) were closing in together, I decided perhaps the lights were too close and duration too much, so I turned the lights off for a while during daytime (when ambient temps were still around 75 degrees F), removed the box I had used for elevating the domed rockwool cube germination starter enclosure, and raised the lights to minimize the intensity.

Within hours, the pair of leaves started parting again as they should.

As of today, the seeds in 100% of the tomato cubes have sprouted, and it looks like at least 2 more of the cubes with the Pineapple Chunk AF are about to burst forth (I can see the seed split with primary stalk slightly beneath the slight rockwool cover).

I feel a couple of the seeds may have been placed too deep within the rockwool cubes, and as a result they're taking longer to break through (requiring a lot more effort).
 
Hope all is well in your world.

Is this grow still alive?

We would love to be updated with some pictures and info.

How about posting a 420 Strain Review?

If you need any help with posting photos, please read our Photo Gallery Tutorial.

I am moving this to Abandoned Journals until we get updates.

Sending you lots of love and positive energy.

:Namaste:
 
Okay, time for the Lazarus treatment on this grow journal (slight homage to David Bowie, RIP).

I've been away for awhile because the plants weren't looking too good, and in fact many died as a result of improper pH, nutrients, humidity, etc. Perhaps I misinterpreted and blended incorrectly the information I read from many different posts here and elsewhere, with respect to indoor growing within coco coir and using LED lighting in a grow tent.

So, with a number of trial and errors, I've come up with what works for me, and believe it or not, a single sprout of Pineapple Chunk AutoFlower (AF) has survived from the very beginning in November. All others have died. I started off more seeds after that, including more Pineapple Chunk AF (PCAF) as well as a few of the Tangerine Dreams (TD) variety, and only two of the PCAF variety have survived.

As a control, due to the similar needs of another type of plant, I also had started some of my heirloom tomato seeds in the very beginning within the rockwool, two different varieties, Mexican Midget and Yellow Isis Candy. Most of the seeds survived since November, with many dying off during this experiment. It's been good to have these while continuing the grow, to see how plants in general are responding to variances in light, water, nutes, pH, with their root growth and structure.

Now that it appears I've figured out what works, I'm reviving this grow journal instead of creating a new one, because there are some survivors from the very beginning, which I can reference, that may help others in their quest for what works for them. I'll try to be as descriptive as possible, and be more actively posting as things progress (having uploaded a huge number of documentary photos in the wee hours this morning).

DSC024848.JPG


Stay tuned! It's ALIVE!!! :cheer:
 
Today is the time for a more substantive post, as I feel I've come to some conclusions about this type of growing that's new to me, which I'll share here...

I've always done my growing in soil, outdoors, and last year's bout with destructive parasites pushed me to look into indoor growing. I've had many friends who went the HID or other type of high-power-consuming and heat producing indoor lighting systems, and as I stated in my earlier posts had experimented with fluorescent lights within a Phototron unit many years ago (unimpressed). Based on this, I wanted to see if another form of lighting developed to the point to where it matched or exceeded the other tried and true lighting methods, and I feel LEDs are finally there.

As a note, I'm going with my Mars Hydro 400w in Grow mode on 24/7.

Given my goal of trying to circumvent some of the problems other growers have shared, I've been trying to control root growth a little better, while maximizing overall growth yields. By using consecutively larger clear planting cups, with coco coir and perlite (which are also new to me), I feel it's working well. The growth since making adjustments has been nothing short of explosive.

I'm going to step back a bit to share the journey, so that others might benefit from my experiences...

I struggled for well over a month, using rockwool cubes to germinate seeds, then transplanting those sprouted seeds within the rockwool into 16 oz. disposable drinking cups. I cut a pair of small irrigation and drainage holes in the base of each cup,
DSC021839.JPG

placed a small amount of clay balls in the base of each cup,
DSC021858.JPG

a mixture of coco coir (80%) and perlite (20%),
DSC021886.JPG
DSC021895.JPG

then filling in the sides and a little on top of the rockwool cube with more coco coir/perlite. I feel the biggest problem was I tried using just distilled water, with a pH of about 6.5, and no nutrients. I also used a domed germination tray with the small square areas for starting off my plants, maintaining that to keep up the humidity and moisture levels.
DSC021917.JPG


My ignorance cost me a few weeks and some seedlings. However, a majority of my tomato plants and just two of my initial seedlings of Pineapple Chunk AutoFlower (PCAF) survived from the start in mid November.
DSC021974.JPG

(photo from 11/23/15)

Around the end of November, I started off more seeds in the same manner, including Tangerine Dreams (TD) and more PCAF. I used the same methods, with one of the PCAF from the initial phase and all of the TD dying off and molding, and only 2 of the PCAF survived from this second round.
DSC0228011.JPG

(photo from 12/8/15)
At that time, I felt there was just too much moisture.

It took me another week to decide to take off the damned dome cover off, which I did on Dec. 15, 2015
DSC0229410.JPG

The thing that perhaps got me the most was seeing all of the plants in such bad shape, but most notably, the 3 surviving "girls" I still had struggling so hard to stay alive.
DSC0229810.JPG


I wanted to make changes gradually, so that I could assess the success or failure of each, starting with just the humidity issue first. The plants started to respond, initially just the tomato seedlings, then the PCAF.
DSC023048.JPG

DSC023057.JPG

(photos taken 12/18/15, just 3 days after removing the dome)

The plants all continued to improve more in days than they had in many weeks,
DSC0231311.JPG

(photo taken 12/20/15)
DSC023178.JPG

(photo taken 12/21/15)
and on Dec. 21, 2015 I decided to germinate a couple more TD seeds to add to my 3 surviving PCAF plants. This time, however, I didn't use the rockwool cubes, and went to the tried and true method of a moistened and folded paper towel under an upside down coffee cup on a saucer. I had at this point finished off 2 gallon containers of water in total since mid-November, and I decided to change up the water mixture based on more online research I'd done. Only one of these TD seeds sprouted, and I added it to a cup of just the coco coir/perlite mixture on Dec. 23, 2015.
DSC023199.JPG


Here you can see the plants on Christmas Eve, Dec. 24, 2015, which is just day 4 of the new nutes, and the new TD is trying to break the surface of the coco coir/perlite covering it.
DSC023238.JPG


Very early (just after midnight) on Christmas Eve, the new TD sprout broke through!
DSC0233010.JPG

(for reference, the four cups in the foreground, have the following plants, starting from the right side to the left: PCAF planting #2 with the larger of 2 survivors from that phase, next is PCAF #2 with the smaller of those two, then the sole surviving PCAF #1 planting plant, and the TD seedling)

By Christmas night, there had been a little more growth of the new TD plant.
DSC023358.JPG


On Dec. 27, 2015, all of the plants are starting to do quite well, and I'm gaining confidence about this growing project and the new changes recently made.
DSC023437.JPG


On Dec. 29, 2015, The plants are progressing,
DSC0235810.JPG

and I started noticing some deformed leaves on the PCAF #1 plant.
DSC023647.JPG


Here's a shot taken the morning of Dec. 31, 2015
DSC023726.JPG


Here are a few more pics taken just before midnight on New Years Eve, and the plants have now consumed the first gallon of new nutes (a total of 3 gallons, with the first two not having the CalMag or nutes, which I'll address in my next post).
DSC023869.JPG

That strange PCAF #1 leaf deformation
DSC023779.JPG

PCAF #2 Big
DSC0237510.JPG

Tangerine Dreams
DSC0237810.JPG

(Sorry about the sideways pics)

Whew! That takes me to the end of 2015, and I'll continue with all of the 2016 news on this journal starting with my next post!

I'm so glad I appeared to have figured out the issues I was having, and I'll get into the nutrients I'm using in the next post as well.
 
Okay, before I get too far into continuing on this journal, I'd like to address the nutrients I'm using with great success (along with the manufacturer, the amount of each I typically use for each gallon, and in the order I normally add them).

In an effort to provide as complete information possible, I'm using for the growing medium and container:
Coco Coir - FibreDust - Block (watch out, this stuff is VERY tough to break chunks off of, and expands insanely when moistened)
Expanded Clay Pebbles - Hydroton - For the base of cups, containers, etc. (I found someone on eBay selling it in any qty. a person needs)
Organic Perlite - Espoma - For a Coco Coir (80%) and Perlite (20%) blend
Phat Sacks - 5 gallon cloth growing sacks with handles, 12.75" diameter and 10" tall (I feel these are going to be much better for my "girls")

I also use the General Hydroponics pH Wide Range concentrate to test my pH (seeing way too many inconsistencies with electronic testers, and not wanting to calibrate all the time).

Please note that I'll definitely be modifying my Nutes as I get into different growth and flowering phases, along with the lighting duration and light spectrum. Right now I'm going for vegetative growth.

Here's what I do presently to prepare my Nutrient Water for my plants:

Water - 1 gallon (filtered to remove cysts, chlorine, etc.)
pH Down - General Hydroponics - typically 25 drops per gallon (bringing pre-nutrient pH to around 7.0)
SuperThrive - 2-3 drops per gallon (great source of B1 for growing in coco coir)
Cal-Mag Plus - Botanicare - 2 tsp. per gallon (REQUIRED for growing in coco coir to counteract the K)
Big Bloom - FoxFarm - 1 tsp. per gallon (great organic fertilizer, with bat guano and lots more)
Seaweed Extract - Growmore - 1 tsp. per gallon (excellent source of liquified natural kelp to promote plant and root growth)
Grow - Advanced Nutrients - 1-2 tsp. per gallon (part of the 3-part nutrient system)
Micro - Advanced Nutrients - 1-2 tsp. per gallon (part of the 3-part nutrient system)
...and when transplanting, I also add:
Tarantula (liquid) - Advanced Nutrients - 1 tsp. per gallon (microorganisms & bacteria for generating root mass)

After adding everything, I close up and shake the gallon container vigorously, then test the pH level. Using 3-4 drops of the concentrated wide pH spectrum testing fluid, I aim for a pH of 5.5, which appears to work very well within the coco coir.

Much of the trials and tribulations I went through appear to be caused by not counteracting the excessive Potassium (K) often present within coco coir. I learned this the hard way, wasting weeks of growing time and many seeds.

Since New Year's Eve, I've been going through about 1 gallon of nutrient water ever 2 days for all of my plants, including the tomatoes.

Here's the method I've used, watering from the bottom, I pour some of the nute water into a cup the same size as those the plants are in (in this case, a 16 oz. clear plastic cup).

DSC024316.JPG


Take the plant and lower it slowly into the half-filled cup of nute water (in this case, it's my PCAF #2 Big, taken the morning of Jan. 6, 2015)

DSC024329.JPG


Remember to lower it slowly into the water, or else it will spill out all over! The coco coir quickly starts to absorb the water through the two holes in the bottom of the cup.

DSC024335.JPG


I try to make sure the hydration doesn't get to the top of the coco coir, letting it absorb until it gets to about 1-2" from the top, or about halfway, before lifting the cup with the plant in it out of the water, tipping it toward one of the two drain holes, and gently raising and lowering it sharply to get out any excess nute water. I often let it sit tipped for a moment, raise and lower it to get more water out, and repeat as necessary to get all of the excess nute water out I can.

DSC024347.JPG


I'm glad I'd taken those photos when I did, because later that day I received my 32 oz. containers, which I bought online via eBay. Essentially, they're thin clear plastic deli containers, which I bought without lids to save money (because I have no use for them!).

I prepared these new 32 oz. containers the same way, in preparation for transplanting all of the plants from the 16 oz. cups. All of the plant roots had good mass around the 16 oz. cups, and my goal all along was to avoid the plants becoming root bound, by using consecutively larger containers.

DSC024449.JPG

(photo of PCAF #2 Big)

Here are the holes I cut in the new 32 oz. containers (afternoon of Jan. 6, 2016), and you can see the coco coir/perlite mixture in the background. As a note, this is the first time I used nute water to hydrate the coco coir, and I also added Tarantula to the nute water, to stimulate root growth after transplanting.

DSC024417.JPG


Thin layer of expanded clay pebbles in the base of the container

DSC024437.JPG


I add some of the coco coir/perlite mixture, and gently remove the plant from its' prior 16 oz. cup

DSC024468.JPG

(PCAF #2 Big, apologies for the sideways photo!)

Here you can see the roots of PCAF #1 before transplanting, with some of the 32 oz. containers prepared in the background

DSC0244711.JPG


This is the Tangerine Dreams plant that sprouted on Christmas Day, 12/25/15, and the root mass already developed in less than 2 weeks, pre-transplant

DSC0244811.JPG


This shot of a Mexican Midget tomato has a much larger root mass, so it shows better the relative size and position of something being transplanted from a 16 oz. cup into a 32 oz. container, with the base medium already within the new 32 oz. container.

DSC024508.JPG


In just a few days from transplanting, the roots had already reached the outer limits of their new 32 oz. containers, and these photos were taken on Jan. 10, 2016 (just 4 days after transplanting).

PCAF #2 Big's roots

DSC024685.JPG


PCAF #1's roots, growing even better than the larger plants, with those weird deformed wide leaves

DSC024697.JPG


Six days after transplanting into the 32 oz. containers (Jan. 12, 2016), the grow tent was running out of room, so I ditched the smaller germination tray and bought 4 of the 12" round deep plant bases. I also removed three of the Mexican Midget tomato plants to allow my "girls" to get more light, and give them a little "elbow room."

DSC024747.JPG


In the foreground, you can see my "girls" are much happier, and through the clear containers and plant bases, you can also see the root mass.

DSC024766.JPG


A side shot of the root mass of PCAF #2 Big on Jan. 12, 2016

DSC024785.JPG


Another shot of the same plant, showing more of the bottom

DSC024809.JPG


An example of how well the Mexican Midget tomato's roots are developing

DSC024829.JPG


Here's the grow tent as of Jan. 12, 2016, with the lights on in Grow mode.

DSC024848.JPG


And that brings me almost current with this Grow Journal!

In a very short time, all of the tomatoes will be removed, and I may start a couple of other plants within coco coir before transplanting these "girls" one last time into their 5 gallon Phat Sacks.

One more item of note is, I seemed to have made some different decisions as my plants progressed (or didn't, as the case was), and perhaps the addition of a medicinal Buddha statue next to the grow tent had something to do with that.

DSC02485b.jpg


Maybe... I'm not sure, but maybe...

Who knows?
 
Nice come back. Just one thing... no light should get to the roots, so a see through cup is maybe not the best idea.
 
I hear you, and the time within the clear cups is rather short, given it's taken only days to reach the outside and pretty much web out from there. Within a few days, they'll be going into the 5 gallon Phat Sacks for the rest of their lives.

They've been in these cups for just 9 days, at this point, and I will likely transplant them into the Phat Sacks this weekend. The one thing I do like about these clear cups is, I can easily see the rate of saturation during watering. Each plant has a slightly different rate of absorption, and I can see how high the water progresses as it's dunked into the watering cup, before draining the excess.

Overall, I feel pretty good about the manner in which the root mass for the plants have progressed from the smaller cups to larger container, developing a good webbing just before transplanting, and then continuing likewise in the larger container.

Historically, I haven't seen great root balls nearest the plants after I pull them when growing outdoors in pots. The roots have tended to head to the outside edge and follow it, developing most of the mass on that outside. I also have read where many growers have seen their plants become root bound within smaller containers. My experiment with this first-time LED & coco coir grow is to gradually increase the root ball within consecutively larger containers before transplanting into the Phat Sacks.

Interestingly, the 420 plants and Mexican Midget tomatoes need watering every day, while the Yellow Isis Candy tomatoes only need watering every 2-3 days. Just a difference on intake, absorption and growth for a different type of plant. At the time of Phat Sack transplanting, all of the tomatoes are coming out of the tent. It has been interesting along this journey to see how each plant has been affected by the different conditions, some bad, some good, some better.

Have either of you ever seen the leaf deformation exhibited by the PCAF #1, as show in the above photos? It's different than anything I've seen before.
 
One thing I haven't fully addressed yet is the grow tent preparation. So, here goes.

As I mentioned previously, I had a terrible time with the boring worms in my last outdoor grow. They decimated so many of my beautiful buds, at one point I felt if they're taking all of my buds, I'd rather use a flamethrower on the whole plants!

DSC018856.JPG


For a while, I had a friend that kept everything under control, and he kept the plant clear of any pests. But, alas, Manny the Praying Mantis, who had grown up with these outdoor plants, eventually left for another place. I like this shot of him on top of one of the buds.

DSC0179210.JPG


I took a couple of puffs, calmed down, and decided to do something different my growing indoors. However, many have reported getting soil mites and other lovely critters even in their indoor grows.

To recap my set-up hardware, including all parts, it's:

Mars Hydro - 27"x 27" x 63" Grow Tent (the smallest they make)
Mars Hydro - Mars II 400 watt LED (Epistar 5w diodes, Grow & Bloom switches)
6' Heavy Duty Rope Ratchet Hangers (2x) - For height adjustment of LED light
8" to 6" Duct Reduction Flange - Used at top of Grow Tent for exhaust and mounting hard 6" ducting and fan
8" Noise Reduction Duct Clamp - Used for mounting reduction flange at top of Grow Tent (inside)
6" Duct Flanges (2x) - Used on both side 6" vents for air intake
6" Noise Reduction Duct Clamps (2x) - Used to secure 6" duct flanges on both side intake vents
6" Duct Right Angle Connectors (3x) - Used for exhaust routing
6" Inline Duct Exhaust Blower Fan - Normal fan, not high power, used for exhaust at top of Grow Tent
6" Ducting Solid 5' Length - Vertical drop for routing exhaust to
6" Black Insulated Flexible Ducting (25' length) - Routing exhaust to window
6" x 10" Right Angle 6" Duct Vent - Venting exhaust to outside window
6" Duct Clamps (4x) - Used for connecting 6" flexible ducting to hard duct and Vent at the window, as well as attaching filter to 6" intake flanges
Silver Foil Ducting Tape - Don't mess with normal duct tape, this stuff works MUCH better!
2" Duct Support Webbing, 50' - Used to support flexible ducting when routing exhaust from Grow Tent to window
16" x 48" Honeywell 38002 Carbon Pre-Filter, Universal Cut-to-Fit - Used for all intake vent on Grow Tent
1" x 9' Black Velcro Sew on Hook Only - Used to secure carbon pre-filter to rectangular side intake vents on Grow Tent
Titan Controls Apollo 8 2-Outlet 24-Hour Timer 120VAC - Self-explanatory
HM Digital TDS-EZ PPM Meter/Tester - Self-explanatory
Acurite Digital Temperature & Humidity Monitor - Self-explanatory
Dotchi 12-in Clear Plastic Plant Saucer - Used at base of plants, to fit 5-gallon Phat Sacks (tried 14", but they were too large)

When I placed my Mars Hydro order for the Grow Tent "Kit" which included the 400 watt Mars II LED, I wasn't sure how long it would take to arrive, but it shipped from the local CA warehouse, and arrived within days, packaged safely. Because the specification changeover was just happening regarding the two switches for Grow and Bloom, I was glad to see my order had them.

Because I'd read about other growers having problems with soil mites and other issues, I decided to filter the air intake, and route my exhaust to the nearest exterior window. Even though the Grow Tent comes with a tray, I still wanted to contain any excess water in something else, just to be safe.

When I first assembled my Mars Hydro Grow Tent, I noticed the dimensions posted online were incorrect, so I measured and created my own scale drawing. Note: the "W", "X", "Y" & "Z" denote where each corner connect to each other, for reference.

MarsHydroTent.jpg


As you can see from the drawing, the size of this Grow Tent will accommodate four 13" diameter items within the base. With my goal being 4 plants in this Grow Tent, I had purchased 4 of the 5-gallon fabric Phat Sacks, with dimensions of roughly 12.75" diameter and 10" height. I tried the 14" plant saucers, but they didn't fit well, so I used the 12", which should work for the Phat Sacks just fine.

For the Mars II 400 watt LED Light, I crossed the included wires to shorten the length, and attached them to two 6' Heavy Duty Rope Ratchet Hangers attached to the top side metal frame supports.

DSC022435.JPG


For proper air flow, I used a 8" to 6" Reduction Flange at the top of the Grow Tent for exhaust, connected to the Grow Tent with an 8" Noise Reduction Duct Clamp inside, and slid the upper support trusses to better support the weight of the exhaust ducting and fan. I then attached a 6" Right Angle Duct before attaching the 6" Inline Duct Exhaust Blower Fan, then another 6" Right Angle Duct to angle it down, to the 5' length of 6" Duct, which then connects to another 6" Right Angle Duct that rests on the floor and supports most of the weight of the hard ducting. This way it places less stress on the Grow Tent itself, and connects without any stress to the Flexible 6" Insulated Ducting. Because I wanted this all to have a better aesthetic appearance, I painted the hard ducting and duct fan green before installation. I had first used green duct tape, but that didn't work so well, sliding around and starting to disconnect at duct joints, so I switched to the foil ducting tape, which has worked very well.

DSC022466.JPG


On the intake vents, starting with the two 6" vents, I installed a 6" Duct Flange in each with a 6" Noise Reduction Duct Clamp, after attaching Filter fabric to each 6" flange with a 6" Duct Clamp.

I also used the same Filter fabric to the outside of each of the three rectangular air intake side vents on the Grow tent by using 1" wide Velcro Hook material, after taking off the removable fabric covers included, cutting the Filter fabric to size for each of the intakes (each one a different size) and cutting the Velcro to create a good seal around all four sides. I feel it's nice to already have the screened vents stitched in place with the Velcro Loop around the perimeter of each vent.

DSC025036.JPG


This way, I'm at least reasonably safe from dust and little critters making their way in easily. Hey, I know it's not perfect, but a good deterrent!

I ended up routing my exhaust to my window by using the 6" Flexible Insulated Ducting, and chose the black exterior color of insulation, so it wouldn't stand out too much (like the Grow Tent doesn't!). I routed that along the walls toward my window, avoiding any kinks or blockage by attaching the 2" Duct Support Webbed Strap around the Flexible Duct along the way, and attaching it to the wall at various points. The Flexible Duct then heads upward to connect to the 6" x 12" Right Angle Vent, to which I added a wire coat hanger at the top edge, so I could hang it on the inside of my wooden window blinds. Because my window faces the front of my house, which has a lot of curious neighbor's prying eyes always present, I feel this somewhat shields it from view but doesn't obstruct the exhaust venting to the outside.

I know this may seem a bit overkill for some other growers, but if you're like me, I sometimes read a journal or blog post, which only ends up stimulating a number of questions to obtain better clarity. So, if this is too much, just look at the photos and refer to the text when necessary!

I hope this helps others in similar growing environments.

Okay, that's all for now...
 
Back
Top Bottom