Armoire Grow Box

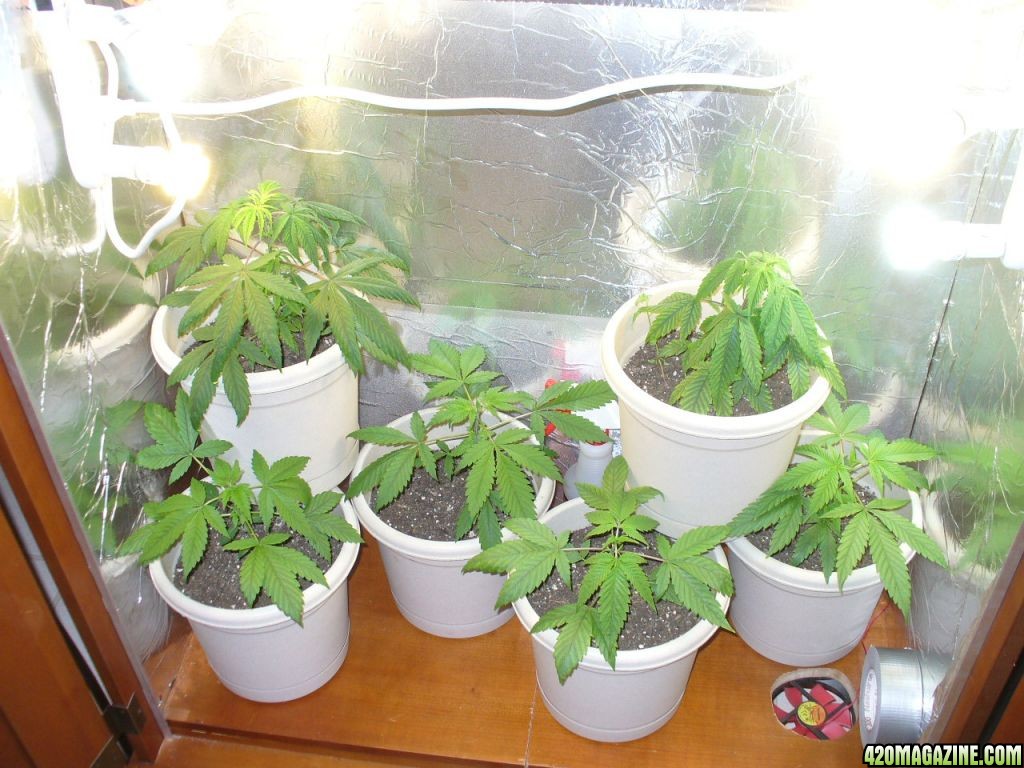
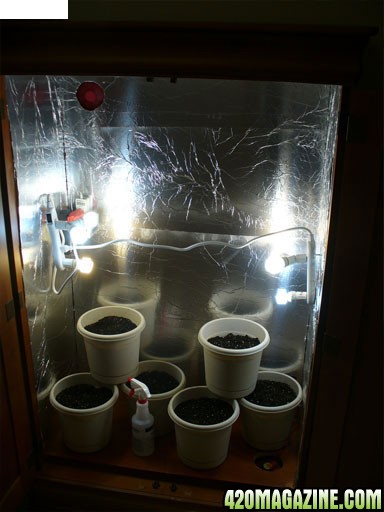
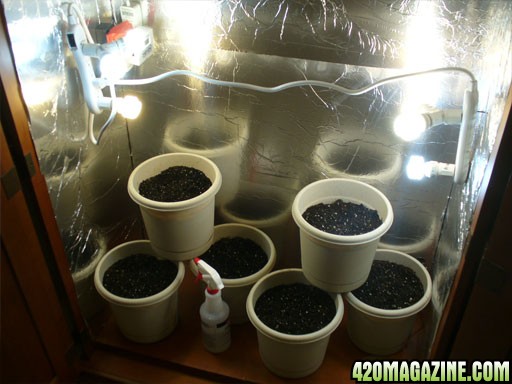
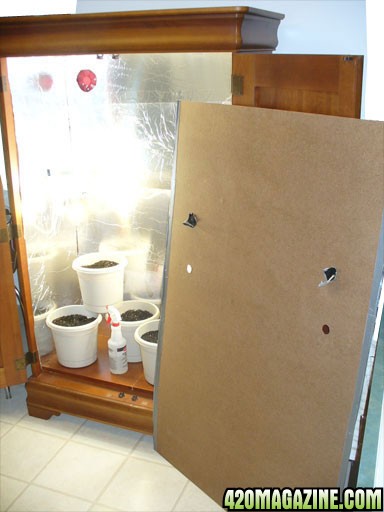
At long last I can put my poor hatchlings in soil and give them some lovin'. The intake fan is running below, and I hang a quick-and-simple light from a hook inside. It's 3 different bulbs (cool white, daylight, and soft white).

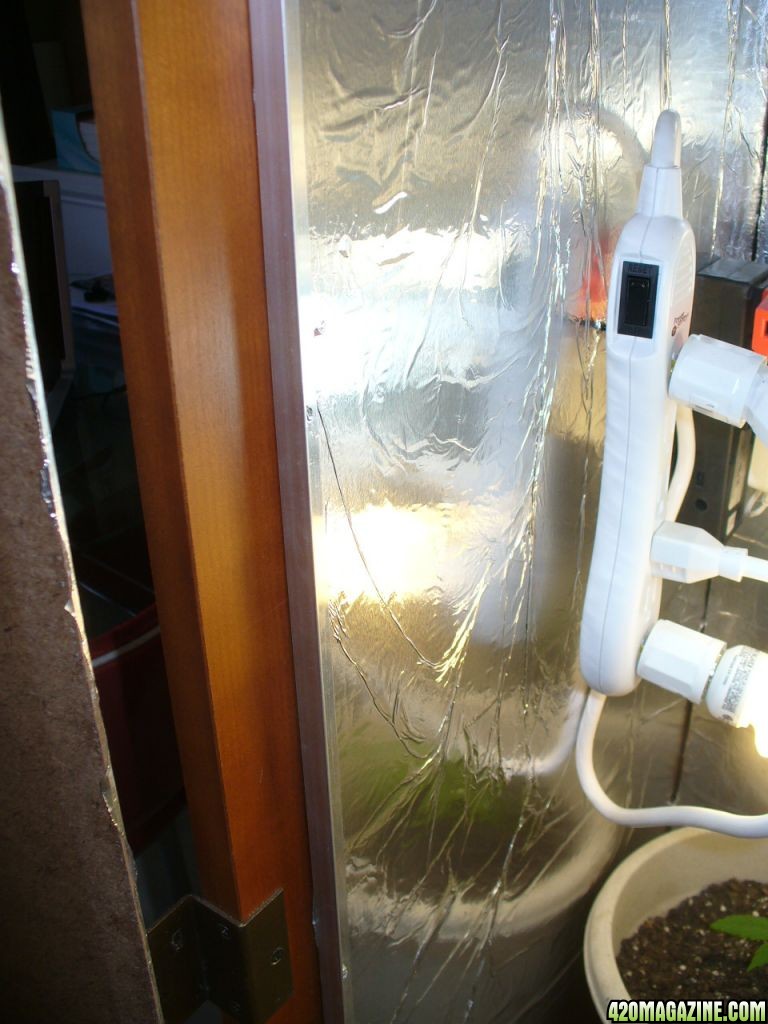
The sides have also been foiled. Tonight I sleep a little better.

2052.jpg
 
Day #3, still racing to get this done. Tools litter my kitchen :(

Here, the newly acquired 2nd power cord has been installed, so both fans are running. The ceiling (not shown) has been foiled, and screws have been placed mid-way up the sides to hold each of my power-strips (each with 3 light bulbs).

23105.jpg
 
I really don't like the ugly way the 2nd power cord just hangs across. It's ugly and unprofessional looking. But it does the job, and this will be a super-easy way to raise the lights as needed. I'll simply add a couple more screws up the sides, in a few increments, to the top.

Behind the bulbs on the left you can almost see the timer, controlling the lights. The fans I leave on at all times.

NOTE: The fans are noiser than hoped. My sealed up armoire sounds like a refridgerator :( Must contend with that eventually.

2497.jpg
 
The inner front panel is created. It will be foiled on the inside (as soon as it stops raining outside), and it has 2 small holes for my fingers to lift it. Seen here is 2 bits of duct tape cover with electrical tape, just lightly hanging there.

2532.jpg
 
As it turns out, the front door still left a small gap on each side, and some light still escaped. So I added duct tape to each side. The tape is not tight on the side, but "rolled over" a little loose, making the board a tad wider than it was, with a soft-ish edge. This sealed up the sides very nicely.

NOTE: however, this makes it tough to move the board :( I have to use real muscle to wedge the board in and out of there. I will eventually install narrow strips inside the armoire to give this door an "edge" to rest against, and to seal the side gaps. But for now, this duct tape works.

Two screws high up on each side keep this panel helf flush against the header board. Otherwise the board sags inward, exposing light from the top.

Also, you see the 2 bits of duct/electrical tape cover the finger holes, keeping in light.

The result is a very air-tight box. I'm pleased in that regard.

2639.jpg
 
And now, at the end of Day #3, with the doors shut, my babies are growing, and my kitchen is once again emaculate.

I still have a small bit of fan-hum to address, and some light leakage through the fans. But for now, I'm really happy (of course I am, this is my first grow!).

Thank you all for this website and the information provided here!

2827.jpg
 
After a short time, wedging that front door in and out became very annoying. I removed the duct tape from the sides of the front panel so it could be moved more easily, without rubbing against the inside of the cabinet.

Of course, that let light peep through the sides, and allowed the board to sag.

So here I've added a small bit of L-trim along the entire length of both sides. This holds the panel upright and blocks light. Much easier access now.
newtrim.JPG
 
Mighty: Weather striping and black Foam is your Friend, Check out my Magnet Experiment in my signature! The Box has a huge 2.5" x 14" slot, the foam compresses into the slot, it vents and no light leaks!

Background Radio on real low will drownd out the hum as well! Forcing the Air thru the Foam scatters the noise as well!

Relocating the Cabinet to a part of the house seldom used is a good idea as well!

Foam is a Stealth Guys Friend! Maybe I helped some!

Fucking nice Job on the Cabinet Buddy!

STG
 
H and M, this is exactly what I had in mind, I already have a HG 126LED but been having trouble finding an armoire on craigslist that is just two door, most have two doors top and drawers below or they want way too much money for the type you got. The hunt continues but you totally have helped me out with your DIY post. Can't wait to get mine started. Yours is great, stealthy and a nice looking piece of furniture to boot.
 
Thanks vapo-eyes! I'm glad I inspired you.

And now, a few weeks in, the ODOR HAS COME. The exhaust (upper) vent is pouring out a steady aroma of green. I now need to look into filtering.
 
Growing smoothly, I think. 6 plants coming in, top left one (closest to light) doing the best. Bottom left plant "arching" itself around the upper plant to grab some light.

Little gnat-bugs sticking around, annoying me. Tried flypaper and tape, but no luck.

Aromatic smell filling kitchen (no filter here) but I don't mind it so much :)

Very antsy about sexing them, watching closely now.

All61.JPG
 
Back
Top Bottom